Category: Eves

the overhanging portion of the roof beyond the walls

  • New Version of Larch Cladding Scorcher Machine created, Eves Got Second Coat of Black and Windows are Progressing

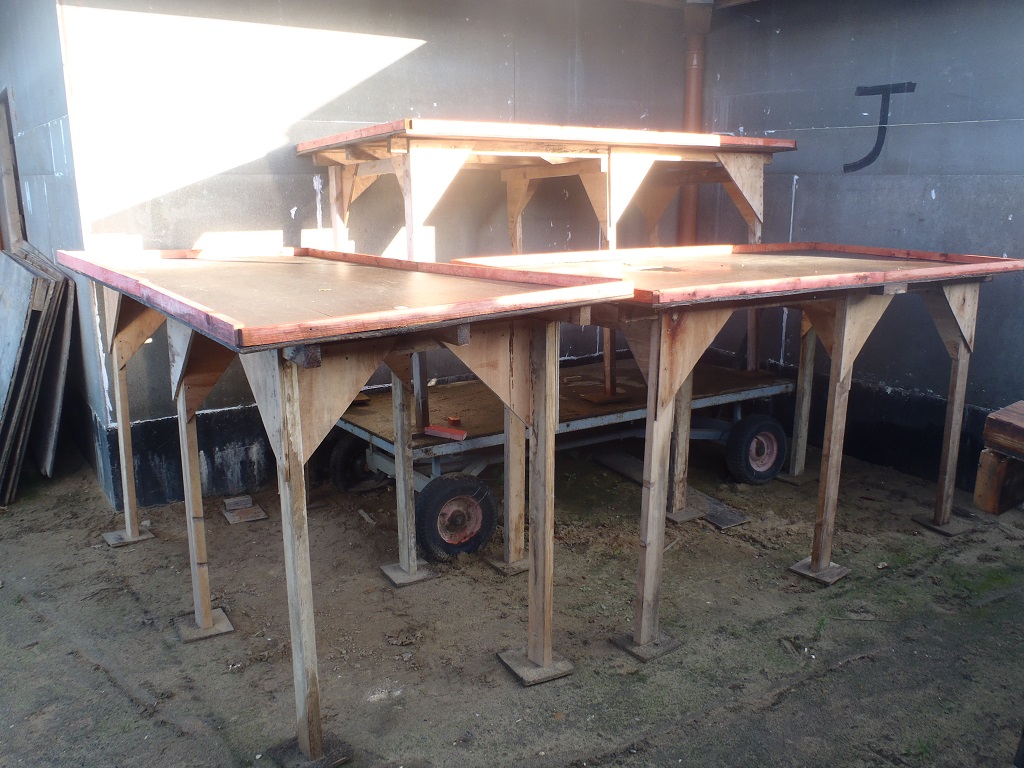
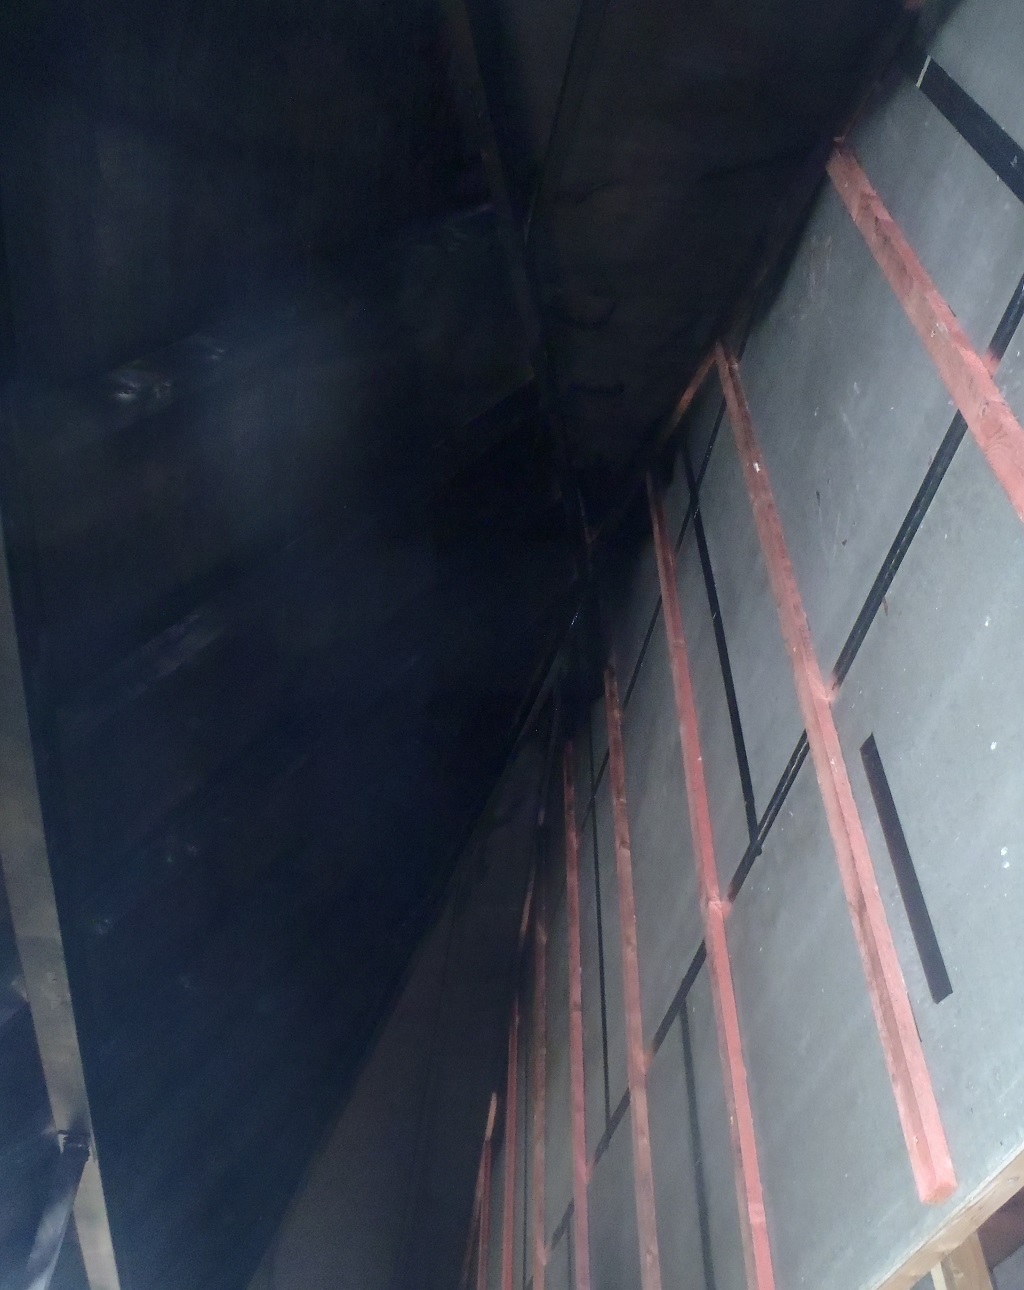
    We started our new week in the workshop to continue developing the scorching machine. We decided to completely dismantle our first version and start over again. Using our new found knowledge and ideas, we put together a new cleaner version and got the two input and output rollers mounted and ready to be connected to drive motors (which are on order).

    New Version of Larch Cladding Scorcher Machine created, Eves Got Second Coat of Black and Windows are Progressing

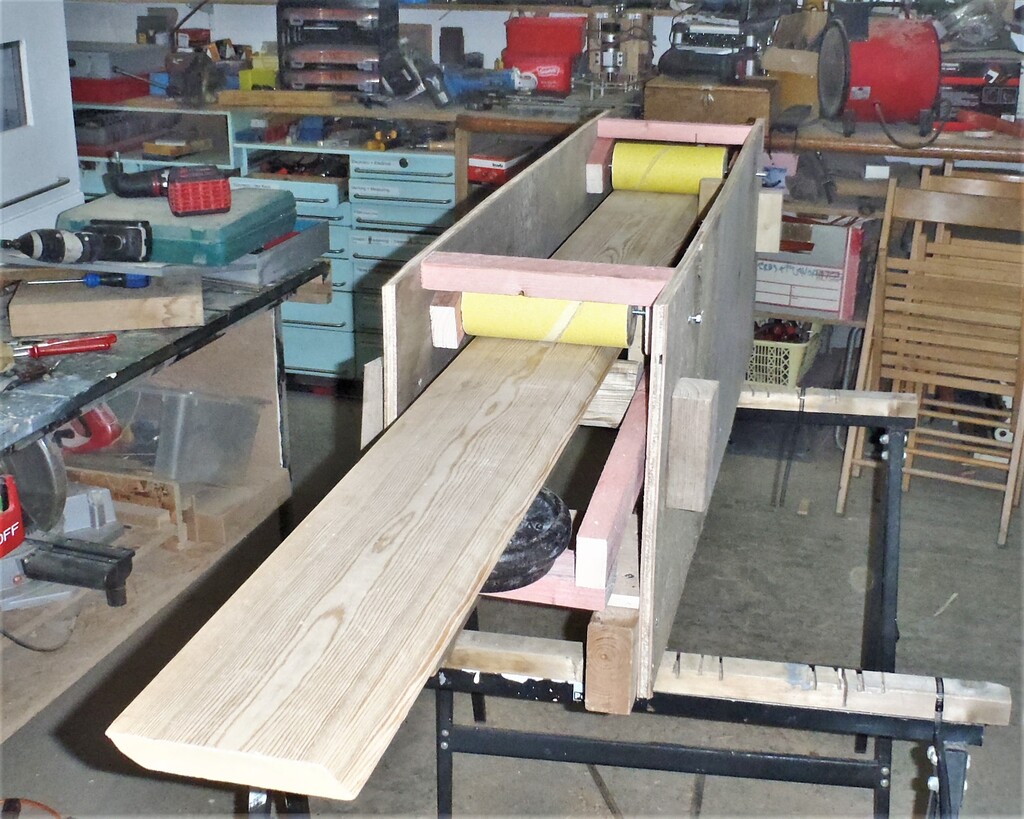
    Larch-processor-Mk2-Day-1

    New Version of Larch Cladding Scorcher Machine created, Eves Got Second Coat of Black and Windows are Progressing

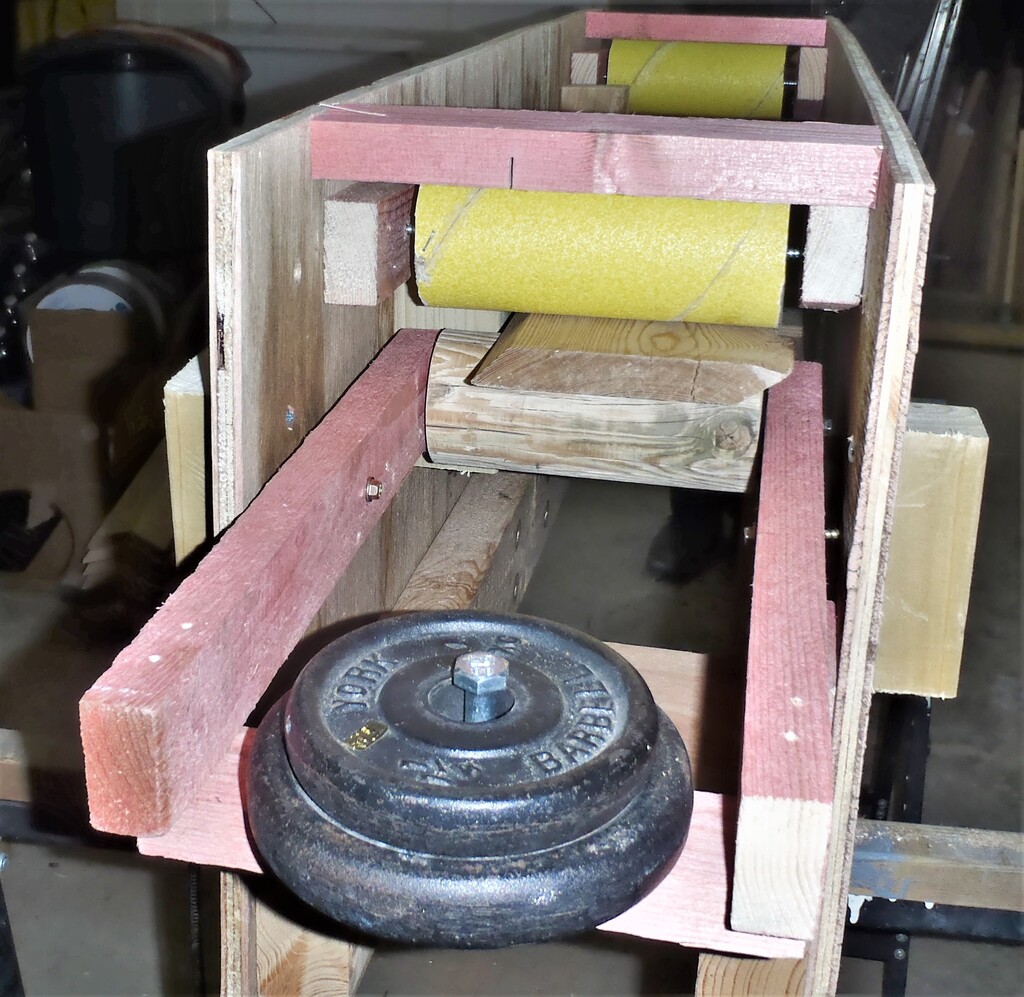
    Larch-processor-Mk2-Drive-rollers-with-counterweighted-pressure-roller


    Then we got our four gas flame torches and connected new pieces of hose and reconnected back to the gas tank and did some burning test to see how the flame came out of each fan like spreader, to ensure that we would be burning the total width of the wood passing under the flames. But unfortunately, one of the four torches is of a different manufacturer and it behaves a little differently. Also we think that one of the fan spreaders is mixed up with the odd one out and the flame shape is different and not producing a same result.

    The following day, Tuesday, had a small interruption (the septic tank was serviced and emptied), we resumed on looking at the gas torches and started analysing each flame pattern, swopping parts around, comparing the results and concluded that there are subtle differences in the manufacturer’s output. We were able to improve one of the torches by expanding the air holes in the gas mixing chamber and increased the oxygen supply to get the flame much more bluer and more powerful. But doing the same trick to the other ‘poorer’ torch didn’t have the same desired effects. Under the magnifying glass, we could see on the brass nozzle injector, that the tiny little hole (less than 0.3mm in diameter) were not consistently centred and perhaps not even straight. But we decided that three were producing a good strong flame and with the spreaders, they will do the bulk of scorching the large area of the Larch timber and the fourth torch with the weaker flame will do the angled edge instead.
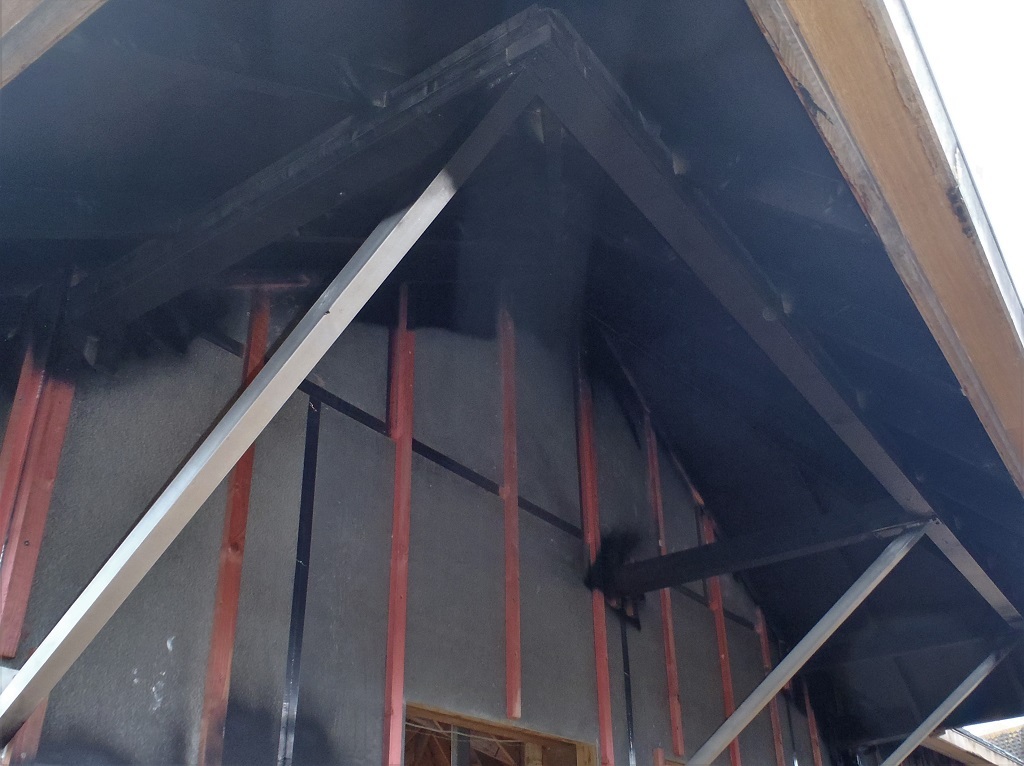
    So rebuilding four individual torch mounting blocks, and putting them on to a piece of plywood, we took it over to our plank moving mechanism and fixed it at an angle of about 30 degrees downwards so the flame would attack the surface of the Larch as it goes pass.

    New Version of Larch Cladding Scorcher Machine created, Eves Got Second Coat of Black and Windows are Progressing

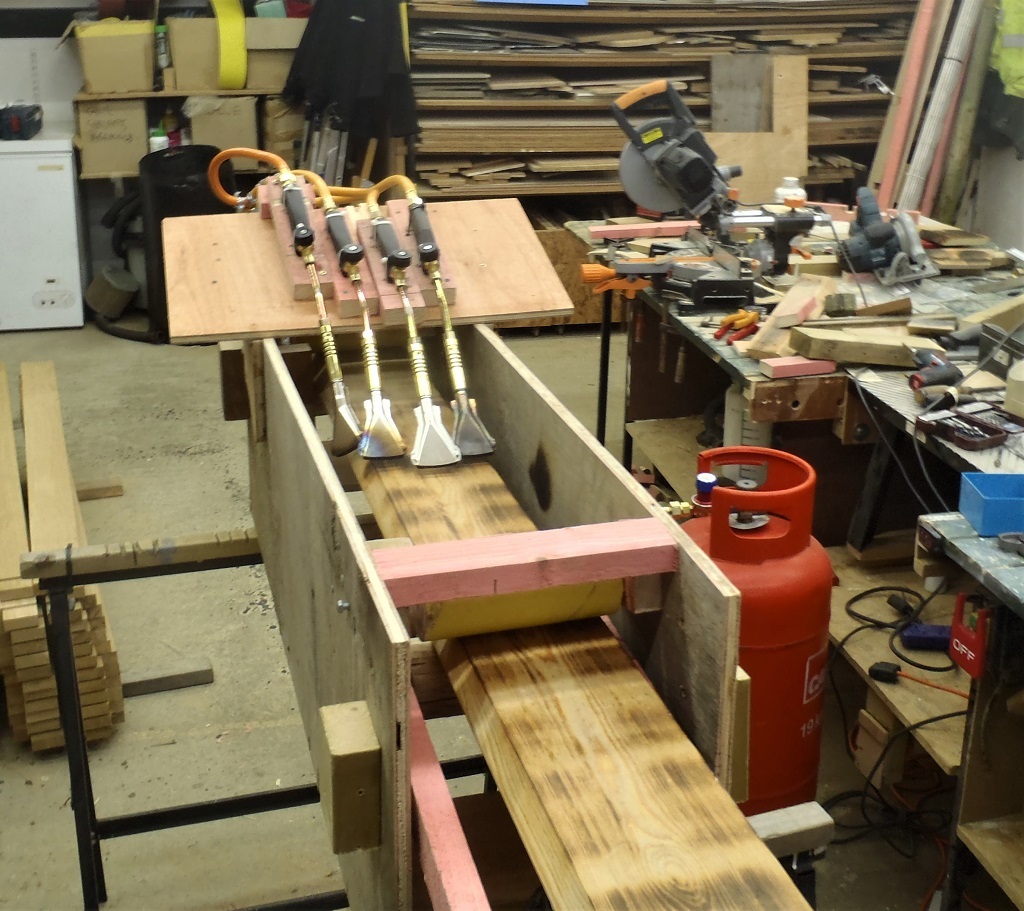
    Larch-processor-with-torches-mounted

    New Version of Larch Cladding Scorcher Machine created, Eves Got Second Coat of Black and Windows are Progressing

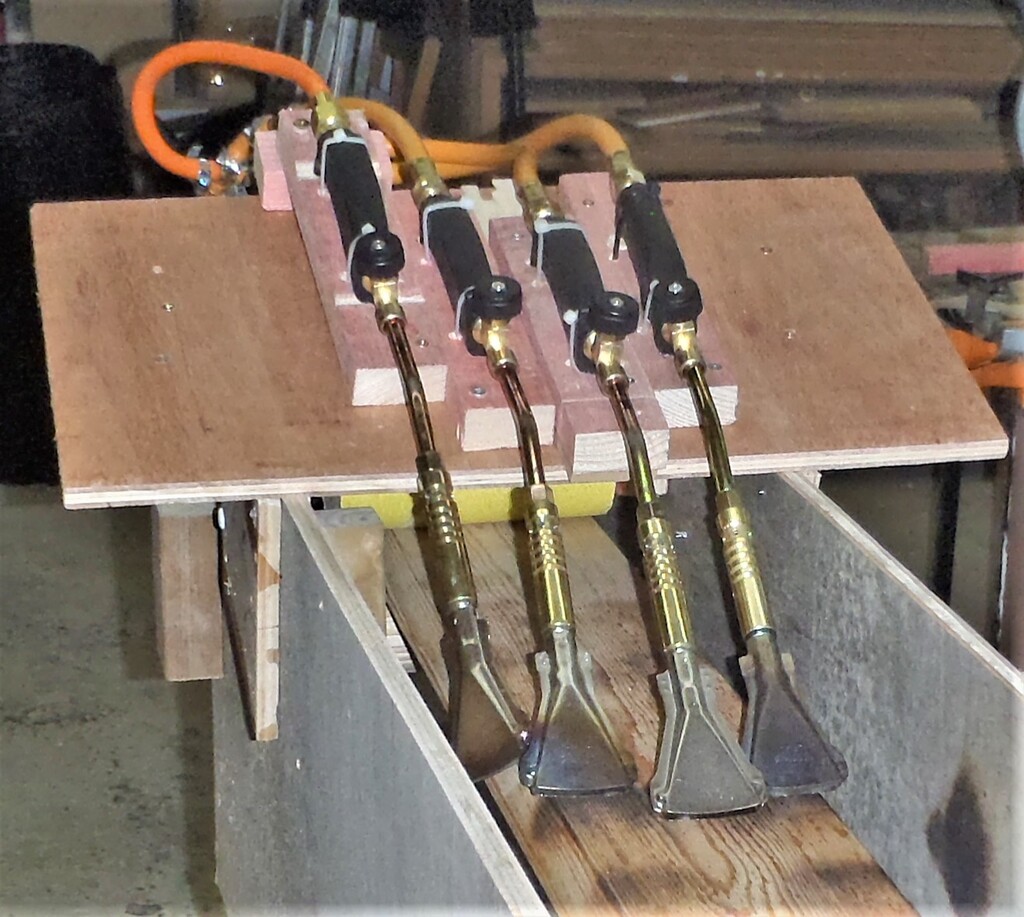
    Larch-processor-Burning-torches-closeup

    New Version of Larch Cladding Scorcher Machine created, Eves Got Second Coat of Black and Windows are Progressing

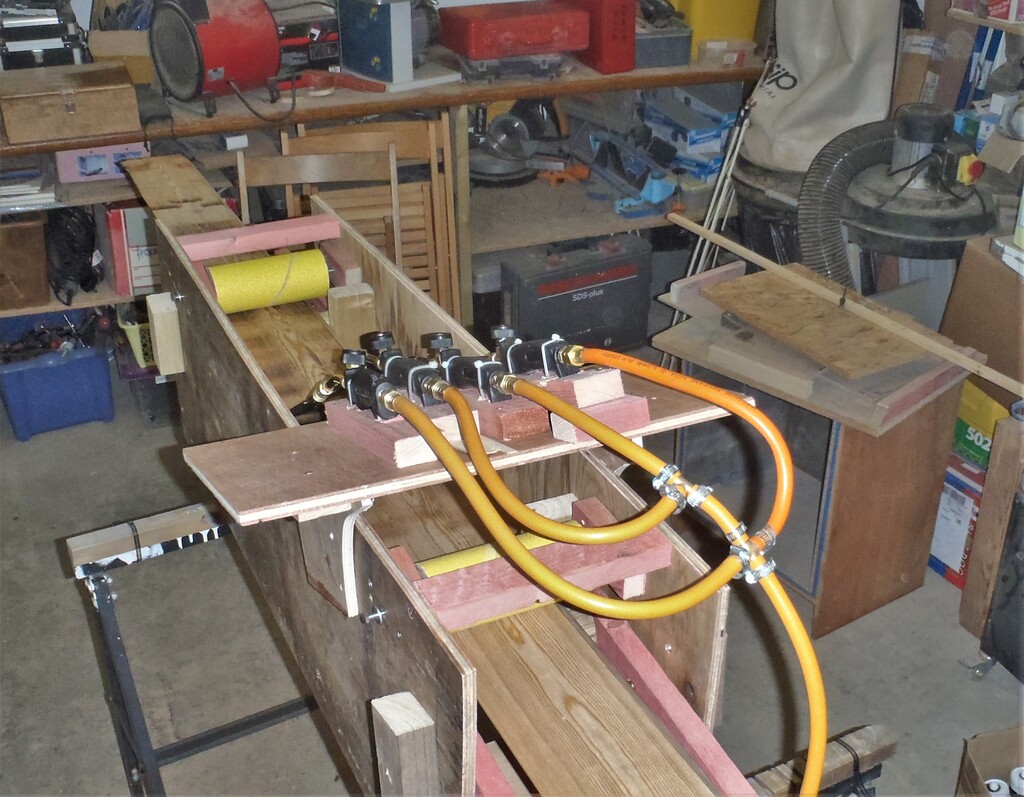
    Larch-processor-Torch-hose-assembly


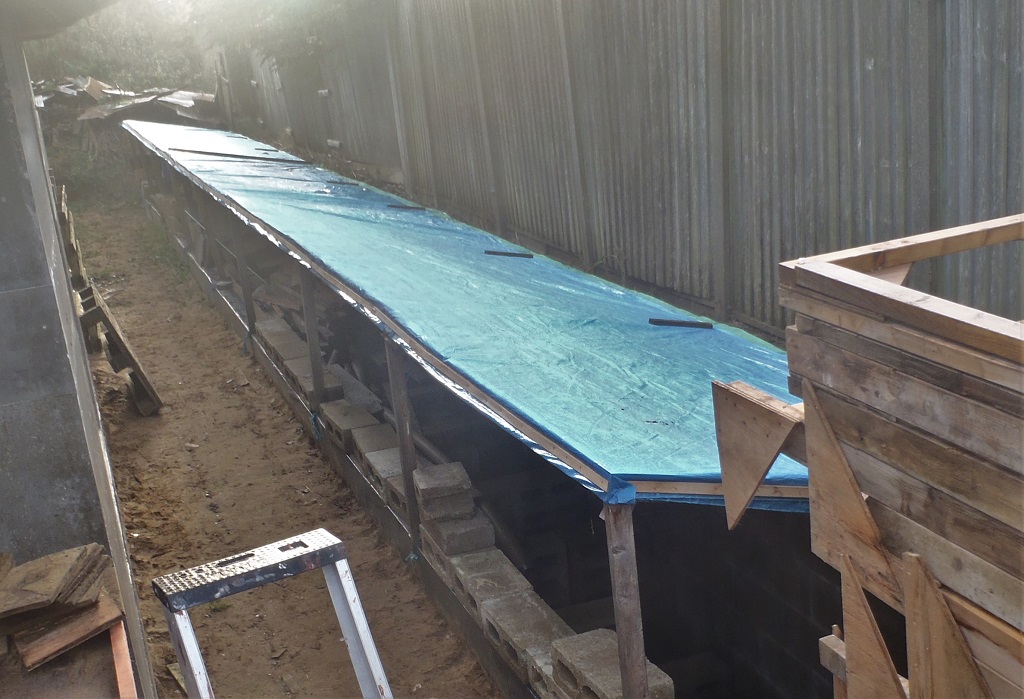
    This is as much as we can do at this stage, because we need the motors we got on order, to help control the movement of the plank through the flames to get a consistent scorching effect. Our test run we did today was just by pushing the Larch through by hand and it was quite obvious in how the burnt surface varied along the plank. We also noticed that the middle torch burner wasn’t as effective as the other two neighbouring ones and therefore there was a paler strip being generated down the middle. We will have to make some adjustment later on when the motors arrives.

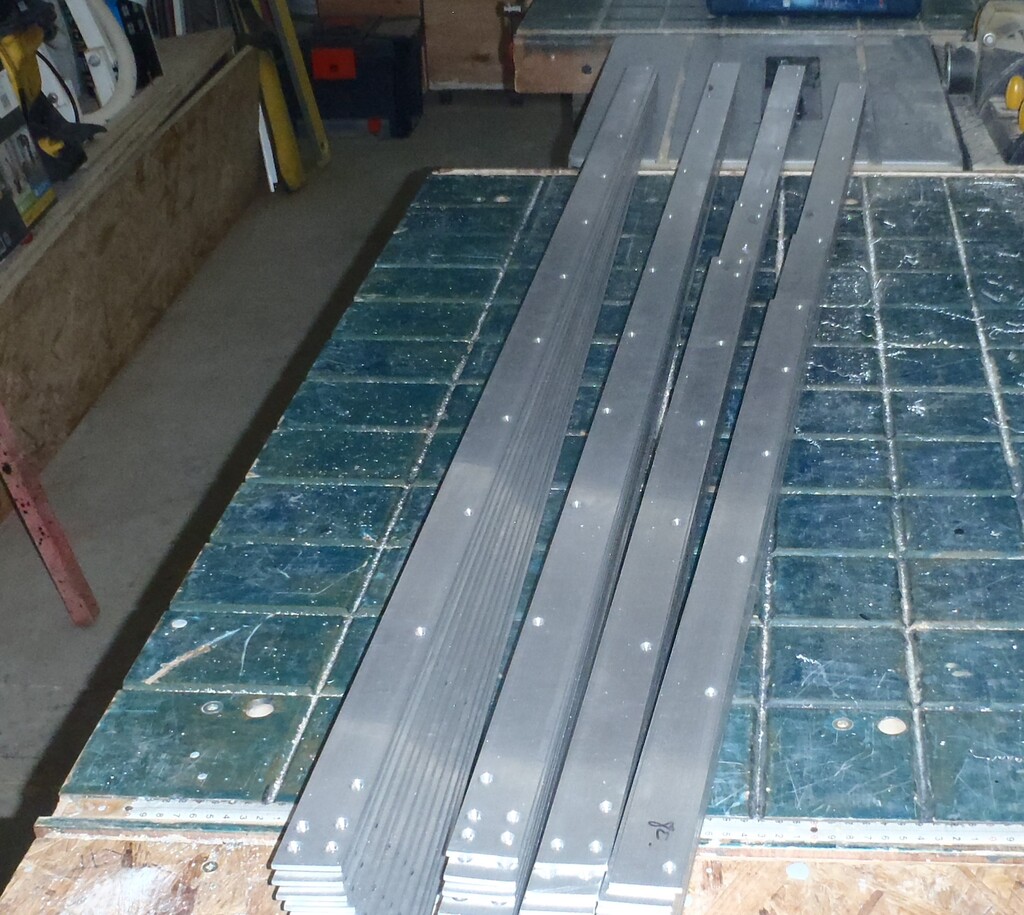
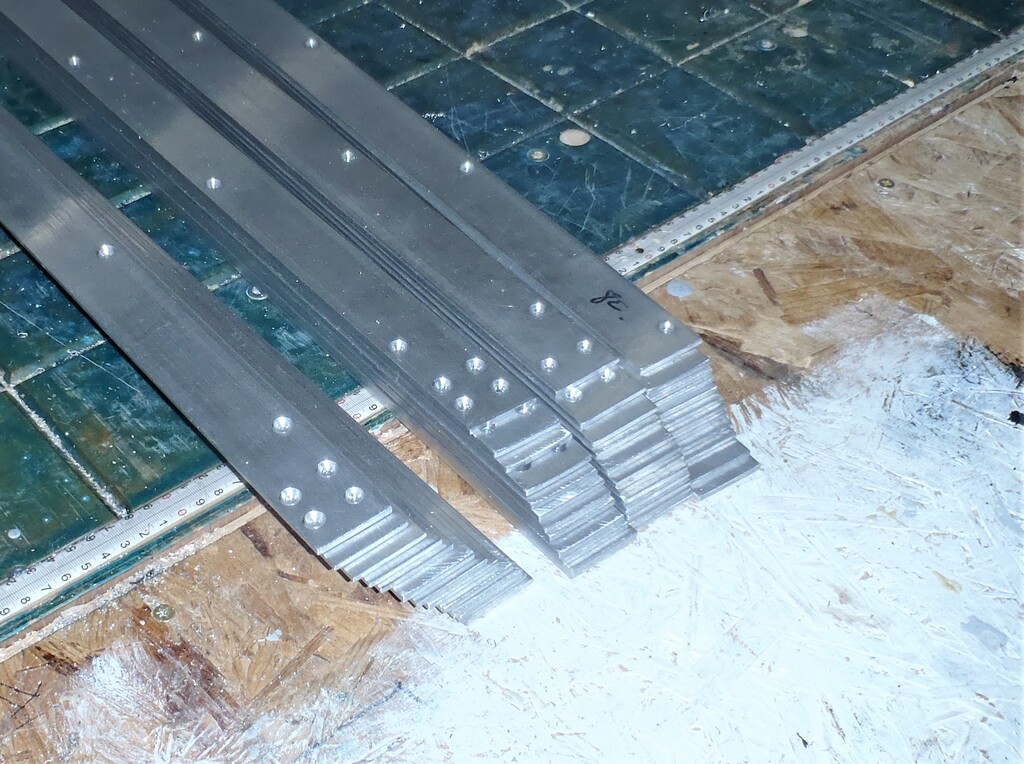
    For the remaining of the day, after tidying up the workshop, we got back to preparing our new windows. We got all our aluminium strips in from our storage rack, and started slicing them up into all the required lengths to make up the twelve windows frames we are going to make. We made nine 1612mm lengths and twenty-four 1637mm lengths.

    On the Wednesday, we discovered that the weather was very calm and actually reasonably warm (at 10°C!!) so we switched tasks and got on with doing the second coat of the black acrylic paint under our Eves. The two Porches got their first coat and that used up our second 5litre tin of paint! A quick trip out to the local DIY store and bought our third tin and used half of it going around all the Eves, making sure that we now got a solid black coverage. We even did the boxing that makes up the Downpipe Channels.

    New Version of Larch Cladding Scorcher Machine created, Eves Got Second Coat of Black and Windows are Progressing

    Its-black-under-the-front-porch

    New Version of Larch Cladding Scorcher Machine created, Eves Got Second Coat of Black and Windows are Progressing

    and-under-the-side-porch


    To finish off the remaining paint, we painted our two temporary doors (the side door and the front door) and they are both now black.

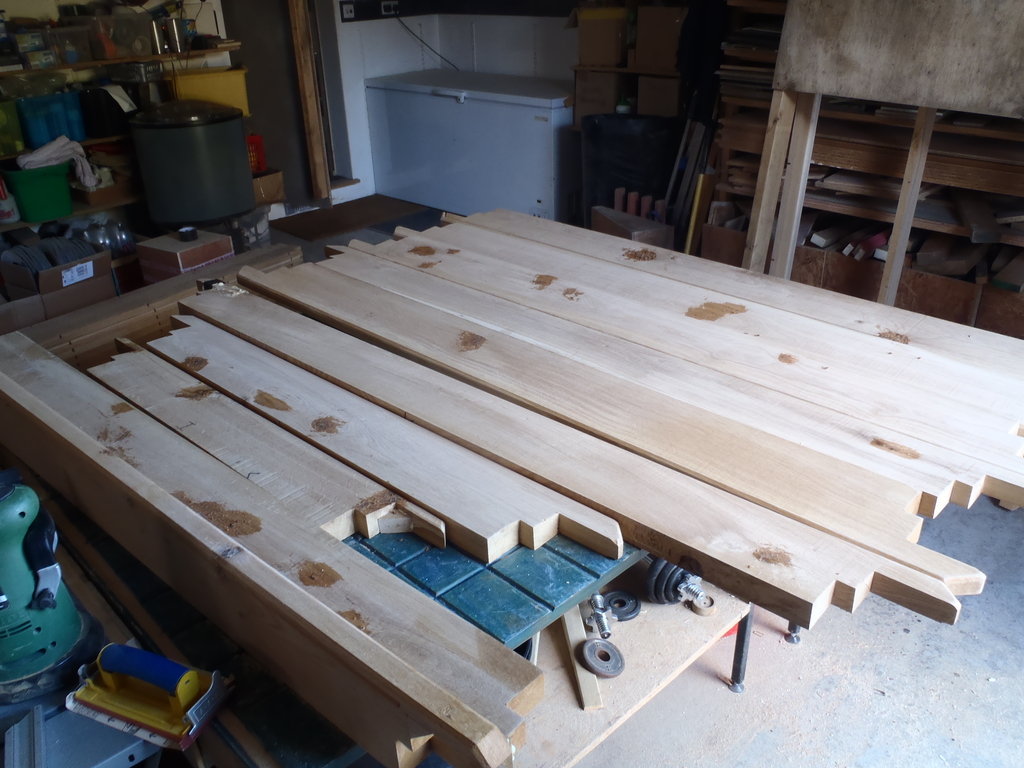
    The for the rest of the day, we were back in the workshop to finish slicing up the aluminium strips into their required lengths, a further nine pieces of 1707mm long, two lengths of 1097mm, two lengths of 1002mm and finally, a 900mm and 805mm pieces to finish off.
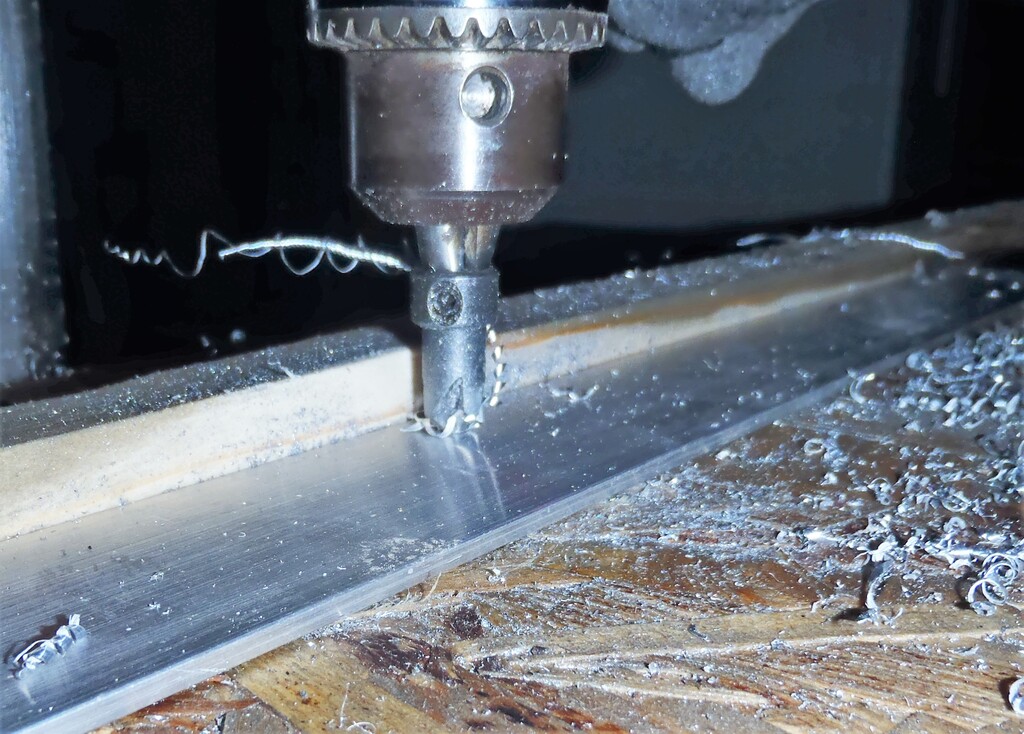
    Then the drilling operation got going; making 3.5mm holes with a countersink, spaced apart by 160mm and 7mm off from the edge.

    New Version of Larch Cladding Scorcher Machine created, Eves Got Second Coat of Black and Windows are Progressing

    Drilling-and-countersinking-the-aluminium-strips


    We got through all 48 strips, drilling over 600 holes in total. All the holes were cleaned with a deburring tool and any sharp ends were filed off.
    New Version of Larch Cladding Scorcher Machine created, Eves Got Second Coat of Black and Windows are Progressing

    Strips-all-drilled

    New Version of Larch Cladding Scorcher Machine created, Eves Got Second Coat of Black and Windows are Progressing

    with-extra-holes-at-the-ends

    New Version of Larch Cladding Scorcher Machine created, Eves Got Second Coat of Black and Windows are Progressing

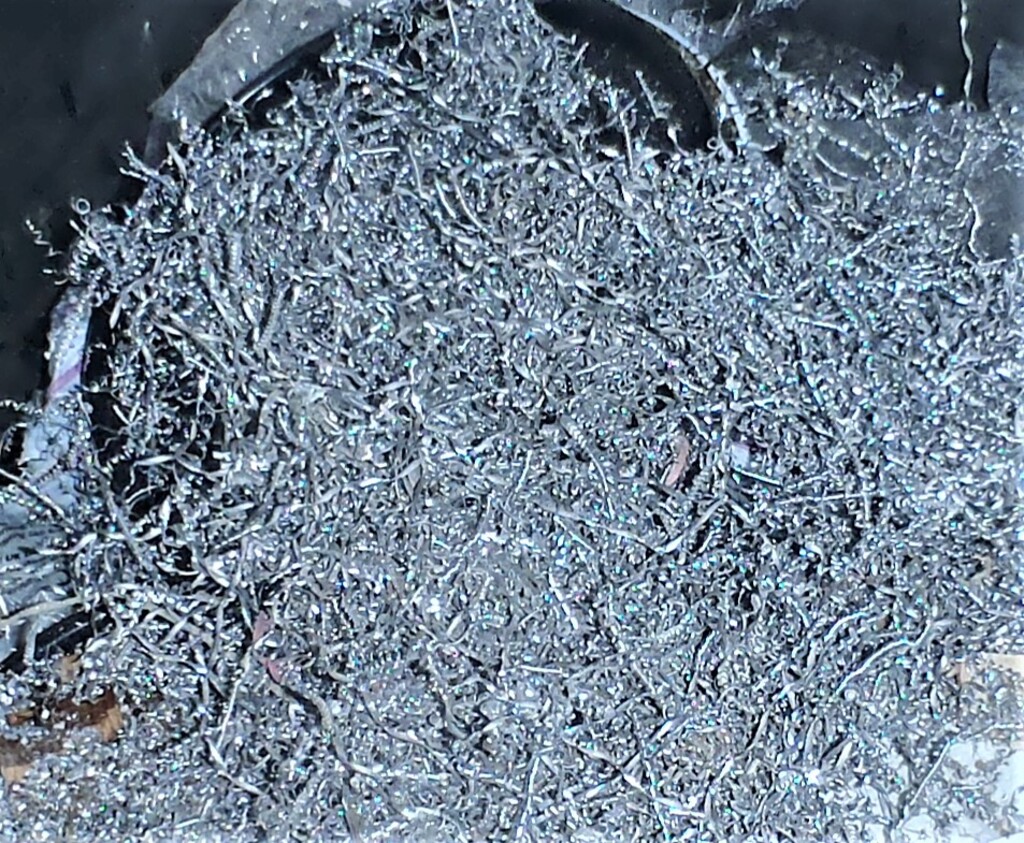
    Making-a-lot-of-swarf


    The next job was to recalibrate our template module that guides our router machines along the vertical Oak side of the window frames, putting in T slots. Our prototype window revealed that we had a slight misalignment between the left and the right sides and yes indeed, we could detect a difference to where the ‘end blocks’ were located. So we adjusted those by a tiny bit (0.75 mm or 1/32″ !!) and now the two ends are balanced.

    We did all one side first, twelve of them, double checking that the timber piece went in the correct way around and proceeded to cut five T slots in each piece.
    Then got all the other twelve pieces done with their T slot cut too.

    New Version of Larch Cladding Scorcher Machine created, Eves Got Second Coat of Black and Windows are Progressing

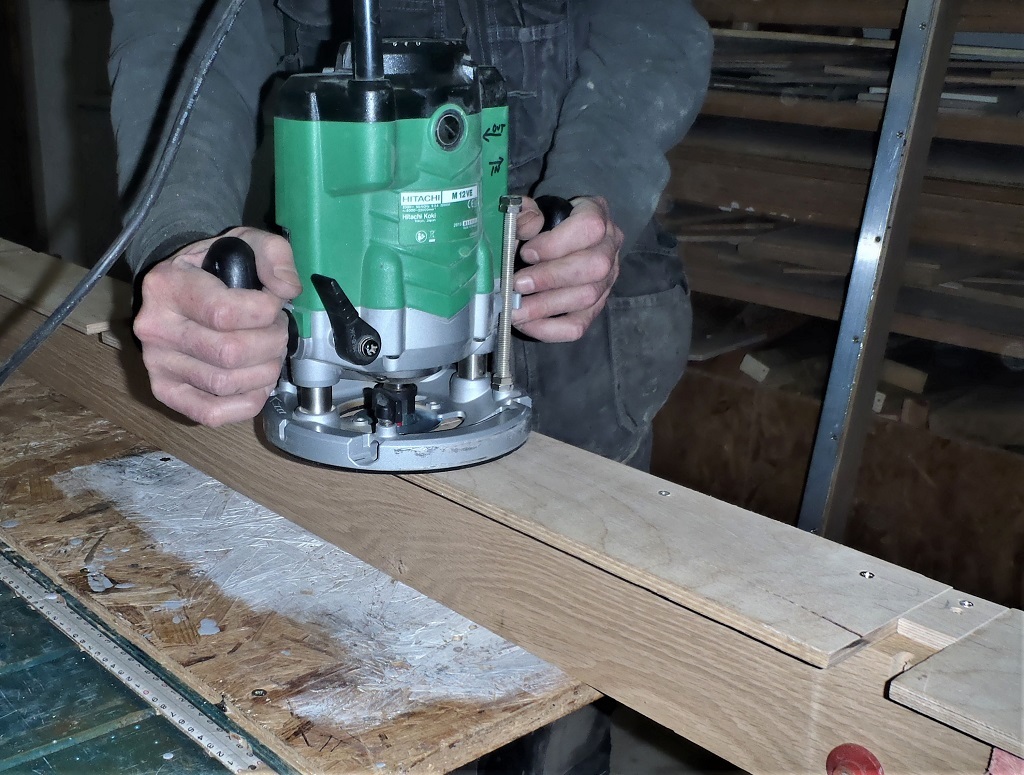
    Routing-keyhole-slots-in-the-window-sides

    The next job was to wash all the metal strips, all 48 pieces, with hot soapy water to remove the coating of the drilling coolant solution (the kitchen got rather wet, all over the floor and worktop!) so the glue will work at maximum strength, adhering to the oak timber.

    New Version of Larch Cladding Scorcher Machine created, Eves Got Second Coat of Black and Windows are Progressing

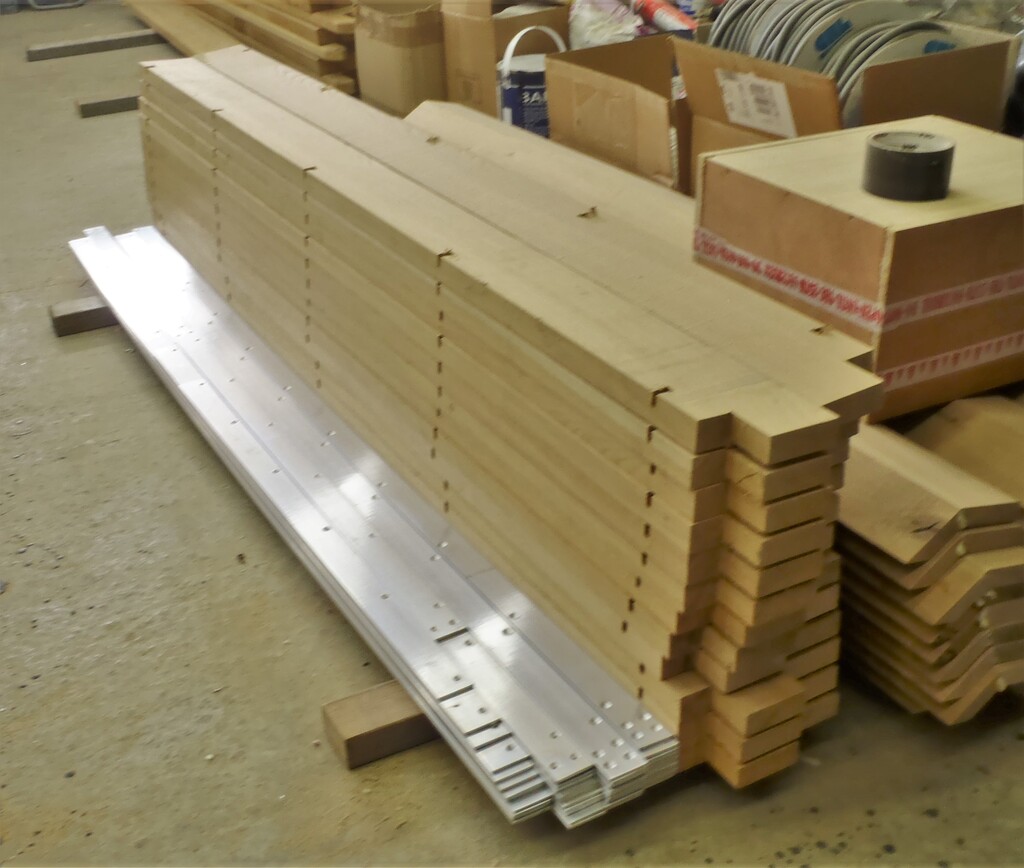
    All-the-sides-with-slots-and-the-aluminium-strips

    Then all the sill and header pieces were fetch from our main house where they have been waiting for this moment, got a thorough sand to remove any oxidation effects for being exposed to air for well over six months. But one of the little jobs was to glue in little triangular pieces into the headers, to block off a gap that was visible when the octagon wings were installed. We glued 24 pieces and nailed them into place and after lunch, power sanded the area to remove the glue and any excess wood to get a smooth finish.

    New Version of Larch Cladding Scorcher Machine created, Eves Got Second Coat of Black and Windows are Progressing

    Gluing-infils-on-the-window-headers


    We also got done was to make a jig frame structure to hold and position the four elements of our window frame so that they are always right angled to each side and also aligns up from sill to header too. The basic design is done and we will add further pieces to it to hold the sill and header pieces.
    New Version of Larch Cladding Scorcher Machine created, Eves Got Second Coat of Black and Windows are Progressing

    Start-of-a-jig-to-assemble-the-windows


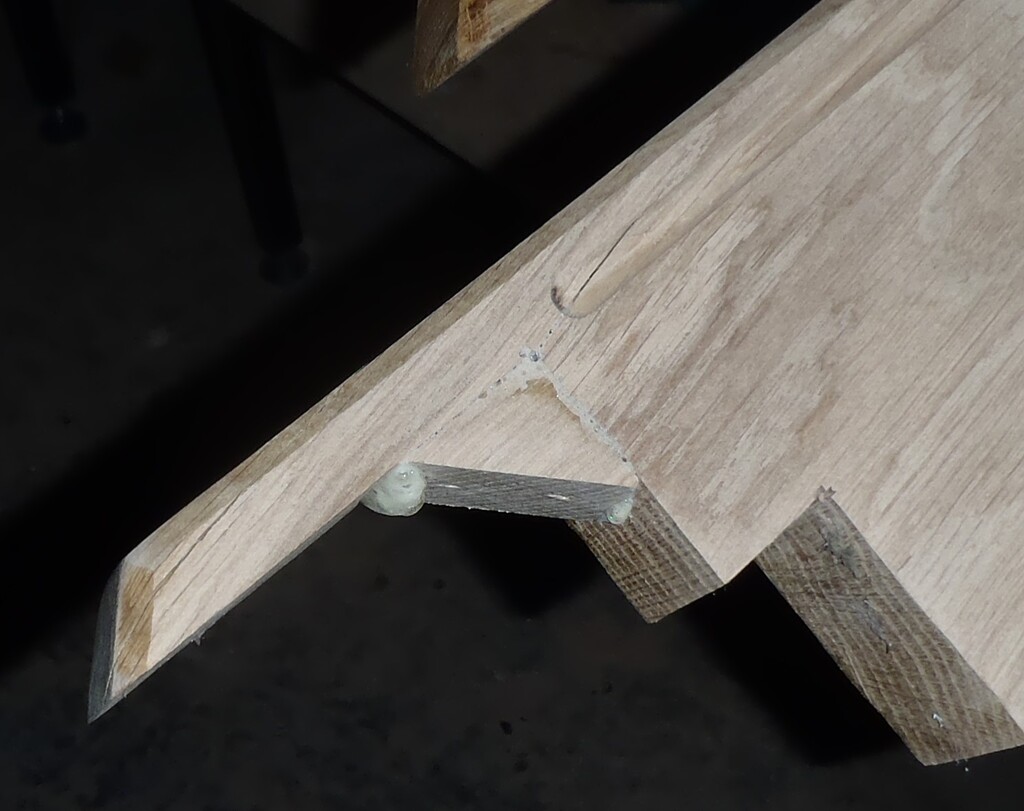
    The last thing that got done for our week’s work, finally, was to fill little holes in the oak sill pieces and some of the header ones too, using a mixture of polyester resin and wood sawdust. This was shoved into the various sized knot holes and we will rub down these repairs next week.
    New Version of Larch Cladding Scorcher Machine created, Eves Got Second Coat of Black and Windows are Progressing

    Filling-some-surface-defects-in-the-Oak-sills


    It was a good week of work with only one afternoon of interruption so we got a lot done. Next week, hopefully, will be another good week and we should get our twelve window frames created.

  • Performed Site Tidy-up and Maintenance plus Preparation and Spraying Black Paint Under the Eves

    After our conclusion of the slates on the roof (the front porch section) on Monday, we finished dismantling of all the remaining platform modules apart from two full height modules that we managed to move inside the house and a further three modules were cut down to provide a new lower working platforms.

    Truncated-platforms

    Truncated-platforms

    We then repaired and completely replaced the covering over the swimming lane storage area. The old tarpaulin that has fallen apart due to long exposure under the power of the sun. We also removed all the old wet hardboard material and chucked them up to our fire pile. Using the old plywood sheets that were the walking surface of the platform modules, we used eight of them to recover the swimming lane, also using a series of the narrow strips to fill in the gap at the front of the roof too. Finally, we recycled two very large tarpaulin off-pieces which was 14metres long by 3metres wide and draped it over the new roof surface, having it folded over to form a double layer. Everything was tied down with pieces of oak strips (from our burn pile) and stapled into place.

    The-recovered-swimming-lane-store-1

    The-recovered-swimming-lane-store-1

    The-recovered-swimming-lane-store-2

    The-recovered-swimming-lane-store-2


    The rest of the week was spent on preparing the eves, removing sticking through nails and removing the last of excess brown rubber glue material around the back of the fascia and sanding it down smooth. Then we got out our new paint sprayer we bought in the Summer, set it up, with water ready to practice spraying only to discover that it didn’t work. There was no suction into the inlet tube. This is the second time this fault occurred as it happened when be bought it but we exchanged it for a new one, which we tested it with water back then. So we contacted the retailer and they said, take it back to the shop and get your full refund. I am glad that we found the receipt because the till insisted that the product only costs £70 but our receipt says £180! The store manager had to override the till so we got all our money back!
    We then found another model which was nearly double the price and went to buy that one instead. We tested that and after a little false start, we got it working with emulsion paint.
    By this time, the day was over and the following day was wet so we didn’t get to spray the under side of the eves until Saturday.
    The black acrylic paint we are using is very very thick and dense, even after diluting it by 30% as instructed on the tin, the paint still wouldn’t spray through the nozzle. So we had to dilute it by a further 10% before it got going. The diluted paint was still very thick like thick custard so this acrylic paint is amazingly heavy for external surfaces (it’s made for barns etc).
    The other piece of equipment we made was a protective shield to stop any splatter reaching the guttering. We just wanted to spray behind the fascia and up the roof board and the rafters coming out from the walls.
    This shield was put on legs so we could prop it up against the fascia edge, but also we mounted 5 little LED flood lamps to help brighten up inside the eves.
    We started around next to the conservatory at the front of the house and worked our way along the front.
    But after a short while, the initial litre of paint we put into the hopper was gone and we had only done a few metres. We did realise that by spraying the paint, it uses it up more quickly, giving the surface a thicker finish, but not that quickly! So we diluted the paint by another 10% and got on with the task, hoping that we will get a fair way around the whole 75 metres of eves!
    And .. we actually got back to the beginning but only just! We do need to buy more paint anyway because the two porches with their under surfaces disappearing high up to a point and we need to get up on a platform module to give us the reach and finish off the last bit. It also looks like some of the rafters need a second coat.

    Eaves-painted-black-1

    Eaves-painted-black-1

    Eaves-painted-black-2

    Eaves-painted-black-2


    We will get that done next week and then we will start on the task of putting up the wall cladding.

  • Sealing the Roof boards to Walls and Cleaning the Eves

    After finishing dismantling the excess platform modules and the lift hoist shaft, we got on with the task of preparing the Eves, ready to be painted. But the week saw quite a lot of disruptions to our work schedule.

    But The first job was to spray PU foam using our gun foam kit and climb up inside the house to the top of the walls and seal the gap between the cement wall boards and the roof boards also seal the rafters where they go through the wall.

    Sealing-wall-to-roof-with-foam

    Sealing-wall-to-roof-with-foam

    Meanwhile, the logo plus name banner design going across our Front Porch, on the outward facing portion of the roof, namely our “C” section that isn’t done yet, is coming along. We have been doing test runs on cutting certain portions of the rose and leaf designs into the slates and filling it in with coloured resin and seeing how it comes out.

    Slate house name banner design

    Slate house name banner design


    We have been building various tools and jigs to help us in selecting and preparing the slates, for example, finding nice flat ones of a reasonable thickness.

    But in light of our tests, we have decided that it was taking too long to arrive at a final solution. We want to do more Research and Development and we didn’t want to rush this stage and then regret it later on. We will make the design slowly and install it when the house is (nearly) complete!

    So on Saturday, we spent all day putting up over 300 slates across a further 13 rows to add to the existing first row we did a couple of weeks ago.

    C-Half-done

    C-Half-done


    We are about half way up the height of the C roof section but only about 120 slates to go to finish it off and then nail up the flashing slates and we are all done. We will come back when we are ready with the banner logo design and swop out the necessary slates for the new ones.
    This means that we can dismantle the final five platform modules and tidy up everything along the front of our house so it looks more respectful. We will keep the component parts of these platform modules so we can rebuild some so we can gain access to the “C” roof again. We would only need two of them (or even just one) as our house banner is currently only 1600mm long and 350mm high.