This afternoon, after a interruption to our work flow due to other meetings, we first went outside to verify the measurements we made last week on the “N” section and updated our spreadsheet. We then started the preparation job for building the next batch of rafters, this time for the “N” section of the roof. Using the new updated spreadsheet (showing the calculations as a result of our verification task earlier) and proceeded to slice and chop up a half a dozen of CLS timber to go towards the heap of material we will need for making another eight more rafters.
Category: Roof
-
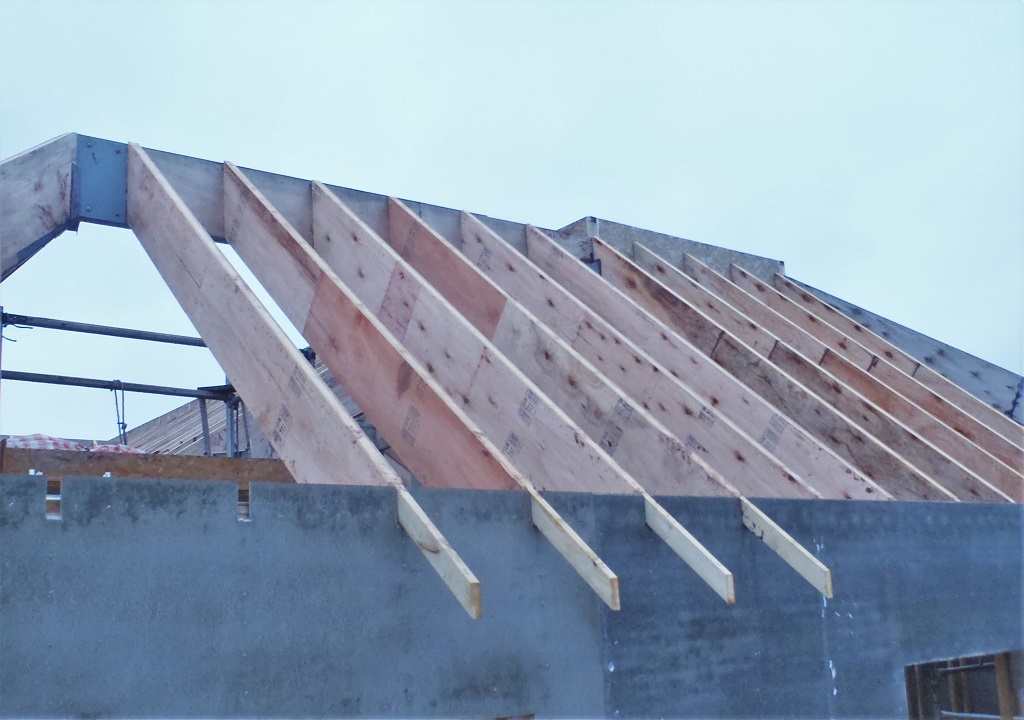
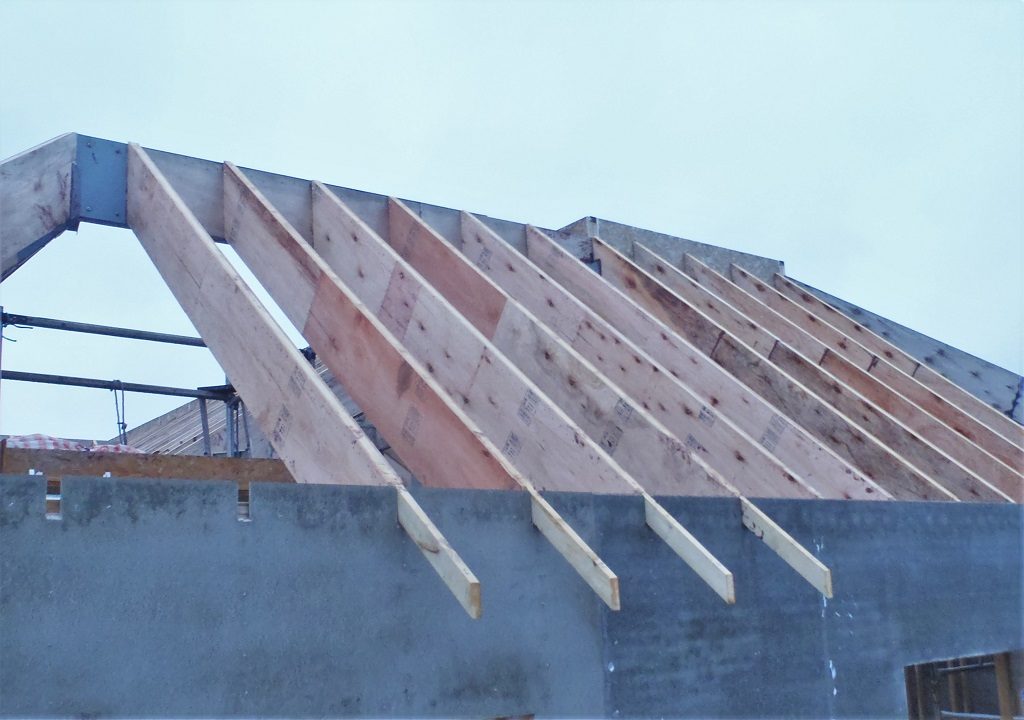
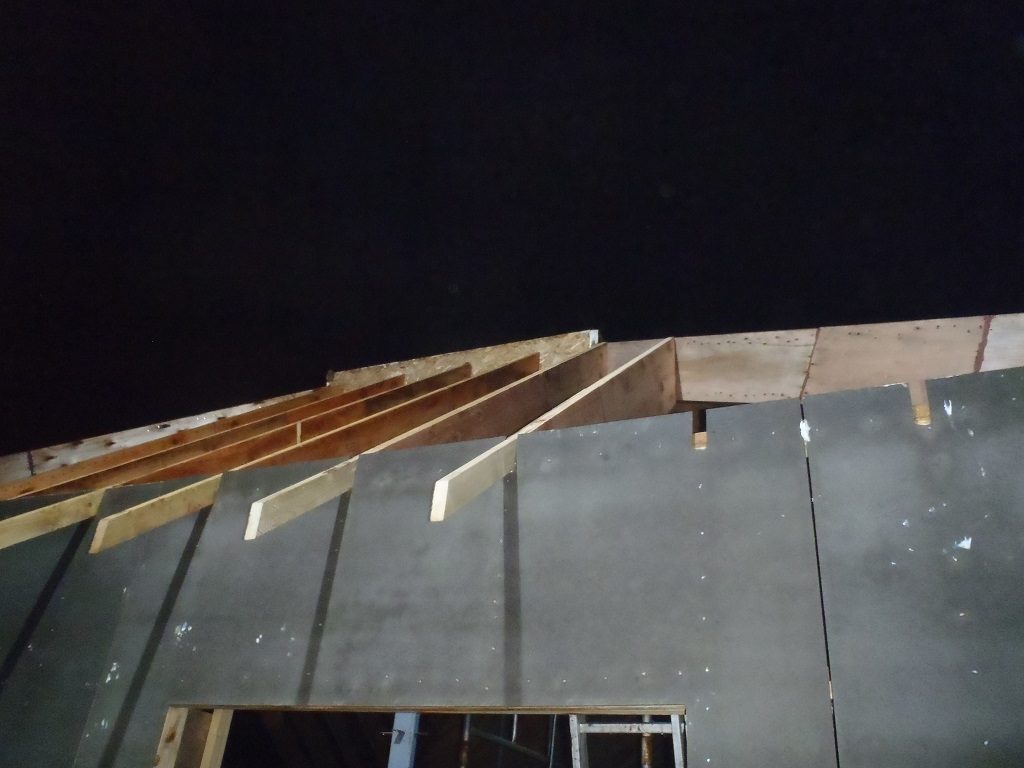
“N” Rafter Installed and Measurements taken for “N” and “O” secitons
This afternoon, while we had some nice weather, even though it was quite chilly, we went and got our odd “N” rafter (the middle one, which is number 6) up and installed. We had to plane the end a fair bit as it was a complex shaped ends and we had wondered whether we had removed enough in the workshop. So it was a case of removing more until it fitted nice and tight.
We then measured the next subset of rafters on either side, these being the triangular sections going up to the steel I-Beam and down to the outside corner. These are now in our spreadsheet!
We did also the same for the “O” section and took measurements for the similar shaped triangular sections for the 45 degree sloping roof too.
We now have finally collected this data and we now have the means to continue working in the workshop while the weather is bad outside and try not to lose too much more time due to the weather!
We hope!
Grin! -
Bevels Cut On Latest Rafters
This morning, while we wait for the delivery of our Oak Timber, we got on with the task of cutting angled bevelled ends on the latest batch of rafters we made yesterday.
These have quite a sharp angle, very deep, at 53° and almost 100mm deep. Our slicing Saw machine performed very well! And this second version which has a new electric motor on board, is a better quality unit and doesn’t get hot at all, only the gearbox! It is also much better at cutting the wood without burning the material as we are able to turn down the speed of the saw blade and that helps considerable in controlling this burning effect.
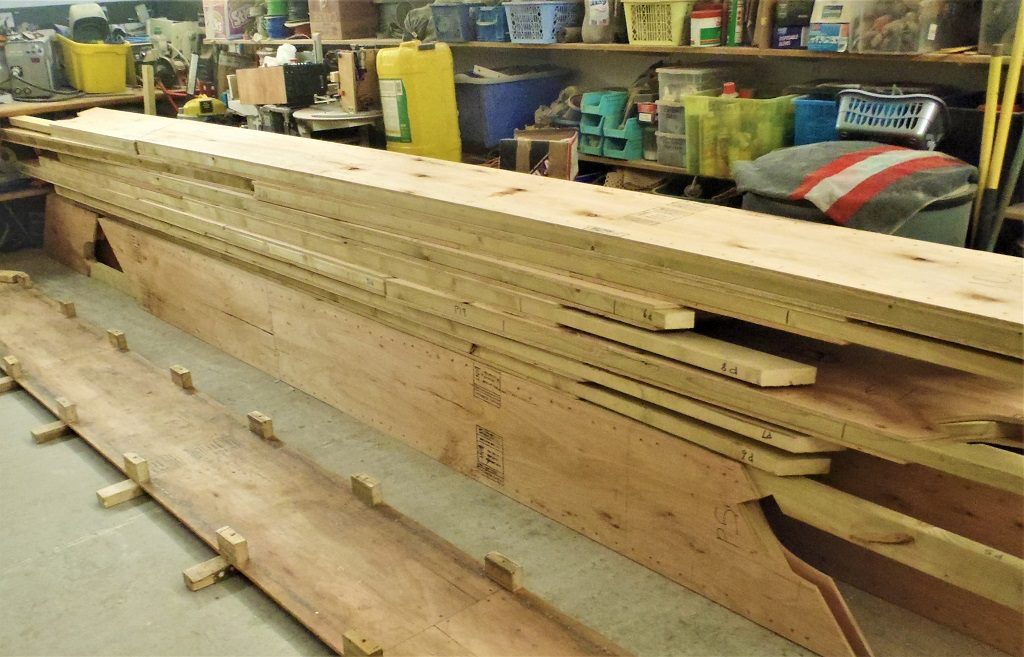
So we have now a growing pile of ready-to-install rafters to go up, all the remaining P rafters and one N rafter. We are just waiting for a day of no falling wetness, whether it is snow or rain! Phew! -
Created Four Rafters
Today and yesterday, we resumed our factory production line to produce the remaining rafters for completing the “P” section of the roof, as well as the first one of the “N” section.
It was amusing to see us racking our brains for all the steps of the procedure of making rafters, getting all the tools, equipment and glues out and get ready.
We finished today at about 4pm and it is snowing outside so that’s the end of our work for the moment!
We will see when we can get them up, weather permitting but also our Oak Timber is scheduled to arrive tomorrow too! -
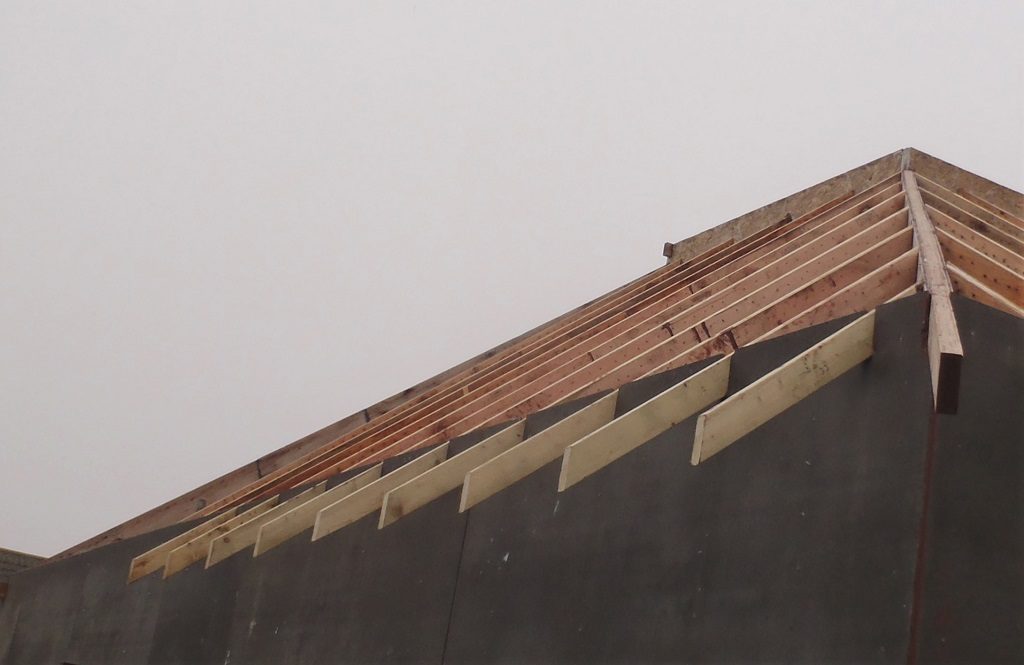
Six “P” Rafters Go Up!
Before the rain arrived (about 3pm ) we got out there to get up and installed the six rafters we had made way back before Christmas, into the “P” section of the roof.
Rafters-P5-to-P10
These rafters were simple straight ones coming down from the O Ridge beam to the “P” wall, four of them had full eves sticking out and the last two didn’t.
Then after tidying up all our tools, under the steady patter of rain, we went and measured the last P4 rafter position so we can update the spreadsheet and then have the sizes for the last 4 rafters (P1 through to P4) to finish off the whole “P” section of the roof’s framework, covering the Great Room and alongside the conservatory.
We also measured on the other side for the middle rafter in the “N” section coming down from the O Ridge to the corner of the N and M walls. This particular rafter the only straight one in this group of rafters and it is situated in the metal bracket on the O Ridge so once that one is made and installed, we can measure alongside this rafter, on both sides, and get more measurements for the spreadsheet and we then can calculate what we would need to make the “N” rafters.
Finally, we returned back into the dry workshop and drilled bolt holes and sanded little slopes on the webbing so they can slide onto the leg and spread out the glue better. That concludes the work for today and the rain can do it worse. Hopefully, we can see dry weather tomorrow or else, we will be in the workshop and start preparing for those final P rafters! -
Bevel Ends Were Cut on P Rafters
This morning, a slight change of plan as the weather has come over wet again, so we got on with the job of cutting the bevel ends on the rafters going into the near corner of the Great Room near the front of the house. There were six in all, 5 were the full size rafters and the last one was just the top flange piece.
We dusted off the Slicing Saw Machine and got the template out of the shed and proceeded to slice the angled ends on these rafters.
And that is it for the day as the weather is now hailing frozen blobs of water so we will have an afternoon off and resume in the morning when we can start to put up these rafters and the others into place at last .. .. weather permitting!!! -
Glazing Framework Type, Shape and Size Final Adjustments
As a companion to the report Winter Cold Virus Hits the Workforce!, this blog describes the last two weeks of our building work.
so with the background noises of coughing, sniffing, sneezing and talking with croaky voices, we have been analysing the design of our Glazing Framework for the Skylight. We are thinking of reducing the number of glazing wooden rafters from the regular 600mm spacing to more like 1000mm instead. This would make the aspect of the skylight more pleasant to look at and to look through too. It would mean less physical number of elements to construct, assemble and install.Structural Analysis
But first, we had to analyse the structural requirements of our roof to make sure the glass can take the strain and loading of various weather conditions, like for example, a foot of snow or gale force winds, as specified in the Building Regulations for our easterly region. The result of that research was that our primary glazing layer needs to be 6mm toughened glass, spanning the 1200mm by 1000mm of support.
Size and Spacing
Next, we took each section of the Skylight in turn, to adjust the size of the glass so it is a regular spacing, for each room upstairs, taking into account the maximum we are allowed as per calculation of research we did, as follows:
- Great Room: 1 module – 1200mm and lots of triangular pieces
- Spare bedroom: 4 modules – 1011mm
- Hall & Stair: 2 modules – 813mm
- Study: 2 modules – 1008mm
- Workshop: 5 modules – 1061mm plus more triangular pieces
The other side of the skylight (where our solar electric collectors are located), starts with more triangles and a 1200mm section over the great room then a regular spacing of 917mm most of the way along the whole length, in 13 modules followed by a last few triangle pieces. This deliberate design choice allows us to fix and clamp the sloping wooden rafters right through the ridge beam for extra strength and security and allow
Thermal Properties
the solar panel modules to all the same size.
Another part of our analysis we have been doing, is the thermal properties of these glazing units, whether the cost of double or triple, or even quad glazing would payback and how quickly. Plus, the added complications of wear and tear to these sealed glazing units, during a hot and cold heat cycle and that causes physical stresses to the joints that seals the layers of the glass panes together. Thermal expansion is one of the most powerful forces out there and there is nothing anyone can do to stop it, apart from engineering the joints and seals to cope with the stress and strain of this physical effect.Summary
At this moment, the results of our research in heat loss, the weather conditions and thermal properties of the various glazing options, here is a summary (for the whole Skylight):
- Heat Loss: 12050 kWh per year using a 10 year historical data
- Energy Cost: £1205 per year with single glazing
- Double Glazing extra: £2000 to buy but Energy cost cuts dramatically to £140; payback time is 2 years!
- Triple Glazing: £3000 to buy; £85 per year for energy; 3 years payback time
- Quad Glazing: £4000 to buy; £60 per year; 4 years payback time.
NOTE: One aspect of this research that have not been included in these calculations, is the Solar Gain factor. This is a very powerful energy source and our Skylight is very large and will be collecting a great deal of solar energy during the daylight hours and we haven’t incorporated this into our calculations. But roughly, it will save us even more money and the payback time would reduce even further!These payback times are all based on a fresh start as the building is constructed, but it would be a completely different story if after 20 years, we have to replace the glazing units and it would be a pure fixed cost spread over the lifetime of the product. Everything fails eventually so one has to get into the frame of mind that we should be saving some money away in a piggy bank so we are ready for the replacement. Glazing units are now given a lifetime of 20 to 25 years so if it costs £4000 up front, then we need to put away £250 per year for 20 years, as no doubt the prices will rise too! eeek!
Our next job is to translate all this into a construction plans, building an order for materials and plan procedures etc. -
“H” Section is Now Complete!
We finished off installing the rest of the “H” rafters outside, on quite a balmy day, on the shortest daylight day of the year!
Rafters-H13-to-H17-Installed
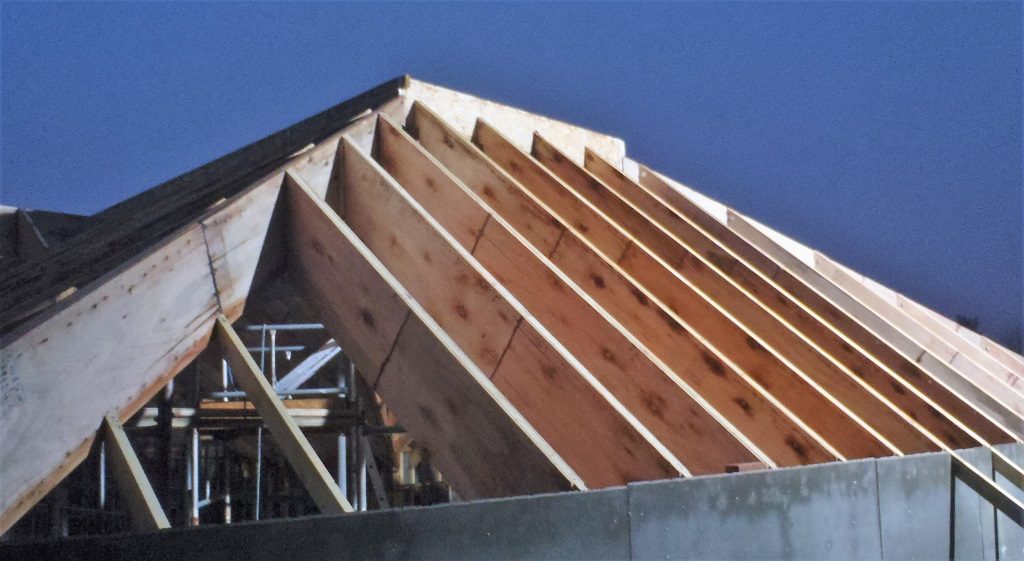
Rafters-H1-to-H5-Installed
Tomorrow, we will try and get some of the “P” rafters up before we have to stop for Christmas. We will see how things go and whether we will do some work on Saturday too. -
Installed Two “H” and Manufactured Eight “P” Rafters
This morning, we ventured outside to install as many rafters in the “H” section of the roof but could only do two in the end before lunch! It was a tight corner of the building and our tower needed to be juggled into position. We got the two rafters up and installed, only to discover that we managed to get our tower stuck in among the rafters! We had to dismantle one top end of the scaffolding in order to make it slide out from under the rafters, and back into a more spacious area!! Eeek!
2-H-Rafters-installed-Rafters-
Then after a quick lunch, we resumed the task of creating the batch of “P” rafters we have prepared and we were successfully able to complete all eight rafters – Phew!
Rafters-P5-to-P21-Glued-up
Tomorrow, we will spend all the daylight hours installing as many of the rafters as possible and then return back in the workshop to slice the bevelled angled cuts on the new ones we have done today. Those final rafters, we will put up on Friday and possibly Saturday too – double phew!! -
Work Begins on “P” Section of Roof
Today, after a fairly long delay where we were recovering from an injury but also doing the Oak timber Survey and Ordering, we resumed our task of creating more rafters for the roof. This time, it was the turn of the “P” section over the Great Room. We chopped up the collection of CLS timber lengths we had in the workshop and produced 12 individual pieces to do P5 through to P10 and P16 through to P21. Then, the large pile of plywood webbing strips were also cut and sliced including cutting in the notches on all 12 sets and ended up with a collection of webbing, ready for the assembly.
Then it was the usual job of bringing in polystyrene foam strips, 12 of them, then cleaning up the workshop and refilling the glue dispenser bottle too.
By the end of the day, we managed to complete three rafters, P5, P6 and P7. Tomorrow, we will take outside as many of the “H” rafters and get them installed up into the structure before lunch and then continue in the workshop to carry on making the remaining 9 “P” rafters during the afternoon and avoid the short daylight hours. We should get the rafters for both “P” and “H” all installed by Thursday and Friday and that will be it for the rest of the year as we can relax and celebrate Christmas and New Year and start fresh again in January!