Category: Roof

  • Fascia Boards Progresses Around the House

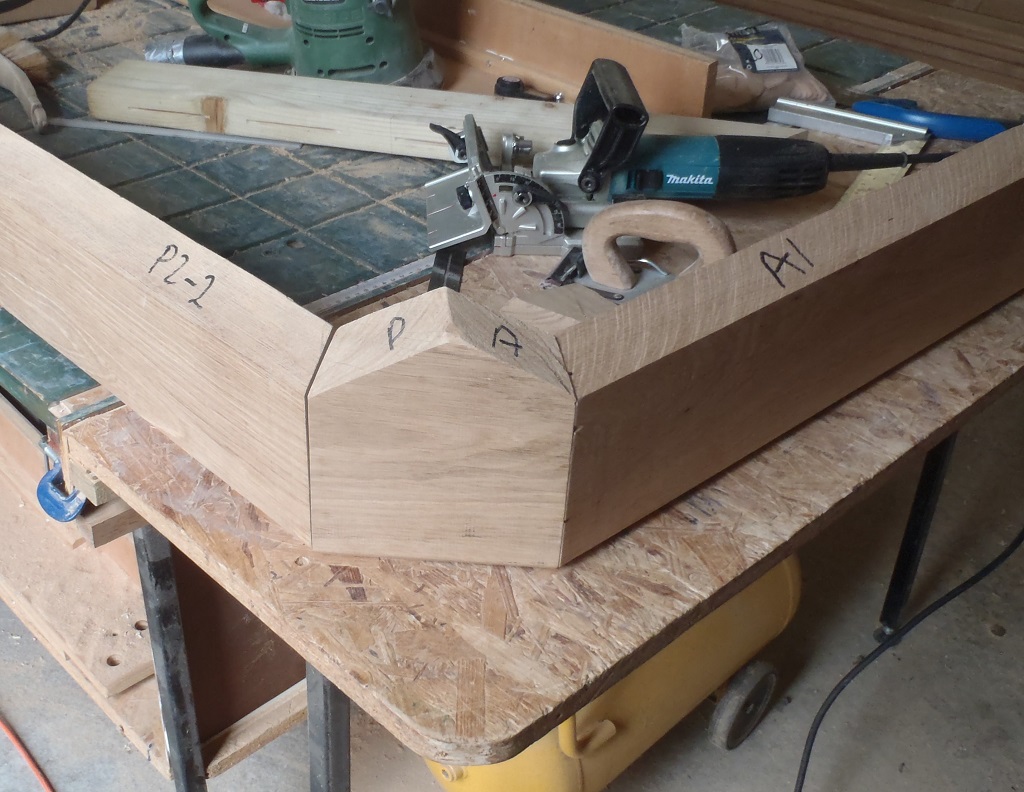
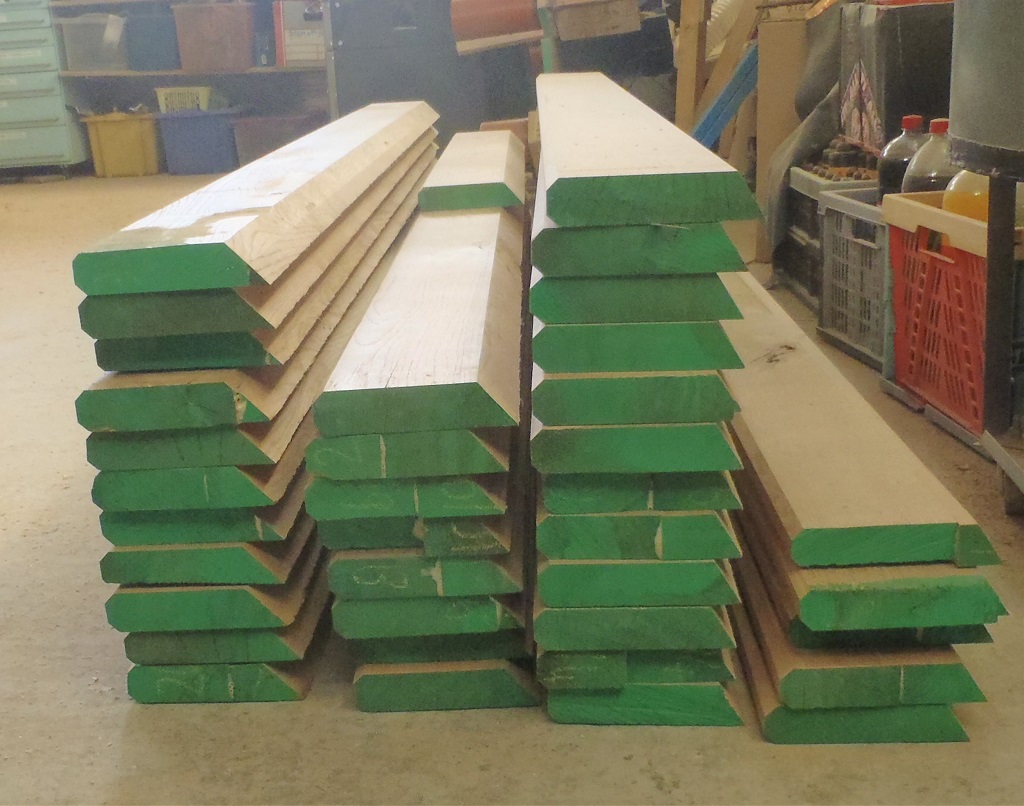
    Yesterday and today, we carried on processing the Fascia boards, sorting out the pile of Oak pieces, taking off the bad ends, adjusting lengths for outside corners, slicing bevel ends, cutting biscuits joints and sanding down rough patches. We got sorted enough pieces so we could tongue and groove several lengths ready for the “C” section of the roof as well for the “N” section too.
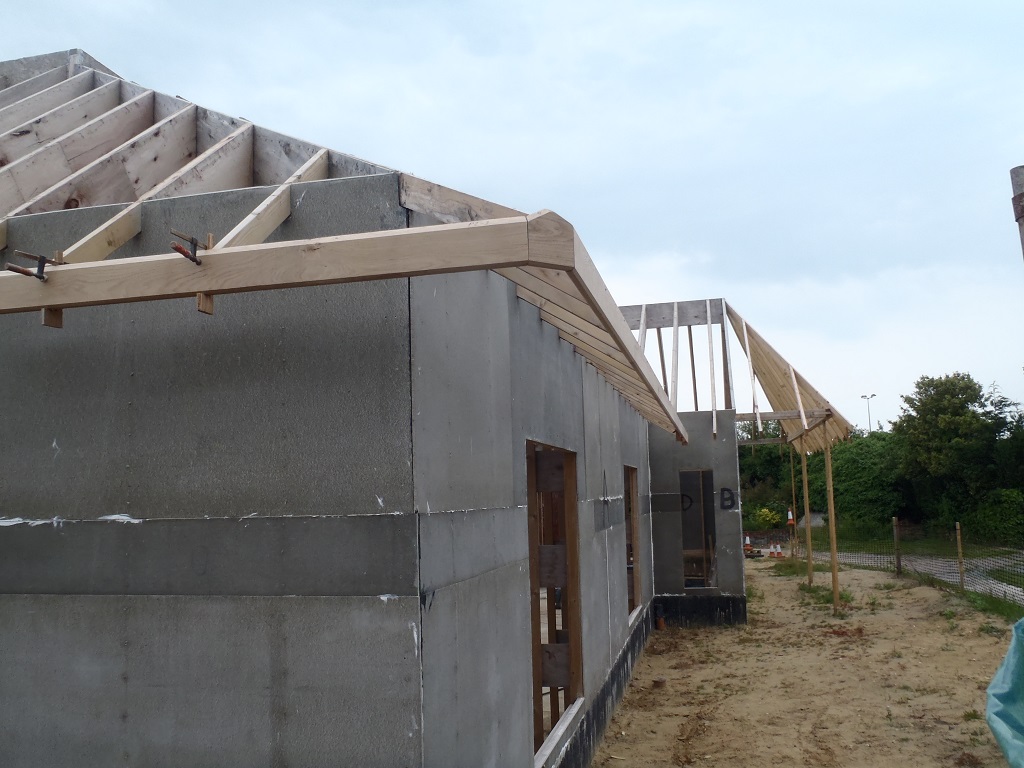
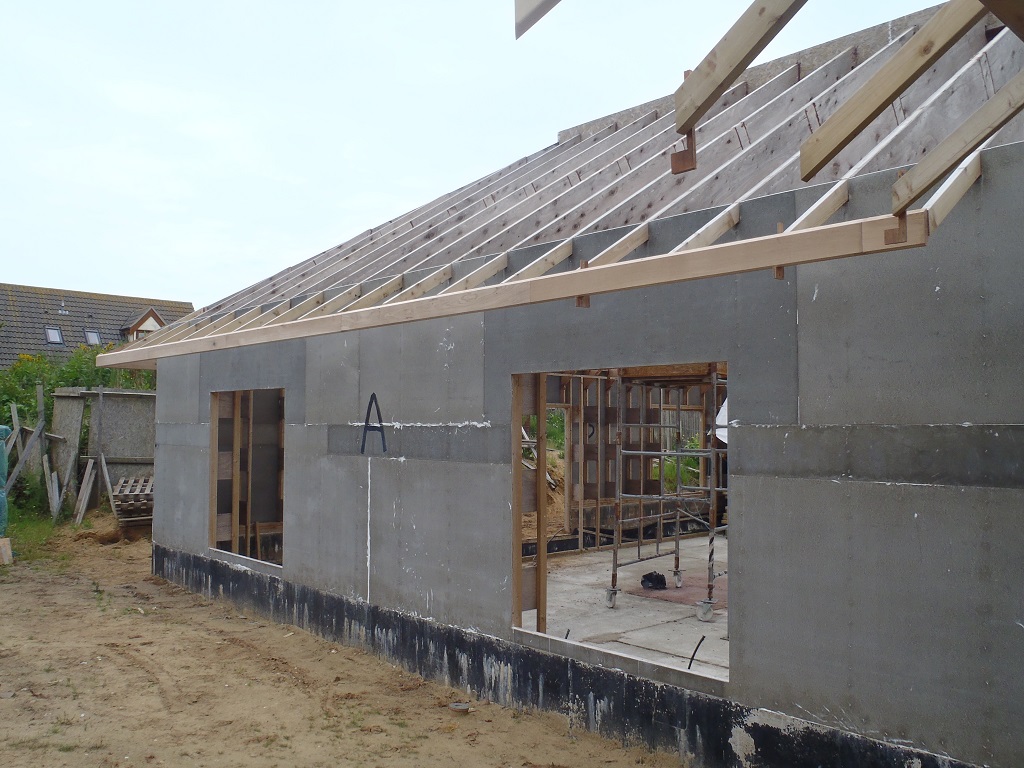
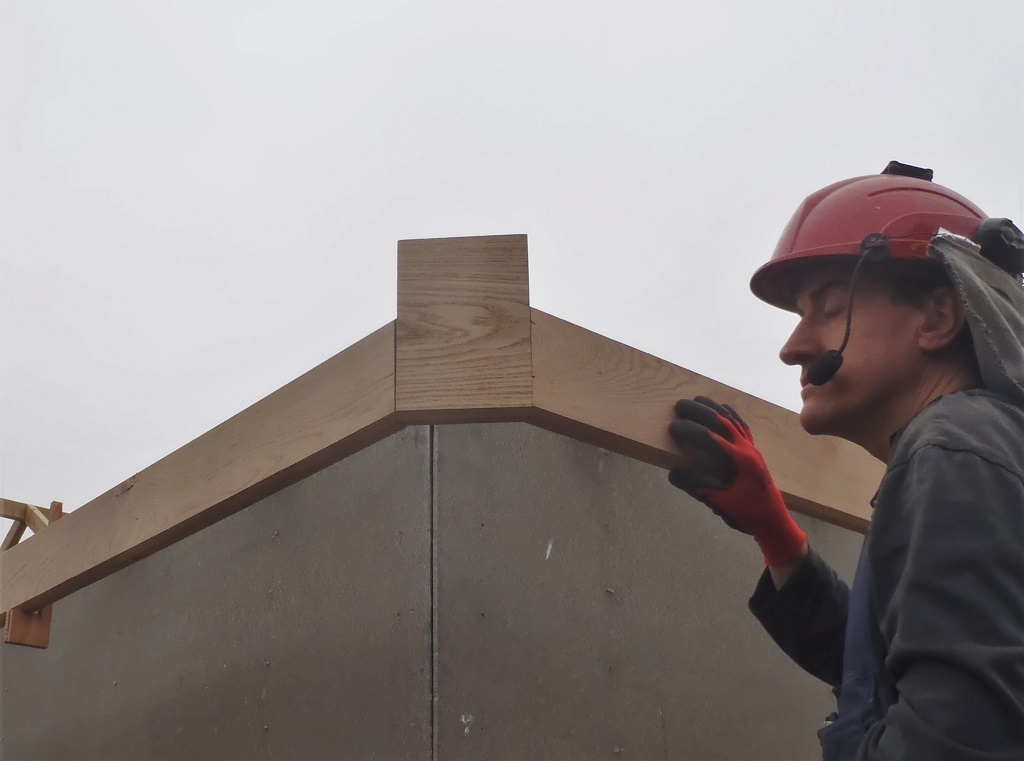
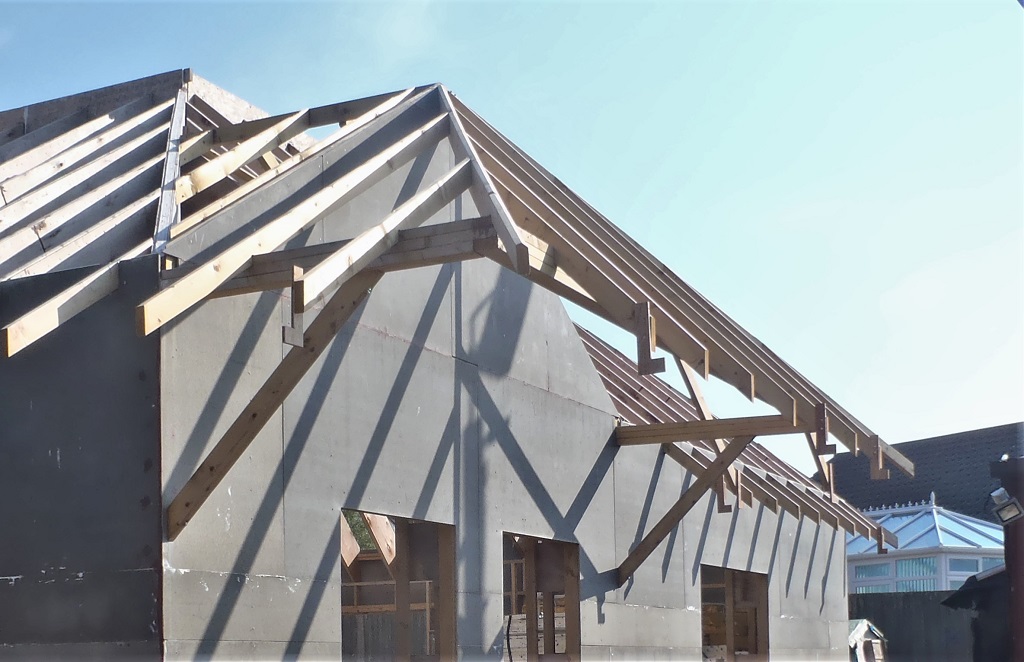
    So after lunch today, we took out the pieces for us to mount up the Fascia board for “B”, “C” (along the Front Porch) and “D” (the two sides of the porch). We started on the two outside corners first, getting the little 45degree angled block positioned into place connected up to the two long sides, which allowed us to chop off the complicated angled slopes coming off the Fascia boards. Then eventually getting the whole “C” section up and screwed into place.

    Fascia Boards Progresses Around the House

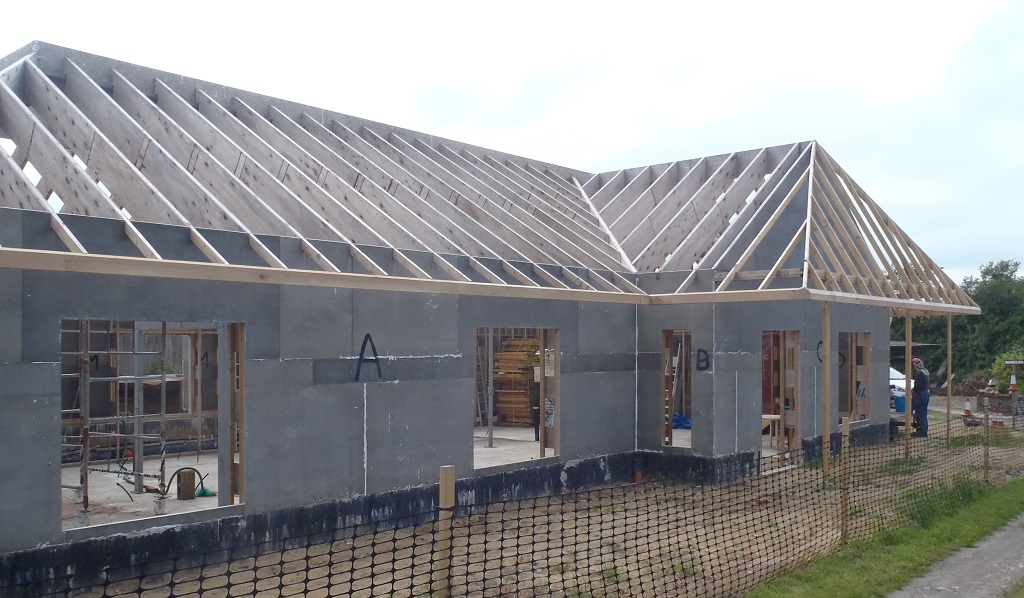
    Facia-for-BCD-fitted-1

    Fascia Boards Progresses Around the House

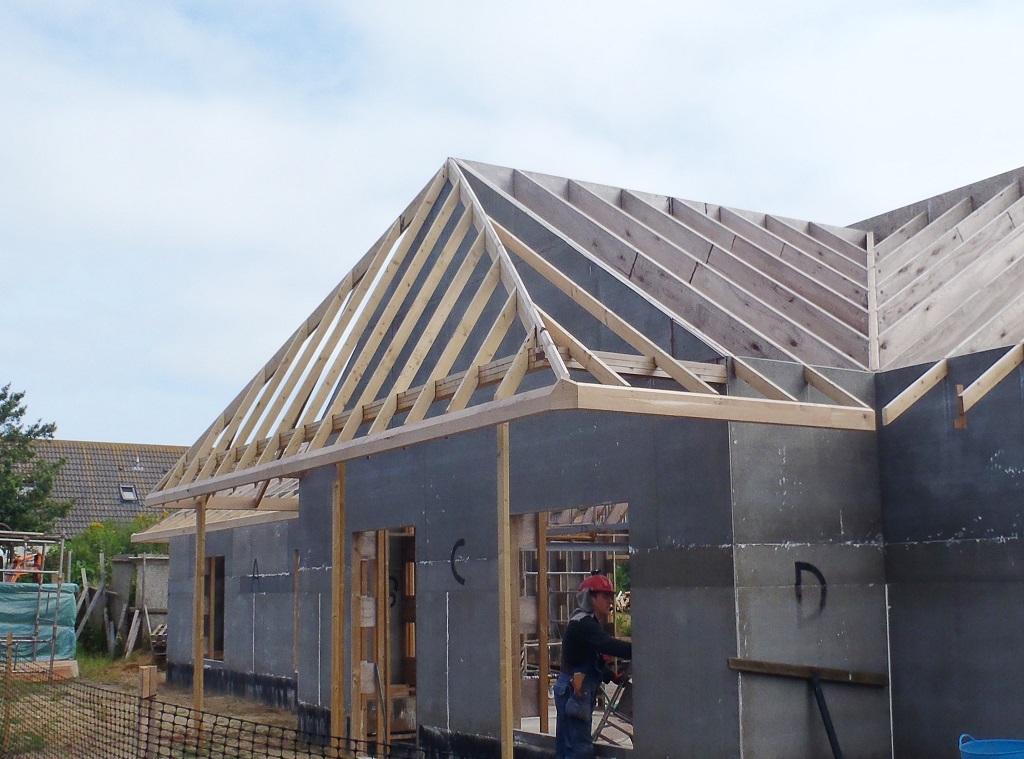
    Facia-for-BCD-fitted-2


    We are making quite good progress and we have almost finished sorting and processing the Oak Fascia pieces and the remaining job of mounting the Fascia will go quicker. On Monday, we will try and put up one of our Downpipe Channels to see how that will go in and what adjustments to our technique we may have to do. We Will See!!

  • Fascia Boards For 32degree Roof Sections Processed

    Yesterday and today, we continued with the processing of the set of Fascia Boards that has the 32degree slope on them, and sorted them out to form sets for the five sections of roof that are the same angle. These are the “A”, “E” (along the front of the building), “G” (the short sticking out bit on the right hand side of the Side door porch) and finally the “I” and “M” (along the back). The outside corners all have the 22.5degree mitre cuts (all of them except “M” as it is completely an inside job!). and all the intermediate planks have a biscuit joint to help align the faces together. We also had to join pieces together using a multi-finger tongue and groove joint to extend the last board arriving into the inner corners (where the downpipe channels are situated).
    We had the “A” and “P” section of the rafters all ready for mounting up the Fascia boards so we took these two sets out and gave it a test run.

    Fascia Boards For 32degree Roof Sections Processed

    Facia-for-A-initial-install-1

    Fascia Boards For 32degree Roof Sections Processed

    Facia-for-A-initial-install-2


    We started at the outside corner and positioned the first planks from both “A” and “P” plus the 150mm wide 45degree angled piece and joined them together so all was aligned. We then continued along the “A” putting up pieces and all is fine. Because it was looking good, we decided that we could do the next step of using our drilling template and make the clearance holes in these Fascia boards and screw down the top hole only to keep it all secured.
    Tomorrow, we will finish off the last plank on the “A” section and then start work on sorting out the “C” section (Front Porch) and have that ready so we can do these outside corners for both BC and CD, which in turn, will allow us to put up “B” and “D” Fascia plus also the “E” section too! It is coming along! Hurrah!!

  • Finished Straightening Ends of Rafters and Started Extending Fascia Boards

    This morning, we completed the task of straightening the ends of the rafters on the last sections of roof, namely “E”, “D”, “C” and “B”. that didn’t take too long and now we have all sections having a nice straight runs around the whole roof of the house – lovely stuff!
    Then we got on with the task of extending some of the Fascia boards, ready for the shorter sections, these being two set of “B”, and “D” plus “J” and “L” which are only 2.1metres long approximately. Wes used our router to cut a multiple tongue and groove joint in the ends of the Fascia boards and attached small lengths, about 390mm long pieces. They were glued and now setting overnight.
    Finally, we went outside to move the scaffolding tower from where it has been sitting for a couple of months now and moved it away to sit alongside the large stack of plywood near the Loke. Tomorrow, we will spread more sand from the bank and widen the levelled area going down the side of the Great Room which will allow us to mount the scaffolding further away from the building beyond the eves of the roof and gain better access to the whole roof when we are doing the boards and the slate tiles too. and then in the afternoon, carry on preparing more Fascia boards with biscuit joints for more outside corners.

  • Rafter Ends All Aligned Up

    We used our new piece of equipment today, a niffy little band saw machine we bought yesterday, to make a collection of wooden spacers of variable thickness. We sliced a 100mm long piece of our CLS timber into lots of spacers, some thin (about 1mm thick), some at 3mm thick, some at 6mm thick and a few at 10mm thick.
    Armed with our collection of spacers, battery circular saw, glue and a staple gun, we started working on checking the alignment of the ends of our rafters in each section of the roof. Using a 100mm by 50mm regularised long plank (4.8metres long), that was very straight (we had to reject half a dozen before we found one that was nice and straight within 1mm or so), we placed it up on our wooden fascia support brackets and examined if any rafter was sticking out more than its neighbours. After careful analysis, some of these had a small sliver taken off their ends and some had extra spacers added (using our new collection of course!), stuck down with glue and a couple of staples to hold while the glue set. We also sprayed more timber preservative on these modified ends to reduce problems in the future.

    Rafter Ends All Aligned Up

    Rafter-ends-packed-out-straight


    We proceeded clockwise around the house, starting from the “A” section of the roof, and did “P” (two halves), “O”, “N”, “M”, “L”, “K”, “J”, “I” “H” and “F”. We have only four more sections to go to complete the circuit. It was quite rewarding to have made these adjustments and now we can look forward to putting up our Fascia boards and have them aligned up, be flat and all at the same level too! Lovely!

  • Four Jig Modules Created for Screw Holes in Fascia Boards

    Today we calculated and created a design for a jig to help us drill two clearance holes through the Fascia boards, positioned in such a way that the two stainless steel screws will drive into the ends of our rafters and pull tight the boards good and tight.

    Four Jig Modules Created for Screw Holes in Fascia Boards

    Facia-fixing-screws-Jigs


    There are four of them to match the different slopes of the roof sections around the house. The 32 degree and the 33 degree versions are created in one jig as the differences are very small. These jigs will allow us to repeat this task of drilling these clearance holes with precision and be consistent on all 196 “ends” that we have in total!
    The diagonal Hip rafters will have a similar jig but not for drilling the hole directly, only to draw the position of the rafter as it joins on to the 45 degree corners. There are only ten of these corners to worry about so we will deal with each one in turn as they come along and drill the holes by eye instead.

  • Last Set of Fascia With Slope Sliced, Tools Prepared and First Test Fitting

    Yesterday afternoon and today, we carried on with the task of getting our Fascia Boards up on our eves. Yesterday, we had the last four and half planks that needed a steep 60° angle sliced along the top edge. We made a homemade jig with various pieces of plywood and CLS timbers to help support and hold each Oak plank in place and run our Bevel Slicing machine down the length.

    We now have five piles of Fascia planks with all the different angled slopes put in, ready for installing.
    Then, starting at the beginning, the PA corner of the roof (the Great Room at the front of the house), we chopped a 22.5 degrees angled mitre so it can join onto the 45degree corner plates. We went outside to put up string between our “L” brackets and temporarily clamp some more of these brackets so we can put up a Fascia board. This would let us position each Fascia board in relative ease and get things connected nice and smooth.
    Today, we initially did some preparation work on some tools so we ready to chop and slice the rest of the Fascia boards for each section of the roof. We were adjusting the workbench modules so our large chop saw was balanced and level. It was a bit fiddly but we managed to get there at last!
    After that, we sorted out our new biscuit jointer machine and worked out how we are going to cut a slot on the ends of the Fascia boards so the biscuit will be able to help us align each board and be a neat flat transition from plank to plank.

    Last Set of Fascia With Slope Sliced, Tools Prepared and First Test Fitting

    Fisrt-two-facia-boards-test-fitted


    We did another test fitting with our biscuits inserted and it is looking not bad at all. we marked the slopes of each roof, the angle and things, on our little corner Fascia bit and hand saw off the extra bits.
    Last Set of Fascia With Slope Sliced, Tools Prepared and First Test Fitting

    The-corner-piece-cut-to-shape


    Tomorrow, we will make some template jigs to help us position exactly where we will need to drill clearance holes through the Fascia boards so the stainless steel screws can be driven into the ends of the Eves (the rafters). We are waiting for some stainless steel tiny brad nails and some specialised highly waterproof PVA glue before we can proceed with putting up for real our first piece of Fascia board!

  • Slicing Slopes on Top of Fascia Boards

    Missing our morning’s work session to other duties, we resumed after lunch on the task of slicing a slope on the top edge of our Fascia boards to match the angle of each section of the roof. We had 41 x 2 metre planks ready for the rip sawing, divided up into the following set:

    • 12 x 32° slope
    • 5 x 33° pieces
    • 8.5 x 40° planks
    • 11 x 45° pieces
    • and 4.5 x 60° slope.

    Using our table saw, we proceeded to do all but the last one as the table saw cannot do more than 45 degrees.

    Slicing Slopes on Top of Fascia Boards

    Facia-boards-tops-angled-to-match-roof


    Tomorrow, we will finish off the last 4.5 planks by using our Bevel Slicing machine we still got lying around and slice the very steep 60 degree angle on those remaining Fascia boards.

  • Completed Setting Up of Brackets for Fascia Boards

    Today, under a superb blue sky and brilliant, very hot sunshine, we continued the task of fixing up support brackets to hold up our Fascia Boards at the exact positions.
    It was very interesting to appreciate how the liquid level tool is influenced by all sorts of environmental factors. It took at least half an hour for it to settle down and acclimatise to things like air temperature affecting the tubing (making it softer and increasing the internal volume), the liquid expanding because it was getting warmer and the different heights of the barriers we had to go over!

    But once we got a handle on its idiosyncratic behaviour, we had full confidence to carry on in doing the task of getting up these “L” shaped wooden brackets, positioned at the 12.550 meter point and we kept on double checking backwards, especially when we had to go out a different window or door.
    We arrived back to the beginning, around on the front of the building just past the front door porch and we measured the very first one we did on Saturday and hey presto, it was the same height!! Yippee!

    L-Brackets-installed-on-end-of-each-set-of-rafters

    L-Brackets-installed-on-end-of-each-set-of-rafters


    The other little job we did while we had this liquid level device out and working well, we duplicated our reference point we have been using (which is situated on our number 5 steel leg) and went all around the whole internal walls (and the other six steel legs too) copying the reference mark. We now can be reassured that if we accidentally block off our main reference mark, we will have lots of other ones to take comfort from accurate duplicated reference marks.

  • Proceeded With New Liquid Level Device to Get Ready for Fascia Boards

    Today, we unpacked our new liquid level device and spent several hours getting it sorted (putting liquid in the 25 metre clear hose, without any bubbles takes time and patience!!), we proceeded to start work on setting the height of our Fascia boards. We are using “L” shaped wooden brackets made earlier and using this new liquid level to position a pair on all the sections of the roof to the precise Height of 2.55 metres above ground level.
    It was very interesting in how this very old technology (the Romans probably invented the technique!) is still useful and how sensitive it is to the slightest changes in where the 25 metre hose pipe was positioned and what obstacles it had to climb over (like windows or doorways).
    It was a case of running back and forth between the reference point on our “5” steel leg which had one end of the level mounted up at the exact 2.55 metre point and the other end going across and out to the edge of the roof.

    Water-Level-on-steel-post-@-2

    Water-Level-on-steel-post-@-2

    Water-Level-on-post-details

    Water-Level-on-post-details

    Water-Level-on-eve-end

    Water-Level-on-eve-end


    We managed to get six of the fifteen sections we are setting up done, and on Monday, we will continue with the task, until we have done all the way around. We wanted to get ready the whole job of where to position and mount up the Fascia boards, before we actually start putting any up at all. We will (we hope!) see that we arrive back to the start and find everything is nicely aligned up!

  • Final Black Finishing Coat of Glass Fibre Resin Applied to Downpipe Channels

    This morning, we finished off sanding and cleaning up the work we did yesterday on the Downpipe Channels, by removing excess glass fibre here and there and preparing them all for the final “top coat” resin layer.

    Downpipe-channels-finished-with-Black-resin

    Downpipe-channels-finished-with-Black-resin


    The deep black resin is a special formulated resin with a bit of wax added. This causes the surface of the resin to “pull” itself into a very smooth finish which is ideal to make the rain water flow as quickly as possible.
    The next job is to use our new liquid level device and set out our “L” wooden brackets all around the whole building to get the Fascia boards to be aligned at the same height everywhere!