Category: Build Progress

  • Wooden Scaffolding All Complete, Fixed and Safety Features Implemented

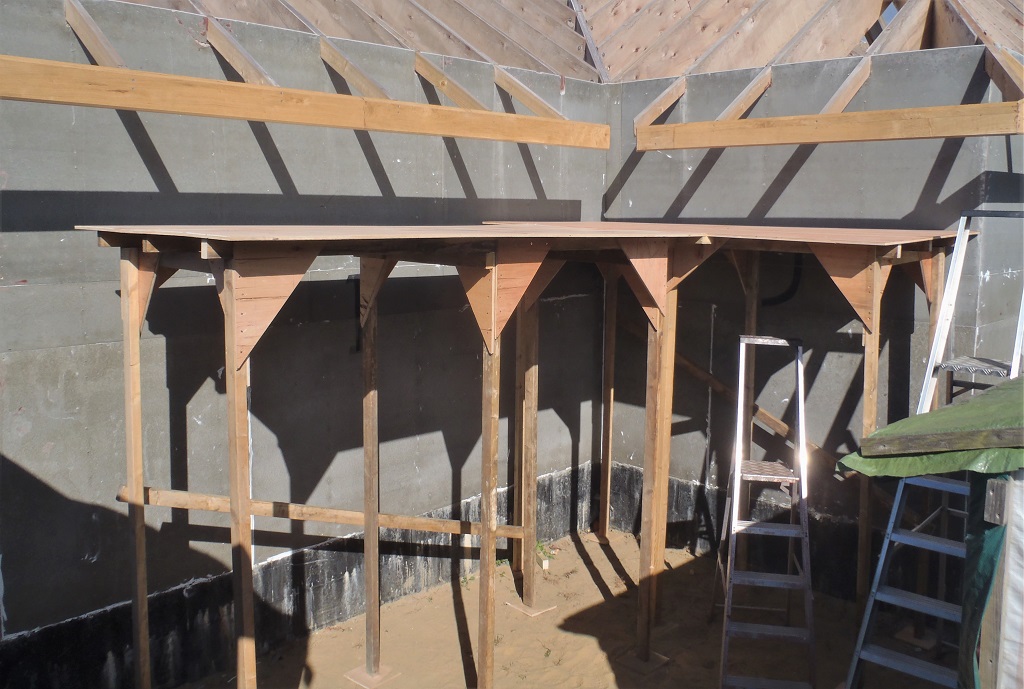
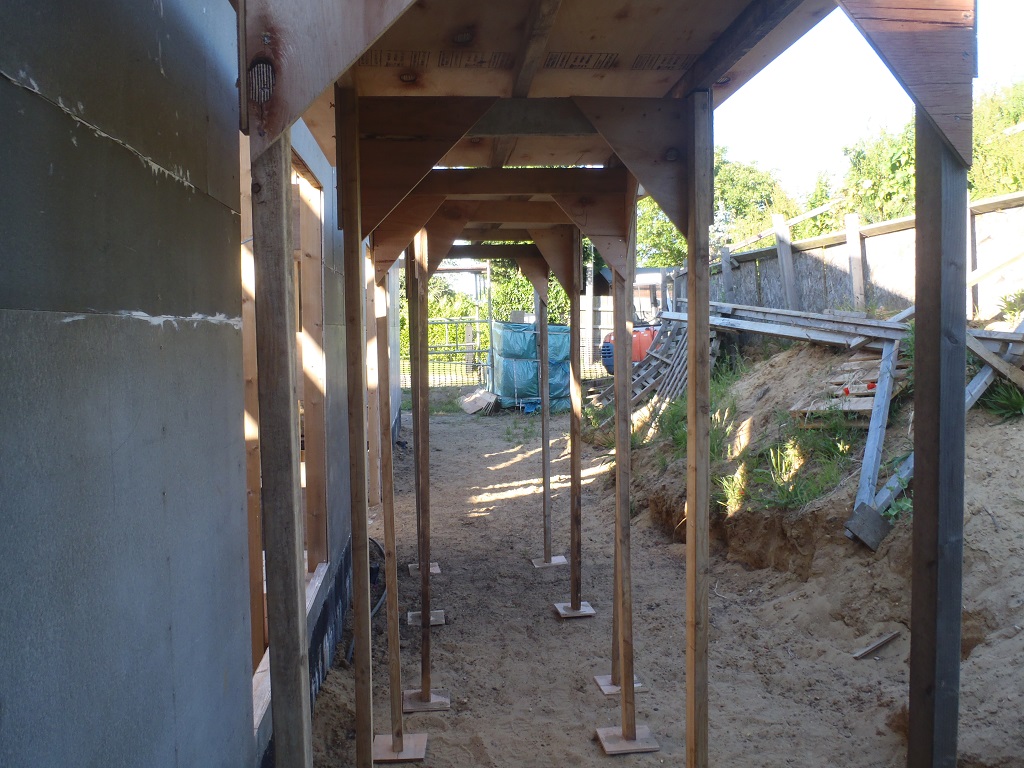
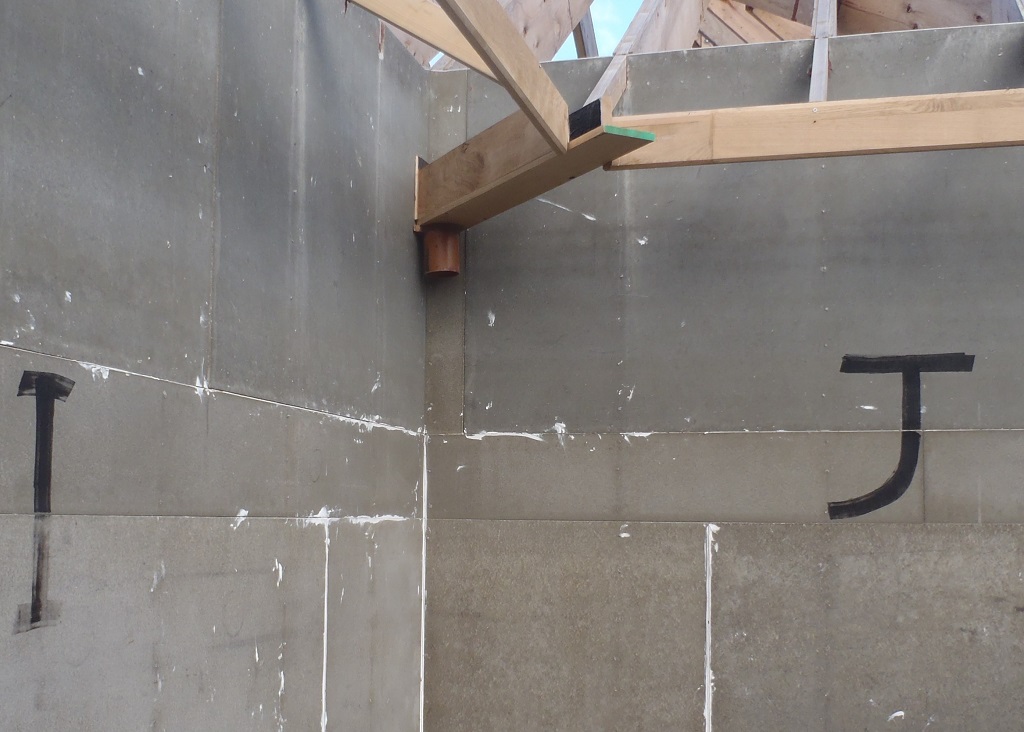
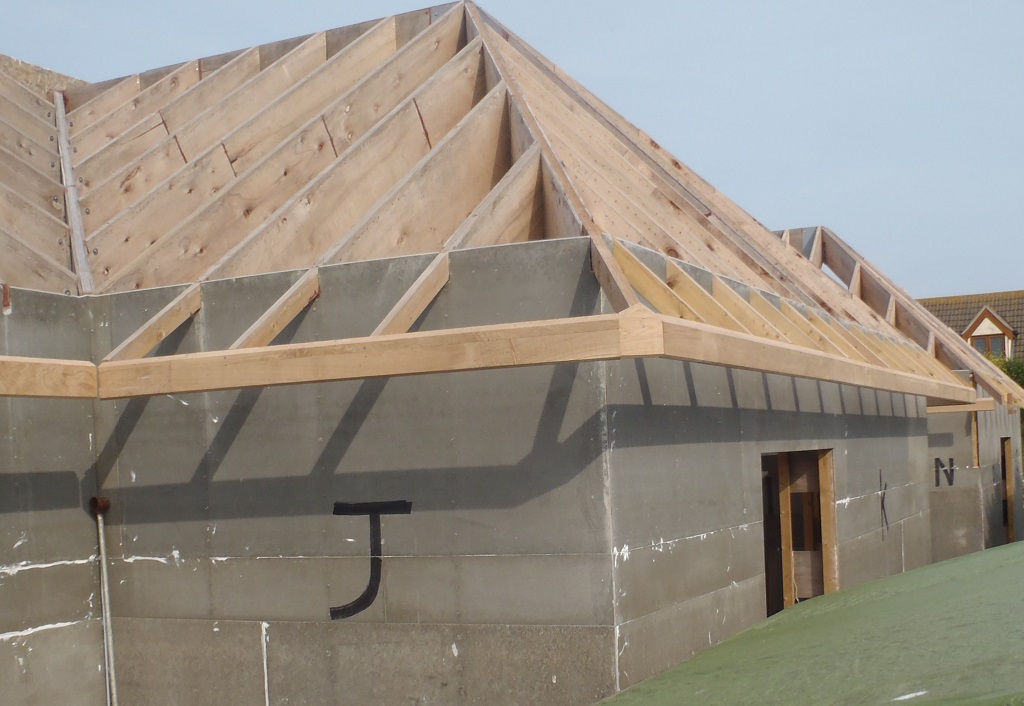
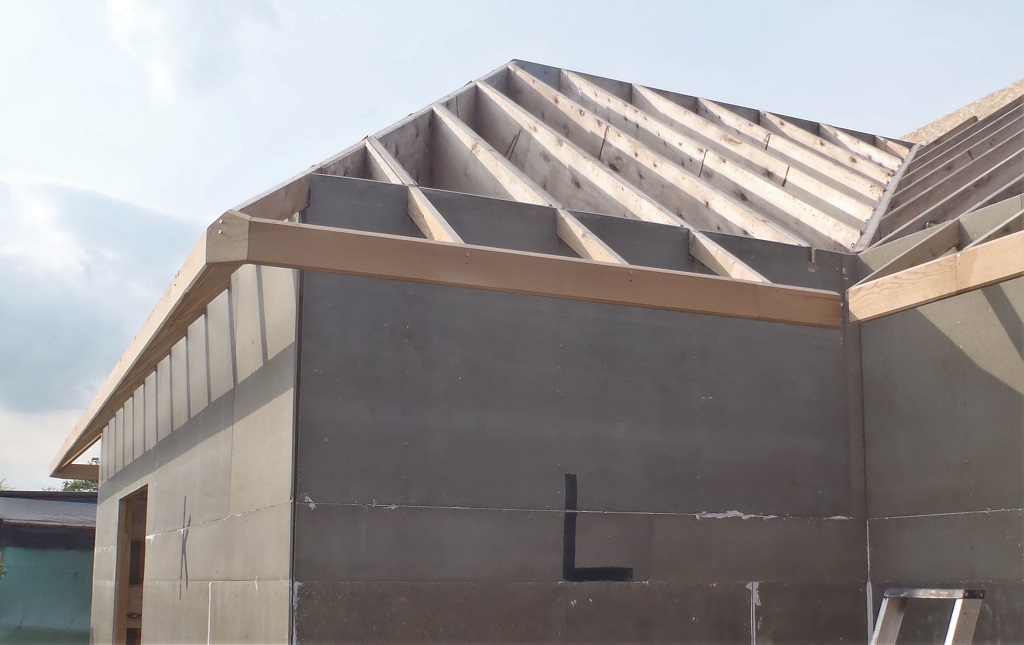
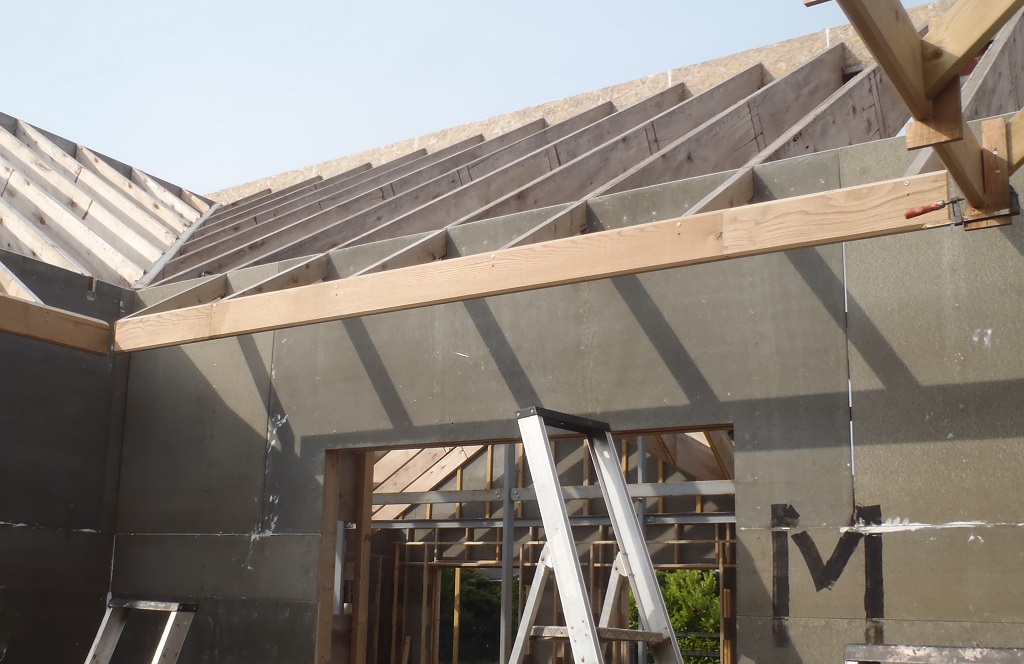
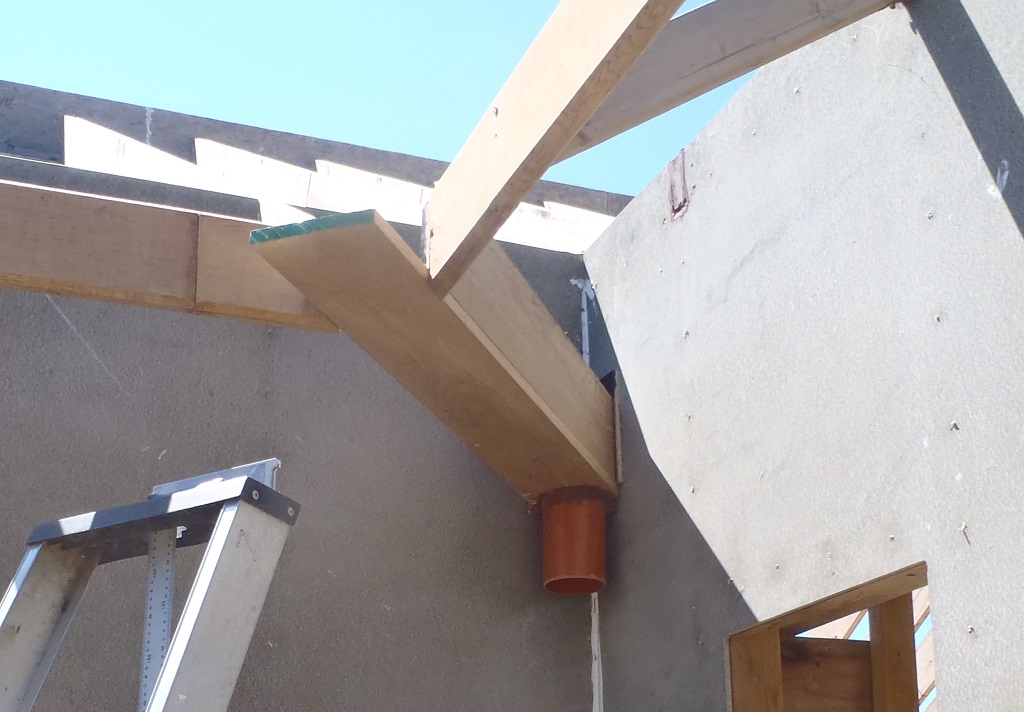
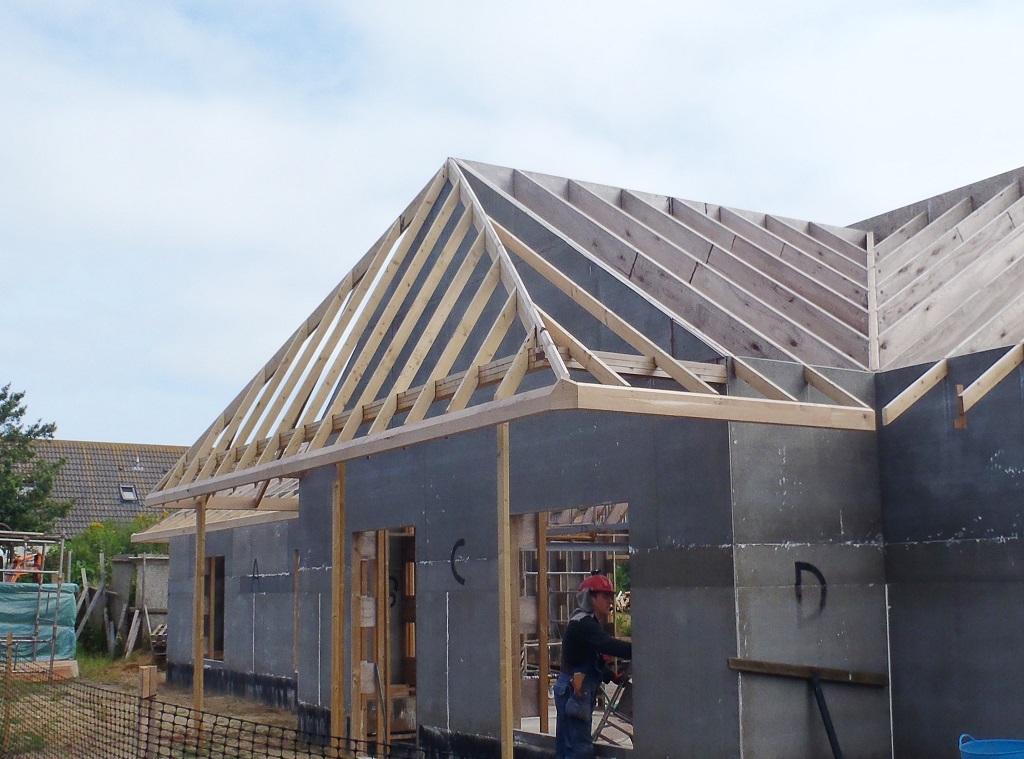
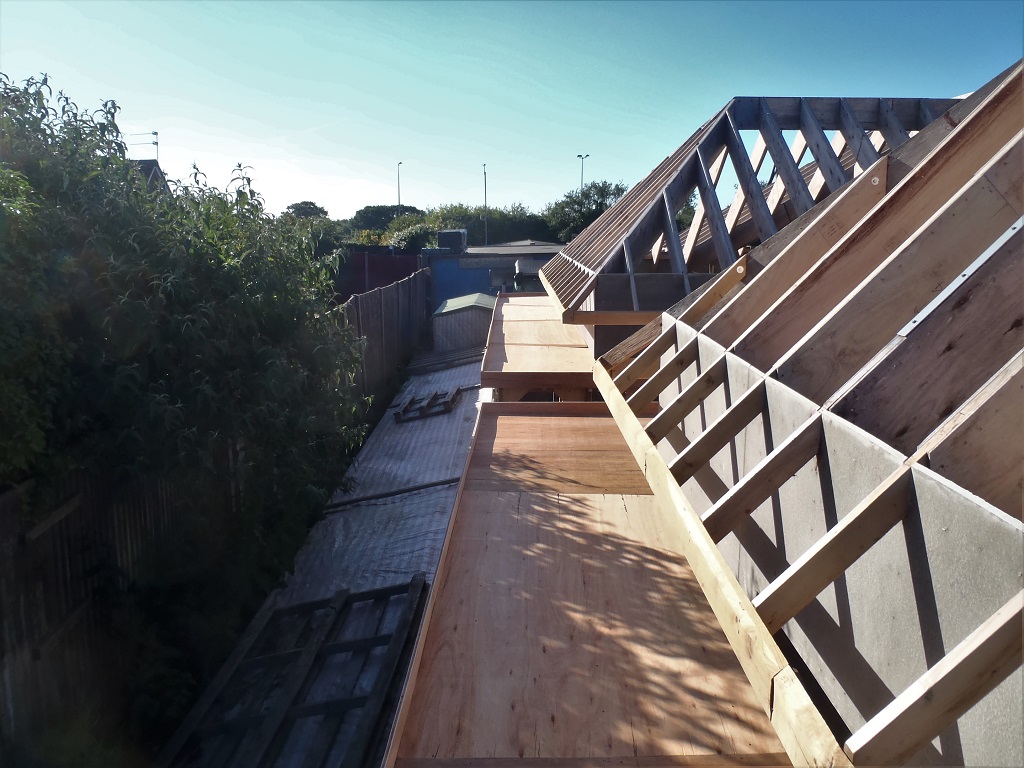
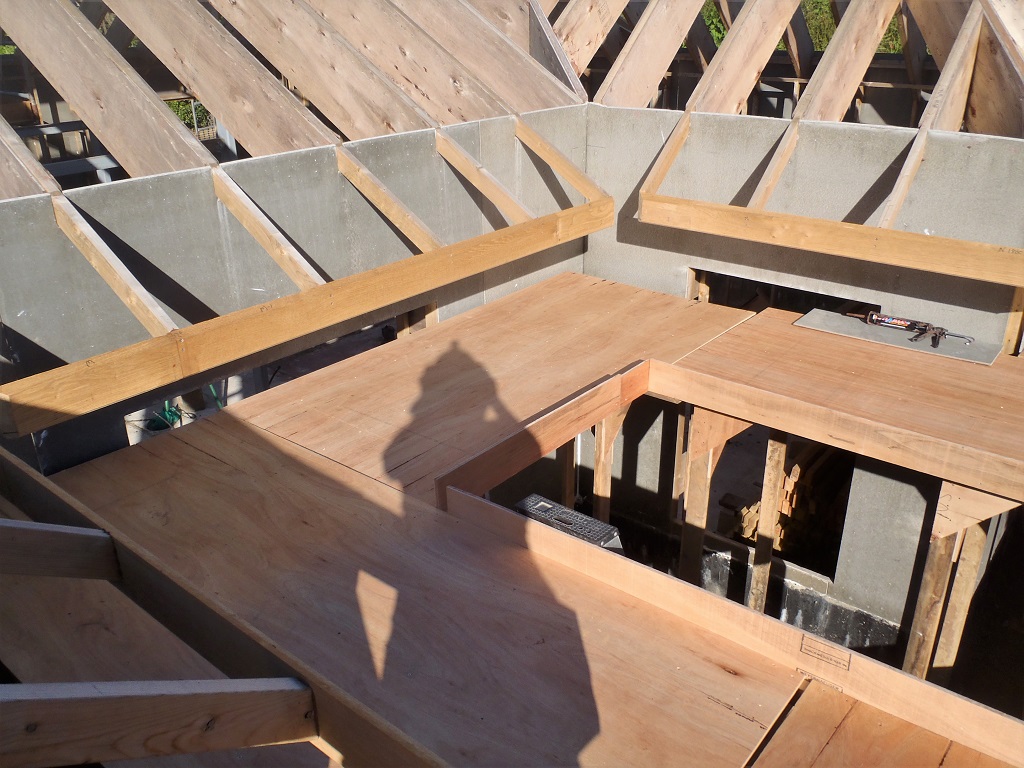
    Today, we continued with the task of getting the line of scaffolding platforms installed and we got each of the eleven modules positioned so each corner had a full 4feet overlap to keep the outer edge all in line. We had to put in short filler pieces between some of the modules, especially along the “K” and “O” sections but we now have a continuous walk way tracing the line of the building from “I” corner (the back right corner near the Garage), all the way along the back until the last corner where the “O” finishes (the back left corner near the conservatory).

    Wooden Scaffolding All Complete, Fixed and Safety Features Implemented

    Timber-Scaffold-complete-2

    Wooden Scaffolding All Complete, Fixed and Safety Features Implemented

    Timber-Scaffold-complete-1


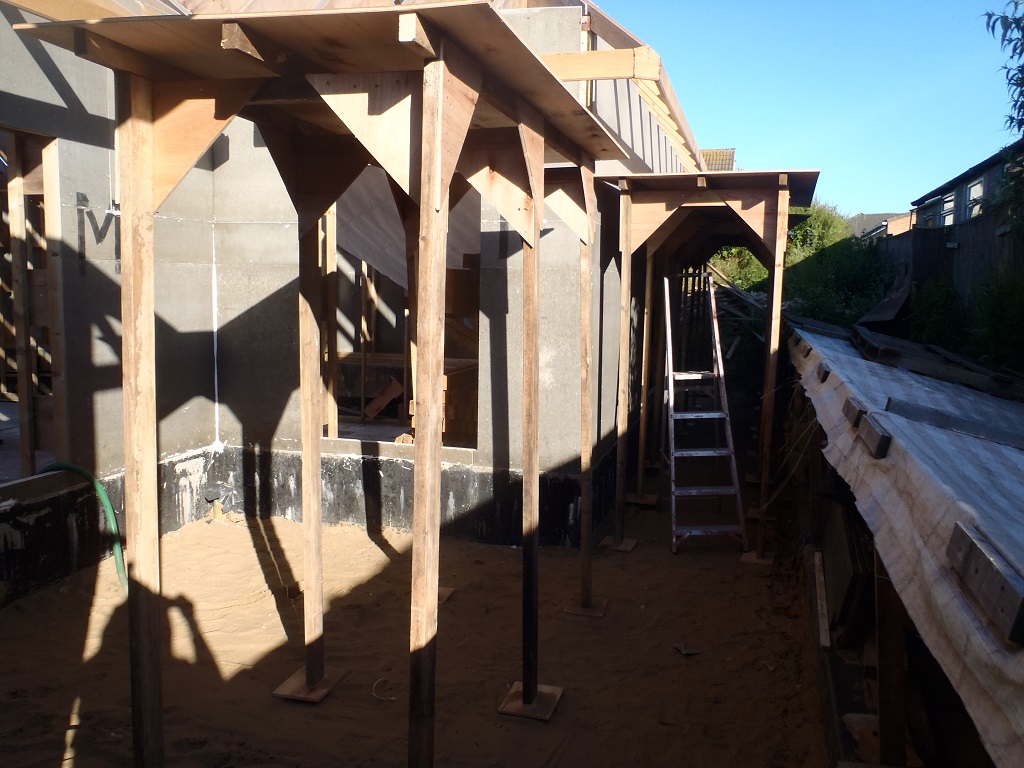
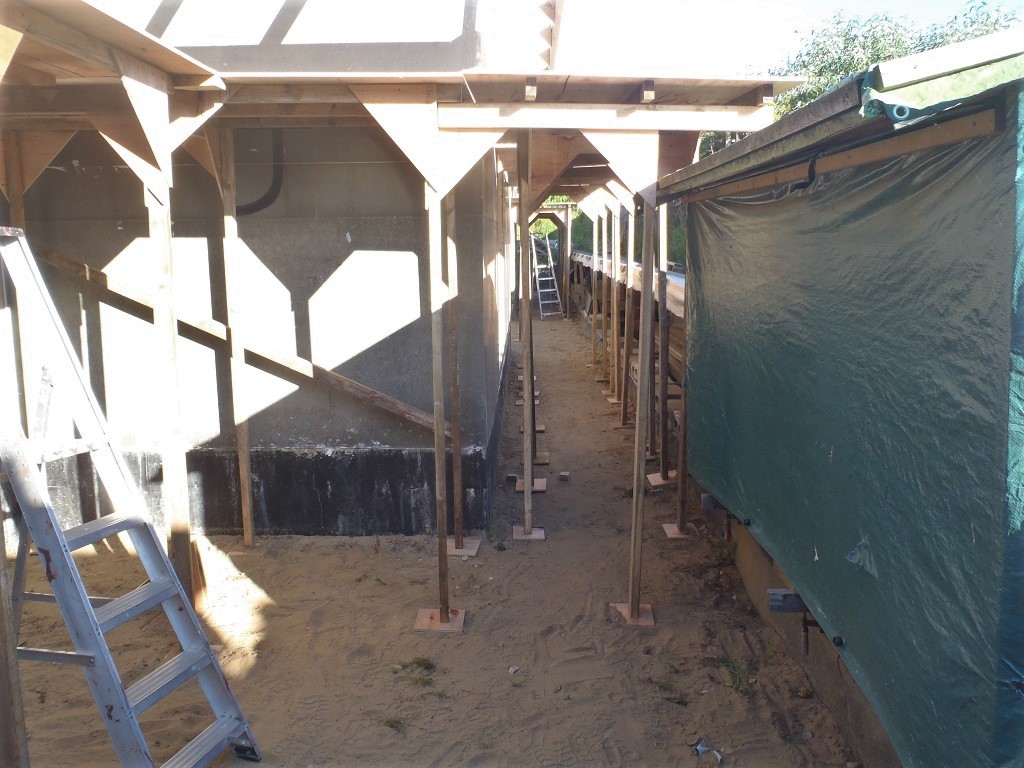
    We also installed a safety feature of a kick board mounted on the outer edge so that no one can accidentally step off or lose trugs of tools etc.
    We can now walk from one end to the other, all 30metres distance,

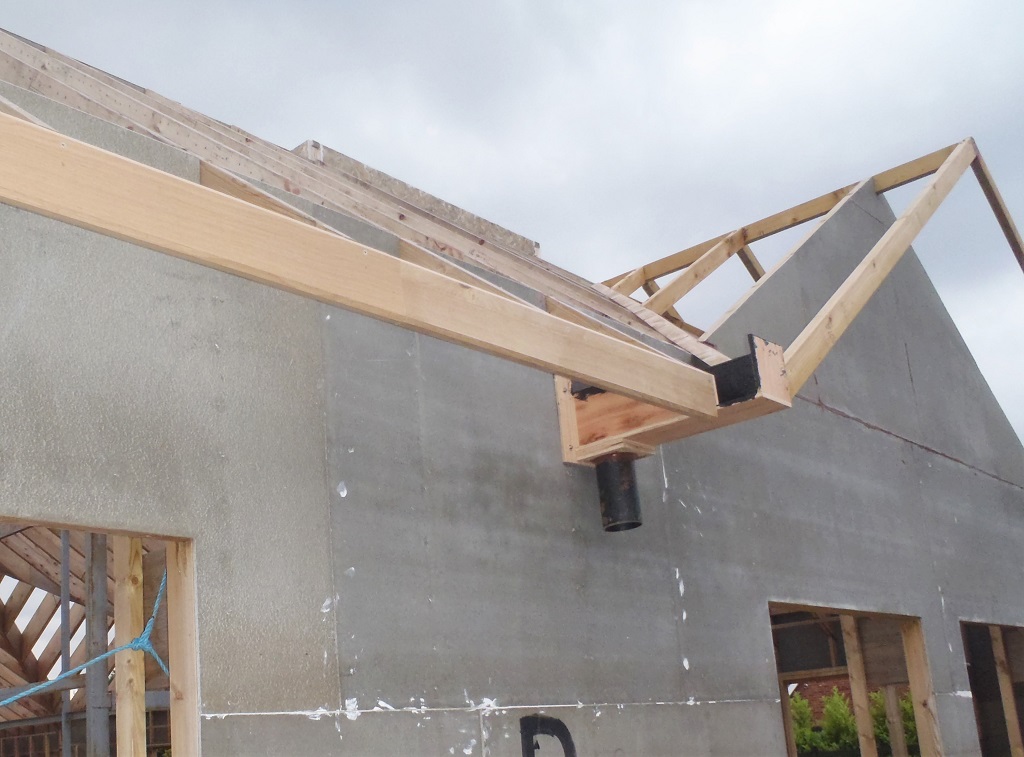
    This very useful structure will stay put until we have completed the roof and got the final guttering all done too. Yes we wish we could have it going all the way around but we didn’t have enough timber and we do have our mobile metal scaffolding tower which we will put on its wheels and extend the platform length so we don’t have to keep moving it so much. We will also have wall mounting points at regular intervals to lock down the mobile tower to make sure we are working as safe as possible. The extension will be done tomorrow and next week we then can start on putting the groove into the Fascia board that will hold the base board of the gutters.

  • Eleven Scaffolding Modules Created

    These last two days have seen the creation of new wooden scaffolding modules, eleven of them in total, each measuring 8feet by 4feet and 2.1metres (7feet) high.
    We spend half the day yesterday in creating the various parts, ready to be assembled, and we had time to make two modules yesterday.

    First-section-of-Timber-Scaffold-made

    First-section-of-Timber-Scaffold-made


    These two were also fixed to the building structure which made it very solid without hardly a wiggle when we stood on the platform.
    Today, we continued making a further nine modules ..

    .. and we now have a total of eleven modules, to allow us to build a complete walkway from one corner at the back of the building, to the other far back corner.

    Eleven Scaffolding Modules Created

    9-more-Timber-scaffold-units-made-1

    Eleven Scaffolding Modules Created

    9-more-Timber-scaffold-units-made-2

    Eleven Scaffolding Modules Created

    9-more-Timber-scaffold-units-made-3


    Tomorrow, we will adjust the positioning of all these modules and fixed them to the building itself to make it all rigid and safe, including mounting a 150mm high kick board on the outer edge to stop both “workers” and “tools” from slipping off the platform!!

  • Wooden Scaffolding Framework To Be Built Around Back of Building

    This afternoon, we decided that we needed to build a fixed scaffolding framework around the back of the house as our mobile scaffold tower will not be able to navigate down the back as the gap between the house and swimming lane is barely 1200mm wide and the tower itself is 1300mm wide in the first place but also we have tight corners and we won’t be able to move the steel scaffold tower around these corners either. So instead, we are going to build a fixed semi-permanent wooden framework of legs and struts to hold up a sheets of 8feet by 4feet plywood, and join them together to form a walk-way at about seven feet off the ground (about 2 feet below the Fascia level). We would be able to go from the “I” section at the start of the back of the house, along “J”, “K”, “L”, “M”, “N”, and “O”, the other end of the house. We using old CLS timber we have recycled from other jobs and cut them into the various parts to make 30 twin-leg modules to make five 8feet long platforms and three 16feet longer platforms. They will be connected together and also fixed to the building in lots of places to ensure that the whole framework is good and solid for maximum safety.
    This scaffolding will probably be there for most of the rest of the year while we work on the roof, getting all the elements done, including the Skylight. we will only take it down when the slate tiles are on and the guttering is all complete and fully working. It might take a few days to build it all but it will save many hours, or even days in not having to keep moving the mobile tower around all the time. We can afford this because we had recycled timber to hand and spare plywood boards but doing it properly using steel equipment would have cost many thousands to hire or buy, as we can only work so quick and we rather spend the money on buying materials like Oak Timber instead.
    Tomorrow, we will carry on preparing the old recycled timber, chopping it down into 30 pieces of 900mm lengths and 60 pieces of 2100mm lengths. Also make 60 triangular plywood pieces plus 60 flat “foot” (using more plywood leftover pieces) and then long 16feet (4.8metres) CLS timber, three of them for each long platform module which will have two full size sheets of plywood screwed down. All the platforms will have safety edges on them to provide some protection against walking off the edge or kicking a box or trug of tools over the edge too!

  • Analysed and Calculated Gutter Flow Direction and Angle of Slope

    This morning, we sat down and did some analysis on the rain collection quantity for each of our roof sections, which totals (including the proposed Conservatory) to 360 square metres. This includes the Skylight region as well. This means that for every 1mm of rain falling on our house roof, we would be collecting 360 litres of water. So for a 10mm rain shower, there would be 3600 litres of water (3.6 tons of the stuff!) pouring into our pipes and down into the rain soak-away modules (or into our rain storage tank when we have made the filtration unit!!).
    The eight down pipe connected to the guttering will handle this quantity of water and our analysis and calculations have assigned which section of roof is combined together for each given Downpipe channel. The other calculation was the angle of the guttering slope or fall. For the longest runs, there will be a 30mm drop from one end to the other (about 10 metres of gettering, making it about 3mm drop for every 1metre or in standardised units, about 1 in 300 angle).
    We then went around all the eight downpipe channel positions to measure the offset of each module again against the Fascia’s bottom edge so we know how much to add these “drops” in relations of that edge, at the start of a run.
    This now means that we have numbers assigned for all the corners of the roof and the next job is to snap a chalk line at the appropriate height and then cut a slot into the Fascia board, ready to receive the Oak guttering pieces.

  • Second Half of Fascia Boards All Glued and Double Screwed

    Today under a very strong Sun, we continued our way around the house, taking down each section of the Fascia, gluing the ends of the rafters and the joints and putting it back up again but this time with both stainless steel screws, wound in and tightened right down.

    We completed the F, G, H, I, J, K, L, M, N, O and the last part of P sections! Hurray! Now we can get on with the next task of mapping out the angles of all the gutter runs, taking into account the prevailing direction of the rain and the collection area on each section of the roof.

  • “P” Section is Completed Together With their Two Downpipe Channels and Began Permanently Gluing All Fascia Boards

    We finished off the “P” section of the Fascia boards where they connected to the temporary Downpipe Channels (which are alongside what will be the conservatory).

    Last-of-the-Fascias-with-downpipe


    After that bit was done, which saw the final conclusion of getting our Fascia Board up, all 77 metres of it on 15 sections of roof, all aligned up and no extra bits needed doing or repairing, we were ready to begin the task, the long task, of permanently fixing and gluing all the Fascia Board into place.
    We started at the conservatory end (on the front part of the “P” section) and began taking down each section of the Fascia, after pre-screwing the second screw first (provide a pilot hole to help us align the boards), gluing all the ends of the rafters and the butt joints with their biscuits and mounting everything back up again! We got as far as and completed section “E” so we managed to get all the front of the house done.

  • Last Three Fascia Sections Done and Three Downpipe Channels Installed

    We carried on with the “N”, “O” and “P” sections of the Fascia boards, getting the last two outside corners up and fitted (on the NO and OP corners) and screwed the Oak pieces into place.

    Last Three Fascia Sections Done and Three Downpipe Channels Installed

    N-Fascia-Installed

    Last Three Fascia Sections Done and Three Downpipe Channels Installed

    OP-Fascias-Installed


    After lunch, we tackled the three Downpipe Channels, for IJ, LM and MN inner corners, each taking an hour or so to complete. It was very hot work under the blazing sun, and the wind wasn’t really cooling at all, even though it was strong!
    Last Three Fascia Sections Done and Three Downpipe Channels Installed

    IJ-Downpipe-installed

    Last Three Fascia Sections Done and Three Downpipe Channels Installed

    LM-Downpipe-installed

    Last Three Fascia Sections Done and Three Downpipe Channels Installed

    MN-Downpipe-installed


    Tomorrow, we will do the last two Downpipe Channels (the temporary ones) for the conservatory where it would join to the “P” section (in the middle of it) and conclude all the Fascia right around the whole house.

    Finally here’s a Time Lapse of yesterdays work.

  • Six and Half Section of Fascia Boards Completed

    Under some glorious sun, we continued with the mounting up of the Fascia Boards. We resumed on the “H” section, then around an outside corner which had it 45° bit put on, done the “I” towards a downpipe inner corner, together with the neighbouring “J” section. This joined up to the “K” long section (on the back of the building) via another 45° corner. Then a duplicated corner, again an outside 45° angled piece, to connect to the “L” section heading back into an inner downpipe corner. And the “M” Fascia was mounted up which has a double ended internal downpipe at both ends. Finally, the “N” Fascia board is loosely held up and we will finish that tomorrow, along with the “O” and “P” and that’s it!

    Six and Half Section of Fascia Boards Completed

    Facia-H-Installed

    Six and Half Section of Fascia Boards Completed

    Facia-I-Installed

    Six and Half Section of Fascia Boards Completed

    Facias-JK-Installed


    Six and Half Section of Fascia Boards Completed

    Facia-L-Installed

    Six and Half Section of Fascia Boards Completed

    Facia-M-Installed


    We didn’t stop this time to do the Downpipe Channels as we wanted to concentrate on getting as many of the Fascia boards fitted up as possible. We will have five of them to do so probably will take the whole day.

  • Downpipe Channels Installed and Side Porch Fascia Mounted

    Yesterday we tackled the job of installing one of our Downpipe Channels for the first time, now that we have up enough Fascia board. The “AB” corner was our designated target. After careful positioning of the channel module, from below and then from above, and double checking gaps between pencil marks etc., we then proceeded to hand saw the end of the rafter and the Fascia timber itself, at the required 45degree angle and ended up with a gap of 160mm wide. The Down Downpipe Channel fitted nice and neat – thank goodness!

    Downpipe Channels Installed and Side Porch Fascia Mounted

    AB-Downpipe-in-place-1

    Downpipe Channels Installed and Side Porch Fascia Mounted

    AB-Downpipe-in-place-2


    We then screwed the back of it, to secure it onto the wall and with that extra support, we could then sawed the excess material off the vertical walls of the channel as they were protruding above the slope of the roof.

    Then we mounted up the “E” section of the Fascia boards, as usual, starting at the outside corner (part of the Side Door Porch) and positioning and screwing up the two and half pieces to form the “E” section.
    Today, first of all, we cut joined several pieces together in the “F” section by the usual tongue and groove joint, all glued up and drying, while we went outside to do the next Downpipe Channel module, this time for the “DE” corner (the other side of the Front Door Porch) and got that fitted in with a similar method as for the previous module.

    Then we carried on with the “F” portion of the roof (the Side Door Porch), now that the glue was set and cleaned up, and around the right end, this being the “G” bit of the Fascia. These two sections were drilled and screwed into place, including the two outside 45degree corners too.
    The last job of the day was to fit the next Downpipe Channel, which is a straight one coming along from the “G” section. It was a complicated joint to fit the module again against the Fascia board but also making sure it had the required slope and clearance for the downpipe connections as well.

    Downpipe Channels Installed and Side Porch Fascia Mounted

    Side-porch-facias-and-downpipe-installed-1

    Downpipe Channels Installed and Side Porch Fascia Mounted

    Side-porch-facias-and-downpipe-installed-2


    Tomorrow, we will continue the circuit of the house with the “H” section to do next and then “I” and so on.

  • Fascia Boards Progresses Around the House

    Yesterday and today, we carried on processing the Fascia boards, sorting out the pile of Oak pieces, taking off the bad ends, adjusting lengths for outside corners, slicing bevel ends, cutting biscuits joints and sanding down rough patches. We got sorted enough pieces so we could tongue and groove several lengths ready for the “C” section of the roof as well for the “N” section too.
    So after lunch today, we took out the pieces for us to mount up the Fascia board for “B”, “C” (along the Front Porch) and “D” (the two sides of the porch). We started on the two outside corners first, getting the little 45degree angled block positioned into place connected up to the two long sides, which allowed us to chop off the complicated angled slopes coming off the Fascia boards. Then eventually getting the whole “C” section up and screwed into place.

    Fascia Boards Progresses Around the House

    Facia-for-BCD-fitted-1

    Fascia Boards Progresses Around the House

    Facia-for-BCD-fitted-2


    We are making quite good progress and we have almost finished sorting and processing the Oak Fascia pieces and the remaining job of mounting the Fascia will go quicker. On Monday, we will try and put up one of our Downpipe Channels to see how that will go in and what adjustments to our technique we may have to do. We Will See!!