Blog

  • Spare timber Store Moved Outside to Swimming Lane

    Today, we decided to move the heap of timber planks we had stored inside our Great Room, on a raised shelving rack system.

    Spare timber Store Moved Outside to Swimming Lane

    Timber-storage-rack


    The main reason for tackling this job now, to move the timber outside, was because we needed access to our external walls to insert the insulation foam boards. We knew that we had to move this pile of various sized planks anyway, sometime in the future so we felt that if we did it now, then we would finish off the insulation task completely and not have it hanging over us.
    So the first job was to have a look at our swimming lane outside, to rearrange some of the items so we had enough room for the 4.8metres long planks.

    We pushed this and that bits and pieces around and was able to transport a collection of planks, ranging from 89mm by 38mm planks, some 100mm by 50mm ones and three big 100mm by 75mm planks to their new storage location, under cover in our Swimming Lane.

    Spare timber Store Moved Outside to Swimming Lane

    Moved-to-swimming-lane-storage


    The shelving system in the Great Room was dismantled and we now got a cleared area to allow us to gain access to the walls for the installation of the insulation chunks.
    The rest of the timber, the 63mm by 38mm type, is staying indoors because they will get used up to build all the internal rooms for both the ground and upper floors.
    Spare timber Store Moved Outside to Swimming Lane

    Tidied-the-CLS-stacks

  • Utility Room reorganised and First Solid Wall built

    We needed access to the sections of the exterior walls in the utility room to get the insulation boards in, we are currently storing tools there. So today, Thursday, on April fools day, we built the first solid wall between Bedroom 3 and the Utility Room to give us more space to store tools. This wall is the usual 63mm thick but we had put on an additional fermacell plasterboard layer on the interior side of the wall, then filled up the hollow space up with 100mm thick glass wool we had lying around in our garden shed, some 10 years old (and perhaps too old as the material didn’t seems to spring back into its full 100mm thickness), to act as another sound absorbing layer. The whole thing was covered up with a layer of 18mm thick OSB board to provide a good solid first layer of sound reducing wall, between Bedroom 3 and the various noisy equipment that will live in the utility, like the washing machine and drying cabinet and the other pieces of equipment for running the air conditioner etc.

    Utility Room reorganised and First Solid Wall built

    First-solid-wall-1

    Utility Room reorganised and First Solid Wall built

    First-solid-wall-2


    Then we moved the Ikea wooden shelving modules over to sit in front of this new wall and unscrewed the electric switchboard off the wall. We then installed the insulation in the walls and re-installed the (temporary) electric switchboard.
    Utility Room reorganised and First Solid Wall built

    Utility-insulated-and-re-arranged

  • Cosicot Fencing Replaced As Barrier Against Mount Sod Movements

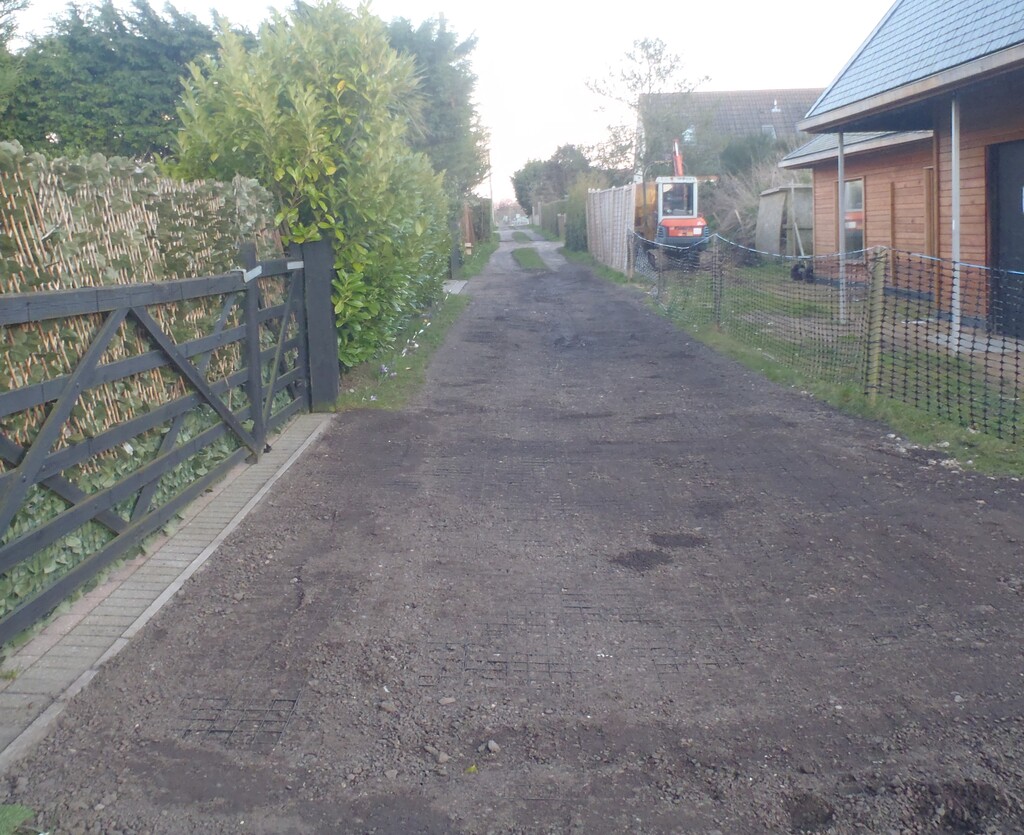
    The last two days has been spent on replacing an old tumbled down fence, the most of it anyway. The boundary is between us and Cosicot, up the hill from us a little bit. The old fencing was a mish mash collection of wooden fence panels, slotted into concrete posts at various distances. These are what we inherited when we bought the whole Roselea plot almost 20 years ago now.
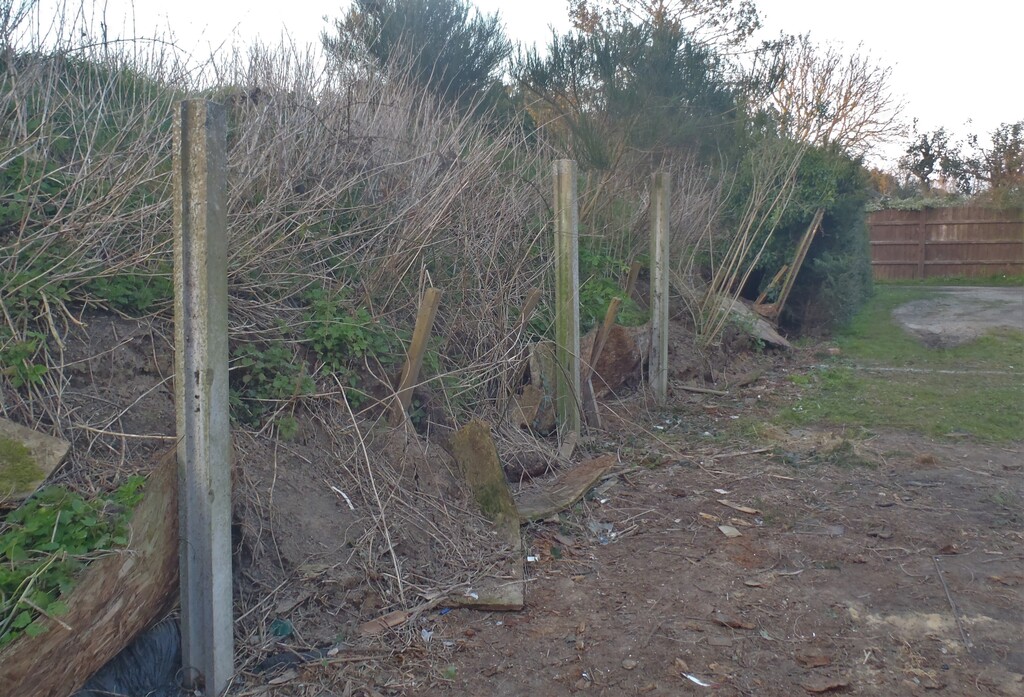
    But also, our lovely Mount Sod has done its usual thing of collapsing in some places around the edge and have pressed into the old fencing too.

    Cosicot Fencing Replaced As Barrier Against Mount Sod Movements

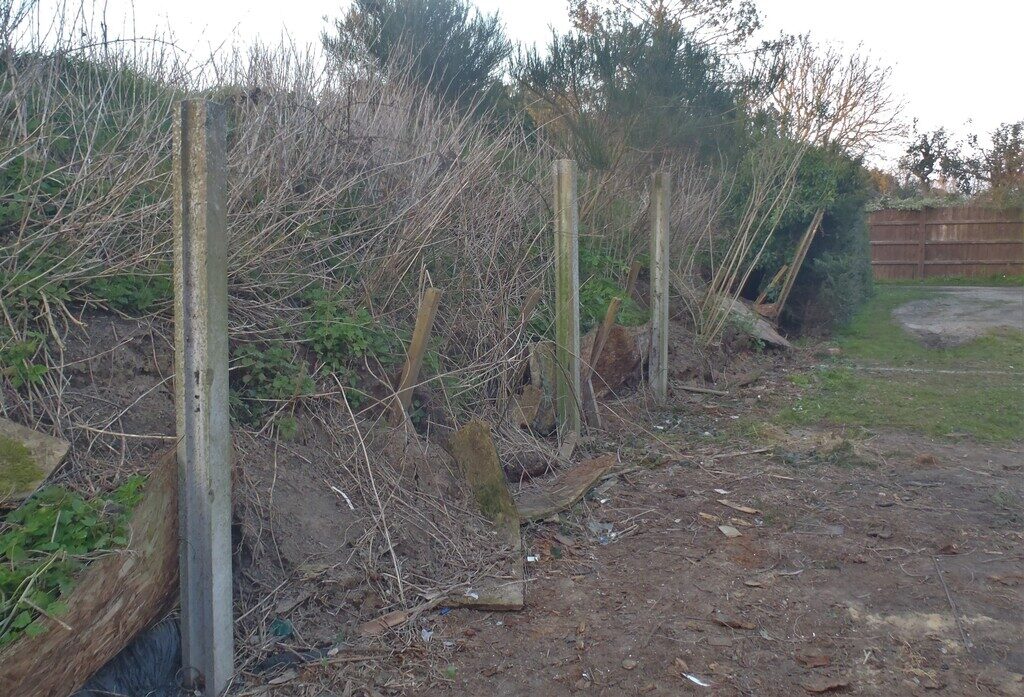
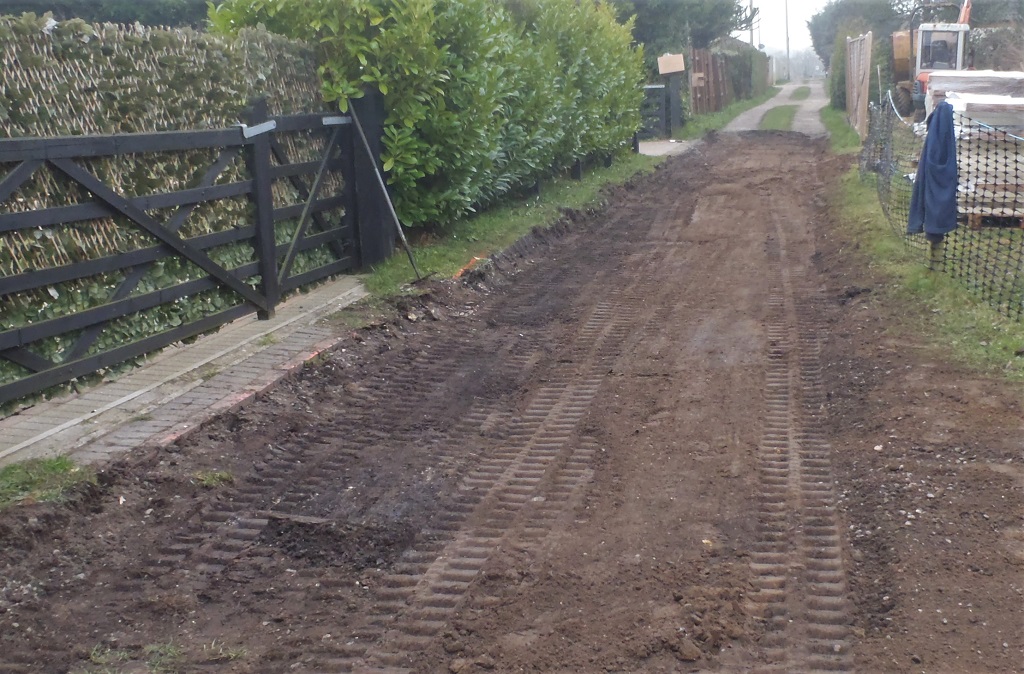
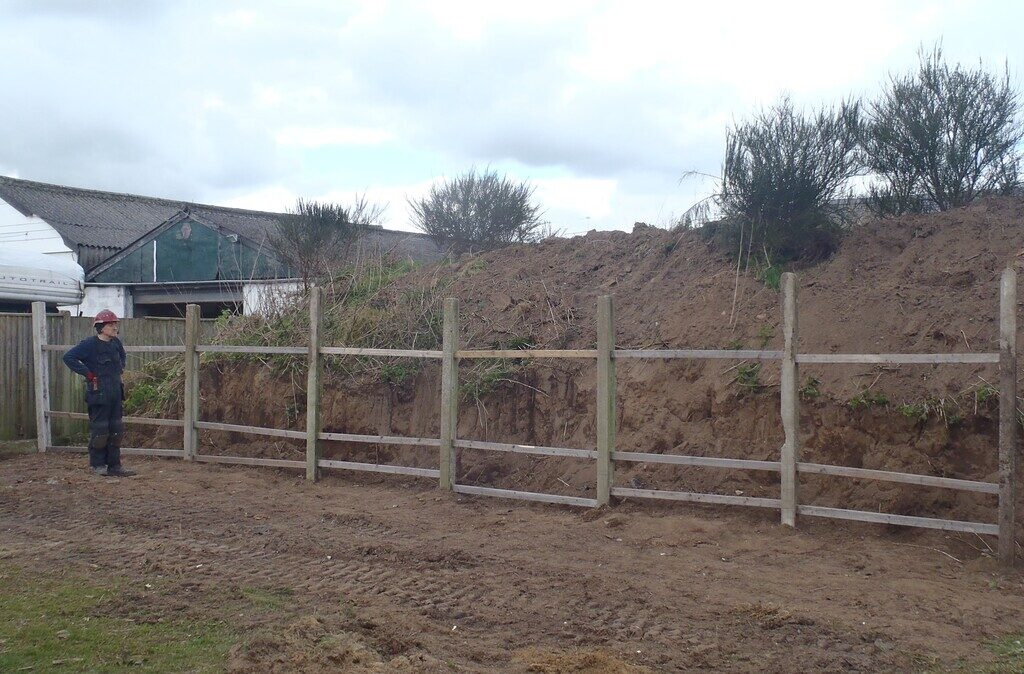
    Tumbled-down-boundary-to-Cosicot


    We had all ways planned to replace this fence with a nice high quality one when we have finished enough of the house to move in and move mount sod to it final resting place at the bottom of the plot.
    So after talking with our neighbour, we agreed that we will put up a new temporary barrier to both act as a new fence but also to act as a barrier against any further subsidence, to hold the status quo for another few years. It is all happening now because our neighbour wishes to build a new replacement garage and he doesn’t want to have to worry about our Mount Sod collapsing any further and messing up his brand new garage!
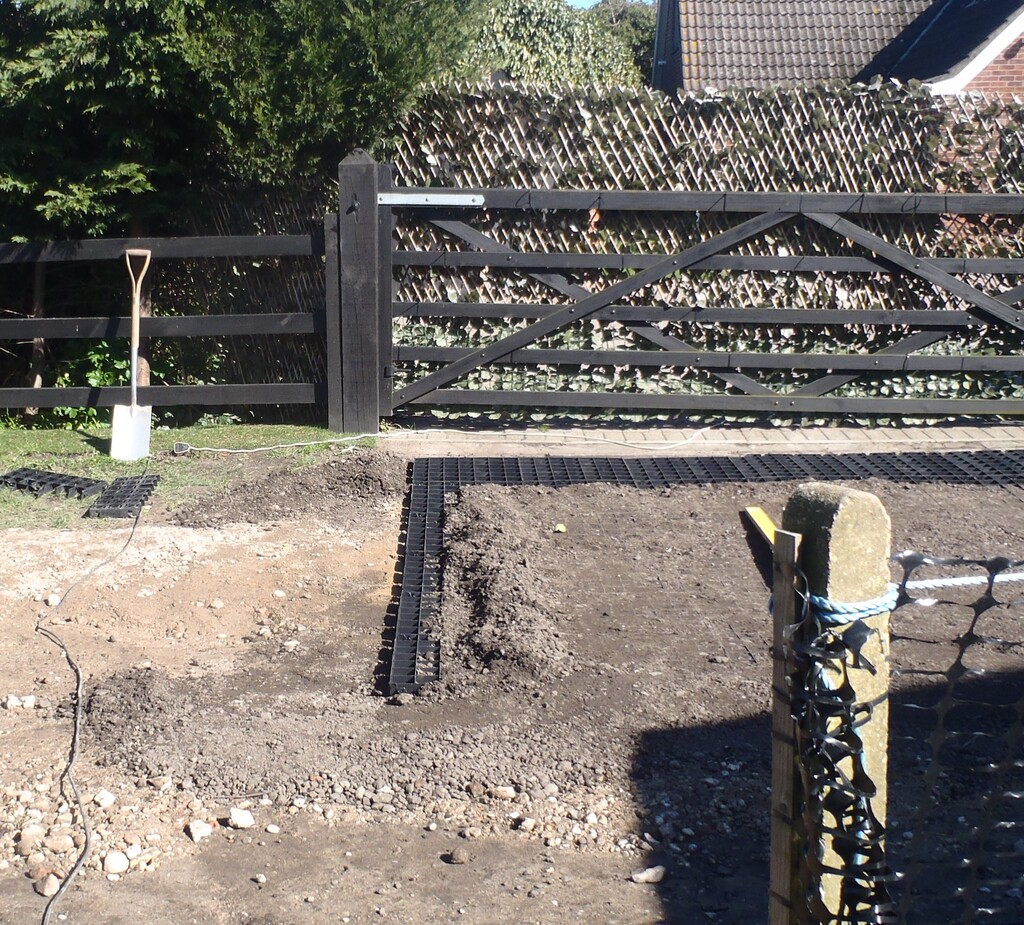
    The first job on the first day was to dig out the lower section of Mount Sod so we had room to work on both side of the fence. We got the mini-digger out, drove up the Loke and into our neighbour’s property. There were originally 4 concrete posts, widely separated, being well over 2.5metres apart but it was still a careful process of digging in between these posts and “chucking” the soil back up on to the top of the mountain of dirt. The next task what to rescue three more concrete posts we had lying in the other corner of our garden, pick them up one by one up using a hook and chain dangling from the digger’s bucket and transfer them around to the area of work. We had swopped the bucket over to our narrowest 300mm wide bucket to dig three deep holes and dropped the concrete posts in. We positioned the new posts to help subdivide the larger gaps and also provide stronger support for the barrier. Fortunately, these old concrete posts were commercial ones and were over ten feet tall so we could bury them three feet down and also they had their original lumps of concrete foundations still on them, which all helps to anchor them very strongly. Finally, we ripped out the last wooden panel and wooden post as it was broken by the shifting soil and original barrier support mechanism which had rotted away.
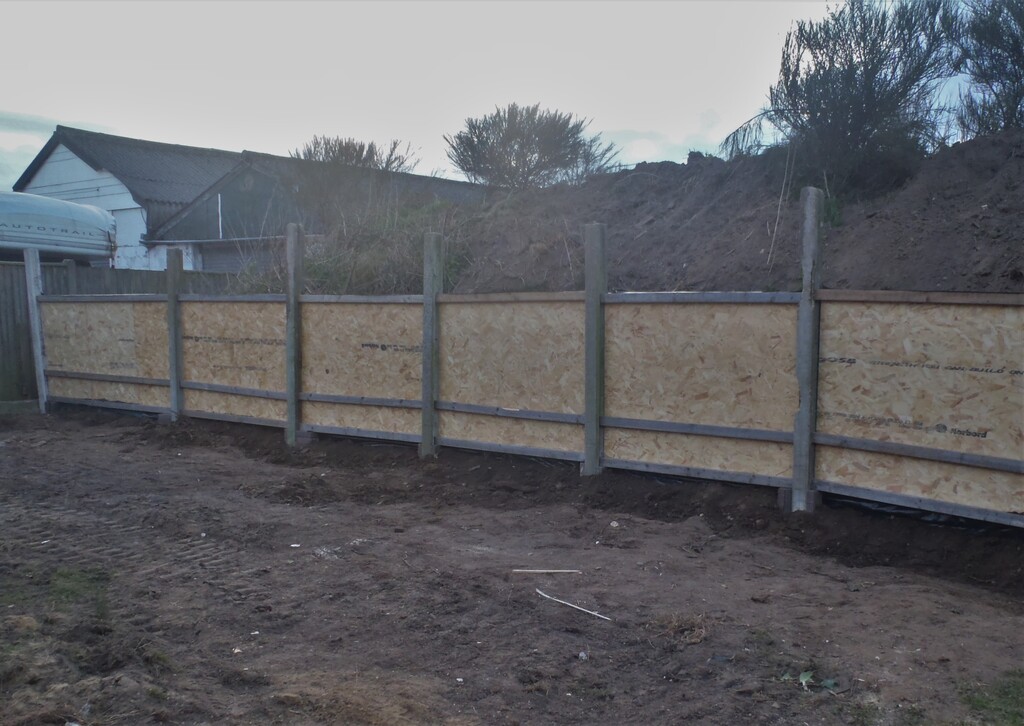
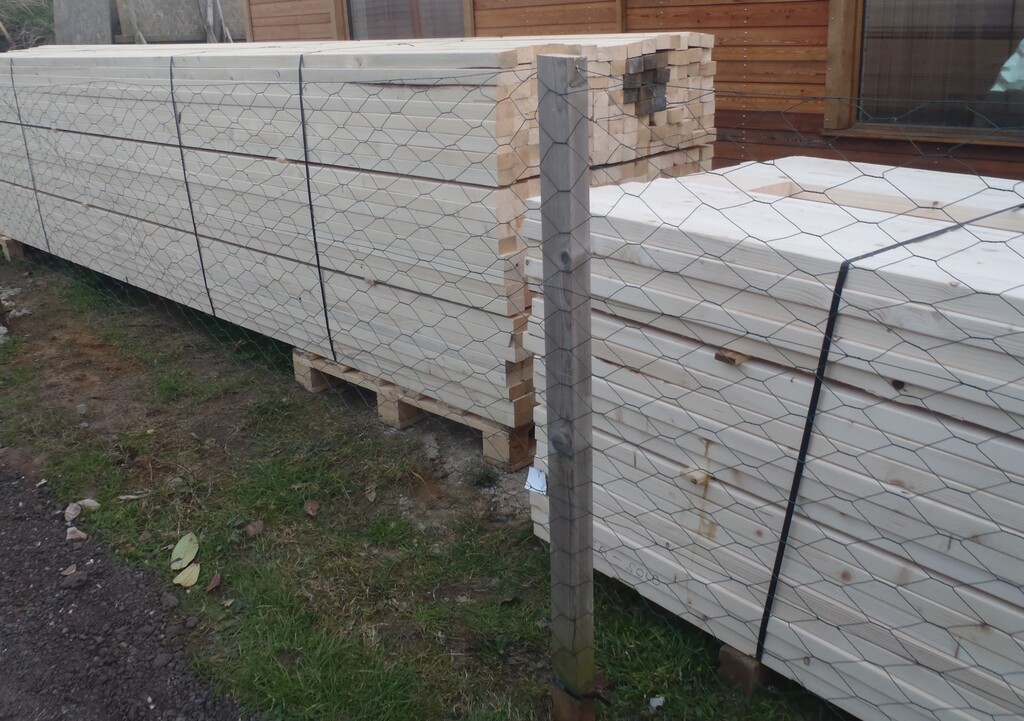
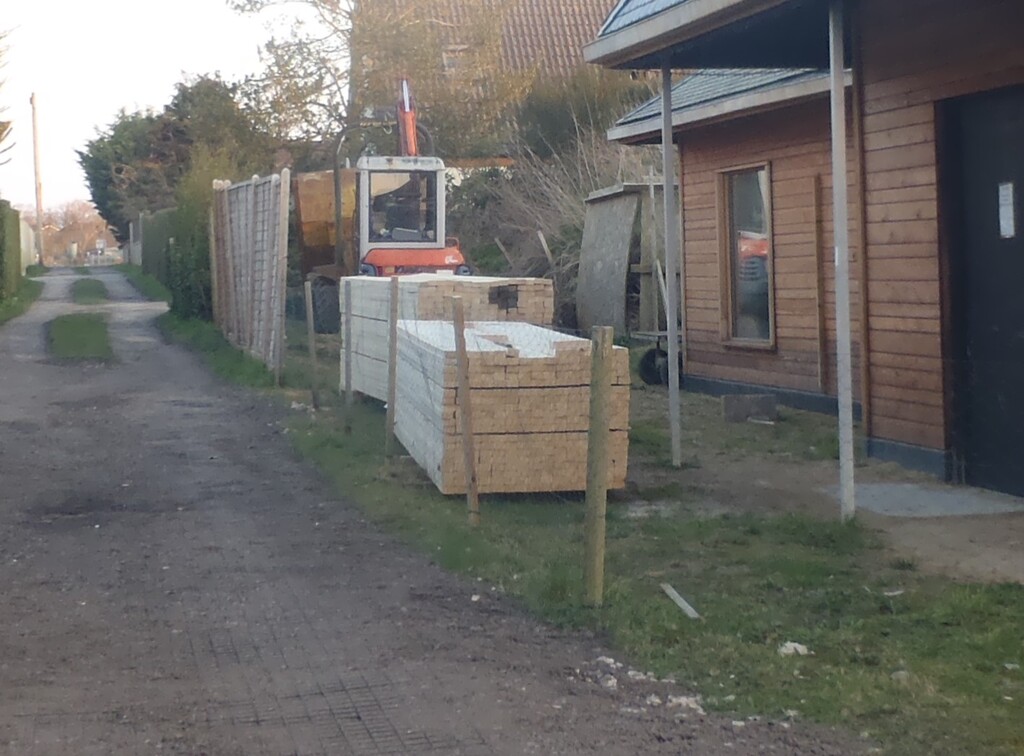
    The second day was spent constructing three horizontal wooden rails, cut to fit in between the posts, fitted into the slots and spaced 150mm below the a marked horizontal line (assisted using our laser level machine) for the bottom rail, then 300mm higher for the second rail and finally the third rail another 900mm up, to align with the top edge of the four feet wide OSB boards. We used “old” weathered 4.8metre CLS planks that we just got from our supplier (they had included these ten planks for free, one assumes to get rid of them!). These CLS timber are 63mm by 38mm thick.
    Cosicot Fencing Replaced As Barrier Against Mount Sod Movements

    Concrete-posts-and-rails-installed


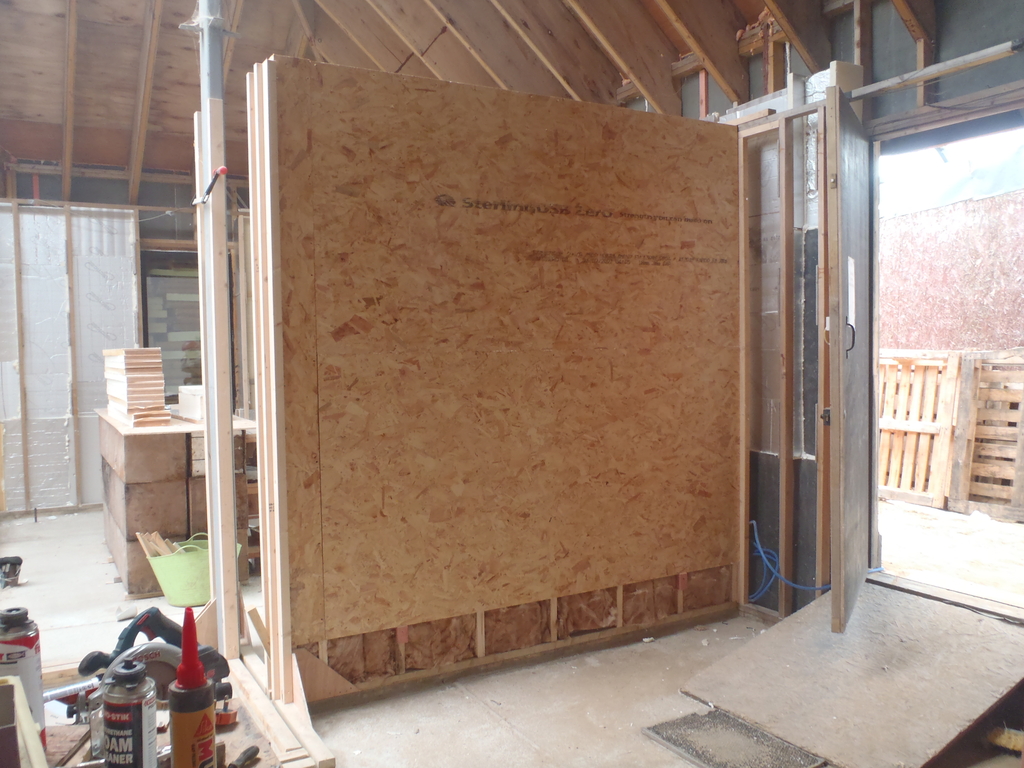
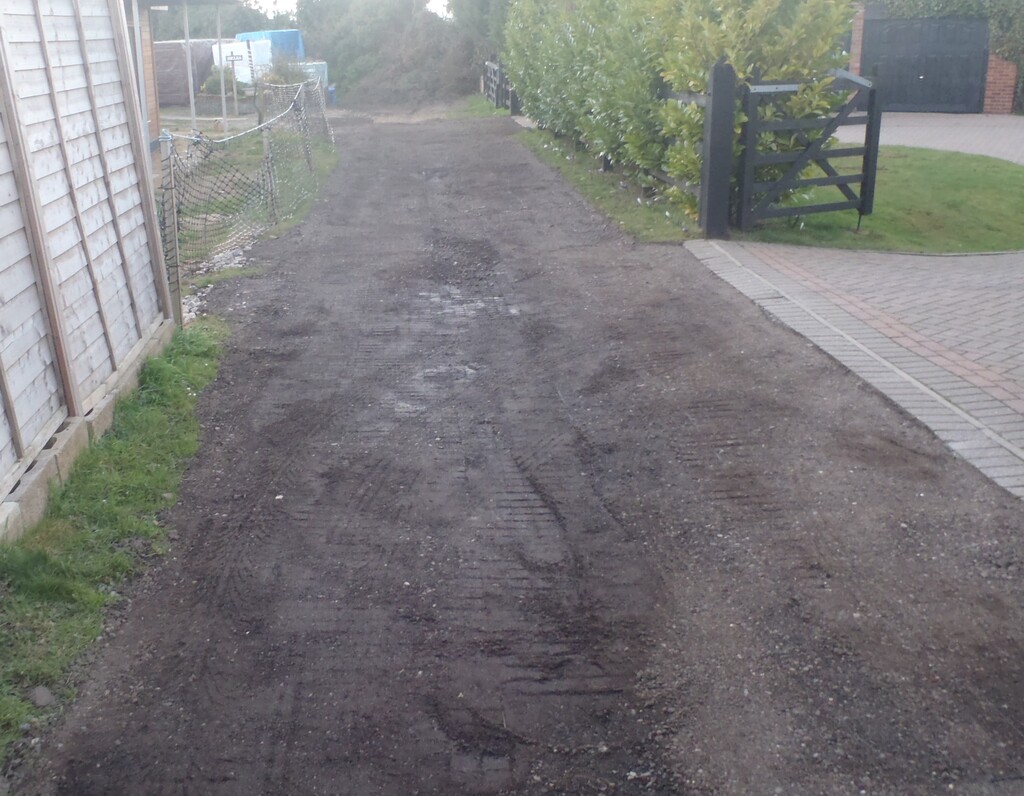
    Taking five sheets of 18mm thick OSB boards, we carefully sliced each vertical edge to follow the angle of each concrete post by measuring the offset from a true right angle (we used our trusty old 4feet builder’s homemade metal square tool) and proceeded to screw each piece into the back of the CLS wooden rails. We used the left-over OSB pieces together on the last section, the widest section (some 2620mm wide) and put on several pieces to fill the space. We had enough left over pieces in both CLS timber and OSB cut-offs that we could extend the fencing the other way (towards the Loke) and join to the existing wooden panelled fence.
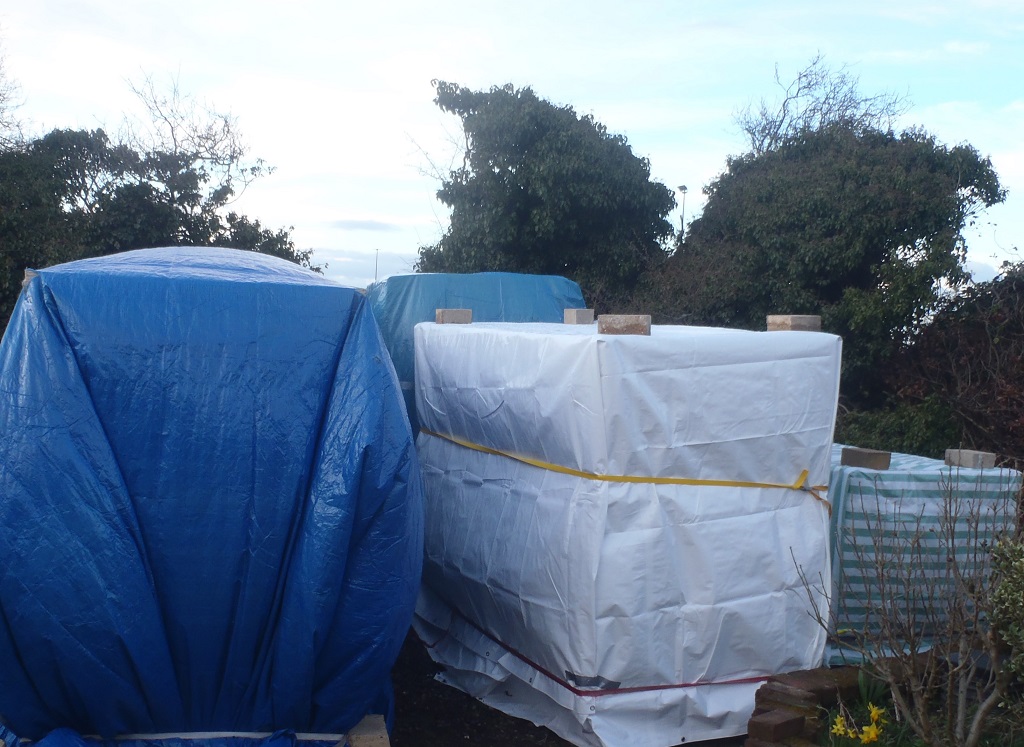
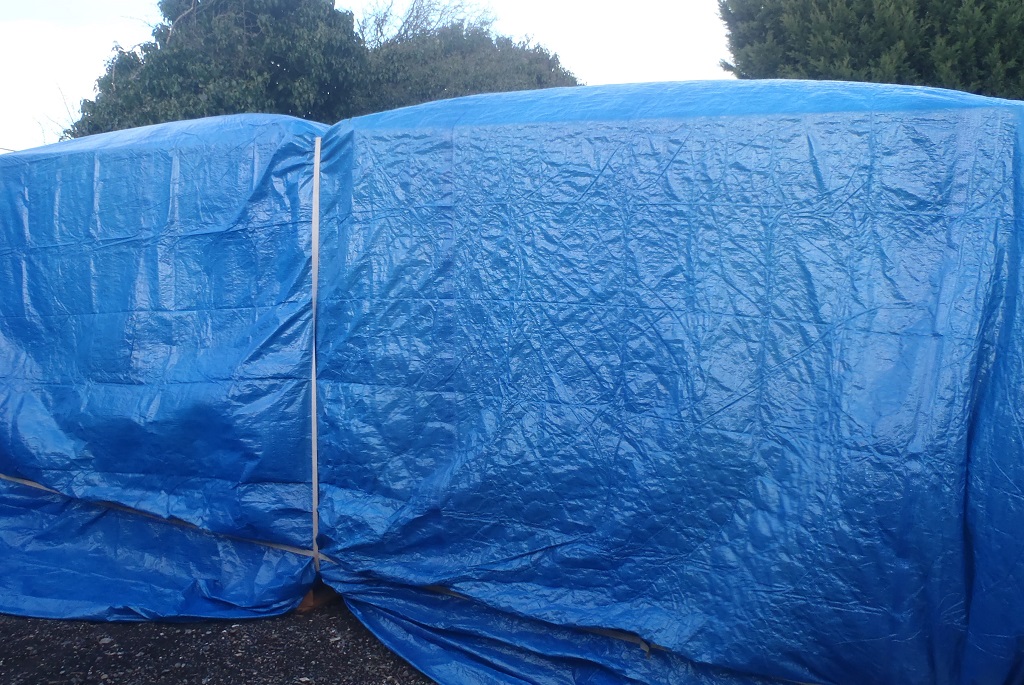
    Part of the final stages of building this new barrier, is to put on a layer of waterproof DPM plastic to protect the OSB from damp soil and extend the life of the whole structure, hopefully for the required two or three years. We had used more left-over material we had stored, like the final act of the day was to push in a line of cement panels, set vertically and pressing against the OSB and DPM plastic to provide a rot-proof bottom 300mm section and to stop the soil from creeping under the fence, including weeds and brambles.
    Cosicot Fencing Replaced As Barrier Against Mount Sod Movements

    Panels-fitted-and-protected

    Cosicot Fencing Replaced As Barrier Against Mount Sod Movements

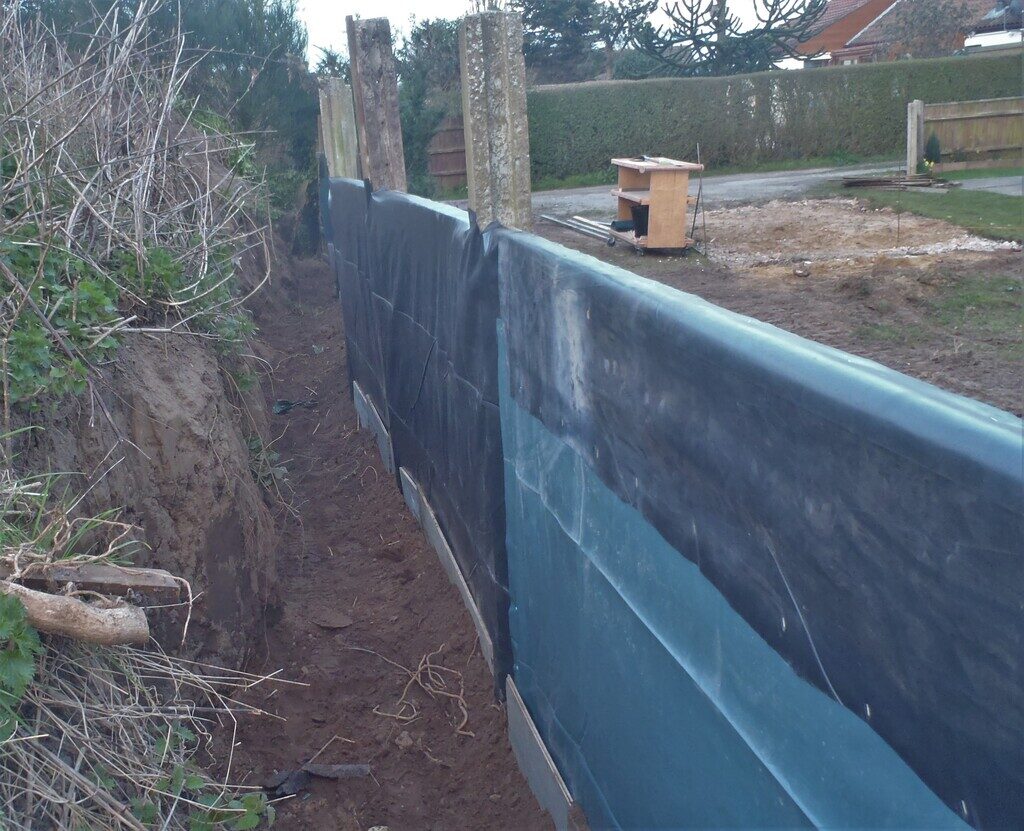
    with-plastic-sheets-and-cement-boards


    The whole thing is over 12.5metres long, by 1200mm high (plus a bit! .. depending on what the ground level is), seven concrete posts, ten CLS planks and five sheets of our OSB material, with hardly any left-overs at all!

  • Replaced Loke’s Fence with New Green Chicken Wire Mesh

    This afternoon, after we had the final delivery of CLS timber, we proceeded to put up the new replacement temporary fencing along the Loke, in front of the house. We are fed up of using the cheap recycled plastic fencing (it keeps splitting and it very brittle, this one only lasted 3 years but we had already replaced a section a year or so ago and it was very unsightly for the last six months anyway). So we decided to use steel wire mesh and in keeping with its short term need for this type of fencing, we bought chicken mesh wire, coated in green PVC plastic, rather than the more expensive and traditional wire chain-linked type. The hexagon pattern is quite large, at 50mm but it should do the job and keep things looking much neater and nicer too.

    Replaced Loke's Fence with New Green Chicken Wire Mesh

    New-Wire-loke-fence


    We had to rearrange and insert more frequent posts to help support the wobbly thinner material of this chicken mesh but hopefully, it will do the job for the next couple of years or five!

  • 63mm CLS Timber Ordered and Arrived

    We also been enquiring about prices for CLS timber, the 63mm by 38mm size, again to cash in before the prices goes up. We were lucky to find two of our local suppliers capable of offering a price of £1 per metre against £1.30 (on average) by other builders merchants. We snapped up all they had in stock (from Norwich and Great Yarmouth) and on Saturday and Tuesday, we had two deliveries, we now have another 630 4.8metre planks. The previous price we paid six months ago was 97p per metre so that is very good, especially in this climate of popular demands!

    63mm CLS Timber Ordered and Arrived

    Lots-of-CLS-delivered


    We have got the two pallets sitting alongside the Loke at the moment, in front of the house but it won’t be too long before we will need them all. In fact, that quantity will do the majority of all the internal structure of the ground and upper walls and floors. We may need a little bit more later on if we had generated more waste than we expected. But we are almost using every bit of timber everywhere, whether it is just 500mm long, right up to the full 4.8metres. We are planning to tongue and groove several lengths together when we are doing the horizontal framework which will allow us to use many of the cut-offs.
    It is all about minimising waste, even if it costs more time. That is our philosophy…

  • Experimental Resurfacing Of Loke Project All Finished

    This week, our neighbour finished off laying out the new surface in our Loke, all filled in with the asphalt recycled material. More compacting was required and the heavier petrol driven compactor was employed to help drive the material further into the cells of the grid modules and now, it is much tighter and more solid.

    Experimental Resurfacing Of Loke Project All Finished

    End-of-the-loke-grids-March-2021

    Experimental Resurfacing Of Loke Project All Finished

    Loke-resurfaced-March-2021-1

    Experimental Resurfacing Of Loke Project All Finished

    Loke-resurfaced-March-2021-2


    We had a bit of left-over from the last order, so the excess was spread further down and around our own entrance way, raising it up a little bit but we still got a channel down the middle to help guide any rain water to the bottom and kept away from our two houses.
    The section completed was about twenty-five metres long and it costs about £1200 So to complete the rest of the 136metre Loke would be in the range of £6500
    We are also exploring the possibility of putting down artificial grass along the middle strip, to give it a slash of bright colour, plus also maybe using pale coloured sand or small stones to compact into the surface too.

  • Ground Floor Walls Being Filled with Recycled Polyurethane Foam Boards

    During the last two weeks, starting last Thursday 4th March and on several days, interspersed with other tasks, we have been filling up the ground floor outer walls with approximately 200mm thick of polyurethane foam “seconds”. We hauled out our slicing bench table from its storage corner and connected up the dust extractor vacuum machine and proceeded to slice up all the various pieces of the PU foam boards, all random in thicknesses and sizes as well as having different coverings (most were foiled coated paper but some were glass-fibre impregnated ones). We resumed clockwise around the building, starting at the Front Door and sliced the foam to fit precisely between the wall legs. We also used spray PU foam to help stick everything together and fill in the vertical gaps, to ensure that we had a air-tight block of insulation.
    One of those other tasks, was to build a Homemade Foam Board Shredder so we can tidy up the rubbish we have generated and will continue to do so.
    We have finished the “C”, “B”, the long “A” section and turned onto the “P” wall and now have reach all the way to the far corner of the Great Room and its Patio Window. We cannot go any further because we got our CLS timber storage located here with the high shelf with other lengths of timber planks resting on it. We will skip that bit and move around to continue on the “N” and “M” walls (part of Bedroom 1) and then around into the “L” and “J” and so on.

    Ground Floor Walls Being Filled with Recycled Polyurethane Foam Boards

    Putting-foam-into-the-walls-1

    Ground Floor Walls Being Filled with Recycled Polyurethane Foam Boards

    Putting-foam-into-the-walls-2

    Ground Floor Walls Being Filled with Recycled Polyurethane Foam Boards

    Putting-foam-into-the-walls-3

    Ground Floor Walls Being Filled with Recycled Polyurethane Foam Boards

    Putting-foam-into-the-walls-4


  • The Loke Scraped, Hardcore Laid and First section of Grid Completed with Crushed Recycled Asphalt

    On several days over the previous couple of weeks, our Loke has been scraped down the middle to remove 2.5metres wide strip of old surface and grass plus dirt. That was taken away by a bloke with a grabber in his 15ton lorry.
    We then buried a pipe under the middle of the loke to act as a conduit for any future needs.

    The Loke Scraped, Hardcore Laid and First section of Grid Completed with Crushed Recycled Asphalt

    Loke-scraped-clean

    The Loke Scraped, Hardcore Laid and First section of Grid Completed with Crushed Recycled Asphalt

    Conduit-placed


    Then twelve tons of crushed concrete arrived and distributed into the 25 metre strip, levelled and crushed down using our mini-digger.
    This week, we had a delivery of the recycled crushed asphalt material, just 4 tons to start off with. Then, ourselves with our neighbour, did another scraping using a wide CLS timber with pieces of plywood screwed to it to form the careful shape we want to finish off, guided by a taut string and smooth out the rectangular in front of the neighbour’s first gateway. The special shape is with the two parallel tracks to have a slight angle to them so any rainwater will be encouraged to flow into the centre channel and then flow down the Loke without spilling into anyone’s garden.
    The Loke Scraped, Hardcore Laid and First section of Grid Completed with Crushed Recycled Asphalt

    Loke-after-hardcore-and-first-grids


    Then a grid of twelve by five modules was clipped together and positioned 500mm away from the gate posts. The small gap was filled in with additional line of these plastic 40mm high grid modules, but with their width trimmed down to fit. The whole area was then loaded up with the crushed asphalt and then raked all over, with plenty of thumping using our lighter-weighted electric compacter to vibrate the material to settle down into each little cells (each measuring just about 70mm square and seven of these cells on a side to form the overall 500mm grid modules).
    The Loke Scraped, Hardcore Laid and First section of Grid Completed with Crushed Recycled Asphalt

    First-set-of-grid-placed-and-filled


    We will go back in a few days time to put down more “fines” to top up any cells that has settled more than others. The next task is to form the two tracks coming down the Loke, connected to this initial finished area and this will take us to the second rectangular section in front of the 2nd gateway. We will have to order more recycled asphalt material, probably another 4 tons.

  • Homemade Foam Board Shredder

    Today, we thought we had better build a quick “Home-made” foam board shredder so we can deal with all the millions of pieces of cut-offs we will be generating from slicing down the large boards. Many has unformed bumpy edges and other defects plus also there will be narrow strips left-over pieces as well. We always planned to “throw” this rubbish away under our suspended ground floor (we got 400mm of space to fill with insulation) but the random nature of all these cut-offs meant that it would be very awkward and annoying to try to get them laying down flat and reasonably efficiently connected together to form a good insulated barrier against the concrete foundations so we considered that it would be so much easier to shred this rubbish up and just pour it in like fluffy balls.
    So we took our garden cultivator which had eight rotating blades, unbolted the handles and wheels, screwed together a new framework to bolt the motor and its blades to and then build a box around the whole lot to allow a large “ton” bag to hang underneath to collect the shredding.

    Homemade Foam Board Shredder

    Foam-shredder-Mk1-1

    Homemade Foam Board Shredder

    Foam-shredder-Mk1-2

    Homemade Foam Board Shredder

    Foam-shredder-Mk1-3


    We have to make some improvements as our tests revealed that the foam would get trapped in between the blades so that is the next task when we have a moment spare.

  • Arrival of Eleven Pallets of Timber Sheet Materials

    On a few days from Friday 5th March to Thursday 11th March, we had the delivery of a load of sheet wood material of various types. All the material is earmarked for our internal structure of our house, doing walls and floors and a little bit of ceiling as well. We ordered it all now because there is several price increases coming because the world of timber is becoming too popular in building houses and high rises using wood instead of bricks and mortar? couldn’t they wait another year for us to get ours done first?? Phew!
    So we ordered the following sheet materials ..

    • 280 sheets of 18mm OSB 3 boards
    •  30 sheets of 11mm OSB 3 boards
    • 170 sheets of 22mm thick flooring grade ‘Tongue and Groove’ chipboards
    • 150 sheets of 19mm thick flooring grade ‘Tongue and Groove’ chipboard

    That is about 15 tons of wood stuff!
    We organised the bottom of our site to store these eleven pallets into four main stacks, each one is covered over with tarpaulin. We had already several tarpaulin sheets but these were lightweight ones and we decided to invest in much heavier duty alternatives, deliberately paying out a premium ‘insurance’ price, to protect our money and our building material while we get on with the other structural jobs that needs to be done first before we can use these sheet materials.
    Approximately, the chipboards will be used first, specifically the 19mm thick ones, to cover the first floor joists when we have finished building the framework on the ground floor and installed the first floor joists. Then once we got all the utility conduits mapped out and inserted, we can nail up the 18mm thick OSB boards to form the walls in all our rooms. Finally, the other thicker chipboards will be used to construct the suspended floors downstairs. The odd 11mm OSB will be used to cover up the roof rafters around in the storage triangular voids up on the first floor to hide away the insulation and rafters to make a neat finish.

    Arrival of Eleven Pallets of Timber Sheet Materials

    Lots-of-sheet-wood

    Arrival of Eleven Pallets of Timber Sheet Materials

    A-wall-of-OSB-6-Tons


    We estimate that we will save about £1000 on the future price increases and we spent about £150 on the better quality tarpaulin for long-term weather protection thus a win-win for us!