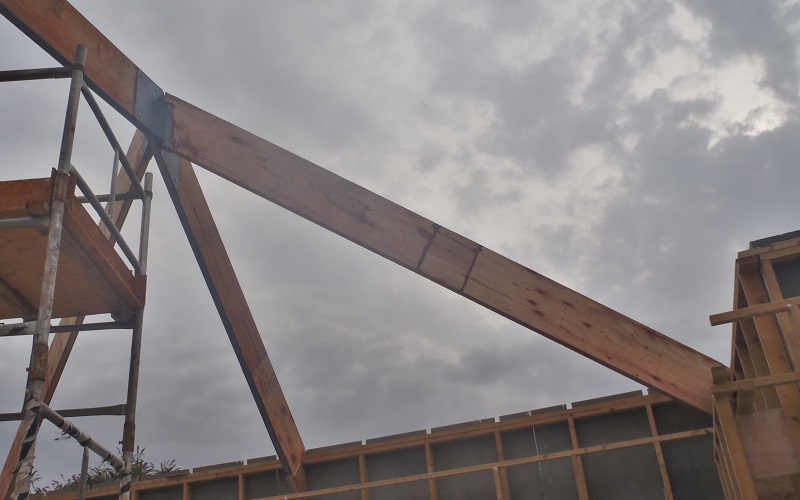
Starting really early this morning, at round 8:30am, to avoid the incoming thunderstorm front, we went outside to have a go at installing our latest created rafter, this time, the O Ridge that has the 45degrees angled sloping down beam.
But unfortunately, even though it wasn’t raining at this time, and we even had sunshine out too, the rafter was still very damp from yesterday’s bad weather so we had to postpone the operation to another day when it is dry.
All we did was to move the two scaffolding towers around and positioned them into the approximate positions and then turned the O Ridge rafter upwards to allow it to drain and dry off easier when the rain comes. We sandwiched the rafter between the two towers to make sure it didn’t tip over.
Blog
-
Postponed O Ridge Installation!
-
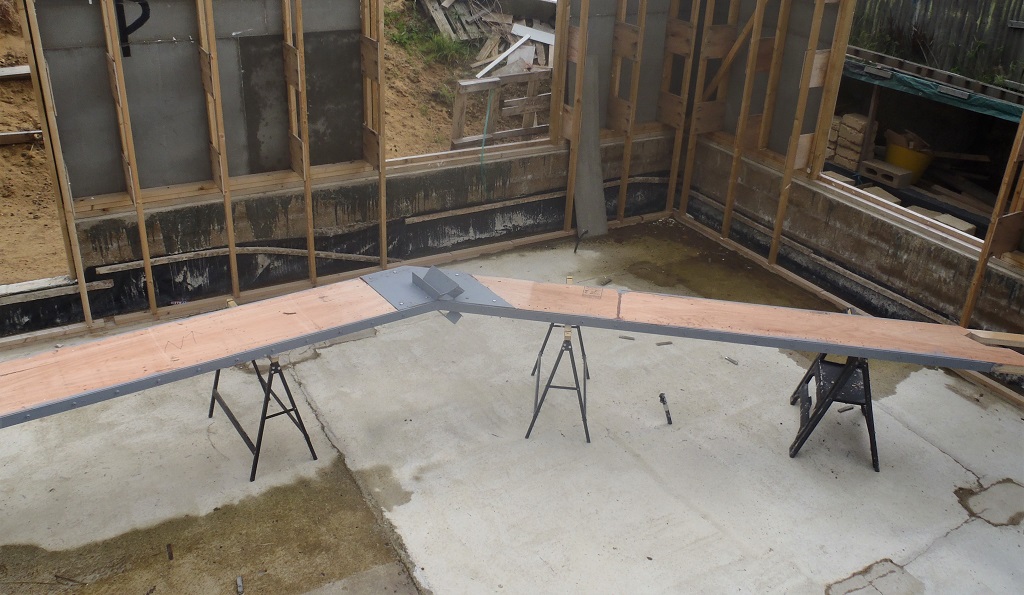
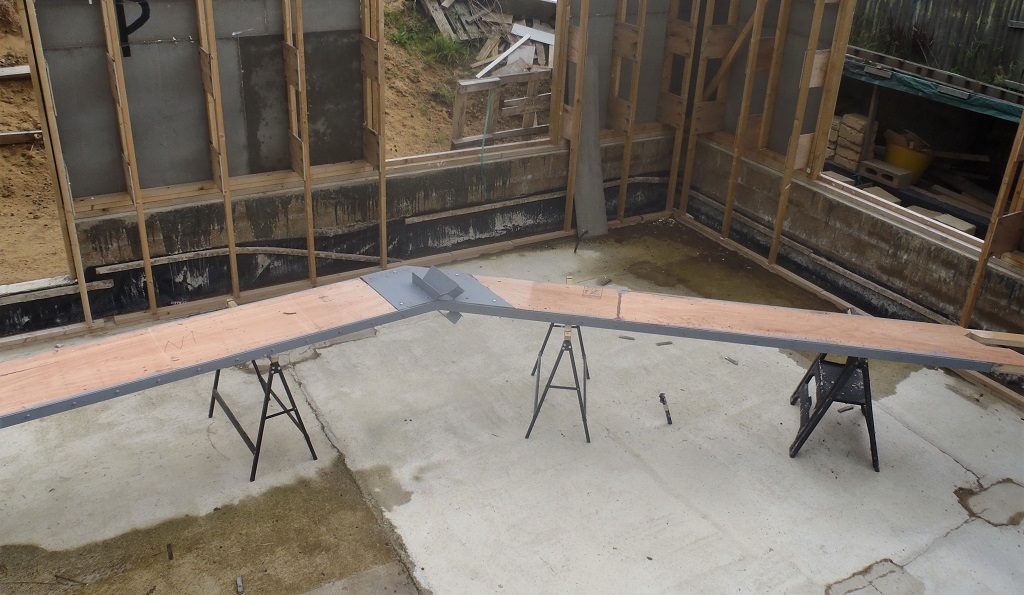
O Ridge Parts Are Married Together!
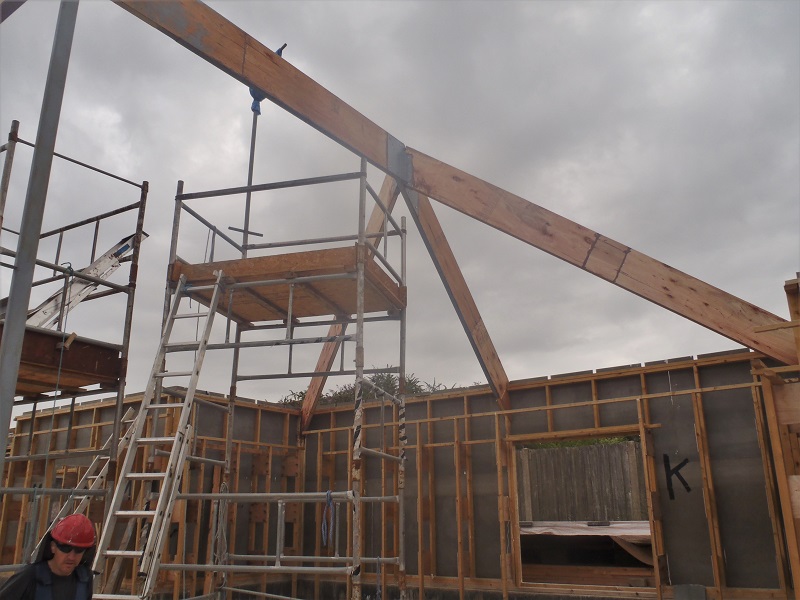
Today, we tidied up the two sections of the O Ridge rafter by running the power planer along all the edges, the top and bottom edges. This made sure that they were fresh and clean as possible, ready for the gluing and bolting on of the steel strips.
Then dragging out half the workshop tools (well it seems so!) and brought out our two sections of the rafter and laid them on trestle legs. We proceeded to drill the eight bolt holes on around the steel elbow bracket and bolted the two plates together. While this was done, we took the two 6 metre steel strips and bent them at the required 45 degrees angles and drilled and bolted those two strips on too.
After a quick lunch (as there was rain forecast to come in the middle of the afternoon), we then unbolted the two big plates off and, after cleaning the metalwork with orange oil cleaning cloth, spread glue all over the surfaces (both the metal and wood) and re-bolted them back on again. The next job was to take off each edge strip one at a time to clean them and apply glue and again bolted it all back together. Nice and tight this time!
Finally, we got out the metal primer paint to quickly cover up the bare metal strips to protect them against rust while it is still exposed. Thank goodness that this paint dries very fast indeed!
Rafter-O-complete
We dashed back indoors with all our tools, electric cable and bits and pieces and just made it before the heavier rain came down!! That was close!! Grin! -
High Winds Rips Off Roofing Felt!
We woke up to the rattle of tremors of storm Agnes passing over and when we looked outside, we discovered a piece, actually quite a long piece of roofing felt lying on the ground just in front of our front door! Where did that come from we thought?
Storm-ripped-this-felt-1
Storm-ripped-this-felt-2
So climbing up onto the roof of our temporary living quarters, we went inspecting our roof! It turned out to be just one single strip of roofing felt that has been ripped off cleanly the roof, leaving behind the marks of the old glue lines and the rest of the felt still clinging on for grim death!!

From-here
The roof is still protected against most of the rain water as the ripped off felt strip was covering existing roofing felt and it looks good enough (with only a few signs of actuall holes) so we can wait for the strong winds to die down and we get some clear and sunny days back again before we repair the roof. -
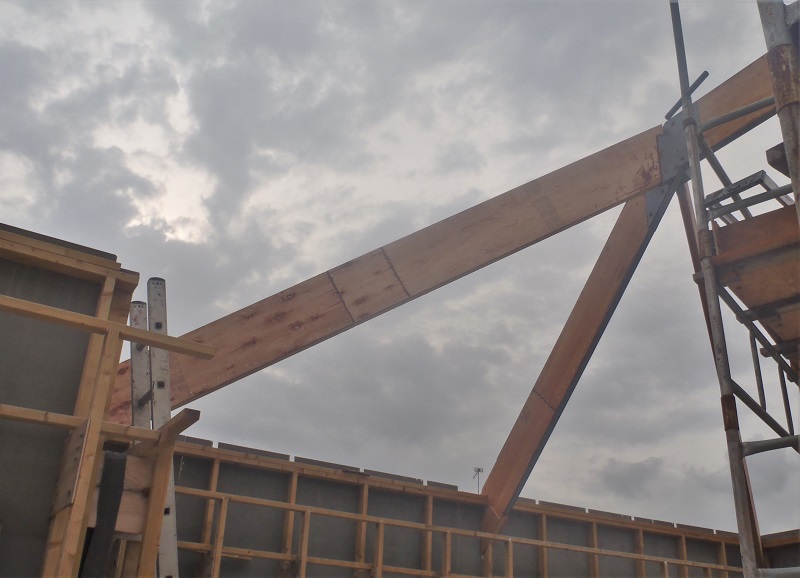
O Ridge Part 1 and 2 Assembled and Rafter LM is Installed
This morning, we resumed our work on the O Ridge Rafter. The first part (the horizontal Ridge section) was vacuumed and then glued and nailed together. Then the second part (the 45 degrees angled section) was cut, sliced and adjusted for all the bits and pieces and after lunch, was sanded and vacuumed and again, glued and nailed together.
O-ridge-Beams-Constructed
Having done that job nice and quick, we had time to take our other rafter, namely the one going into the LM corner, and take it outside to install it into position. The end results was a clean and neat job without fuss! Yippee!
Beam-LM-in-Place
Tomorrow, we will take out the two sections of the O Ridge and start assembling it with the metal elbow joint and the two metal strips on the top and bottom edges, hopefully the thunderstorm weather front will keep away as promised by the forecasters!! Smile! -
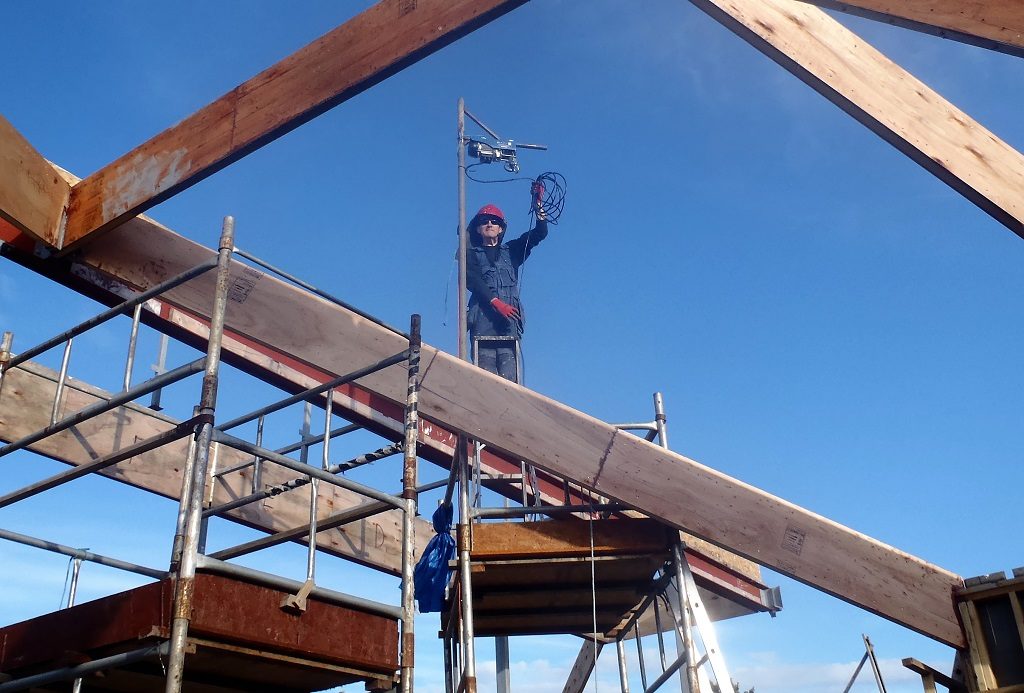
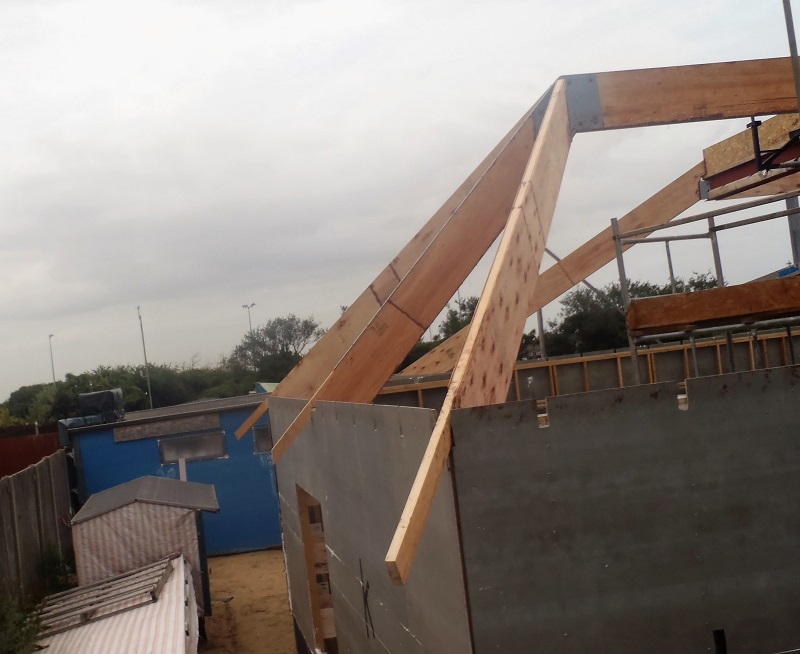
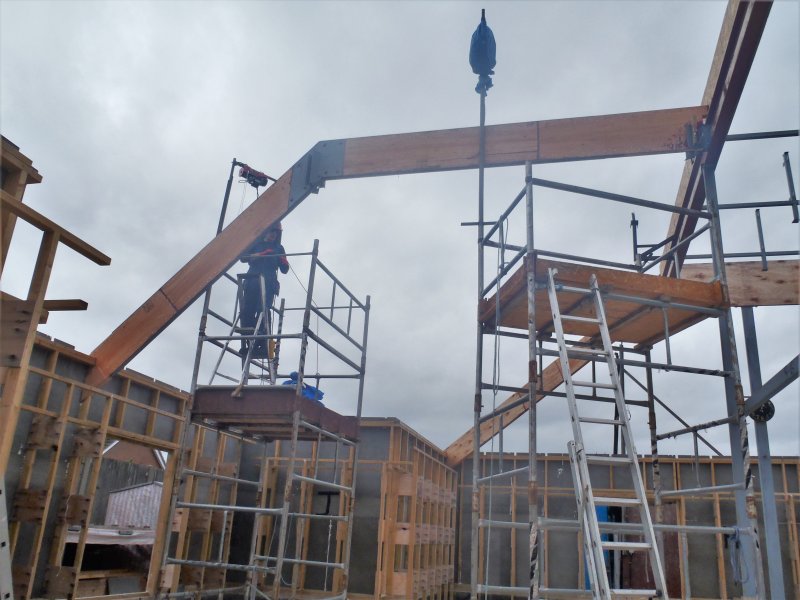
Rafter IJ Goes Up and O Ridge is Started
This morning, in a bit of a stiff breezy and chilly wind, we took out our first of the two rafters we completed on Saturday, but before that, I just remembered, we sliced off the bevel angled cut at the top end of the rafter (the end that fits into the metal bracket up on the I-Beam).
We shoved the scaffolding towers around, connected up the hoist and winched the IJ rafter up into the air and got it approximately into position. It looked good so we got the glue out and prepared the IJ corner leg with the glue and did the same up at the metal bracket too. Then we slid the rafter into place and with encouragement from our club hammer, managed to get it to fit nice and tightly!

Rafter-IJ-Installed
We finished the morning off by tidying up all the equipment and wrapping up the winch motor again to protect it against the forecast rain (which duly arrived!).
After lunch, we started preparing the bits and pieces for the O Ridge rafter (this is the bent one with the metal elbow joint in the middle of it). We doubled checked the distances of the NO and OP corners against the I-Beam and the bracket at that end point, which turned out to be also pretty much on the spot too! So with this reassurance, we proceeded to cut and slice the LVL timber (we brought in the correct set of 4 lengths before lunch) putting a 6.5degrees angle on one end of the set of two LVL pieces and then cut the same 6.5 degree angle off the end of the webbing plywood bits too. Plus the usual internal noggins too. Everything was sanded to clean the surfaces and that concluded our day’s work.
Tomorrow, we will first vacuum the prepared bits and then glue and nail the rafter together, and after that, weather permitting, we will put up the other rafter, the LM rafter to get that one out of the workshop! Lovely! -
Rafter IJ and LM Created!
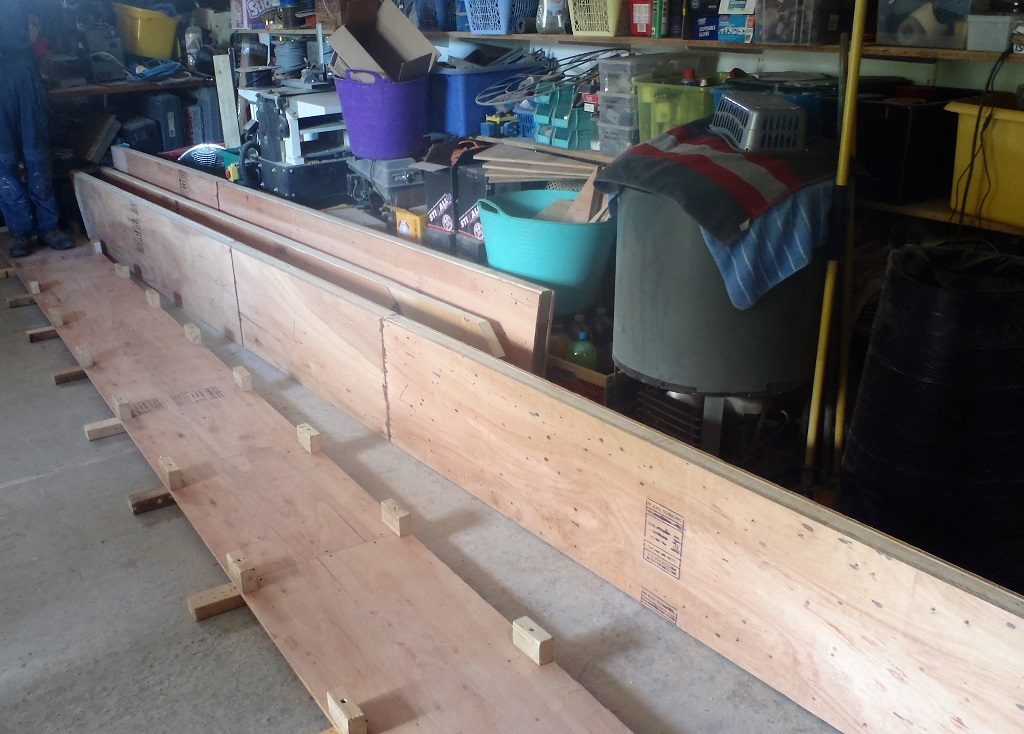
Today, resuming where we left off from the very short morning’s work day yesterday (which was cutting the legs for corners IJ and LM and then measuring the distance from these legs up to the metal bracket at the point up on the I-Beam meets the K Ridge, which turned out to be 5860mm and 5855mm and only 10mm and 15mm off what the drawing indicated – not bad!!), we got on with the job of assembling all the bits and pieces (10 strips of the 423mm wide plywood webbing, 5 strips of the polystyrene foam strips, 4 LVL timber lengths, and a heap of noggings – some angled and some straight). We spent the morning preparing each of these bits with the correct angle slices (24.2° to be exact) for all the LBL timber pieces, the 8 strips of the plywood and 4 noggings. Then we sanded everything to clean up the surfaces for maximum gluing strength and finally adjusted the template to handle these 423mm wide rafters.
After lunch, we went into the task of vacuuming all these bits and pieces, putting each into the template, and as usual, gluing and nailing the webbing on each side, flipping the rafter over and doing the other side. All this repeated again for the second rafter and .. oh boy .. we finally finished quite late just before 7pm!
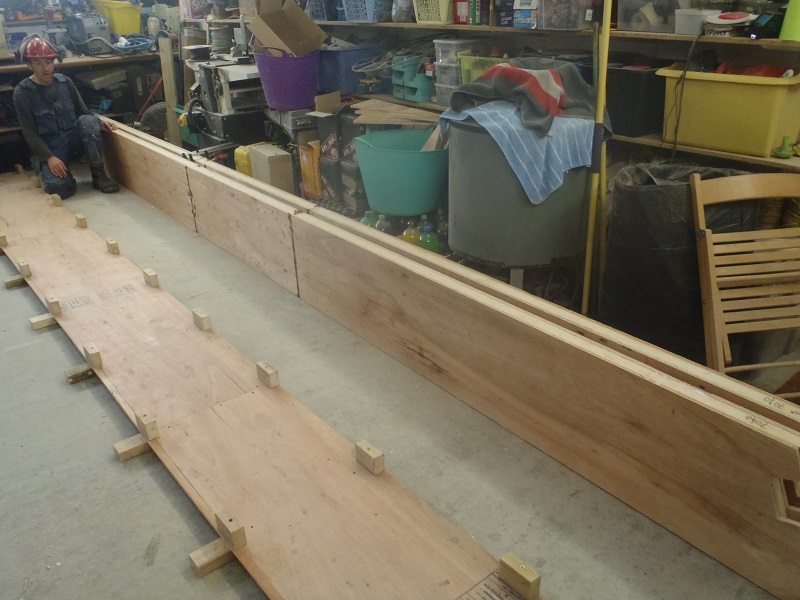
Beams-IJ-and-LM-Constructed
It is good that we got these two rafters done so they can dry and be ready for installing on Monday first thing (after we have sliced the bevel on the top end first!!) and then we can get on with doing the O Ridge “elbow” rafter and tackle the final section of the specialised roofing job! -
Rafter JK and KL are Now Up!
Today in the pleasant sunshine, we tackled the job of hoisting up the next two rafters, which are the rafters going into the corners JK and KL. After fiddling with the tower and the winch, we managed to lift them up separately into position and glue and nail everything together!
Rafter-JK-Installed
Rafter-KL-Installed
View-of-K-Wall-Rafters-1
View-of-K-Wall-Rafters-2
It is slowly coming together, the roof skeleton framework, we have two more diagonal rafters to do for this section of the roof and then we will have only the O Ridge complex over the Great Room to do and that’s it! Well, at least, these LVL special rafters will be done, after that, it will be building and installing dozens and dozens of “regular” rafters to fill in between all these skeleton hips and valley rafters! Phew!! -
Rafter JK and KL are Both Created
Today, we carried on with the creation of the rafters for the corners where wall J and K meets and again for walls K and L meet, all part of the extension where Bedroom 2 lies.
The usual construction is done, the webbing had their ends sliced with a 28.6degrees angles off them and cut-away notches removed at the other end. Then the LVL timber chopped with the same 28.6degrees angle too and the bird’s mouth notch cut as well.
The whole lot was sanded and then vacuumed before piling each layer into the template and applying the glue and then nails.

Rafters-JK-and-KL-Made
These two rafters are now drying overnight before tomorrow, we will hoist them up and install them into position .. weather permitting!! -
JK Rafter Being Created
After lunch, we resumed the task of creating the next rafter, this time, the JK diagonal LVL going from the K Ridge and down into the far outside corner of the Bedroom 2 extension. We double checked the measurements outside now that the K Ridge is up. The corner leg was pulled out of the stack and sliced down to 2382mm high and and then measured from that point back up to the metal bracket up on the K Ridge, which turned out to be 4912mm distance. The other task we did outside, was to cut the corner cement board away and a piece of the top-plate too, to make a receptacle for the bird’s mouth on the JK rafter to slot into.
Back in the workshop, we sliced 28.6 degree angles on the end of four pieces of the 455mm wide plywood webbing strips and then proceeded to do the same to the beginning of the LVL timber and also one noggin 89mm timber piece too.
That concludes our day today! Tomorrow, we will continue with this rafter and also start preparing for the KL rafter too. -
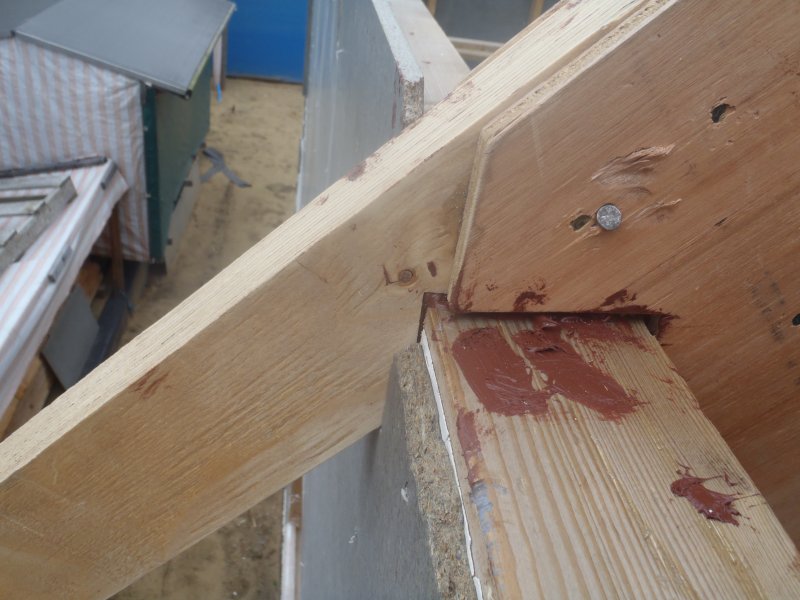
K Ridge Is UP!
This morning, we resumed the battle with the K Ridge Rafter!! We first applied Plan K by slicing off the sticking out webbing down on the wall end of the rafter.
K-Ridge-Showing-section-of-webbing-trimmed-off
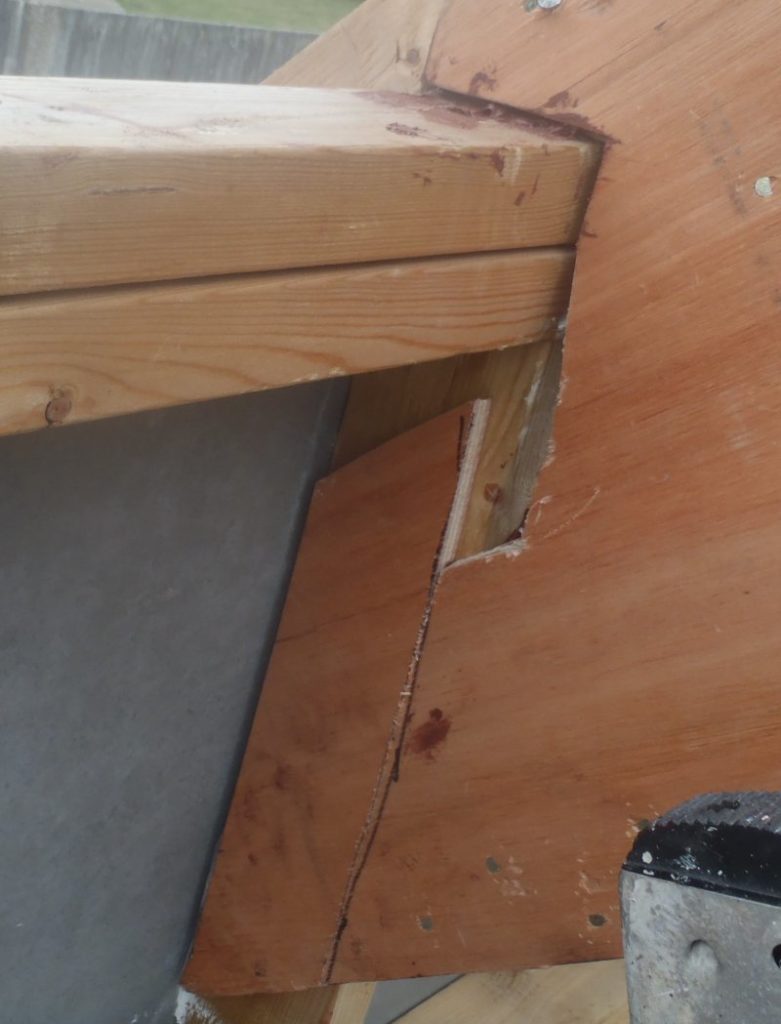
This then allowed much more freedom of movement. But even then, we still had to cut away a little more of the webbing so the top flange could fit on and slide into the bird’s mouth. We even had to cut away a small piece of the webbing and internal noggin at the I-Beam end to get it to swing downwards into the bracket and avoid the I-Beam flange! But we FINALLY got I it in!!
K-Ridge-It’s-finally-in-place
We glued and nailed both ends plus also we doubled up the webbing at the wall end to reinforce the connection to the vertical post. It is now very, very solid and it ain’t going anywhere!!

K-Ridge-Showing-section-of-webbing-repaired
K-Ridge-Nice-tight-Birdsmouth

K-Ridge-Beam-end-clamped-while-glue-sets