This means a more traditional storage heater design, taking electricity and storing it as heat in ceramics. But it is really difficult to find a shape of size that will fit into our existing arrangements and also it seems that the cheapest ones that is big enough for our needs would be also cost us well over £1000 as well.
So we fall back to our usual solution .. Build It Ourselves!!
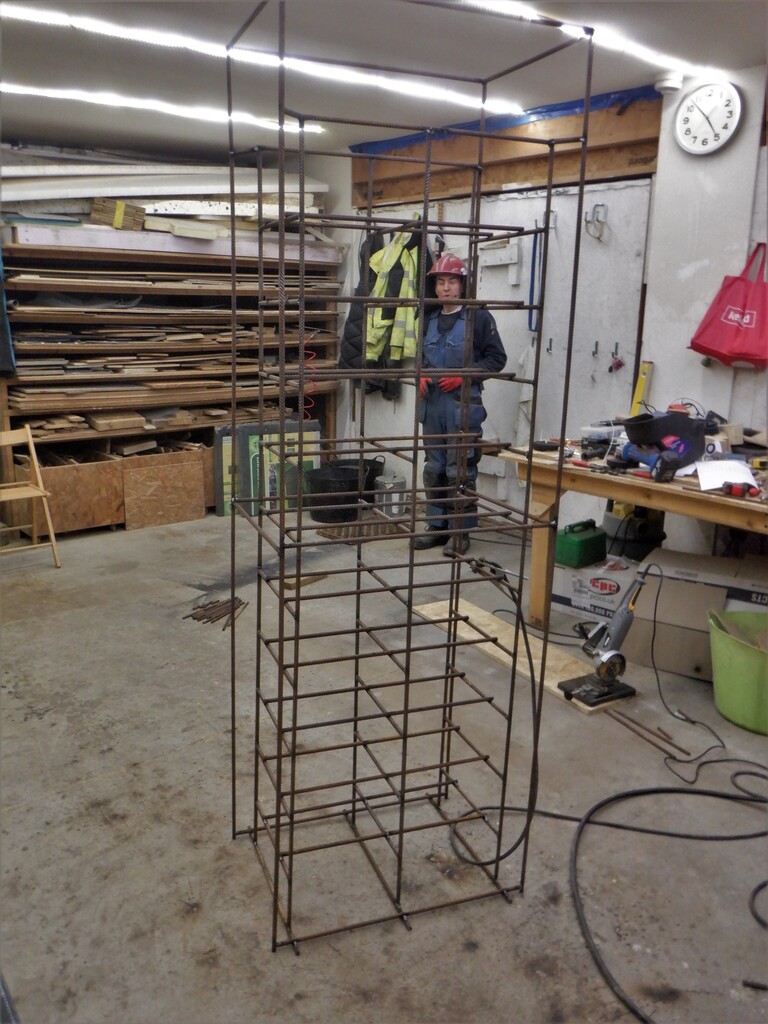
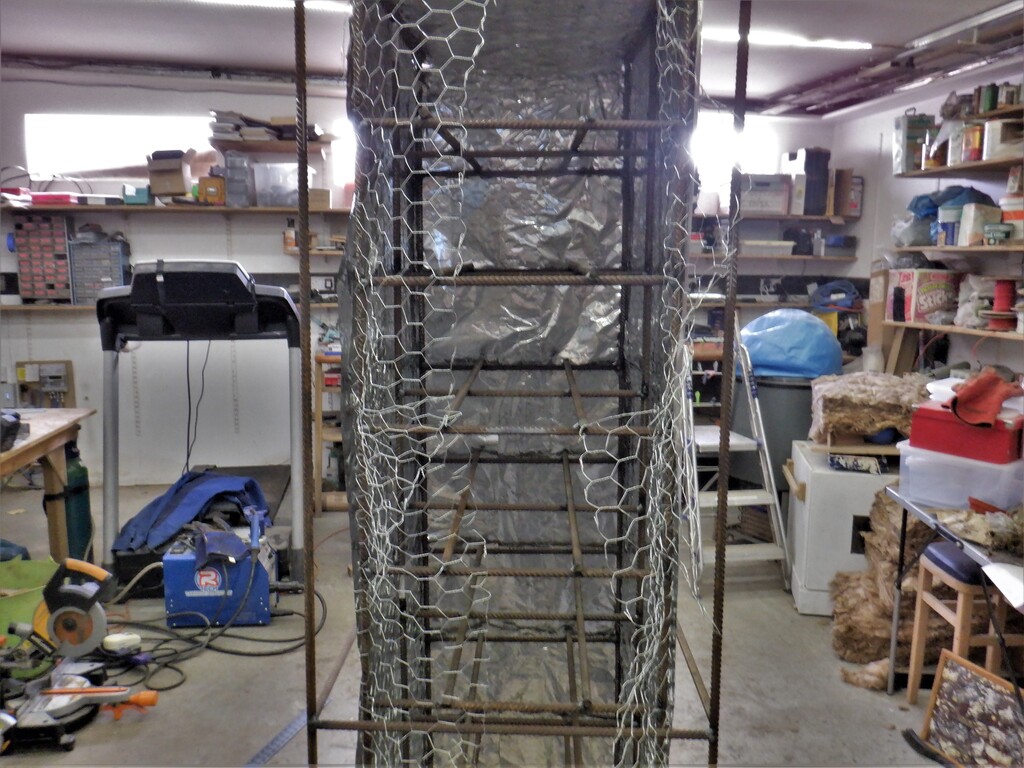
We had some steel ‘rebar’ that were the left-over from doing our swimming lane so we designed a frame for the heater, an inner cage that will hold trays of house bricks and an outer frame to hold the covering, with space between for insulation. We had a load of clay bricks sitting outside, not doing anything so we grabbed 180 of them and got them all washed in hot soapy water.
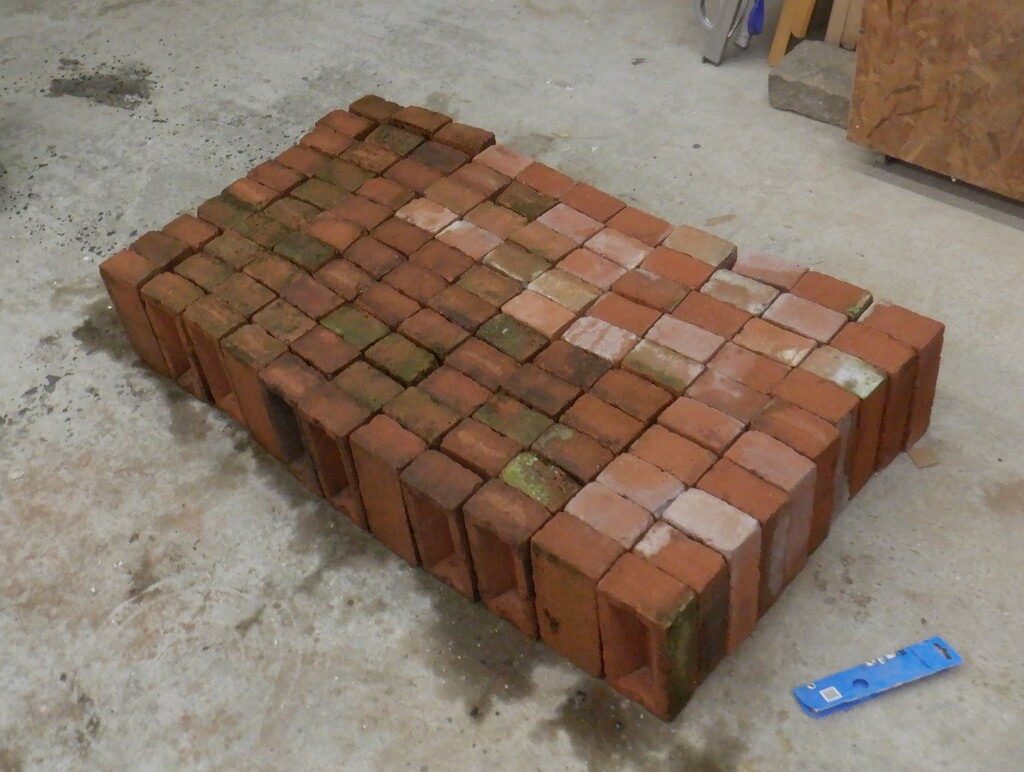
Cleaned-bricks-waiting-to-be-used
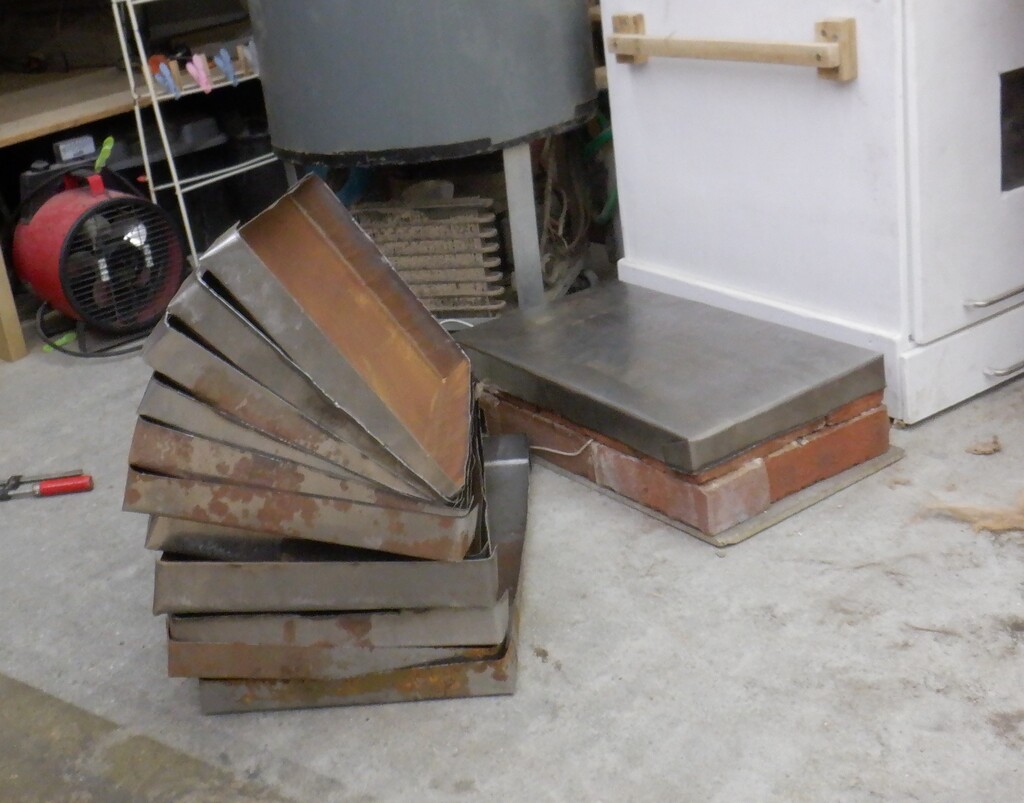
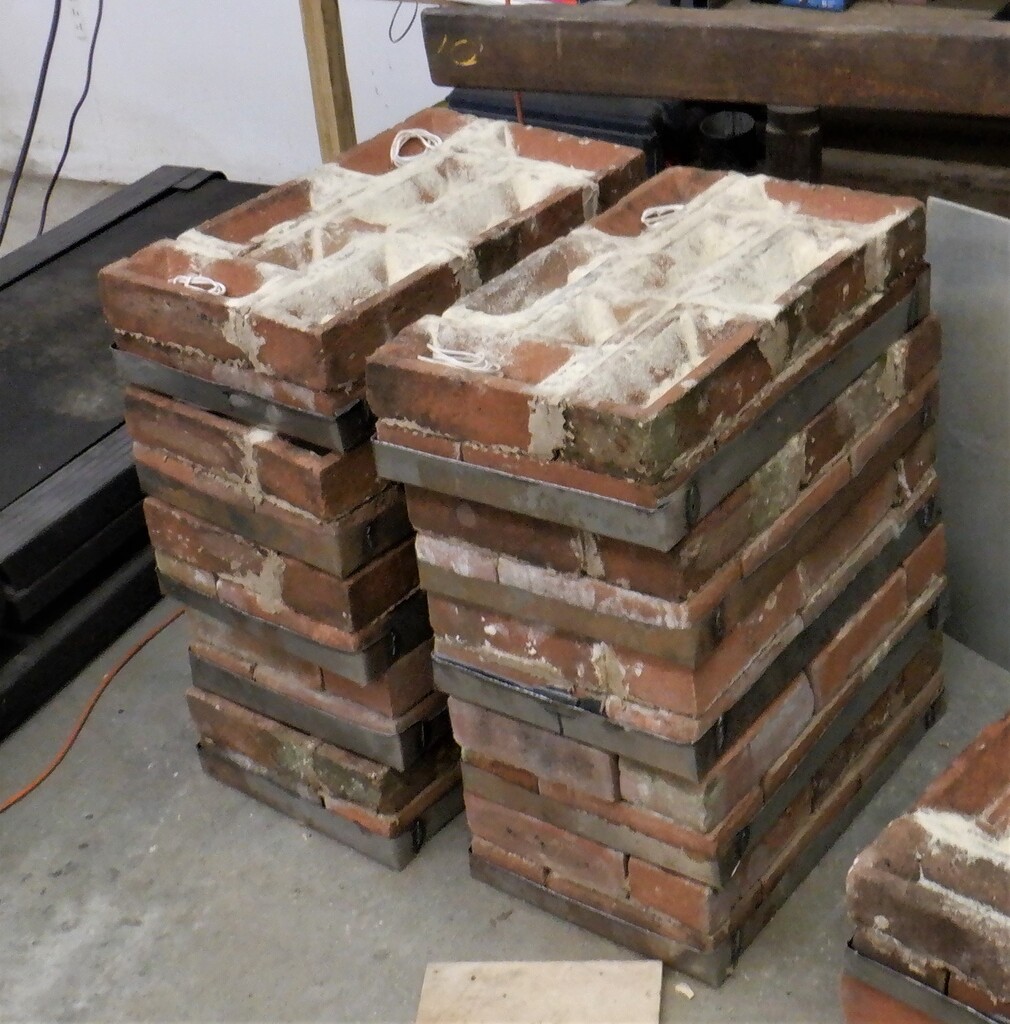
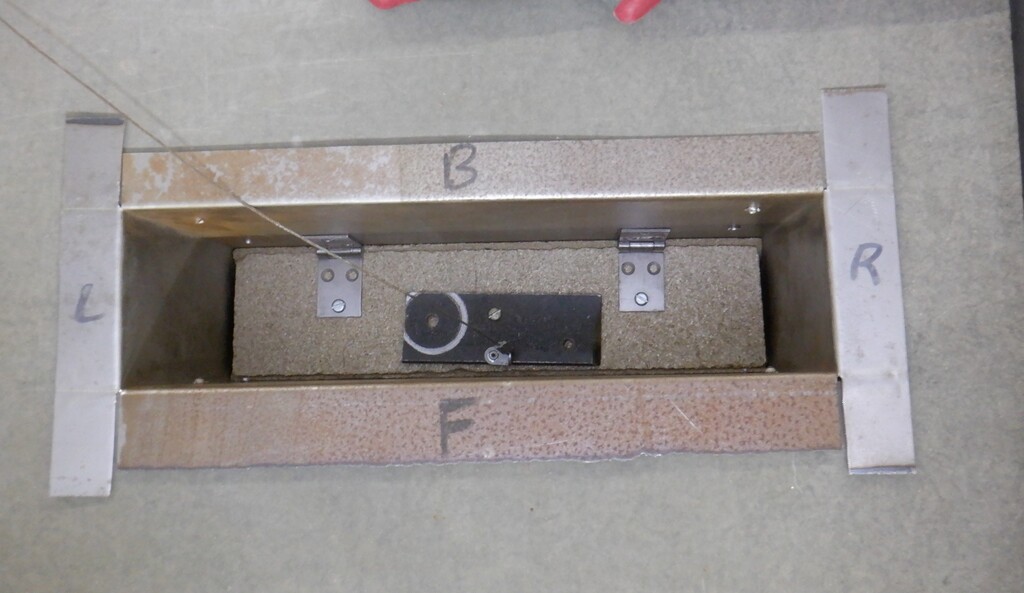
We then cut up thin steel sheets we had and bent up a narrow edge to form the metal trays then welded the corners, each tray holds 2 layers of 7.5 bricks. Next, we bought some high temperature mortar mix, designed to be used in brick kiln ovens and cemented the first layer of bricks together and then buried the electric heating wire in a layer of cement before sticking down the second layer of bricks on top.
Storage-Heater-Brick-trays
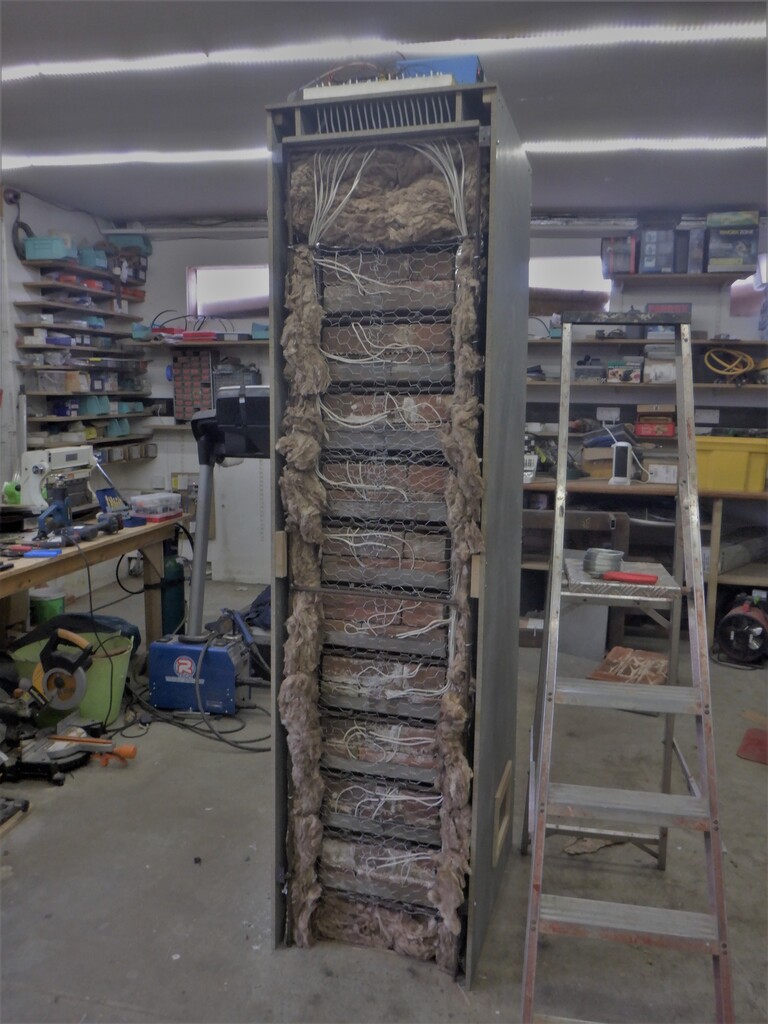
The electric heating wire is the standard industrial type, an alloy called nichrome, which is composed of 80% nickel and 20% chromium. We wanted to end up with a pair of trays drawing 1kWatt of energy from the mains national grid. We made ten of these trays, to fit into the steel cage, to form a tall stack.
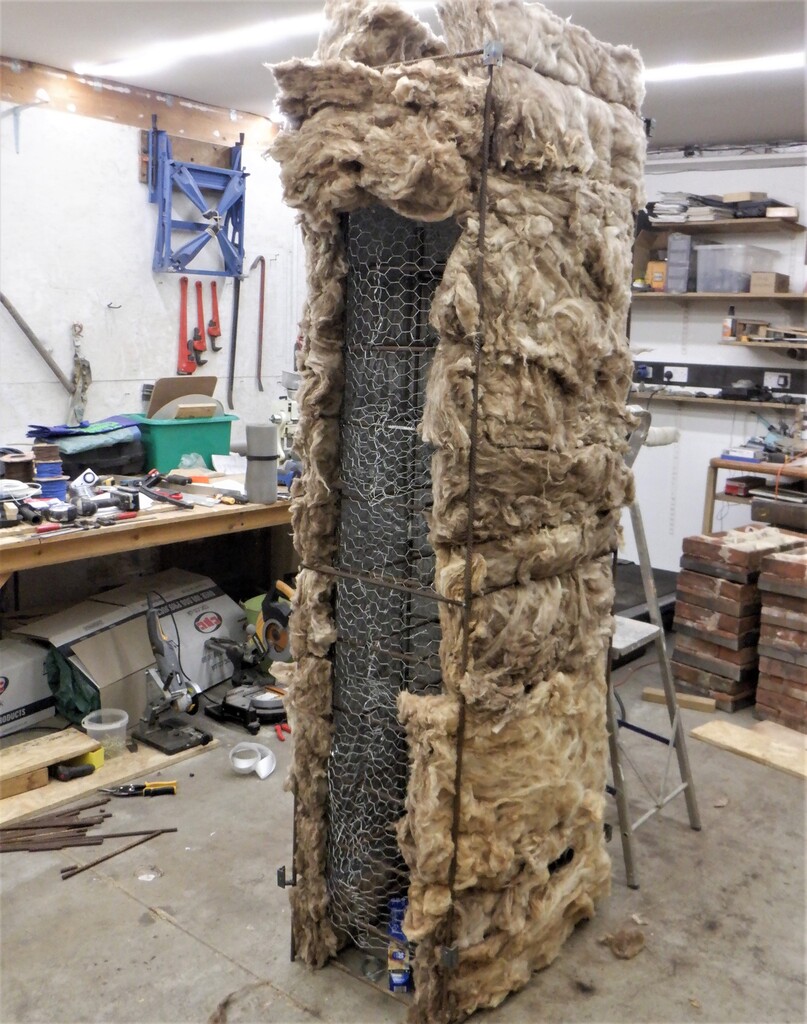
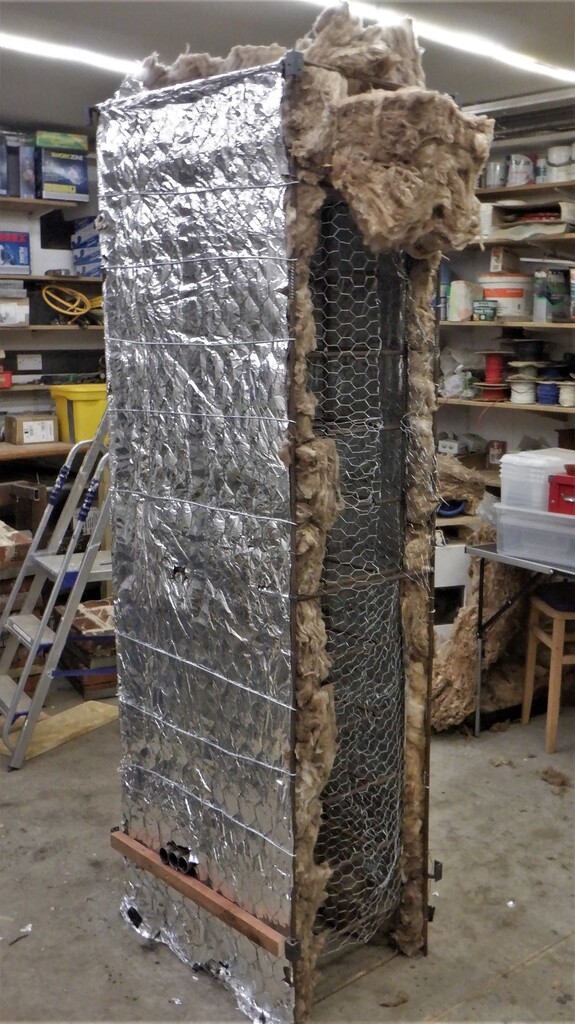
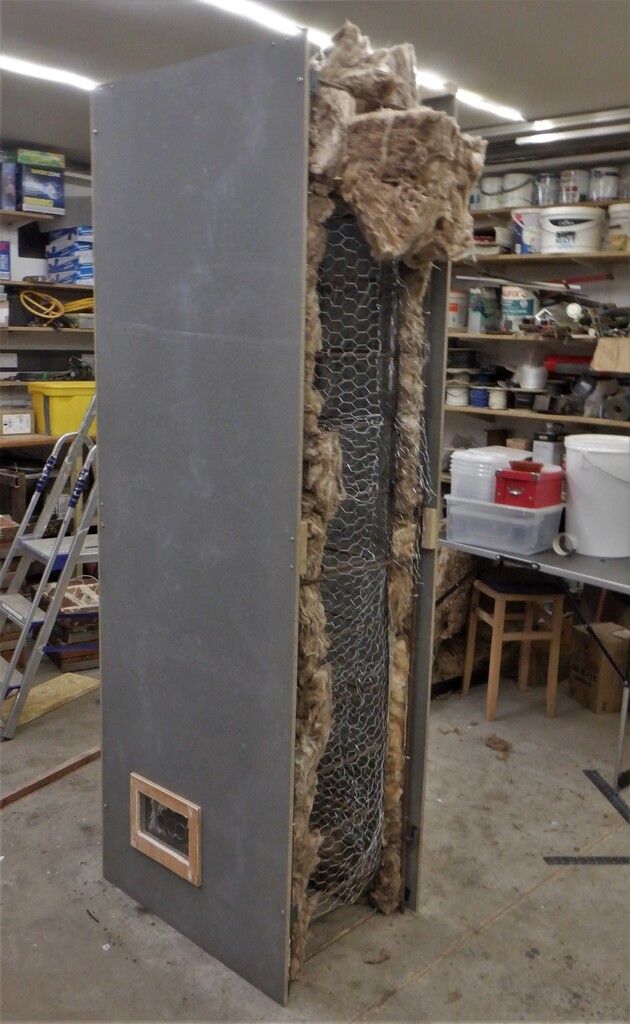
The next job was to wrap the steel cage in chicken wire which will hold the glass wool insulation in place without it bending into the inner chamber and touching the trays of bricks. We needed an air gap around all the trays so that the hot air can rise and escape out of the top. We also laid across the chicken wire a layer of aluminium foil to reflect the heat back into the core. Finally, the glass wool, which was 50mm thick, was squashed into place with a second layer of chicken wire and another layer of aluminium foil. That is the basic design of the inner core.
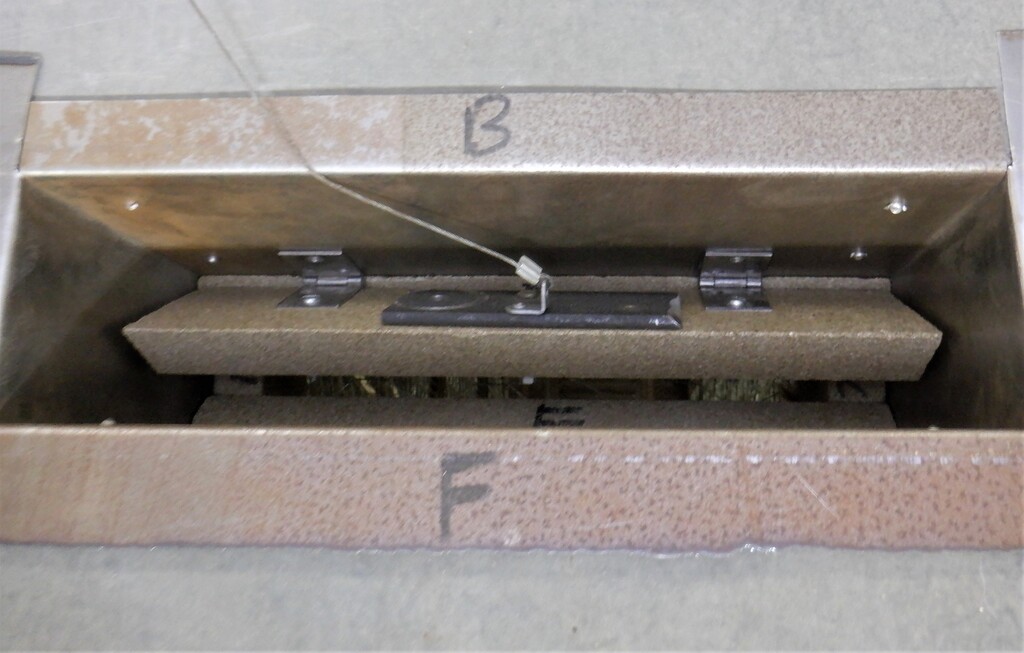
The chimney at the top had an 1inch thick ceramic trap door which can be lifted up using a motor and let the heat out. The whole upper section is 150mm thick of glass wool to minimise the heat losses upwards and avoid overheating our electronic control board as well.
The whole thing was then encased in a mixture of 10mm and 8mm thick cement boards to provide the final human safe outer cabinet shell. There is a small air gap between the cement shell and the insulated inner core, to allow fresh air to circulate up and around the whole unit and keep it cool.
The front panel then had a wooden duct built on it, to form a channel for the hot air to be vented out into the room around the floor level, using three high temperature rated case fans. They are speed controlled so can be adjusted electronically depending on various factors like room temperature, the chimney temperature and mixing chamber at the top. We would like to keep the temperature under control and not allow the shell to get too hot.
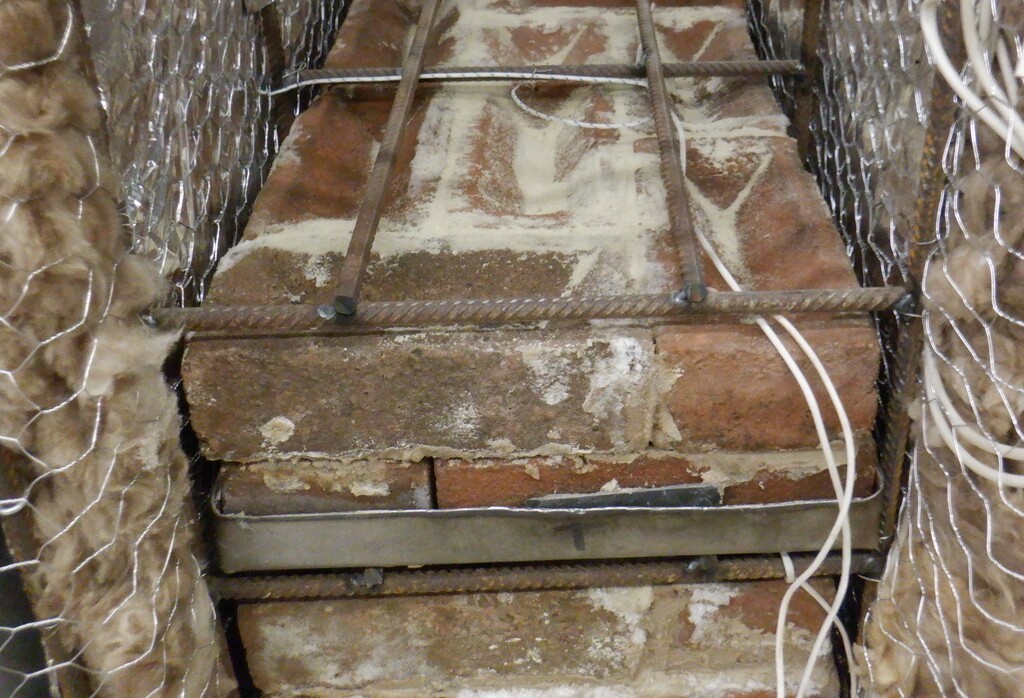
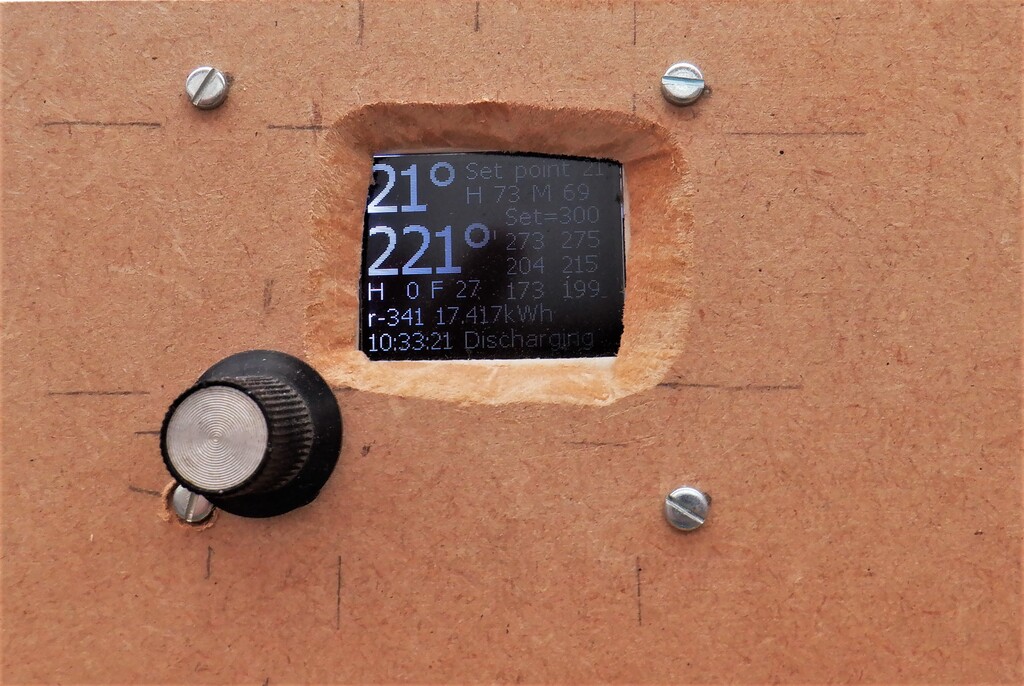
The electronic control board has a little microcomputer that has lots of input pins connected to 9 different temperature sensors, 6 of them are high temperature thermocouples and the other 3 are the more normal types. We placed the thermocouples in and around the trays of bricks, three of them actually placed inside a brick, down a small hole and the other three are measuring the air temperature between trays, with one of them up in the chimney itself.
With a combination of all the temperature sensors, we could control the heat output during the daytime by opening and closing the chimney and speeding up the fan to extract the hot air pouring out of the inner core. The control circuit also took the mains grid electricity during the night-time period and ?charged? up the ten trays of bricks, bringing them up to a working temperature of 300°C. Our calculations suggested that we should have been aiming for a much higher temperature of around 450°C to 500°C but we couldn’t get that far. There was too much heat loss out of the inner core, probably a lot of it is going up the chimney, even though the flap is fully closed. We discovered that it seems that our amount of glass wool insulation isn’t thick enough to provide a longer term heat storage.
In hindsight, we probably should have gone for a smaller tray of bricks and put in twice as much glass wool insulation so we could have gone for a higher working temperature and be able to have a better control over the core temperature during the different periods of the year. On the other hand, it is working well enough to make a fabulous difference to our electricity usage during these cold times, and especially with us only paying 11p for a kWh unit of energy during the night 7 hours period, we are saving enormous amount of money this year. It doesn’t matter what the daytime prices are (actually it is 51p per kWh unit) because we don’t need to use any grid electricity during the daytime hours at all. Our battery is also being charged up during the 7 hours night-time period and we then can power our house from the batteries almost all the time. It is only during a rare occasion that we exceed the 5kW power capabilities of our powerful Solis inverter that we have to draw a little bit off directly off the National Grid.
We completely assembled the heater while still in the garage and did a test run of heating it up just in case something went wrong and burst in flames! First to only 200°C, inspect all side and check the temperature of the outside shell. As this was OK we started heating further and got to about 350°C and checked everything was again OK. The hottest outside parts only reached 50°C.
Then the moment arrives when we had to install the giant thing into our living quarters. You may not appreciate this but this thing measures 550mm wide (nearly 2 feet), 750mm deep (2½ feet) and a massive 2100mm tall (7 feet) and it weighs, with all the bricks and everything, somewhere in the order of 500kg!! That is half a ton!! Smile!
But of course, we couldn’t move 500kg! So we had designed it to allow us to undo the front section of the cabinet, undo the inner core and slide out the ten trays of bricks as well. We could then move the cabinet on a sack trolley into the long corridor of our living quarters and get it positioned into the correct location so that we could slide it into the hole we had made into the floorboards. We knew that 500kg would have been too much for our floorboards so we cut a rectangle segment out and put in some reinforcing wooden beams across the wooden foundations underneath. After a tricky time of moving the cabinet around and aligning it up to the hole, then slowly rotating it upright and at the same time, drop into this hole. We were just about clearing the ceiling but only just!! But we made it .. just ! Phew!
We reassembled all the ten trays of bricks, redid the glass wool and chicken wire mesh to lock up the insulation again and then put the front panel back on. We laid in a new mains high capacity electric cable back to our consumer unit that we had to upgrade .. .. and switch it all on!!
It works!!
As part of our new regime of working, we are doing a lot of computer work and this storage heater has some of the components of managing our equipment and communicating response packets back to our database. We record what the storage heater is doing during every minute of the day .. and night and we can see how the temperature of the various parts of the inner core is doing, and also, measuring what power we extract from the grid, plus what the fans are doing etc.
We learnt to how control the fan speed during the different modes of operation, whether the flap is open or not and we must have reprogrammed the little microcontroller brains a dozen times with new functions and techniques to get what we wanted. It is still a working in progress but ..
We have pretty pretty much finished all what we want to do to this storage heater. There may be minor adjustments as time goes past. But, now we are going to concentrate on getting our computer sorted and start working on the various software libraries for managing our whole house. We will resume our work on the house soon.

Leave a Reply
You must be logged in to post a comment.