Category: Repair

  • Courier Driver Comes to Apologise and Provides New Wooden Post

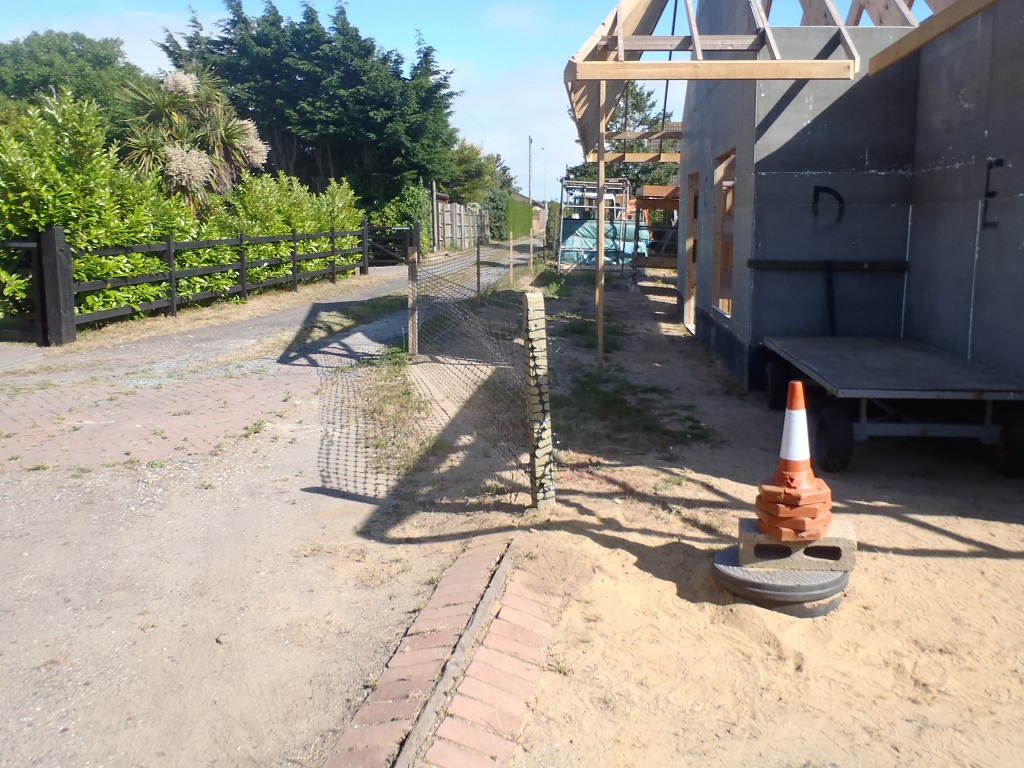
    At lunch time today, we had a visit from an unexpected person, the courier driver from UK Mail that had caused the damage to our Fence (see Fence broken by delivery driver) and he was honest and upfront to admit that he did the damage. He didn’t realise that he had done, hence why he didn’t stop. He also bought a replacement fence post and offered to install it as a token of apology as well, he also offered to get some replacement cones as well but we let him off on this as they were very old anyway.

    Courier Driver Comes to Apologise and Provides New Wooden Post

    Replacment-Fence-Post


    We were pleased that he came back, to be honest and gave us the wooden post. We consider this matter now resolved and closed.

  • Loke Post and Fencing Repaired

    After the UK Mail courier driver had smashed our driveway post and ripped a section of our fencing, we managed to find another post, this time a solid concrete post that we had lying around and replaced the wooden one. Then carefully reattached the plastic webbing fence to the new post, pulling tight and trying to minimise the torn layers in the mesh.

    Loke Post and Fencing Repaired

    Replacement-fence-post


    The “hi-vis” traffic cones were all pretty much destroyed so we will have to order some more and put them out to help drivers to see our boundary line and the posts!!! It obviously didn’t work this time!! Slow Shake Of Head!!

  • Bevel Slicing Machine Repaired

    Today, while it was snowing outside, we got down to repairing our Bevel Slicing Machine which suffered from a burnt out electric motor. We had ordered another handheld circular saw off the web and it arrived yesterday. but upon inspection, we decided that it wasn’t ideally suited for the job, the construction of the metal guard plate wasn’t flat enough to be bolted onto the plywood surface.
    So we looked at two other circular saws we had and one proved to be much better and easier to adapt to the requirements. After discussing the pros and cons, we sacrificed this unit and converted it into our Bevel Slicing machine.

    Upgraded-Bevel-Saw

    Upgraded-Bevel-Saw


    One of the positives was the ability to change the speed of the motor and we felt that this was a big advantage, especially we felt that the previous version was operating too fast for the size of the 300mm saw blade we needed and causing the wood and the glue or the pine resin to burn.
    In conclusion, after slicing the final two rafters, it does seems to be the case that slowing down the blade does reduce the burning side-effects.

  • Replaced Missing Roofing Felt on Living Quarter’s Roof

    Because of the bad weather coming later in the day and also more bad weather forecasted for the next three days too, we decided to tackle the small job of replacing the missing strip of roofing felt that got torn off in strong winds a couple of days ago.
    Buying a fresh roll of roofing felt, the cheapest one going, and a bag of large headed zinc coated felt nails, we started by brushing any loose materials and then rolled out the 10metres strip. We proceeded to fold back each edge in turn and painted the two outer edges with bitumen glue and then folded the felt back down and followed by bashing in a line of nails for the extra security of holding down this strip against the next strong winds!

    Temp-Living-Roof-Repair-Sep-2017

    Temp-Living-Roof-Repair-Sep-2017


    Mind you, it has been seven years since we had laid these roofing felt so it has done well to stay stuck down with just the bitumen glue and no nails!!

  • Roof of the Wendy House Covering the Stack of OSB and Cement Boards Was recovered

    One of the little job we did today was to recover the tarpaulin roof of the Wendy House (the rain protection for our stack of OSB sheets and cement boards). We simply removed the battens from around the perimeter and laid down a fresh tarpaulin over the existing one and re-screwed the battens back on!

    Sheet-Storgae-replace-roof

    Sheet-Storgae-replace-roof


    The old tarpaulin was failing where the sunshine and the UV radiation has damaged the plastic fibres and was getting very weak!!
    So we chopped off a 2.1metres piece off another much larger sheet we had lying around (3.6metres in the other direction) and flapped it into place. and that’s was it!!

  • Vaccum System Version 2.0

    Yesterday, the new filter separator module was created using 4 layers of 18mm OSB board with a large circle cut out in a increasing diameter at a sloping angle. Then an inlet 50mm hole was drilled at the tangent of these circular chamber so the air would come in and fly around the circle and make the rubbish to be flung outwards and downwards into the main rubbish collection area. A pipe up the middle of the lid would extract the air, being pulled by the motor unit and second filter chamber.

    Vacuum-system-Mk-2

    Vacuum-system-Mk-2


    Then this morning, the final hook up job was done to connect the pipework to the new second generation of the filtering unit that we copied off the web. It seems to be working quite well but after doing a major clean up around the whole workshop, the amount of dust in the paper filters was quite significant and was reducing the power of the air flow. This is a disappointing result and we need to go back to the drawing board. But at least, it is working as a vacuum system so we will use it for now and will have to empty the second chamber more often.

  • Vacuum System Being Repaired

    This afternoon, for something different from rafters, the Vacuum System was taken apart, well half of it was at least. The broken first stage filtration unit. The box was reinforced with edge strips and cross bracing supports. The power of the vacuum is such that when the system is going and someone causes a blockage, then the force pressing on the sides of the boxes is about 4lb per square inch and when the area of the side of the box is 24 inches one way and 24 inches high, a total of 576 square inches and so when you multiply the force (that 4 inches per square inch) together, you get as much as 2300 lbs of force squeezing into the sides! That is nearly a ton of weight! Eek! Plywood is strong but after repeated pulses of being hammered with that kind of force now and again when the nozzle gets blocks, it is not surprising that the wood suddenly snapped!
    The other aspect of this repair work is that the vortex separator is just not working and we suspect that our power of our vacuum motor unit is way over the top for that particular size and shape! We have been researching on the web and surprisingly, there are many designs out there and we are going to try making our own homemade centrifugal spinning chamber to separate the “dirt” from the air. Very Fascinating stuff, this whole field of Rubbish separation and filtration, without the need of paper or cloth filters and hence maintaining full power at all times!

  • Tidying Up and Planning the Next Stage of Work

    We did some miscellaneous tasks around the building site this afternoon, at the same time, talking about what we needed in terms of tools, jigs and templates to help us with the manufacturing of our roof rafters.
    The tasks were as follows:
    • Fixed and cleaned out the water pump non-return valve.
    • Tidy up the workshop of all the polystyrene foam waste bits and the tools
    • Sprayed weed killer around different areas of the building site
    • Trimmed back the old hedge along the Loke
    • Repaired the Sabre Saw where the blade wouldn’t hold in place anymore(a little spring clip has been knocked out of position).
    • Emptied Rubbish

    The tools and templates we talked about are as follows:
    • A squashing tool to ensure a tight joints between the plywood webbing and the flange of all the rafters
    • A measuring jig that hooks up on the steel I-Beams and the outer walls to allow us to check the distance down to the outside walls.
    • A rafter template to hold the long lengths of the timber and plywood in place, ready for gluing and nailing.
    • A birds mouth jig for making the notch in the flange
    • A jig to create an nibbed scarf joint (long diagonal joint with stepped ends) to join up two CLS pieces together making the required stronger lengths.
    • Planning the logistics of materials and workshop layout for supply of parts and placement of finished items.

    On Monday, we can start in earnest with all those items of action points above!! Grin!

  • Router Straight Cutter Ruined!

    During the task of cutting the vertical slots into the cement panels on top of the walls, Shaun ruined the router cutter bit on a nail! He didn’t see it in time or rather feel it and remove it with a crow bar and hammer! The cutter bit now has smashed edges!

    Broken-cutter

    Broken-cutter

    So an hour was lost while we went off to the shop to buy 5 more bits, some spare ones too just in case!!

  • Router Machine Blew A Capacitor!

    The Bosch router machine suddenly stopped working while cutting the window on the “O” wall of the Great Room. It blew the fuse in the plug back in the garage!

    We managed to track down the problem to a capacitor which had blown up! We replaced it with a new one (measuring 0.15 microfarads 400 volts) which we assumed that this capacitor suppresses spikes from the motor when you initially start the machine.

    It took about an hour to do the repair job and get it back into working order again!