Category: Roof

  • Timber Rafter Supports for Steel I-Beams Created

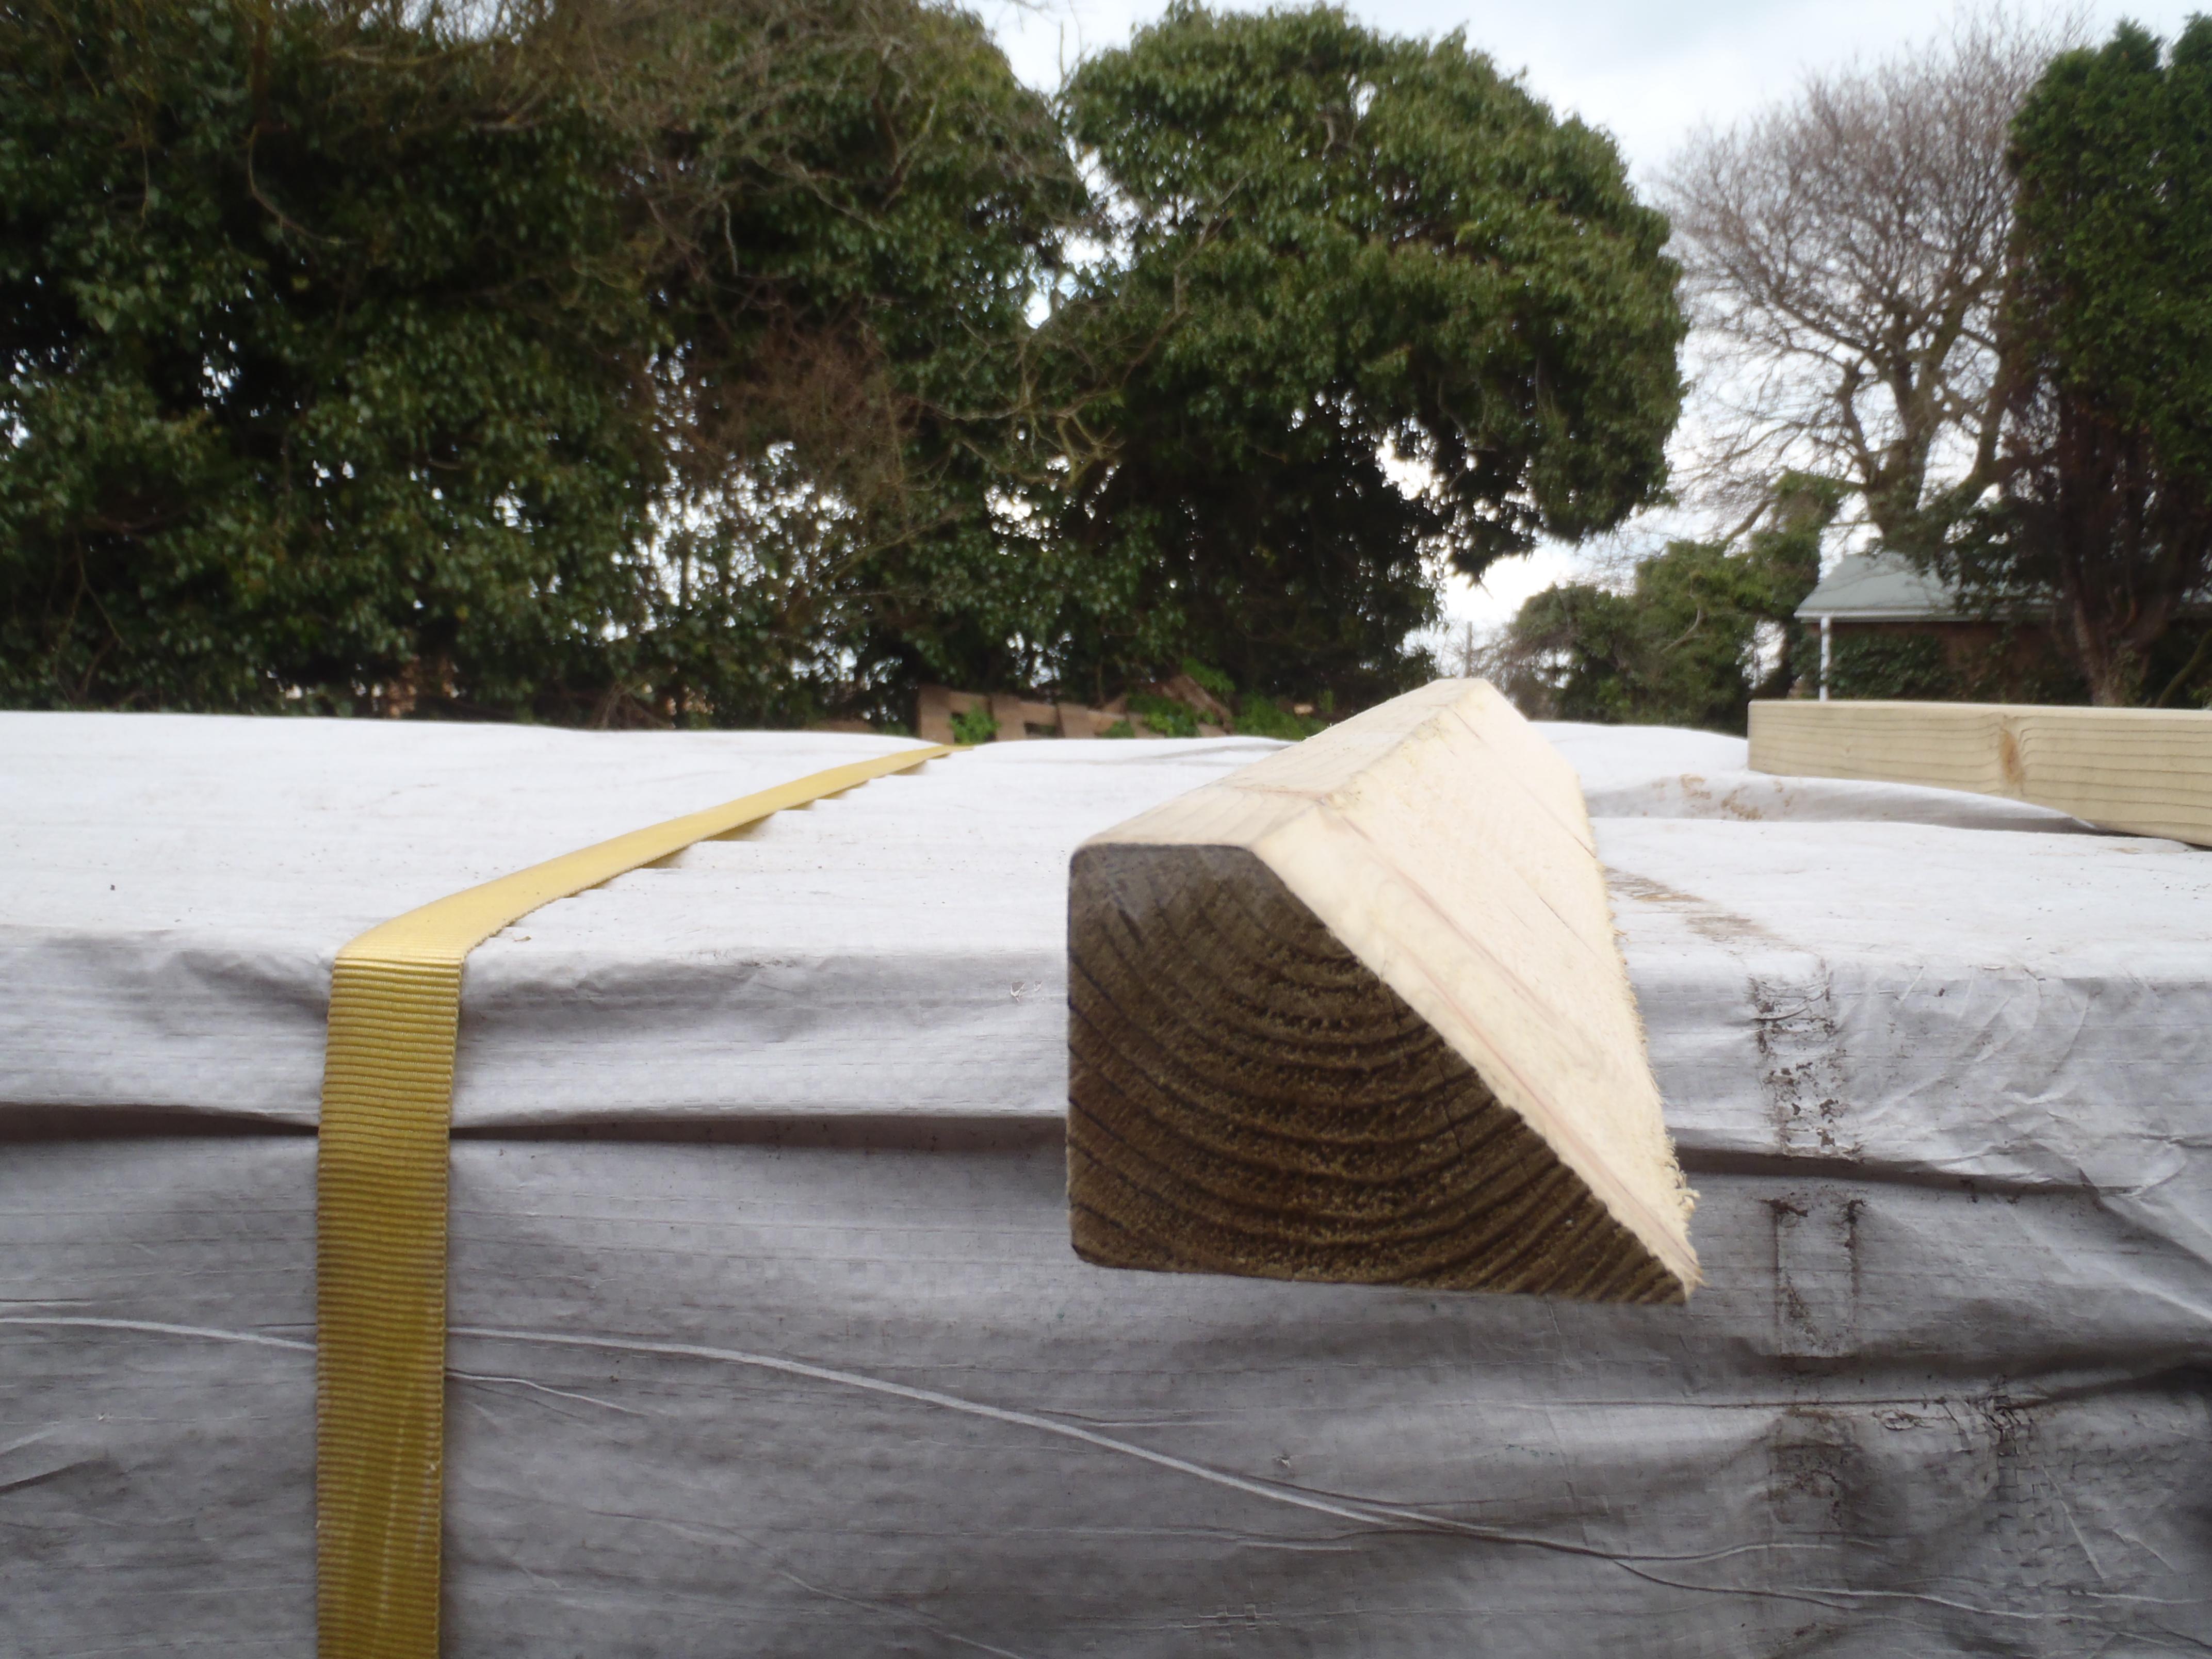
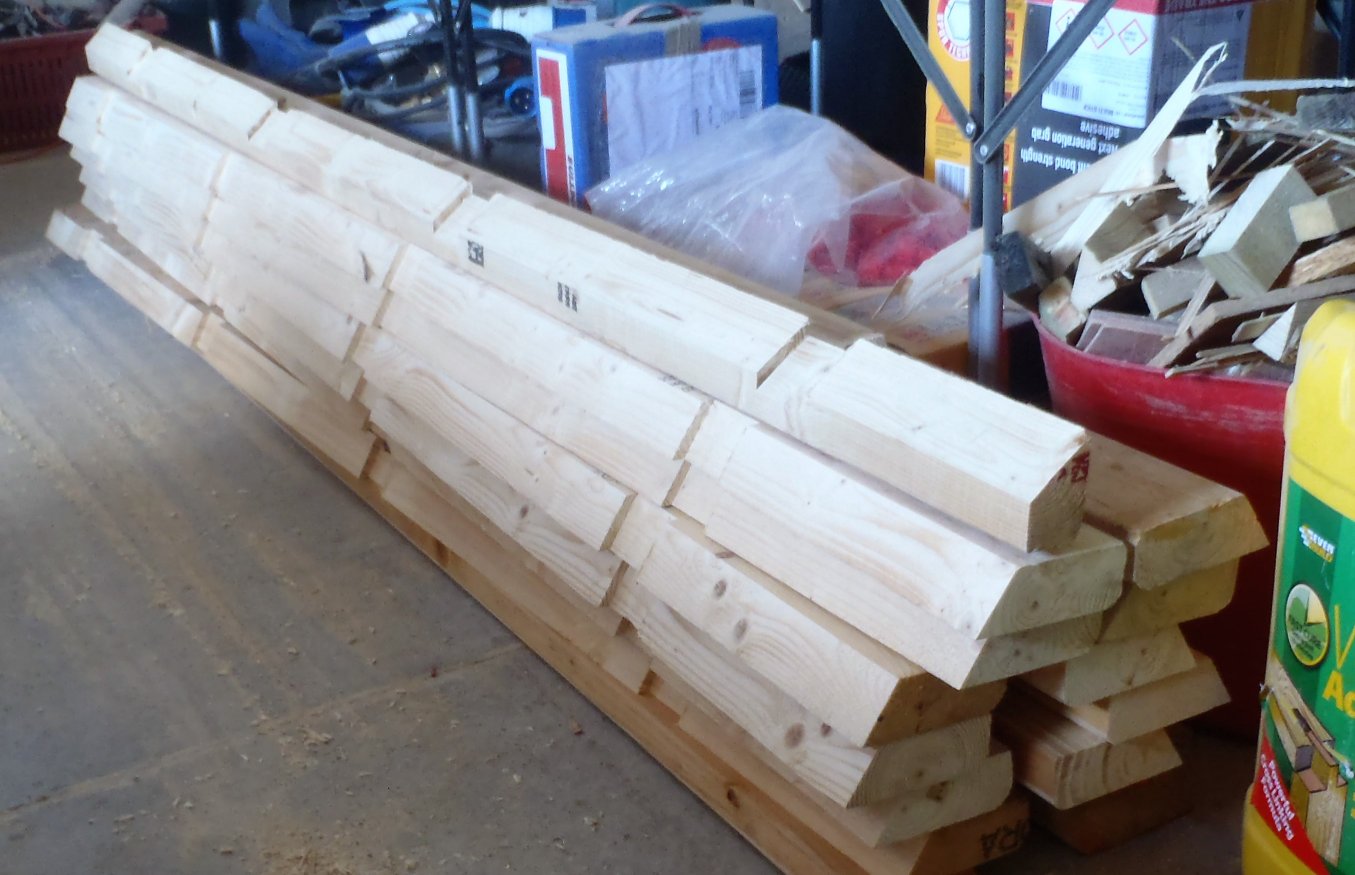
    Over the last few days, we have been cutting, slicing and routing a whole series of timber pieces that will provide the fixing points for the ends of the roof rafters up on the Steel I-Beams.

    There are three basic sizes for the different parts of the steel work as follows:

    • 2 ends which has a 40 degree angle sliced @ 61 mm from a 75 mm by 50mm wide timber
    • 6 lengths with a 32 degree angle sliced @ 117 mm into from a 150mm by 50mm timber pieces
    • 8 lengths with also a 32 degree angle sliced @122 mm from a 150mm high by 50mm thick timber.

    The differences is the height of the slots that have been routed in. The end result is that when the roof rafters are placed into the slots, the top edge of the rafter all lines up, thus creating a levelled roof. The steel I-Beams comes in two sizes and thickness hence why we needed to have difference sizes.

    Rafter-lower-supports-on-I-beams-1

    Rafter-lower-supports-on-I-beams-1

    Rafter-lower-supports-on-I-beams-2

    Rafter-lower-supports-on-I-beams-2


    We had to make a template to route the 10mm deep slots, all done at the correct angle, one at 32 degrees and 40 degrees.

    Now we need a dry day to go out and fix these pieces on to all the steel I-Beams all the way around. We will align up each piece using our laser alignment module (this sits on the top of the walls on a leg and the laser sends a beam up to the steel work). But first, we would have to clean the bird poo off before gluing and clamping the timber into place – grin!

  • Steel Ordered!

     It was a fairly easy and quick decision to place our order for the Steel pieces with the one company that was pretty good on the price (not the cheapest but also nowhere the most expensive either!) but won on the grounds of having a crane on-board their transport. It is a local small business called Standley Steel in Wymondham and we already have a good rapport with them! We expect that the delivery will be early next week.

    So, to be ready for that event, we need to get the area beside the Loke levelled out and have blocks of wood and pallets ready .. and currently it is raining hard – Grin!

  • Steel Questions, Shopping List and Quotes

     The Steel requirement for the skylight frame has been sorted out into a shopping list and sent off to half a dozen different local suppliers in Norfolk, and beyond. We are getting Quotes from most of the suppliers and they are all running in around the £2300 mark but for one major difference, only one (so far) has said that their transport has a built-in crane, which would make it so much easier to unload the 3 tons of steel pieces we need!

    But, we discovered a situation regarding the Building Regulation and fabrication of steelwork, where in certain circumstances, one needs to show a certificate (or two) proving that the quality of workmanship and grade of steel meets the proper European Standard (as of November 2014). We made enquiries with our local building inspector and after leaving someone to look into this matter, and waiting a few hours, and a final telephone conversation answering last minute questions, they agreed that our design is neat and simple and well within our remit to fabricate and assemble the Steel framework  ourselves. Phew thanks goodness for that!

    We are now just waiting for one more final quote to come in and then we will probably order from the supplier that has the crane on their vehicle.

    In the meantime, we are tidying up along the Loke side, levelling up the ground so we will have a landing area for the delivery of the steel bits and pieces, as well as other material we will need later on.

  • Roof Repair on Store room

    We took the opportunity to put on a new roof covering on our store room this weekend. It was lovely weather and quite calm thus avoiding the problem of 10metres of roofing felt being blown about!

    We bought 5 new rolls of the cheapest roofing garden felt and 3 tins of glue. but after all we only needed one of the new tin as we had an old tin almost full!
    We will get our money back on the other two tins!

    Everything looks good now and hopefully this will be the last time we have to put on a new covering – on either roof!

  • Final Clamp Down!

    Today the final finishing touches were done to the roof. An aluminium grip bars were screwed down all around the edge, clamping down the rubber membrane with mechanical grip in addition to the glue we have already used. We needed nearly 200 stainless steel washers and screws to do the job!

    That is the garage roof done! Now we wait for the thunderstorm to come and test it for us!

  • Dirty Big Hole in Roof!

    A 110mm (4inch) dirty great big hole was cut into the rubber membrane! In the back left corner of the roof is where we have the rain water drain pipe coming up through the roof and today the major operation of cutting into the waterproof skin was made and fitted the special flappy rubber flange connected to a piece of 110mm plastic pipe which slid into the waiting pipe behind the hot water tank. The special rubber had a coating on it which very strongly binds to the rubber roof membrane (after the roof membrane was treated with a rubber primer and scrubbed!). the final seal was extremely sticky and very strong. There was only one chance to get it right! And it was ok! Phew!

    Roof drain hole

    Roof drain hole

    A stainless steel mesh was coiled up and stapled together using stainless steel staples (naturally) and carefully jammed into the hole to provide a filter to stop leaves, moss and other larger bits and pieces from floating into the drain system.

  • Rubber Membrane Glued!

    Today, in the blazing sun, we glued the rubber membrane down on the roof of the Garage. It was very hot on the roof and especially the black rubber was absorbing huge amount of heat from the Sun! we were forced into doing narrow strip before the glue dried on us!

    Roof ready for glue

    Roof ready for glue


    Roof ready for glue

    Roof ready for glue

    It was quite tricky trying to keep the rubber smooth without any ripples and unfortunately we didn’t quite make it! There were lots of things we could have done in hindsight but mostly it was so hot that we had very limited time.

    Rubber stuck down

    Rubber stuck down


    Rubber stuck down

    Rubber stuck down


    Rubber stuck down

    Rubber stuck down


    Rubber stuck down

    Rubber stuck down


    Rubber stuck down

    Rubber stuck down

    We folded the rubber over the edges to provide a complete waterproofing seal for the whole roof. Just the rain drain connection left to do in the morning.

    At least we can say that our roof is water tight not barring the wrinkles! We thought we would cover them up with a layer of small round stones! We had previously calculated the load bearing of the roof to allow for a 25mm thickness of stones!

  • Trimming The Edges!

    Today we took advantage of the clear weather to finally finish off the roof we put on 6 months ago! Mostly we have been waiting for the weather to get warm enough so that the glue will dry and cure properly in the required 48hours the instructions states.

    We went around the three sides (the back edge was done a couple of weeks ago) trimming the excess OSB boards off! We calculated that we needed an overhanging distance of 120mm before the Oak facia boards sticks down. This distance is made up of two layers of vertical and horizontal 25mm thick battens and 19mm of Cedar wood coverings, with a 50mm air gap around behind the facia and up and over the Cedar to allow the whole wall to breathe.

    Next we glued and screwed the sloping boundaries made of a 100mm by 50mm Pine timber sliced diagonally at 45degrees to make a chuck of solid edging with 25mm flat tops and 75mm bottoms. The corners were mitred together.

    Roof - Upstands fitted to last 3 sides

    Roof – Upstands fitted to last 3 sides


    Roof - Upstands fitted to last 3 sides

    Roof – Upstands fitted to last 3 sides


    Roof - Upstands fitted to last 3 sides

    Roof – Upstands fitted to last 3 sides


    Roof - Upstands fitted to last 3 sides

    Roof – Upstands fitted to last 3 sides

    We covered up again just before the rain started drifting in! Phew!

  • Back Edge is Done

    Our temporary fixing of the rubber material has proved troublesome during rain showers, we have had too many little leaks coming down the back wall and spilling into the air holes for the rafters. We decided to put up and fix down the 45 degree sloped flange along the back edge of the roof and then mount a wide 180mm (just over 7inches) Oak plank the facia hanging down from the roof.

    Rear upstand and Facia

    Rear upstand and Facia

    The rain will now gush off to the sides of the roof for now and not straight off the middle of the roof and trickle down the back wall!

    As soon as we get another series of good dry days and warm too then we will be back on the roof to finish it off properly, preparing and gluing the rubber material down all over the roof.

    It is the first time we have used our supply of Oak Planks, we pulled out 4 pieces of 6 feet lengths and 1 x 8 foot length which were all very similar in width. We sanded one face and the edges to take off the worse of the rough sawn surfaces and put them up untreated and in their full thickness of over an inch! Nice and solid!

  • Sliced 2 by 4 timber

    We had the table saw outside today so we took the opportunity to slice the 2 by 4 inch timber diagonally down the length, to produce a sloping edge shaped piece, two of them. These will be used on the roof to create an edging right around the perimeter to form a dam to push the rain water down and into the rain drains. The rubber membrane will be glued up the slope and fix down with aluminium grip bars on top of these rhomboids we have made today!

    Roof Edging

    Roof Edging