Blog

  • Scratches On Glass Latest Results

    We made contact with our Triple Glazing supplier and directed them to our previous blog report. After examining the photos, they decided to send their Sales Director to inspect our three windows in person. The person came on Wednesday and agreed that one of the windows was unacceptable. They were surprised to why their fancy laser scanning machine didn’t pick up these scratches in the first place. Apparently, the equipment costs £120,000!!
    The other window was deemed borderline acceptable, the scratch being small enough and faint enough to not be a bother and one has to really concentrate on finding it to notice it. We agreed with that way of looking at the problem. The third window had the scratch on the outside surface of the glass and they pointed out that the scratch could have been caused when we were handling the glass, but, to be fair, they said that they will supply some polishing compound and we can polish out the scratch ourselves. This will also help remove any of the metal splash marks too.
    So we bought some quality polishing pads and wheels and when the new replacement glazing unit arrives, we can use the polishing compound on the other windows.

    They have phoned us to say they will replace both of the windows with the internal scratches which is very good of them and they will be manufactured the week starting 9th November.
    We did have a delivery date of Friday the 14th. We had elected for the Friday so we had time to fine some extra bodies to help lift out the 120kg window and put in the replacement one.
    But now with the new COVID-19 Lockdown we don’t know when the delivery might be! (The supplier will store the units until we can install them) Phew!

  • Chop Saw Plank Slicing Station

    We started the week by creating a new piece of equipment, this time, a plank slicing station down in our Great Room, using our large chop saw and a length of 63mm CLS timber and two pieces of plywood strips to build a long 4.8metre long straight channel. The chop saw was placed about three quarters the way along towards the right hand end so we can put a end block clamped to the CLS fence and we then can consistently chop up many planks into the same length. To aid in measuring planks we attached a 3m measuring tape to the top of the CLS.

    Chop Saw Plank Slicing Station

    Saw-Station

    Chop Saw Plank Slicing Station

    3m-Measure-along-the-Saw-station-fence


    We also sub-divided the space underneath into shelves so we had loads more storage space for various building materials and pieces of equipment.

  • Patched Hole in Corridor’s Roof, Caused by a Firework!

    Today, we discovered a leak in our corridor in our temporary living quarters while it was raining outside! Upon closer inspection, there was a hole right through the outer layer of the clear corrugated plastic sheet, and we found a little spent firework payload, only measuring about 12mm by 18mm!
    Our neighbour, yesterday, decided to celebrate Guy Fawkes Night really early this year and was letting off some fireworks which included these mortar shells that pumped sparkling displays up into the air. One of those empty payload capsules must have went straight up and came down hard on our roof.

    Patched Hole in Corridor's Roof, Caused by a Firework!

    Hole-in-the-roof


    But to be fair, our corrugated plastic roof is getting rather old and it is becoming more and more brittle as the years roll by. But, it was still amazing that such a little thing could punch clean through the first layer of our roof, and bounced off the second layer inside, we now have a permanent souvenir visible until such a time in the future when we dismantle our temporary living quarters!
    So the solution was to thoroughly clean the surface, with sand paper and chemicals, and lay down aluminium tapes to try and make a waterproof patch. We will see !

    We will have to keep an eye on this roof and hopefully, it will survive for another couple of years.

  • Cleaning and Polishing our New Windows

    On Tuesday, in lovely sunshine, we went around cleaning our new windows, on the outside surfaces. We will do the inside later on after we have sealed the inner glass to frame joints.
    So having a large bucket of hot water and detergent, we proceeded to cut into the dirt and dust on all twelve windows. We could see a faint shadow of a large circular effect on the glass, which we assume was caused by the giant suction cups the glass factory was using to grab and lift the completed glazing unit. There were also smaller circular ones too, from our own rubber suction cups attached to our handles that was used by our cohort during the installation session two weeks ago.
    We did some research on the web and apparently, one can remove them by using a very fine scouring cream, like the traditional Windolene Cream glass cleaner and scrubbing hard. So this is what we did and went around again to all twelve windows, scrubbing, wiping, drying and polishing.
    But we made a disappointing discovery, we found defect marks in the glass itself.

    Some were surface effects like little splatters of metallic looking droplets, a tiny air bubble embedded inside the glass but most seriously, scratch marks, three of them so far on three different windows. All look very similar, a bent line, coming down vertically and then sweeping sideways, the whole thing about 70mm long.

    Cleaning and Polishing our New Windows

    Window-H-Scratch


    Two of these scratches are on the inner surface of the outer pane of glass so we cannot possibly be the culprit and the third one is so similar that somewhere in the manufacturing process, the same “mishandling” caused these scratch marks.
    We decided that we will wait until after we have cleaned the inside surface of the windows before compiling a full report and decide whether we can live with them or not. To this goal, we went around with a black PU sealant to seal the glass to the aluminium framework to stop any water and dirt from dribbling into the joint.

    On Saturday, we had a moment in the morning to go around and wash the windows on the inside this time, now that the sealant have hardened nicely. This allowed us to really inspect the glass, looking for defects.
    Here are a gallery of photos showing these defects ..

    Cleaning and Polishing our New Windows

    Window-A-Scratch-From-inside

    Window-C-Scratch-From-inside

    Window-C-Scratch-From-inside

    Cleaning and Polishing our New Windows

    Window-H-Scratch


    Cleaning and Polishing our New Windows

    Window-H-Bubble

    Cleaning and Polishing our New Windows

    Window-I-mark

    Cleaning and Polishing our New Windows

    Window-M-Bubble


    We did some research on the web, read an industry’s document of expected “allowable” defects and even compared to that document, the scratches we found are classed as unacceptable. Therefore, we will be raising an issue with the glass suppliers on the strength of the poor quality.

  • Setting out the Entertainment room

    For the start of our new week, for the start of the work inside the house, we got on in sorting out the area where the Entertainment Room is situated. There is going to be a concrete shell to provide some level of sound proofing so the rest of the house is not disturbed by crazy noises, loud bangs and awful discordant sounds from musical instruments etc.!
    But we have to make some adjustments to the framework around the window first, to make room for the 100mm wide concrete blocks that will go up on either side of the window to form a barrier to keep the noise in. We moved a pair of inner (63mm CLS) legs sideways 150mm and glued together three layers of the 63mm CLS timber horizontally going over the window that forms the lintel to hold up the first floor. Also, we sliced away some pieces of the insulation to make room for these concrete blocks too.

    Setting out the Entertainment room

    Gluing-lintel-reinforcements

    Setting out the Entertainment room

    C-Window-ready-for-Entertainment-walls


    Next, we decided that we needed a larger tool to help mark out the layout of the stud walls (see Created Large Right Angle Framing Tool ) and using this piece of equipment, we marked out the outline of the wooden stud wall that surround the concrete shell.

    At this point, we put out our laser level gadget and proceeded to measure the relative height differences around the perimeter of the room, to judge where the highest and lowest points were. We had set of numbers ranging from 108 to 122mm which means a different of 14mm between the highest spot and the lowest spot.
    Then, we measured and cut up a series of 89mm and 63mm CLS planks to form the bottom layer of the stud walls where we drilled clearance holes through and then using our SDS mains powered machine, drilled the required holes into the concrete, ready for the self-tapping concrete screw bolts.

    Setting out the Entertainment room

    All-fixing-holes-drilled

    Next, we blasted all the holes with compressed air to clear the drilling rubbish out, collected up a trug full of soft sand (from our own sand pit, using a medium holed sieve to avoid larger stones) and got a bag of cement we had lying around that hadn’t gone hard yet. We started with four scoops of sand and put in two scoops of cement, a couple of finger pinches of fine plastic fibre and got it nice and moist. But we discovered that there was too much fibre in it, it was clumping together!
    So, following the earlier survey results, we decided to put in 2mm of mortar at the highest spot, just enough to wet the surface and sit the plank down. We put in enough underneath and then thumped the wood down along the length and using our laser level machine again, settled the whole plank flat. This spot is then the reference point to get all the other pieces of timber footplate all at the same flat level. This was duly done and left it to set hard overnight.

    In the morning, we came along to scrape any excess mortar away, to tidy up the surfaces on the timber and on the concrete alongside where the concrete blocks will be placed. The next task was to slice up more planks to form the second layer, making sure to overlap all our joints to reinforce the total strength of the footplate. We proceeded to drizzle PVA glue over the wood and screwed the two layers together.

    Setting out the Entertainment room

    Double-wall-plates-fixed

    We had finished by early afternoon and we spent the rest of the day looking at making another piece of equipment to help us produce regular and precise lengths of timber, for legs, posts and top plates that will form the internal walls of the house.

  • Created Large Right Angle Framing Tool

    We needed a tool to set out the rooms inside the house, as all the walls are right angled we needed something to get long right angled measurements. So we spent a few hours making a large framing square, using the mathematical and ancient truth that a right angle triangle measuring 3m by 4m always forms a 5m hypotenuse. So using a good quality and straight wooden batten, to form the base of the triangle, the 3metre side, we then took a flexible “cord” to stretch out to form the other two sides of the triangle.
    But we were struggling to find a “cord” that will serve the purpose and not stretch alarmingly when tensioned. Ordinary string was no good, even high strength highly woven cord didn’t work (it stretched 50mm over 4m) and we resorted in using a piece of 1mm stainless steel wire (left-over from our bird disruption system up on the Skylight), this only stretched 3mm! Luckily, we had enough to make a 9metre piece with two marks at 4metres and 5metres.

    Created Large Right Angle Framing Tool

    Large-Framing-Square


    So holding the wire out taut, at one of these marks, we can form either a left-handed or a right-handed triangle, which forms a good line perpendicular from the surface we placed the batten against.
    We can mark the floor at the beginning and end points and if necessary, can extend the line out to the required length of the stud wall we are mapping out, and once that task is done, we can wrap up the wire around the batten and put it away in a nice compact package.

    Created Large Right Angle Framing Tool

    All-rolled-up

    P.S. Can you spot our problem in the first photo?


    The wire is looped around the roof post!

  • Concrete Material for Sound-Proofing Shell for Entertainment Room collated and Ordered

    After buzzing around several different suppliers, all across the country, looking for pre-stressed concrete beams and dense concrete blocks (the heavier 20kg ones), we chased down various prices, ranging from the wow high price to a super low price but a heavy delivery charge (eeek!), we have finally settled an agreement with our local builders merchants Jewson, to supply us with ..

    • 10 concrete beams
    • 650 heavy dense concrete blocks
    • A pile of soft sand
    • Some bags of cement
    • A few large heavy paving slabs
    • And a concrete lintel (for our doorway).
    • 50 lengths of 89mm CLS timber

    We managed to get a very good price for the whole lot, that is a fabulous as we get the benefit of having our material delivered using the standard truck with a crane to help unload the 12.7 tons of stuff! It shows that it pays to spend time shopping around even if you end up back at your local business (but you know what price to negotiate too) Phew!

  • Oak Beadings and Wings Installed

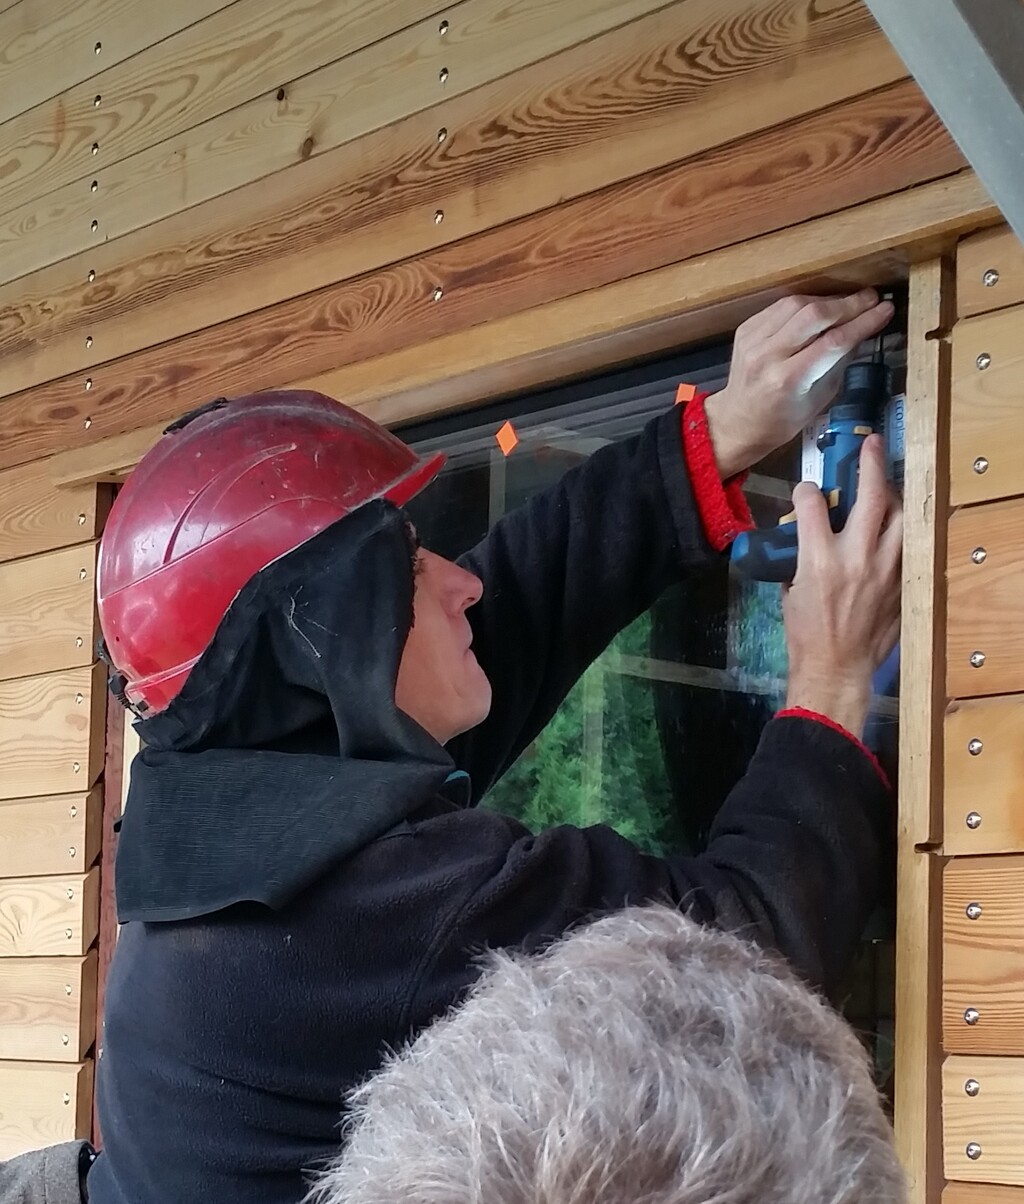
    After the glass was installed into the twelve windows, we spent the next two weeks putting on the Oak Beadings and Wings to finish off each window.
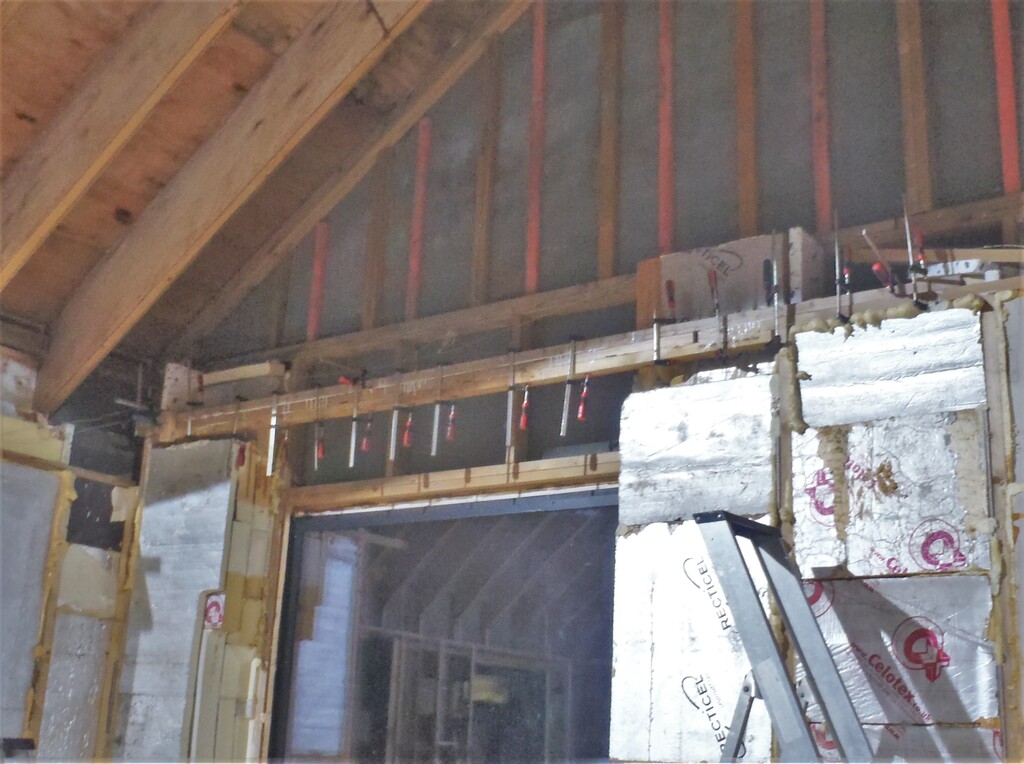
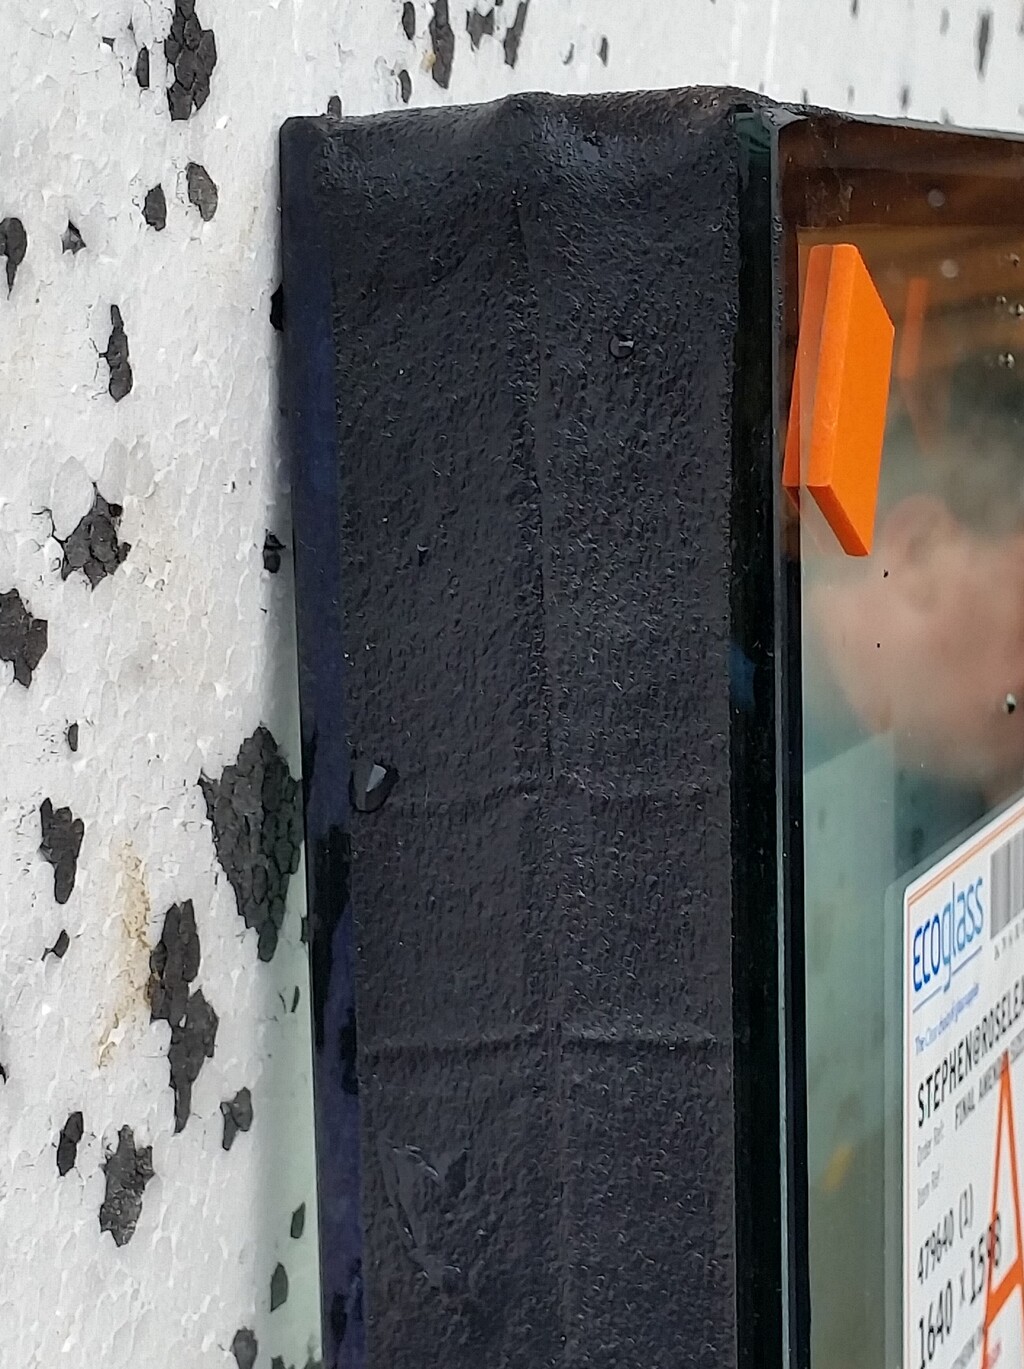
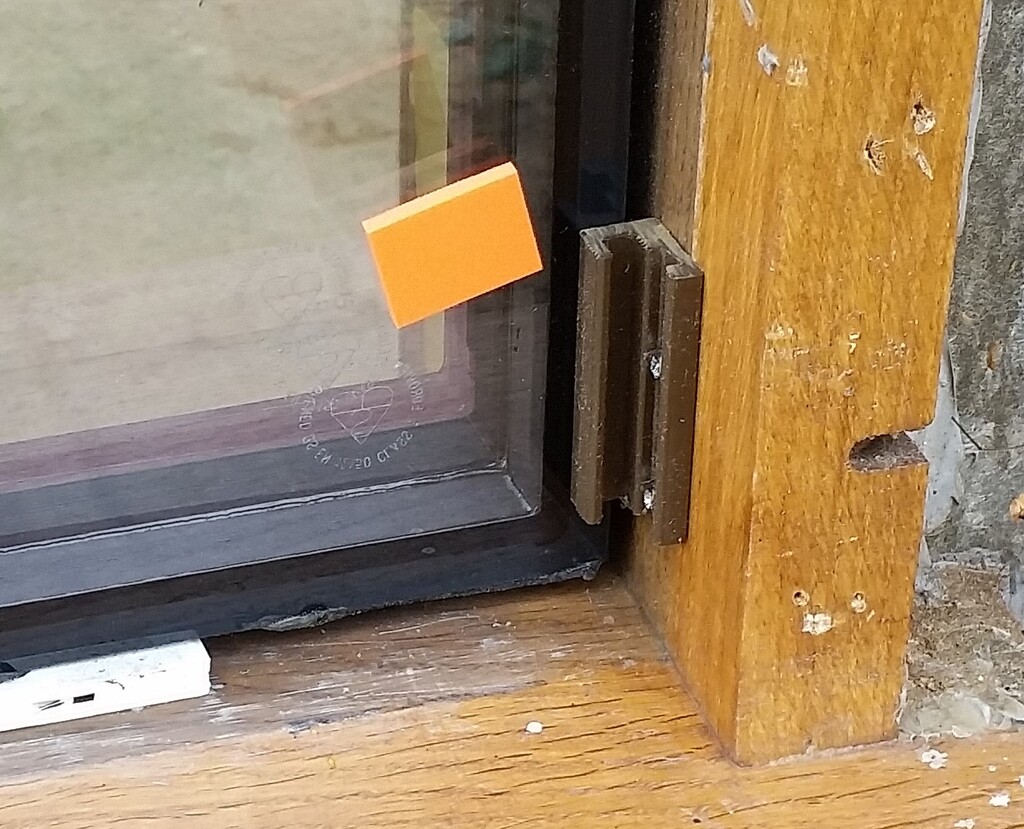
    Each window has the normal four Oak Beadings (see Oak Beading Created) and each piece is held into place by a collection of special plastic clips. There are eight clips for each beading, plenty enough to rigidly hold the wooden finishing decorative strip in place against the glazing unit, squeezing the rubber seal up to the glass surface itself. We did have to do a little bit of trimming first, removing the excess sticking out bit of the glazing pad we 3D printed (see Manufacture of Glazing Support Pads) beyond the triple glazing units because they interfered with the Oak Beadings or would have done so if we hadn’t done anything. We just used a chisel to cut the plastic off next to the glass. The brown ones are the straight 90 degree regular clips and the black ones had the extra 6degree angle added to accommodate the slope of the sill. There were, in total, just under 400 clips to screw into place, using up nearly 800 stainless steel round headed screws.

    Oak Beadings and Wings Installed

    Clips-in-place

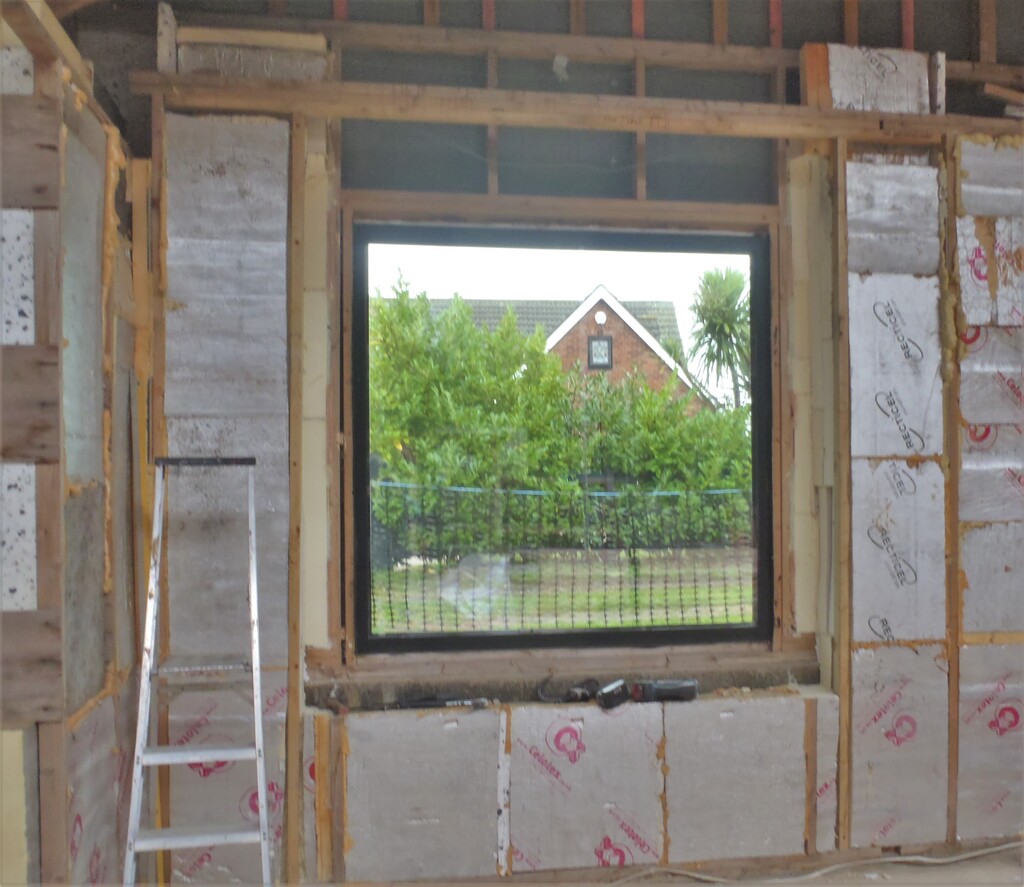
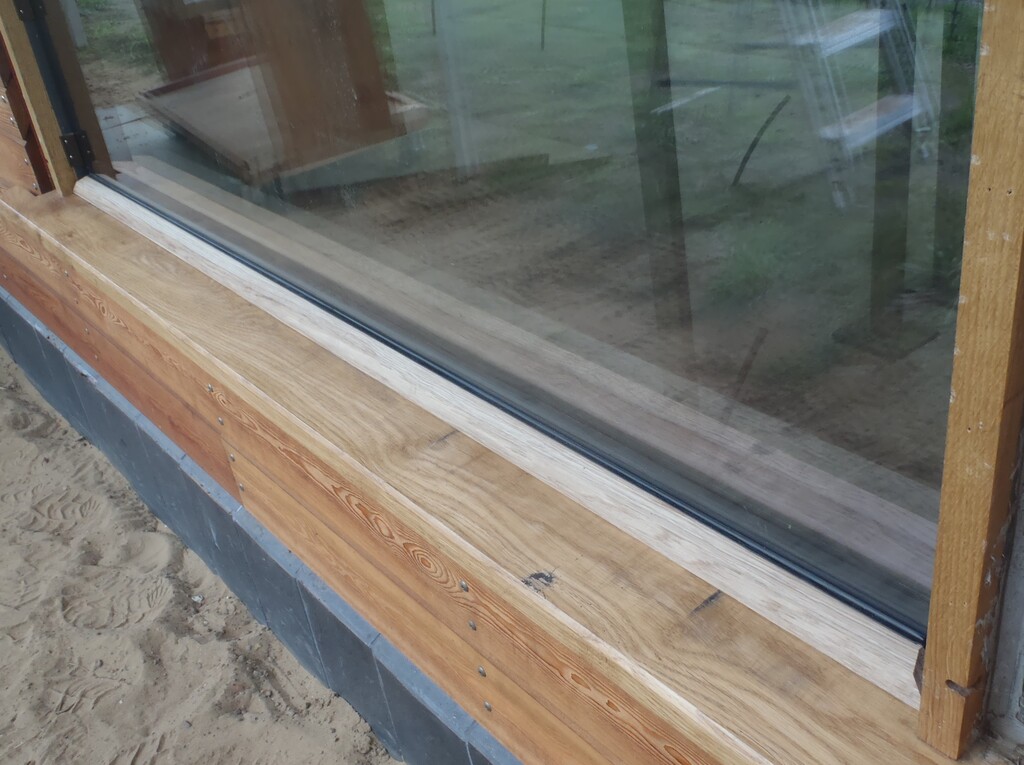
    Then each Oak Beading was trimmed to fit exactly each window in turn, using our chop saw and then our very sharp guillotine to slice off very thin slivers at exactly 45degree angles until each beading fitted in, nice and tight. The range of lengths were from 1613mm to 1616mm high and, for the larger windows, 1650mm to 1648mm in length. The narrower windows were pretty consistent at 1040mm and 830mm wide. We had to carefully hammer each strip down tight (using a shaped piece of oak with a rubber sheet material stapled to it) and work each beading down to the glass. The rubber seal was carefully teased straight before applying the final tap home.

    Oak Beadings and Wings Installed

    First-window-bead-in-place

    Oak Beadings and Wings Installed

    All-the-beading-on-a-Window


    In our second week, we tackled the Oak Wings that goes on either sides of each window itself, to cover up the Larch cut ends. We had made them over the last twelve months during disruptions to other tasks and they have stood ready for a while since February this year. So at last, we proceeded to finish off the last stages of creating these Wings, by setting up the chop saw with the 6degree angle to slice the bottoms of each piece, making sure we had a set of “left” and “right” handed ones. We swopped around several pieces to select the best looking ones and finally arrived with a set of 12 pairs. The left over pieces (three of them) were bundled together, along with the remaining Oak Beading strips and stored away for any future needs like doing repairs.
    Then we went around to each window in turn, and measured the precise height of the vertical sides, recording the left and right numbers. Using this data, we carefully sliced the length on each wing (after confirming the method on the first piece and testing outside on a window). Finally, we bevelled a small 45degree chamfer on the ends to clean up any splinters and also soften the visual joint when the Oak Wings are installed. The whole lot was vigorously sanded smooth.
    The next task, a tricky one, was to place each piece into our template for making the T-slots we got in our window frames, and this time, using a router with a small 3mm diameter cutter, proceeded to make pilot holes for the locking stainless steel countersink headed screws. These screws provides the “key” to slide into the T-slot “holes” to lock each wing onto our window frames to form sideway flaring wings, shaped in the octagon scheme we got around the whole house.
    The tests went well, making slight adjustments to our template and making lots of test pieces (short 6inch ones) and checking them outside on a window frame, before committed ourselves to doing all the other 24 pieces. That done, we could finally take each pair outside and install them to the eleven windows. The only one we didn’t do is the Q window that is in our Conservatory. In that room, the walls are left uncovered, no cladding etc. as we wanted to build the whole Conservatory first before deciding on the final wall coverings. So that pair of Oak Wings have been also stored away.
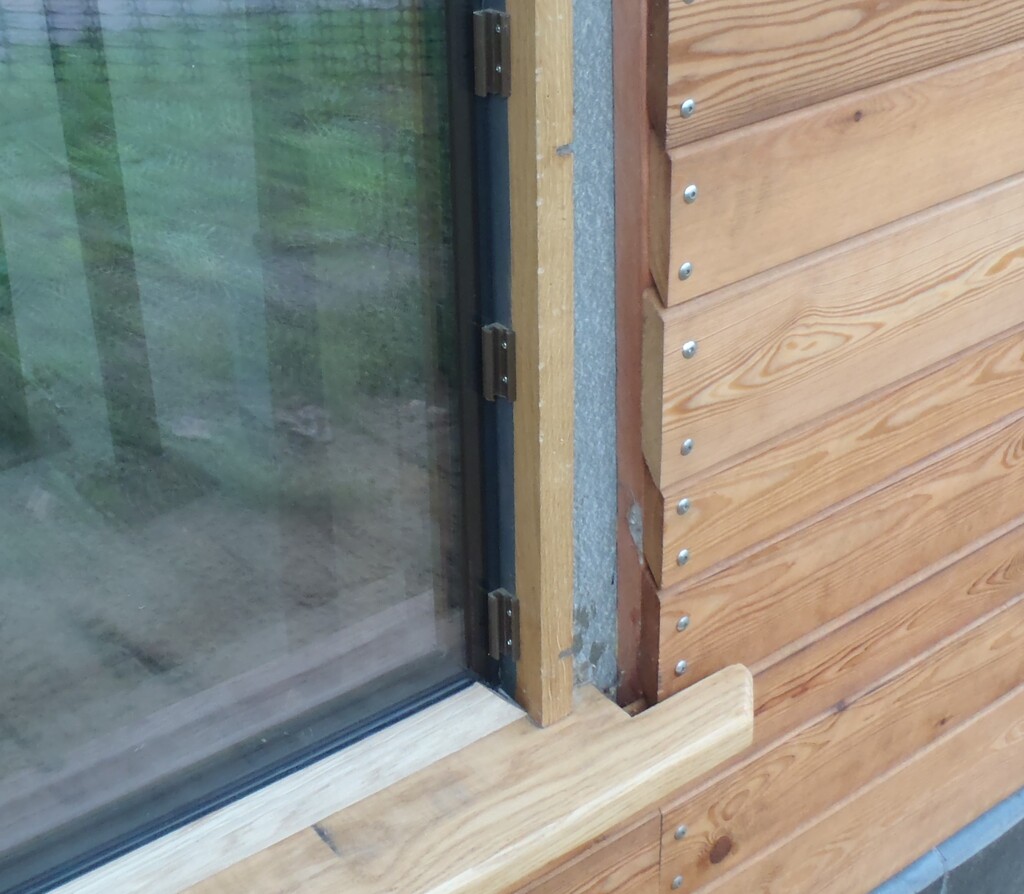
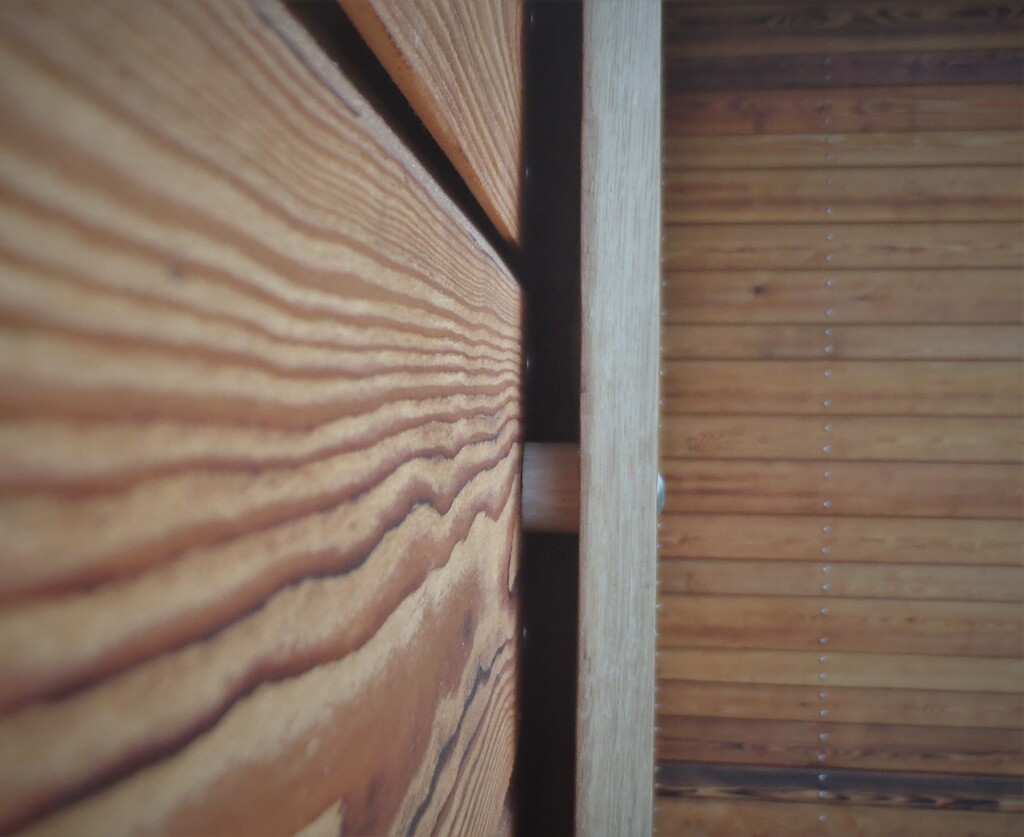
    The wings were fixed into place with mushroom headed stainless screws, just like all the other screws fixing down the cladding and Oak Corners. We had to slice up lots of 25mm dowel pieces to fill in the gap between the wings and the Larch cladding, to make the whole thing very rigid and have plenty of air circulating around behind the timber pieces to keep them dry and free from wet rot.
    Oak Beadings and Wings Installed

    Wings-on

    Oak Beadings and Wings Installed

    Spacer-behind-the-wing


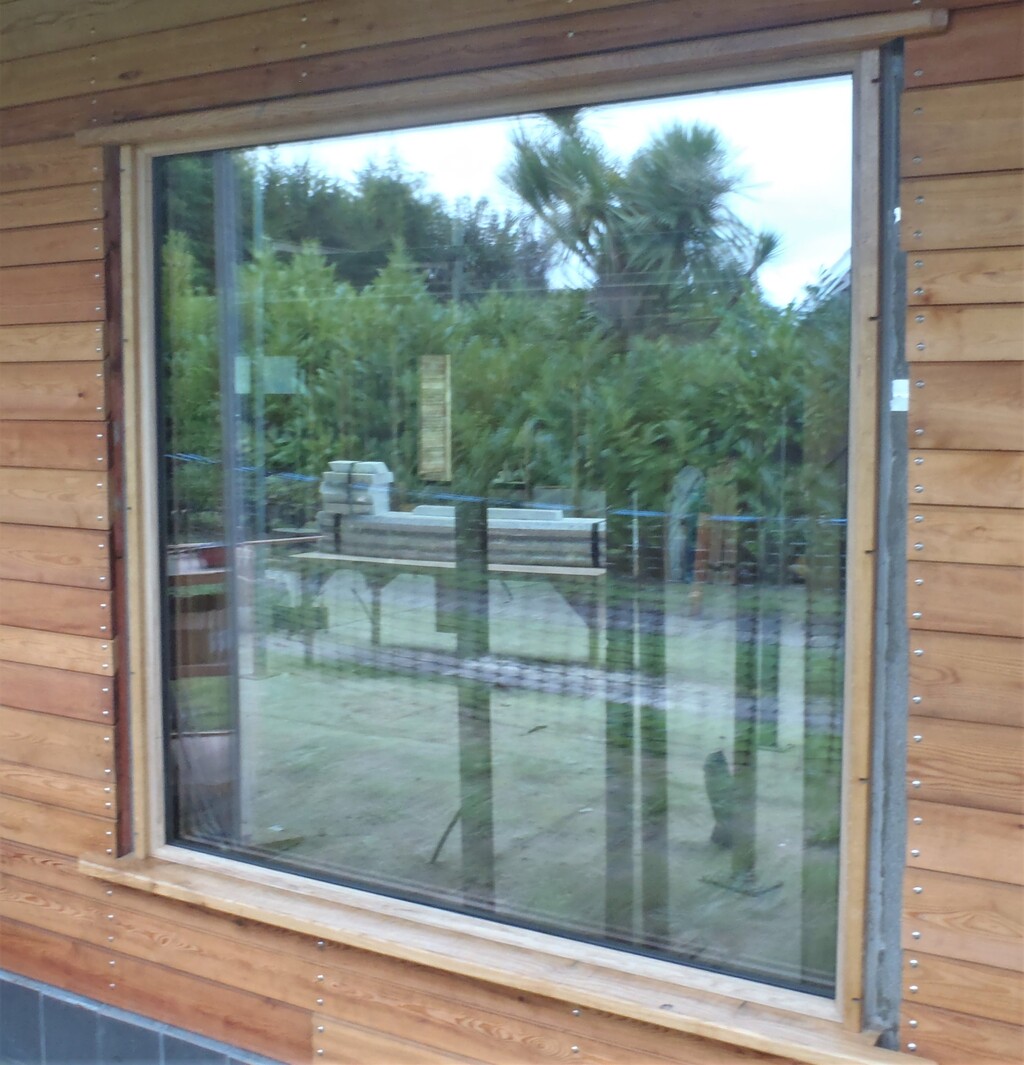
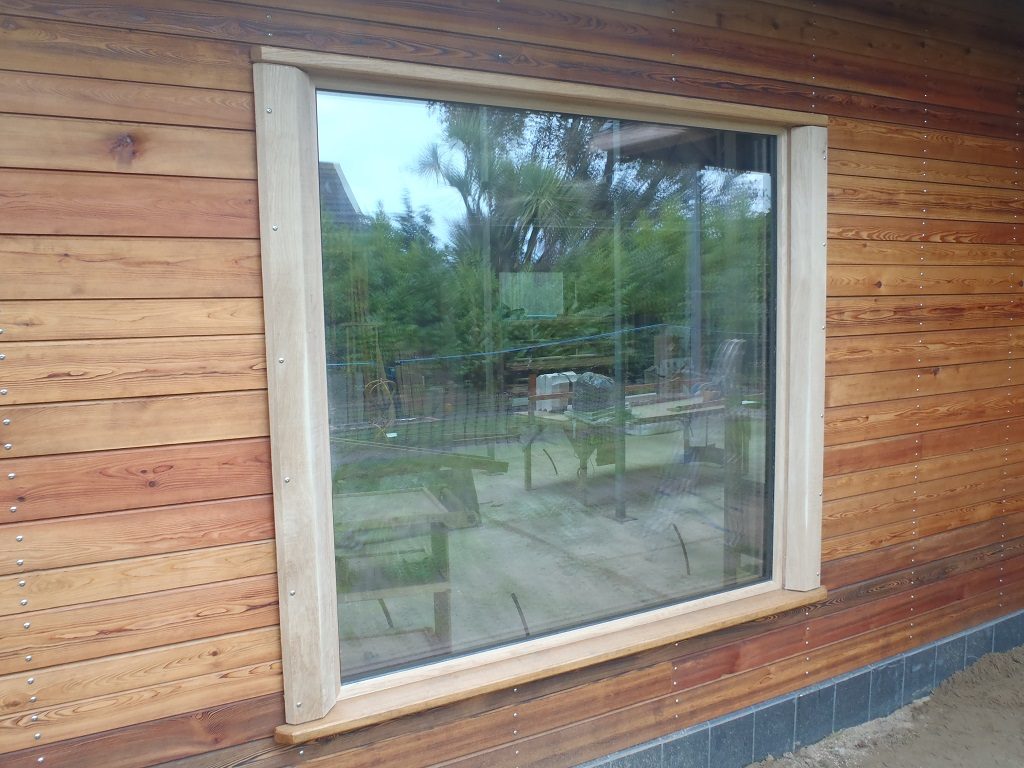
    The last task was to smooth off the joint, that is overlapping with the frame of the window, using a mini planer and our new battery powered orbital palm held sander and then giving everything a good dose of timber oil, the first of many coats, to protect the timber from aging in the Sun and weather.

    Oak Beadings and Wings Installed

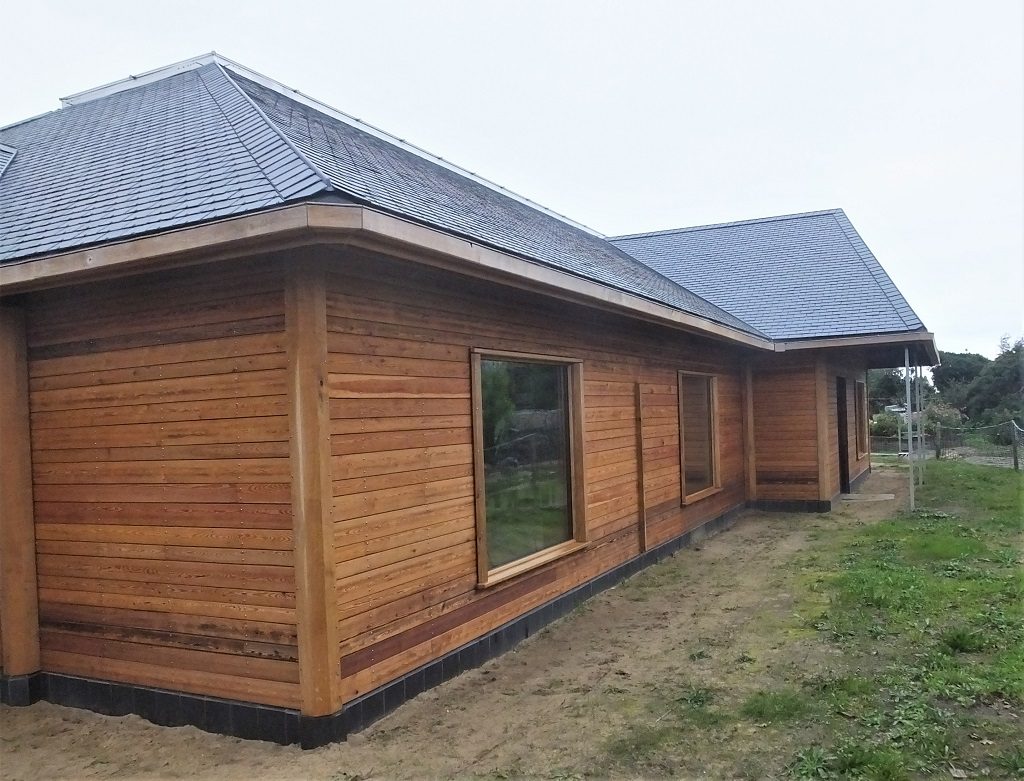
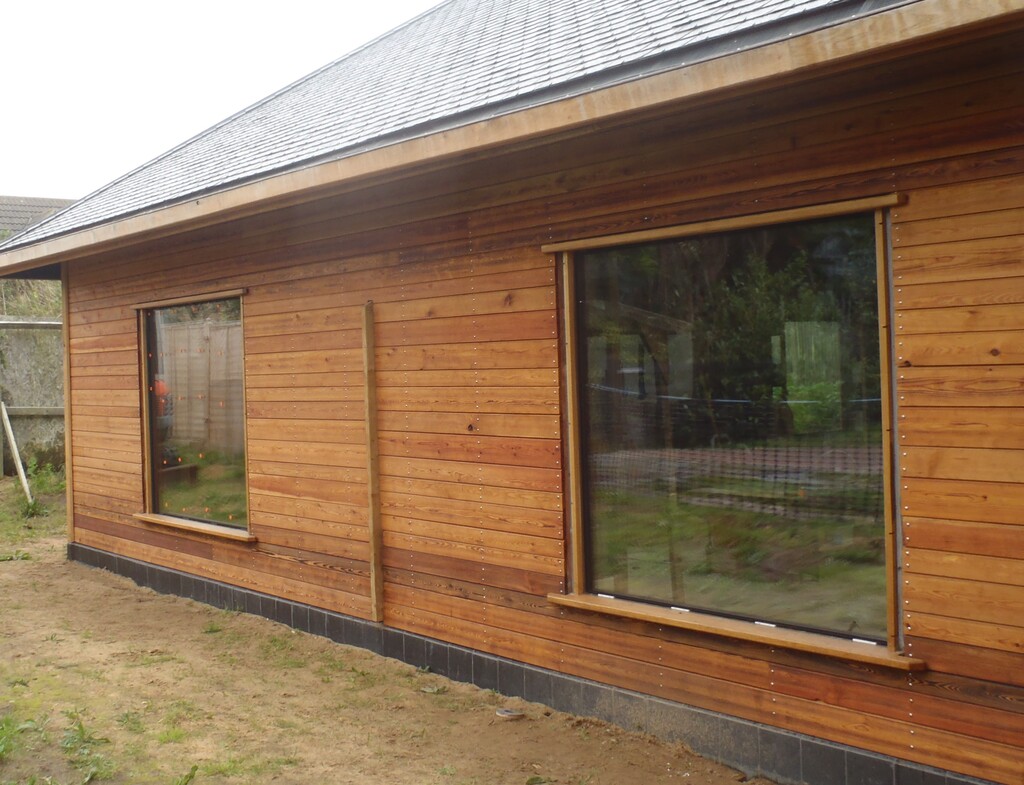
    Windows-All-finished

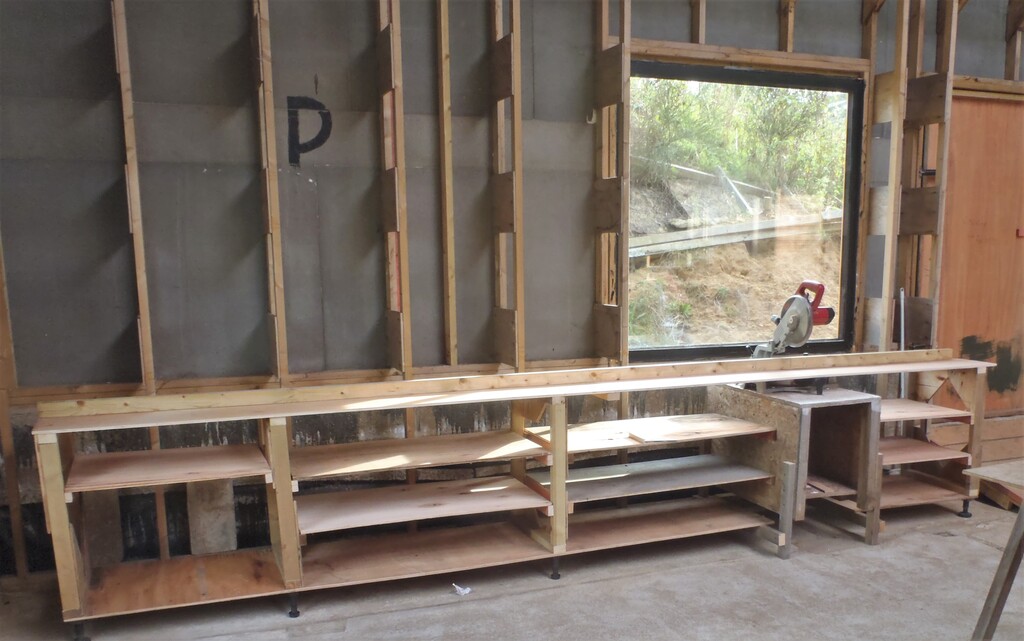
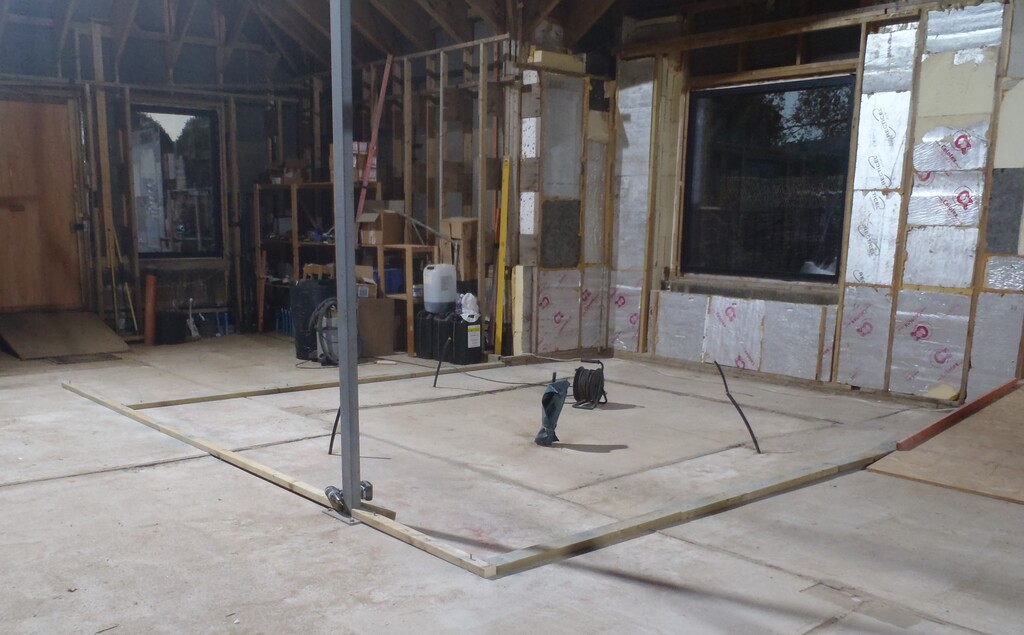
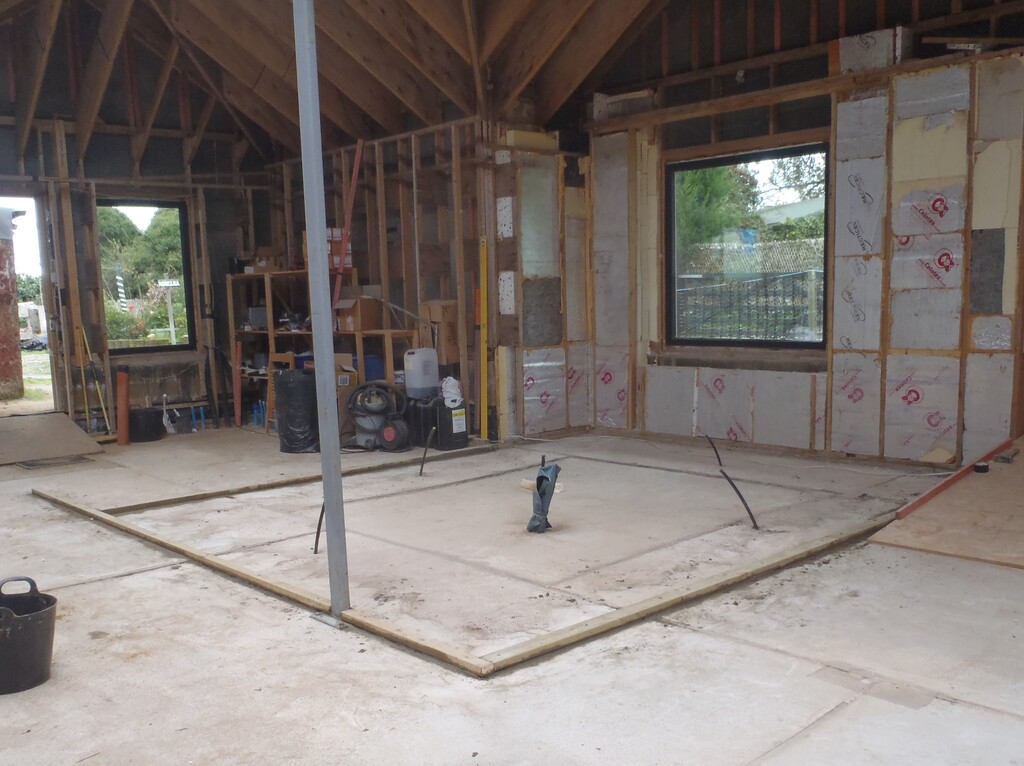
    That pretty much finishes everything we have to do to our exterior of our house (at last!!) and we can move on to starting to building the interior structure etc. The first job is to do the Entertainment Room, putting up its concrete sound-proofing shell.

  • Ordered Concrete Beams and Blocks plus Sand and Cement for Entertainment Room

    Today, for our Entertainment Room, we calculated the number of concrete blocks and concrete floor beams needed to build a sound reducing barrier around the walls and ceiling. There are twelve rows of standard dense concrete blocks, a lintel for going over the doorway and eleven 4 metre long concrete beams, the smallest one available (the 150mm by 120mm wide version) because it is just a false ceiling and not holding up any loads apart from itself. The concrete shell is approximately 5metres long by 4metres wide and 2.6metres high, just shy of the first floor joists.
    The total number of blocks is around 635 but we ordered 650 to have some spares. We also ordered a ton bag of soft sand and eight bags of regular cement and a concrete lintel measuring 1200mm long, 100mm wide and 65mm thick to go over the doorway, it is rated at seven kilo-newtons (7kN/m) and we calculated that the block and beam ceiling will be 3.6kN per metre , loading over the 900mm wide doorway. That means a double safety factor, without us having to do anything special, just the minimum strength of the lintel we selected.
    We have asked Jewson’s for a price on the whole job and we are waiting for it…

  • Twelve Triple Glazing Units Arrives and All Are Installed

    Very very early Friday, with all the alarms waking everyone, we staggered up to get ready for the arrival of the glass which could arrive as early as 8am!
    What we are expecting is as follows:

    • Nine large units, each weighing 118kg
    • Two medium units weighing 75kg
    • One slightly smaller one weighing 65kg.

    We had our troupe here by 8am or soon after, under a very heavy cloudy sky and swirling winds. We passed the time having a much needed hot drink and fortunately, it wasn’t too long to wait. The van arrived at 8:47am.

    Twelve Triple Glazing Units Arrives and All Are Installed

    The-Glass-arrives

    Twelve Triple Glazing Units Arrives and All Are Installed

    12-Triple-glazing-units-waiting-to-be-unloaded

    Twelve Triple Glazing Units Arrives and All Are Installed

    The-edge-of-a-Triple-glazing-unit


    We carefully unloaded each unit, using four suction pad handles and transported each one on the adapted trolley to near each window position around the house. We put the glass on a narrow piece of polystyrene sheet to both protect the edge of the glass and keep it clean from the damp sandy soil.
    Twelve Triple Glazing Units Arrives and All Are Installed

    Preparing-to-lift-a-unit-off-the-van

    Twelve Triple Glazing Units Arrives and All Are Installed

    Moving-the-heavy-glass

    Twelve Triple Glazing Units Arrives and All Are Installed

    Unit-ready-to-install


    It took us 50 minutes to complete this task of moving well over 1.2 tons of glass. We had a much needed cup of tea and a slice of cake before resuming work!!


    Then this is the big moment, will the glass fit?
    And yes of course it did!
    All of them!
    We proceeded around the house, with one person inside taking off the wax protection paper off the sticky tape and four lifting up the glazing unit up and slotting it into the framework and then screwing several plastic beading clips against the glass to secure it into place.

    Twelve Triple Glazing Units Arrives and All Are Installed

    Holding-unit-whilst-tape-is-uncovered

    Twelve Triple Glazing Units Arrives and All Are Installed

    Glazing-clip-being-installed

    Twelve Triple Glazing Units Arrives and All Are Installed

    Glazing-clip-installed


    We started this process at 10:30am and got the last one done at 12:30pm.

    We all had another much needed break to recover and enjoy lunch!!
    So that concludes the installation of the Triple Glazing units, all Twelve of them! This makes us pretty much weather proof! Yahoo!
    The final step to do next week, is to fix well over 300 of these plastic beading clips, cut the oak beading strips to length, mitre the corners, add the rubber seals and slide them onto the plastic clips. After that, we need to finish off doing the oak “wings” that covers up the ends of the larch cladding on either sides of each window. At this point we will be finished Phase 4 (The exterior of the house)!

    Twelve Triple Glazing Units Arrives and All Are Installed

    Windows

    Twelve Triple Glazing Units Arrives and All Are Installed

    Reflections