After repairing the Bevel Slicing machine, we proceeded to finish off the final two “L” rafters to have their bevel ends sliced in. So we now have five “L” rafters plus one odd pair of flanges (to fill in a large gap right up near the steel I-Beam end of the K Ridge) all ready.
To finish off the day, we went through the nine other rafters we had already constructed and tidied up the ends, especially the wall ends where our webbing wasn’t cut deep enough to keep clear of the noggin and the wall’s top-plate.
We have other commitments tomorrow (Friday) and we hope that Saturday will warm up and have melted all the snow and be dry so we can put up our 14 rafters we got ready!
Blog
-
“L” Rafters All Done and the Nine “P” and “H” rafters Tidied Up
-
Bevel Slicing Machine Repaired
Today, while it was snowing outside, we got down to repairing our Bevel Slicing Machine which suffered from a burnt out electric motor. We had ordered another handheld circular saw off the web and it arrived yesterday. but upon inspection, we decided that it wasn’t ideally suited for the job, the construction of the metal guard plate wasn’t flat enough to be bolted onto the plywood surface.
So we looked at two other circular saws we had and one proved to be much better and easier to adapt to the requirements. After discussing the pros and cons, we sacrificed this unit and converted it into our Bevel Slicing machine.
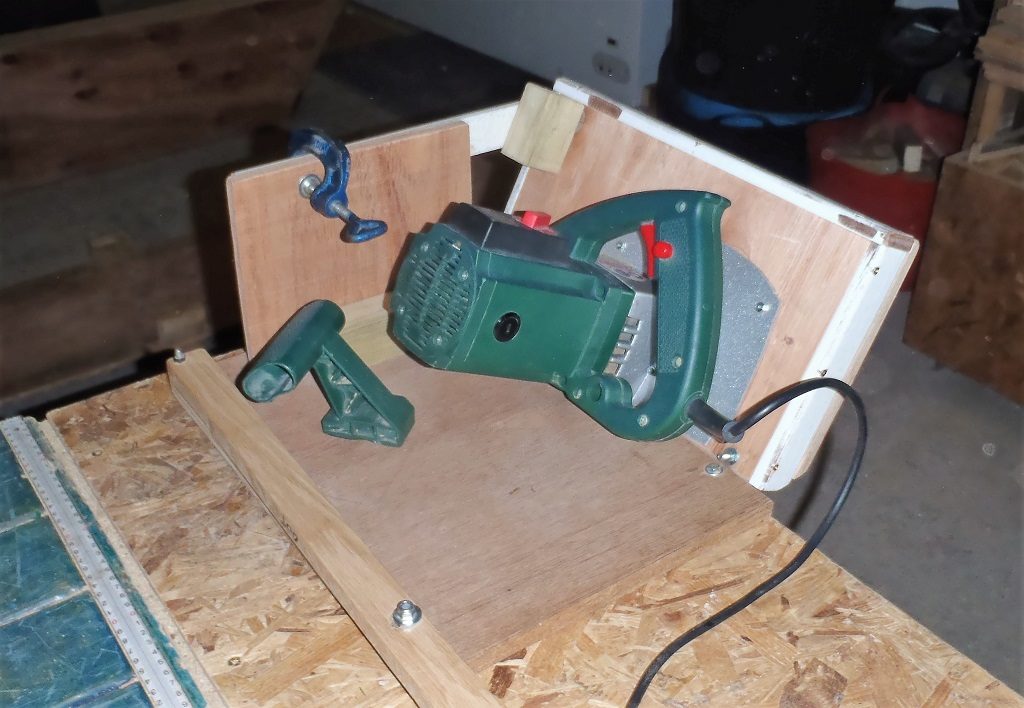
Upgraded-Bevel-Saw
One of the positives was the ability to change the speed of the motor and we felt that this was a big advantage, especially we felt that the previous version was operating too fast for the size of the 300mm saw blade we needed and causing the wood and the glue or the pine resin to burn.
In conclusion, after slicing the final two rafters, it does seems to be the case that slowing down the blade does reduce the burning side-effects. -
Snow!
We woke up to a lovely coating of snow over everything!
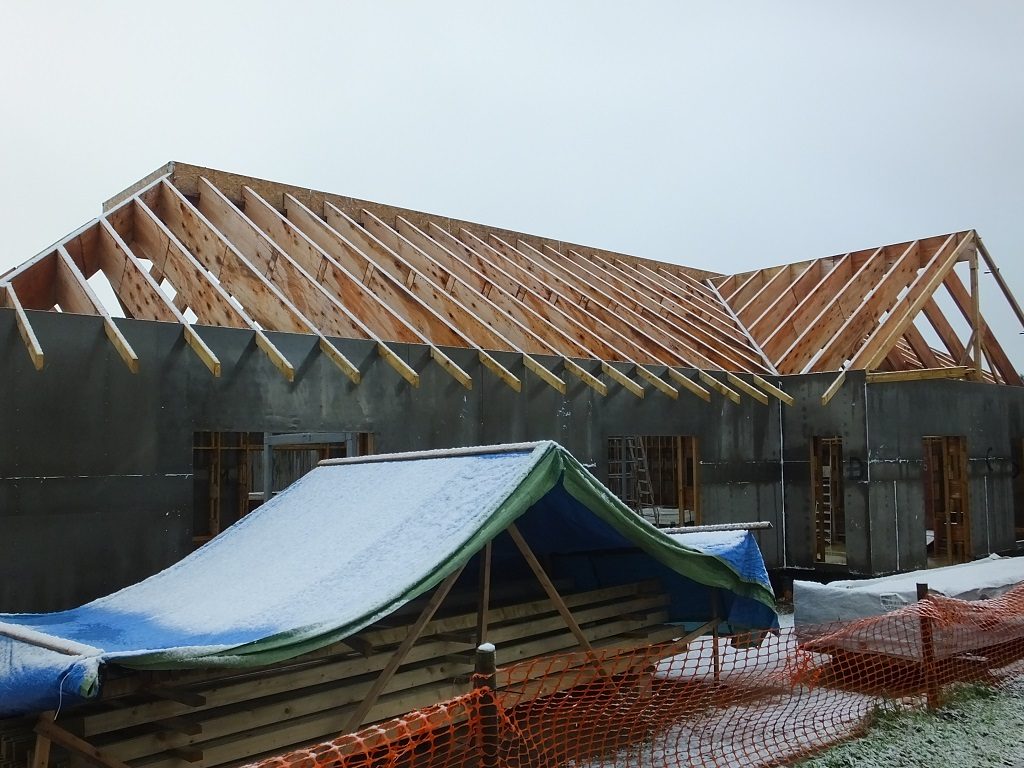
Snowy-House
It isn’t a real stoppage to our work as we have things to do in our workshop but there were plans to look at our garden shed’s roof and also put on extra tarpaulin coverings on our timber storage stacks .. but alas not when we have about an inch of snow on everything!! -
Nine Rafters Created for “H” and “P” Roof Sections
After finishing the preparation work this morning, like filling up the glue dispenser bottle, cutting some more straight noggings as well as eight little “filler” noggings too, then collecting 14 polystyrene foam strips and finally sweeping the whole workshop, we were ready to start assembling the nine rafters in nine separate sessions.
And amazingly enough, we managed to do all nine rafters in one day! We are definitely speeding up our technique and procedures and now can turn around a long rafter in about 30 minutes on average – wow!
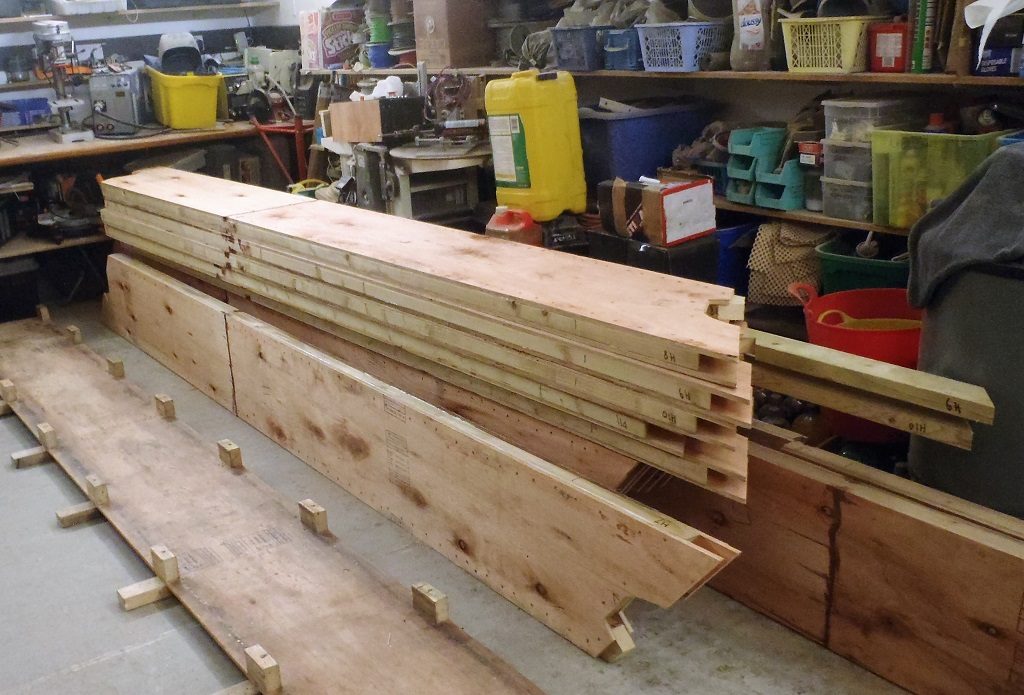
Rafters-H7-to-H10-and-P11-to-P15-made
Tomorrow, we will look at our Bevel Slicing Machine and repair that. Also look to see where the leak in our garden shed roof is plus improve the coverings on our various timber storage stacks too. Then, we will Bevel cut the two remaining rafters and dress the nine rafters we did today to tidy them up and leave them all ready for Saturday to be installed outside. -
“J” Roof Section Fully Complete and Preparation Begins for “H” and “P” Sections
First thing this morning, we hauled out the five “J” rafters outside and got them installed up into the roof. This cleared up some much needed space in our workshop.

All-J-Rafters-Finished
We finished off the morning by finishing off converting the various templates to the new 40 degree mode.
After lunch, we started the preparation work for the “H” and “P” sections of the roof (these sections are over the Utility room and Bedroom 3 and back door, and over the Great Room respectively ). We needed 36 plywood webbing strips and 9 lengths of both the 63mm and 89mm CLS timber, all so we can make nine rafters (4 for the “H” and 5 for “P” sections).
We sliced the 40degrees ends on the webbing strips, cut down to required lengths and paired them off ready for their respective flanges. The flanges had also the 40degrees ends done (with two of the 89mm CLS having the Bird’s mouth cuts too) and all of them chopped down to their required lengths too.
We spent the remaining of the time making loads of noggings until the 18:00 “tools down” time arrived!
Tomorrow, we will proceed to make these nine rafters, hopefully all in the one day – that would be good!! -
Bevel Slicing Almost Complete Until ..
This afternoon (the morning was skipped due to other commitments), we got down to the task of slicing the bevelled ends on all the remaining rafters for the “J” and “L” sections.
We managed to do all five “J” rafters and then did three out of the five “L” rafters before our Bevel Slicing Machine developed a fault in the electrics. Oh Damn and Blast!! We took the covers off the motor and upon close inspection, there are signs of the copper wires in the windings are showing cracks in the insulations, probably caused by overheating. We realised that the motor is working very hard and getting hot so we tried to keep it cooled down by halting every now and again and let the motor run without any load to blast cool air through the motor unit. But alas, the motor still suffered, probably early on when we first started doing this task several weeks ago and perhaps not realising how hot things were getting and the damage was already done.
We will have to replace the saw module with a new one which we have now ordered off the web.
In the meantime, we carried on with the measurement of the “H” section to confirm our numbers we did last week on Saturday and we now have a better set of numbers for our spreadsheet. And finally, we started converting our various templates to the new 40degree angle as we are now entering the next stage on our roof. Tomorrow, we will start preparing the material bits and pieces to build four rafters for the “H” and five rafters for the “P” sections. Despite our trouble with the Slicing machine, we are not going to lose too much time as we can get on with these new rafters while we wait for the repairs. -
Remaining Rafters for “J” and “L” Now Manufactured and “H” and “P” Measured
We resumed our work (after a two day break) on manufacturing the remaining rafters for the “J” and “L” sections of the roof. There were 10 individual elements plus an odd one to fill in a small gap up on the “L” section near the steel I-Beam.
Half way through the task, after lunch, we went outside to measure the last set of rafters that connects to the steel I-Beam and these were on the “H” and “P” sections (at opposite ends of the house) the “H” being over the back door and Utility room + Bedroom 3 and the “P” section solely over the Great Room. We moved the scaffolding tower to each end of the building and did the measurements, ready for our spreadsheet .. it was very cold out there!
We finished the last four rafters after that, all done by 5pm and they are now curing. All ten will have their bevel ends cut on Monday and installed Tuesday. -
Half of “J” and “L” Sections Completed
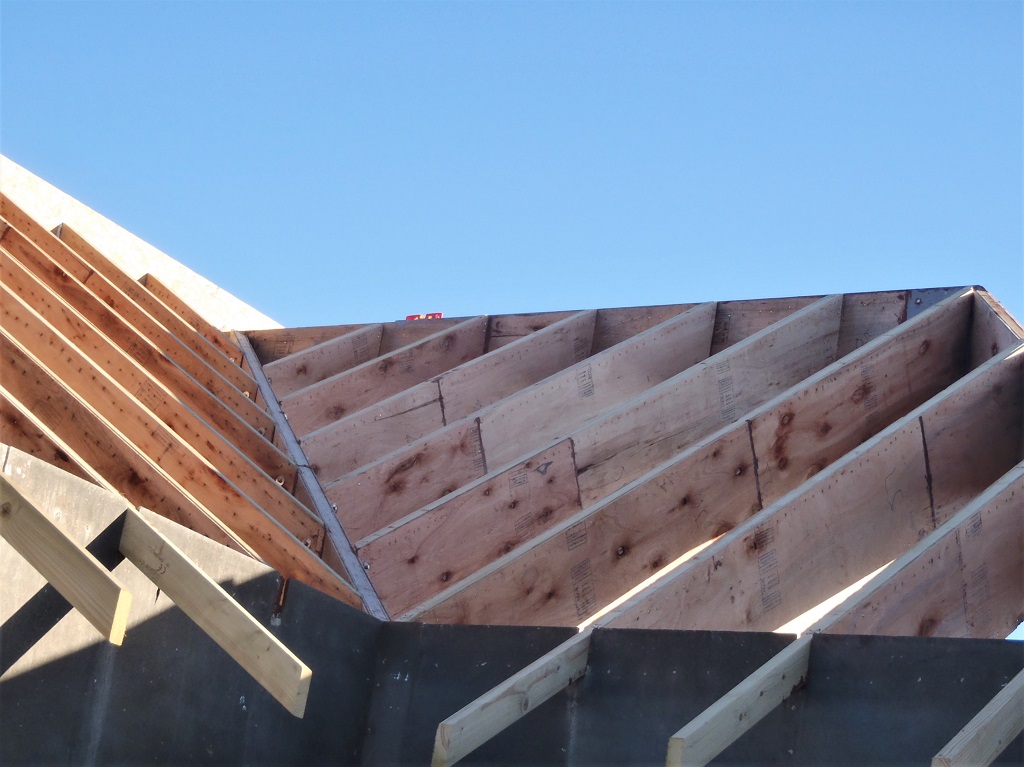
This morning, in slightly breezy conditions, we took out the six rafters we have previously created and then completed the cutting of the bevel ends yesterday and got them all installed.
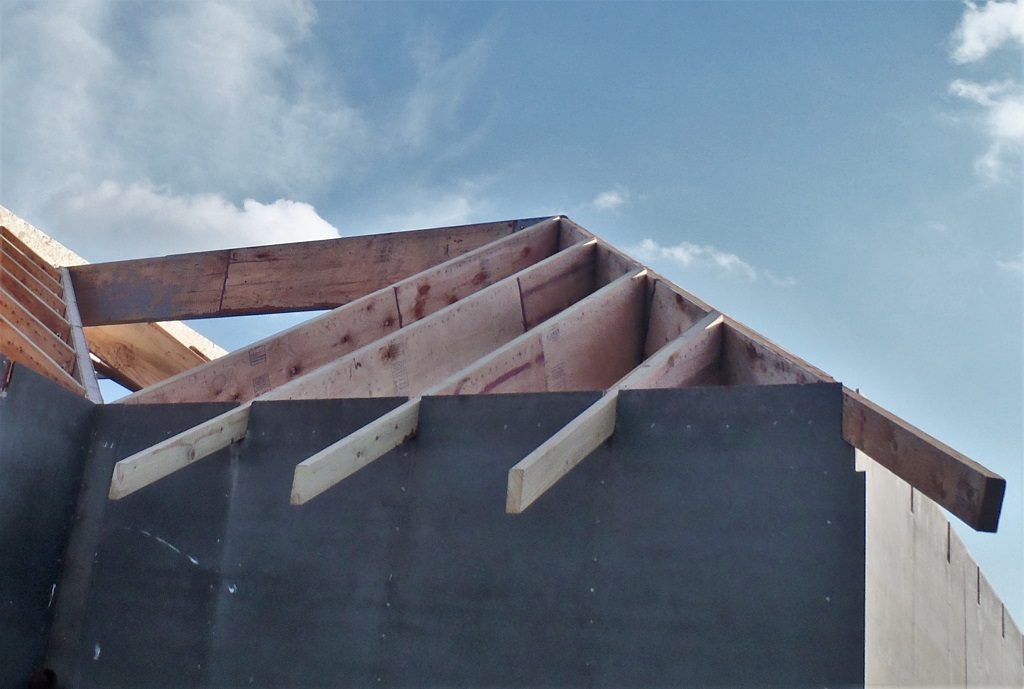
Rafters-J6-to-J9-Installed
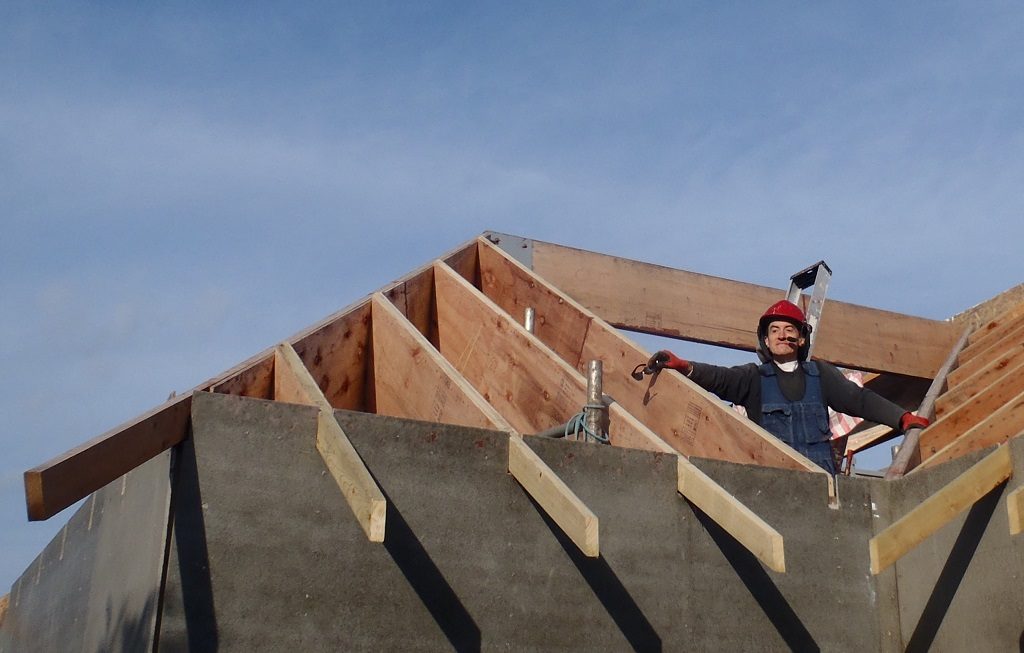
Rafters-L1-to-L4-installed
We did it all by hand without needing the electric hoist unit and it all went very well.
We then measured the length of the next set of rafters that will connect onto the IJ and LM diagonal valley beams and transferred the results to our spreadsheet.
After lunch, we brought in the next set of plywood webbing strips (25 of them), along with 5 lengths of the 63mm CLS and 6 lengths of the 89mm CLS timber. These were given the 33 degrees angled ends (for the last time .. no more 33 degrees roof sections after this lot!) and then cut down to the required sizes. These don’t have any clearance notches or bird’s mouths, just plain and simple.
These were sorted into five sets of two rafters for each production run in our 6 metre long template.
Then, brought in 25 straight noggings, 20 and 10 diagonal noggings (63mm and 89mm wide respectively) and 9 polystyrene foam strips.
We finished off the day by tidying up the whole workshop, taking outside a large heap of cut-offs plywood strips to our garden shed, filling up another couple bags of wooden bits of rubbish, swept the whole floor and got everything ready for Saturday to proceed with the manufacture of the next ten rafters to complete the “J” and “L” sections of the roof. -
“J” and “L” Proceeds …
This morning, we finished off the last two rafters hanging over from yesterdays work. Then we adjusted our Bevel Slicing Machine to the new angle of 57 degrees which is by far the biggest depth of cut we have to do. The final cut surface spans across 115mm with a large cut-off pieces.

These-bevels-are-very-wide
It is very slow work and very hard work for the electric motor to cut the wood, the teeth on the saw blade only just comes through the cut which means the blade is actually cutting through about 250mm of material and that is enormous amount of work!!
We did a small rafter J9, to test that it did the job and we took that one outside to fit it into place. It was ok so we glued and screwed that one! Then, we tackled the longest one, J6 which has a funny “half” bevel end on it because it fits into a metal bracket. This one also went outside and got installed into place too.
but by this time, it was getting dark so we just carried on slicing the bevel ends on the remaining rafters in the workshop, as mentioned above, doing it slowly and carefully without over straining the engine and equipment.
So tomorrow, in the predicted strong winds, we will take the six rafters outside and install them all up into the roof and then finally measure the remaining rafters we were going to do today! -
“J” and “L” set of Rafters In Progress
For the start of a new week, we start on a new section of the roof. This time, it is the “J” and “L” sections, which are over Bedroom Two and Bathroom plus cupboards! We fetched twenty plywood webbing strips, 6 lengths and 5 lengths of the 89mm and 63mm CLS timber respectively. Oh yes, 8 polystyrene foam strips and a heap of various noggings too.
Then we did the task of cutting the angled ends in all the webbing strips plus also the wall clearance notches too and proceeded to slice the CLS timber pieces down to required sizes, to end up with all the pieces ready to create eight rafters (four “J” and four “L”), all sorted in pairs of two rafters per session of manufacturing. But before we start gluing and nailing, We refilled the glue dispenser bottle, swept the floor and throw away scrap wooden bits.
It was important to do in particular J6 and L4 rafters today so they would be dry and ready to be installed tomorrow as it would allow us to then measure the rest of the “J” and “L” sections and start preparing the bits and pieces for those rafters (J1 through to J5 and L5 through to L9).
By the end of the day and deliberately overrunning, we managed to complete six rafters, J6, J7, L4 plus L1, L2 and J9.
So on the morrow, we will bevel slice the ends off on all those rafters except J6 which has a funny shaped end in order to fit the metal bracket socket up on the K Ridge.
But first, we will finish off the last pair of rafters first thing in the morning so we can start making a mess with saw dust flying around when we do the angled bevel ends.