Category: Build Progress

  • Half of the Glazing Completed on Skylight

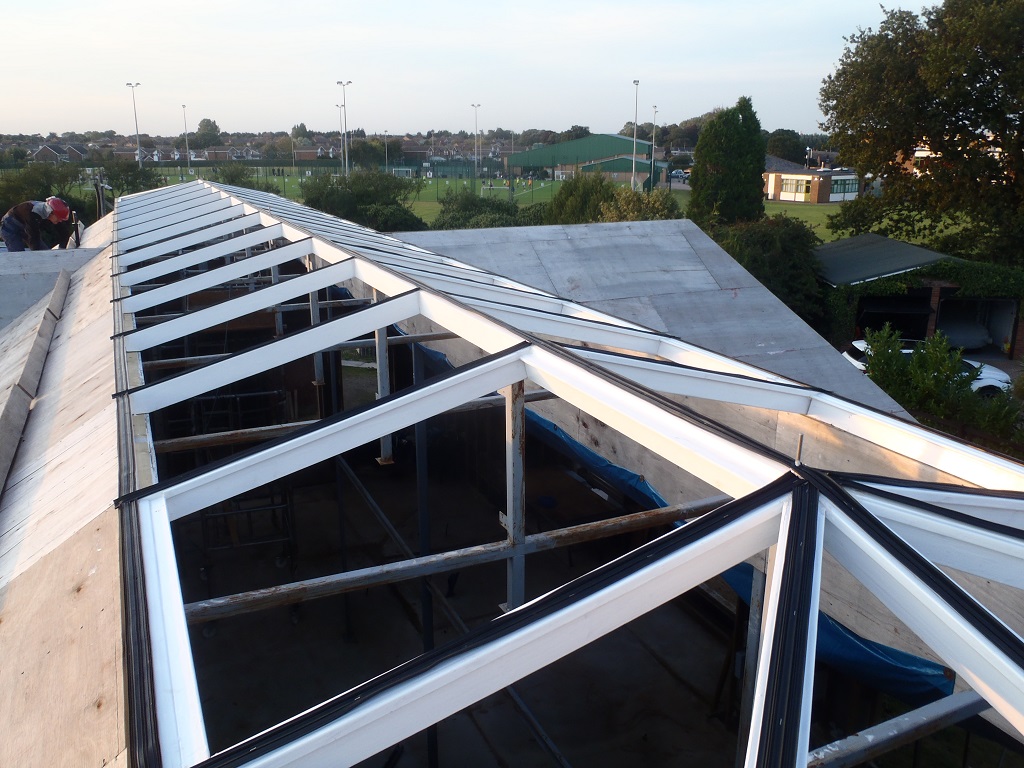
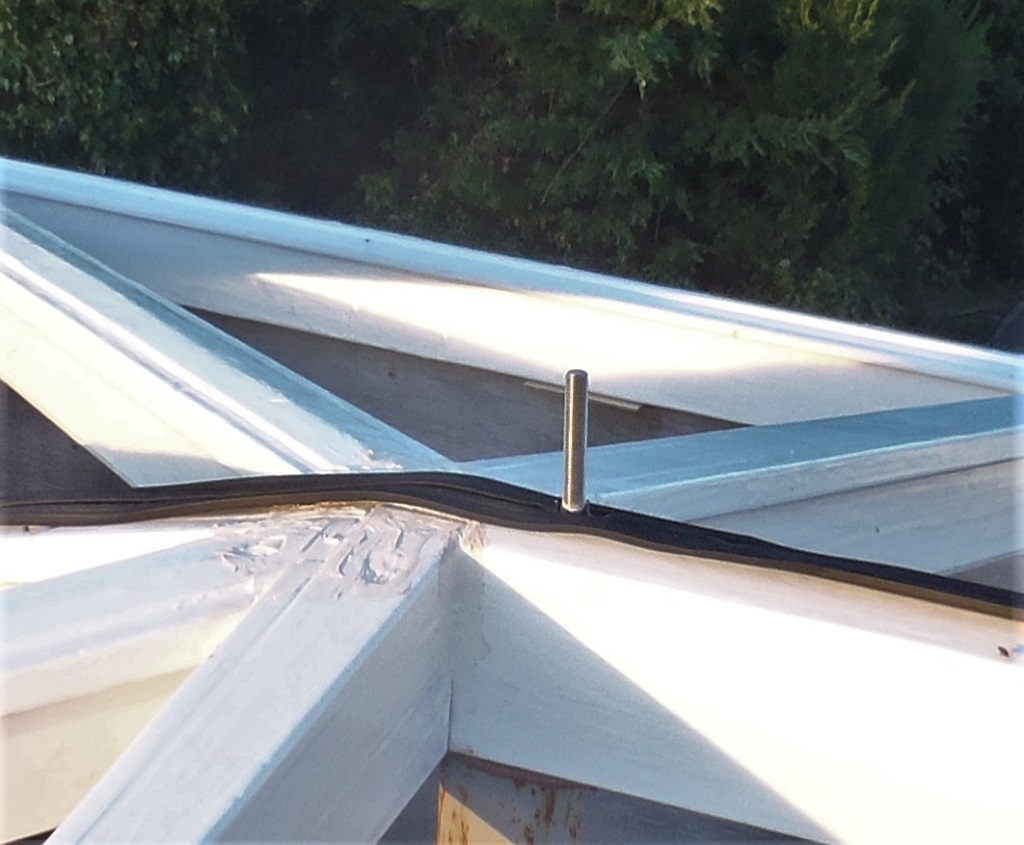
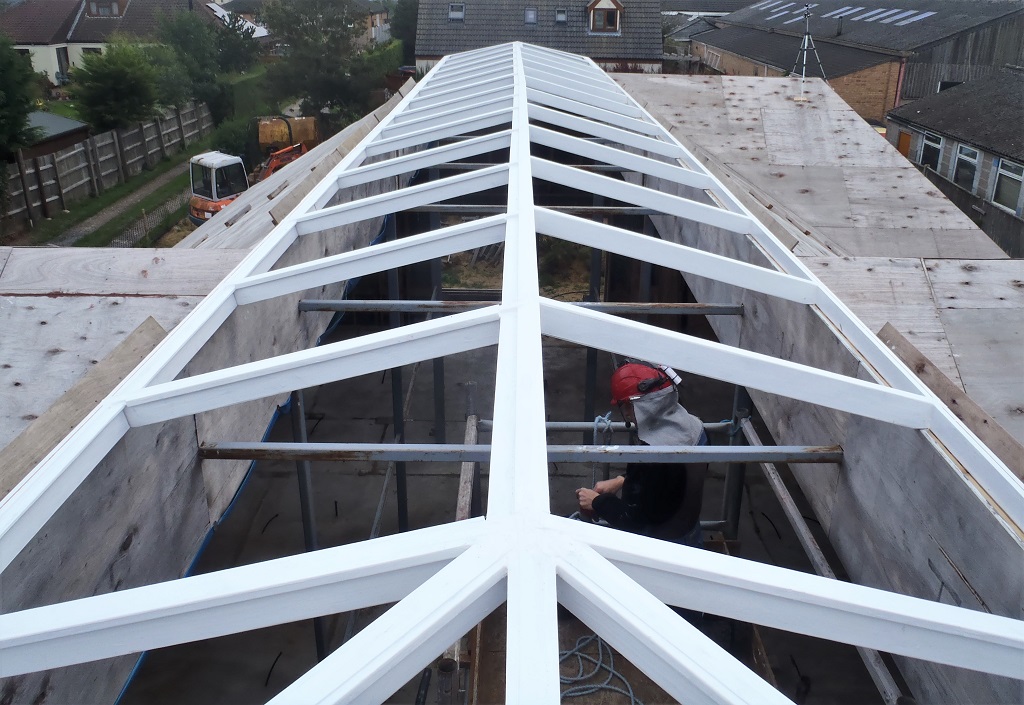
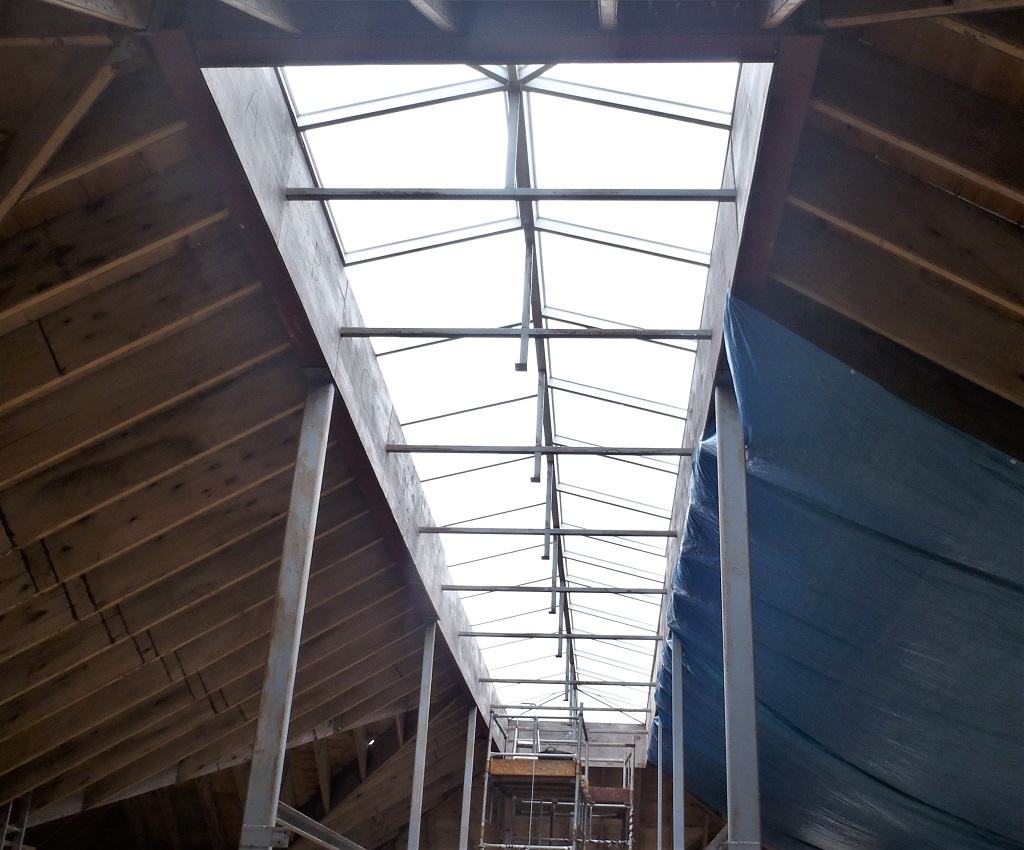
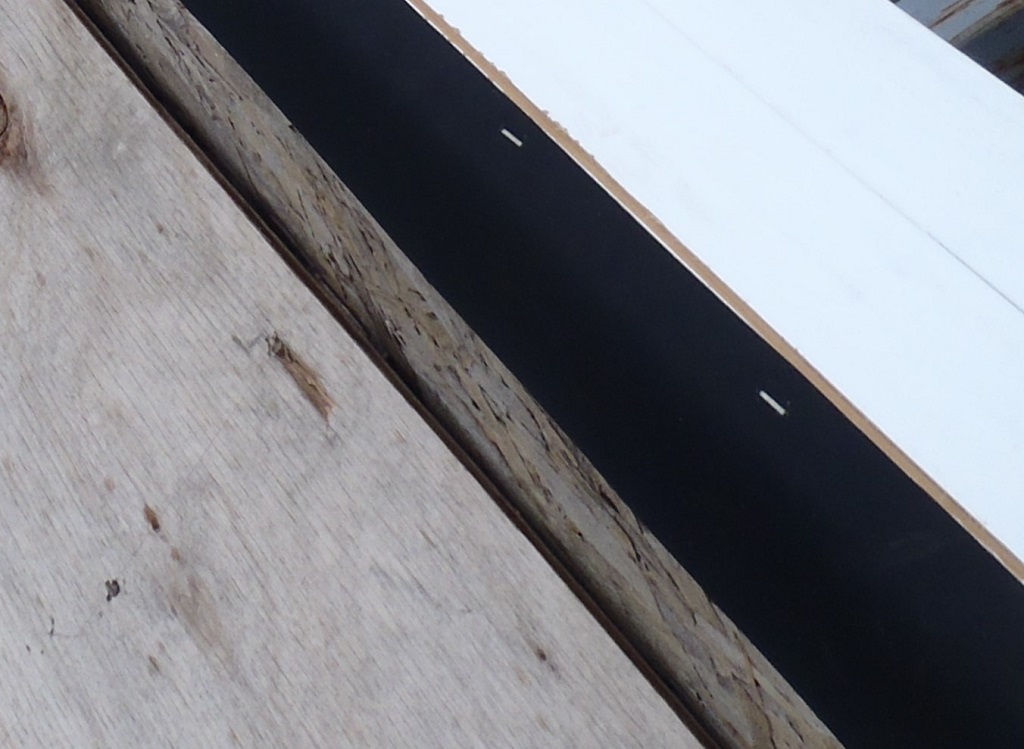
    On this glorious sunny day, we started the job of taking up the glazing panes up to our Skylight! But we had to finish off a single special job of slicing one of the plastic panes, the one over the staircase which needed a 13mm thin wedge shaped strip taken off. Then the next job was to insert a pair of rubber strips to all our Rafter bars, all 25 of them. Then we lifted up the polycarbonate plastic panes, starting off with the front set (labelled from 1 to 13) by using a rope and suction pad handle unit, to pull each piece one at a time and they rested in place (fortunately, we had no wind today!). We then dealt with them one by one, positioning them with an overhang of 65mm, centred on the to edges and then screwed down. The plastic has 2 protective films on it, we removed the inner one before fixing them and will remove the outer white film as the last thing we do on the skylight.

    Half of the Glazing Completed on Skylight

    First-half-of-glazing-done


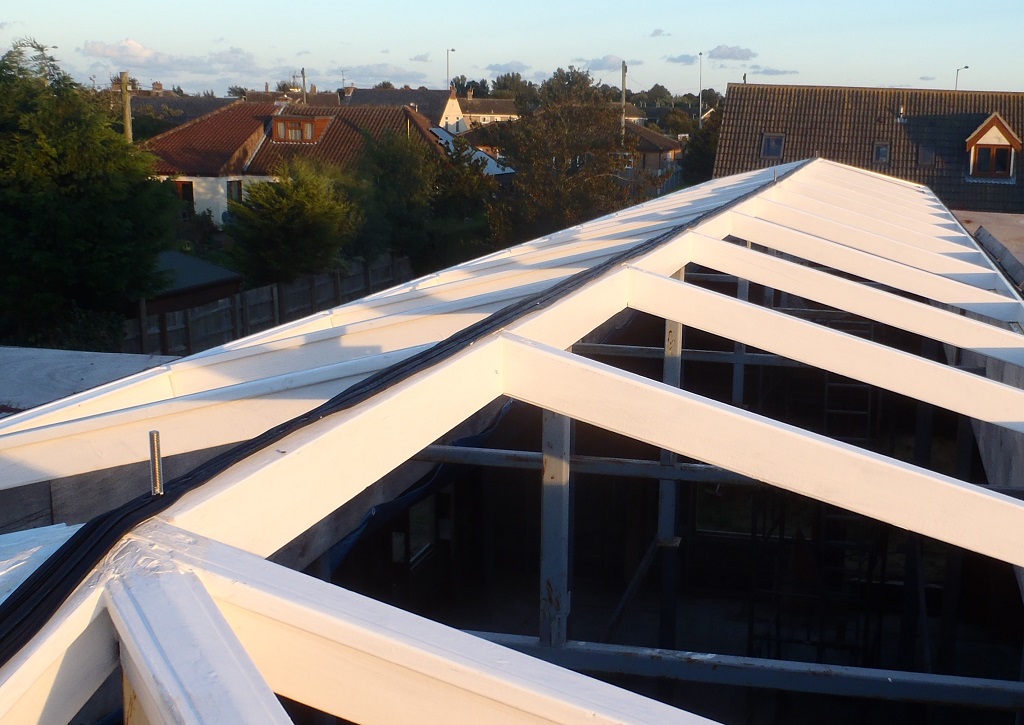
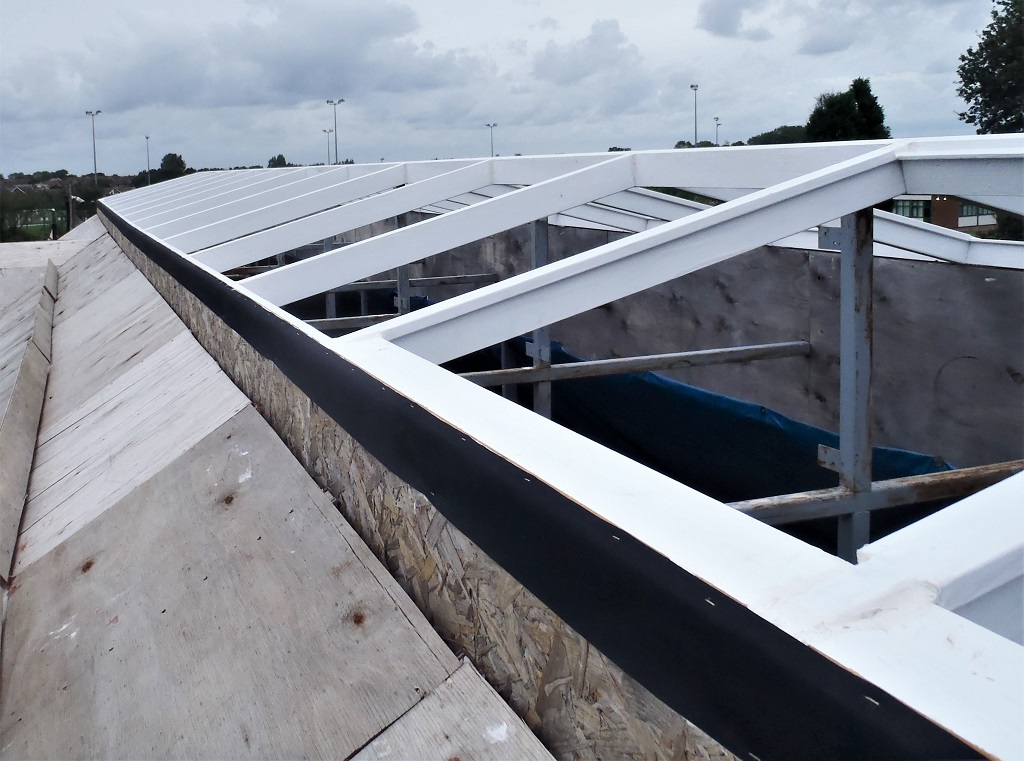
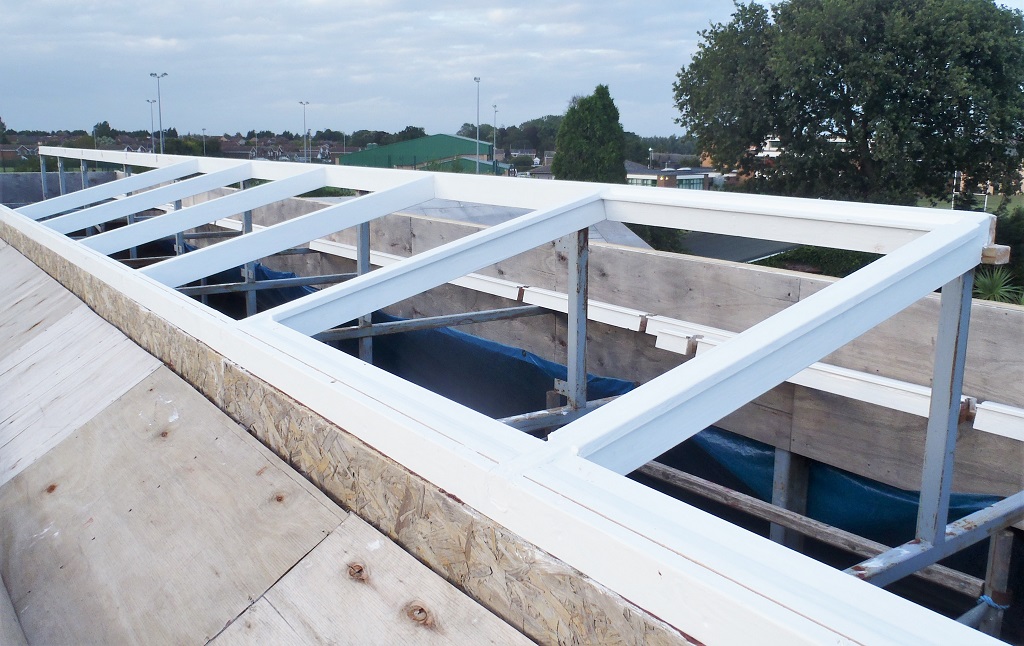
    We were very pleased with the results, all fitted just nicely and we now have the main set on the front completed. We did two on the back side, just to see how the centre ridge was looking and whether there were plenty of room for the ridge bar to fit, and .. no problems!!

    So on Monday, we will continue with the back set of glazing panes, another 10 to do and then install the ridge glazing bar down the middle and finally concentrate on sorting out the two ends which has four triangular shaped glazing units which will be fun to get exactly right!!

  • 25 Rafter Bars Complete with End caps plus 25 Polycarbonate Panes Prepared

    This morning, we finished off the task of fixing the End Caps to the set of rafter bars we are preparing for the first batch, mainly for the whole of both of the front and back sections of the skylight, and just finishing off by drilling clearance holes near the ends of each bar, ready for the stainless steel screws to fix the bars down.
    Next, we sliced up the small aluminium U channel pieces into 25 individual items, ready to be attached on the bottom edge of the plastic panes, this will help to stiffen up the fourth edge and help prevent a strong wind to lift up the overhanging portion of the polycarbonate panes and let in rain water into our skylight.
    After lunch, we started on the task of drilling holes into the plastic panes, 77mm from the bottom edge, to allow us to clamp down this fourth edge using another aluminium strip that will be screwed into the wooden rim framework.
    We made a template to consistently position where to drill these 8mm clearance holes (double the size of the screws to allow for movement in the plastic) and also we glued on the U channel pieces too.

    25 Rafter Bars Complete with End caps plus 25 Polycarbonate Panes Prepared

    Panels-drilled-for-fixing-and-edge-protected-1

    25 Rafter Bars Complete with End caps plus 25 Polycarbonate Panes Prepared

    Panels-drilled-for-fixing-and-edge-protected-2


    We got 24 of them all done including one of the special ones where we had to take the plastic pane up to the skylight to double check the accuracy and confirm that we needed to slice off 13mm sloping down to 0mm on one edge to fit properly. We got that done before the day ended. This adjustment was needed to accommodate our bent skylight!
    On Saturday, we will do the other special one that is part of these main set and then we can start installing these completed unit up onto the skylight – Yippee!

  • End Caps All Done, First 27 Rafter Bars Also Done

    This morning, we finished off the creation of the End Caps for all of the 33 rafters of the Skylight. They had a pilot hole drilled into the sticking out tab bit, and then this tab was reduced so it could slide into the end of the rafter bars. Finally, they were all given a bit of a rub to smooth edges and remove burrs.

    End Caps All Done, First 27 Rafter Bars Also Done

    End-caps-finished


    Then, after lunch, we got on with the task of slicing up our stock of rafter bars with their covers, which was supplied as nine lengths of 3metres long and 5 lengths of 4.8metres. These were first sliced into more manageable pieces, before one end (including the white cover at the same time) had a 15degree bevel cut. We did the first 27 rafter bars measuring 1328mm long at the base (plus another 4mm for the angle cut).
    End Caps All Done, First 27 Rafter Bars Also Done

    Rafter-glazing-bars-cut-to-length


    Then we made another template to hold the ends of each rafter bar with one of the end caps, both centralised, which allowed us to drill another hole into the aluminium bars. A stainless steel screw was inserted to lock the end cap into place.
    End Caps All Done, First 27 Rafter Bars Also Done

    End-caps-attached


    Tomorrow, we will finish that job and then tackle the next tricky task of drilling clearance holes for the fixing bar near the bottom of each polycarbonate sheets!

  • All Rubber Gasket strips Fitted and Started Creating End Caps for Rafters

    We finished off the installation of the rubber gasket strips on all the rafters and also the complete circuit of the outer rim of the skylight.

    All Rubber Gasket strips Fitted and Started Creating End Caps for Rafters

    All-gaskets-fitted

    Then in the workshop, we started the task of making aluminium end caps for all our 33 rafters, to cover up the cut ends and also hold in the polycarbonate sheets too. The bar manufacturer sells end caps but they are over large and would cost us £150!
    We took a T shaped aluminium bar, 50mm across by 25mm deep and using a drill press and a core drill bit, cut out 50mm circles to end up with a flat slightly offset circle with a sticking out tab behind it. The tab will be screwed into the ends of the rafter glazing bars before we install it.

    All Rubber Gasket strips Fitted and Started Creating End Caps for Rafters

    End-cap-cutting

    All Rubber Gasket strips Fitted and Started Creating End Caps for Rafters

    End-Cap-2

    All Rubber Gasket strips Fitted and Started Creating End Caps for Rafters

    End-Cap-1


    Tomorrow, we will finish off this job, smoothing the rough edges and cutting the tab down to 30mm wide to allow these end caps to slide in and will have a screw to self -tap into the aluminium rafter bar to lock it down.

  • Additional Glazing Pressure Bars Created and First of the Rubber Gaskets fitted, along with the Three Support Pillars for Bird Disruptor

    This morning, we created a further set of glazing bars for clamping down the fourth edge along the bottom of each window in the Skylight. It is a 20mm wide and 4mm thick in a so-called feather edge style. We sliced up our supply of 7 lengths of 4metres strips, into 33 individual pieces, 10 were 1metre long, 21 were 800mm long and the final 2 were 600mm long, to fit the various width windows (33 of them!) around the whole Skylight. Each of these strips were then glued onto strips of rubber membrane so these aluminium pressure bars will not scratch or dig into the polycarbonate plastic window panes, especially when there is a temperature difference and the plastic expands and shrinks over the course of a day in different seasons.

    Additional Glazing Pressure Bars Created and First of the Rubber Gaskets fitted, along with the Three Support Pillars for Bird Disruptor

    Rim-fix-down-strips


    While the glue was drying, we went outside to start fixing all the rubber gaskets to the skylight framework. We tackled the ridge beam, which also needed three stainless steel threaded rods fitted too, one at each end and one in the middle, to support the Bird Disruptor.
    Additional Glazing Pressure Bars Created and First of the Rubber Gaskets fitted, along with the Three Support Pillars for Bird Disruptor

    Bird-deterent-support-bolts-Ridge-gasket-

    Additional Glazing Pressure Bars Created and First of the Rubber Gaskets fitted, along with the Three Support Pillars for Bird Disruptor

    Ridge-gasket-and-bird-deterent-support-bolts-


    Tomorrow, we will cut up the rest of the rubber gasket into strips of 1280mm long (27 in total) and a further 4 strips of 1800mm long pieces (for the diagonal rafters). The final line of rubber sealing strips will be the outer rim, stop and starting at each rafter.

  • Skylight Framework Fully Assembled and Installed on Roof

    Today (and a bit from yesterday), we resumed the assembly of our Skylight framework, working along the front, then along the back side, both towards the right hand end and finally finishing off the whole framework with the five way coming together of rafters. All was successfully glued and screwed into place.

    Skylight Framework Fully Assembled and Installed on Roof

    Skylight-Frame-finished

    Skylight Framework Fully Assembled and Installed on Roof

    Skylight-Frame-from-inside


    Now we have started on the next phase of putting on the rubber membrane and gaskets all over the white surfaces, with the completion of a “skirt” strip around the whole outer edge. This skirt is 100mm wide and it was glued and stapled right on the outside top edge of the frame, just below the slot and it falls down on the outside towards the kerb. Eventually, the breathable roofing membrane will come up the roof slope and tuck under this rubber skirt to seal the skylight to the roof, it also provide protection against the rays from the Sun for the membrane and ensures that it will last for years to come.
    Skylight Framework Fully Assembled and Installed on Roof

    Flashing-strip-installed-1

    Skylight Framework Fully Assembled and Installed on Roof

    Flashing-strip-installed-2


    Finally, we brought into our workshop all the aluminium glazing bars and other bits and pieces, ready to cut them into their assigned lengths. We chopped some sample pieces so we can get a handle on how they feel and how they fit together.
    On Monday, we will start on the Ridge and sort out the stainless steel bolts (three of them), slice up the glazing bars and start stapling on the rubber gaskets.

  • Half of Skylight is Assembled

    Today, this afternoon, we resumed the job of assembling the bits and pieces to build our Skylight module. We went around the left end of the skylight and along the front, doing another seven rafters, two diagonal rafters and three sections of the rims.

    Half of Skylight is Assembled

    P-End-of-Skylight-frame-done

    Half of Skylight is Assembled

    Another-part-of-the-frame-done


    Everything got the same treatment as yesterday, all glued and screwed and all holes were filled and sealed against water.

    Tomorrow, we will carry on along the front and around the right end and proceed along the back side to complete the whole thing. Also our polycarbonate glazing sheets are expected to arrive tomorrow – Good Stuff!

  • Drawing Up the Quantity of Slate tiles Plus Accessories

    Yesterday morning and this morning, we continued with the calculations for the Slates and all the accessories to cover our roof. A 18 page spreadsheet was used to quantify the number of tiles, the number of rows and what sort of angled adjustments is needed for the various hips and valleys ends, depending on which roof section is under the spotlight. We are getting close to a final set of numbers, just need to run through the calculations again to verify the results before we start the process of ordering everything. The quantities are as follows:

    • 17200 300mm x 200mm “normal” slates
    • 700 300mm x 300mm “wide” slates
    • 3550 metres of 50mm x 25mm tiling battens
    • 700 metres of 38mm x 25mm counter battens
    • 300 metres of 1.5 metre wide Breathable water barrier membrane
    • 90 metres of valley drainage channel

    We just need to double check these figures, plus any other material we would need, like for example, for the guttering and anything else for our roof!

  • Assembly of Skylight Starts ..

    Yesterday we started on the task of installing and assembling our Skylight framework for real, right on top of our roof – at last!
    The first job was to finish off putting on the wooden platform on the second scaffolding tower and get that ready for action. Then, using strips of foam, tied down with a lifting rope, we hauled up all the very long pieces, six of them individually and laid them resting on the steel cross tie bars. The shorter pieces of the outer rim parts, we carried up in pairs by hand, around and up the sloping roof to place these six items in their rightful places.
    Then we concentrated on getting the ridge beam up on the nine central steel posts. We temporarily installing the two end rafters (inline with the ridge beam), so we could verify that the beam was in the correct position. Then we went to each of the nine points to glue and screw down tight the beam, including putting white PU sealant all over the middle kink joint too.

    Assembly of Skylight Starts ..

    Ridge-installed


    Today, in the afternoon, we resumed the task, this time getting the outer rim edge (we decided to work on the back of the skylight first) positioned in the correct place, using a couple of rafters and were made to be as right angled as possible. Then we proceeded to get six rafters glued and screwed into place, plus also screwing and gluing this section of the rim too. Plenty of the white PU sealant was used to cover up all the joints and the head of the screws to provide a waterproof seal against rain water.
    Assembly of Skylight Starts ..

    First-part-of-Frame-installed


  • Final Bit of Preparation on Skylight Joints and Scaffolding Towers Sorted

    This morning, we used our new tool for the first time (a power file – a spinning little belt sander) to clean out the slots in all the various framework pieces that had dribbles of the resin stuff. This was the final stage of the preparation task before we could start installing and assembling the skylight up on the roof.
    To this aim, this afternoon, we sorted out our scaffolding towers, putting a fresh new one up and getting it ready with the working platform etc. We had to do a quick repair job on one of the nut clamping point because the bolt had got really stuck and it sheared off. So we had to cut off the old nut and weld on a new one!
    The other tower needed one more layer of the scaffold elements, so the second tower would be high enough to reach the Skylight region at the top of the building (We were lucky! the scaffold only just clears the steel skylight framework) !

    Final Bit of Preparation on Skylight Joints and Scaffolding Towers Sorted

    Scaffold-towers-errected-1

    Final Bit of Preparation on Skylight Joints and Scaffolding Towers Sorted

    Scaffold-towers-errected-2


    Tomorrow, we will just quickly install the other working platform and safety kick boards and hand rails and we will be all ready to start the task of bringing up all the pieces of the Skylight module.