Category: Phase 4

Construction of External Skin of House: External Walls, Roof and Skylight. Slate tiles on roof and timber cladding on walls.

  • Technical Drawings Updated and Slots Cut into Footplate

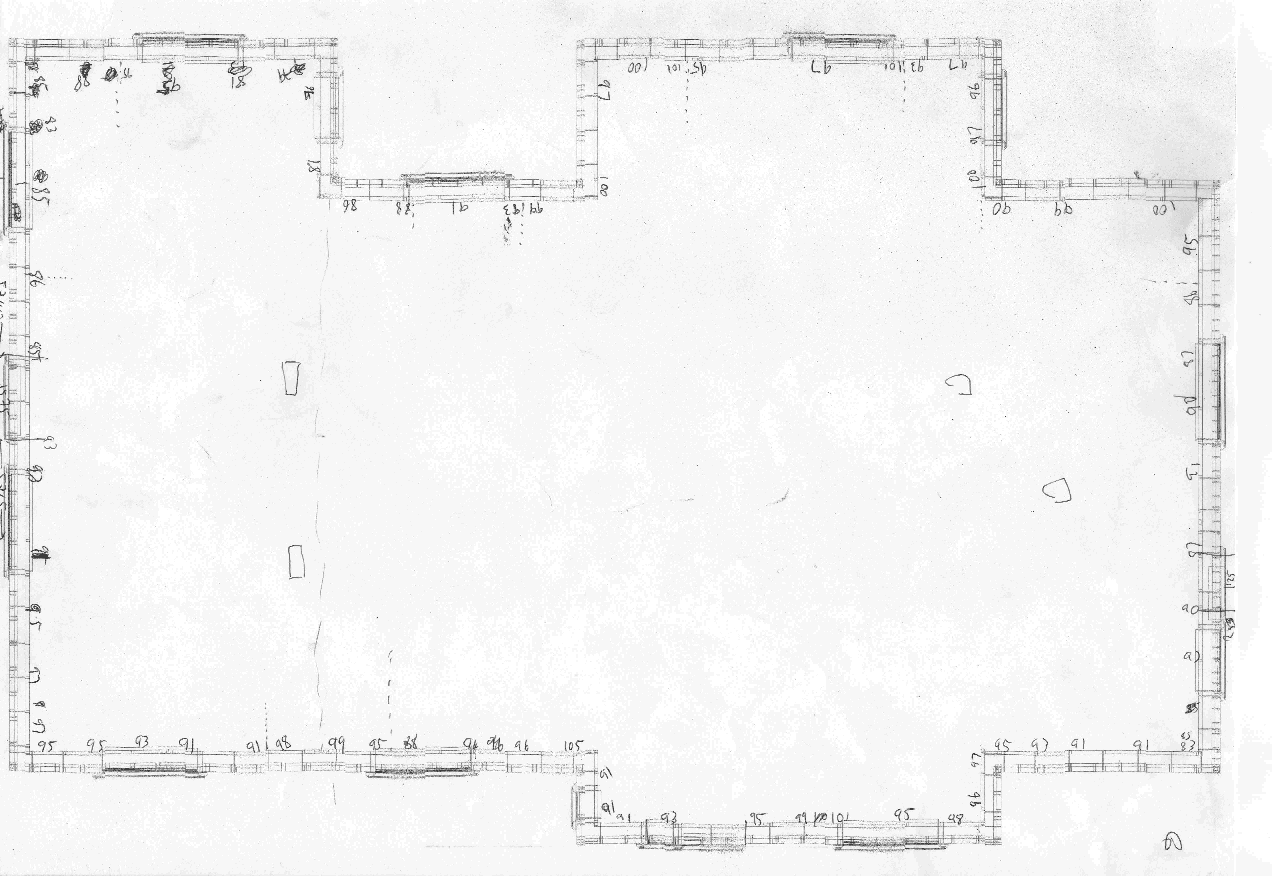
    Today, we updated the electronic CAD drawings to reflect the new position of the windows along the wall that has the back door in it (this wall is next to the garage), and also the front door side wall where there is a small window, and finally, the Great Room side window that looks down the length of the swimming lane.

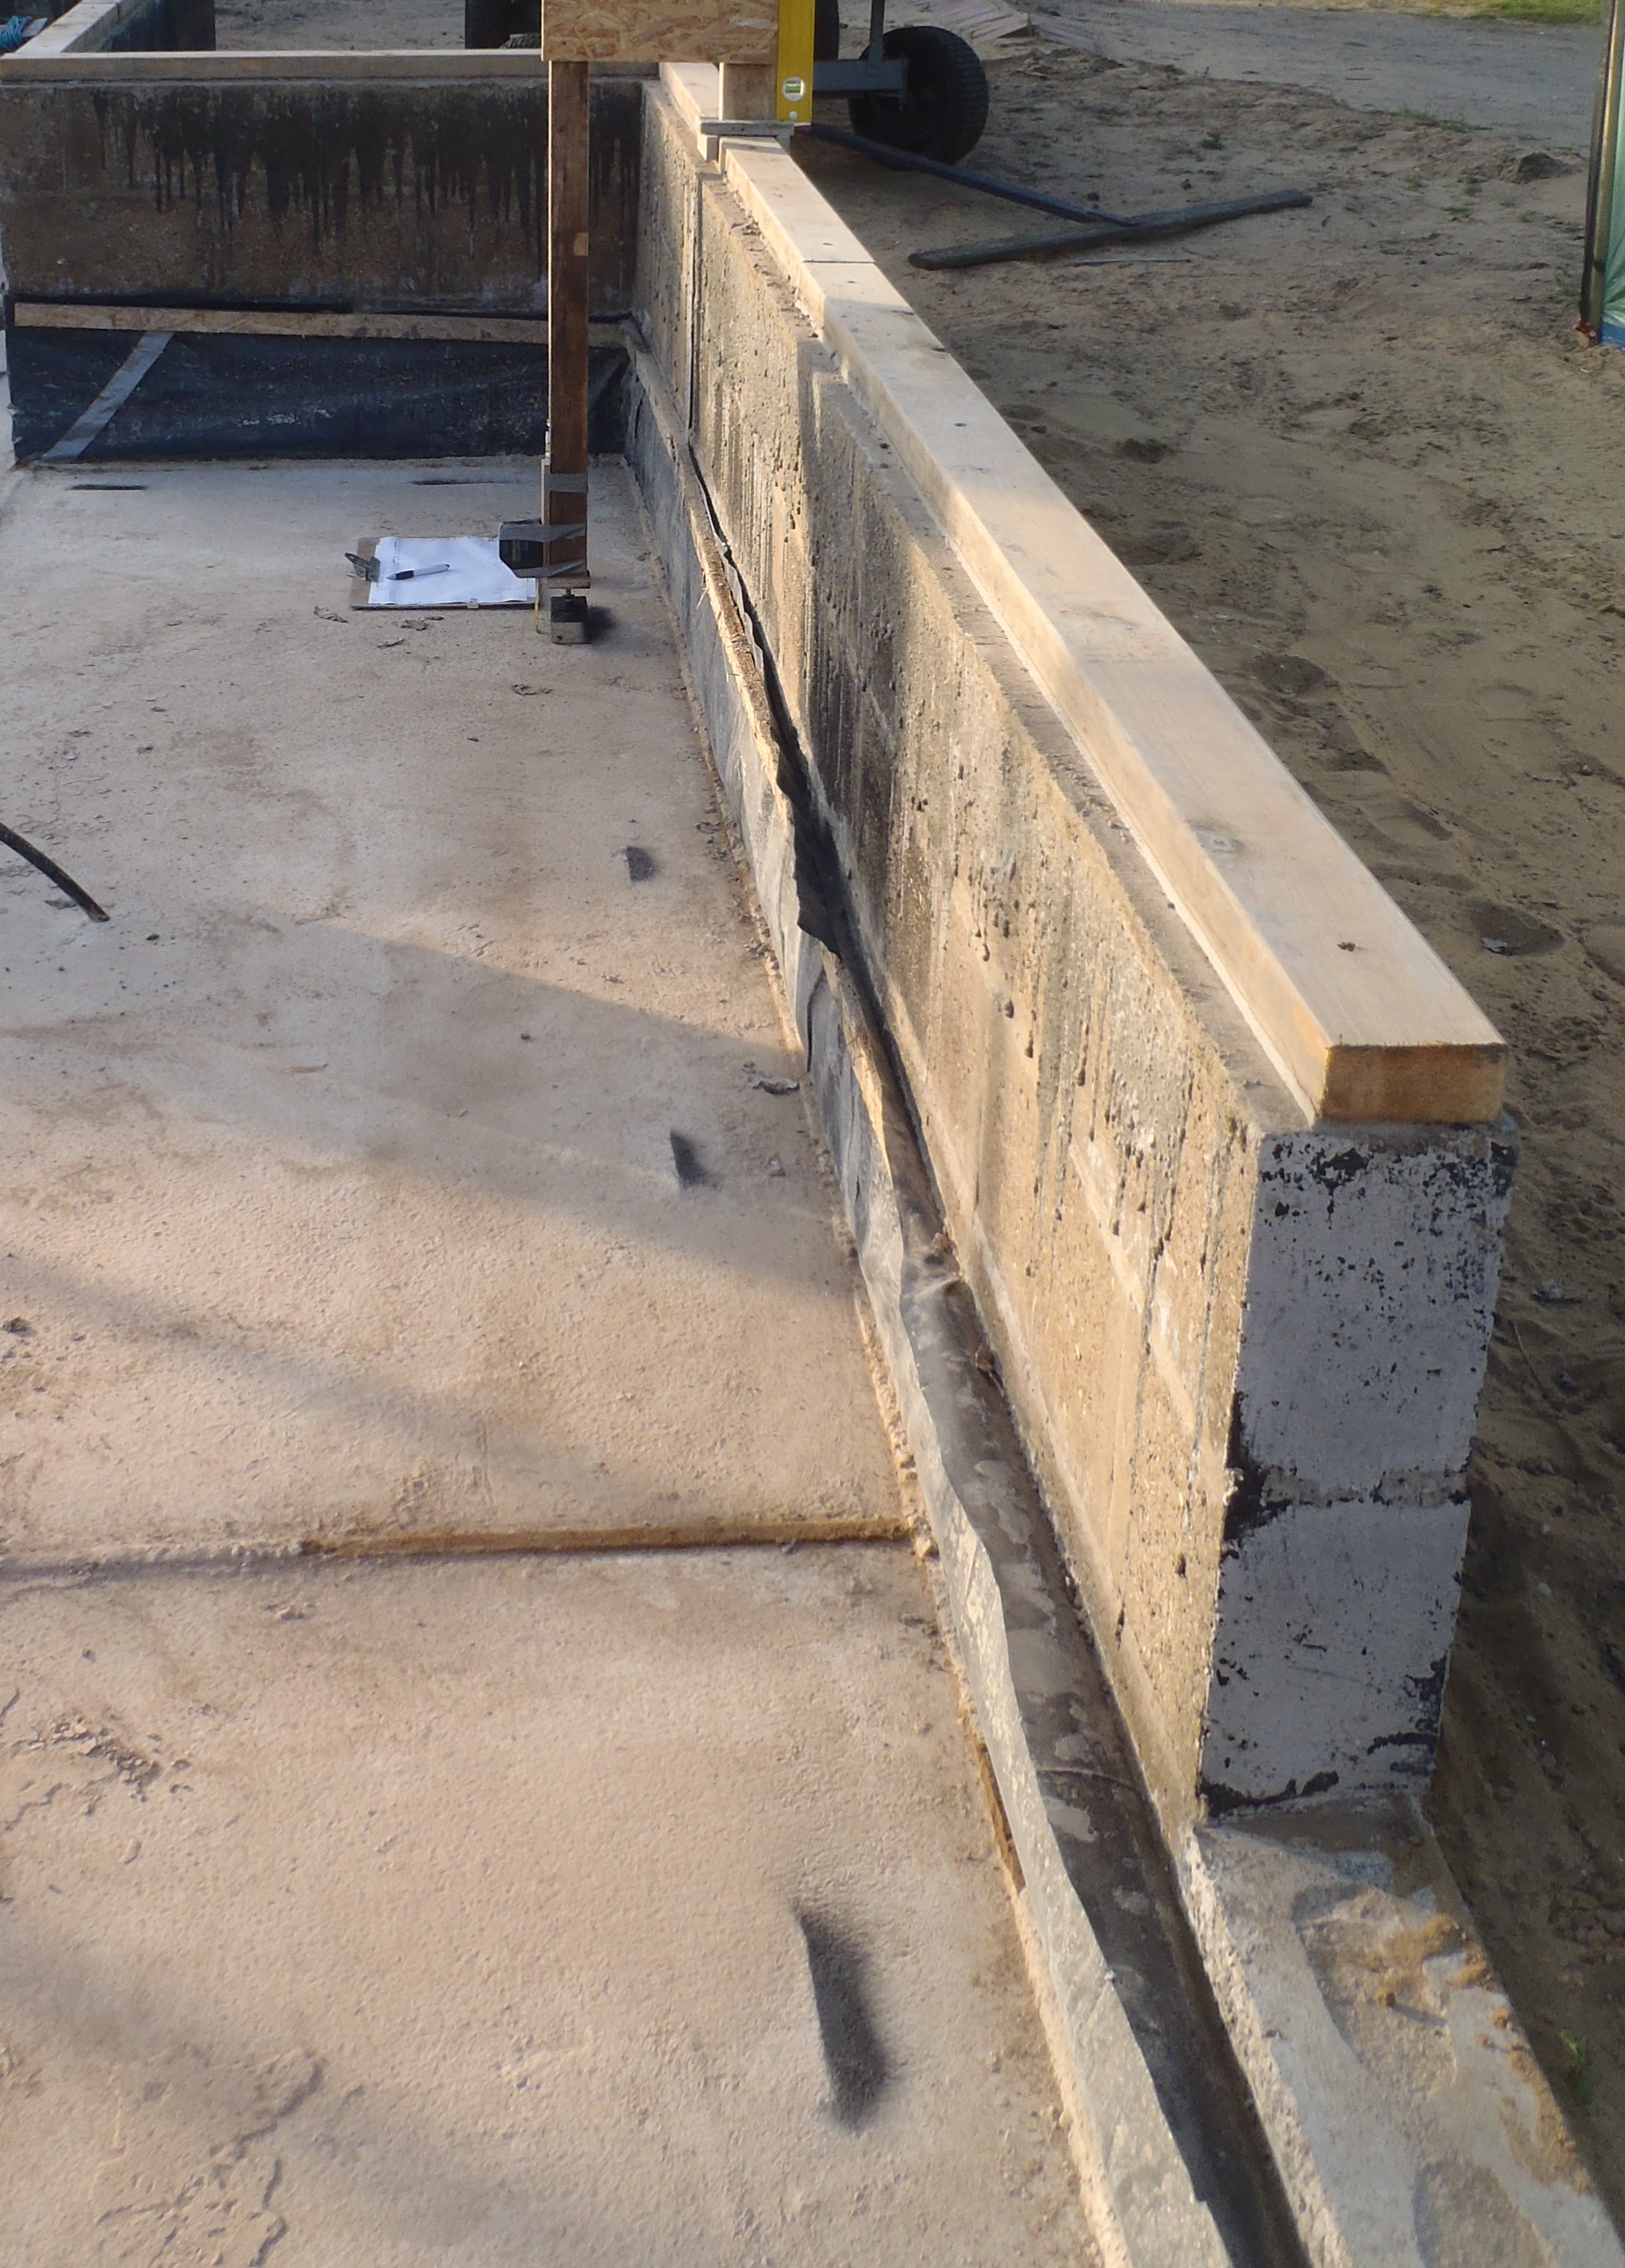
    Then after lunch, we went around with our slot template and our router machine, and sliced a whole series of slots into the Footplate which is sitting on top of the Perimeter Wall. we did all the windows first and then with a list of measurements off the drawings, we then did the walls that had no windows. For the smaller length of walls, we had to cut down our template so we could fit it into the space and finally finished off at the front extension. We were careful to make sure that any nails were properly knocked down well below the surface so the tungsten router bit didn’t hit a metal object and crack the bit.

    Router-cutting-a-slot

    Router-cutting-a-slot

    Slots-cut-in-Sole-plate

    Slots-cut-in-Sole-plate


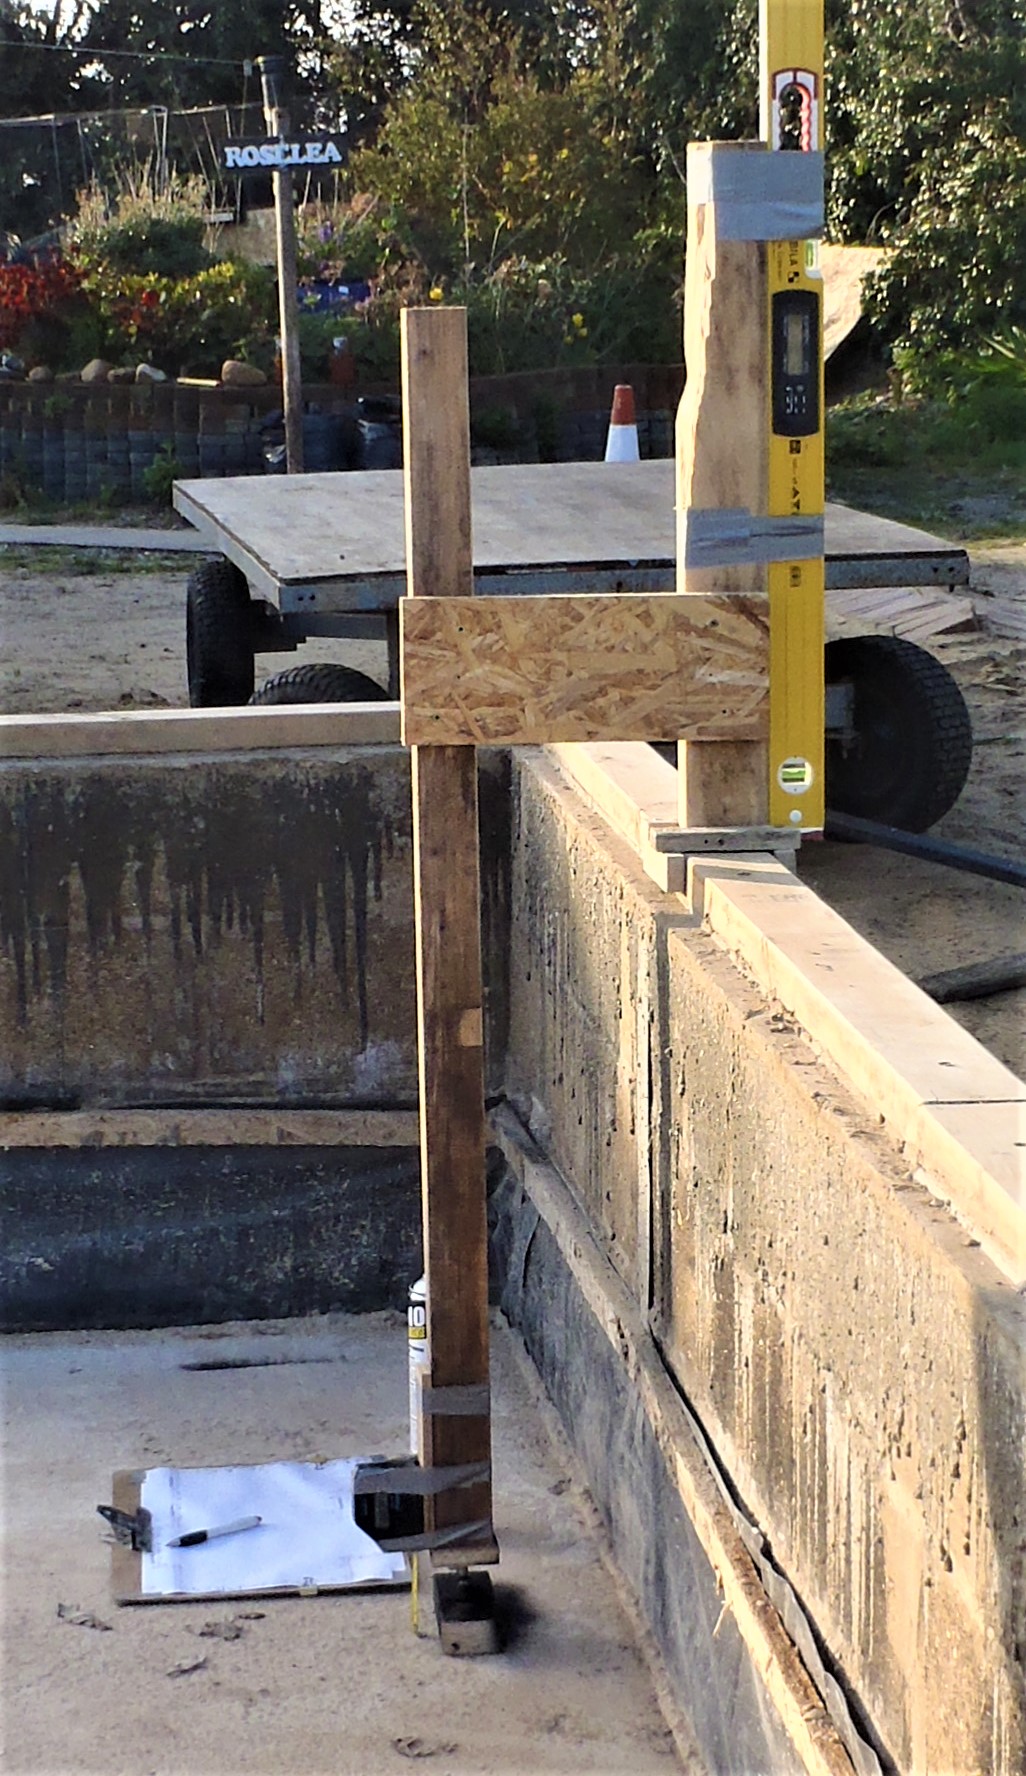
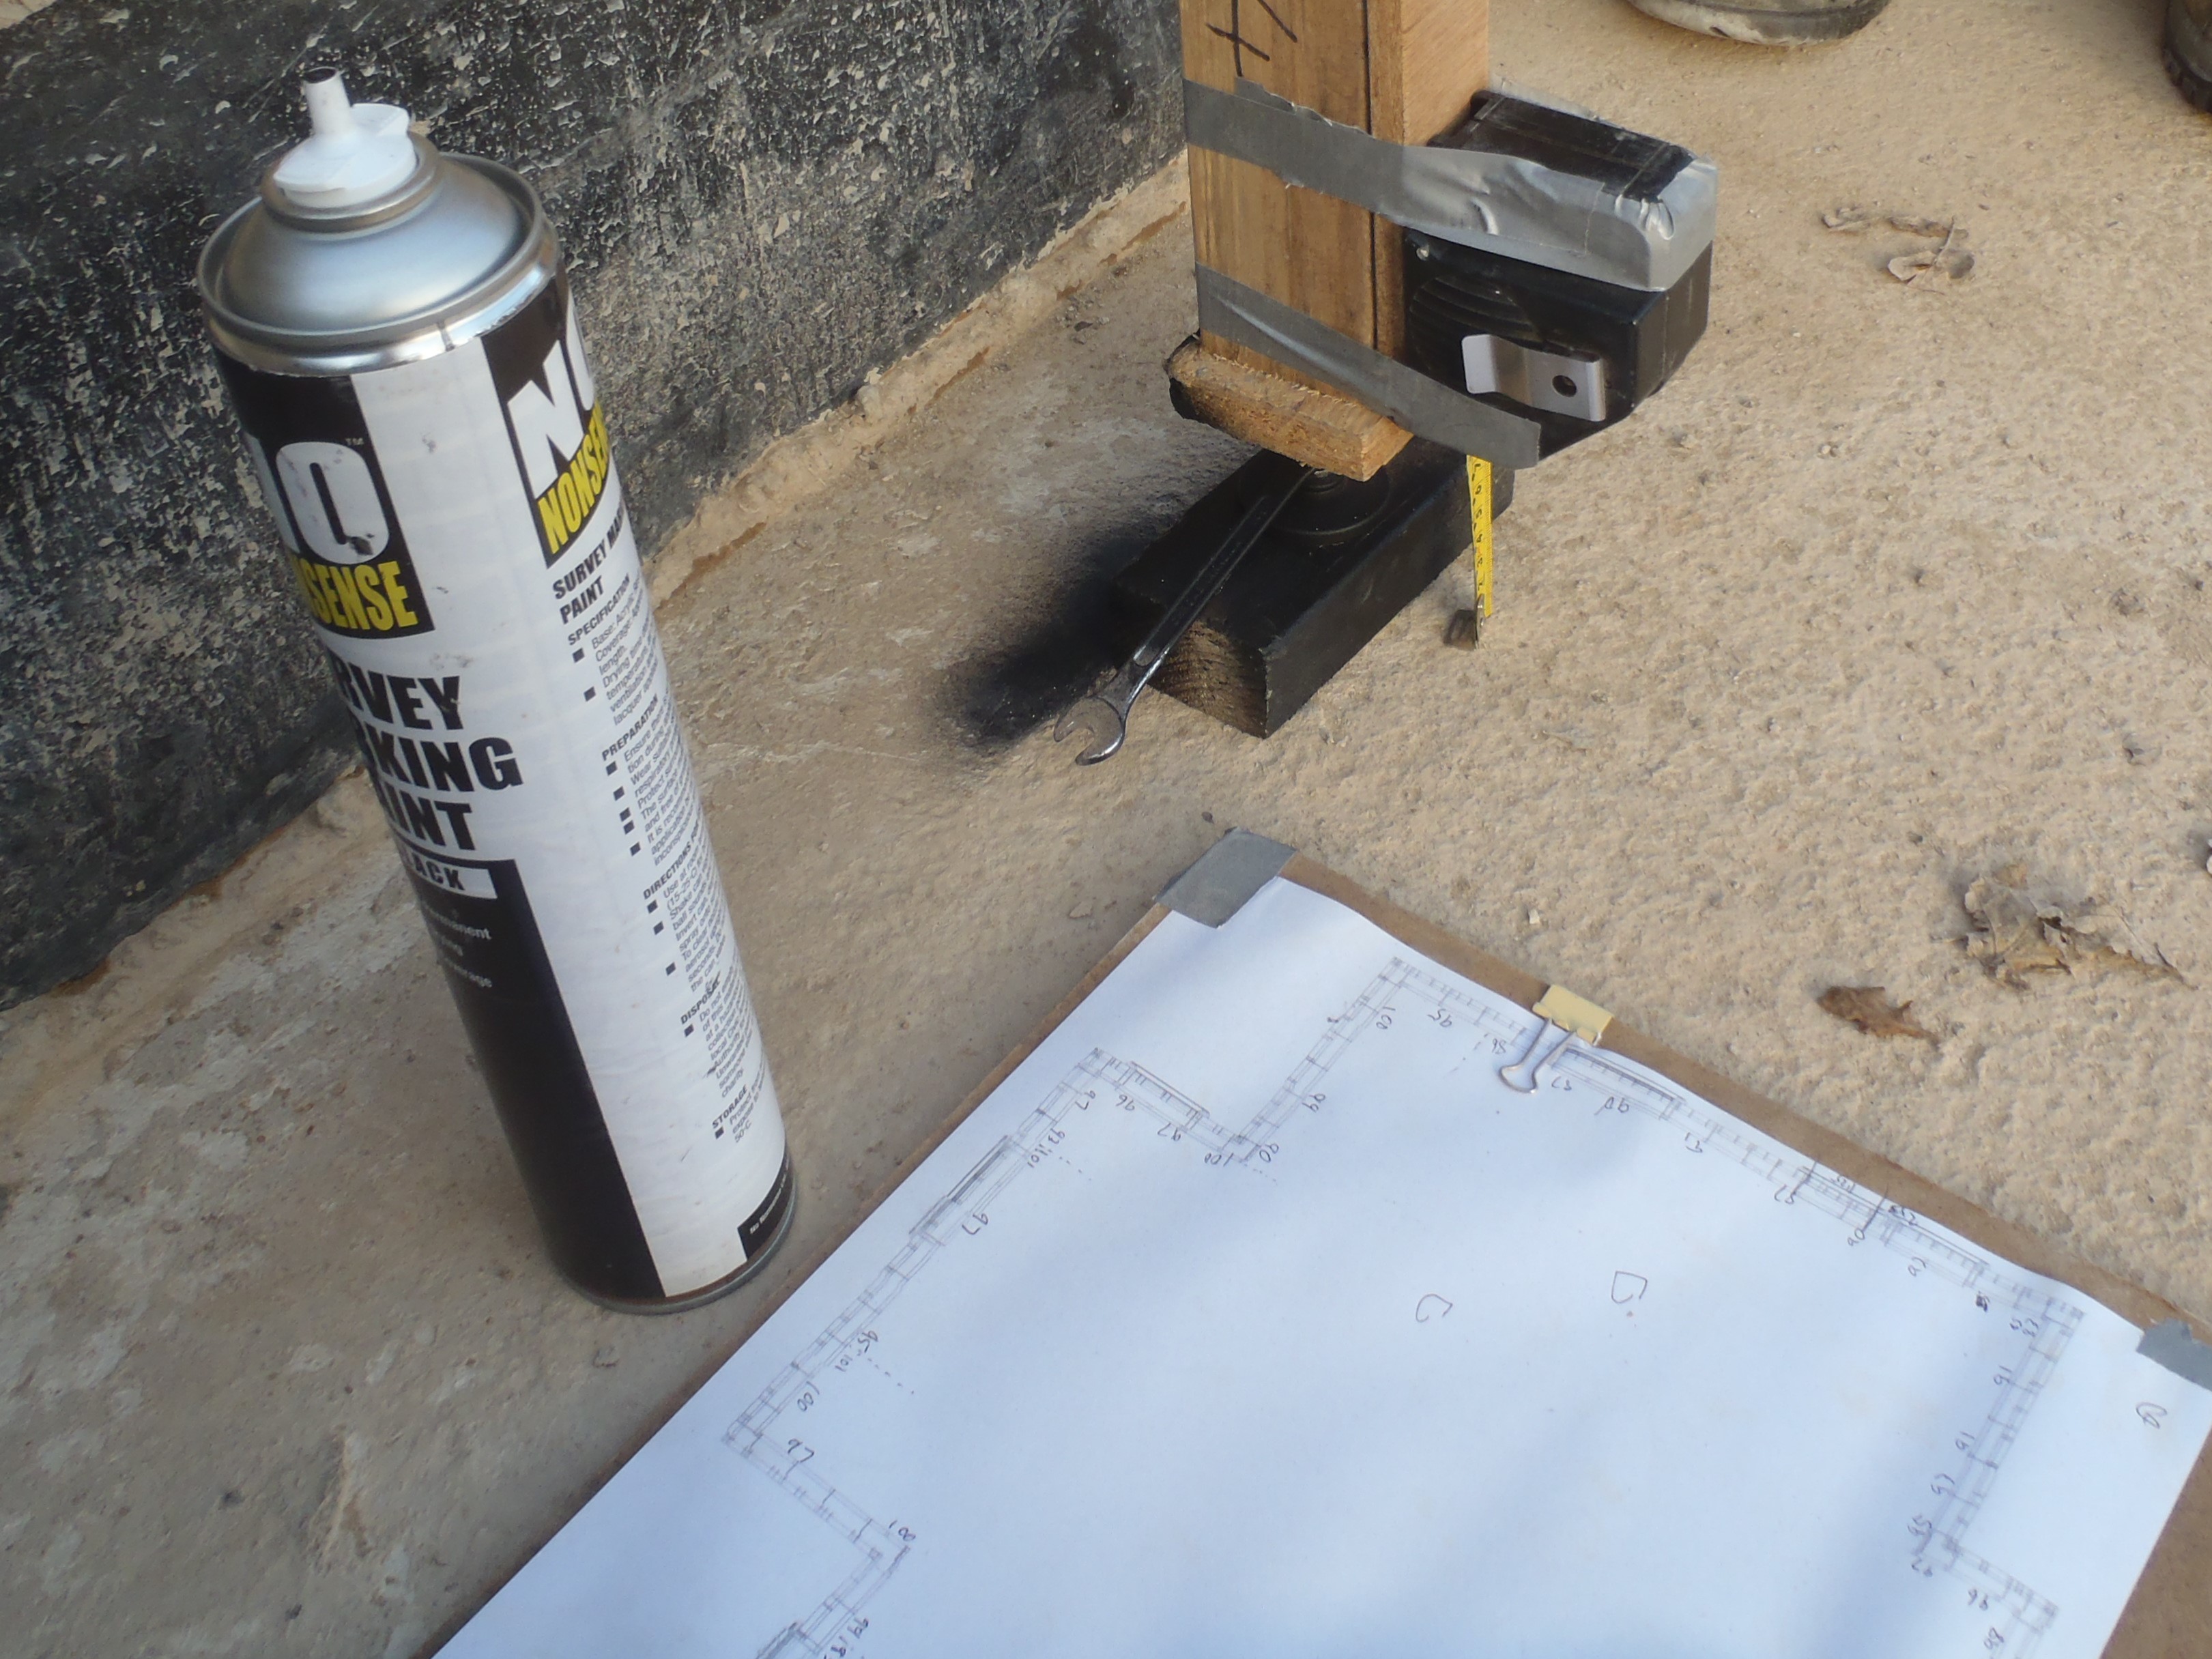
    The final job was to laser measure the absolute height of the footplates (the upper one on top of the Perimeter wall, and the lower one on the concrete floor) and transfer these numbers into the drawing. We had a range of measurements of mostly 460 mm to 461 mm with a couple of odd 455 mm and 463 mm points, all for the upper Footplate. The lower Footplate came out at mostly 1340mm to 1342mm with a couple at 1336 mm and one at 1346 mm. Not bad we would say if we weren’t modest!

  • Two Layers Glued and Template Constructed

    On a dull, windy and slightly damp day, we went around the Perimeter Wall and glued down the first layer of the 89mm CLS treated timber we had cut last thing yesterday.

    We used our pressurised glue dispenser to squirt 5 lines of the white wood glue from our homemade nozzle and laid on the section to be place in that spot, wiggled it around to spread the glue and then nailed it down using 70mm long nails, fired using our compressed air nail-gun.

    It took about two hours to go all the way around, rubbing with a rough sandpaper to remove any mortar spills on the 100mm planks and clean off the surface, ready for the glue and nailing. After this, we immediately continued with the third layer, pulling out another 11 lengths of the 89mm CLS timber off the pallet, cutting them to fit in between the windows, doors and corners of the building. We went the opposite way around this time so the joints are always overlapped for extra strength.

    We were slightly concerned because it started raining but it was only a very light sprinkle and hardly wetted the ground so we just carried on working.

    We concluded this circuit after lunch at about 4pm. We then did one additional task of drilling and screwing two more concrete screws in the section over in the Great Room where the conservatory will go. This section was a little loose so we decided to supply two more fixing points to stiffen it up, which it did nicely.

    Outside-wall-footplate-complete-fixed

    Outside-wall-footplate-complete-fixed

    Finally, we constructed a template to help us guide the router machine to slice the slots that will lock and hold each leg module when it is positioned along the walls.

    Tomorrow, we will begin with that task of cutting about 75 slots, aligned with each window and cut about 4mm into the top layer of the timber.

    Slot-routing-jig

    Slot-routing-jig

  • Doors and Windows Marked Out

    This morning, we finished off the final section of the inner wall footplate that had wet mortar from yesterday. All concrete screws are now tightened down, including 3 of them that has lost their grip so we glued them into place using Polyurethane glue.

    Then, we marked out on an old cloth measuring tape, on the blank white side, all the regular position of each leg of the wall, which  repeats every 612mm spacing. This allowed us to slide back and forth the tape on each segment of the wall and get a precise alignment of each window or windows, depending on the length of the wall segment. We did this all the way around the whole house and completed this just before lunch.

    After lunch, we got out the compressed air hose, the yellow tank (which has multiple connections which independent controllable air output points), the nail gun and the bottle of glue. But we only discovered that the glue bottle wouldn’t hold the pressure (a very low pressure of 1.5 bars) due to an old rubber seal. Then, the feeder tube was weakened half way down and it looks as if the glue had attacked the aluminium metal and made it weak. Then, we discovered that the flexible hose coming from the bottle was blocked and it took full pressure of 8 bars to shove out whatever it was causing the blockage (it was old glue that has gone “funny” and very thick!). So after repairing the glue bottle, putting in a new plastic feeder tube to go down inside the bottle to the bottom of the liquid glue, repaired the rubber seal and reconnected the flexible hose, it was all working again at last!

    Pnumatic-Glue-dispenser-

    Pnumatic-Glue-dispenser-

    But it was getting late in the afternoon so we decided to test the glue with two bits of old timber, just to make sure the old glue was still working properly after sitting around for 5 years.

    In the meantime, we got out our circular battery saw and a tape measure and went around cutting up a heap of 89mm CLS timber to form the second layer, stopping and starting at each door and window. There are 12 windows and 3 doors.

    Next-layer-of-external-footplates-cut

    Next-layer-of-external-footplates-cut

    Tomorrow, we will nail, screw and glue all these pieces into place. We will do a third layer immediately afterwards, overlapping any joints to reinforce the strength of the wall and then slice the required leg grooves afterwards, as there are many short pieces so we thought it would be easier and less wasteful if we went around with a template and cut the 38mm wide grooves there and then using a flat bottom tungsten cutting bit in our router.

  • Final Wet Mortar Is Shoved In

     This morning, we mixed up the final load of mortar to finish off the last 15metres or so of the Inner Wall Footplate.

     We also went around tightening down all the concrete screws on the section that the mortar is set. We had only some trouble with holes where the rubbish has fallen in so we got out the compressed air blaster (just a tank of compressed air) and cleared out the holes. Most were successfully tightened down, with only about 3 needing more drilling (we only use the battery powered drill driver to disturb the rubbish) and then air blasted it again. That did the trick.

    Inner-footplate-all-mortared-and-mostly-screwed-down

    Inner-footplate-all-mortared-and-mostly-screwed-down

    Tomorrow, we will tighten down the final section we did this morning and then start with the second layer of timber on top of the concrete wall, this time, a complete loop of 89mm CLS timber on top of the 100mm wide timber already there. We will use our old supply of wood “weather proof” glue that has been sitting in a large pressure bottle (that was an old garden sprayer) for 5 years or so. Amazingly, the glue inside was still liquid. Wow!

  • Leveling and Fixing Footplate Almost Done

    We had a long day of adjusting and setting the exact height of the wooden Inside Footplate for our External Wall. We decided that we would plane and trim the pieces of Footplate to accommodate the rise and fall of our concrete floor.

    This morning, we hauled out our planer machine outside in the lovely sunshine and passed through it several lengths of our timber we had already put into place yesterday. Some of the pieces were planed down by only 5mm, but some of them were reduced by 10mm and one piece was reduced by 15mm! We generated 4 bags of shavings!

    Then after lunch, we mixed up two loads of mortar and went around putting underneath the footplate the mortar and using our laser level gadget, to set the height  so that all the timber pieces are set exactly the same.

    Inside-sole-plate-mostyly-mortared

    Inside-sole-plate-mostyly-mortared

    The two loads of mortar almost allowed us to complete the full circle of fixing the footplate into place, we have only 15 metres to go to finish the job.

    The next job is to put a second layer on the concrete wall, this time a 89mm wide CLS planks, and then the third  layer would have slots cut into it (this also includes the inner footplate as well) and then this layer will be fixed down in exact positions so that the slots would receive the vertical wall post in a controlled manner without us having to keep measure where the next one will need to go.

  • Inner Wall Footplate Screwed Down

    Today, we went around fixing into place the bottom layer of the Footplate timber pieces that makes up the inner structural leg element of the External Wall.

    We drilled a 6.5mm diameter holes through the 38mm by 63mm CLS treated timber (it is nice and green colour!) which provided a pilot hole for us to then drill down into the concrete floor using our heavy duty SDS drill machine, using a 6.5mm diameter drill bit. We went down about 80mm into the concrete itself so that there is plenty of room for the concrete screws to tap into (allowing space for the little bit of broken bits of sand and granite to fall down into). We then drilled a clearance hole in the wood and drove in the concrete screws but we left a gap underneath for the mortar.

    Inner-footplate-drilled-fixed

    Inner-footplate-drilled-fixed

    The next job, is to mix up some mortar and then put it under the footplate and laser level it to an exact height.

  • The Inner Leg: Marking the Position and Cutting the First Layer of the Footplate

    This afternoon, we went around the whole perimeter and finished marking out where the footplate is going to go. We used a can of spray black paint and an old length of CLS timber as a ruler and paint guide.

    Inner-footplate-alignment-marked

    Inner-footplate-alignment-marked

    Then, we pulled out 16 lengths from our new pallet of treated 63mm CLS timber and laid a complete circuit of putting down a layer of timber to form the footplate for the inner leg of the wall structure.

    Inner-footplate-cut-to-size

    Inner-footplate-cut-to-size

    We had only a small collection of left over pieces from the 16 lengths!

    Five-pieces-left-over

    Five-pieces-left-over

    The next job is to drill pilot holes in the wood, then drill masonry holes in the concrete and start shoving nice wet and sticky mortar under the timber and set them at a constant height.

  • Last Chunk of Material Finally Arrives

    Early this morning, the last of our building material arrives! At 8:51am, the lorry came reversing down our Loke, loaded with all our timber planks! They were: 4 large pallets of 63mm CLS treated timber (2 pallets) and 89mm CLS treated timber (another 2 pallets).

    Lots-of-CLS-Timber

    Lots-of-CLS-Timber

    Plus also delivered loosely, 20 lengths of the 150mm by 50mm planks, 2 lengths of 75mm by 50mm planks and 34 lengths of 100mm by 50mm planks, all of which are untreated.We moved all the odd sizes over to our timber storage yard (our swimming lane!) so they are now under cover from the weather.

    Some-100-x-47mm-timber

    Some-100-x-47mm-timber

    Some-150mm-x-47-timber

    Some-150mm-x-47-timber


    It is interesting to note that the treated timber pieces were done on the 22nd March (shown on a label stapled to the packs), but we ordered the timber way back on the 14th March. The treatment plant was up in Hull of all places! We assume that the liquid chemicals (which contain Copper, Benzalkoniumchloride & Boric Acid ) which were vacuum impregnated into the timber needed to be dried hence why it took 2 weeks from treatment date to delivery today.

  • Surveying The Inner Footplate On Concrete

    This afternoon, we made a measuring tool to allow us to survey the height of the concrete floor around the base of the External Wall, log the results down on the printout of the plan and spray black paint to mark where the inner footplate will go.

    Concrete-Level-survey-Overall-view-of-tool

    Concrete-Level-survey-Overall-view-of-tool

    WE used our digital spirit level attached to the outer leg and switched on the audio feedback feature (it provides a beeping tones, one pitch for leaning over backwards and another pitched tone for when leaning forward and the speed of the bleeping tones to how close to perfectly vertical, the faster, the closer) this is useful so we didn’t have to keep looking up and trying to see the bubble whilst adjust the angle of the post by winding a foot in and out with a spanner. Then, we attached our talking tape measurer down near the bottom of the 2nd inner leg so we can measure the relative height of the concrete when we managed to balance up the whole contraption to be vertical. We just simply pulled out the tape down to the concrete surface and the male voice would announce the distance in millimetres. We also sprayed a bit of paint alongside the wood on the concrete to mark where the inner wall’s footplate will go.

    Concrete-Level-survey-Level-Measure-and-mark

    Concrete-Level-survey-Level-Measure-and-mark

    We started about 1:30pm and by the time we had finished, we were rather chilled by the cold wind and the sun dropping down behind buildings so we were in the shade during the latter half of our surveying task.

    The quick summary of the results were that quite a lot of the concrete is in the 90mm to 95mm range (the number is arbitrary and measured downwards so larger numbers are lower concrete), but we got some that were quite high at 76mm, and 85mm (mostly in corners where the concrete would have flowed into) and a couple of lowest spots where we got 105mm (where the concrete didn’t get push evenly around).

    Concrete-Heights

    Concrete-Heights

    This means that we have a height difference of almost 30mm from one spot to another spot on our concrete floor! Phew! Normally, we would take that difference and bed the wooden footplate on to a layer of mortar to even out the “bumps” whole way around, but when there is such a marked difference, it would mean a great deal of mortar to mix and lay down. We may do it in independent sections and adjust the length of the vertical legs within the wall structure to cope with the different heights. We haven’t quite decided yet – Phew!!

    Concrete-Level-survey-Dashes-showing-wall-line

    Concrete-Level-survey-Dashes-showing-wall-line

    Finally, we now have a complete line of dashed blobs going right around and these markings will keep us on the straight and narrow when we come to put down the 63mm CLS treated timber and drill pilot holes into the concrete for the concrete screws to tap into, through the timber and holding it into place.

  • All Tidied Up!

    This afternoon, we finished off the tidy up operation around the base of the External Wall, clearing the last small section of the concrete floor of leaves, dirt and rubble.

    We also went around the outside of the perimeter wall, collecting up lumps of mortar that dibbled down and landed on the sandy soil.

    So in the end, the total amount of “stuff” was about 5 bags worth!!