Category: Phase 4

Construction of External Skin of House: External Walls, Roof and Skylight. Slate tiles on roof and timber cladding on walls.

  • Parts for the Corner Posts Sliced

    It was another day of working in the Workshop while the cold rainy weather front slowly drifted down from the North. Today, we created the Parts that will make the Corner Posts for the External Wall.

    These posts have three parts to them, two “wings” joined onto a central body, looking like an “arrow”. The orientation of the body part is at different angles, depending on where on the roof that post is situated. We got the computer to draw and calculate the angles and print the results on paper for us to refer to and tick off each corner as we have done them.

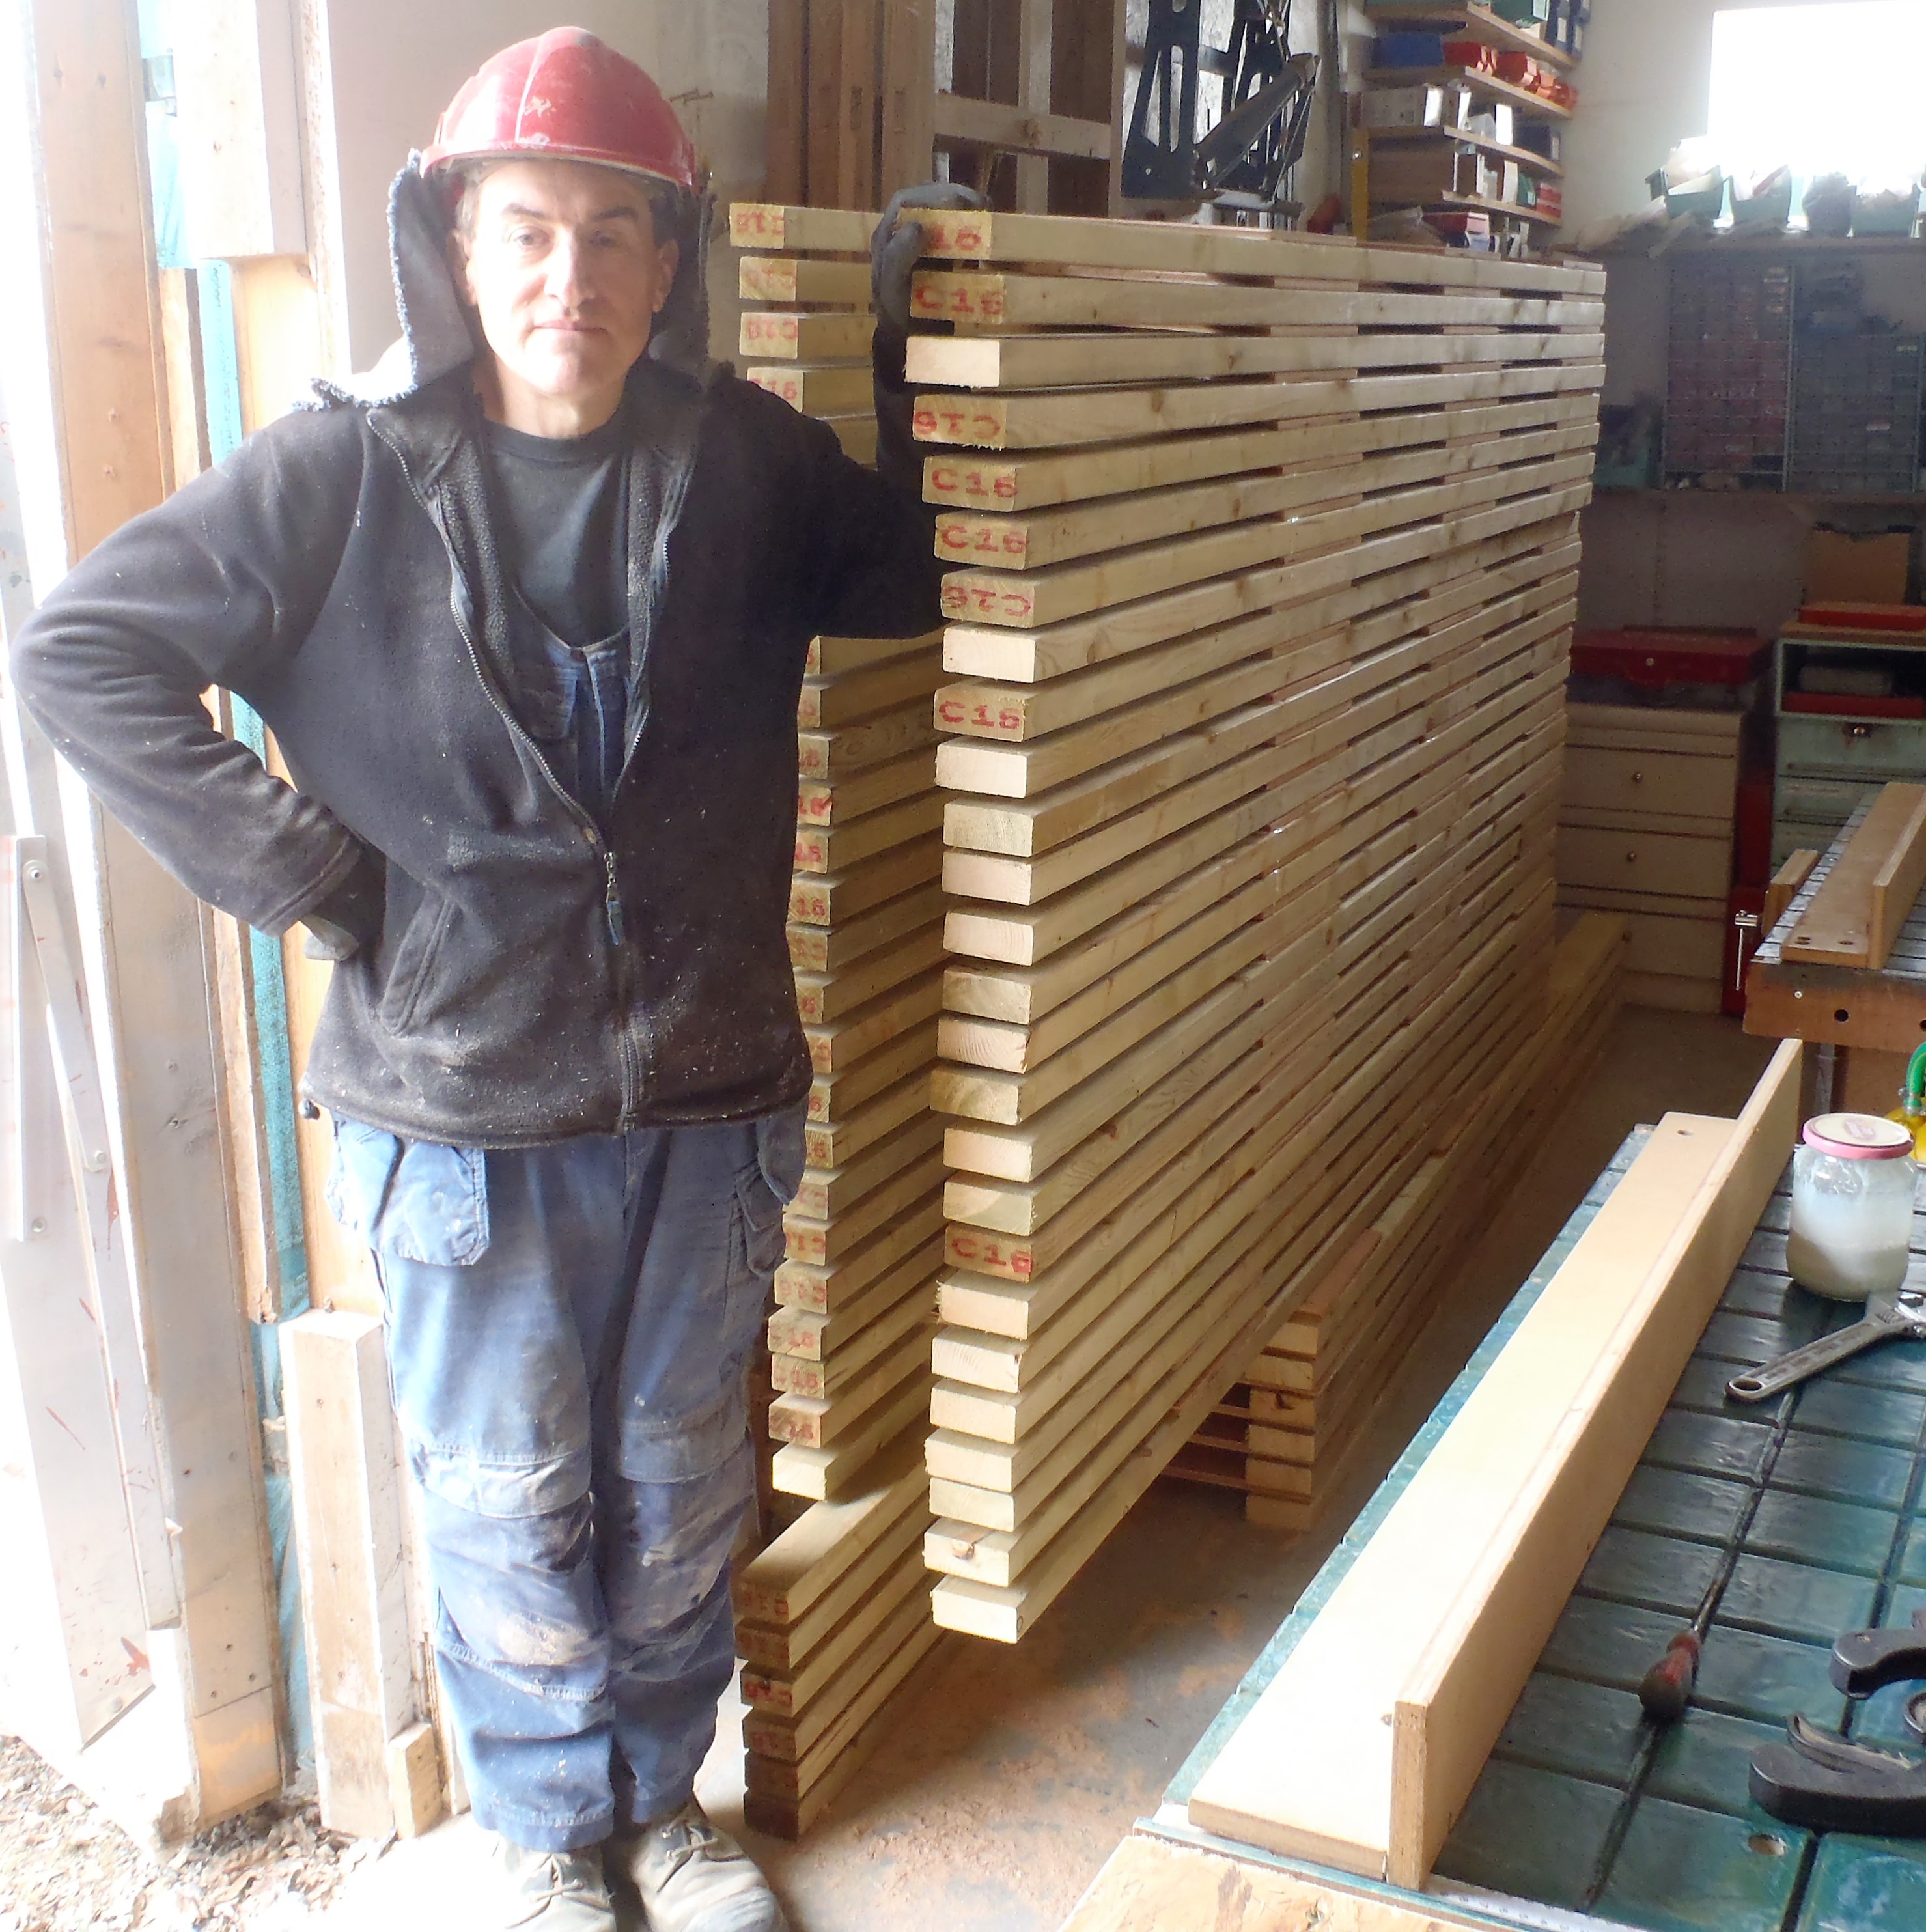
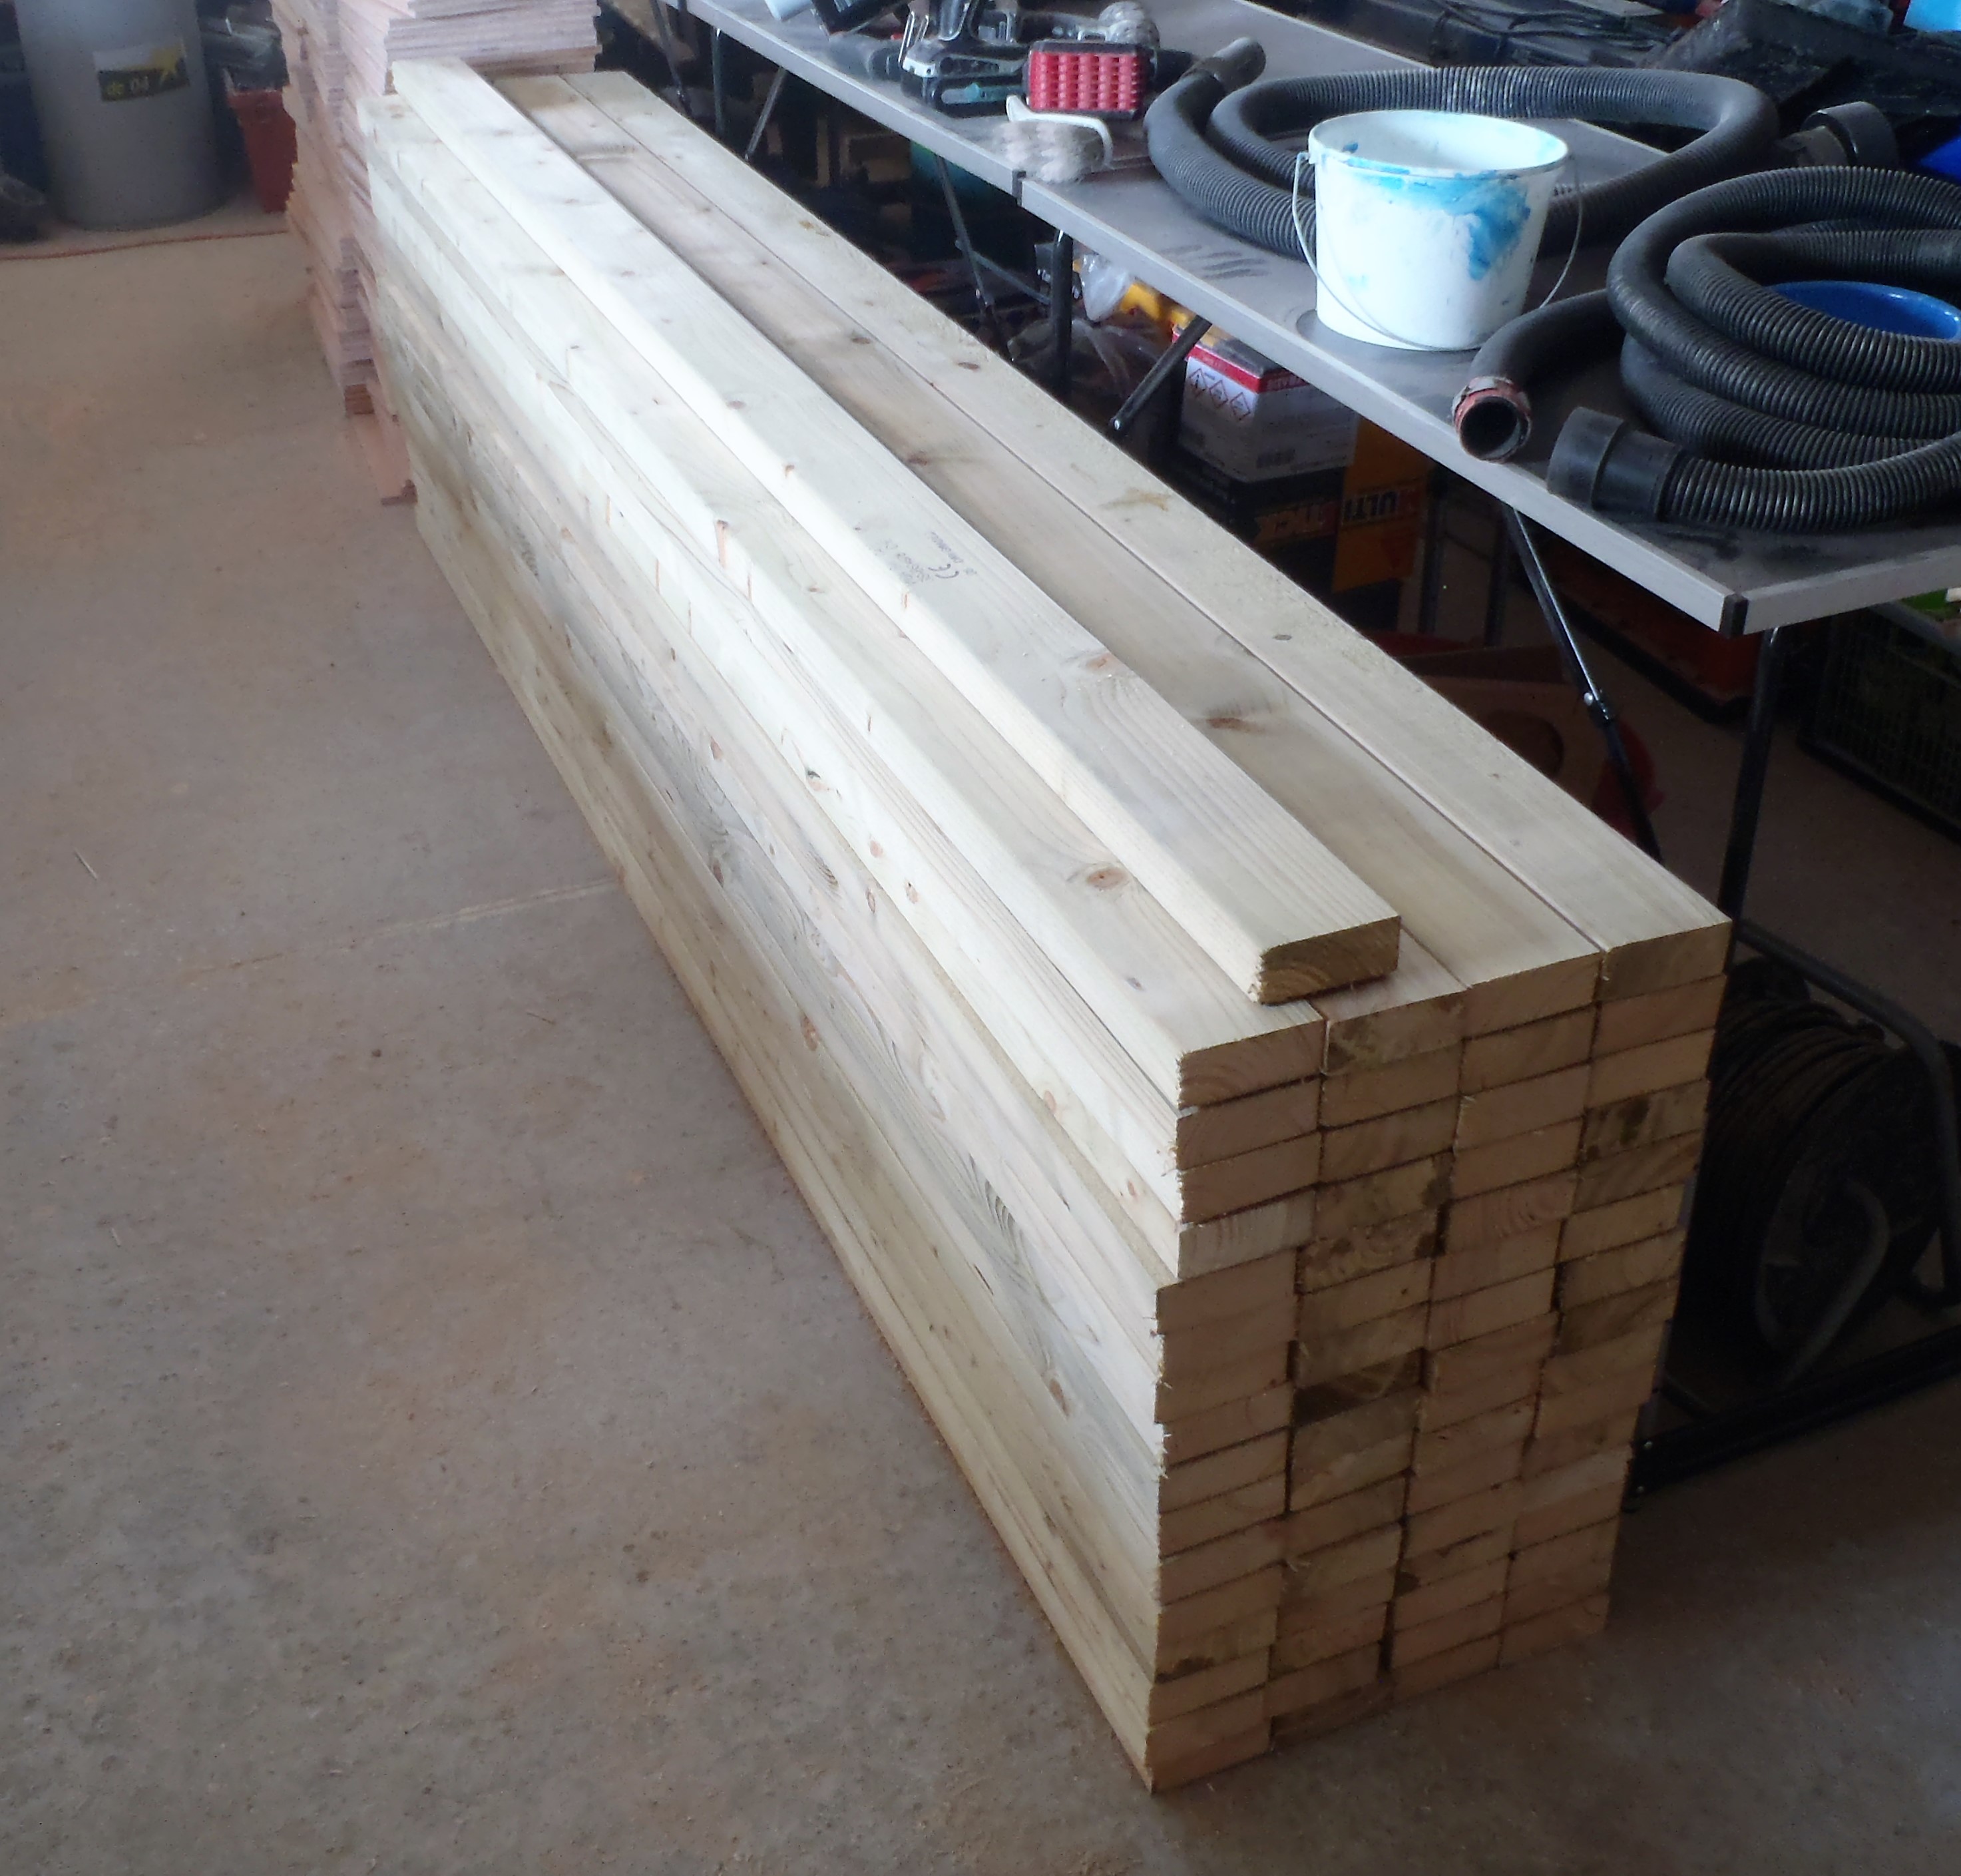
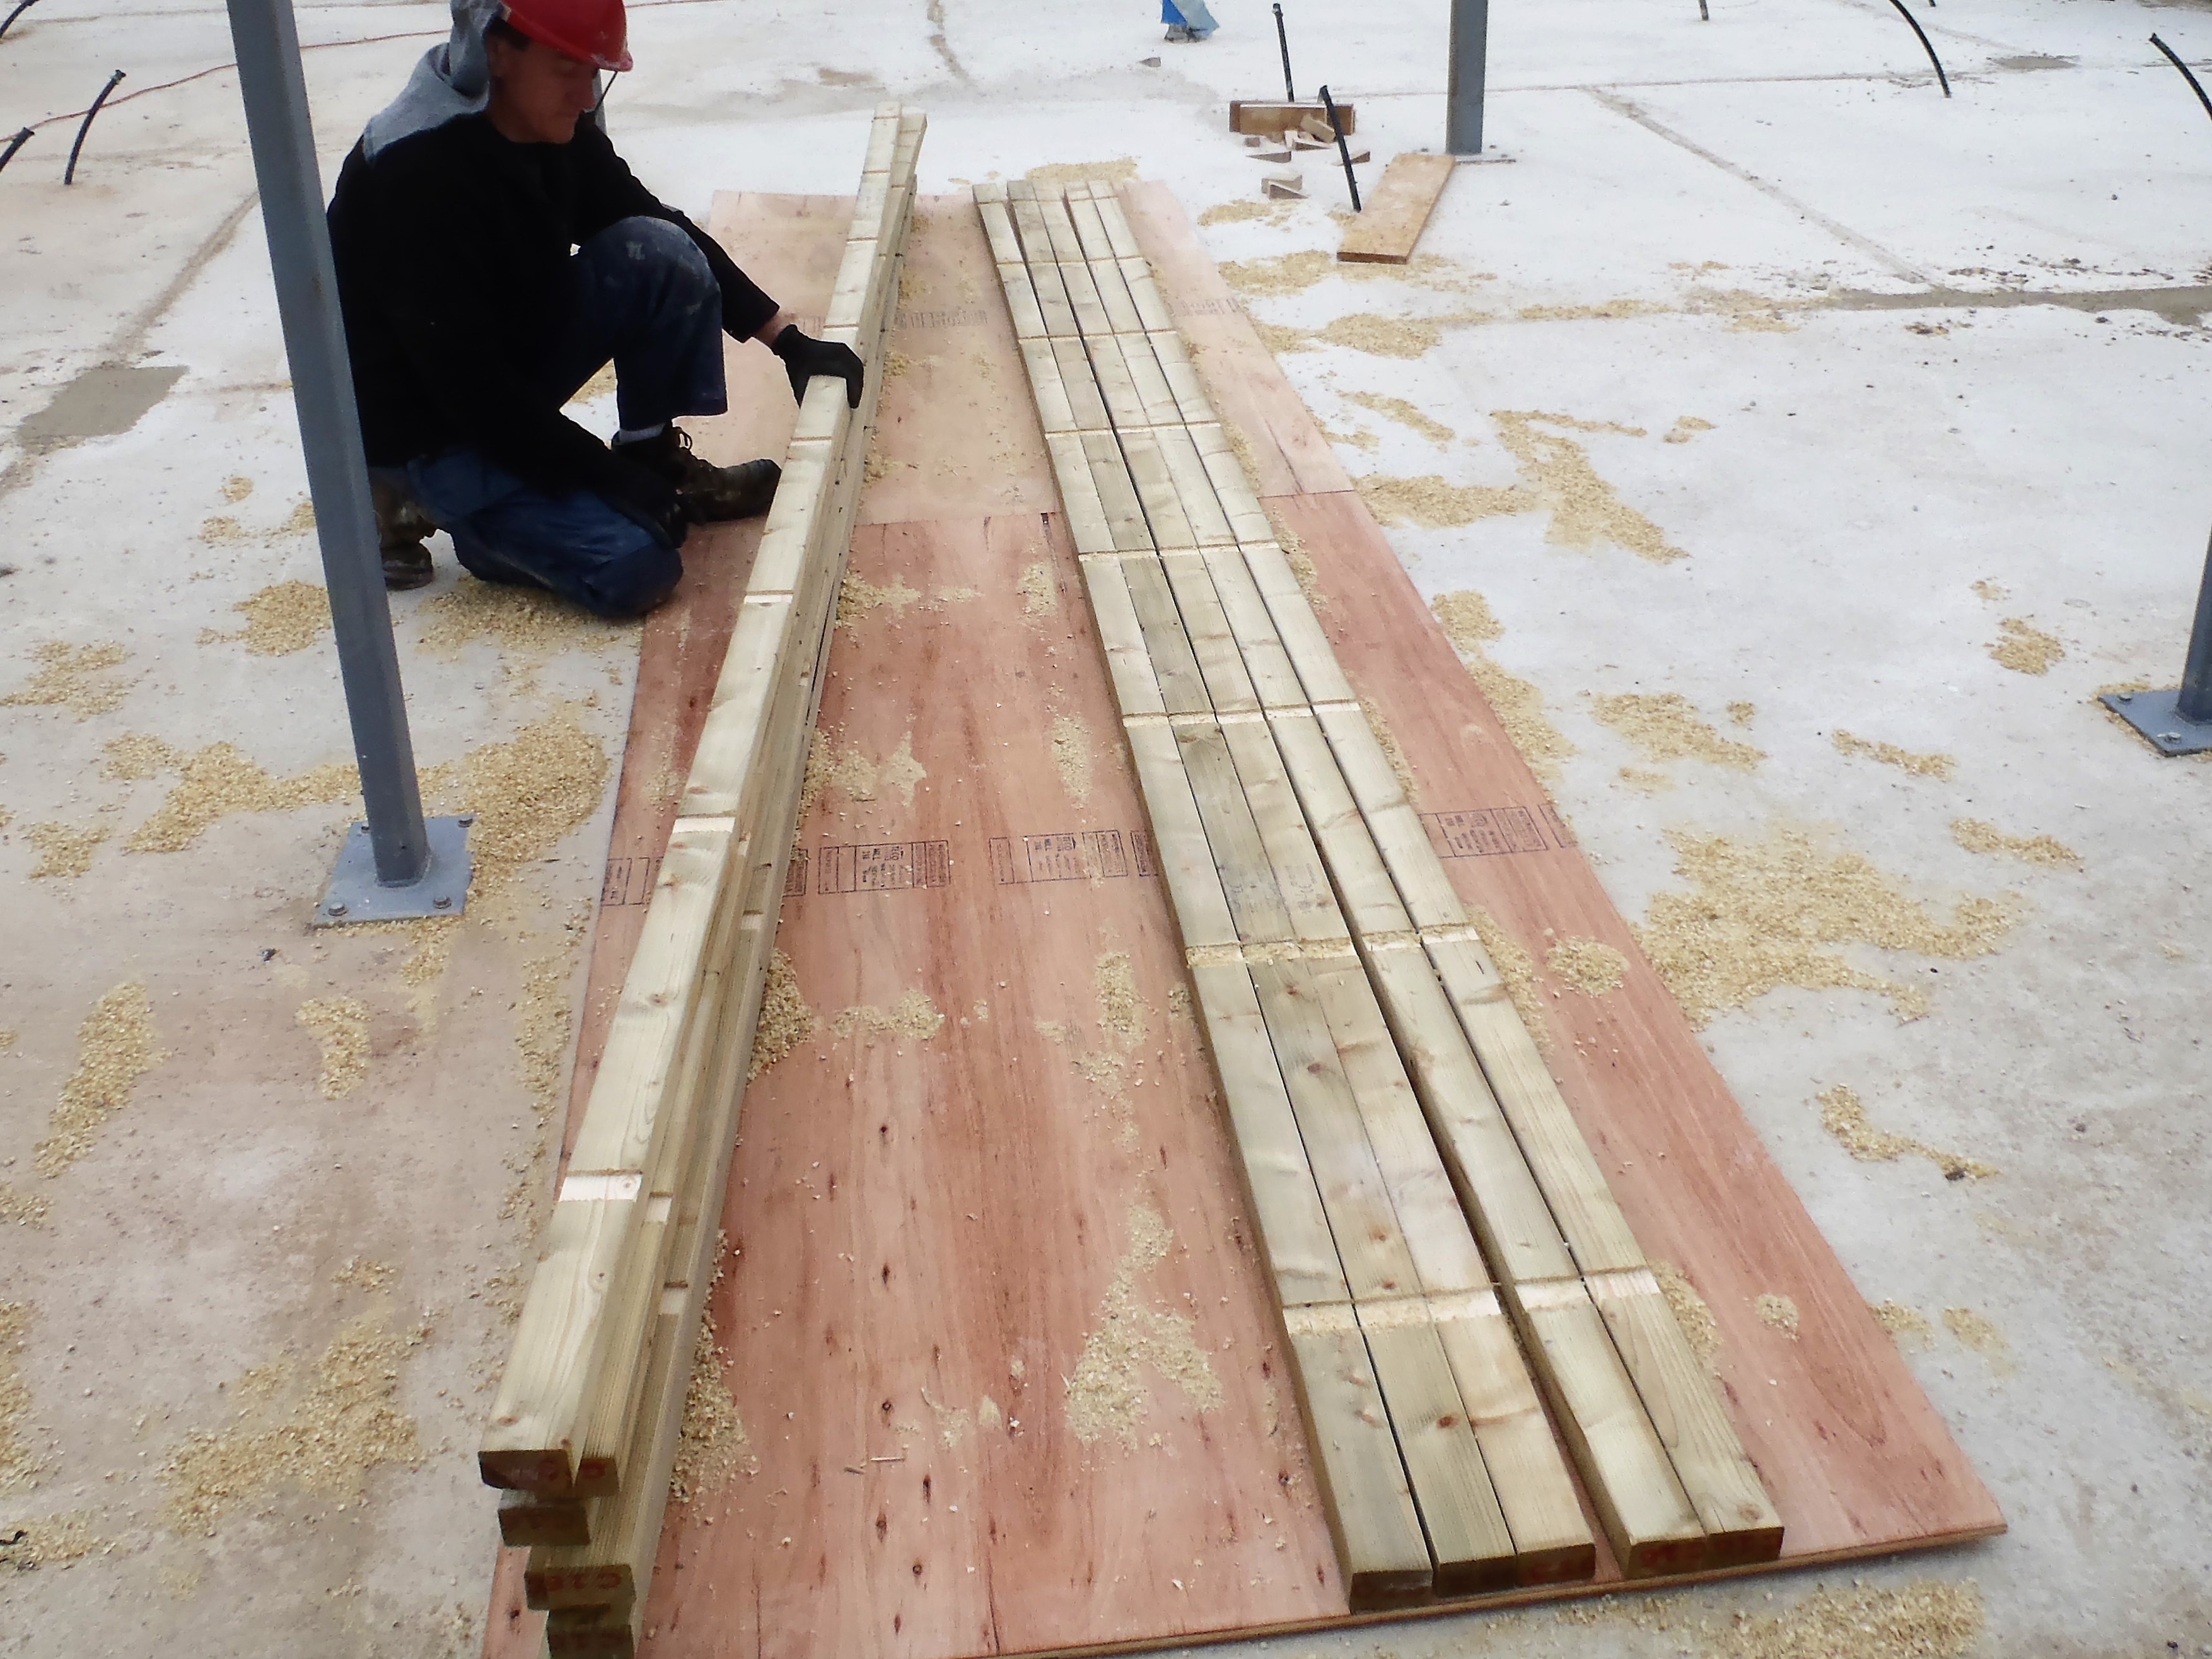
    But first, we collected another 20 lengths of the 89mm CLS timber from our pallet and chopped them more or less in half. This and the 3 odd ones we had leftover from yesterday, we now have 43 pieces ready for the next stage.

    Chop-saw-in-Action

    Chop-saw-in-Action

    Parts-for-corner-posts

    Parts-for-corner-posts


    Then, we made some improvements to our Modular Workbench System by putting in locking nuts and bolts onto our fence strips. We wanted to lock down the fence so it couldn’t wiggle or ride up during any operation we might be doing. Every position of the fence needed a nut to be installed into the surface of the work top (a total of 20 of them) and the fence has 2 bolts to screw down where ever it is located.

    After lunch, we slid in the circular saw module and tilted the blade over to various angles to rip cut down the lengths of the 89mm CLS pieces, according to our printout. Each Corner Post has these wings that attached to the central Body and it is the central Body that is angled each time depending on its location around the wall and the roof it is supporting.

    So for example, if the body part needs to be set at a 33° angle, then the two wings has to have the corner bits sliced off, one is a 33° bit and the second wing will have 57° sliced off, so when these two wings are combined together , they form a 90° right angled corner (33° + 57° = 90°).

    The trick is to pass through the circular saw, one piece of CLS timber lying flat and the another CLS piece going through vertically, making the two opposite angle cuts without having to adjust the saw blade each time!

    Rippping-the-angle-

    Rippping-the-angle-

    We tested this technique out using short bits and glued and nailed it together as you can see in the photo below.

    A-Sample-corner-post

    A-Sample-corner-post

    The 12 corners have the following angles:

    • 2 x 33°
    • 4 x 36.5°
    • 2 x 40°
    • 4 x 44°

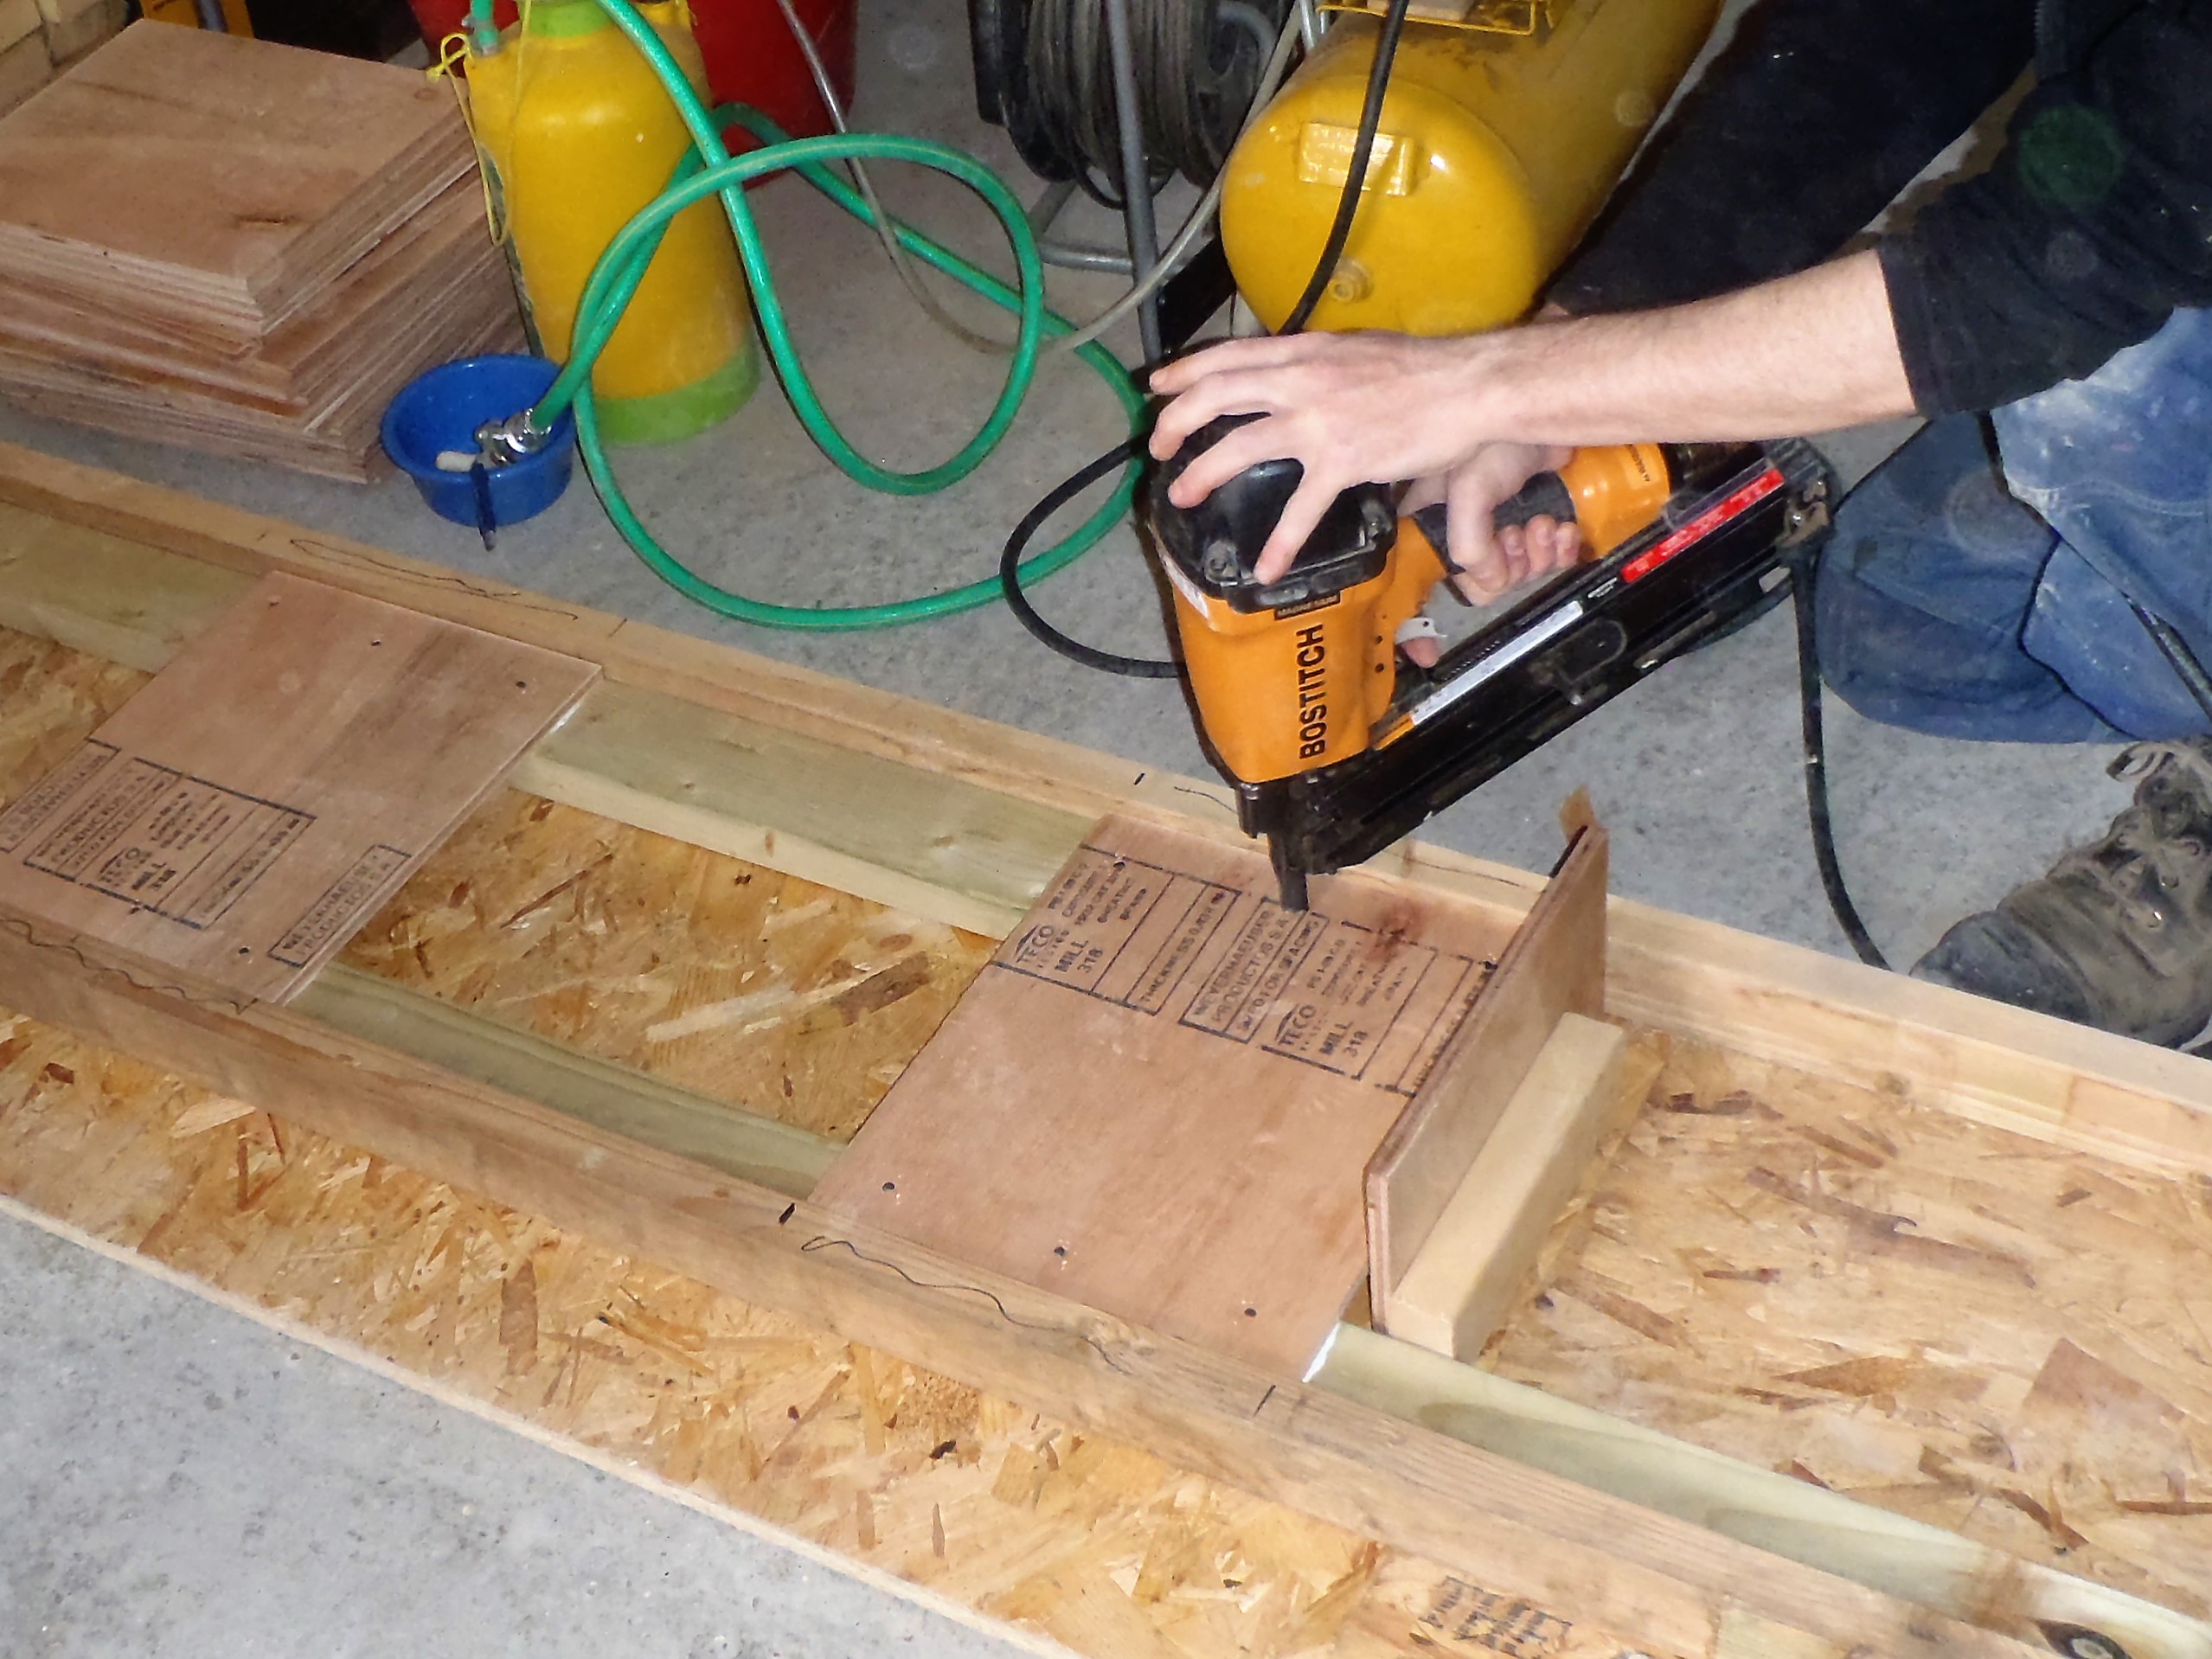
    We have created the 12 sets of the parts, ripped cut down too length and ready for the next stage. The next stage is rather tricky, as we need to place these wings onto the central body part, glue it using our non-creep structural wood glue and nail it together to hold it while the glue dries and cures. We made two little jigs to form right angled templates to hold the three parts together whilst being fixed.

    This will be quite fiddly so we need more practice and learning how best to do it. That’s the job for another day!

  • All The Perimeter Legs Now Created

    Today, we carried on making our Legs that will create our External Wall of the house. We got the glue dispenser going, connected up the nail gun and started loading pieces of timber into our jig.

    We made 22 right-handed “first floor” legs – this means this size of Leg will support the First Floor Joists on the inner 63mm CLS posts. We put to one side 3 pieces of the 63mm CLS for making the left-handed legs later on when we adjusted the jig.

    We moved these completed legs out to our trolley to go alongside the Great room legs.

    Legs-which-support-the-First-Floor

    Legs-which-support-the-First-Floor

    After lunch, we carried on and made another 34 right handed “non-first floor” legs – this time, these sizes of legs only holds up the floor boards on the first floor level, and hence these has longer inner posts.

    Again, we moved these out to the trolley to keep the workshop from being overly cluttered.

    Legs-which-dont-support-the-First-floor

    Legs-which-dont-support-the-First-floor

    Now, we turned around the jig, adjusted the end stop so that we now can make the left-handed version for going around the edges of windows and doors, on their left sides – surprising enough!

    We finished off the day by creating 3 plus 9 of these left handed legs and moved all out to join their siblings on the trolley. So we made 33 Legs for the Great Room, 43 Legs which runs on the front and back walls and 27Legs that supports the first floor, mainly along the side wall nearest the garage and the side sections of the extension.  A Grand Total of 103 Legs in all!

    We wrapped it up with a tarpaulin to keep the rain off.

    Trolley-full-of-legs

    Trolley-full-of-legs

    And then .. We hauled it .. We tried to haul it .. We Could NOT haul it!! Not at least  by human power alone – OOPS! We had to get our ratchet come-along winch to crank it across the softer ground to get it off our drive way so we can get our car out!! We calculated the weight of the 103 Legs and here is the summary of the results:

    • 770kg of the CLS timber
    • 190kg of the plywood webbing
    • 15kg of nails!

    A grand total of 975kg or virtually a ton!! Eek!! No wonder we couldn’t move it!!

    Tomorrow, we will make the 14 corners posts (most of them are quite complex), and also cut up some extra pieces ready for filling in some extra support where needed, as instructed by our Construction Drawings.

  • Rain Changed Order of Work and We Created Heaps of Leg Parts

    Since there was a big threat of rain arriving in the early afternoon, we changed our planned task for the day and instead went into more Factory Production mode to produce more Leg Parts.

    First of all, we went outside in the morning, while it was still dry and sanded each slot in the slot cutting template to widen it very slightly. We had found that the slots were just a bit too tight for easy insertion when we was trying out a completed Leg.

    Then we cut the regularly spaced (at 612mm) slots in a further 12 lengths of 63mm CLS timber, to add to our previous 8 lengths we had done earlier, making a total of 20. This means we are ready to put on the top-plate for the inner posts for the Installation of the Wall Legs.

    We repeated the process of cutting slots for another 20 lengths of the 89mm CLS timber, so these are also ready for the top-plate on the outer posts. The only outstanding job is to cut slots for both the 63mm and 89mm pieces to cater for the doorways and at some corners where extra legs are needed.

    Slots-cut-into-CLS-for-top-plates

    Slots-cut-into-CLS-for-top-plates

    Just before lunch, we carried into our workshop a heap of the 63mm CLS timber, another 65 lengths, ready for chopping into the required lengths.

    Stack-of-Timber-to-cut-into-legs

    Stack-of-Timber-to-cut-into-legs

    After lunch, armed with a piece of paper with our measurements and tally numbers, we went to chop 43 lengths of the 63mm CLS to exactly 2900 mm long and a further 25 lengths of 2660 mm pieces, these will form the other two sizes of the Legs to complete the circuit of the External Wall.

    We had to fetch another 5 more 63mm CLS and 3 more 89mm CLS timber pieces to make up the numbers. The 89mm were chopped to produce the 2393 mm outer wall legs.

    The-parts-for-68-legs

    The-parts-for-68-legs

    Finally, we swept up all the sawdust to tidy up the workshop and then tied into bundles all our offcut pieces and moved them outside to go with the other off-cuts already out on the pallet.

    The-off-cuts-from-the-legs

    The-off-cuts-from-the-legs

    Tomorrow, we will continue in the workshop whilst the rain and winds blows down from the North, and make more Legs!! Oh yes, we earlier moved out the previous created Legs and put them on the large platform trolley and covered them in a tarpaulin, so they are ready to be transported around the house when the weather changes to being dry!!

  • Wood Preservative Treatment For All Cut Ends and Slots

    Just dashed outside this evening to quickly (an hour’s work) treat all our cuts ends and slots with chemical Preservative to make sure that no rot will occur in the years ahead.

    Using our can of the clear preservative liquid and a paint brush, went around coating all the doorways, windows, corners and slots in the outer 89mm CLS line of timber sitting on the concrete Perimeter Wall.

    This task was done today so the chemicals has a chance to soak into the wood fibre and dry overnight before we start our installation of our new Legs tomorrow.

  • The Great Room Legs Created and Odd jobs Done

    This morning, we resumed the production line  of the Legs for our Great Room. we made another 25 Legs to add to the 7 we did yesterday, making a total of 32 Legs in all.

    34-Great-room-legs-comstructed

    34-Great-room-legs-comstructed

    You can see from the little video below of us assembling a leg and the use of the jig, gluing and nailing everything together.

    After lunch, there was a threat of rain so we decided not to start installing the completed Legs into the house outside so we instead did some more chopping up of timber, this time, the outer post, the 89mm CLS pieces and chopped another 32 lengths to make 64 2393 mm long posts ready for creation of the Legs.

    Timber-cut-for-rest-of-the-outsde-studds

    Timber-cut-for-rest-of-the-outsde-studds

    Then, we went outside to do some odd jobs, like for example, cut some missing slots on the lower footplate where we will need to install the Leg element, mainly around the doorways and three internal corners.

    After that, we used a length of 38mm wide timber with sandpaper stuck to it and went around sanding the slots in the lower footplate to remove lots of splinters and slightly widened the slots. Also we brushed and collected a whole large trug of old mortar and sawdust from right around the base of the perimeter wall too.

    The rain did not ever arrive, so much for the weather forecast – Grin!! On Monday, we will start fresh in the morning and install our first set of Legs in the Great Room and in the afternoon, anchor them all together  by gluing and nailing the two layers of top-plate on top of the legs to stiffen up and lock the completed Walls together and survive against any sudden strong winds.

  • Production Line Starts to Rolls Off Legs for Great Room

    Today, we spent the time slicing and chopping lots of materials for the creation of the Legs for our Great Room. After carefully checking yesterday our Leg Element and how it fitted, we were ready to speed up production of the various individual items to make a Leg.

    We spent the morning slicing up 12 more sheets of our 11mm structural plywood into over 300 webbing pieces, using firstly our circular saw module and slicing the full sheets into 4 x 300mm wide strips. Then taking each set of 4 strips, we put it through our chop saw module every 370mm, creating our neat webbing items. This is enough webbing for all the legs.

    Then, we brought in 33 lengths of our 63mm CLS timber to have them chopped down to the required 3070 mm size, and piled up next to the 89mm CLS pieces we have already done.

    Pile-of-cut-wood

    Pile-of-cut-wood

    After lunch, we tidied up the workshop of all the sawdust we created from the morning’s work, tied up in bundles the left-over pieces of 63mm into 12 piece piles and tied up a heap of plywood pieces, all using old string we had lying around. All these bundles were then moved outside to get them clear of our working area. The CLS went on a spare pallet  near the other pallets, and the plywood stacks went under the rain protection in our swimming lane.

    Then we resumed the assembly of each Leg itself. We did a further 6 more “left hand” orientation which will be fitted on the left hand side of the 5 windows and the door in the Great Room. It was the usual job of placing each element into the jig, gluing and then nailing it all together.

    Now we needed to switch the jig over to make “right hand” types of the Legs, so a quick unscrew of the barrier to slide it across to the other side of the jig and hey presto .. we now have a template for making the leg with the plywood webbing pieces on the other side of the Legs.

    We started the next Leg to only hit a snag .. the glue stopped flowing!! Oh why does it stop just right now??! We took it apart and checked the pipe going down inside the bottle of glue by blasting full powered  compressed air down the pipe, did the same for the flexible hose section and finally got to the nozzle and guess what? It was Blocked! Just Typical that we started at the wrong end!! We cleaned out a lump of half set glue out of the nozzle and by this time, it was approaching finishing time for the day. it was slightly earlier this time as we had other commitments on.

    We did actually finish this leg off! Tomorrow, we will resume our assembly of more Legs for the Great Room and after that, start getting them into position outside in the house itself – yippee!

    First-7-legs

    First-7-legs


  • Creation of Legs Begins

    Today saw the start of the creation of the External Wall Legs. These legs forms the main structural load bearing elements for both the roof (on the outer leg) and the first floor support (on the inner leg).

    First-leg-errected

    First-leg-errected

    As the photos shows, it is a very tall twin vertical lines of CLS timber, the outer one being 89mm wide and the inner one being 63mm wide, connected together with three plywood pieces measuring 300mm high and 370mm wide (this being the actual depth of the External wall).

    We did a block job of cutting up 18 lengths of the 89mm CLS in our chop saw module to produce 34 required length of 2393 mm long pieces. As some of you may have noticed the odd difference between 18 and 34 and not 36 lengths, several of the timber that came off the pallet had cracks in them so we chopped them around these faults and had to fetch another piece from the stack.

    We made a jig to repeatedly position each of the parts in their correct location and have the three 11mm thick plywood spacers glued and nailed into the correct place each and every time.

    Jig-for-legs

    Jig-for-legs

    Then, getting one length of the 63mm CLS timber off the pallet, we sliced this down to 3060mm long and inserted this into our new jig template, along with a 89mm pieces we made earlier and glued and nailed the plywood pieces into place.

    Nailing-spacers

    Nailing-spacers

    Our first completed Leg element we took outside to test how it fitted and we discovered a mismatch with our expectations against the survey task we did on Monday. We had concluded that we needed a length of 840mm below the upper level but as we realised, it wasn’t enough! We had a mismatch with our measuring on that Monday and today. It seems that we should have doubled checked the method we used to calculate this required distance by using a different method and tools and we would have realised our mistake. We actually needed to increase our required distance to 850mm to make sure we can set the Leg perfectly vertical.

    So this first Leg is now reassigned to be a Leg in the Utility Room beside the Window’s left hand side instead, it fitted nicely there – grin!!

    Having made the adjustments to our jig, we made a second Leg and this time, we had the flexibility to shave little bits off the end of the inner leg, bit by bit, until the Leg was vertical. We used a combination of our battery powered circular saw and a heavy razor sharp guillotine to slice off large and thin slivers respectively. We also had a length of timber with sand paper stapled on one edge to help us clean up the slots and if necessary, rub the slot ever so slightly deeper to provide that final adjustment.

    This Leg went into the Great Room on the wall labelled in O the number 8 slot, the wall is part of the extension facing our Swimming Lane.

    Finally, we had time to make a third Leg and repeating the process we did on the previous leg, got this one fitted as well. This Leg went in also in the Great Room but this time on the Kitchen / Great Room Front Wall which is labelled A and Slot number of 7.

    Tomorrow, we can now ramp up the production rate and do another 32 Legs to do all the Great Room Legs as they are all the same size, before we move onto the next wall.

  • Final and Double Check Measurements

    This morning, we went around with a spirit level and our talking tape measure, to measure the distance from the upper wall level, the 89mm wide footplate, down to the lower level, the 63mm wide footplate on the concrete.

    We balanced the spirit level horizontally, with the tape measurer stuck on the end pointing right angled downwards, and at each and every slot around the Perimeter Wall, pulled the tape down and listened to the announcement of the distance. This got written down directly onto the timber.

    The range of measurement was between 833mm to 840mm, with most of them being 833mm and 835mm. Matching this series of distances, which is after all, only a relative amount from the upper level down to the lower level, we needed to see if this set of numbers, when added to the absolute height  of the upper level, does anything to our calculations and any adjustments we might need to make.

    The conclusion was no. A Good Old Fashioned No! Hurray! Grin!

    This means that we now know how long to make the inner leg to ensure there is enough excess wood so we can shave small amount off the end with our guillotine tool and get the whole leg assembly perfectly vertical when we install each leg.

  • Final Inner Footplate Layer with Slots Gets Glued and Nailed

    We had a slightly delayed start today’s work because we had rain overnight of about 3mm and we wanted to make sure the wood planks already out there will be as dry as possible before we use our glue. The wood glue is normal everyday stuff and it doesn’t work very well in damp conditions. So we started 11:30am instead of our usual time of 10am.

    So starting in the corner of the Utility Room, we went around clockwise, laying down the second and final layer of the Footplate, this layer having the slots already cut in the timber.

    Alignment-gadget

    Alignment-gadget

    We used our Alignment Tool as shown in the picture above, to lock into a slot on the outer Footplate, and the new piece we were putting down then was lined up to make sure all the slots are in sync. We glued and nailed this strip down and repeated this process all the way around.

    No problems to report and we used 16 lengths out of the 24 lengths we had slots cut into yesterday. the other 8 (plus another 8) will be used for providing the Top-plate to position and lock the tops of the legs when we got all the legs built and set into place.

    Second-layer-of-inner-footplate-installed

    Second-layer-of-inner-footplate-installed

    The final task of this particular stage of building the outside walls, is to laser measure the inner footplate, or at least, measure the distance from the lower level to the upper level so we can cut correct sizes of the 63mm CLS timber for the inner legs and only have to make minor final adjustment on the spot to ensure that the wall will be as vertical and solid as possible.

  • Built a Template and Cut More Slots

    Today, we made a long flat template that will hold 12 lengths of 63mm wide CLS planks and guide our router machine to make a series of 40mm wide slots, spaced out regularly at 612mm intervals. This is used like the temple from earlier to get a consistent spacing on the legs.

    Slot-cutting-jig-for-multiple-pieces

    Slot-cutting-jig-for-multiple-pieces

    It measured 4.8metres long (16 feet) and 1 metre wide, with 8 pairs of short rails (made from 19mm by 25mm battens) screwed down the length for guiding the router to go up one side and back down the other side.

    We got 12 CLS timber planks off the pallet and laid them all in a tight group on the ground, and laid the template over the top of them. we then carefully sliced away wood to leave a groove in the flat surface of the CLS timber, ready for the inner leg to lock into when we start building the exterior walls.

    Slots-cut-in-multiple-pieces

    Slots-cut-in-multiple-pieces

    Tomorrow, weather permitting, we will glue and nail these pieces we made today, putting them on the layer of wood we already have installed. We will use a short version of the wall leg (one 89mm CLS chunk for the front leg and one longer piece of 63mm CLS for the inner leg) to help align the upper outer slots we got in the 89mm wide Footplate, to position the new timber with the slots for the inner legs so they are both lined up.