Blog

  • Stage 2 Construction of Modular Work Bench Progresses

    The Modular Work Bench for our Circular Saw, Router and Mitre Saw is progressing. The last few of days of work have seen the construction of the fence and also preparing the surface of the Work Benches.

    Work-Table-Groves-2

    Work-Table-Groves-2

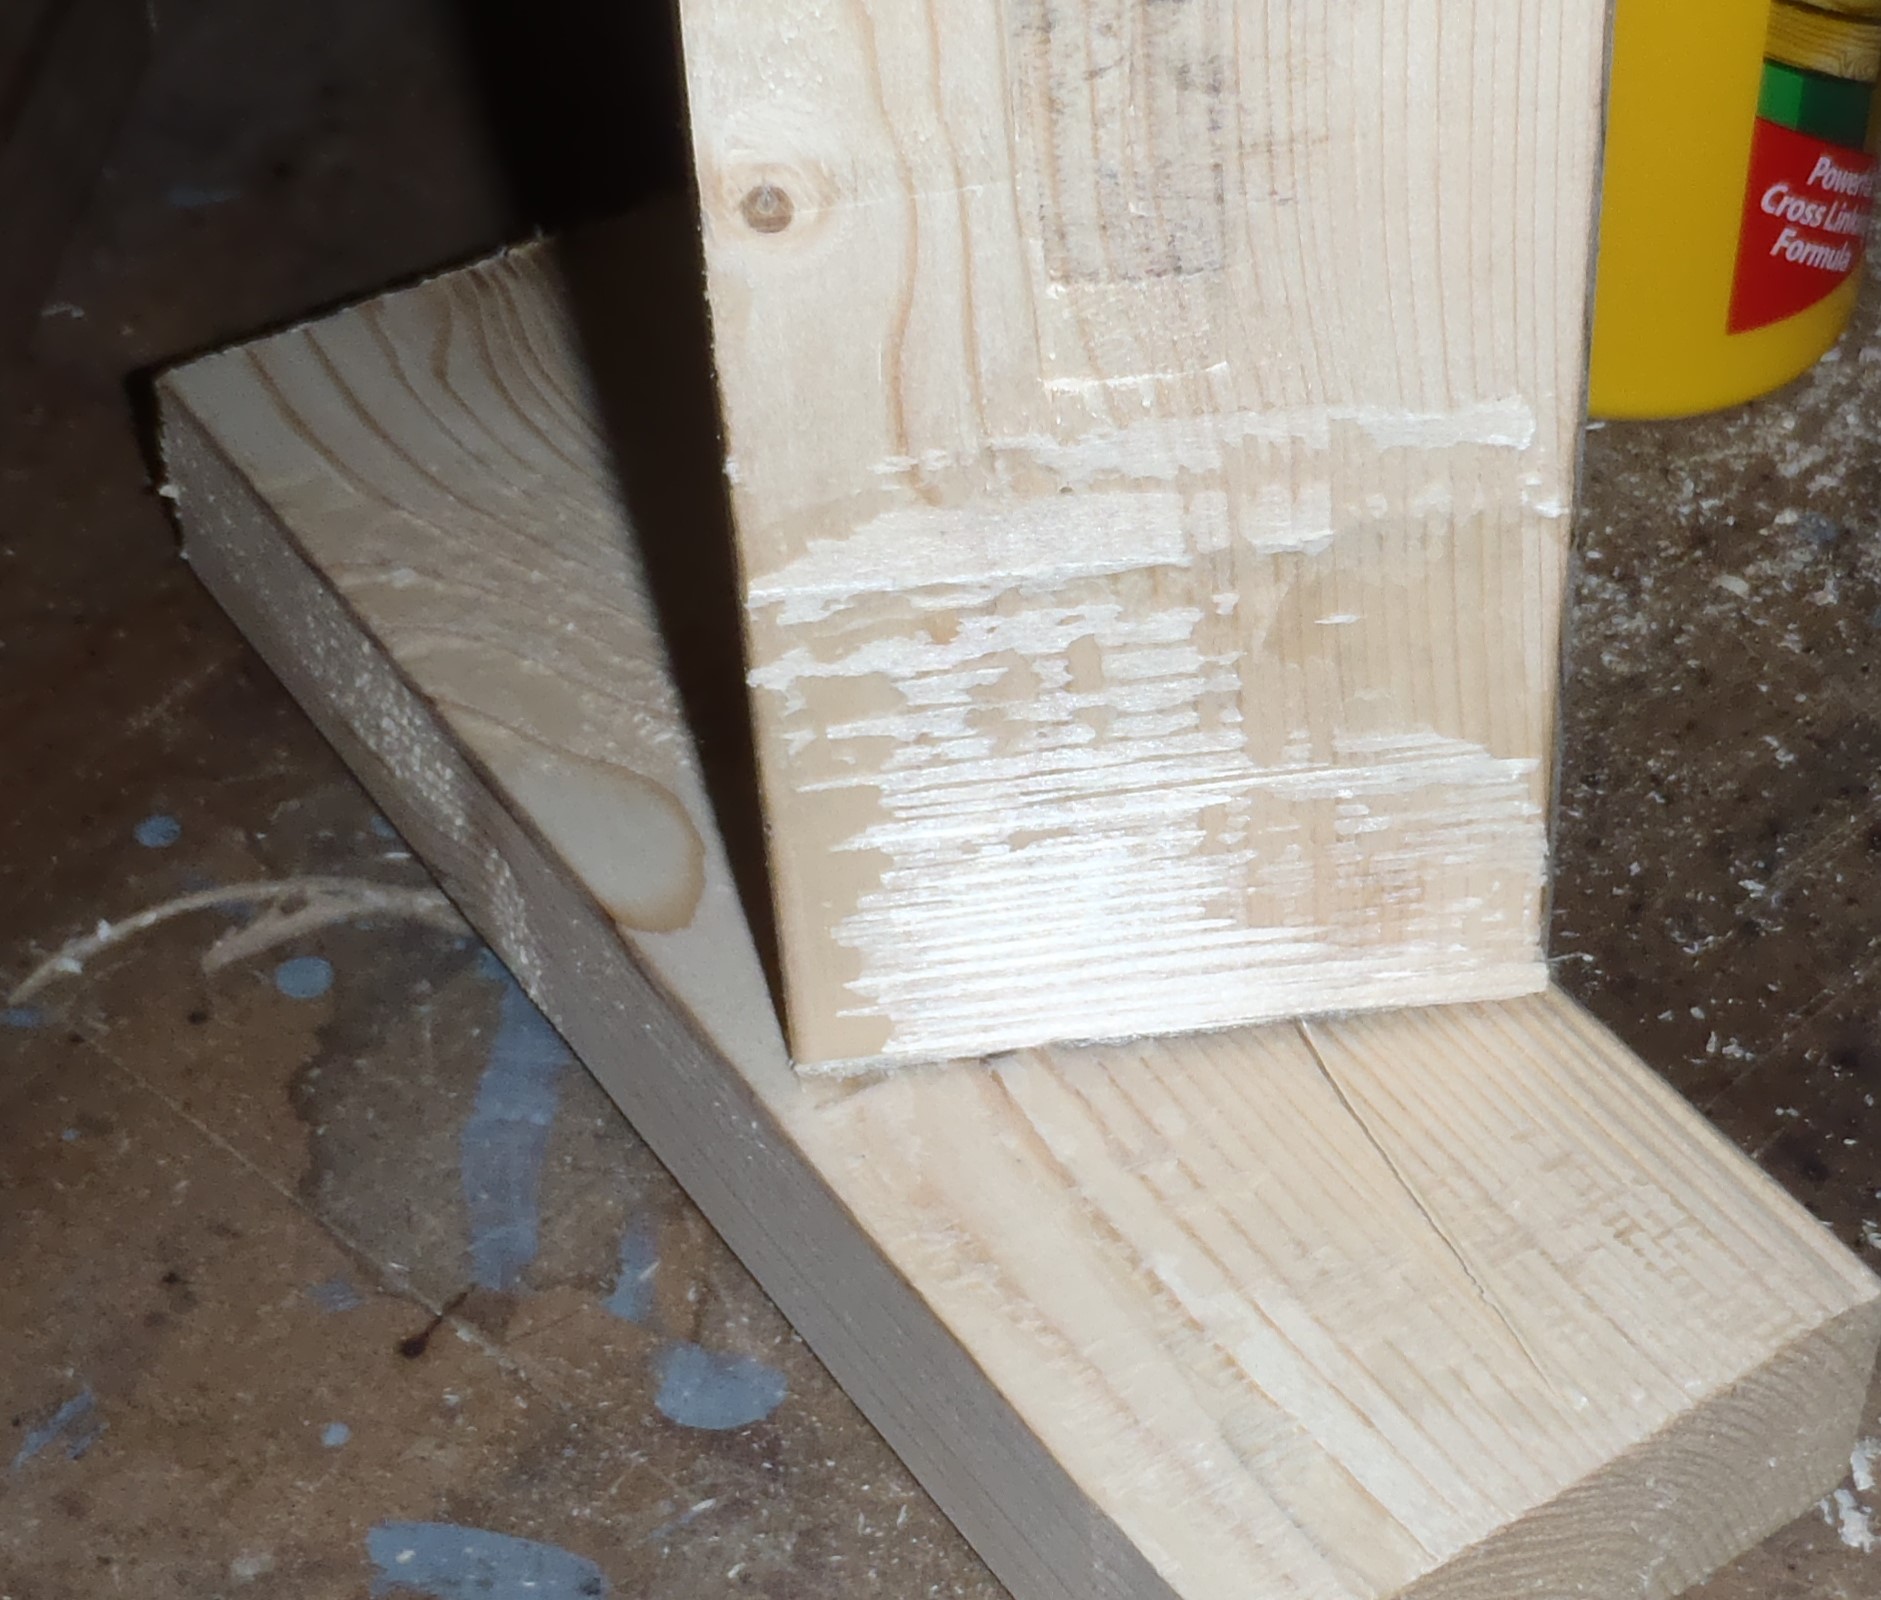
    The fence is made up of 18mm Plywood strips, one for the vertical to act as the guide surface, and the 2nd strip is flat horizontally to provide stiffness to keep the fence from bending under loads. The gap between the two Modules, saw another but shorter fence being made which will cross pass the Machine Module and connect together both sides, to make one very long fence, totalling about 3metres (10feet) of straight guidance.

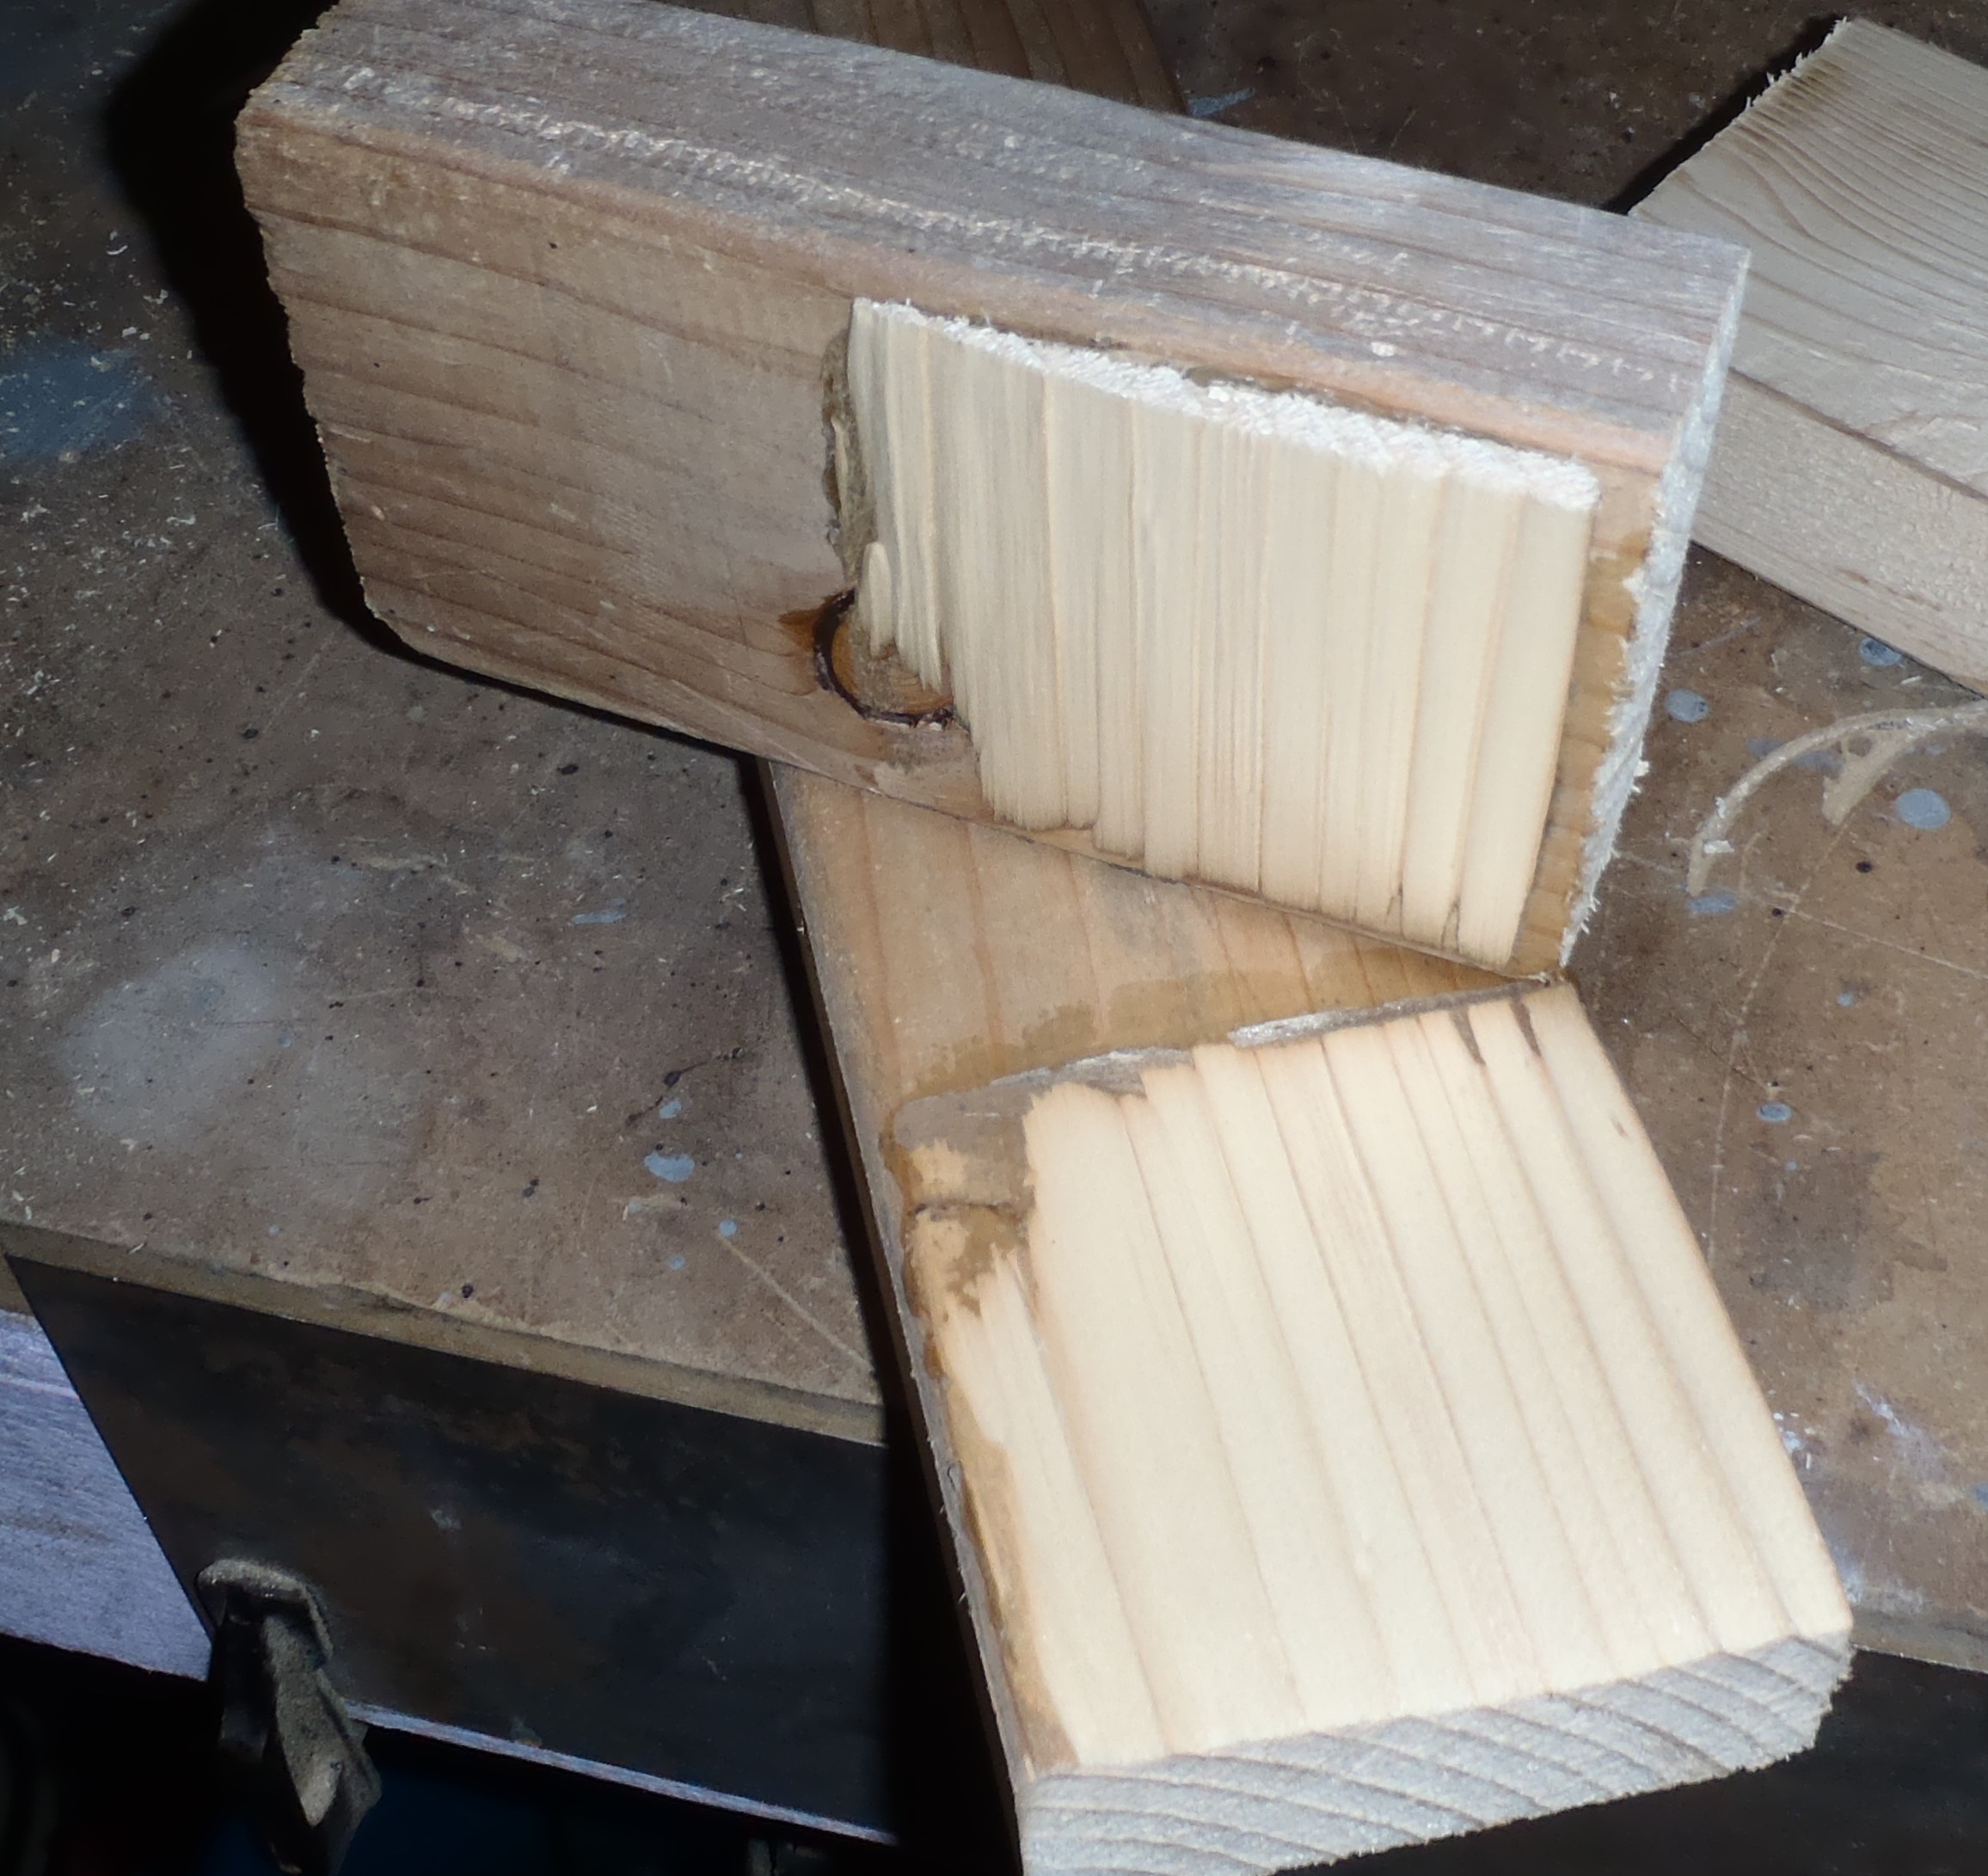
    The shorter piece was designed to be “Plug and Play” using 16mm round steel rod pieces to lock the ends together.

    Fence-peg-and-Hole-in-Bench

    Fence-peg-and-Hole-in-Bench

    Work-Bench-Fence

    Work-Bench-Fence


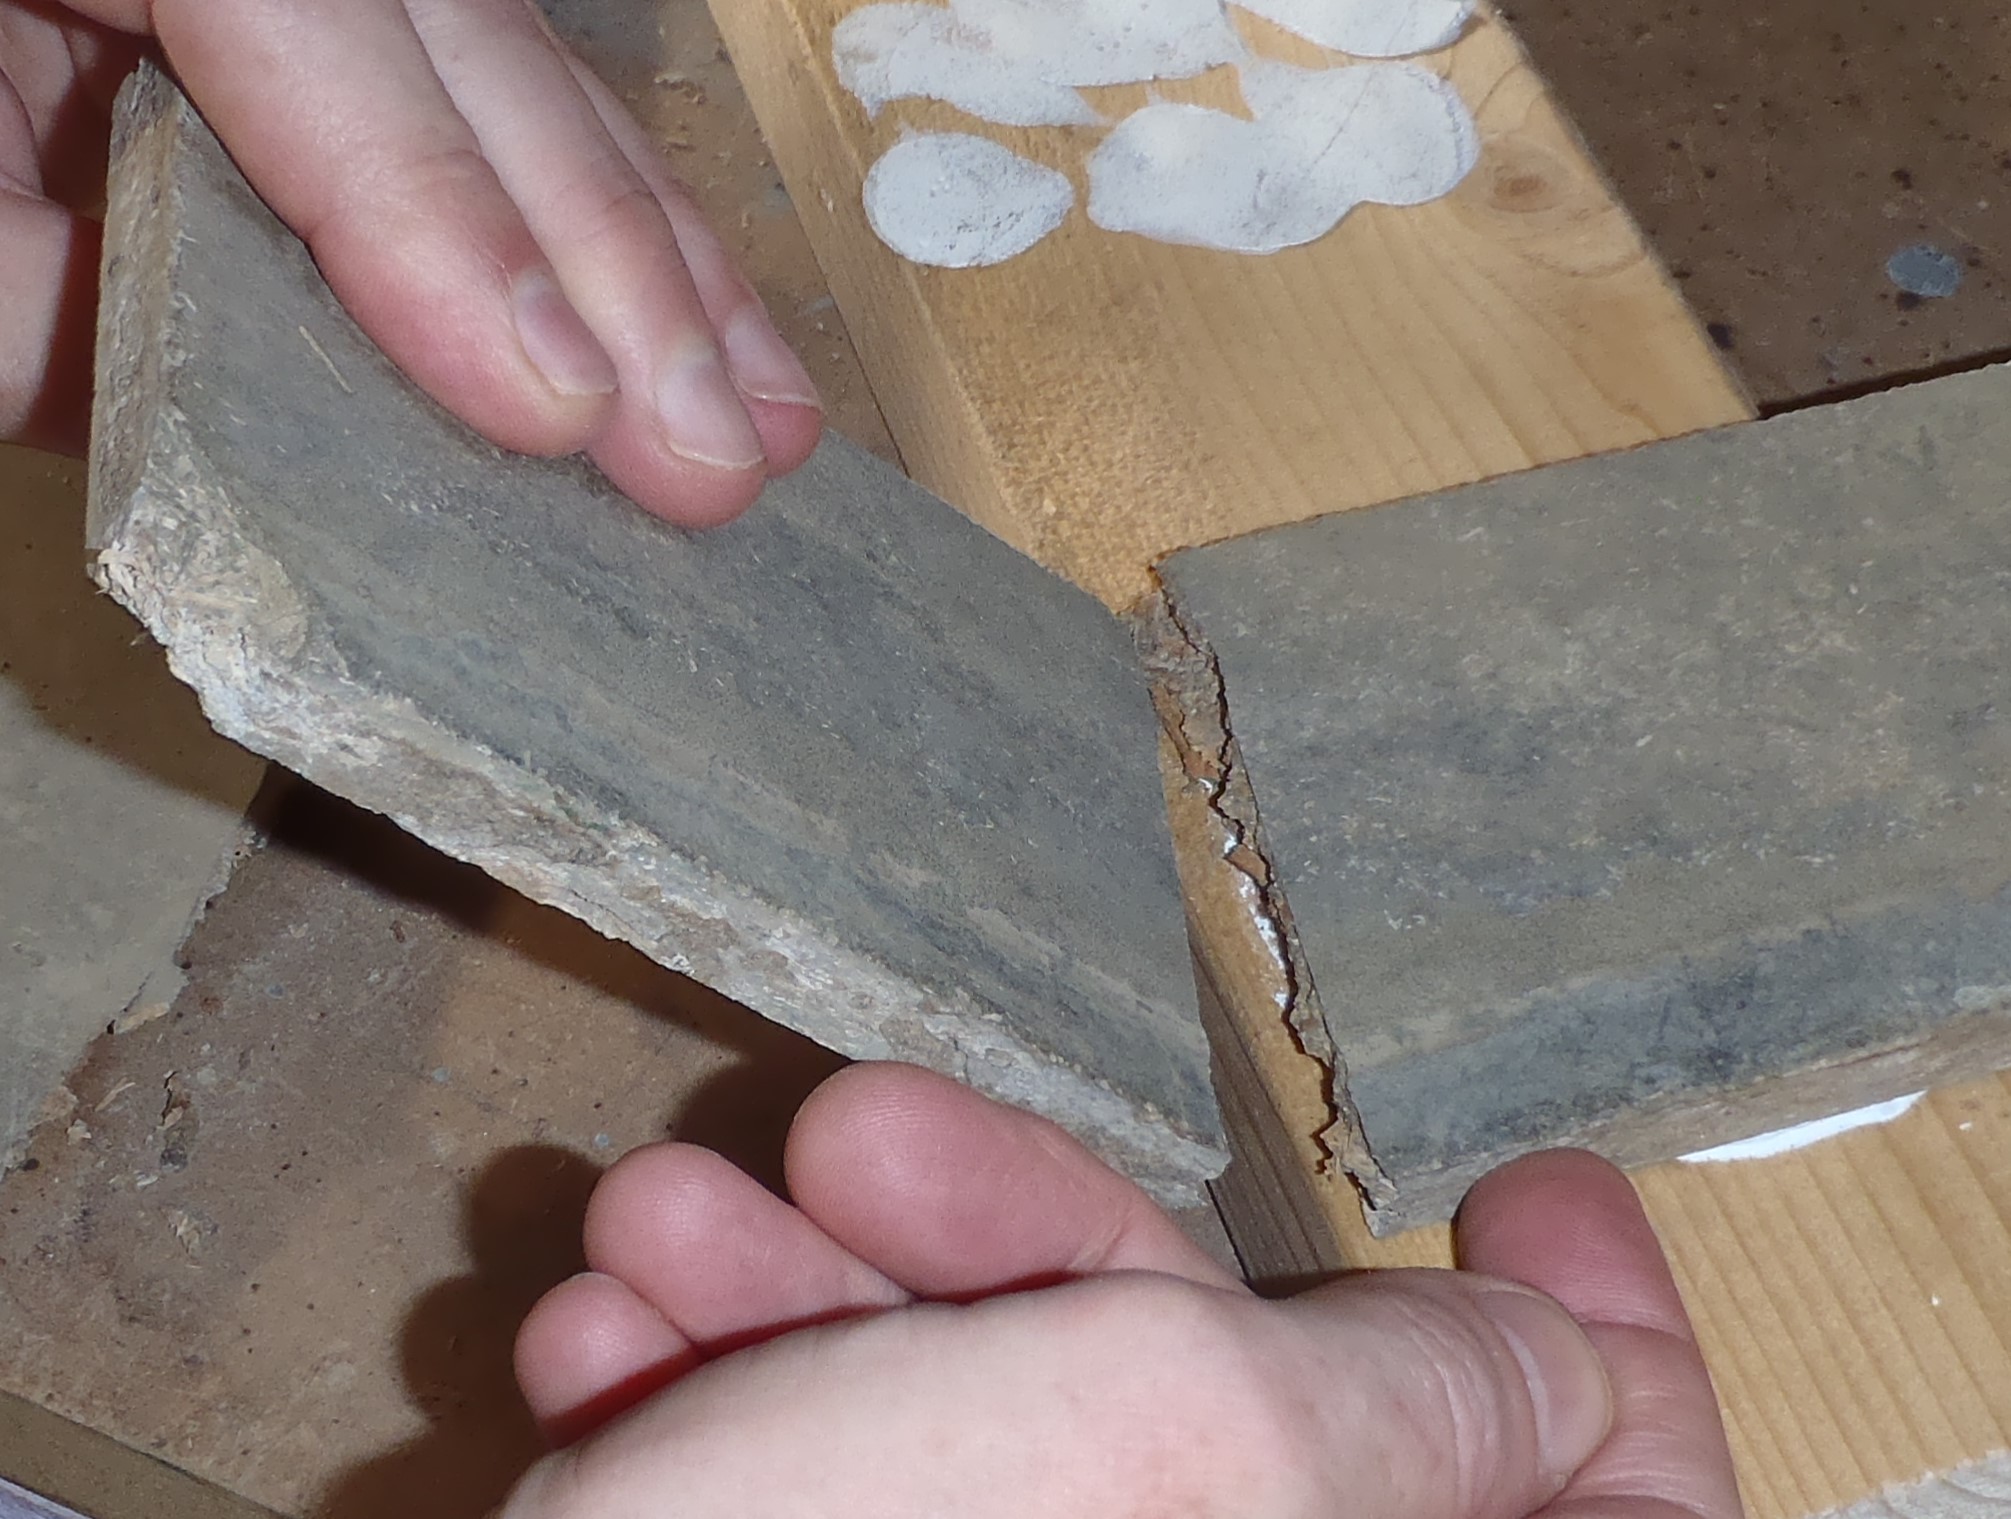
    Then, the Work Bench itself had a series of 16mm holes, spaced apart 200mm laterally to allow the whole fence to be locked into various positions that will provides a good support when working on whatever Machine Module is being used.
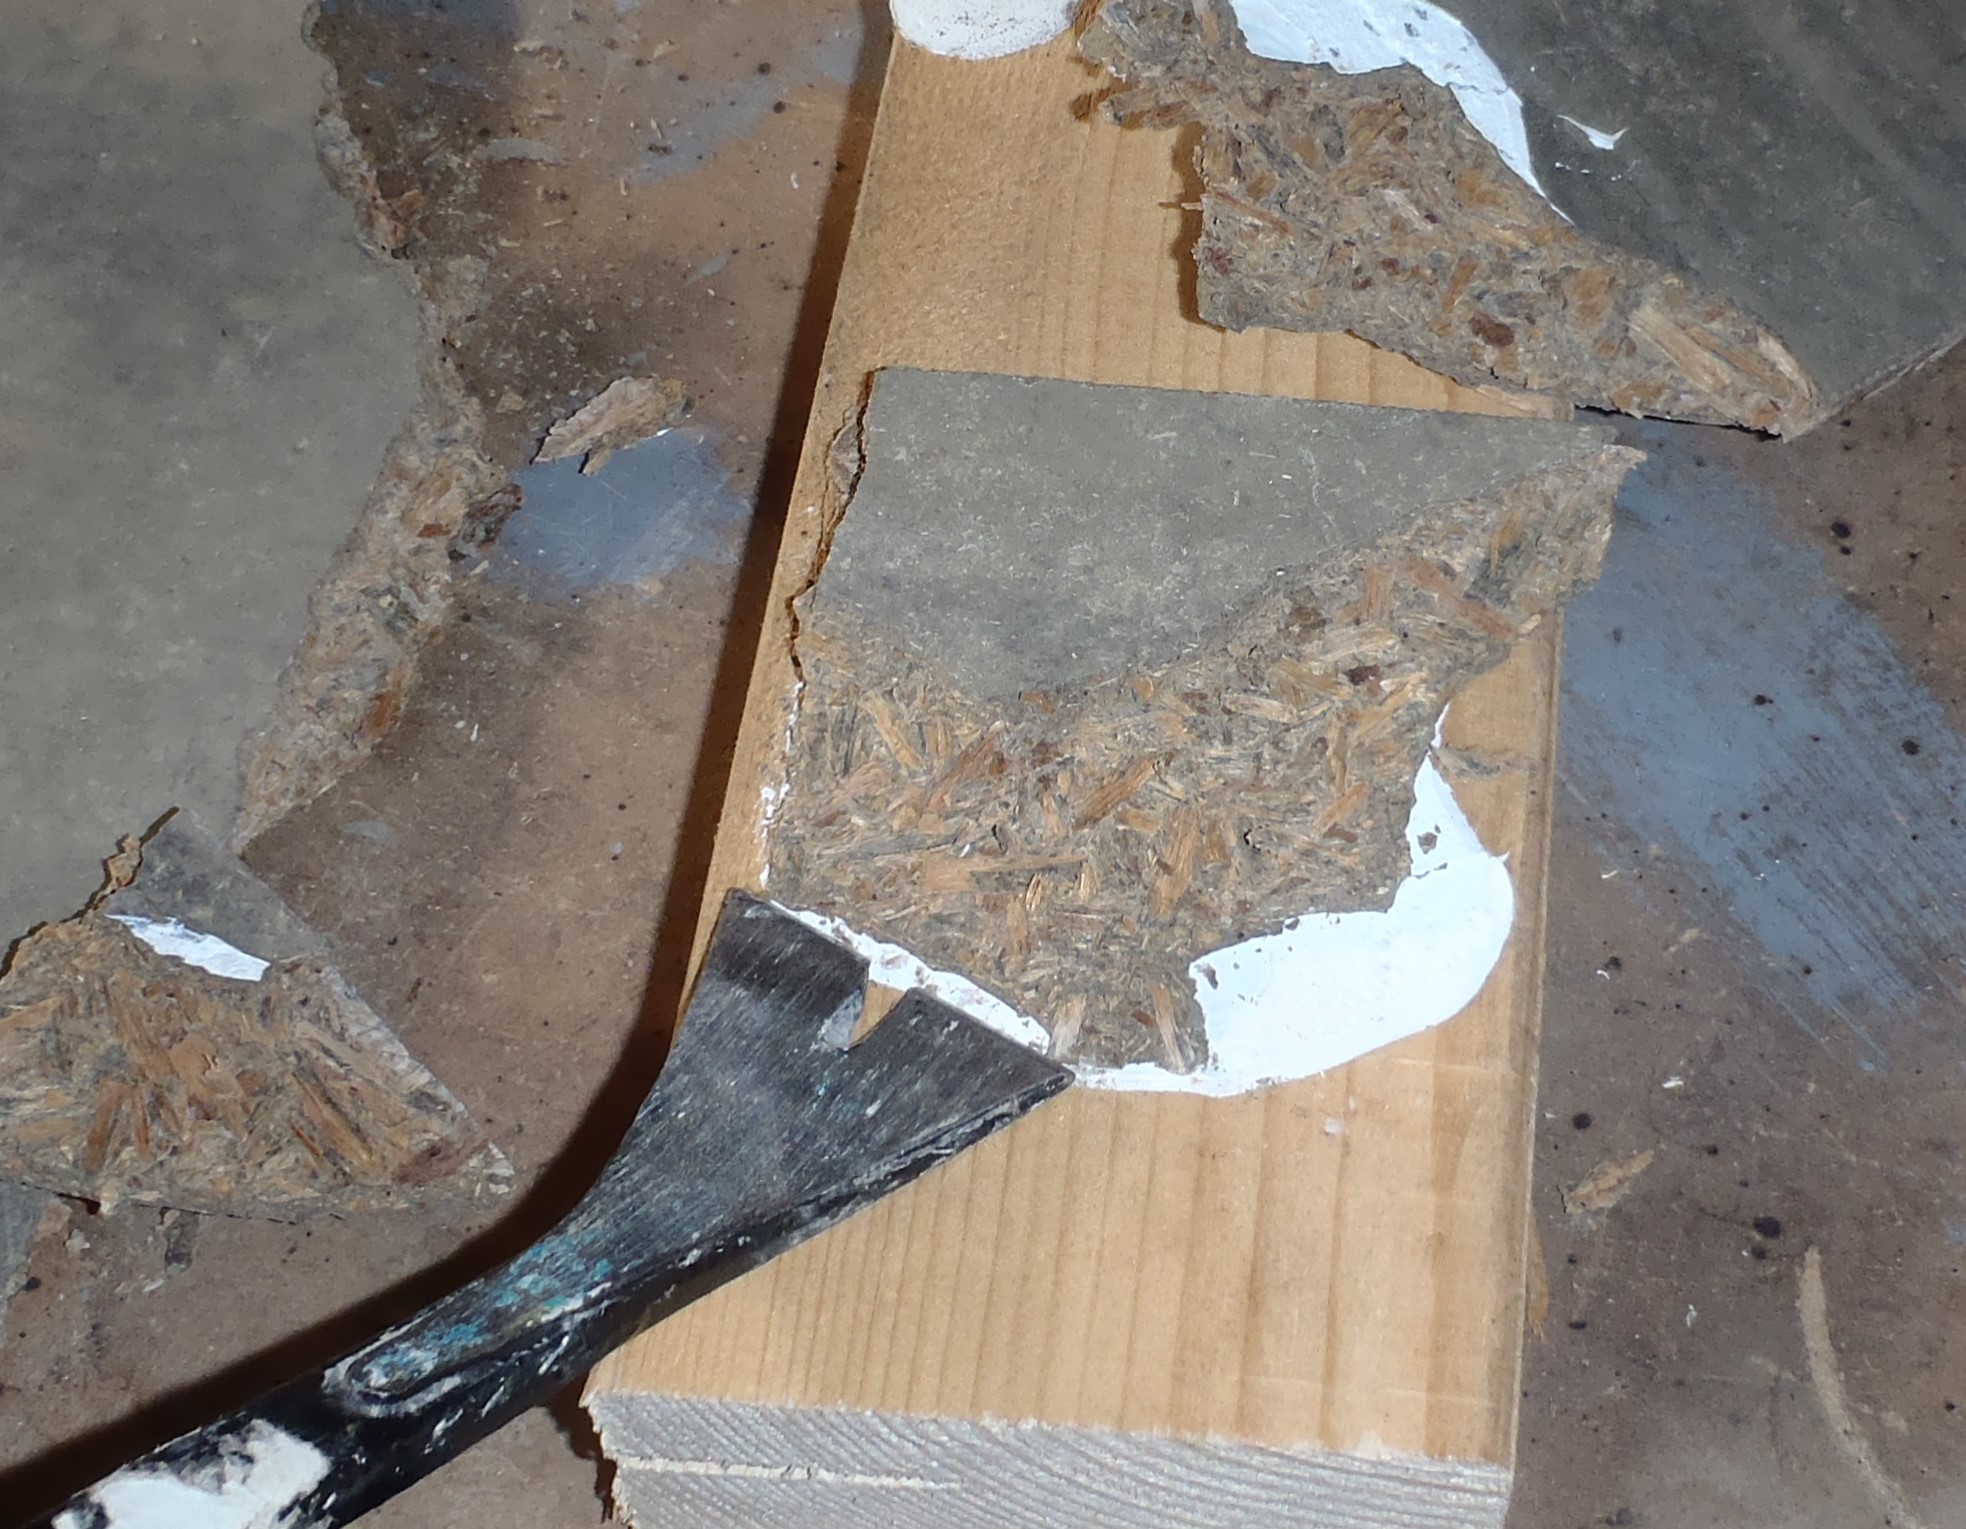
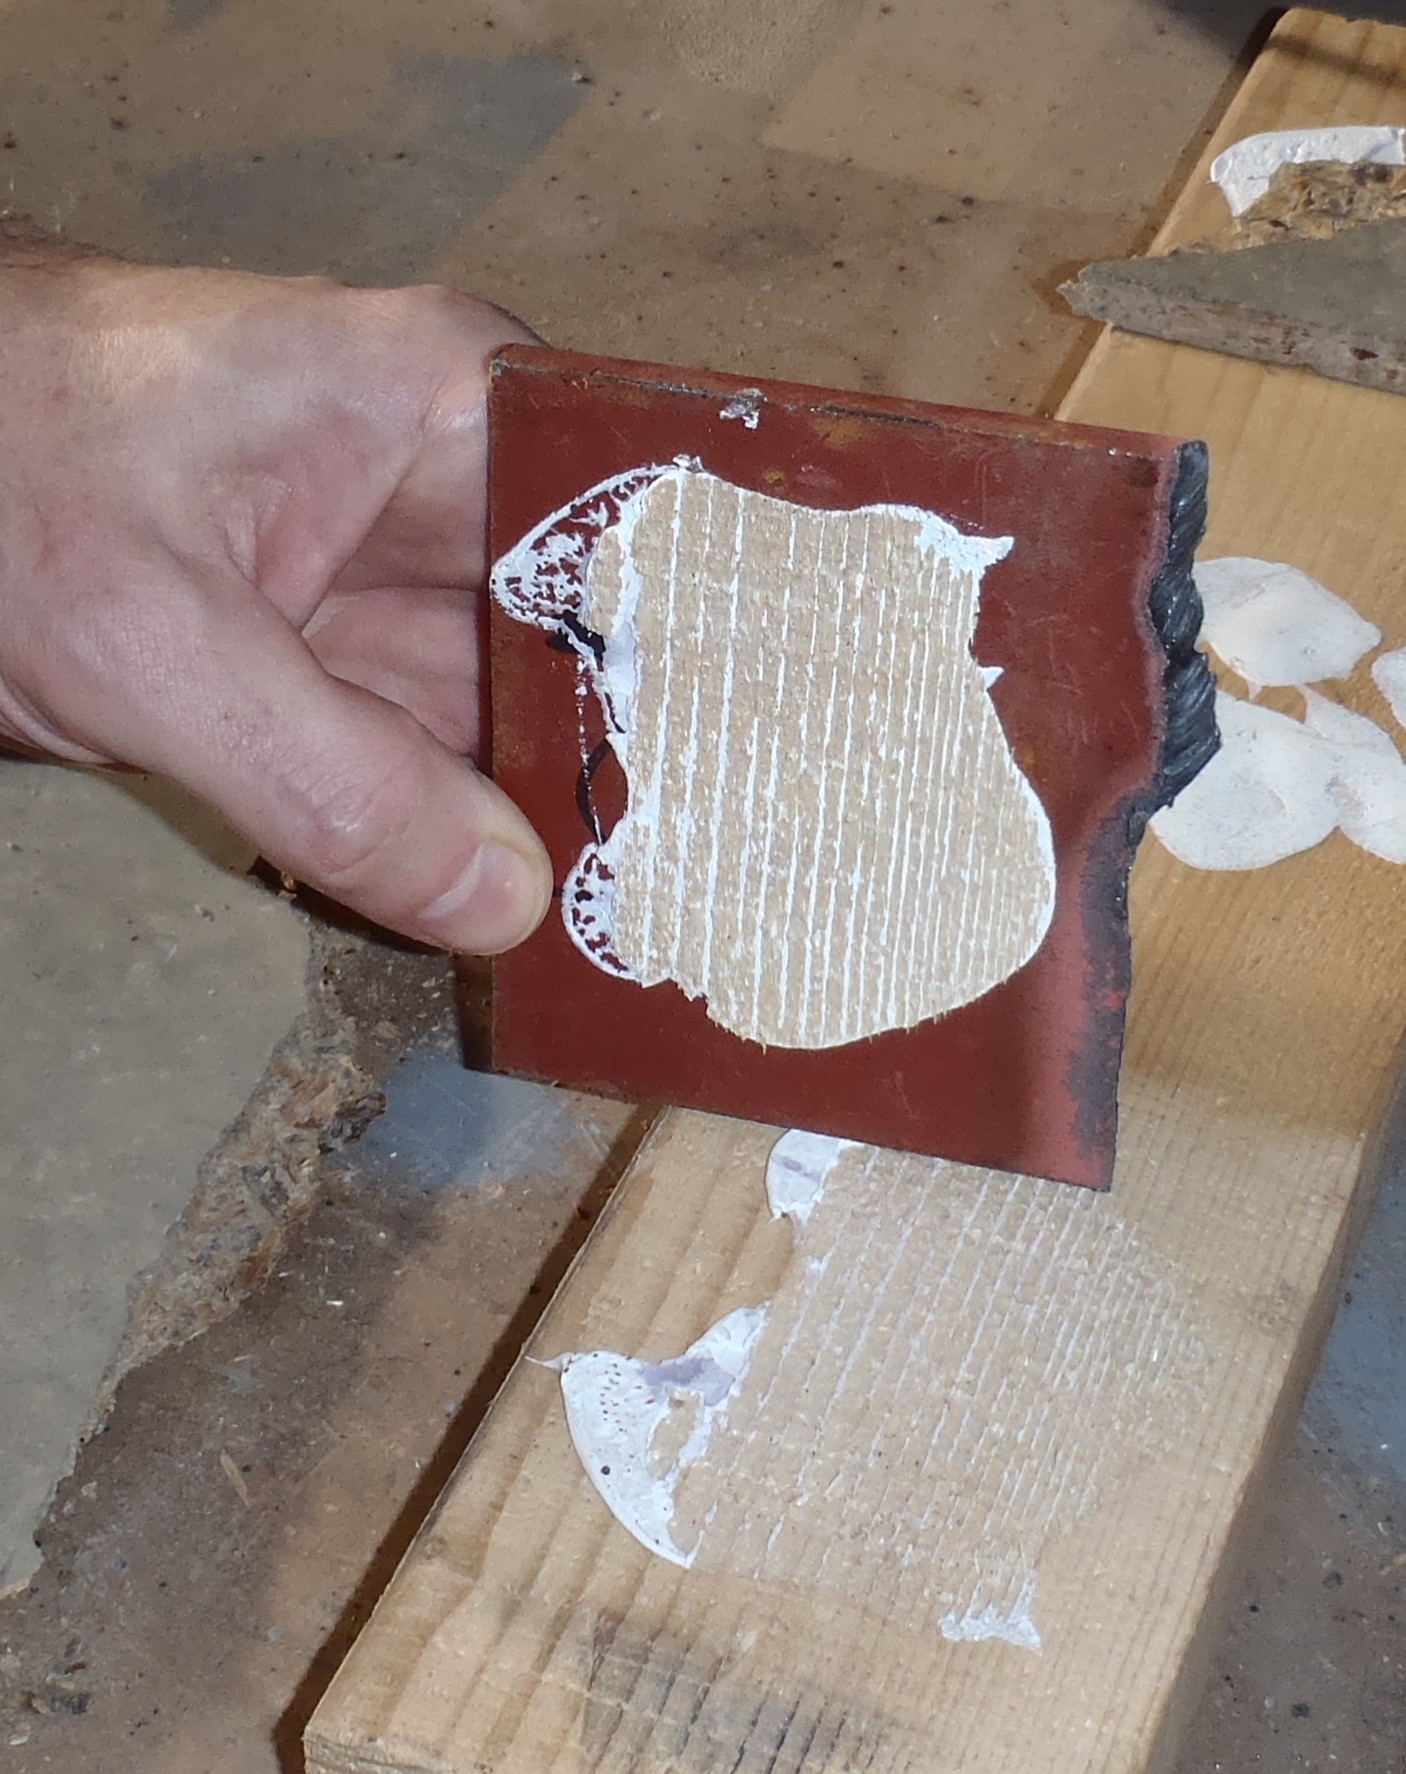
    Plus also a series of V slots, both vertically and across, has been cut into the surface of both benches to allow for the sawdust to hide away when a work piece is being pushed through the Machine Module, hence reduce the problem of too much sawdust causing the work piece to ride up on a cushion of sawdust.

    A large woodworking vice was bolted to the bench along one edge. Then the electrical system was installed with a 4 way strip being controlled by a NVR safety switch (No Volt Release) which turns off if the power in interrupted. This allows a emergency stop switch to be fitted on both sides of the bench.

    Fence-joint-Woodworkers-vice-and-Emergency-Stop-Switch

    Fence-joint-Woodworkers-vice-and-Emergency-Stop-Switch

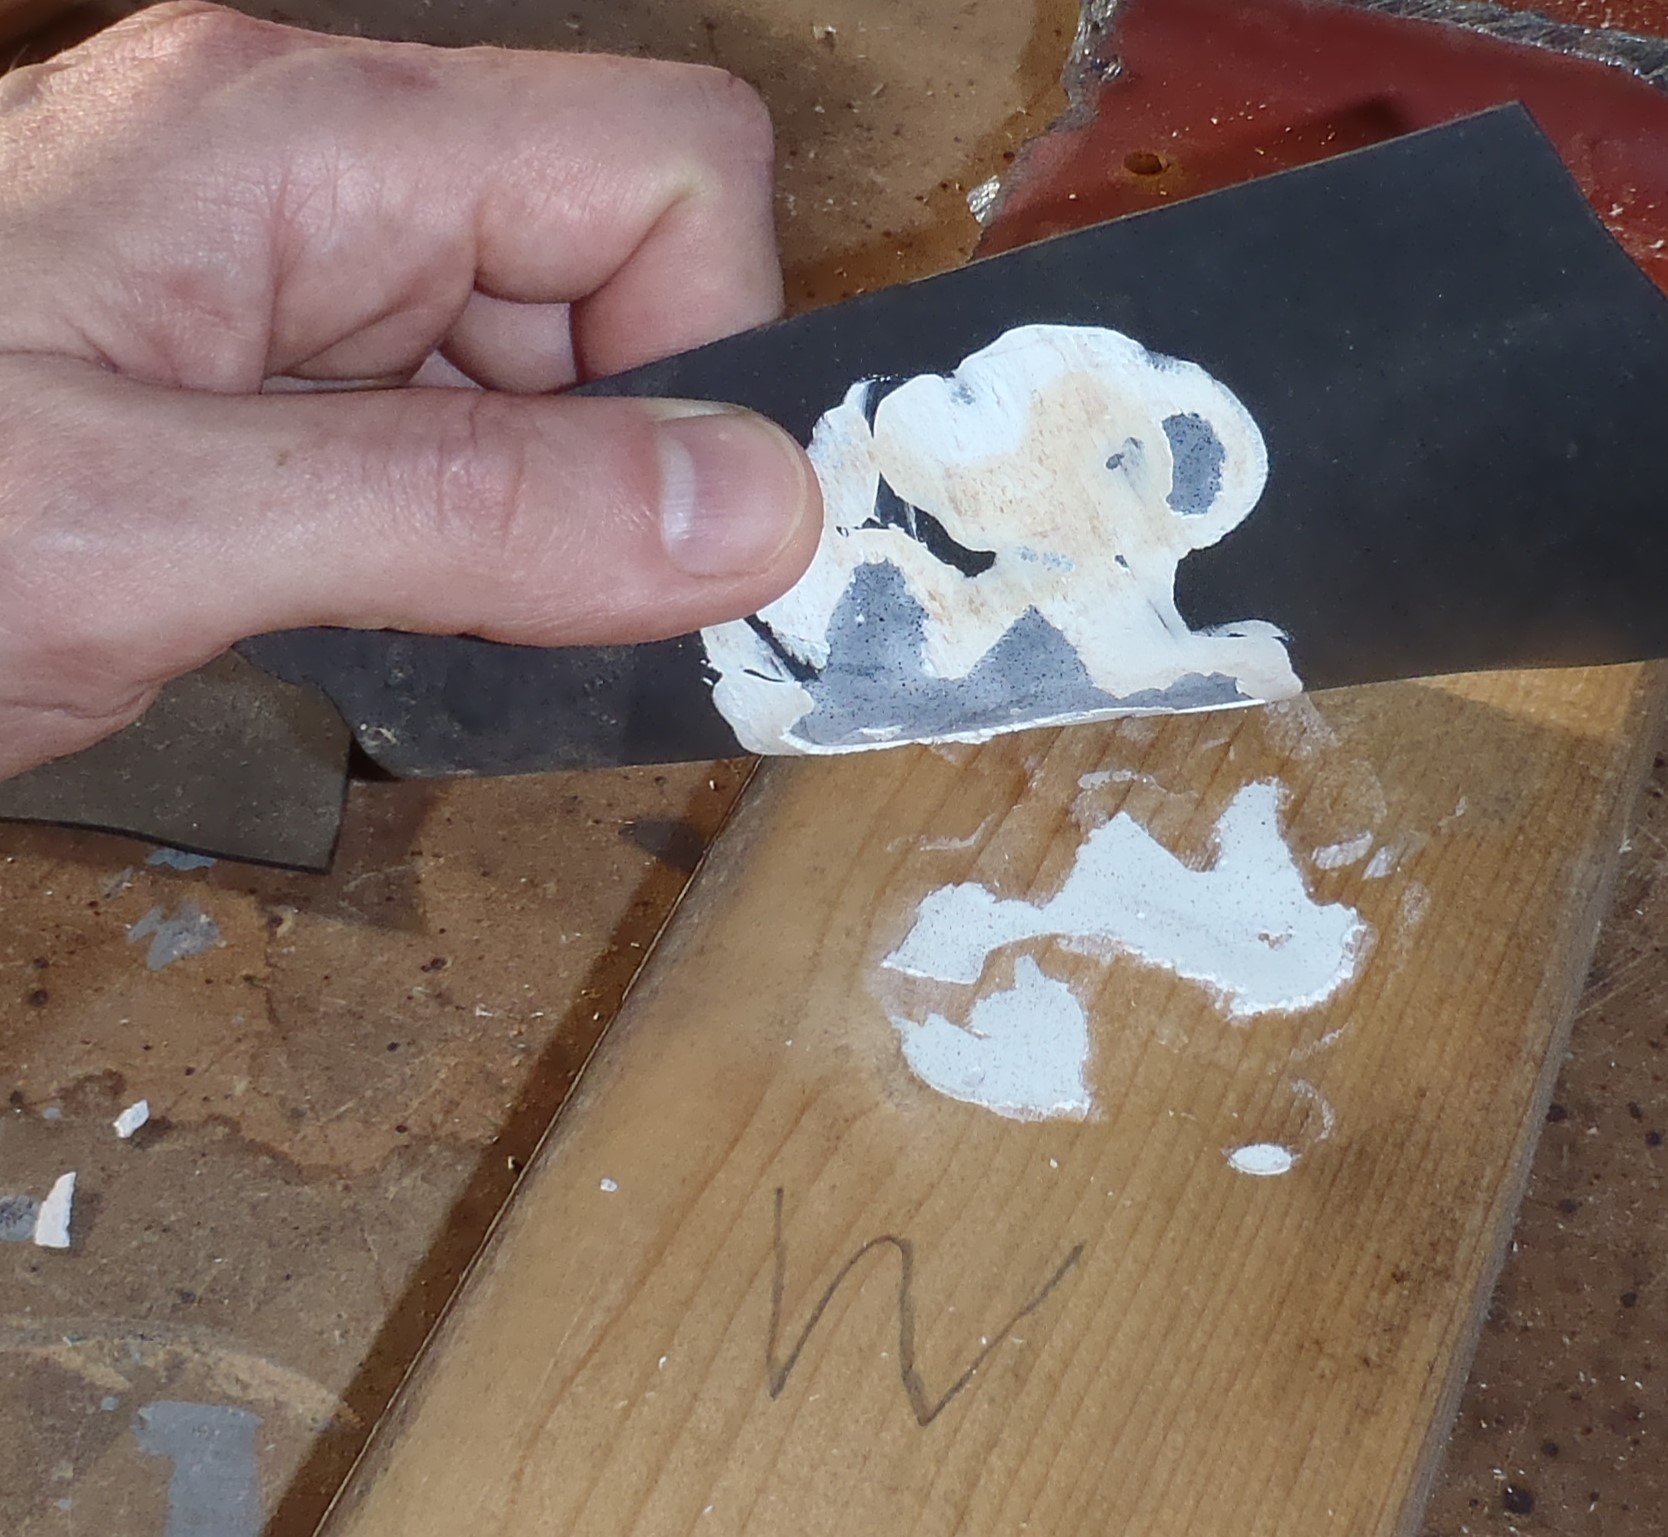
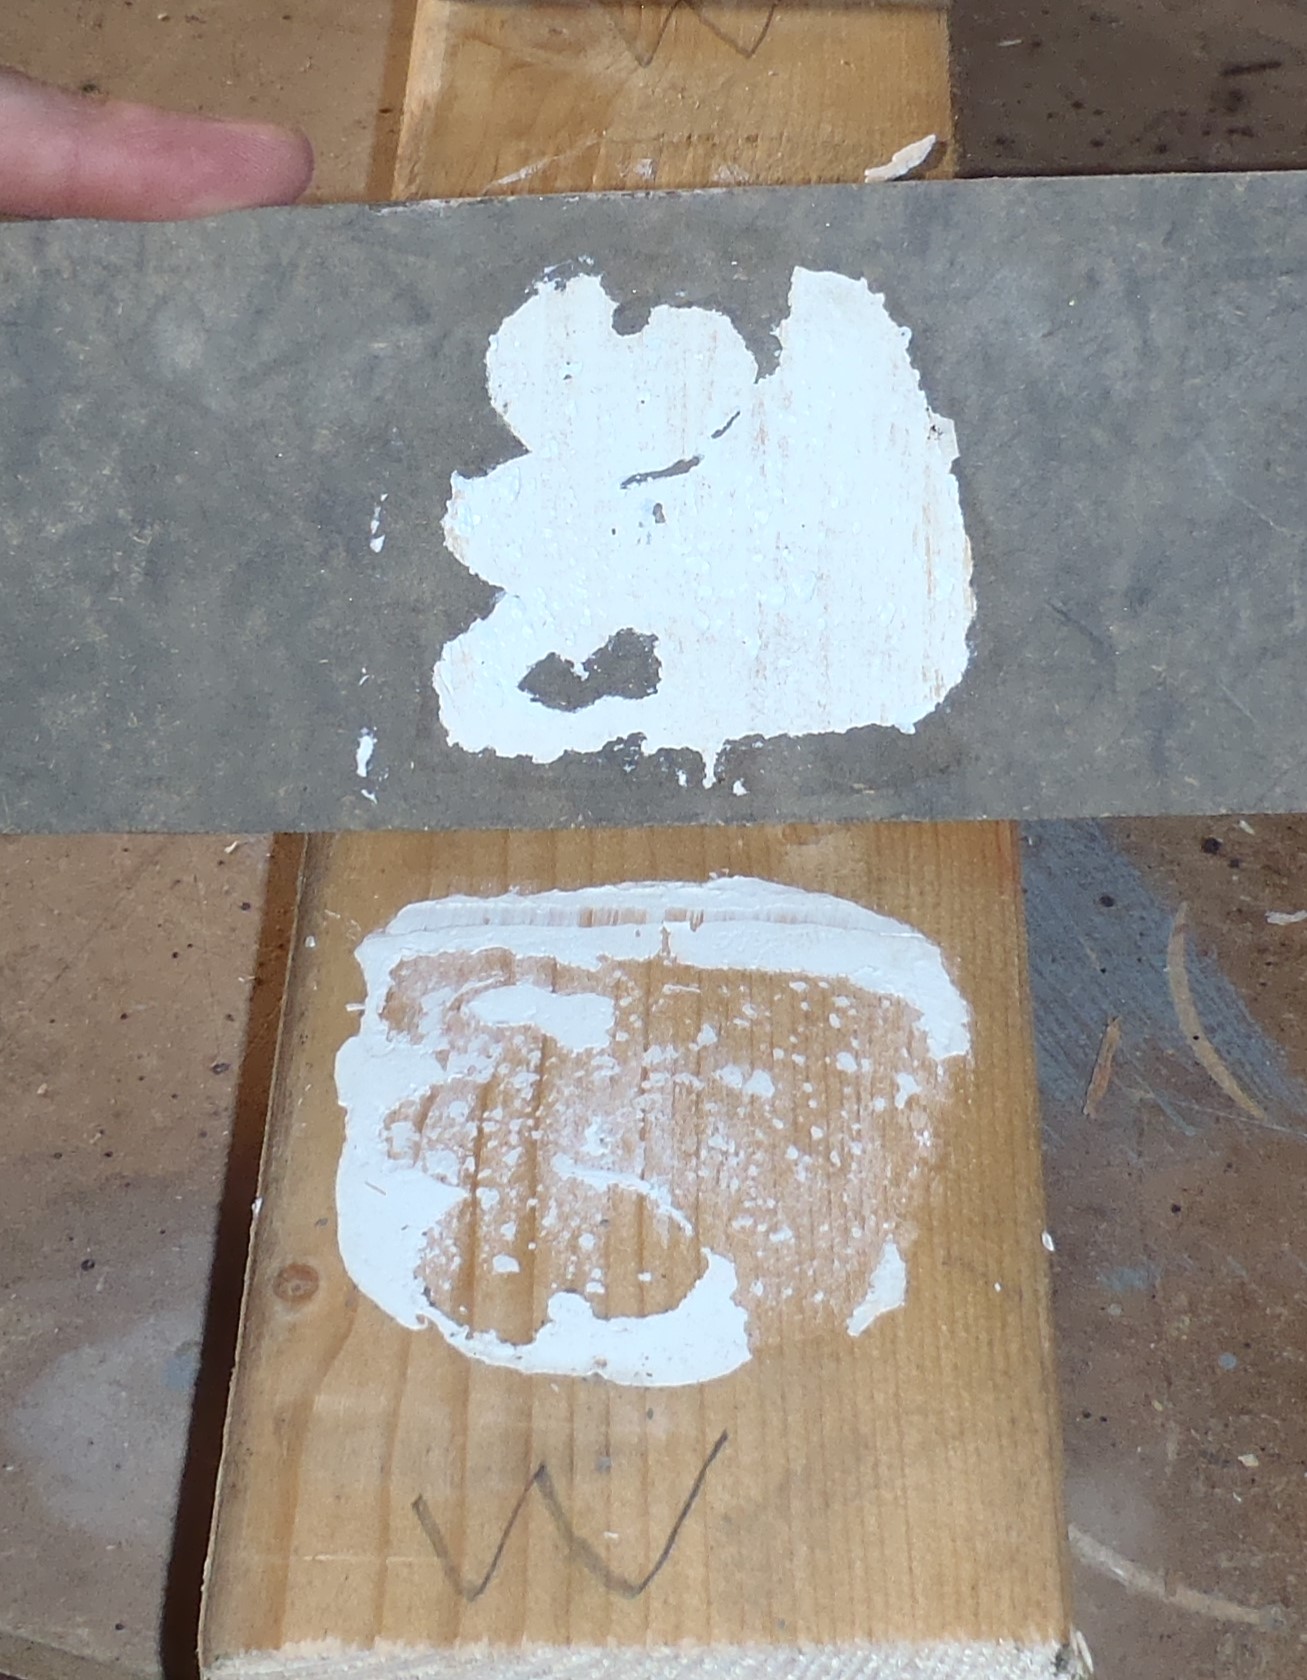
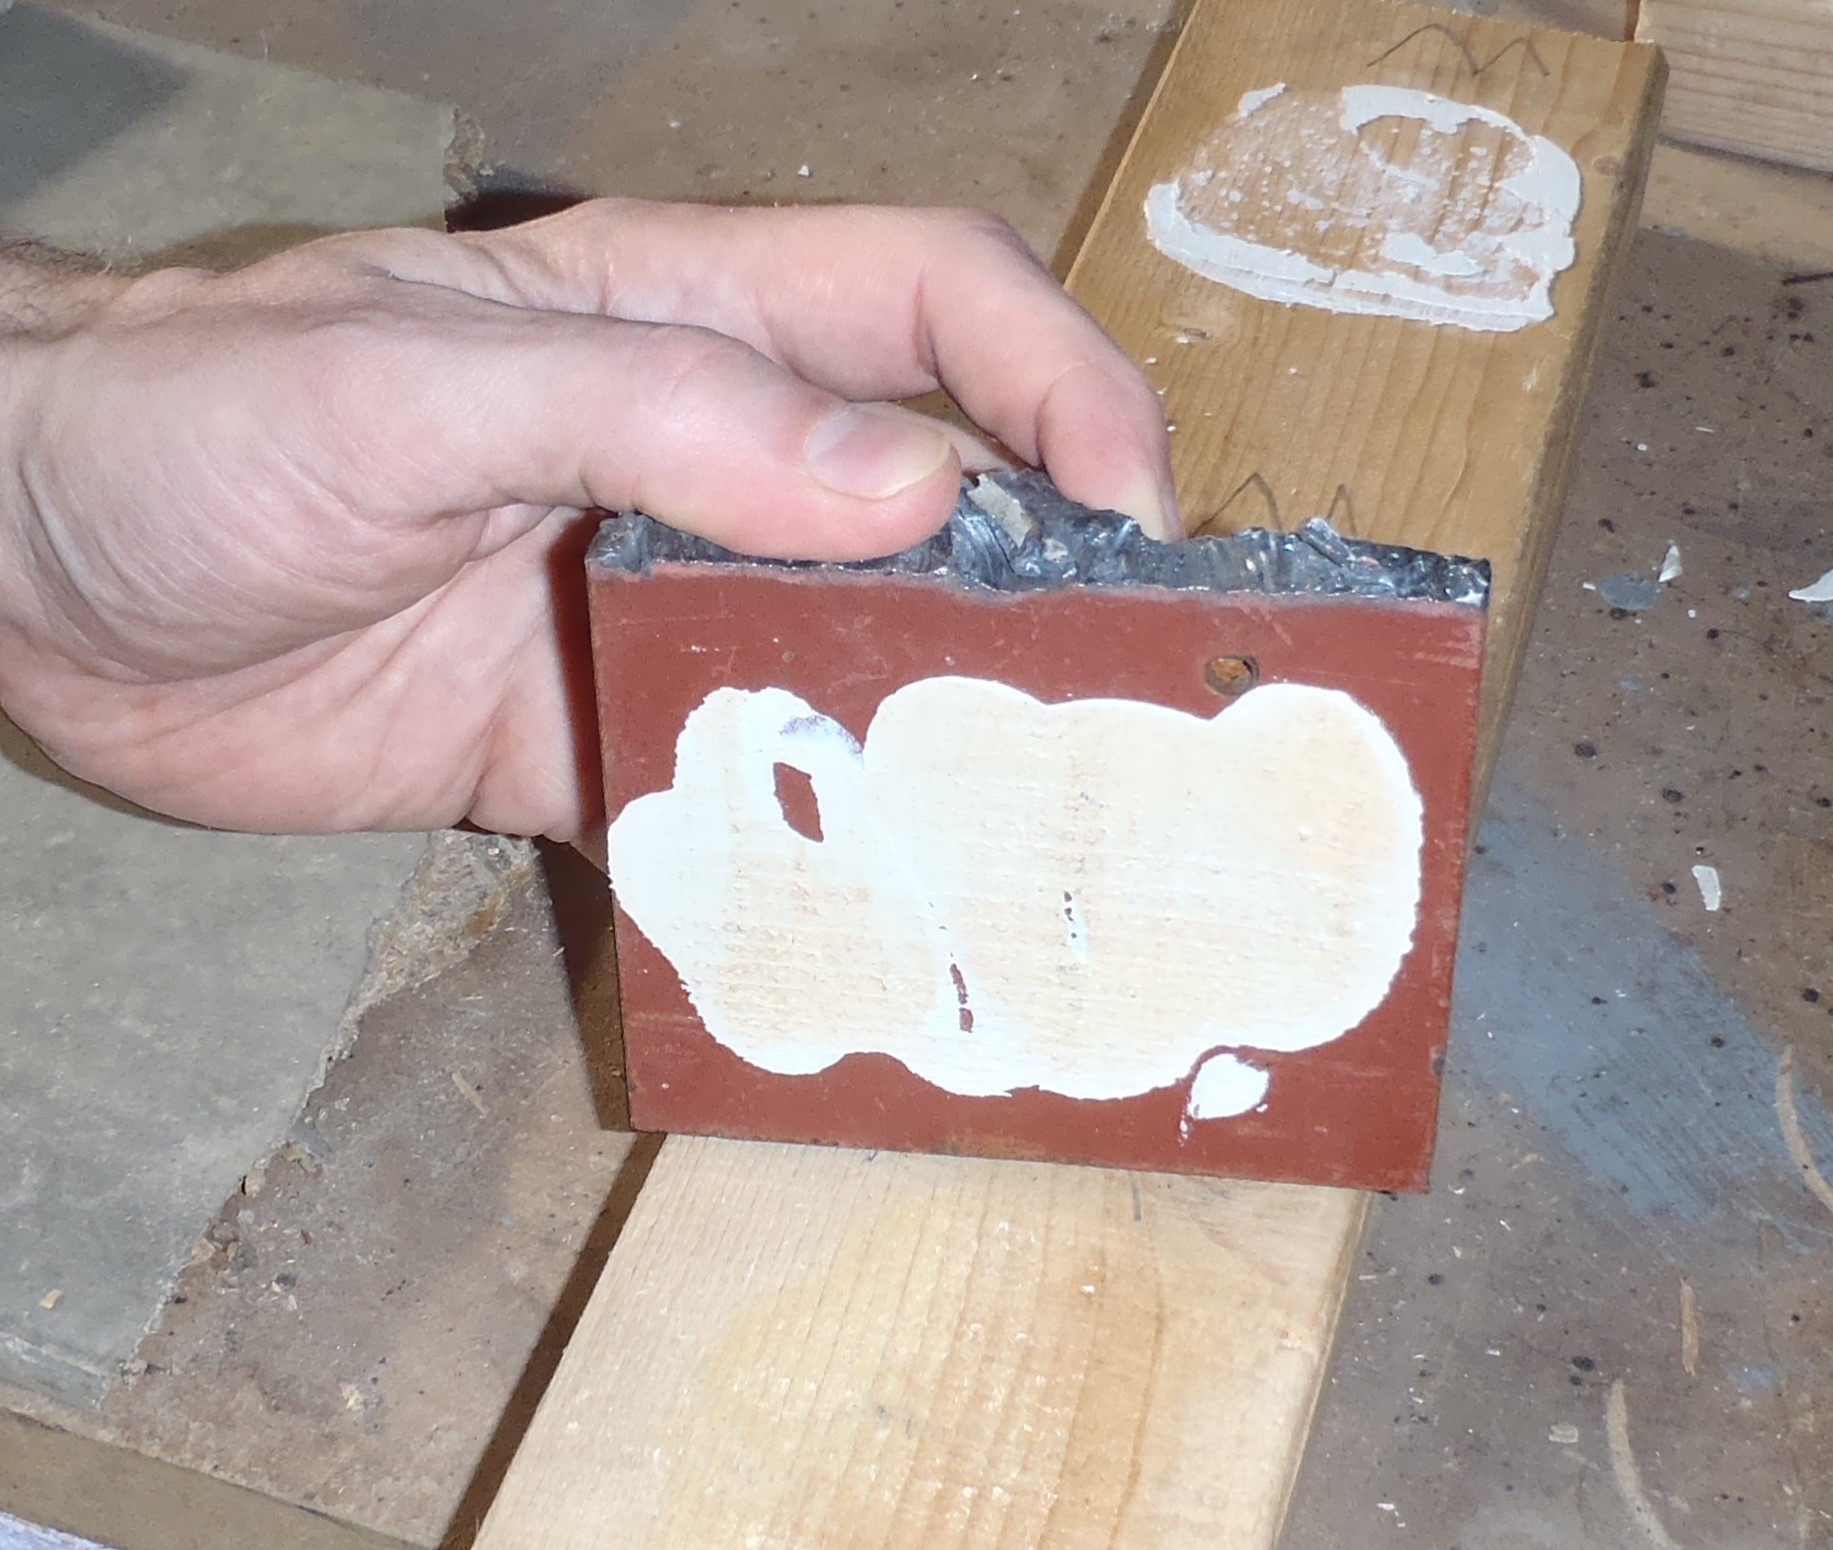
    Last of all, the whole surface of the two Work Bench modules and the vertical surface of the Fence, were coated in polyester resin to provide a hard wearing and smooth finish to reduce the friction.

    Work-Bench-Surface-finished

    Work-Bench-Surface-finished


  • Multipurpose Modular Workbench for Circular Saw, Router and Chop Saw

     While we have been waiting for the prices and delivery of the building materials to be completed, we needed a replacement saw table to make it as easy as possible to accurately slice our materials into their required shapes and sizes.

     So using 10 metres of 2 inch by 1 inch box steel tube and another 7.5 metres of 1 inch by 1 inch box steel tube, we made 3 modular frames, 2 of them a square with 4 legs and the third one a 2 leg “end” frame.

    Work-Table-Frames-1

    Work-Table-Frames-1

    Work-Table-Frames-2

    Work-Table-Frames-2

    Work-Table-Frames-3

    Work-Table-Frames-3


    Then using a 25mm thick MDF sheet, we sliced it up into 2 halves, each being 4feet by 4feet and screwed down onto the metal frames. Hanging off the edges are sliding channels using some of our Oak timber to provide a smooth slots for the machines (like the circular saw module) to easily run in and out for adjustment against the position of the fence.

    We have adapted our circular saw, the router table and our big chop saw, each having their own Oak sliding rails mounted on them so we can just swap in and out the machinery we need next.

    Work-Table-Mostly-done

    Work-Table-Mostly-done

    We will finish the table by making a fence which can be moved back and forth by 200mm steps and the machine then can be moved to provide the necessary width of cut or guide for the router.

    This will allow us to be consistently accurate and produce regular pieces at all the same size etc.

  • Preparing Site for Delivery

     Yesterday and today were spent levelling out areas alongside our Loke, so our building materials can be delivered and unloaded.

    2 Packs of CLS timber in the middle

    2 Packs of CLS timber in the middle

    The Pack of Cement boards and 2 Pallets of Plywood at the end.

    The Pack of Cement boards and 2 Pallets of Plywood at the end.

    2 Pallets of Plywood here - near the Garage

    2 Pallets of Plywood here – near the Garage


    We want to make sure that we can access each of the materials at any time, so each zone needed to be pointing in the right direction.

    For example, the long 4.8metres timber stacks will be slightly rotated so about 300mm is always exposed to allow a length of timber to slide pass other pallet loads of stuff!


    We are now ready for the 1st delivery load !!

  • Part 1 – Exterior Building Materials Are Now All Ordered

    This morning, we had the confirmation of prices for the rest of the building material for constructing the exterior skin of the house. Nearly everything needed to build the complete ‘shell’ of the building is now ordered…

    Below is a summary:

    Now we wait for all this to arrive!!

    320 sheets (4.5pallets) 12mm x 2440mm x 1220mm plywood £4220
    448 lengths (1 pallet) 38mm x 63mm Treated CLS 4.8metres £1784
    320 lengths (1 pallet) 38mm x 89mm Treated CLS 4.8metres £1705
    70 sheets (1 pallet) RCM CEMBOARD 10mm x 1200mm x 2400mm £1147
    20 lengths 47mm x 100mm Sawn Treated Reg 4.8metres £143
    2 lengths 47mm x 75mm Sawn Reg 4.8metres £10
    35 lengths 47mm x 100mm Sawn Reg 4.8metres £235
    15 lengths 47mm x 150mm Sawn Reg 4.8metres £151
    20 sheets 120mm x 1200mm x 2400mm Expanded Polystyrene £239
    6500 nails 50mm Hot Dipped ring shanked Airgun Nails £55
    6500 nails 60mm Hot Dipped ring shanked Airgun Nails £61
    25 litres Structural grade Crossed Linking Non-Creep Wood Glue £196
    120 tubes MS Polymer Construction All Purpose Glue £210
    Total: £10156
  • Ordering Starts at Last

    Today, at last, we have started the ordering process! We have got the last of the prices in and we have selected our suppliers.

    The first item ordered is 320 sheets of 12mm Structural Plywood

    we will be ordering these items shortly….

    a pallet load (440 lengths) of treated 63mm by 38mm CLS timber

    another pallet (320 lengths) of treated 89mm by 38mm CLS timber.

    And finally, 70 sheets of 10mm cement  fibre boards.


    We have already got our special MS polymer glue, all 120 tubes! Plus 13,000 hot-dipped nails too!

  • New Incinerator for Rubbish Clearance

     Today, while we are still waiting for prices and quotes from the last of our building merchants to come back to us, a new Incinerator was constructed!!

    Fire-Barrel-with-new-Grate-1

    Fire-Barrel-with-new-Grate-1

    It was made using an old oil barrel which had already been made into an incinerator,but it had been a struggle to keep it going for long jobs as the ash would fill the barrel up and we couldn’t get it out as it didn’t have any holes in the bottom!

    So, taking this bit of spare time, and using lengths of 10mm reinforcing bars, welded together a grid of closely spaced bars for the drum to sit on and then raised the whole thing up 300mm on legs to allow the ash to fall out and move it out of the way.

    The bottom of the oil drum was sliced out completely and then the barrel turned up and spot welded to the new iron grate in a couple of places to hold the whole lot together.

    Fire-Barrel-with-new-Grate-2

    Fire-Barrel-with-new-Grate-2

    This weekend, it looks as if it will be wet so that would be our chance to try out this new piece of equipment to help with keeping our site clear of rubbish!!

  • Storm Doris Has Broken Our TV Aerial Pole

    Well that’s one for Storm Doris! She has caused the 5 metre wooden pole holding the TV aerial and weather station to SNAP! It came down across the roof of our garage with one loud thump!!

    Pole-down

    Pole-down

    Snapped-off-at-the-roof

    Snapped-off-at-the-roof

    Broken-Aerial

    Broken-Aerial


    It made a little hole in our rubber membrane in one spot where the metal aerial frame jabbed in and that’s it! No damage to the OSB boards themselves so that’s good.

    Patched-roof

    Patched-roof

    We patched up the little tear with a quick job with a piece of aluminium tape to make it last a little while before we do a proper repair using our special rubber glues and a rubber patch. Then we moved the TV aerial and the pole over to jam it in the gap between the garage and our living quarters for safe keeping against Doris’s Blows!

    The TV aerial is bent and broken and some of the weather station equipment is smashed to pieces but we think it is the old one that suffered and not our newer one! Phew!

    The steel framework of the house is only jiggering and moving a little bit in the strongest gusts, it is our scaffolding towers that are feeling the pressure. They are slowly walking and promenading across the concrete!!

    The Camera pole is holding very nicely and the flood light is only wiggling a little bit.

    Only a few more hours to go .. Come On Storm Doris, just you blow away – grin!

    P.S. The pole with the house name board on it has just snapped off as well.

  • Wood Construction Glue Tests

    We did another test, this time using a sample of the non-creep crossed linked construction grade wood glue.

    Strong woodglue

    This time, we took pieces of CLS timber, one was left as is (looking it age of about 5 years) and the other piece was planed to remove that “dirty” layer.

    Glue-Test-2-Blocks-glued-together

    Glue-Test-2-Blocks-glued-together

    After drying and curing overnight with the clamps on, we then tried to pull them apart. It was rather hard to do!!

    We ended up putting it in the vice and using the strength of the lever principal, managed to snap the joint apart. It was quite hard to do, bearing in mind that the joint was at the end of the timber grain, which is the weakest point.

    The “Dirty” old piece:

    Glue-Test-2-Old-Timber

    Glue-Test-2-Old-Timber

    It was very noticeable to how the wood grain splits across the rings in the timber, pulling a large chunk still stuck to the other piece. Notice how wide the rings were, not so many of them.

    The “Clean” planed piece:

    Glue-Test-2-Fresh-planed-

    Glue-Test-2-Fresh-planed-

    This one was definitely harder to break, and only splitting a thinner layer of wood. Then we noticed the closeness the timber grain lines were and it is much more heavily pack together. This was a much stronger piece of timber!


    Conclusions:

    The glue was very strong and there was no signs of the glue itself failing. It was also very nice to see the glue working just as well on older grey wood as well as fresh timber.

    Another quick piece of testing done!!

  • Day 1 & 2 of Processing Quotes

     Over the last couple of days, we have been receiving a number of quotes for our materials.

    Today, we had a good price from our own local timber merchant (in Great Yarmouth) which is quite nice. They offered the cheapest price on the CLS timber, both treated and untreated. But they weren’t so hot on the 12mm plywood – they were £3 per sheet more expensive than the cheapest!!

    Also we got more prices for our cement boards and another localish firm (in Newmarket) came back with the cheapest so far AND they included their delivery and crane facility in the quote too!

    But one of the biggest shocks we have received (so far), is the price for the Cedar Shingle Tiles. Several years ago, probably about 5 years, we were getting a price of about £35 for British sourced Cedar tiles and Canadian prices of about $30. All these prices are for “bundles” and 4 bundles covers one hundred square feet (yes imperial measurements!) so one bundle covers about 2.28 square metres of roof area (and slightly more on walls). This works out that we would need about 235 bundles (including the garage) in total.

    But the shocking discovery, is that ALL the prices has gone shooting up, even in USA and Canada! It is now more like £50 for British and $60 for American and the exchange rate is not good at the moment too!

    But hold your hat again, these prices are for untreated ones! We need to have at least a third of the bundles treated for fire retardant to conform to the building regulations, and, wait for it, it’s doubled!! Yes the price doubles!! OUCH!!

    Roughly, the cost would be running around £16,000 just to buy the Cedar tiles!! AND we were originally thinking of using fire retardant treated Cedar tiles for all our external covering, we felt happier with the house being better protected against the risk of fire nearby. This would now make the price nearer £25,000!! Oh WOW!

    So, putting a grim face on it, we have resumed investigating alternatives. We had previously explored the possibilities several years ago of course and we rather liked the all timber approach but after that shock .. we are re-examining some other options!!

    Roof Options as follows: (prices are approximate and for each square metre)

    • Concrete tiles : £8
    • Red interlocking clay tiles : £20
    • Slates  : £25
    • Treated Cedar tiles : £45

    Wall Options:

    • Slip Bricks : £15 to £20
    • Solid coloured panels : £30 to £40
    • Cedar treated tiles : £30 (less needed)

    We are analysing all these options and talking among ourselves to get a sense of which one to go for! Phew!!!

  • Results of MS Polymer Glue

    This morning, we went back to our test pieces after having 24 hours to set and cure.

    The first one under the spotlight is the dry wood:

    The rubber piece peeled off cleanly leaving behind the solid glue on the wood. It was quite hard to pull it off. The glue was well stuck on the wood.

    Glue-Test-Rubber-on-Dry

    Glue-Test-Rubber-on-Dry

    the cement board didn’t budge and just snaped at the joint.

    Glue-Test-Cement-Board-on-Dry-Snapped

    Glue-Test-Cement-Board-on-Dry-Snapped

    Tried to use mini crowbar to force the piece off but kept breaking.

    Glue-Test-Cement-Board-on-Dry-strongly-attached

    Glue-Test-Cement-Board-on-Dry-strongly-attached

    The Steel was very well held and it took quite an effort to drive the crowbar in at an edge.

    Glue-Test-Steel-on-Dry-

    Glue-Test-Steel-on-Dry-

    It finally came off but only by splitting a layer wood fibre completely off the timber. The glue was well and truly stuck on the metal.


    Now for the second test piece, the wet one:


    The rubber piece came off fairly easily and the glue was still stuck to the rubber and not the wood itself.

    Glue-Test-Rubber-on-Wet

    Glue-Test-Rubber-on-Wet

    The cement board came off also fairly easily with the crowbar and only had some splitting of wood fibres. We didn’t try bending the end up!!

    Glue-Test-Cement-Board-on-Wet

    Glue-Test-Cement-Board-on-Wet

    The steel was easier, just like the other two pieces, and again, only having a little bits of split wood fibre.

    Glue-Test-Steel-on-Wet

    Glue-Test-Steel-on-Wet


    Conclusions:

    Withstanding the difficulty of having two identical timber pieces with the same surfaces, it does seems to indicate that gluing onto dry surfaces is much better than wet ones, which of course is always going to be the case.

    But at the end of the day, we were attacking these test pieces with far more force and pressure, including the wet test case and in reality, the strength of the bond should be perfectly fine for our purposes. Also, we have to remember that we won’t be working in totally dripping conditions and most likely will be dry or only slightly damp when we are building our house!!


    That was one very interesting little quick test – grin!!