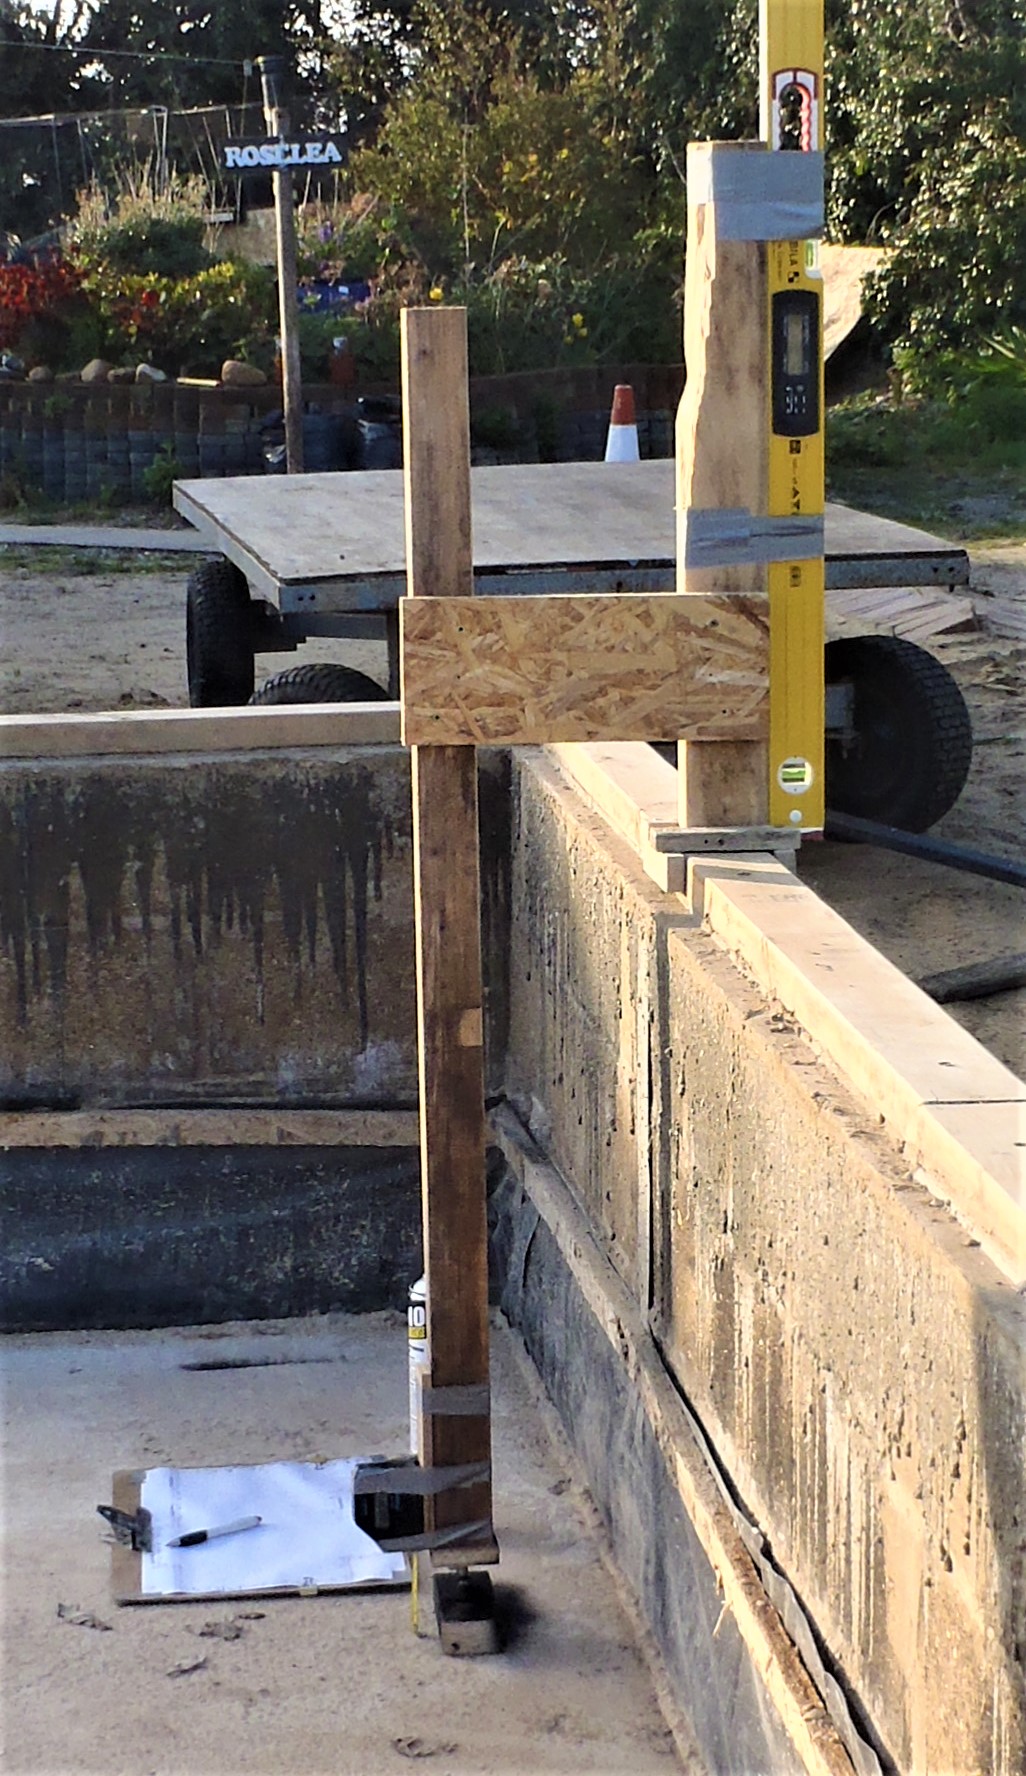
This afternoon, we made a measuring tool to allow us to survey the height of the concrete floor around the base of the External Wall, log the results down on the printout of the plan and spray black paint to mark where the inner footplate will go.

Concrete-Level-survey-Overall-view-of-tool
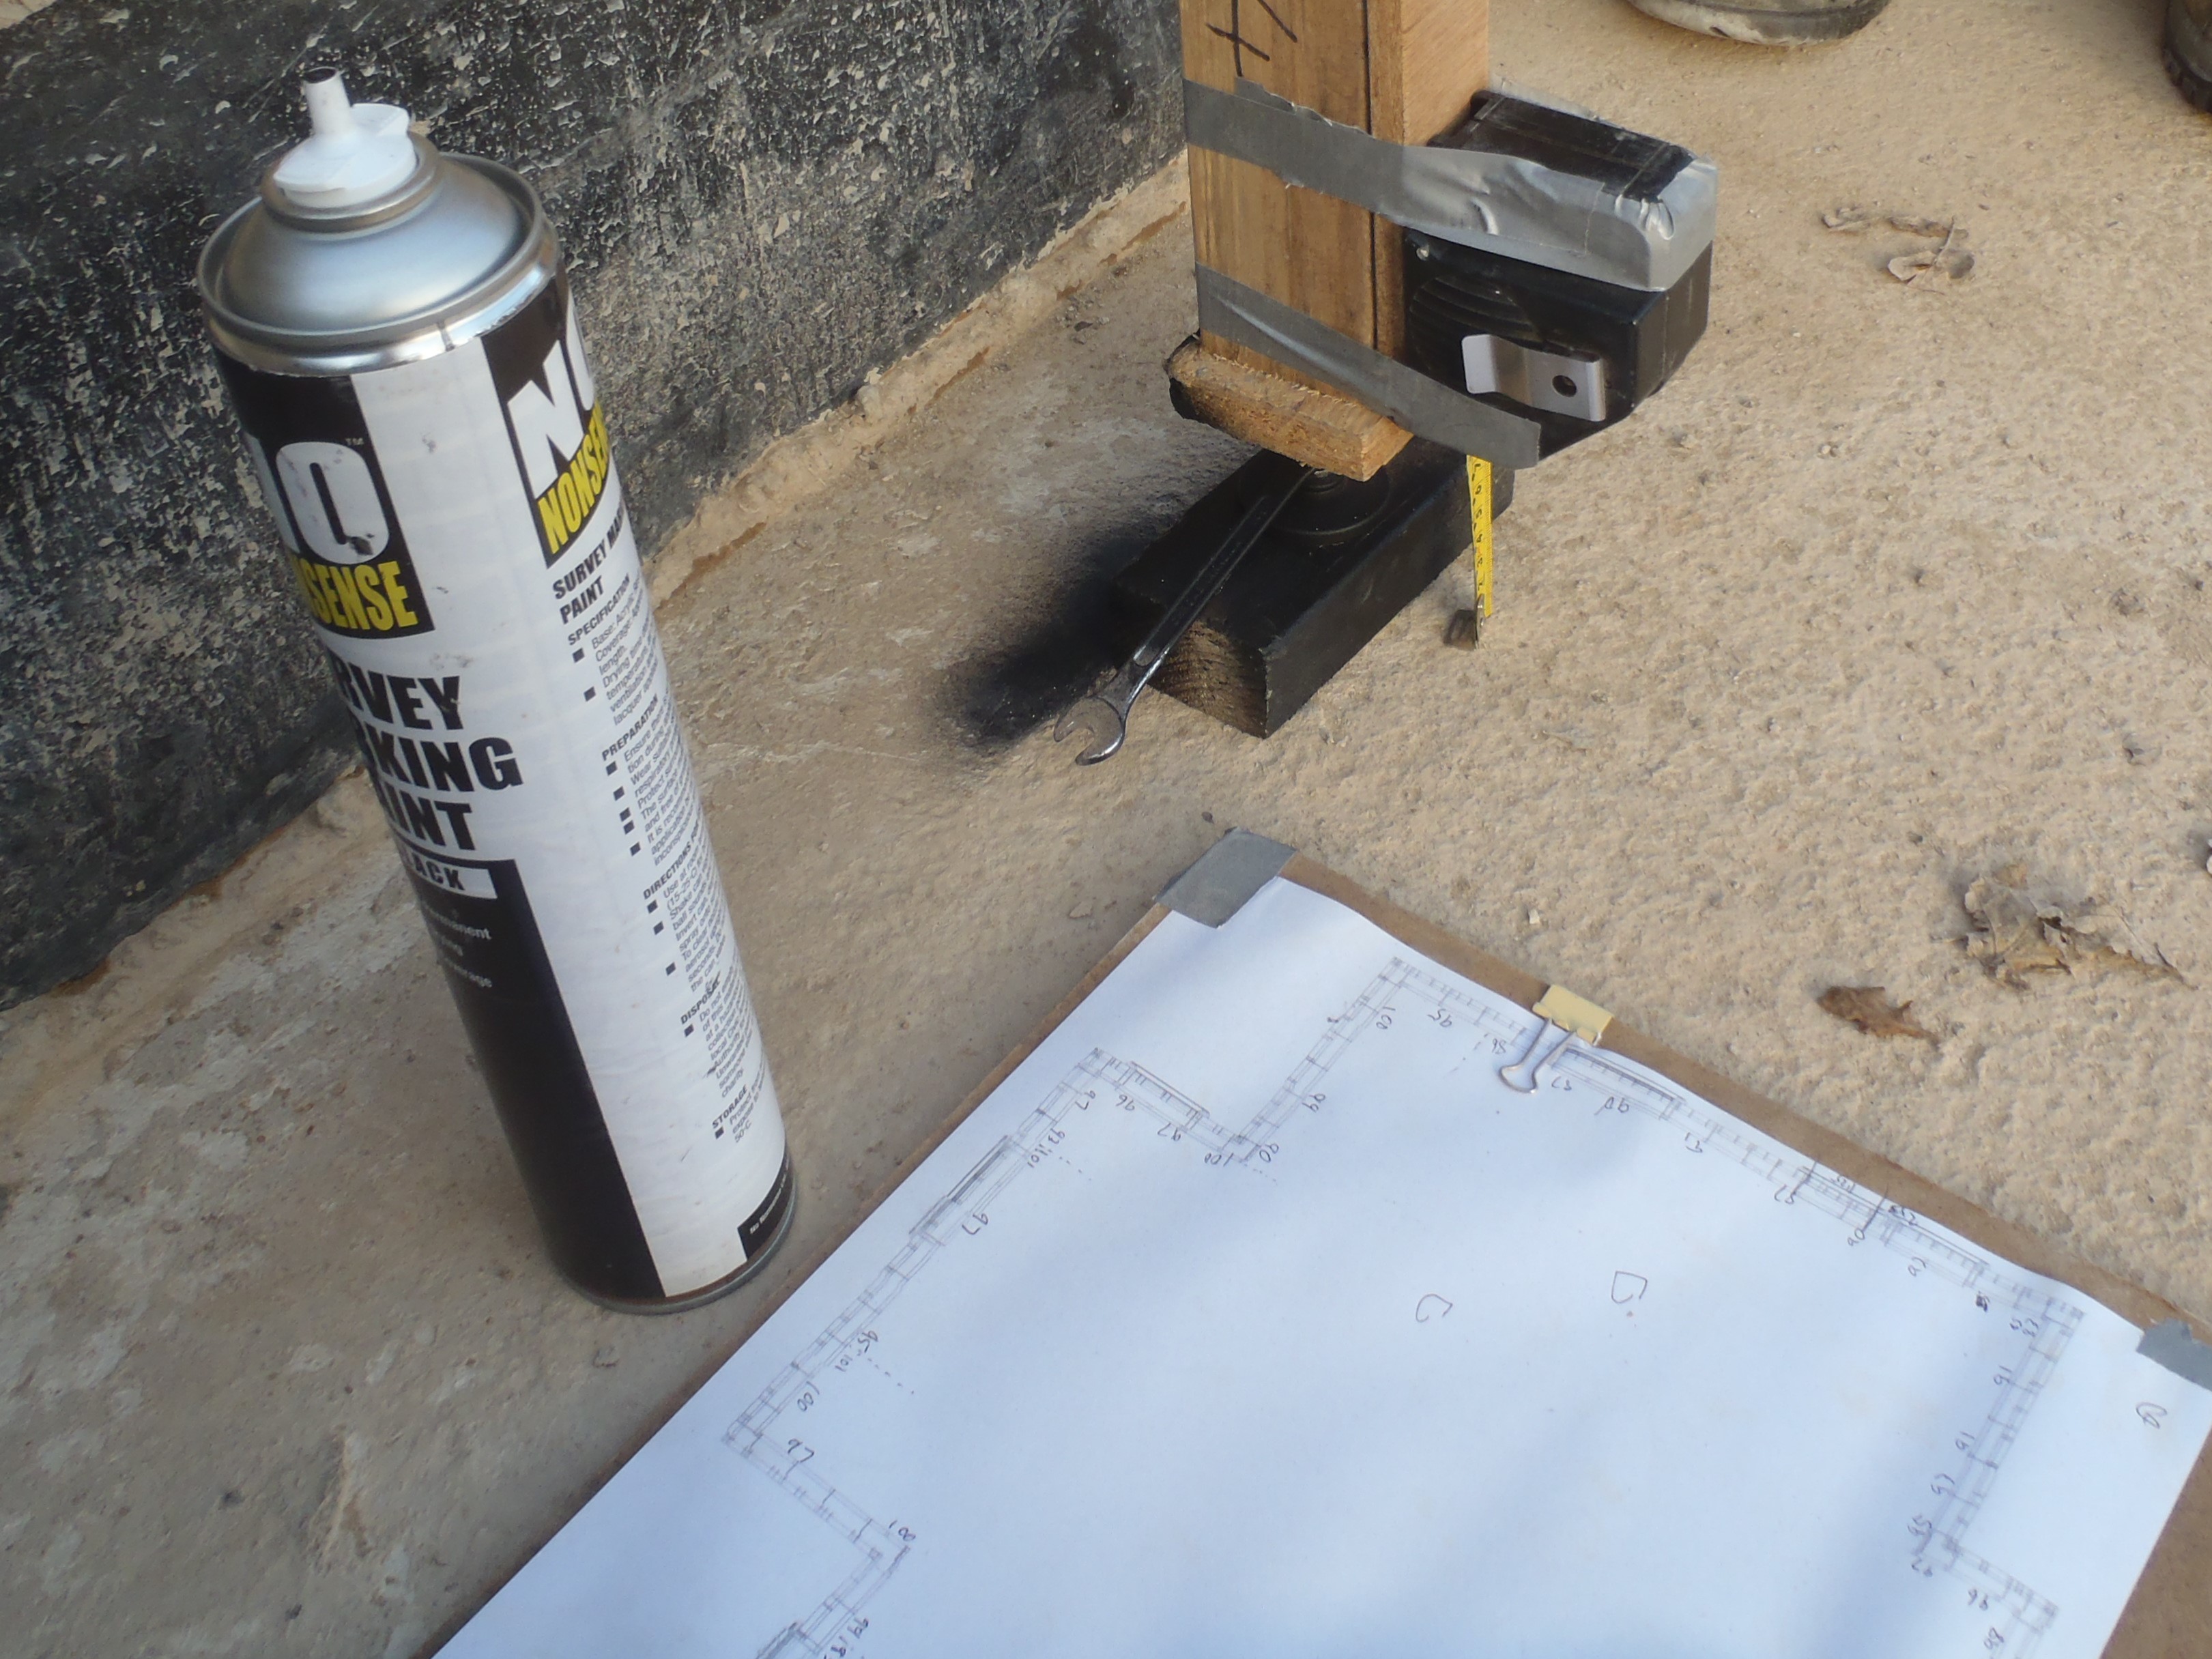
WE used our digital spirit level attached to the outer leg and switched on the audio feedback feature (it provides a beeping tones, one pitch for leaning over backwards and another pitched tone for when leaning forward and the speed of the bleeping tones to how close to perfectly vertical, the faster, the closer) this is useful so we didn’t have to keep looking up and trying to see the bubble whilst adjust the angle of the post by winding a foot in and out with a spanner. Then, we attached our talking tape measurer down near the bottom of the 2nd inner leg so we can measure the relative height of the concrete when we managed to balance up the whole contraption to be vertical. We just simply pulled out the tape down to the concrete surface and the male voice would announce the distance in millimetres. We also sprayed a bit of paint alongside the wood on the concrete to mark where the inner wall’s footplate will go.

Concrete-Level-survey-Level-Measure-and-mark
We started about 1:30pm and by the time we had finished, we were rather chilled by the cold wind and the sun dropping down behind buildings so we were in the shade during the latter half of our surveying task.
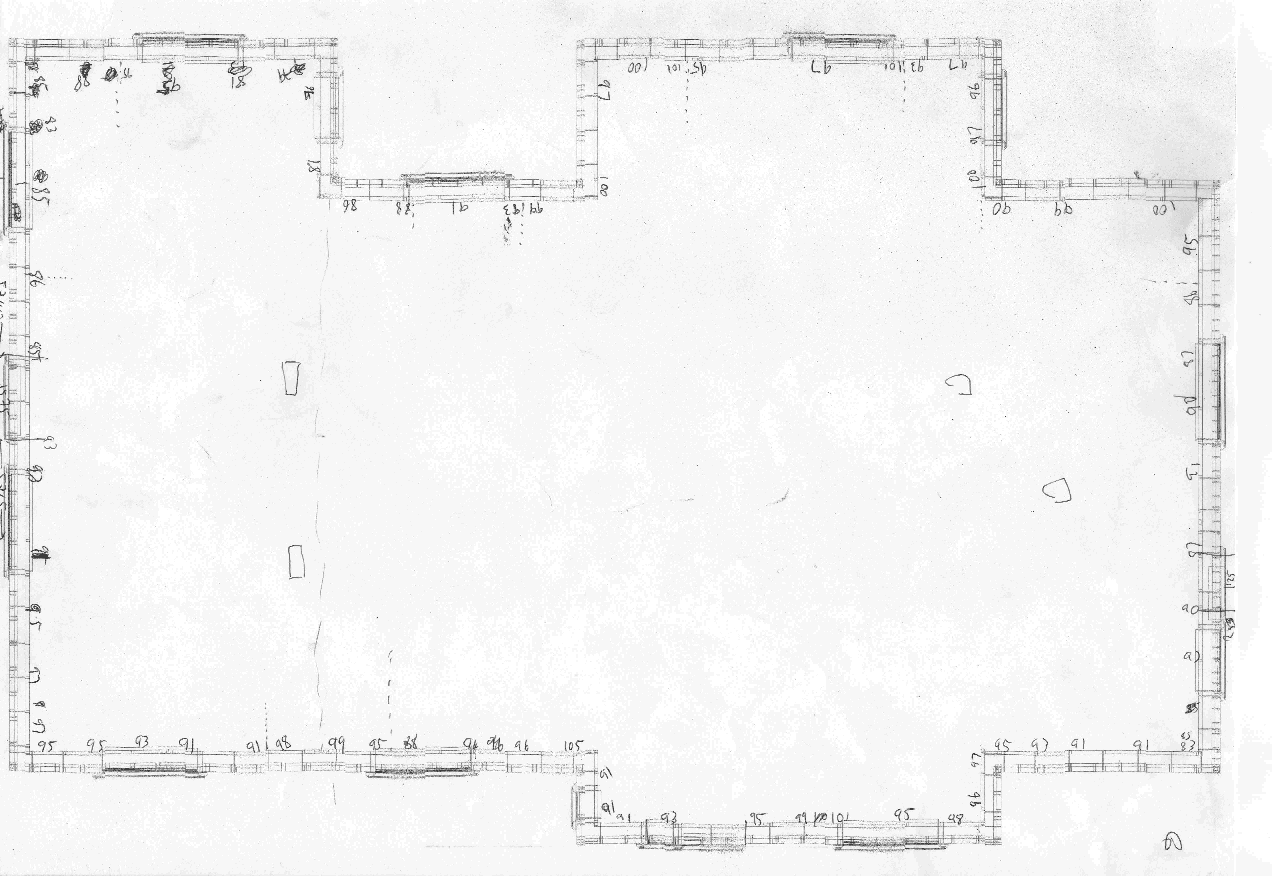
The quick summary of the results were that quite a lot of the concrete is in the 90mm to 95mm range (the number is arbitrary and measured downwards so larger numbers are lower concrete), but we got some that were quite high at 76mm, and 85mm (mostly in corners where the concrete would have flowed into) and a couple of lowest spots where we got 105mm (where the concrete didn’t get push evenly around).

Concrete-Heights
This means that we have a height difference of almost 30mm from one spot to another spot on our concrete floor! Phew! Normally, we would take that difference and bed the wooden footplate on to a layer of mortar to even out the “bumps” whole way around, but when there is such a marked difference, it would mean a great deal of mortar to mix and lay down. We may do it in independent sections and adjust the length of the vertical legs within the wall structure to cope with the different heights. We haven’t quite decided yet – Phew!!

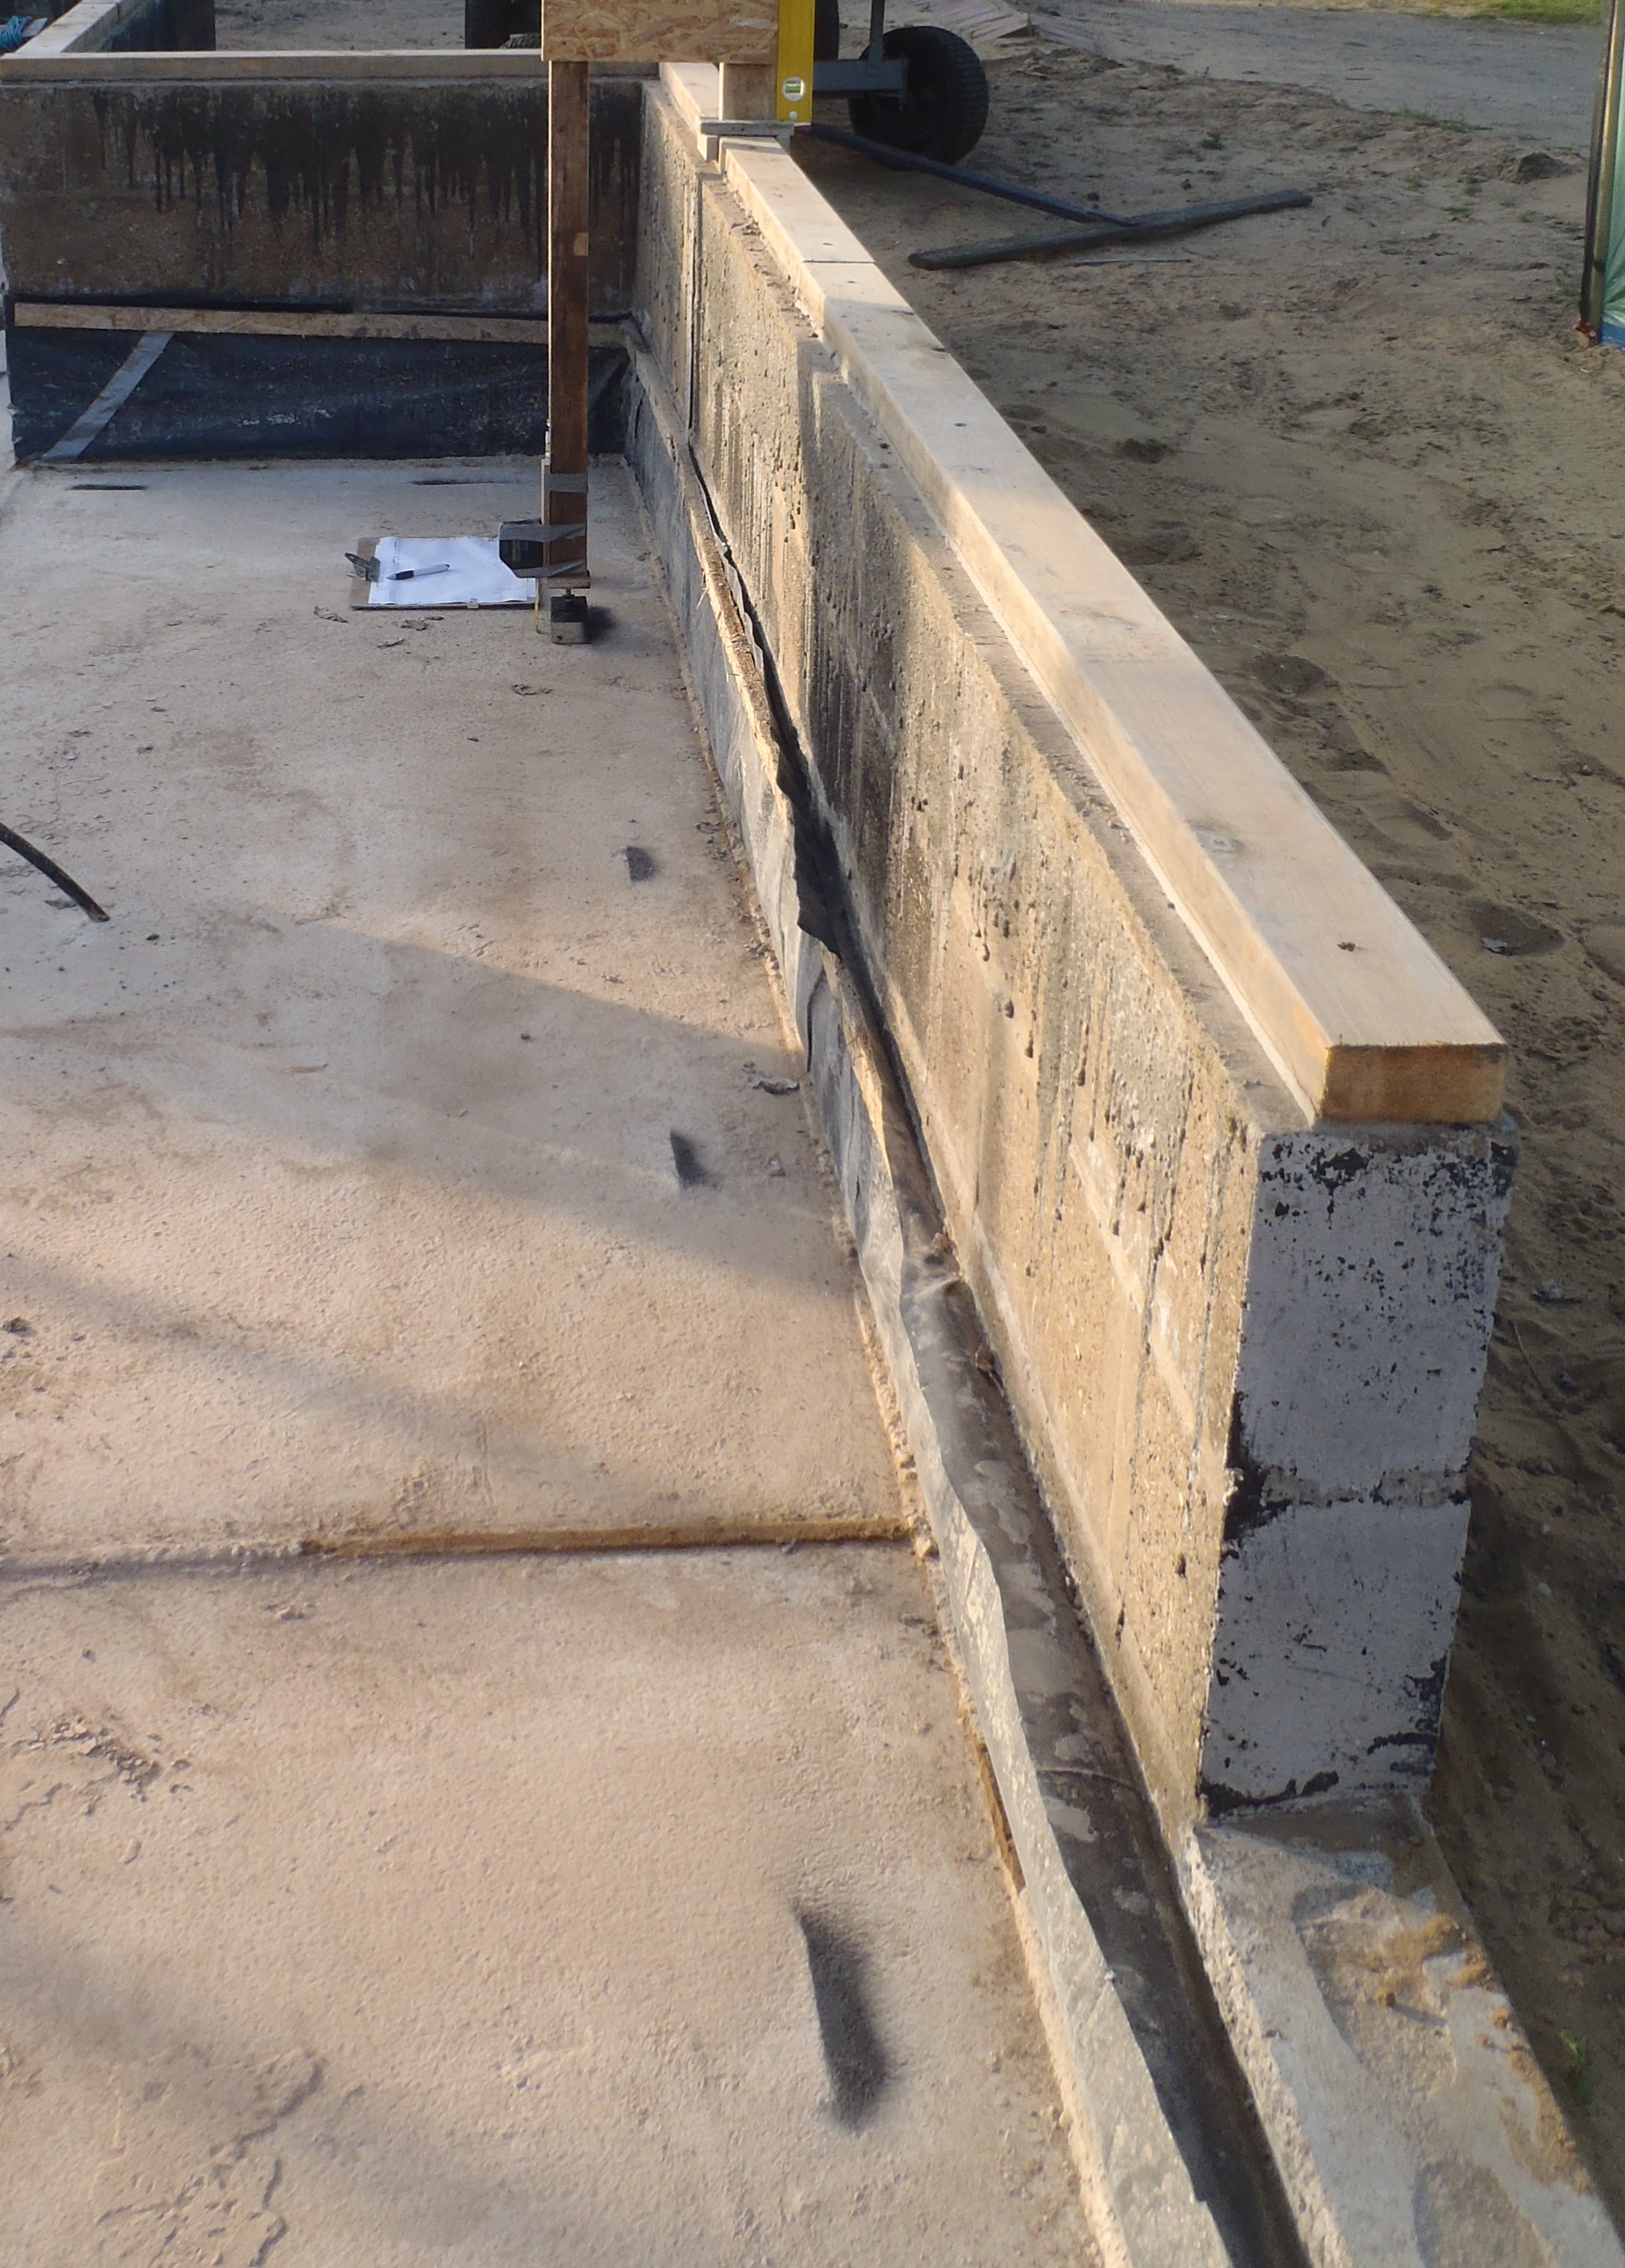
Concrete-Level-survey-Dashes-showing-wall-line
Finally, we now have a complete line of dashed blobs going right around and these markings will keep us on the straight and narrow when we come to put down the 63mm CLS treated timber and drill pilot holes into the concrete for the concrete screws to tap into, through the timber and holding it into place.