This afternoon, in the dry and warm workshop, we cut up various steel pieces, for example, 3 lengths of 50mm by 50mm square tubing, a small length of 50mm by 25mm rectangular tubing, some flat 3mm plates and a piece of 6mm thick U shaped channel piece too.
Then slicing a series of angles on 2 of the square tubes (the angle being 32 degrees that matches the angle of the roof) and drilling 10mm bolt holes in the U channel piece, we then welded the whole lot together like a jigsaw into a support arm that will be bolted on both the top and bottom flange of the steel I-Beam, angled downwards to travel just below the roof surface and a vertical pole which will stick up through the roof surface and tiles that has the U shaped steel piece above this surface, ready for the rest of the chimney to be bolted onto.
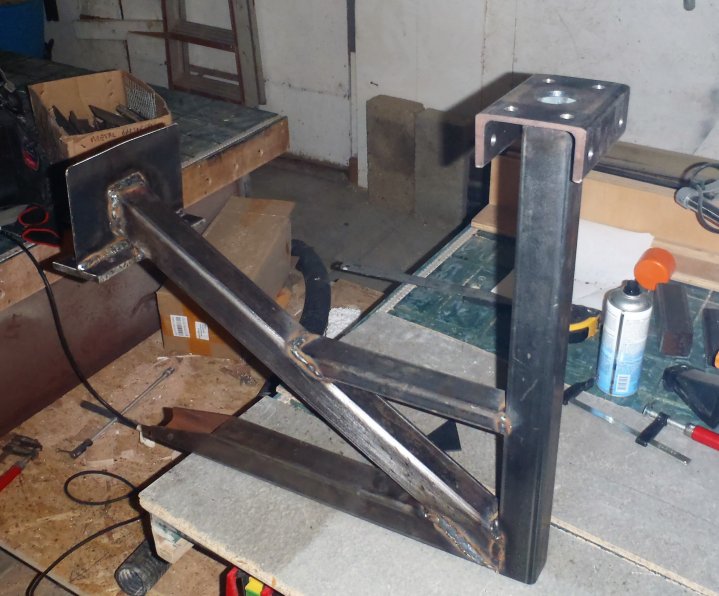
Chimney-bracket-welded-togther
There is a 40mm hole down the middle for a plastic conduit to be threaded through the steel tubing which will allow for various wires and cables to be pushed through from inside the house to the chimney and the equipment that is mounted on it, like TV aerial, weather monitoring gadgets, lights, cameras and anything else we might think to put up on this chimney – grin!
Tomorrow, we will clean and give the whole steelwork three good quality coats of metal and weather proof paint to keep it in tip top condition for years to come! Then we can mount it up on the steel I-Beam and finally put on the very last plywood panel because it would have hidden the heads of the bolts!