Category: Halls

All the Hallways for the house.
There are four legs on the ground floor and one upstairs.

  • Hall Hatches Improved and Ready for Bolts

    While we waited for our latest modification we have done to our basin bowl mould, we decided to do one of the tasks that have been outstanding for quite a while now, which is to do two things. One was to glue in the captive nuts in the lid. We noticed that sometimes, they would pop out when we push in our special hatch keys, to screw the handle and then lift the hatch up, but instead, would pop the nut out. So, we went around all twenty-three of them and glued all these captive nuts back into place using construction glue. We also populated missing ones as well.
    The second task we did to these hatch lids, is to drill out a clearance embedded hollows, to take a 14mm washer and hide the head of a bolt so that both are below the surface. Then, we drilled a 6mm hole through the rest of the material which will allow a 35mm length bolt to poke through and will connect to another captive nut that will be screwed into the framework of the floor joists. We have positioned four of these “fixing down” points around the four corners of the hatches, 60mm in from each edge. We will have to glue a block of wood into each of the corners of the framework, but, we can do that later on.

    We had selected two of these hatches, to test out this technique last week and glued in a 63mm square block of wood in each of the four corners, and so we could see that when the 6mm hole was drilled, it went into the block underneath which was widened out to a 8mm hole, to allow for the captive nut to be itself screwed in as well. Then, the lid was bolted down nice and tight, to stop the various clunking noises when walking up and down the hallways.
    It worked very well.

    Right, that is another job done .. well half done .. we still have to glue in those wooden corner blocks .. but that it another time .. while we are waiting for glue or paint to dry somewhere!!

  • Most of the Doorways Are Lined

    We finished off doing the Hallways over the last four days, or rather three days and a morning. We went around putting in liners in almost all of the doorways. We used our 18mm OSB boards to line the left and right edges of the door hole, plus a horizontal piece going over the top. But we wanted to make sure that we finished off with nice square and level sides so when the door is hung, it will swing smoothly and not twist out of alignment. So in order to achieve this, we built a solid frame using some nice straight 89mm thick CLS timber and anchored it all together using lots of triangular plywood pieces to provide a solid perfect rectangle to align to.

    Most of the Doorways Are Lined

    Doorway-Framing-jig-1

    Most of the Doorways Are Lined

    Doorway-Framing-jig-2


    Two of the Bedrooms, number Two and Three were relatively simple to do, putting in 270mm wide pieces of the OSB boards, cut to a height of 2080mm, plus a 876mm wide piece for the top one going over the top. We liberally put a whole load of PU construction glue on all the surfaces inside the door frame and then put in some locking screws to keep it place while the glue dries and cures.

    But for Bedroom One, we had to trim and plane the door frame a bit, to get it straightened up. We also inserted additional timber pieces in the utility rail space, all glued on all surfaces, to provide a much stronger load bearing anchorage for the hinge side of the door. We then inserted the OSB liner pieces and got that doorway all square and vertical as well.

    The other doorways were the various cupboards and they were only 150mm deep as cupboards do not have the extra layer that forms the Utility and Air Channels and also are only one frame deep instead of two posts. We did the same trick of inserting the extra CLS timber pieces into the utility rail space, again to reinforce the hinges, and slid in the liners as usual.

    All these liners are too wide, deliberately so, and we went around trimming the excess off using our router with a ball-bearing straight cutter. If there was too much overlap, we reduced it down first using the jigsaw as it reduced the work load on the router.
    Oh yes, we also inserted little pieces in our sliding modules like the Kitchen, Cloakroom and Bathroom, this was also trimmed too.

    Most of the Doorways Are Lined

    Some-finished-door-liners-1

    Most of the Doorways Are Lined

    Some-finished-door-liners-2


    That pretty much completes all the basic structure for all the Hallways downstairs and the only doorways that were not done, was the Linen cupboard and the Entertainment room, and also the Utility room too.
    We are going to get on doing the Great Room next, we have decided that we cannot wait for our building insulation foam rejects, we made enquiries again and still no news. But, doing the Great Room, does mean that we will have to move our huge pile of timber upstairs, most of it anyway, ready to start building the upstairs framework and rooms later on. It would be good to see the floor all complete in our Great Room and feel that we are still making progress.

  • Installing All Conduits and Pipes to Serve the Upper Floor from Hallway’s Services

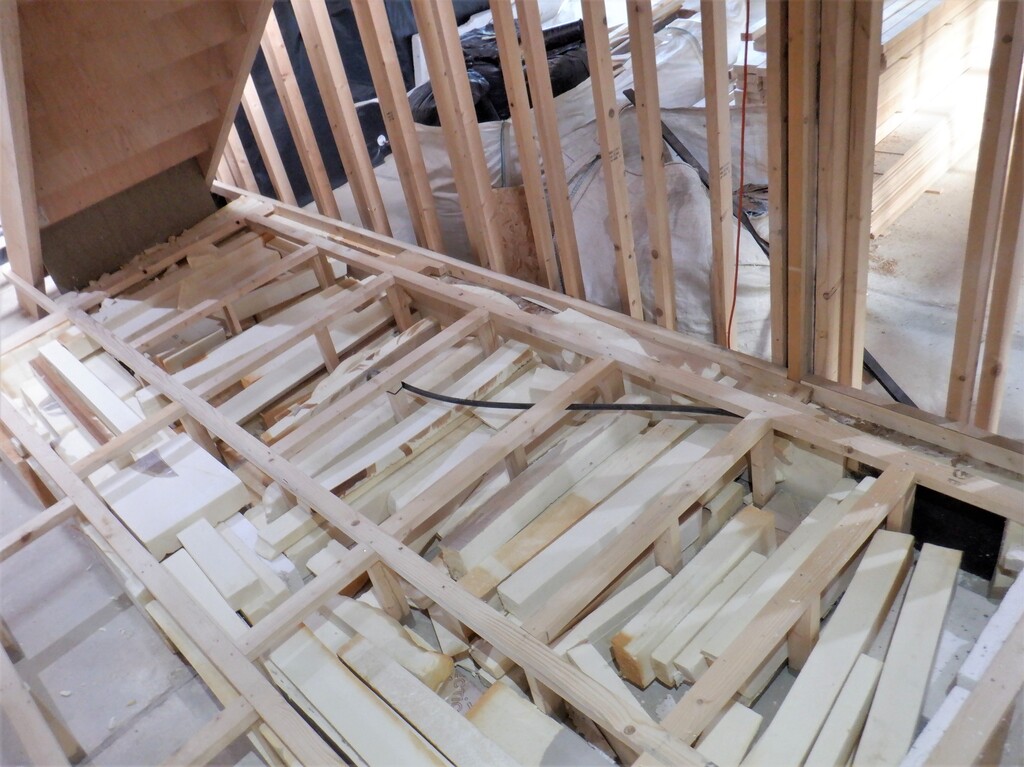
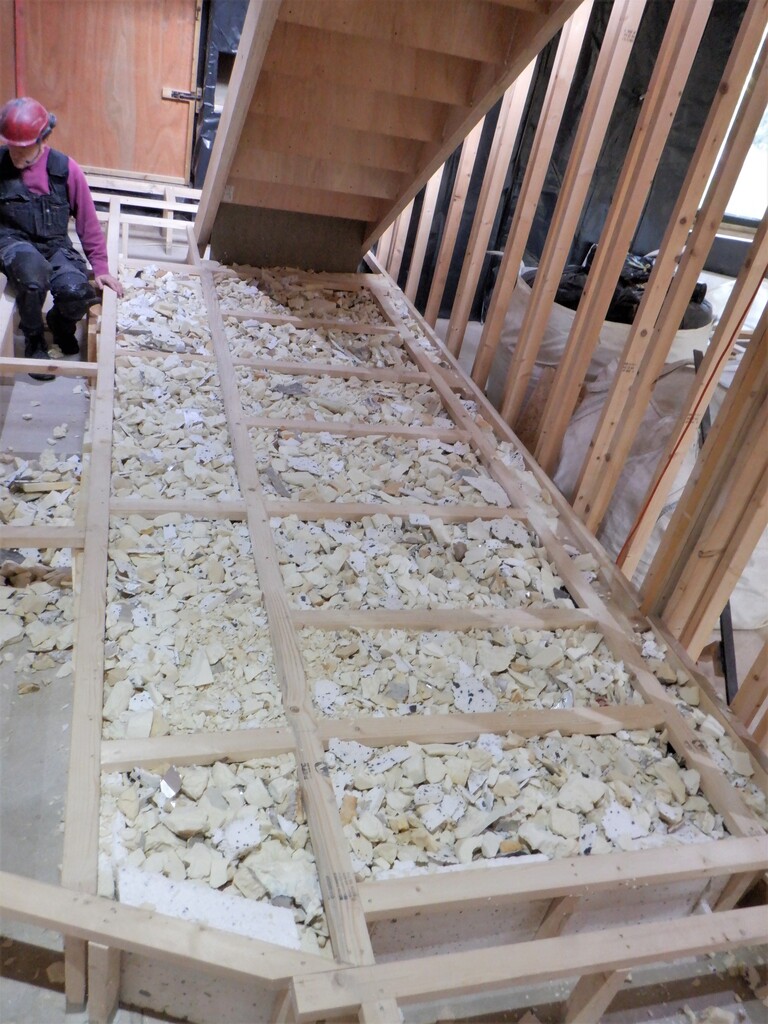
    While we wait for more insulation PU foam boards to come from the scrap material merchant, we got on with the next task to do, to get the walls insulated and boarded on our various Hallways on the Ground floor. But, before we can cover up everything, we need to install all the conduits and pipes that needs to go upstairs or up to the hall ceilings.

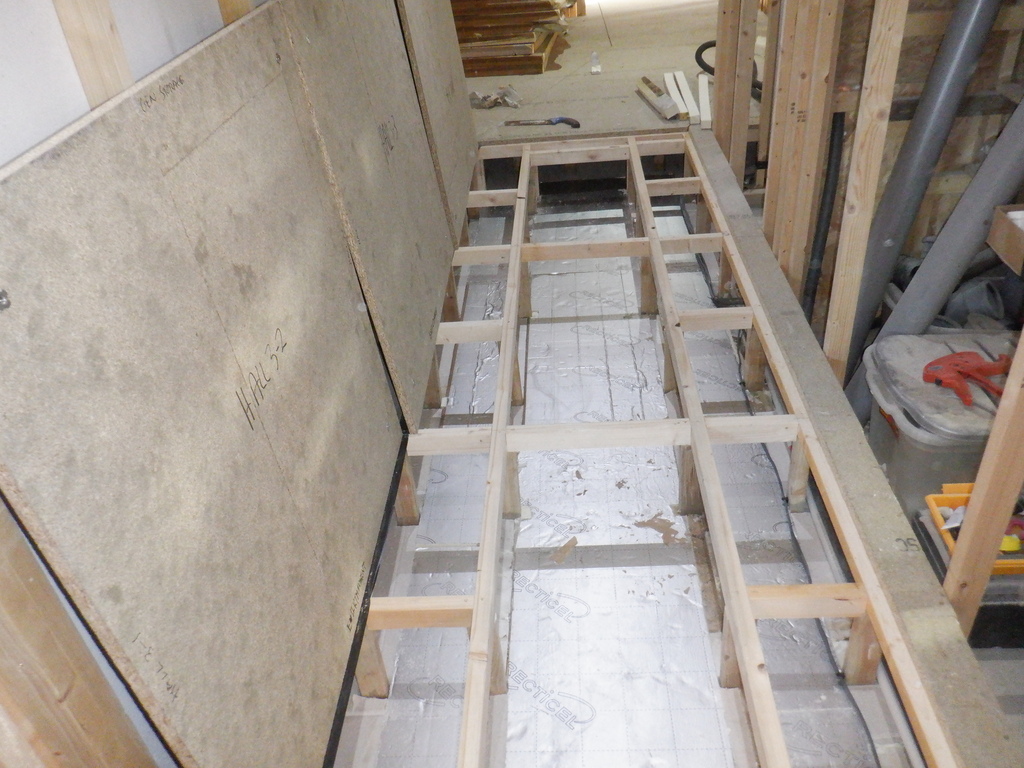
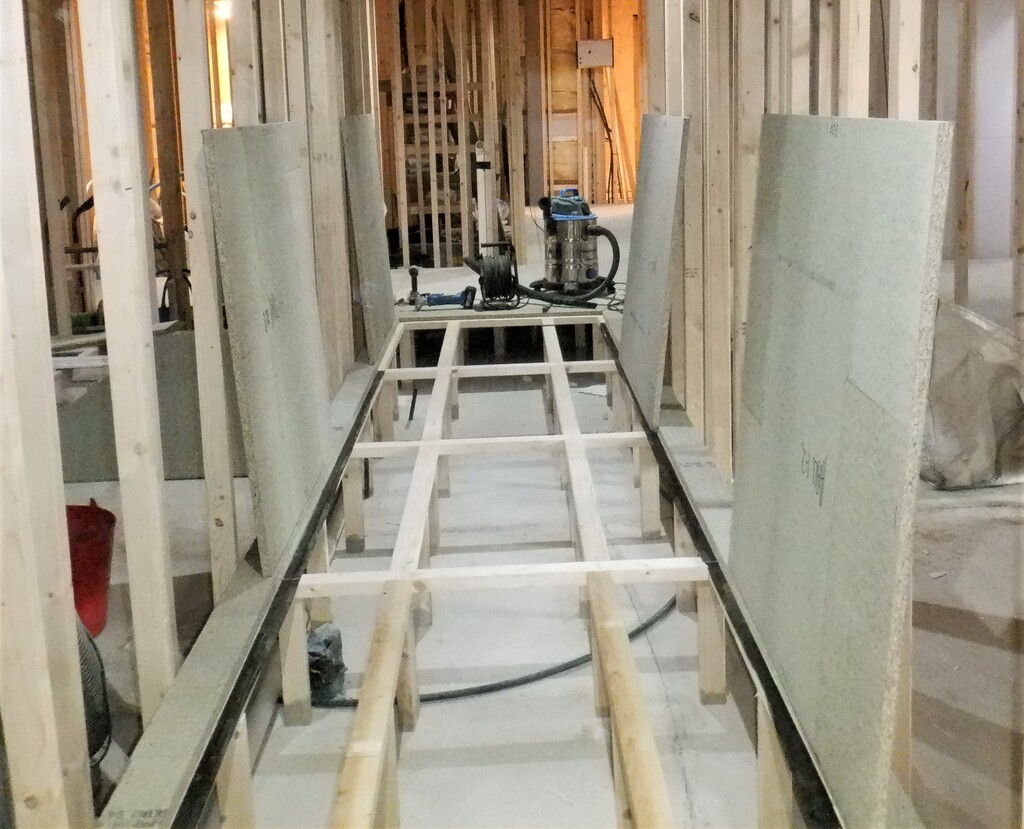
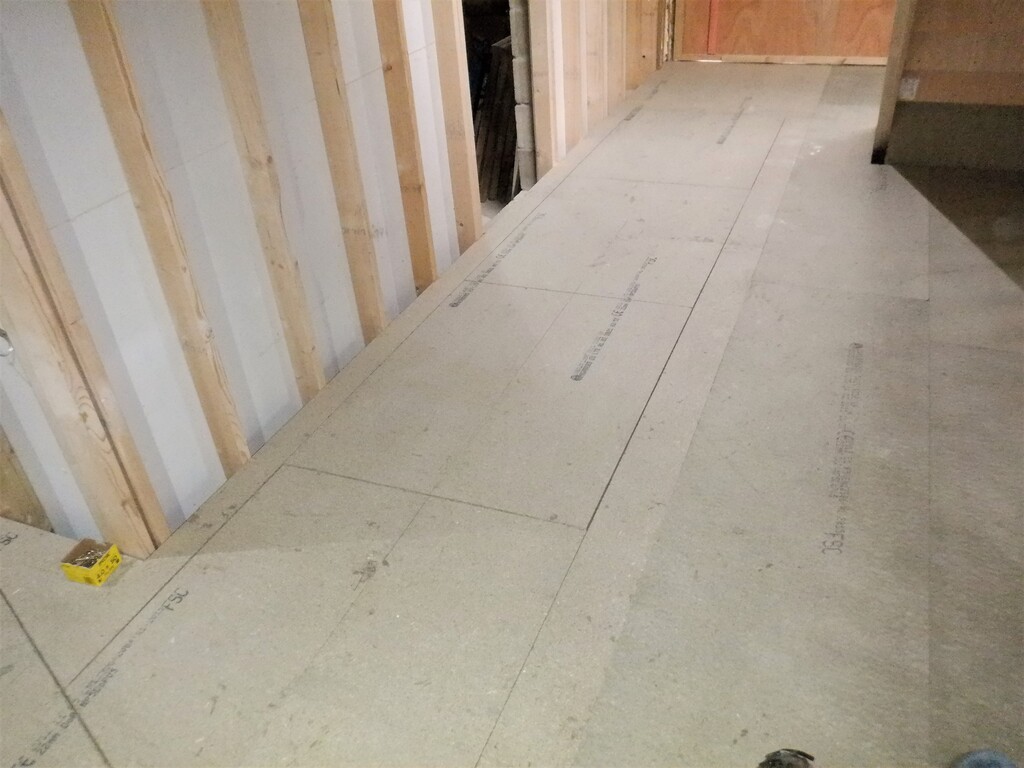
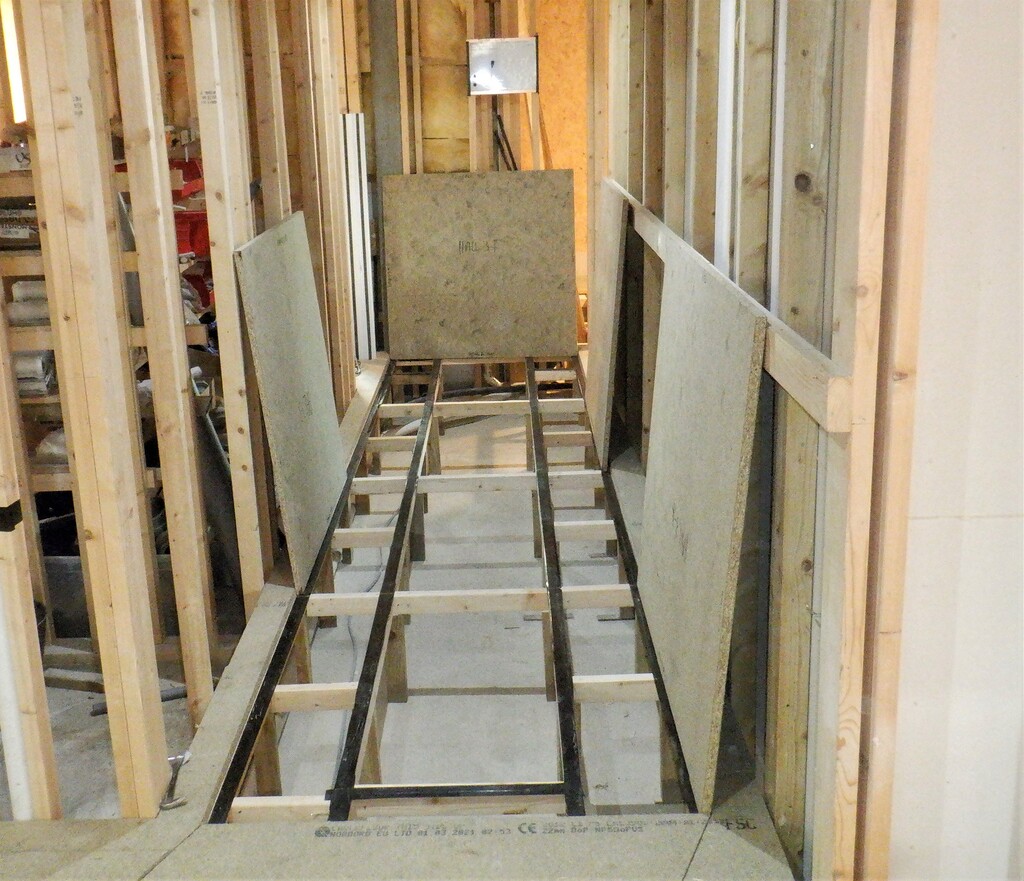
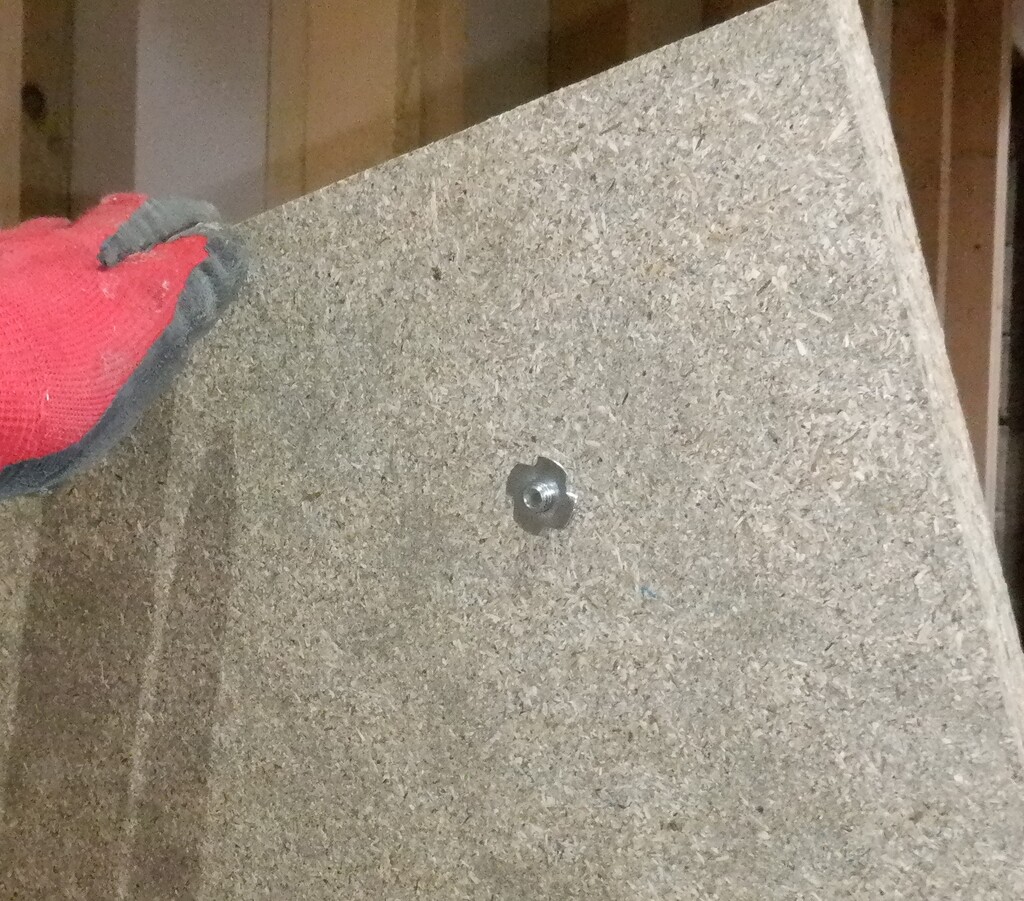
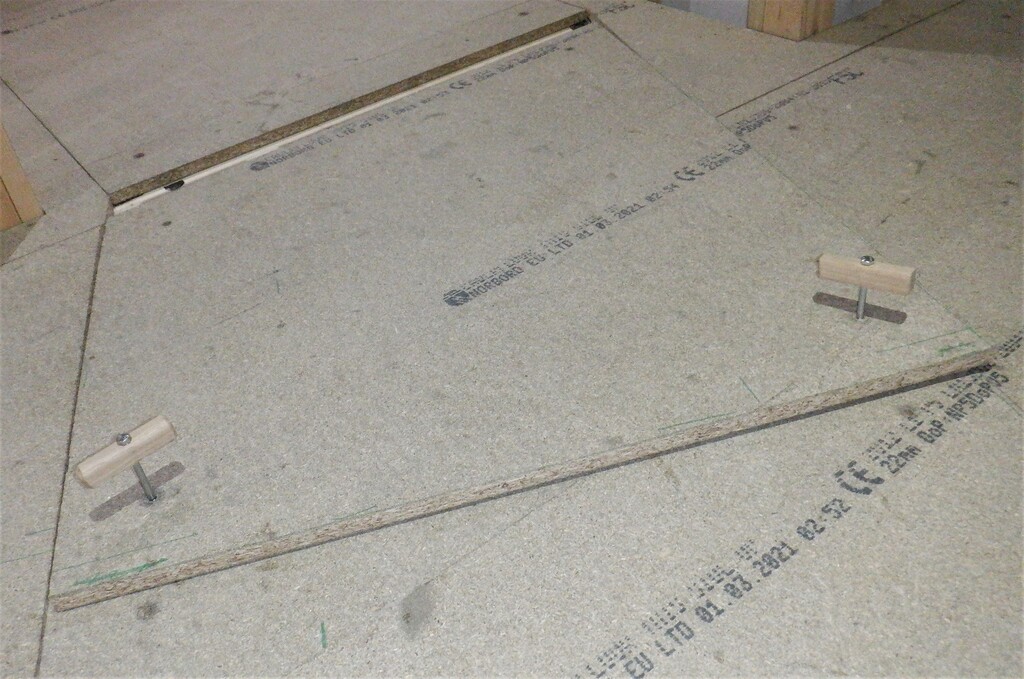
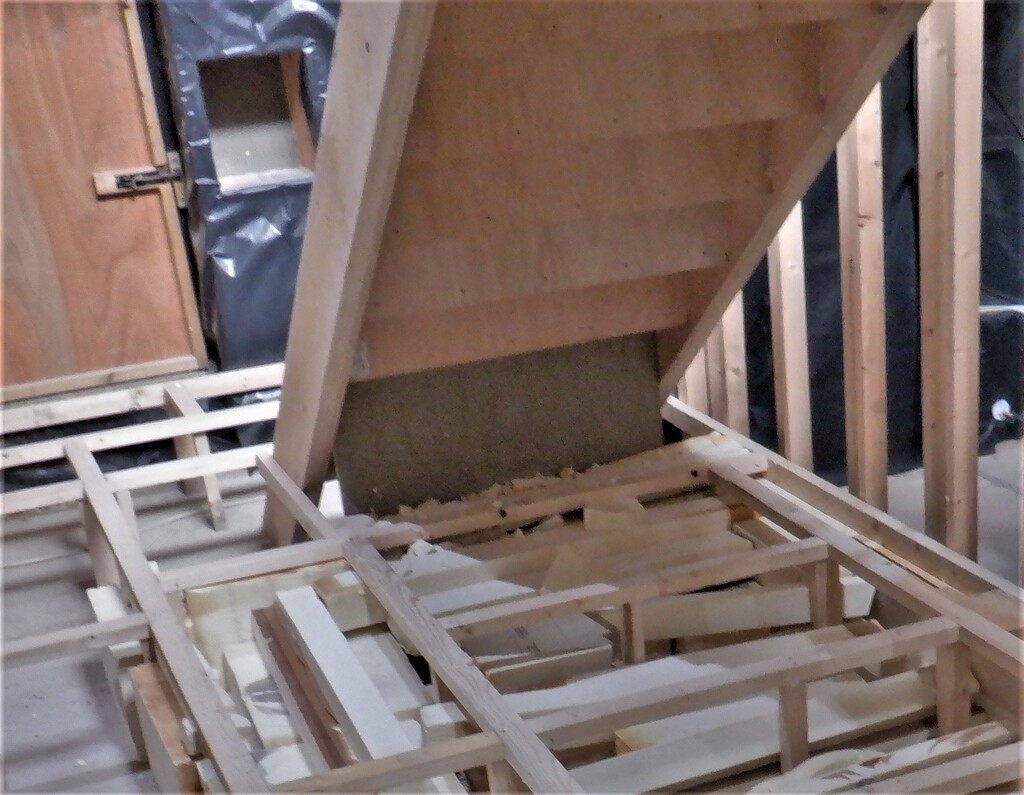
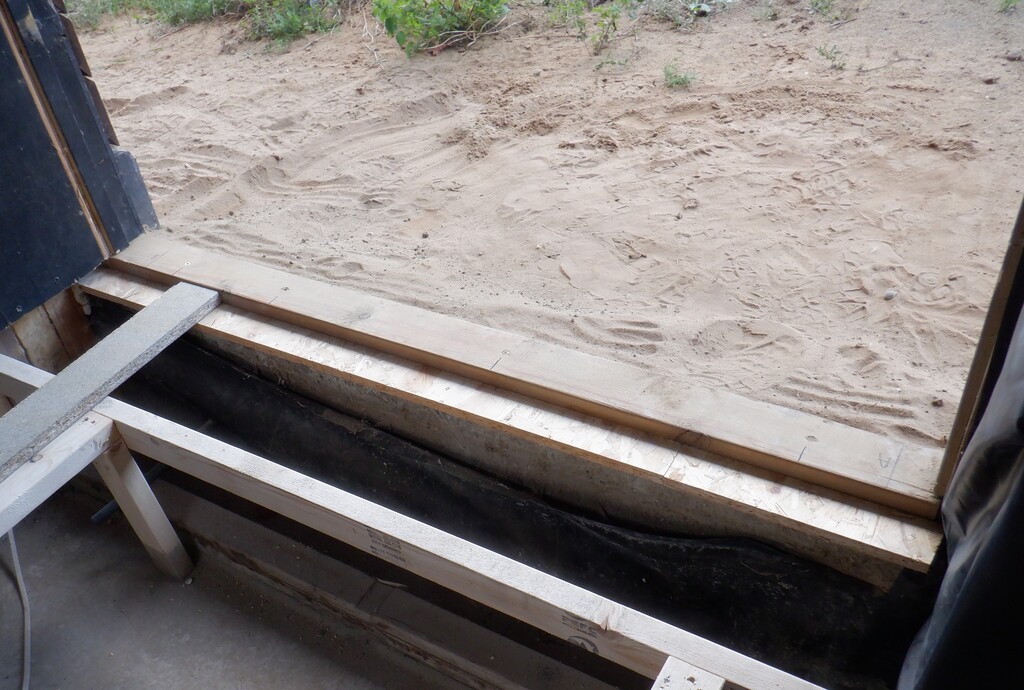
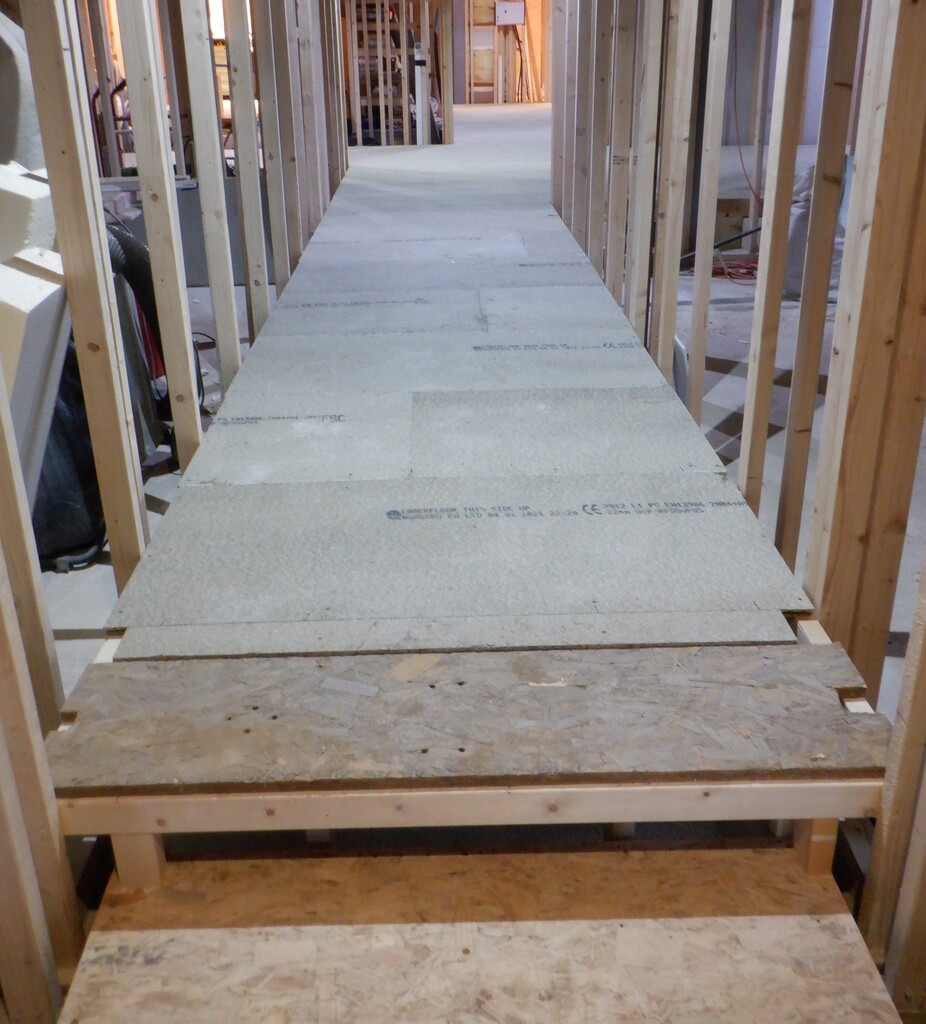
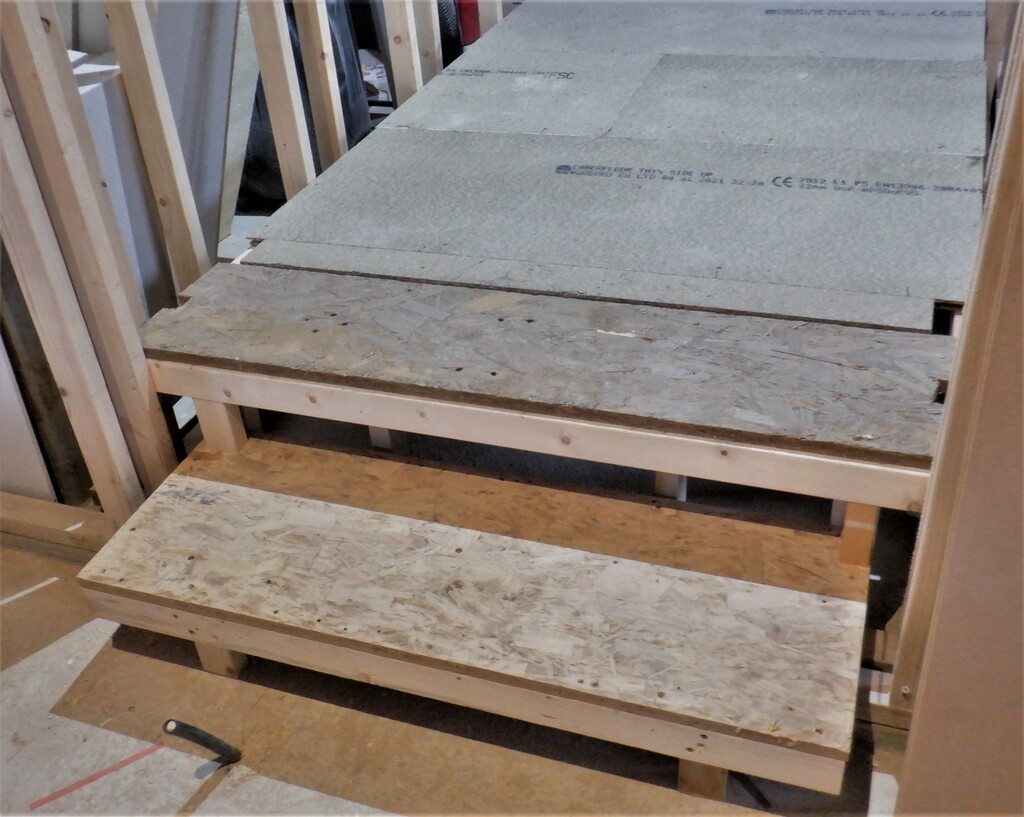
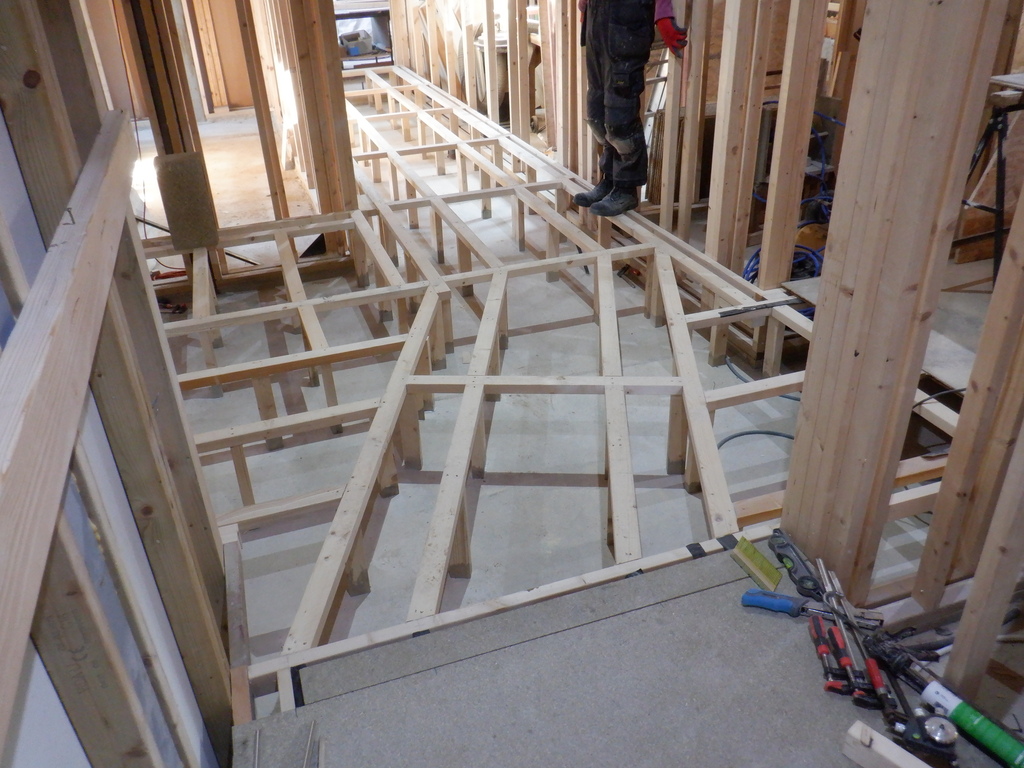
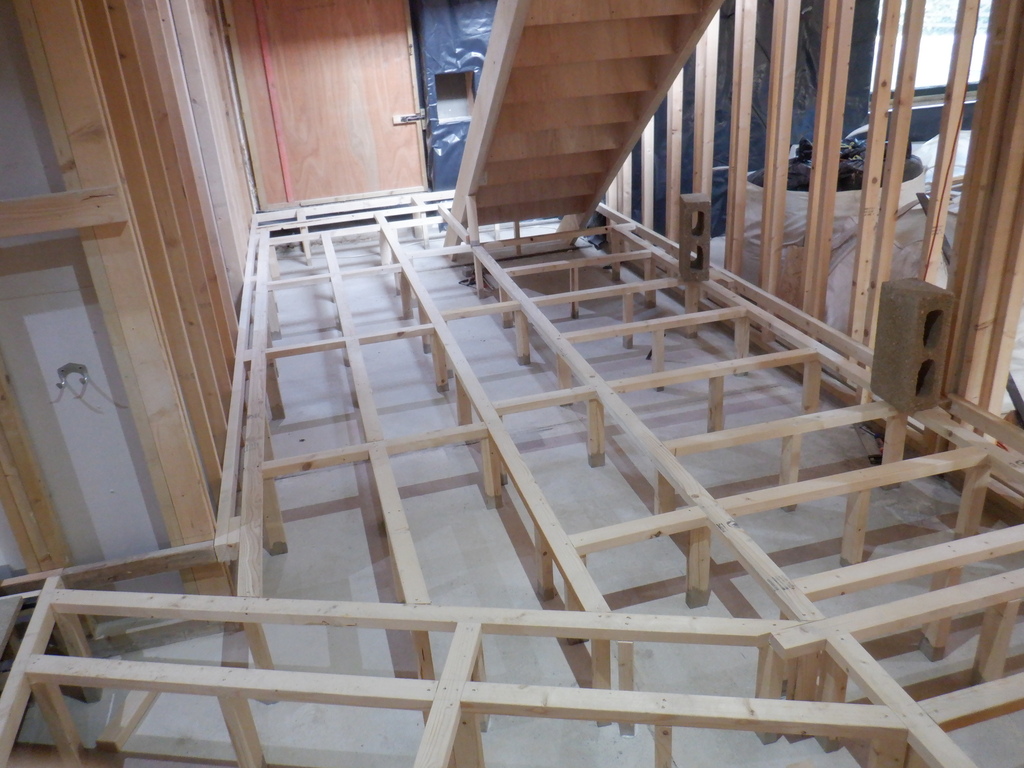
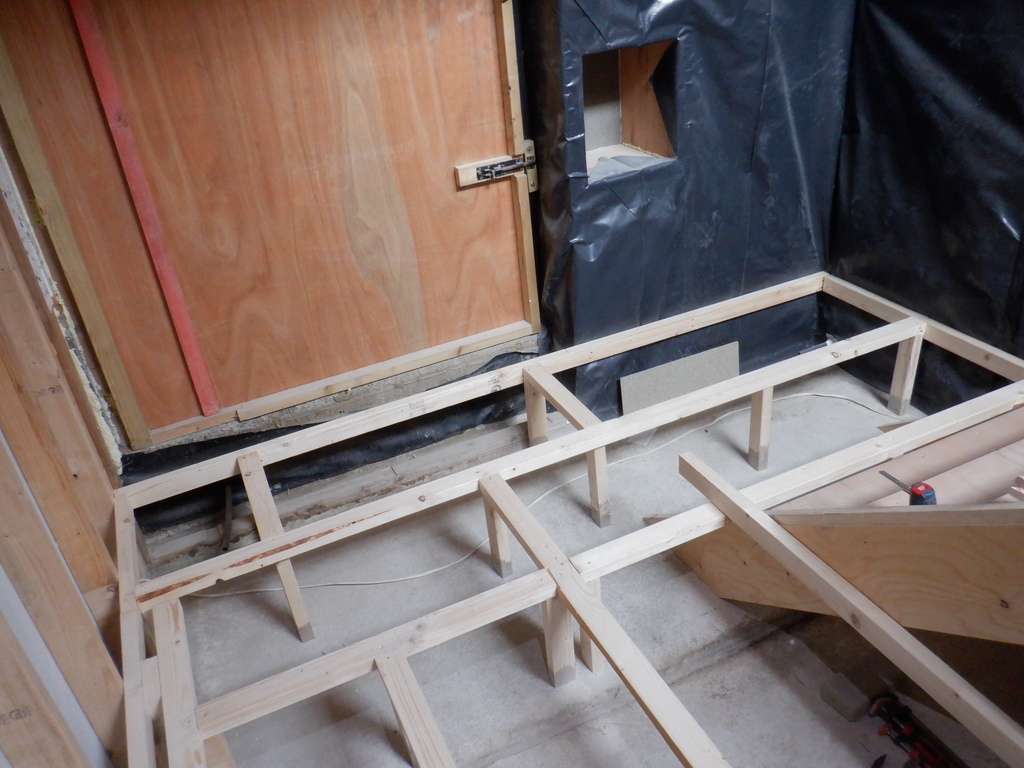
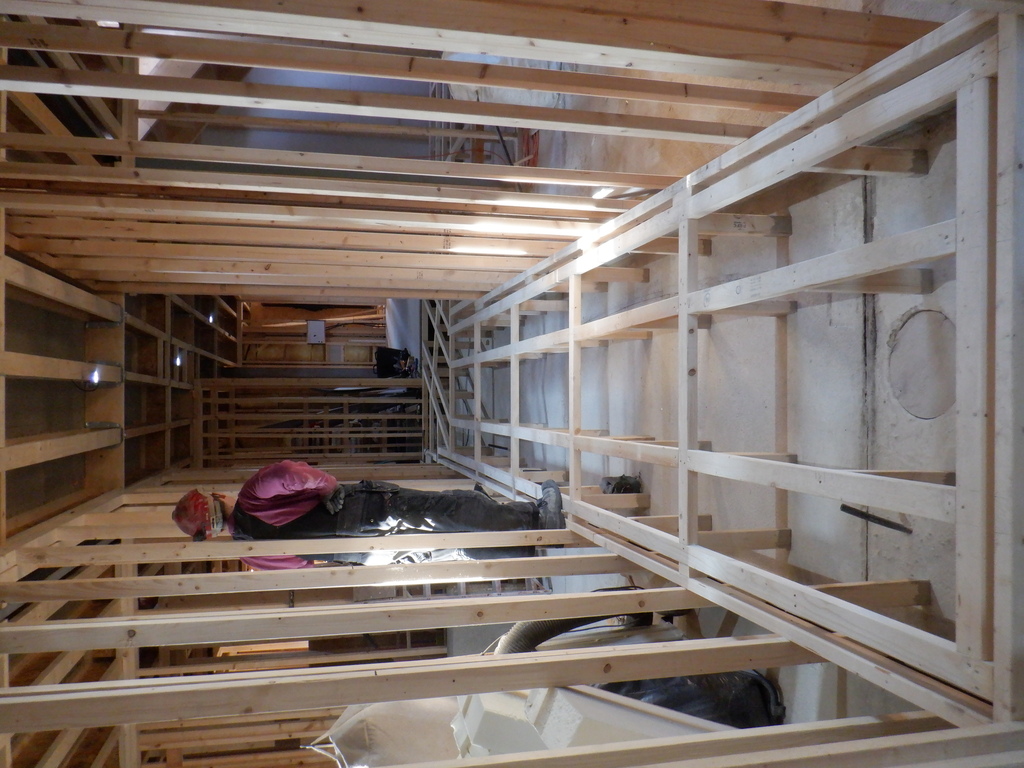
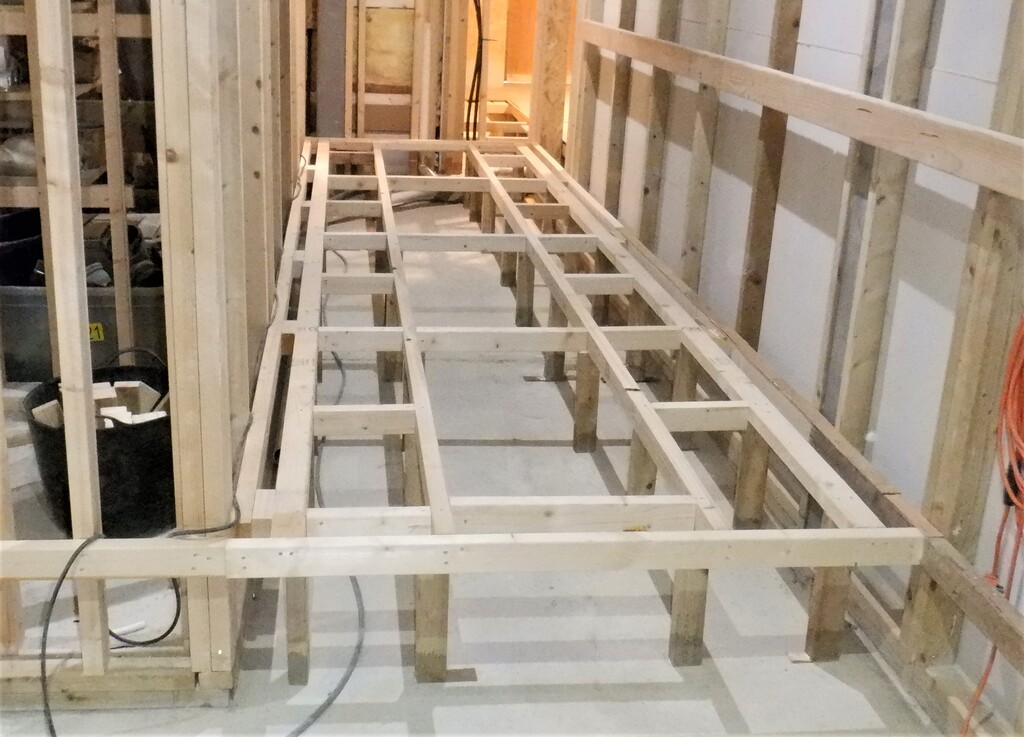
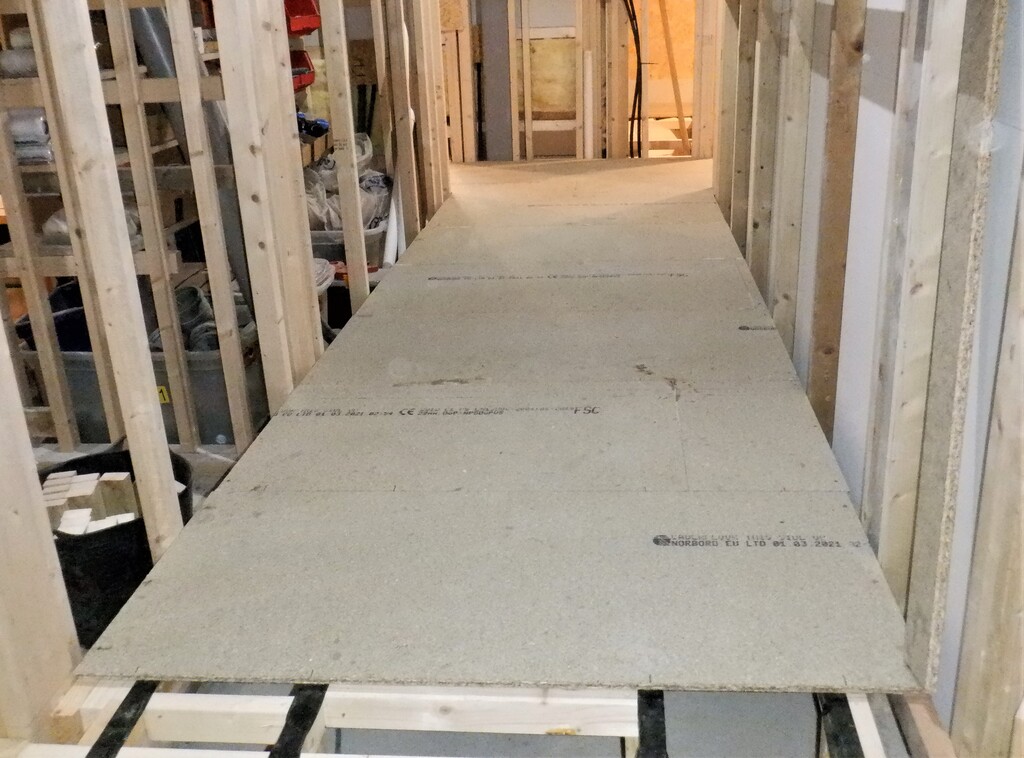
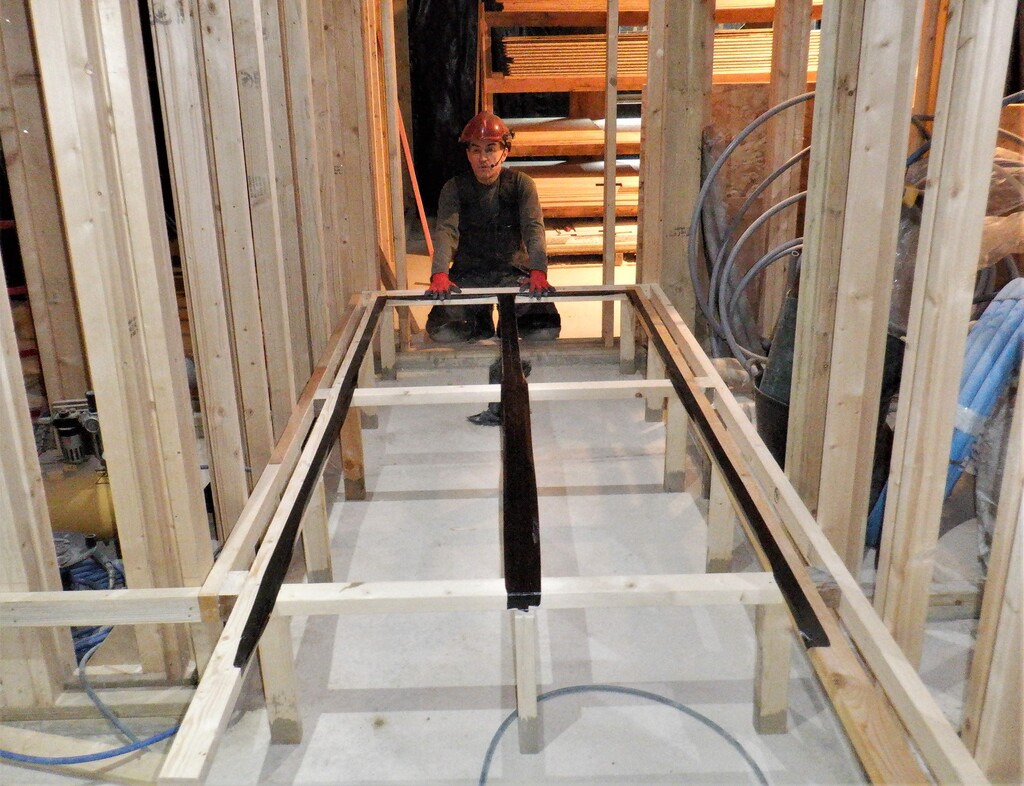
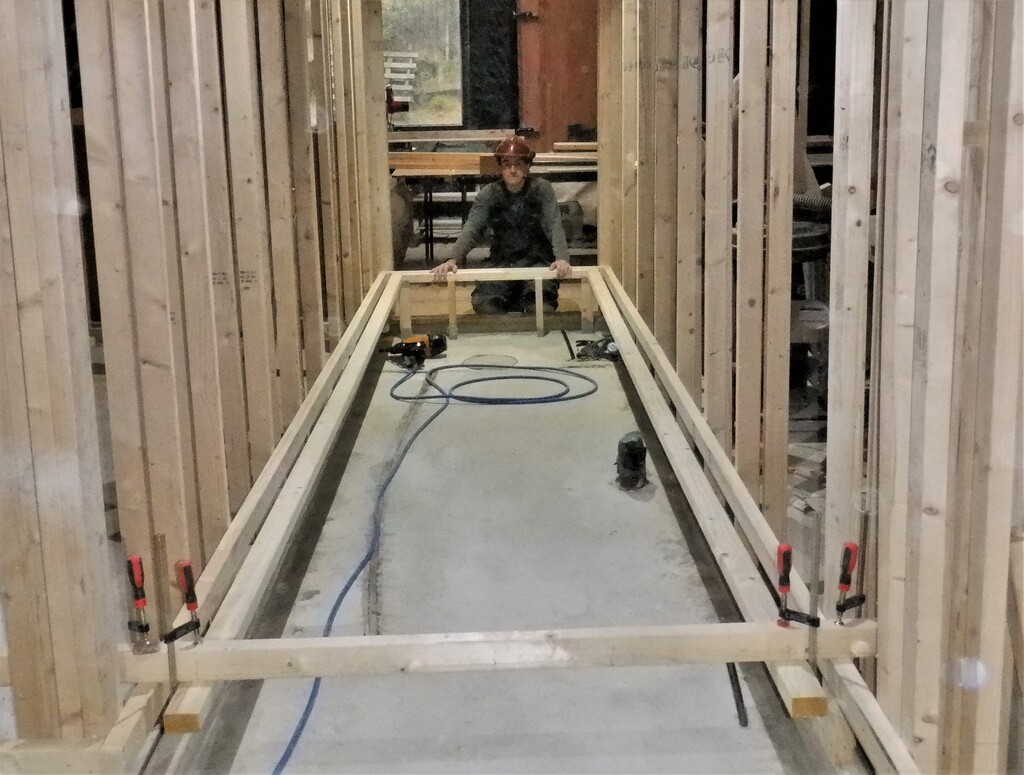
    To aid in this task, we decided that the Cloakroom and Linen cupboard would have their floors built so we could route any pipes etc underneath. We did our usual procedure of using the green laser level to give us the height of the flooring, nailed the framework around and across the floor and cut to size loose 22mm chipboard floorboards.
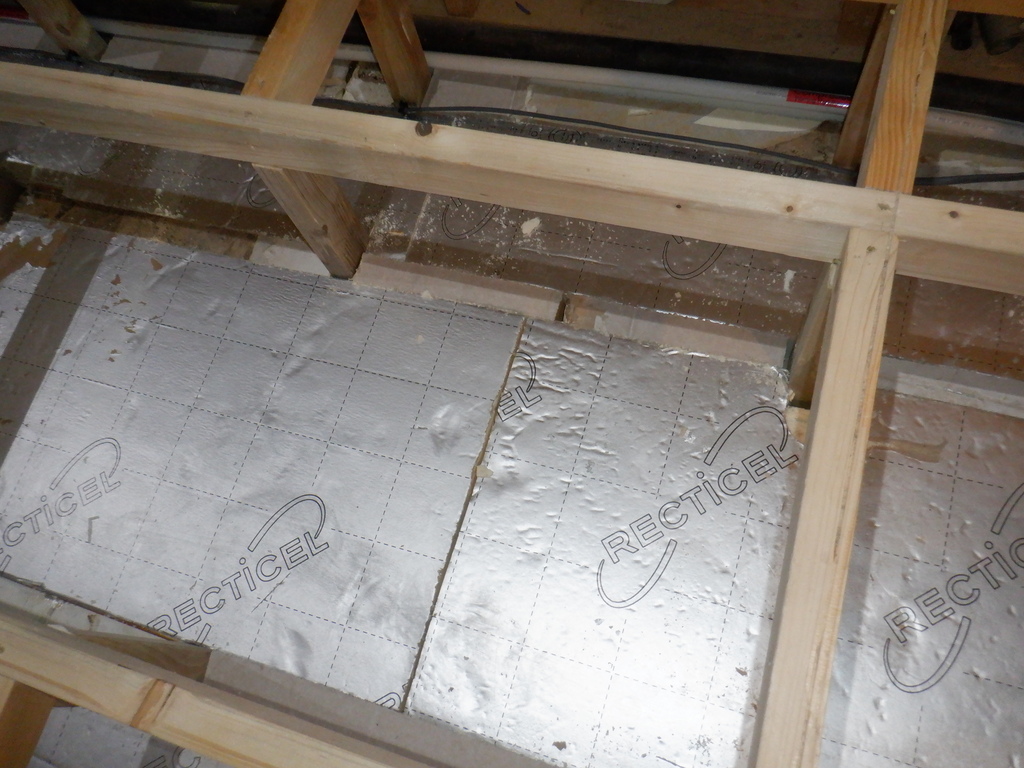
    The floorboards are not glued or screwed down so we can lift them up easily for doing our routing of any Utility pipes, ducting or conduits.

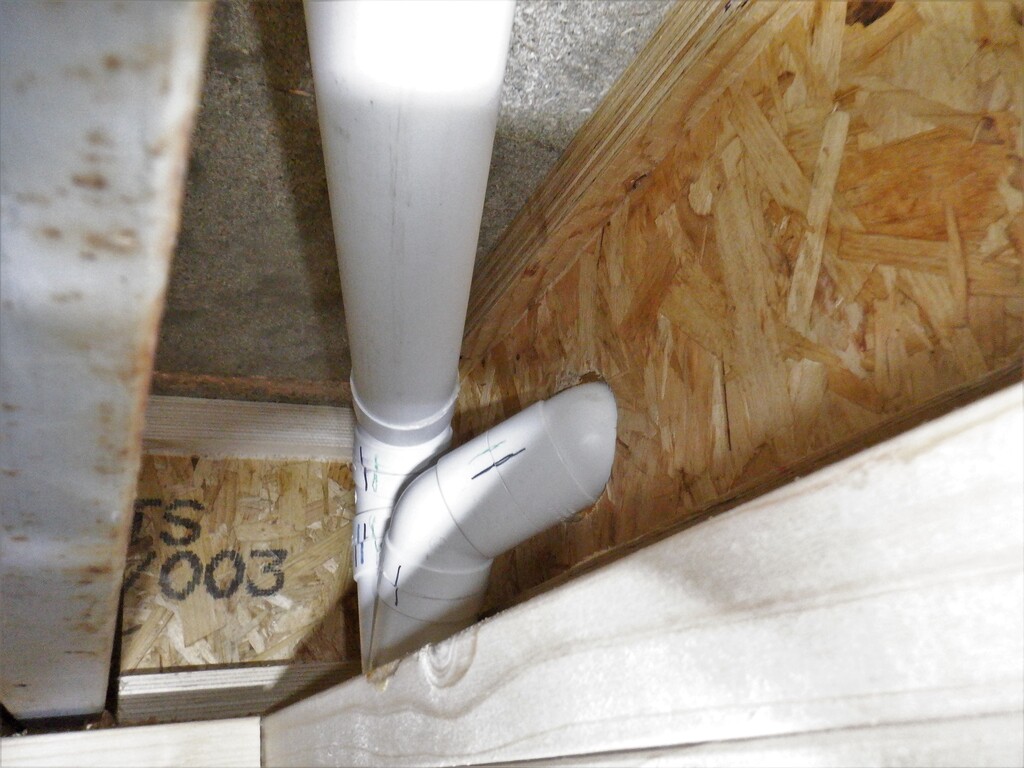
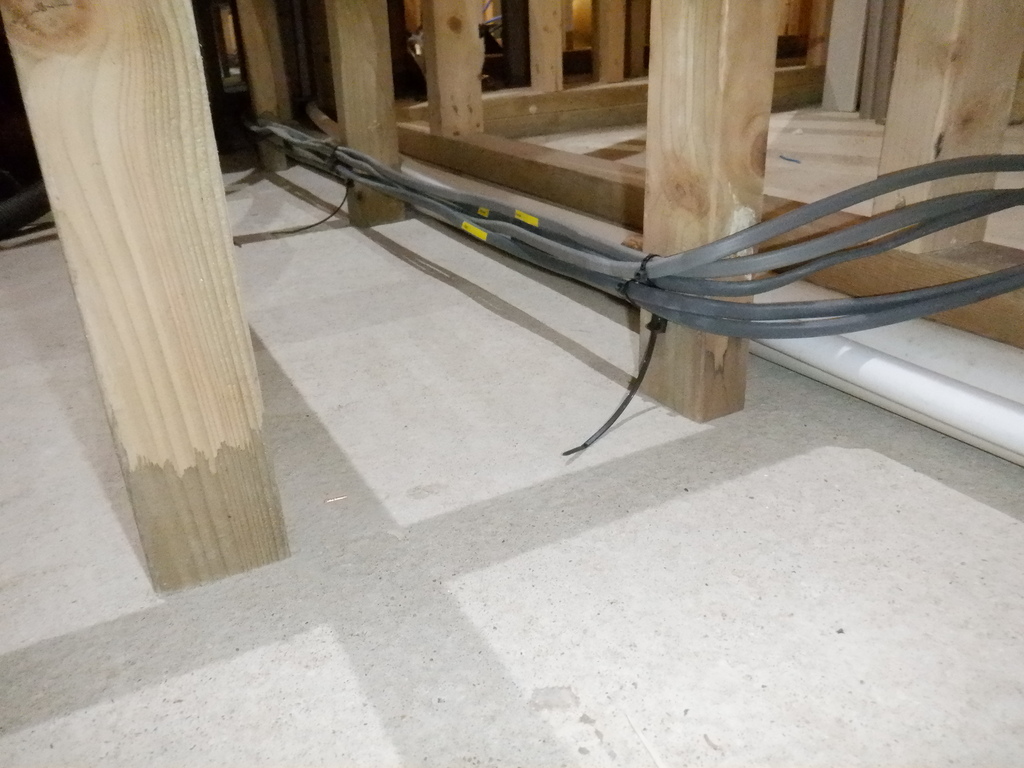
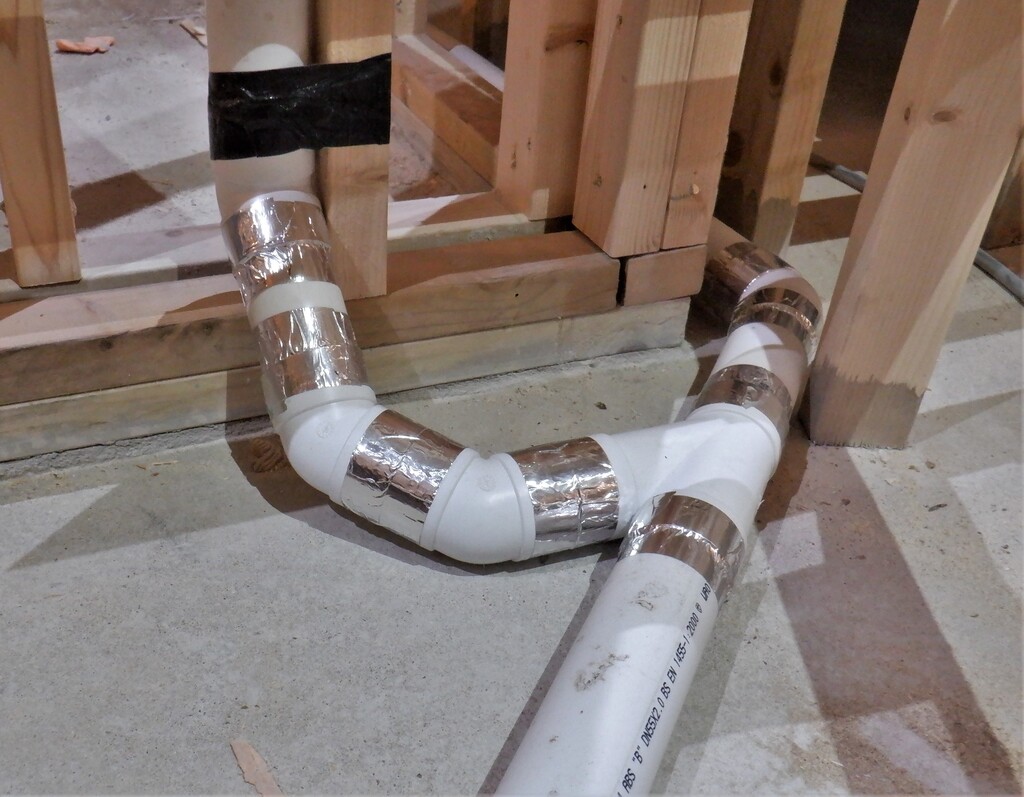
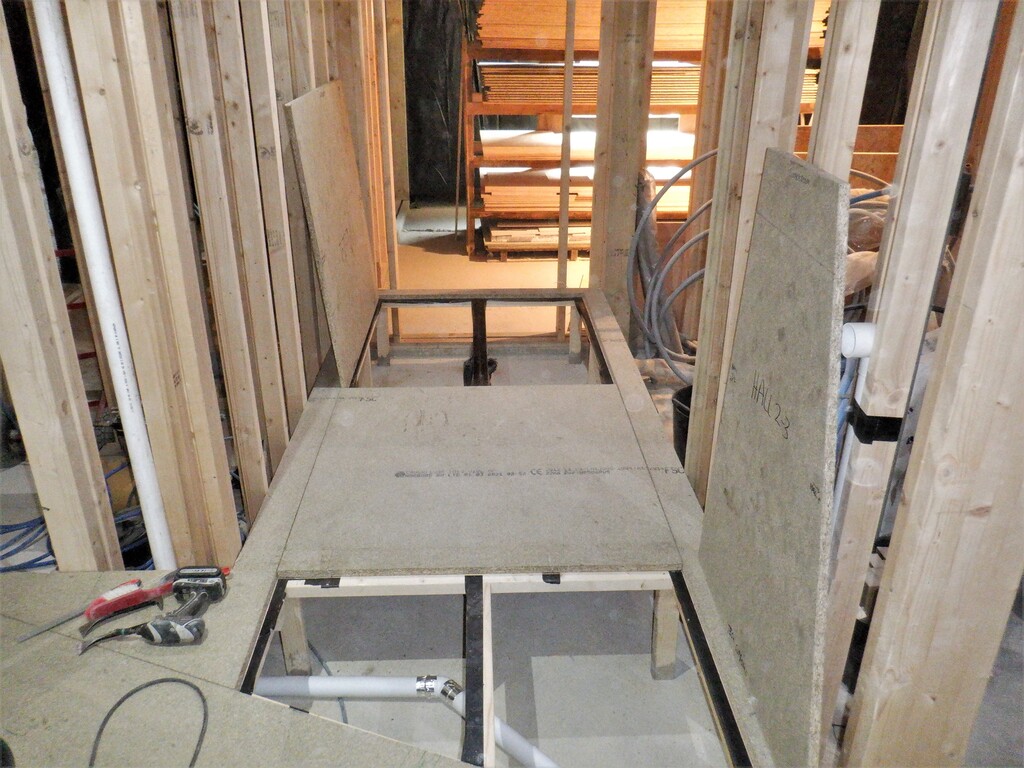
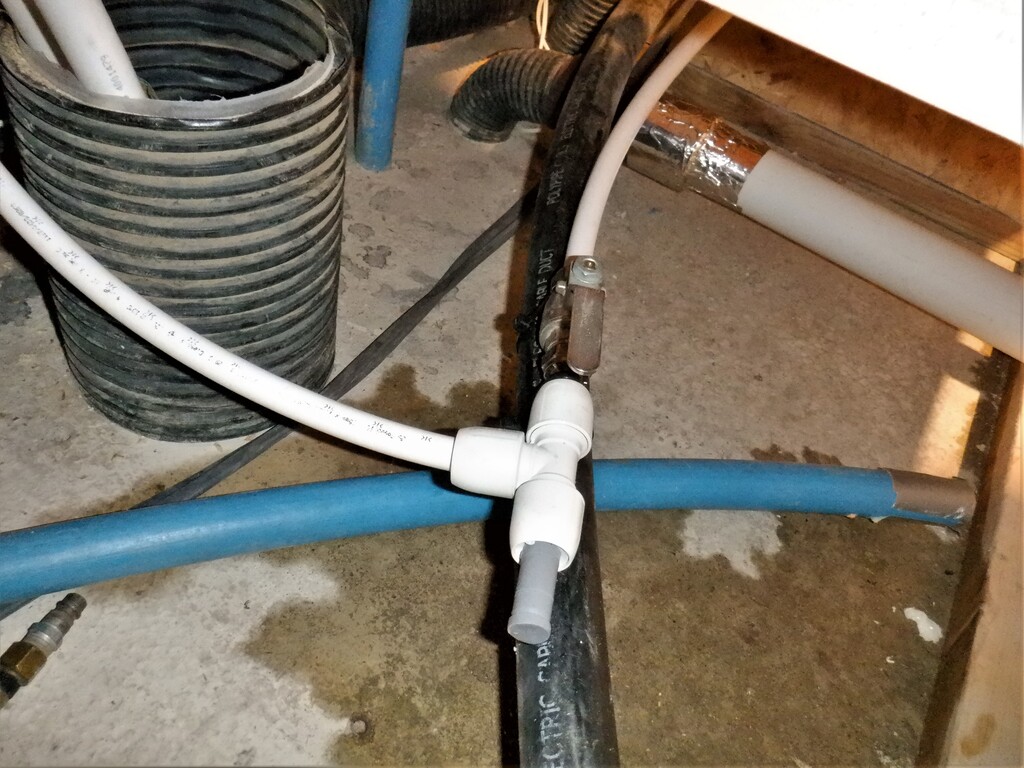
    One of the first utility we did was the vacuum ducting pipework, to extend the capability of providing a vacuum cleaning service upstairs. It was going up inside the wall just right of the Cloakroom sliding door module and it needed two junctions at the top, one for the ā€œportā€ for the mini hallway upstairs and a second pipe run going off to the work room to provide local vacuum facilities for plugging into various machinery. Each junction needed two 45° fittings joined together to make the right angle turn. We wanted to have more gentle turns so we avoid encountering blockages hidden inside the network somewhere. But having two 45° units fitted together, they are quite bulky so we had to wiggle, twist and trim down various joints before we had our solution.

    Installing All Conduits and Pipes to Serve the Upper Floor from Hallway's Services

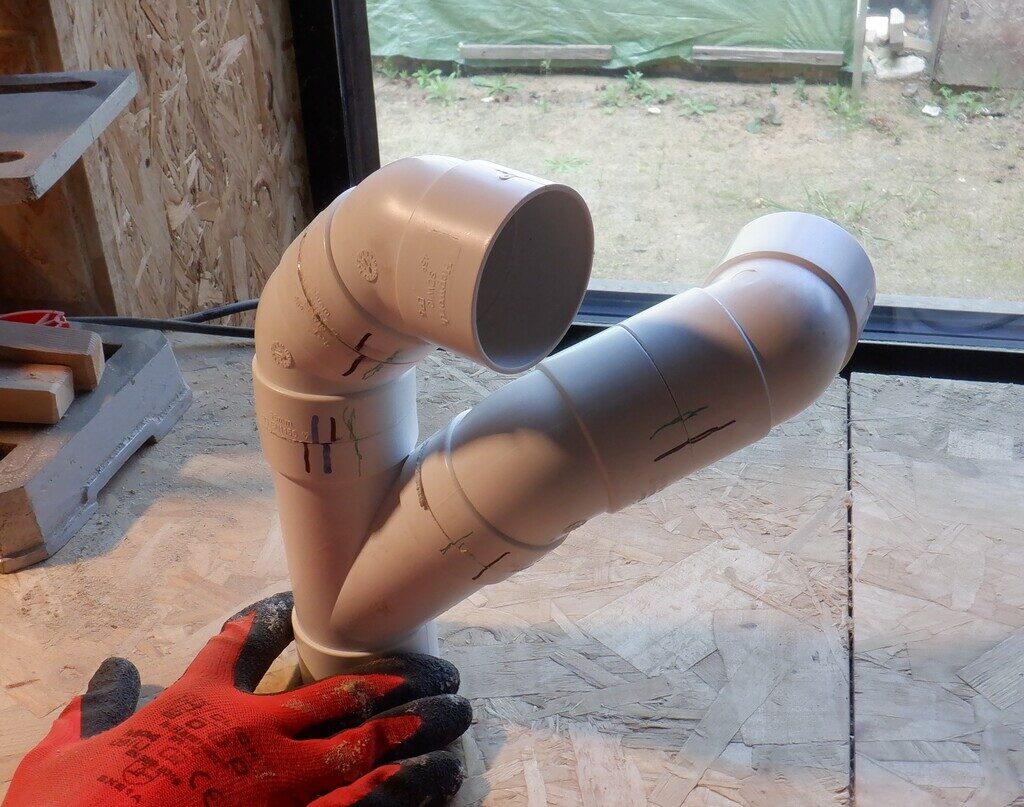
    Complicated-vacuum-pipe-junction

    Installing All Conduits and Pipes to Serve the Upper Floor from Hallway's Services

    From-the-joint

    Installing All Conduits and Pipes to Serve the Upper Floor from Hallway's Services

    Vacuum-pipe-for-upstairs-hall

    Installing All Conduits and Pipes to Serve the Upper Floor from Hallway's Services

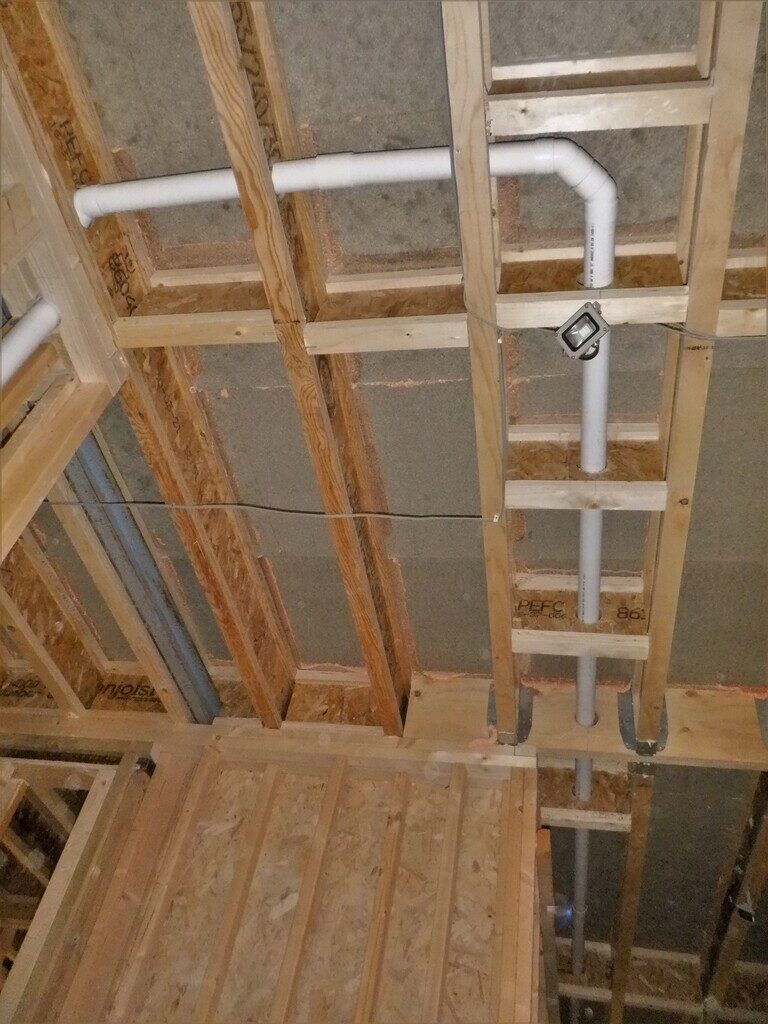
    And-down-the-hall-towards-the-utility


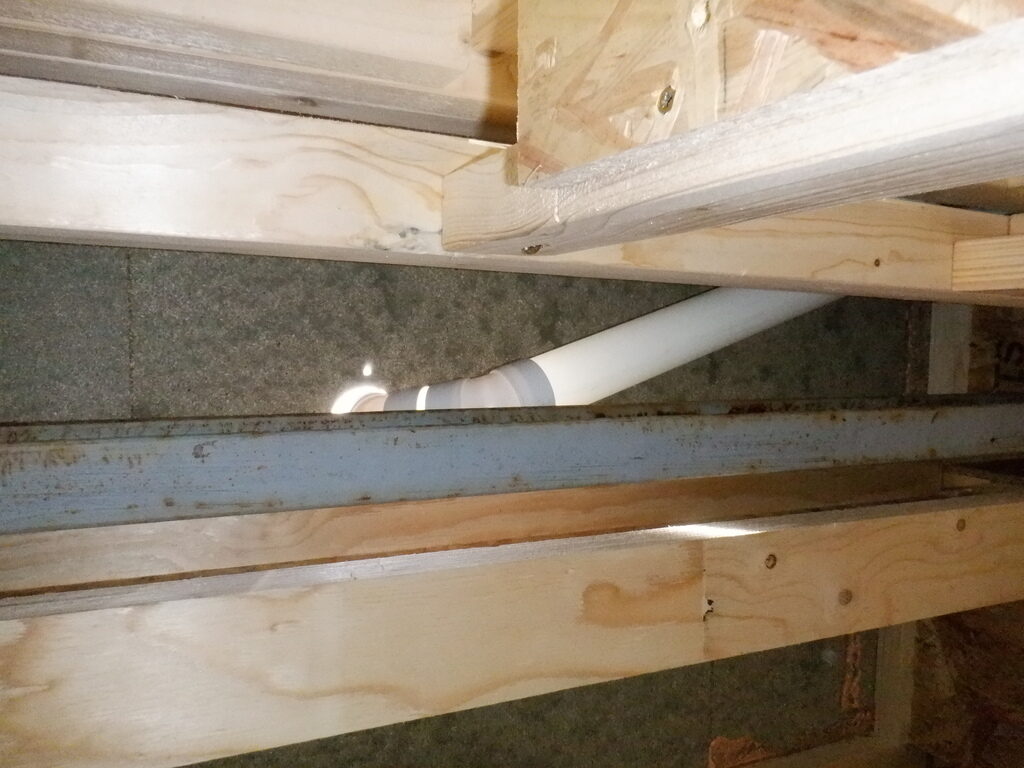
    But we did realise that we had missed a shorter connection, to provide a port for upstairs in the workshop room. We already had a vacuum port downstairs next to the Utility Room, on the end wall of the hallway! So, we made some adjustments and removed a long straight section. Then we extended the new location upwards instead, making it come out upstairs that will be the workshop.
    Installing All Conduits and Pipes to Serve the Upper Floor from Hallway's Services

    Shorter-route-to-Work-3

    Installing All Conduits and Pipes to Serve the Upper Floor from Hallway's Services

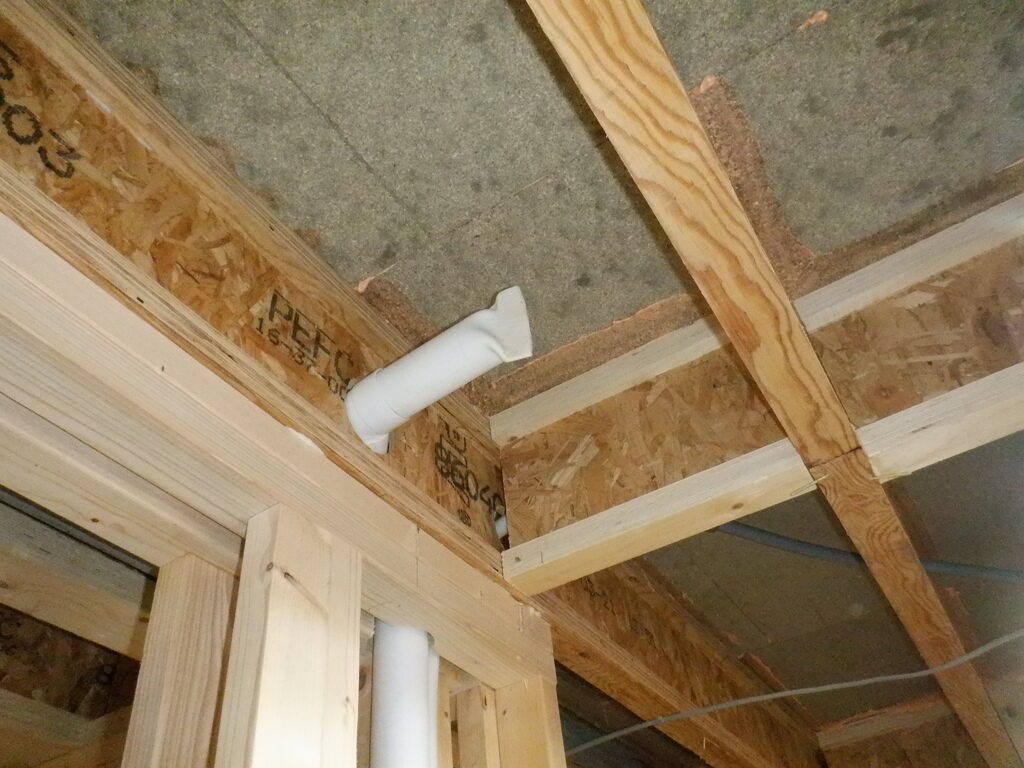
    Vacuum-branch-sealed-off


    The other location for another vacuum port is all the way down next to the Great Room entrance so that we can plug in the hose and do any cleaning jobs in the Kitchen, Bedroom One, or indeed the Great room too.
    Installing All Conduits and Pipes to Serve the Upper Floor from Hallway's Services

    Vacuum-port-for-Great-room-and-Kitchen


    We also bought some adapters, to reduce the 50mm diameter down to the 40mm size because we discovered that the manufactured ā€œprettyā€ vacuum port themselves can plug straight into a 40mm socket without any other items or adapters.
    We now have three ports downstairs (plus another one to do across the Great Room near the Conservatory later on) and two upstairs minimum and maybe a third one for connecting to various equipment like a band saw or drill press in the workshop.

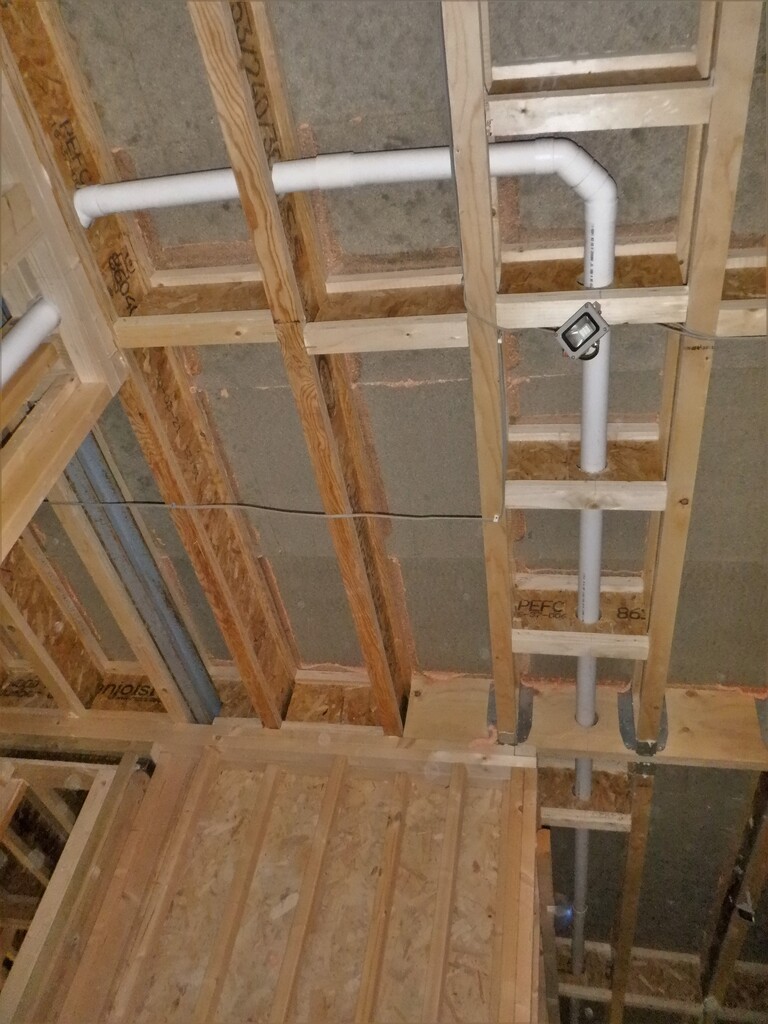
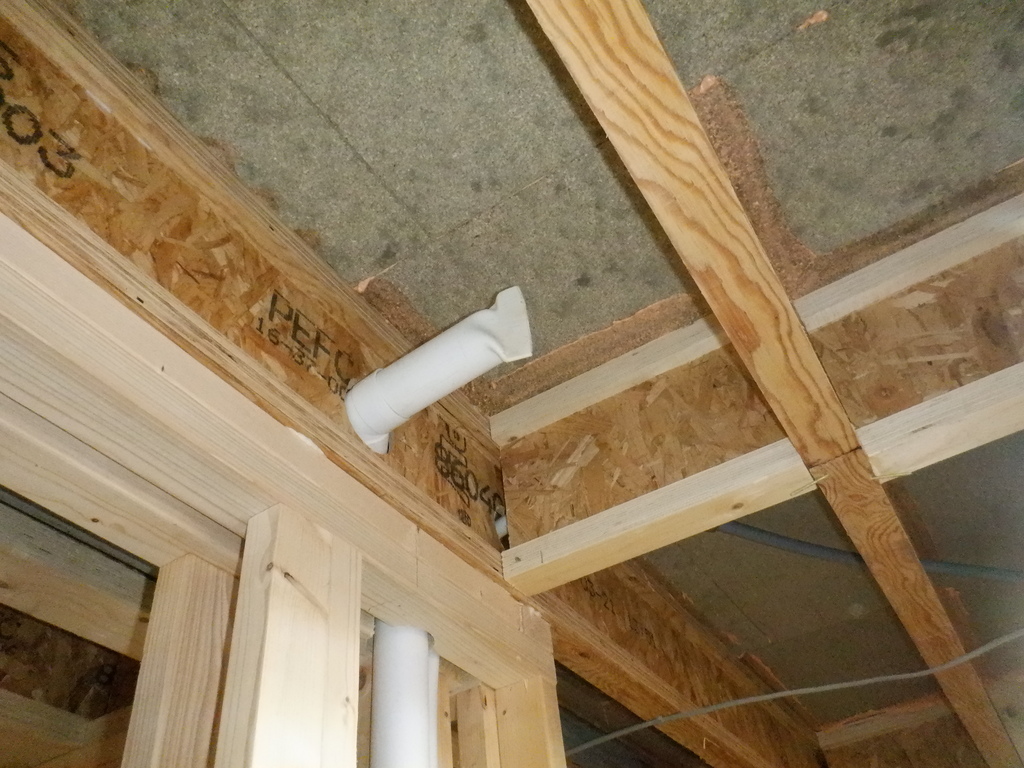
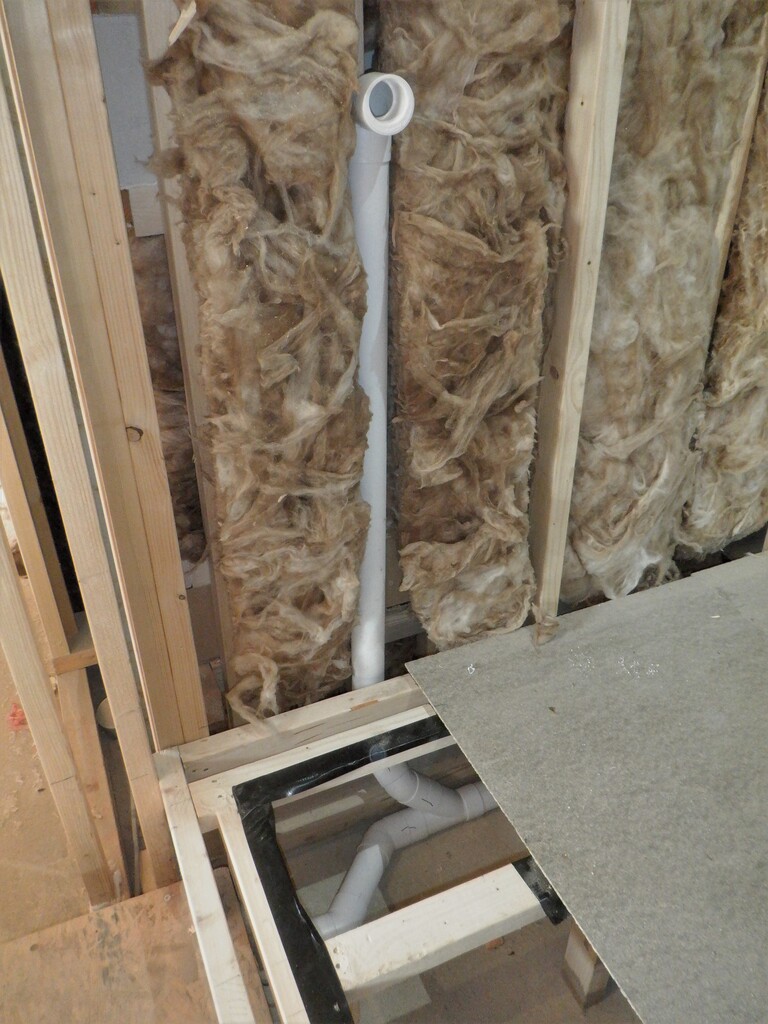
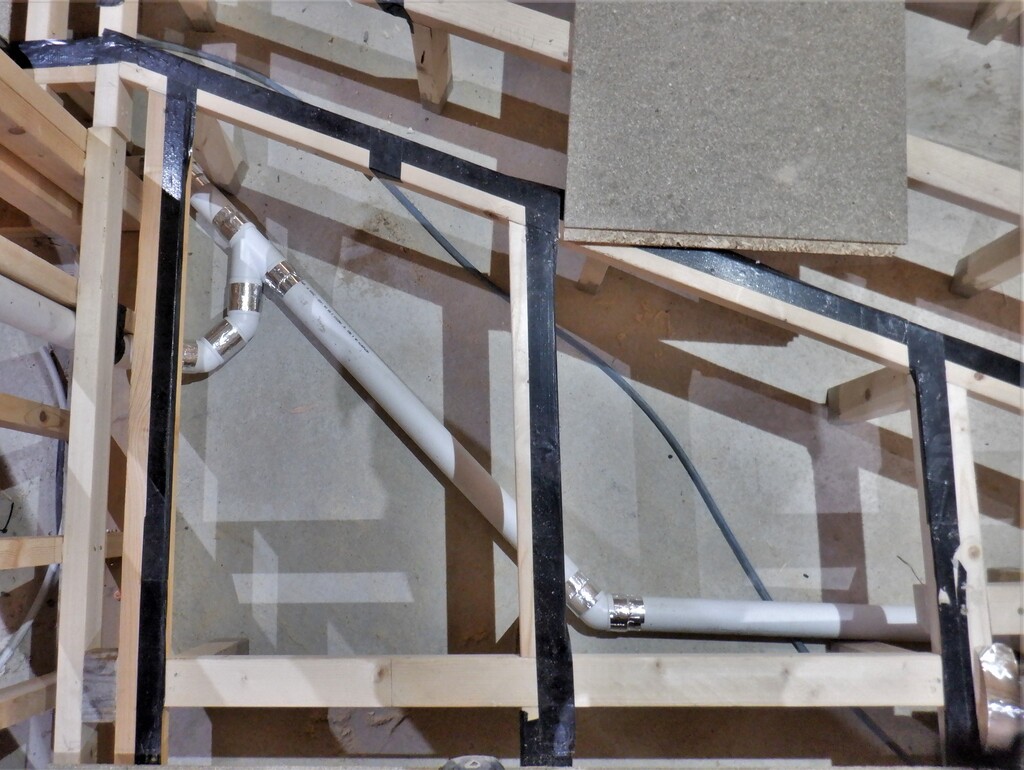
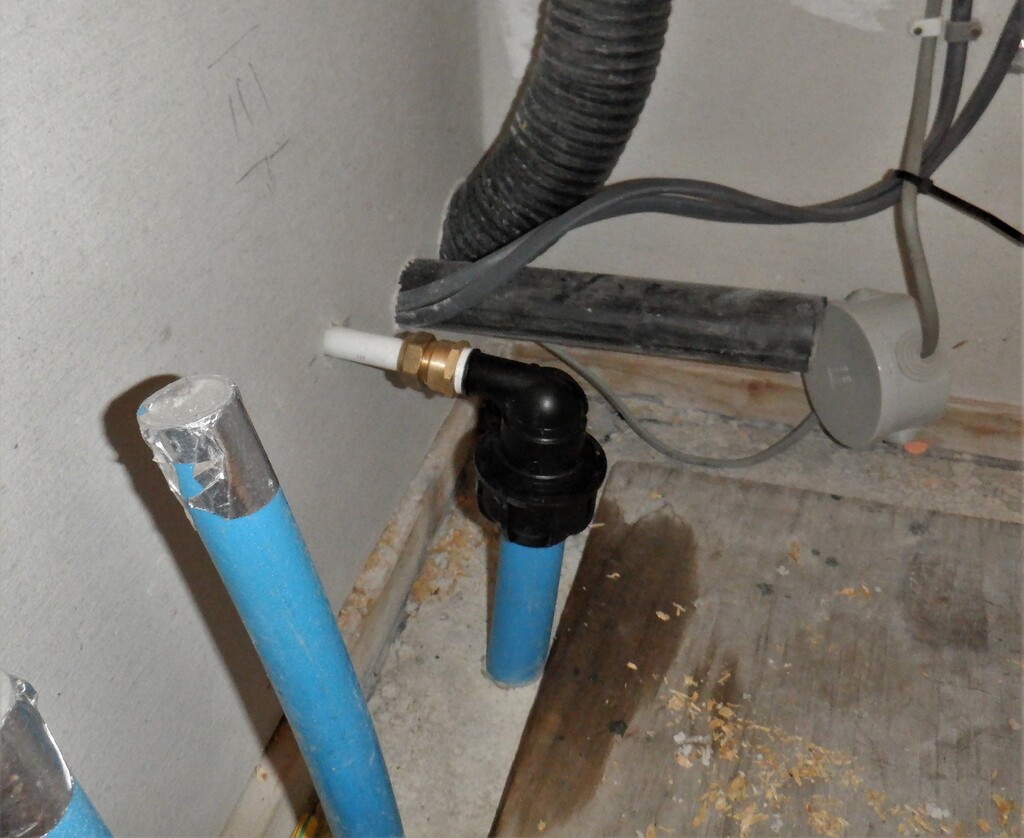
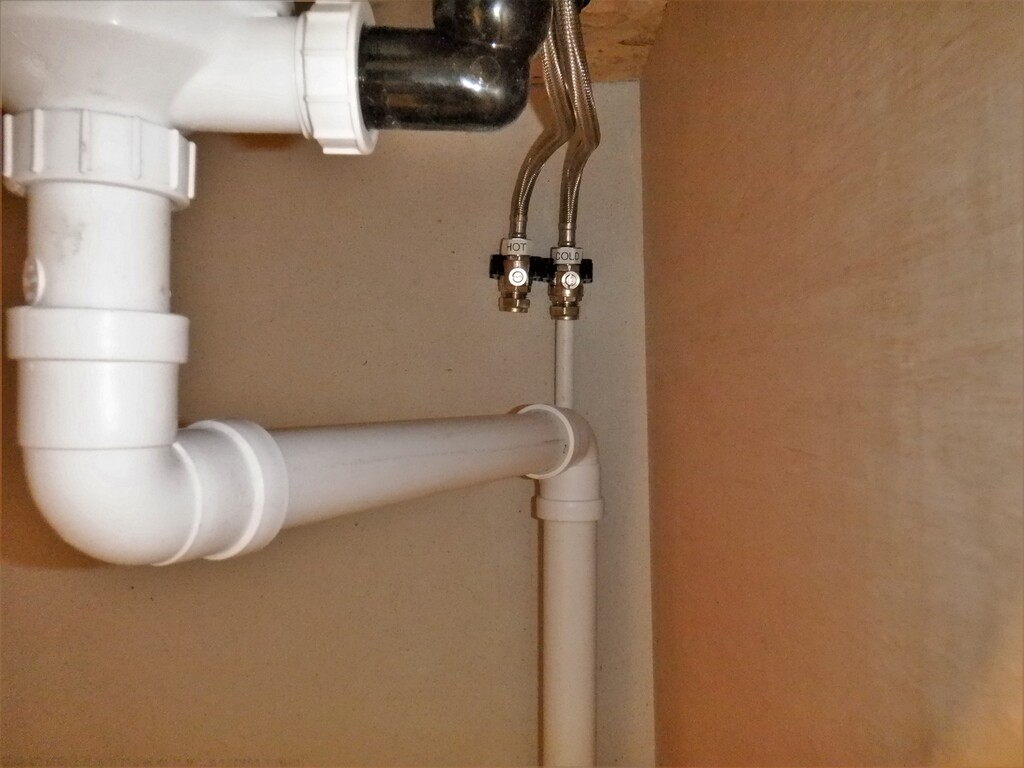
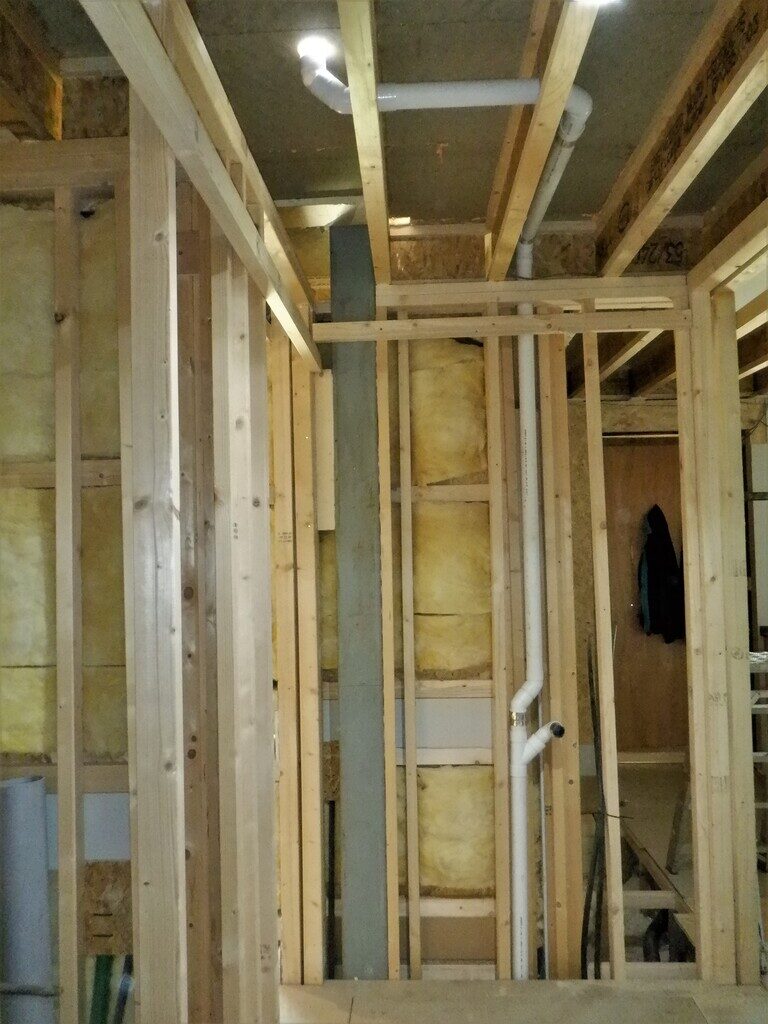
    Then, the next utility to deal with, is the compressed air supply. We inserted a 22mm plumbing pipe up near the cloakroom and ran a line all the way down the hall up in the ceiling space, to give a local supply up in the workshop somewhere. All the sliding doors will have compressed air cylinders to provide a powerful and quick motive force to opening and closing the doors. We have seven sliding doors in total, not including the sliding door we got in our Garage already. So we inserted 20mm black conduit pipes at each of the sliding door modules, the Cloakroom, the Bathroom and another one for upstairs bathroom too. The ensuites already have these conduits installed. The final two, the Kitchen and Great Room also had been installed too.

    We are thinking of extending the compress airline, all the way across the Great Room and put a connection in the Conservatory, alongside a Vacuum port as well.

    Another set of conduit pipe was installed in various locations from the Hallway, this time it is for routing a fire suppression system up to the ceiling, to enable a nozzle to be placed in the middle of the ceiling in each large room. These nozzles will generate a water vapour ā€œfogā€ to reduce the heat and severity of a potential outbreak of a fire. We have been researching on the web for the different suppression and there were several types of nozzles, some spraying droplets of water and others producing a mist or a fog. The empty conduits will allow us to thread a thin water pipe up to the ceiling so we can install such a system later on when we are satisfied with the appropriate design. The conduit is a black 25mm diameter polyethene pipe that we had purchased 10 years ago and it is big enough for us to thread water pipes up to 15mm in diameter.

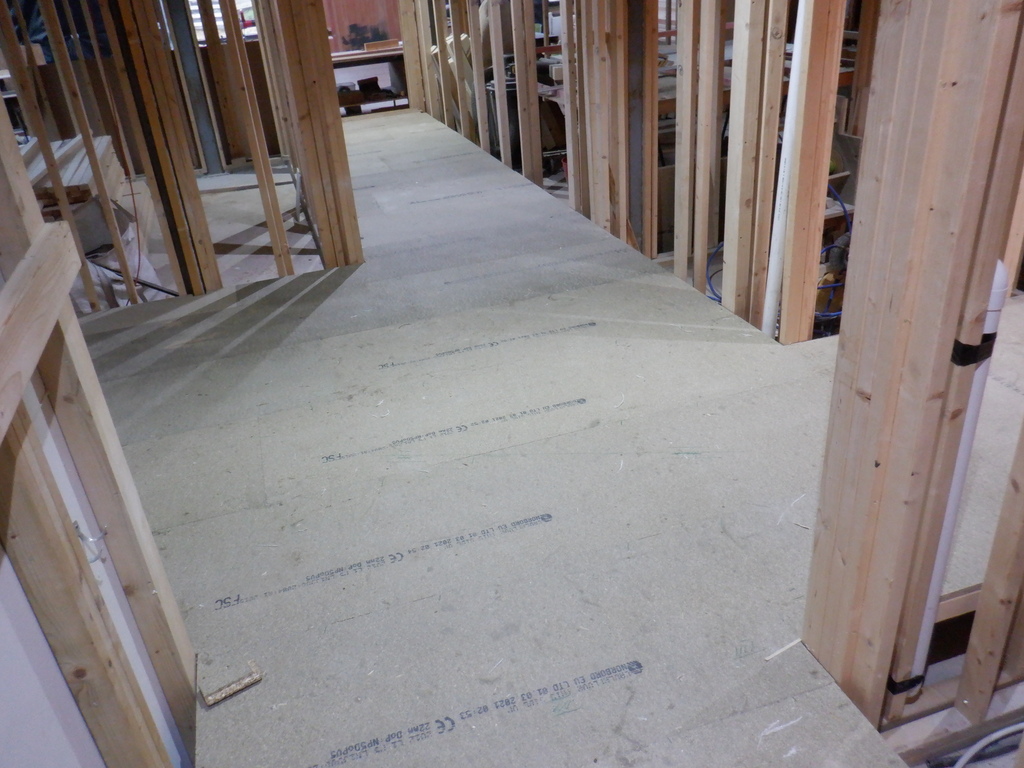
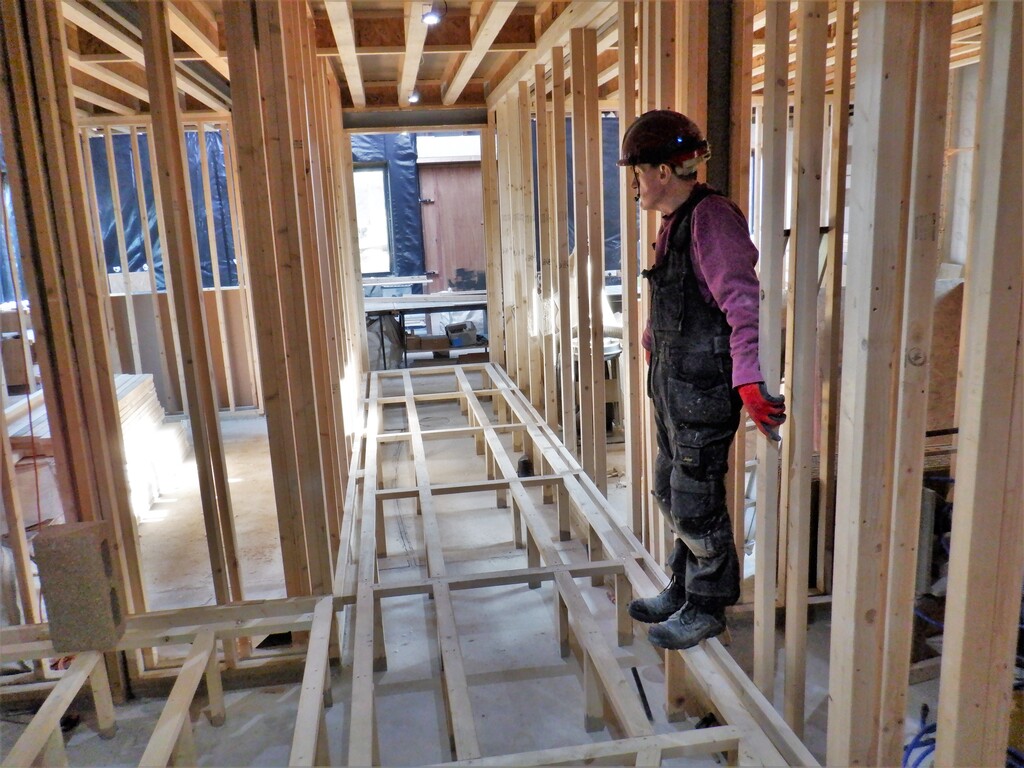
    Now, after we had finished checking our list of connections for the walls and halls, we got on with nailing up the various utility horizontal rails on the walls as per standard design.
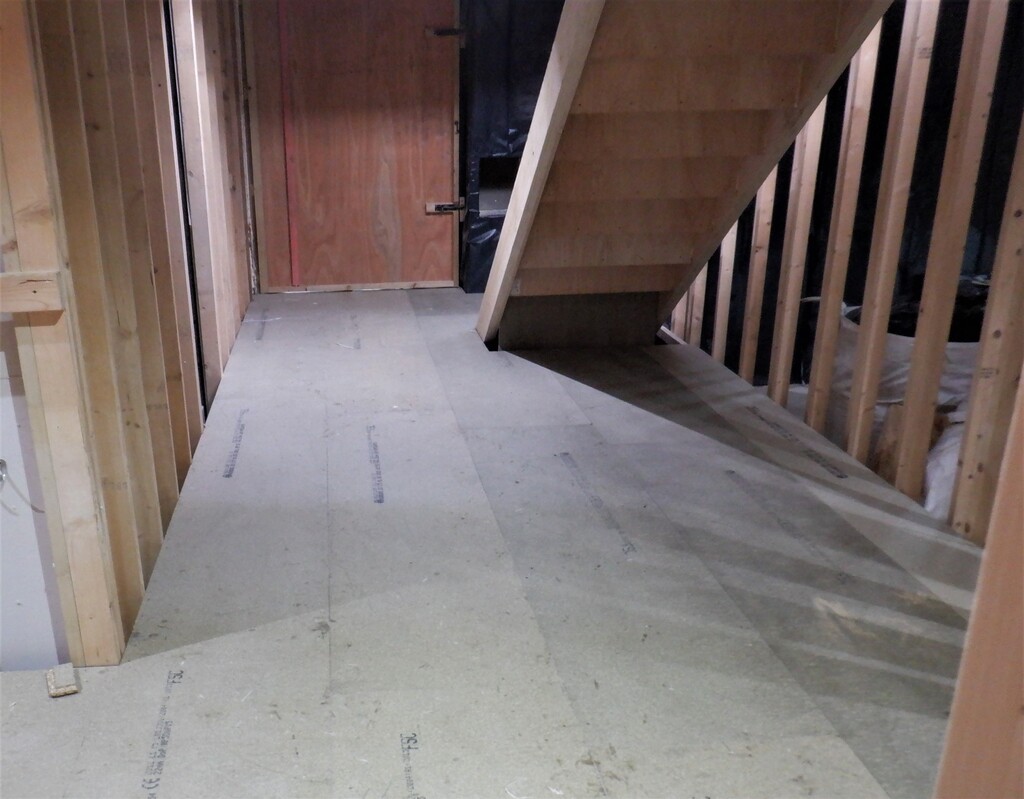
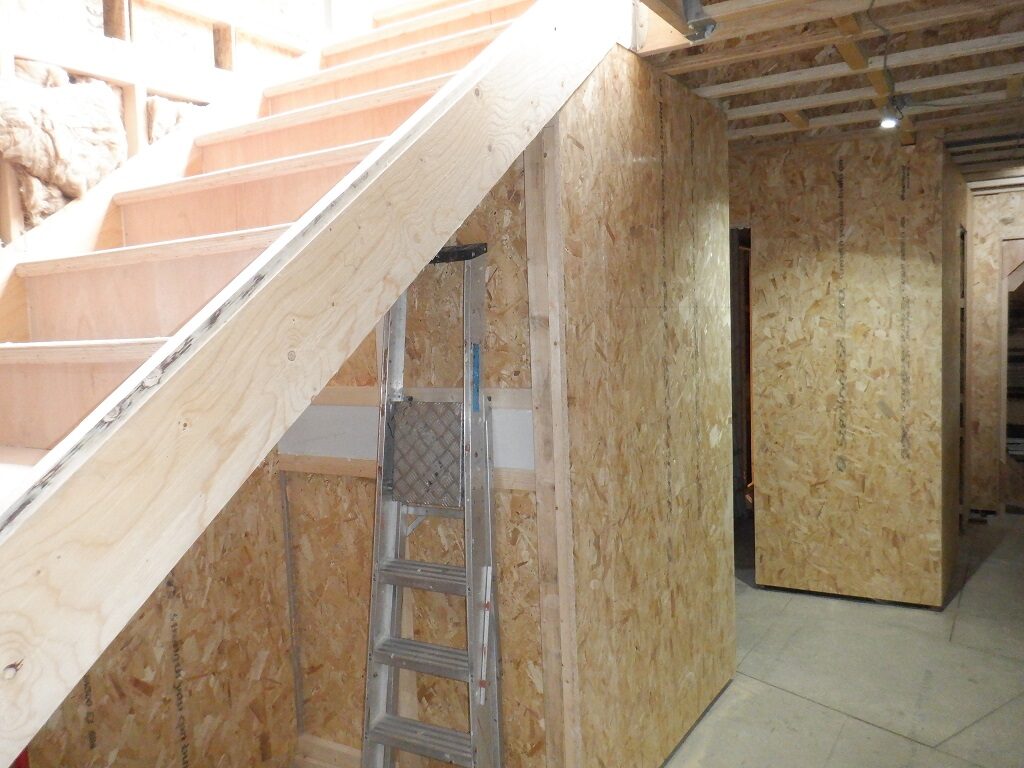
    One section of wall had to be extended to form the understairs cupboard, the Kitchen wall, coming out another 1260mm and then turning and heading towards the edge of the stairs.

    Installing All Conduits and Pipes to Serve the Upper Floor from Hallway's Services

    New-understair-cupboard-1


    There is a standard 800mm door entrance, which is nicely aligned with the Cloakroom’s own entrance, which provides access to this small cupboard, going only a few feet under the stairs. The rest of the space underneath the stairs will be divided up into a set of sliding modules on wheels that will provide additional storage facilities, we can never have enough storage capacity in a modern house! The cupboard is a bit over 1300mm deep and we decided to build the back wall with short length of our Utility Channel, which will take a spur off from the Kitchen, and this will provide access to mains and other cabling, to charge up cordless equipment and the like.
    Installing All Conduits and Pipes to Serve the Upper Floor from Hallway's Services

    New-understair-cupboard-2

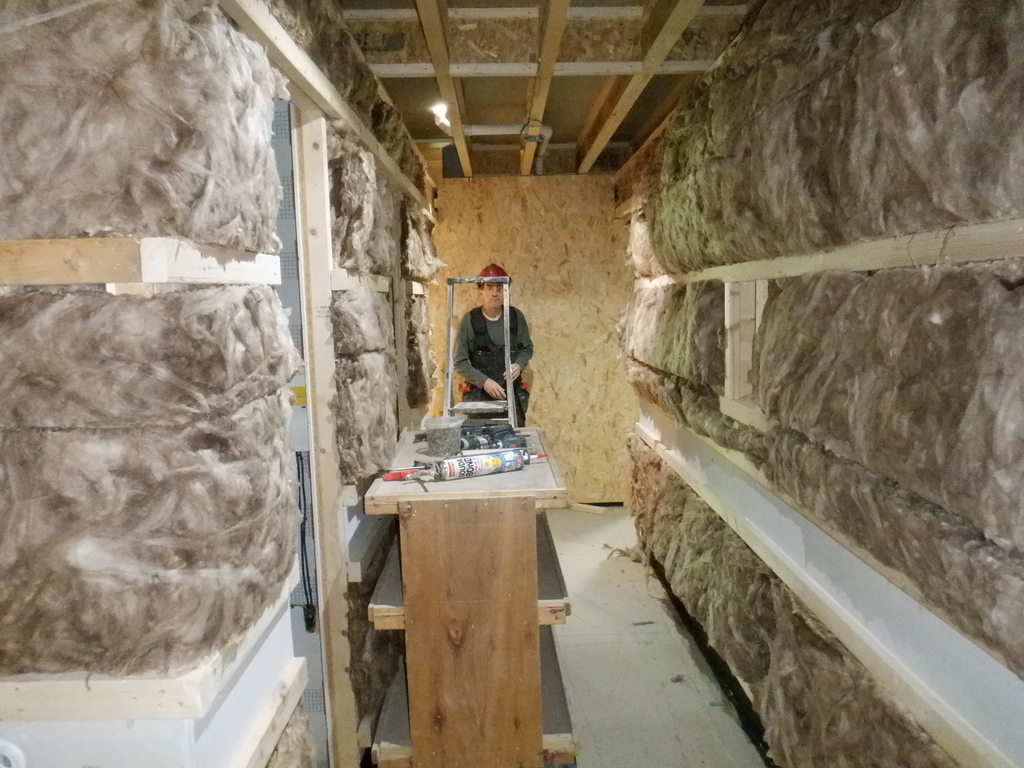
    Also, as part of putting up the horizontal rails, we have been stuffing in lots of glass wool into the walls cavities to both block the sounds but also provide better fire protection. This is a very yukky job and we were wearing our dust masks with great relief, to say the least!

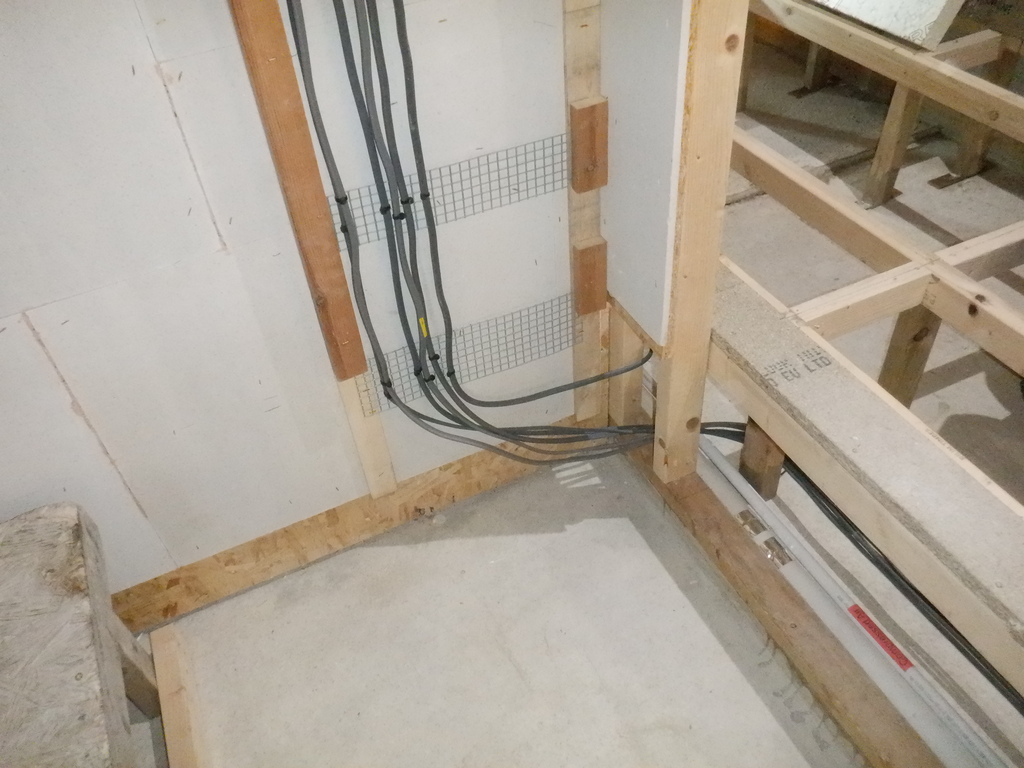
    The Utility Channel was created as per normal, being located at the 800mm to 900mm position up the walls and we put in more conduits to make sure every section is accessible. We also built the ā€œcontrol boxā€ near the Front Door to house the touch display panel but we won’t have any of the other bits and pieces inside (like fuses and audio amplifiers etc), mainly because it is not in a central location and would have meant long cable runs. So we are having a underfloor ā€œcontrol boxā€ instead, located in the central part of the hall, where all the arms of the hallways meets together.

    One of the other jobs we had to do, was to drill several holes through the concrete block walls of the Entertainment Room, to provide more access to the Utility Channel inside the room later on. But, because the solid nature of a concrete wall doesn’t allow us to fit the conduits and pipes in where we want with simple ease, hence why we had to drill through the concrete and insert a couple of 32mm diameter and 20mm conduits, going down into the underfloor space in the hallways next to the entrance.

    The Air Channel, running around the bottom of the walls was created. We made four more air distributor modules, using the 40mm diameter plastic plumbing pipe parts but this time, with a right angle extra piece so the air ducting won’t stick out into the crowded space under the floorboards. We located one down Hall Three (near the Utility Room), another one along Hall Two section, outside the Kitchen and the final two are down by the Front Door, to provide both fresh and warm air to the coats and hats but also to give a boost to counteract any chilly air that rushes in when the door is opened. The 150mm high MDF 6mm thick strips were stapled and glued into place on all the wall sections, including the one going down to the Great Room where we had to finish off the floorboard, the last 420mm strip to reach the entrance.

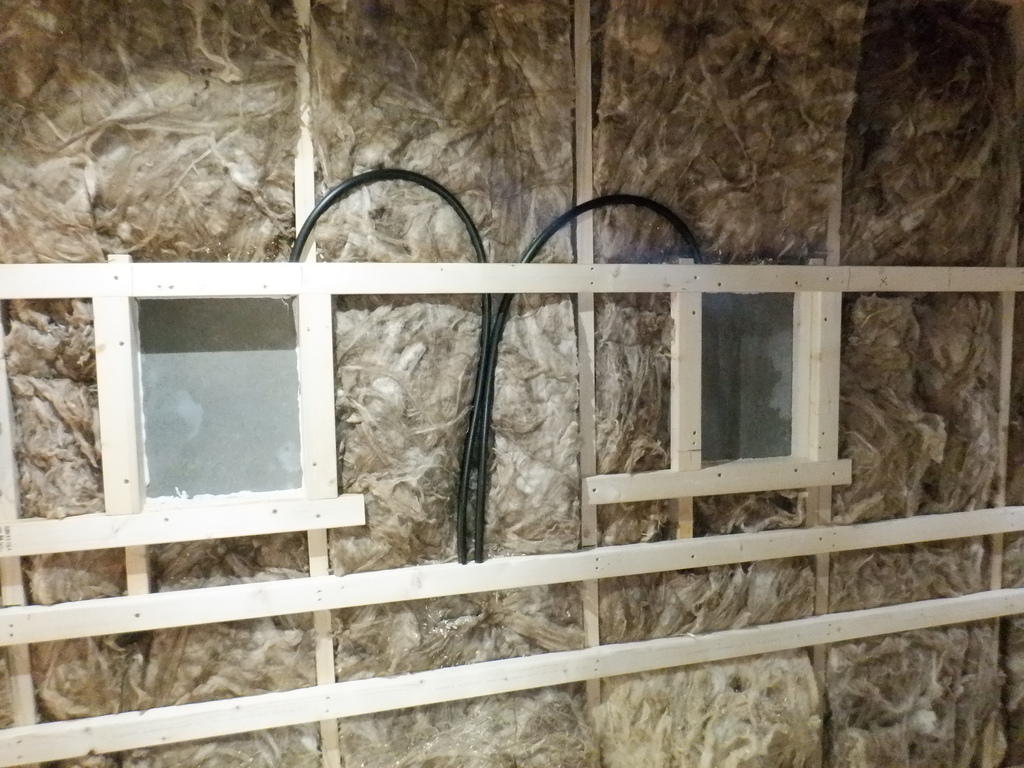
    Then, we continued putting up horizontal rails at the eye line point and finally, at the top of the walls, ready to have the OSB sheets fitted. But before we can do that particular job, we wanted to break up the long sections of wall so we created five Niches on several section of our halls, two are located down Hall One towards the Great Room opposite the Kitchen, one just on Hall Two next to the Bathroom entrance, the fourth one is located half way down Hall Three towards the Utility Room and the final one is around the corner on Hall Four just before the Entertainment Room’s entrance. They are all the same at 320mm wide by 420mm high and the basic depth is 101mm (except for the last one on the Entertainment Room because the wall leg is 25mm wider so this niche is deeper).
    We built up the box using pieces of CLS timber and then glued a back panel on the back for three of them, to box off from the glass wool material. So, when we have put on the wall boards and the final finishing layer, these niches will be 125mm deep and if we put a oak ā€œsillā€ in the bottom and it sticks out another 25mm, then we could have these little spaces in our walls that is six inches deep, enough for a vase of flowers or other things like ornaments. We also routed a 20mm conduit around from the Utility Channel to the top corner to provide a possible connection to provide built-in lighting, to give these niches a lovely soft glow.

    Installing All Conduits and Pipes to Serve the Upper Floor from Hallway's Services

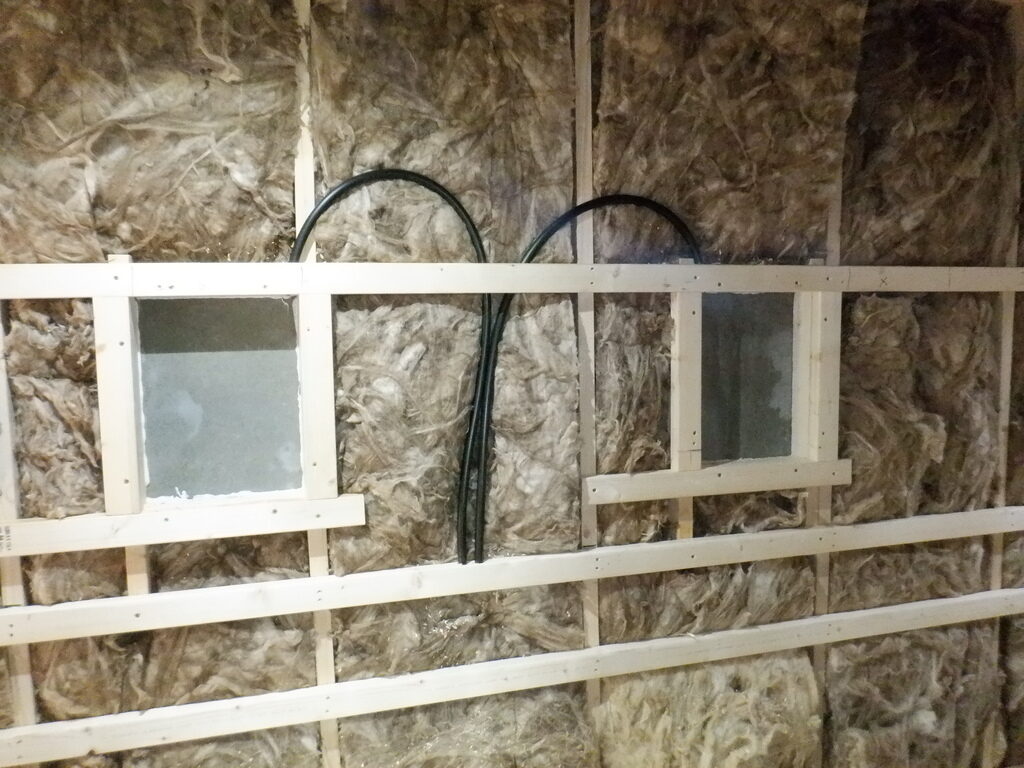
    Hall-niches-with-conduits-to-utility-channel

    And then, we inserted a few more conduits around our sliding door modules plus also a large conduit that goes up to the back wall of the Kitchen, aligned with the Utility channel where fatter and larger electric cables can be installed for the ovens and the hobs. Also, we inserted wooden lintels over various doorways, mainly the cupboards ones but also inserted small pieces of battens up inside the sliding door modules as well as a vertical post on either side of the entrance way, so it is ready to receive the pretty Oak architraves going around the edge of the door hole.

    Finally, we layered in another load of glass wool strips, horizontally between the horizontal rails, using up two more rolls of 100mm thick wool. They are bulging well out of between the wooden rails, which is good as when the boards goes up, it will compress the wool down and improve the sound dampening qualities.

    Installing All Conduits and Pipes to Serve the Upper Floor from Hallway's Services

    Insulation-in-the-halls


    It is very interesting to how quiet and soft the sound is in our hallways at the moment, because of all the glass wool absorbing most of the sounds. This is what we are hoping for when we have finished.

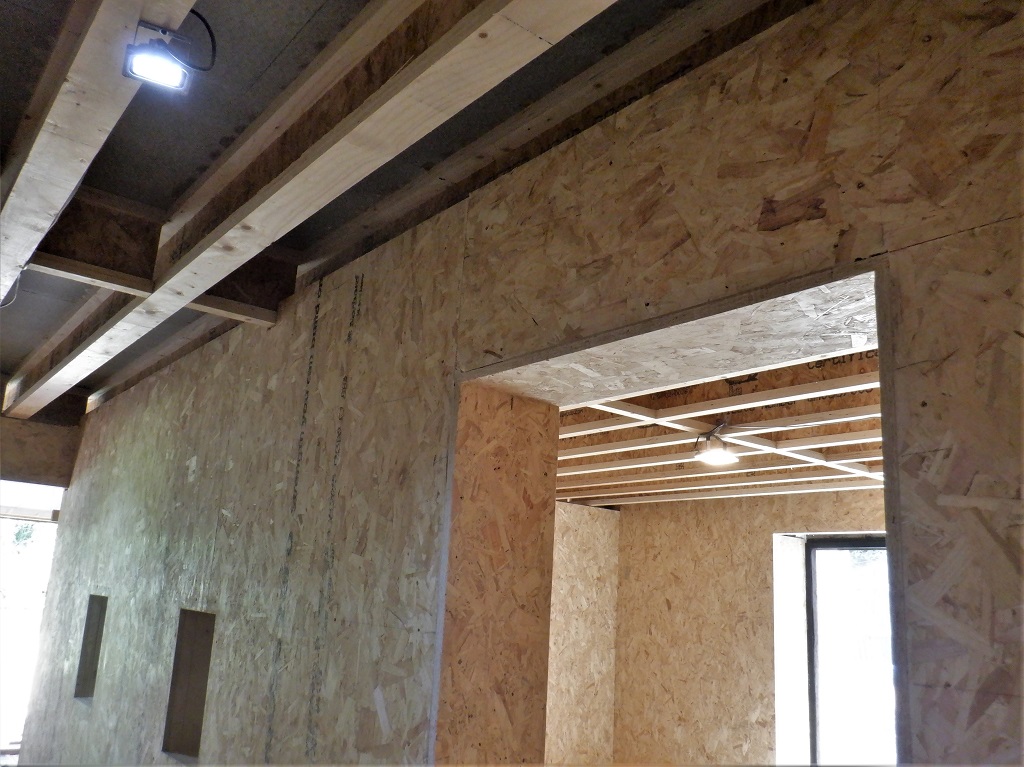
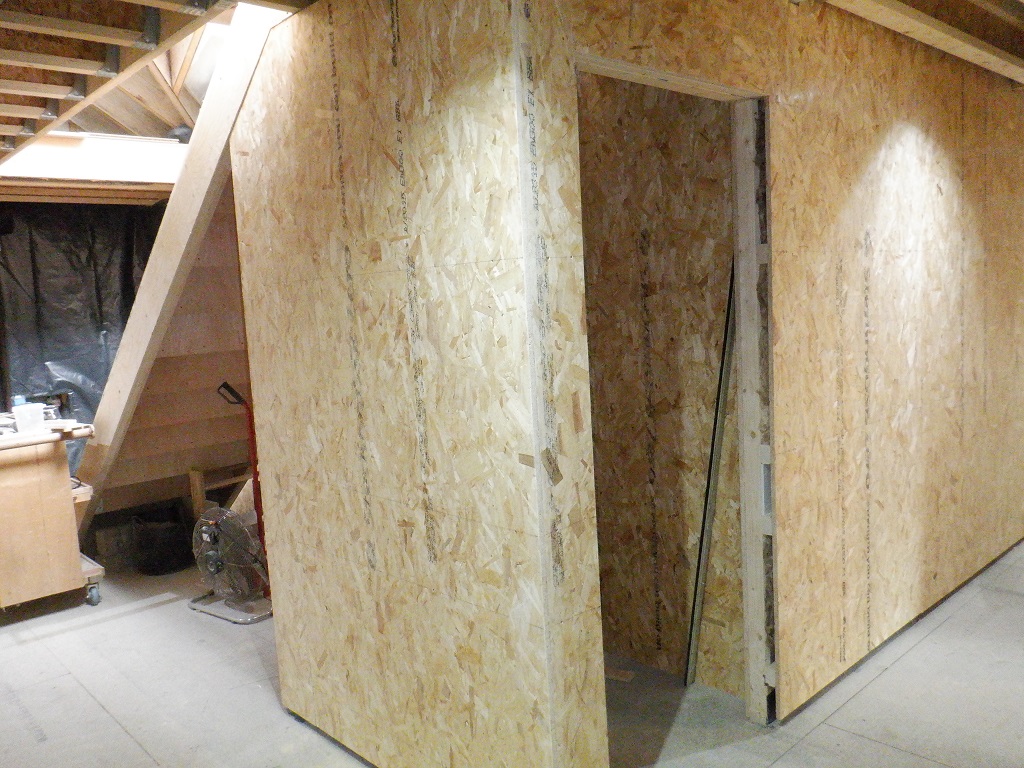
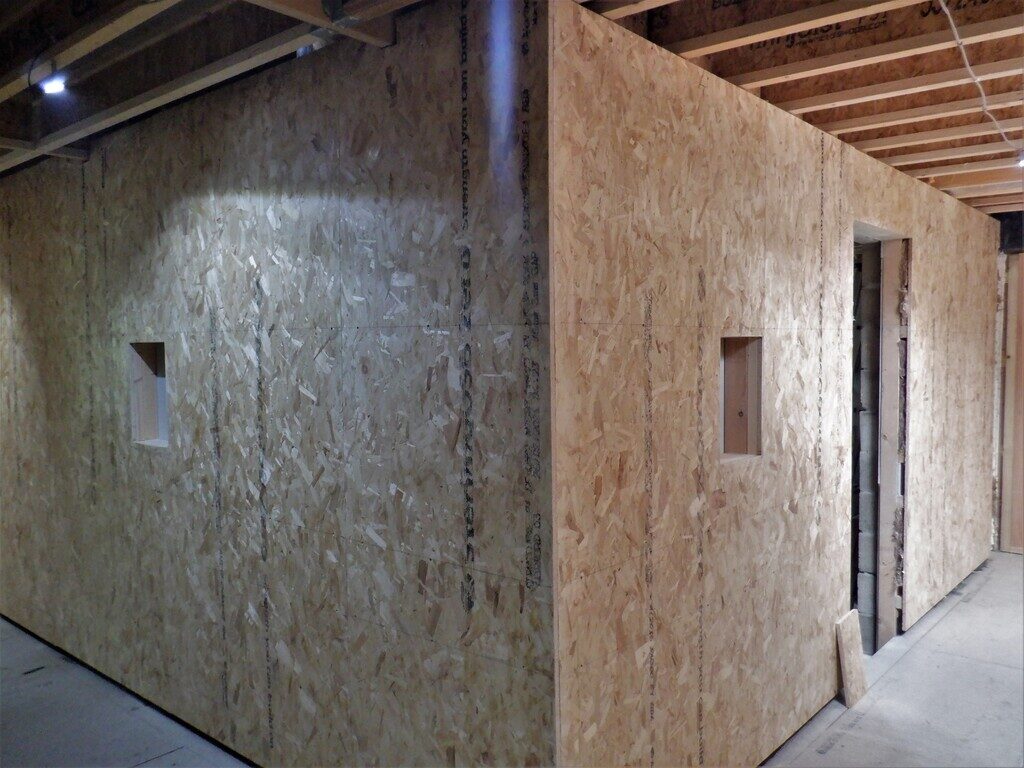
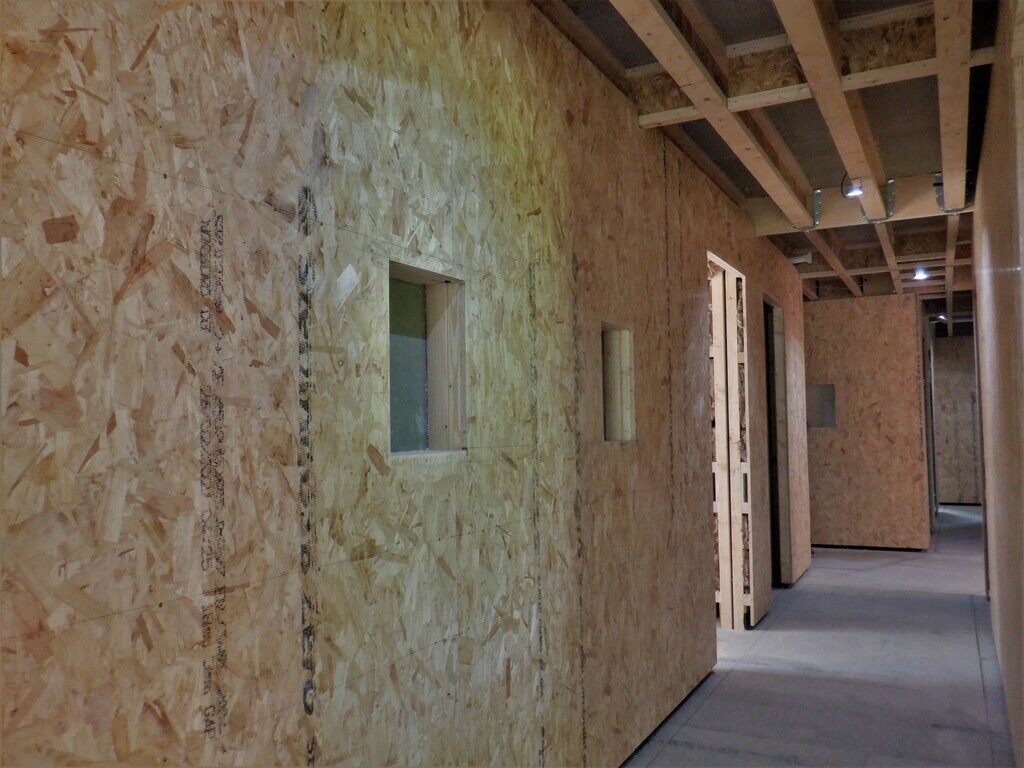
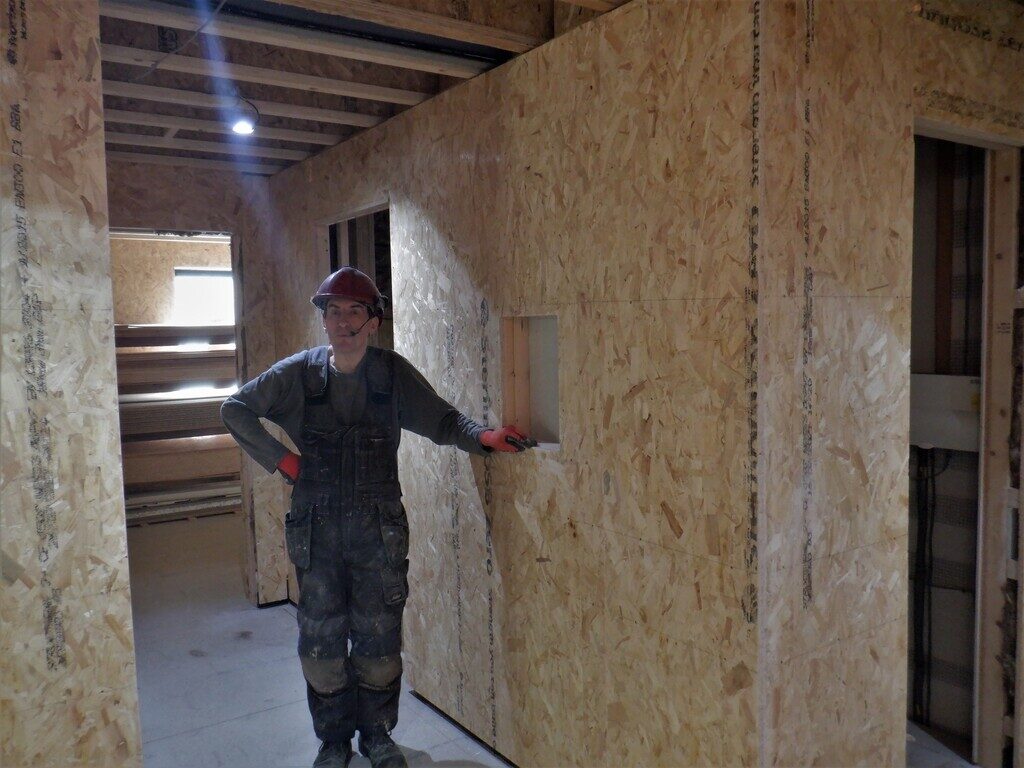
    And .. at last .. we have put up the OSB 18mm boards, onto the framework, to finally make a solid walls along all our hallways, all four sections are now covered from floor to ceiling!
    Plus also, we have cut out the Niches too, just to show those off too!

    Installing All Conduits and Pipes to Serve the Upper Floor from Hallway's Services

    Halls-boarded-1

    Installing All Conduits and Pipes to Serve the Upper Floor from Hallway's Services

    Halls-boarded-2

    Installing All Conduits and Pipes to Serve the Upper Floor from Hallway's Services

    Halls-boarded-3


    That concludes the construction of all the four Halls and here is a small video showing our ground floor layout etc.

  • Hallway Cavities Insulated and Mains Electric Installed

    The week was spent installing a layer of insulation inside the cavity under the hall’s flooring. We wanted to make sure that we don’t have too much leakage of valuable house energy, especially we will have our main air duct running in this cavity to supply fresh and warm air to all our rooms. So we took all the thin insulation boards that measured 50mm or 60mm thick and sliced them up into various widths to fit between the leg supports. This took a few days as you had to cut each piece to fit around the legs.
    We completed all the four hallway sections and glued them into place with spray PU foam.

    Hallway Cavities Insulated and Mains Electric Installed

    Jigsaw-of-Insulation-laid-in-halls-1

    Hallway Cavities Insulated and Mains Electric Installed

    Jigsaw-of-Insulation-laid-in-halls-2


    The next little job was to install mains electric cables, using twin and earth 2.5mm solid copper wires and ran them from the Tech Cupboard and its new consumer switch unit. We screwed little cable tie saddles on each of the legs and grouped together a bunch that are going off in various directions. We laid in cables to go to the Great Room, the Kitchen, then to Bedroom One, around the corner to Bedroom Two and finally to Bedroom Three. At the end of each cableĀ  we installed a double switched socket (the Great room has already several sockets so we carried the cabling across the room to those, plus also Bedroom Three also had its collection of sockets already installed too) so we could plug in local piece of equipment without having to run our extension reel everywhere. We also sent one cable upstairs through the ceiling of the Tech Cupboard and mounted another double socket on the metal leg to serve the First Floor. The cables were then neatly connected to the appropriate switches in the switch panel.

    Hallway Cavities Insulated and Mains Electric Installed

    Cables-running-off-to-rooms

    Hallway Cavities Insulated and Mains Electric Installed

    Cables-enter-cupboard-and-are-routed-up-the-wall

    Hallway Cavities Insulated and Mains Electric Installed

    Power-to-each-room-neatly-terminated-in-the-switch-panel


    It doesn’t seems that we have done a lot this week, which is true because Shaun is still recovering from his eye operation but hopefully, things will get back to normal soon.

  • Hall floor hatches completed

    This week we finished cutting hatches into the hall floors on Monday and Tuesday.

    Hall floor hatches completed

    Hall-1-Hatches

    Hall floor hatches completed

    Front-door-hall-hatches

    Hall floor hatches completed

    Hall-3-Hatches-cut


    Then we needed a way of lifting the panels easily. So we drilled a hole 100mm diagonally in from each corner and inserted a ‘Pronged T Nut’ into each hole from below, then we could use a bolt with a T piece as a lifting handle.
    Hall floor hatches completed

    T-Nut-inserted-from-below

    Hall floor hatches completed

    Hatch-lifting-Handles


    This completes the hall flooring.

  • Floorboards Laid for all Hallways

    For this rather truncated week of work, we resumed the task of laying down the floorboards after a week of building the framework. One of the first things we did was to put in a load of insulation bits and pieces from our giant bag of “rubbish” we got outside into the area under the stairs. We also screwed a left-over piece of floorboard and put it vertically on the back of the 2nd step of our staircase and this will become the base of our control board for the stair-lift mechanism.

    Floorboards Laid for all Hallways

    Under-stairs-with-insulation-strips

    Floorboards Laid for all Hallways

    Under-stairs-filled-with-foam-scraps

    Floorboards Laid for all Hallways

    Panel-for-stairlift-controls


    We then installed more vacuum cleaner piping across the central cross hall with connections for a cleaning point and the Hall 2 side of the Tech cupboard and a T connection going upstairs.
    Floorboards Laid for all Hallways

    Vacuum-ducting-hall-crossways

    Floorboards Laid for all Hallways

    Vacuum-duct-for-hall-crsossway-point

    Floorboards Laid for all Hallways

    Vacuum-duct-going-upstairs


    The other thing we did was to sort out the front door. It was built way back before we had the new flooring so it is too low. We simply just sliced off a chunk of material using our wiggle saw after noticing where the new floorboards will be etc. Then we had to fix down a fresh new door sill (there wasn’t one there before) using another left-over piece of 2by4 pine timber and along with a sheet of 10mm cement board, we screwed and sealed both items down into the concrete blocks underneath. This is only temporary until we are ready to build and install the proper door structure later on, using proper Oak timber.
    Floorboards Laid for all Hallways

    Temporary-front-door-sill


    Then we carried on putting down lots of floorboards, starting where we left off, in both Hall Two and Hall Three (going off to Bedroom Two and Three respectively) and we were very lucky to discover that these two “arms” were right angles to each other so the tongue and groove slotted together very nicely. Going down the side of the Entertainment Room only needed to slice off a very small narrow strip which was also lucky and arrived at the front door. We soon got the crossroad all covered up and then cut around the staircase too. finally, we went down Hall One towards the Great Room, going past Bedroom 1 and the Kitchen. It all went very nicely in the end and to finish off, we made a wide step at the entrance to the Great room to make it easier for anyone stepping off the new hall floor surface (being 400mm- 16inches high) especially if we are carrying large or heavy material in and out of the Great room.
    Floorboards Laid for all Hallways

    Hall-cross-way

    Floorboards Laid for all Hallways

    Front-door-hall-1

    Floorboards Laid for all Hallways

    Front-door-hall-2

    Hall 1 from Great room

    Hall 1 from Great room

    Floorboards Laid for all Hallways

    Step-down-to-Great-room


    We had finished at end of Thursday. Friday was lost to Shaun having a minor eye operation and Stephen resuming doing the Grapevine Talking newspaper after 18 months.
    On Saturday Stephen started slicing the nice solid floor boards up into Ribbons! Well the ribbons are about 1m wide and are cut into rectangles as well. These are the liftable hatches to give access to the utility’s under the hall floors. All the ribbons have been cut and cutting of the hatches has started with Hall 2 and Cross hall hatches being cut.
    Floorboards Laid for all Hallways

    Hall-2-lifting-panels-cut

    Floorboards Laid for all Hallways

    Cross-Hall-lifting-panels-cut


    There will couple of slower days next week because Shaun needs to keep quiet and recover from his Op.

  • Finished Framework for Hallway Flooring

    This week (apart from one day on Friday lost due to other commitments) was spent constructing the complicated framework for supporting the remaining Hallways, going up to the Great room, the crossroads and the bigger section under the stairs and up to the Front door.
    One of the tasks we had to do first before all that was done was to dismantle our large 8foot ramp that have been serving a very useful unction when we needed to bring in a trolley load of 8foot by 4foot sheet material or a pile of floorboards. It has been there for a few years and now it is gone, the pieces recycled for other jobs around the house.
    The assembly of the framework was a slow process of setting the main outer rails down a section, supporting it with clamps while then progressing bit by bit using our green laser line generator to mark where each leg needed to be sliced so it can fit under the rail just about right, to avoid lifting it up or being too short and missing the concrete floor entirely, which meant repeatedly going back to our chop saw and nipping off very thin slices. We even took to grinding the concrete floor itself to help settle these legs in place. There are dozens and dozens of these blessed .. I mean lovely legs, doing a vital job of holding up the flooring for all our hallways.
    One of the section that we thought didn’t need liftable panels was the route up to the Front door area but we realised that we couldn’t achieve that goal because we don’t have any pipes or air ducts ready to be permanently installed so we had to create a narrower lifting up section to allow us to install the necessary utility pipes etc, up to the front door, to serve the Entertainment room, the Front door itself and the stair lift mechanism too.
    We completed the framework under the stairs which will holds various storage segments, some will pull out on wheels and a larger section for walking in. We had to put down temporary framework around the bottom of the staircase where the stair-lift mechanism will reside but again, we didn’t have any of the pieces that will make up the platform module or the pulling chain and cog wheels. We will have to come back to this area and unscrew the floorboards later on.
    There was one sticking up conduit, coming out of the concrete, it is one of our temperature probes for monitoring the soil temperature between our energy modules buried underground, so we connected additional 20mm plastic conduit and routed it around to where the main gathering of the access point to this large Energy module situated under the Kitchen and Bedroom One.

    Finished Framework for Hallway Flooring

    Hall-floor-framing-1

    Finished Framework for Hallway Flooring

    Hall-floor-framing-2

    Finished Framework for Hallway Flooring

    Hall-floor-framing-3

    Finished Framework for Hallway Flooring

    Hall-floor-framing-4

    Finished Framework for Hallway Flooring

    Hall-floor-framing-5


    One of the consequences of putting down the framework, right up to the Front door area, is that we cannot open the temporary front door! It is too tall, or rather too deep. We will have to slice off a small piece off the bottom of the door before we can open it again!
    That will be one of next week’s tasks, as well as filling in some of the area with insulation and then proceed to cover all this lovely framework with floorboards. Hurray!

  • Worktop Plus Sink Installed and Started on Flooring for Hallways

    We got the week going by taking our slab of OSB board we cut last week for the worktop in the Utility Room and cutting a large hole in the middle of it for the stainless steel sink to be placed. We wanted it fairly near the front and have more room around the back for pots and bottles to live and be ready to serve anyone using the sink. Then all the edges were rounded using a quarter turn cutter bit to take off the sharpness, rubbed down all over with the sanding machine.

    Worktop Plus Sink Installed and Started on Flooring for Hallways

    Temporary-worktop-ready-for-paint


    ThenĀ  a coat of black two-part resin scraped and brushed all over the surface to provide a waterproof barrier. We put the drying worktop upstairs into the warmer sunshine to help cure and harden the resin for a day and then brought it to its final resting place in the Utility room, sitting on top of the four plywood sides supporting the worktop. The stainless steel sink was installed and tied down using the supplied clamps and putting in a line of sealant to stop liquids creeping under the edge and dripping into our drawers and cupboards under the worktop.
    Worktop Plus Sink Installed and Started on Flooring for Hallways

    Temporary-worktop-painted-and-sink-installed


    Next, we plumbed in the waste pipe from the sink to the waiting socket we did last week and also inserted a long vertical waste pipe in the other waiting socket just positioned under the floorboard, this second one is for the washing machine in the future setup of the house when we finally move in properly.
    Then, we turned off the mains water supply at our water meter so we can break into the capped off pipe that is coming up through the concrete floor, we put an right angle adaptor to convert from the 32mm diameter polyethene pipe to a standard 15mm internal plumbing pipework. This 15mm feed went through the side of the Equipment cupboard and had a cut-off valve inserted in just at the start of the middle cupboard (still under the floor) so it is relatively nearby and only requires lifting up a trap door to gain access. We will have clear labels to remind people to where it is but also we are planning to employ a motorised valve in series so we can tell the computer to turn off the mains water if we need to do any servicing. The other thing we added after this cut-off valve is a T-junction so we can feed a supply of cold water to our new mixer tap. The continuing 15mm pipe is terminated at this point but it will go all the way to the main kitchen and also upstairs to the header tank to feed those end points too.
    The new mixer tap is a large flexible design with a mini shower head on the end pointing down into the sink bowl, being held up on an arm projecting from the body of the mixer tap. It has just cold water coming out for now but we will plumb in the hot water later on when we get that far with the pumps and tanks etc.
    Worktop Plus Sink Installed and Started on Flooring for Hallways

    Incoming-mains-water-turning-under-the-sink

    Worktop Plus Sink Installed and Started on Flooring for Hallways

    Mians-water-stop-cock-with-T-to-sink

    Worktop Plus Sink Installed and Started on Flooring for Hallways

    Mains-water-to-the-sink

    Worktop Plus Sink Installed and Started on Flooring for Hallways

    The-sink-is-working


    In the meantime, between waiting for the black resin to harden, we proceeded in building the flooring in our hallways. We started outside the Utility Room and Bedroom Three and after much discussing, we wanted to have a middle section to take the large air duct which is 440mm wide and 150mm high, plus also, we need to break up the floorboards into modules so we can lift up an access panel to do any servicing or additions that the house might need in the future. This led us to have four long rails running down the length of the hall, positioned across the width at 440mm and 1100mm apart. In the other direction, down the length of the hallway, we then had noggings every 1200mm and this will be our trap door dimensions. It was quite fiddly getting in the four rails, using 63mm CLS timber, two of them laid flat that will form the outer edge of the liftable panel zones, and two vertically mounted CLS pieces down the middle to support the air ducting. The laser was used to guide us in cutting the legs, every 600mm down all four rails, and then a whole series of horizontal noggings to brace the framework together. Every joint was glued, as well as being nailed, so to avoid any annoying creaking noises if any old timber joint warps or dry out and start making noises in the future. We had to do quite a bit of adjustment in putting in wedges under some of the legs as we discovered that the original horizontal rail we had mounted on the Entertainment wall was ever so slightly lower than it should have been. So we had to “fill” in the gap with thin layers of hardboard (3mm thick) and very thin sheet of veneer 3ply sheet we inherited from one of our deliveries (1.5mm thick), to get it ready for the floorboards to be glued and screwed down.
    Worktop Plus Sink Installed and Started on Flooring for Hallways

    Bedroom-3-Utility-hall-framed


    Next, we could then, and did, lay down the floorboards, more of our 22mm thick tongue and groove chipboard material, down the first leg of our four hallways. We went across both doorways of the Utility Room and Bedroom Three, we had to insert extra pieces of CLS timber to support the cut edge of the floorboard at the start of the rooms. We shaped this first and second boards to fit around the two doorways but after that, it was easier in just putting down a row at a time, measuring 1335mm wide (getting slightly wider as we went along the hall) and used our PU construction glue to join the tongue and groove joints together. Oh yes, we also glued the outer edges of the framework but not the middle rails and we also stuck down lines of cheap tape to isolate the glue from the timber so we can free our “doors” when we cut through the floorboards at the correct positions. To this goal, we carefully marked the positions of the rails and noggings, up on to the floorboard surface, ready for that slicing task later on.
    Worktop Plus Sink Installed and Started on Flooring for Hallways

    Bedroom-3-Utility-hall-boarded


    The next section of hallway we decided to tackle, was the shorter one going down to Bedroom Two. This leg is a little simpler as it doesn’t have a full size air duct so we reduced the number of rails to just three, but with a difference. We would still have the tow outside flat rails that defines the outer edges of the removeable door panels but this time, have a flat set of noggings going down the exact middle of the hall. This middle line was made up of a series of 1137mm length pieces but interrupted every 1200mm to put in a full flat nogging going across the width to join the two outer rails together. It was much easier to deal with the cutting of the individual legs, which are still placed at every 600mm point, putting the outer set of legs on first and then put in a middle segment, one by one. Another trick we realised, was to mount a piece of CLS timber across the open end of the hallway, mounted on the side walls with clamps and in turn, clamped the two outer flat rails underneath this supportive bar, while we worked from Bedroom Two end of the hall, towards the open area where all four arms all meet together, at what we call the crossroads. This method allowed us to continue using the laser to highlight the height of the framework, without being blocked by other legs etc.
    Worktop Plus Sink Installed and Started on Flooring for Hallways

    Bedroom-2-Hall-Framing


    It worked out quite well, covering about 2.5metres of hallway, which we proceeded to cover over with six rows of the floorboards.
    Worktop Plus Sink Installed and Started on Flooring for Hallways

    Bedroom-2-Hall-boarded


    Finally, we finished off the week by getting the first set of the framework up for the third arm, the section coming from the Great Room, passing the Kitchen and Bedroom One. This arm is just over 4.8metres long so we clamped two more flat outer rails, just like the other section we have done and got those glued and nailed into place, with one cross nogging in place down at the Great room end of the hallway, along with their four legs holding that end up and everything.
    Worktop Plus Sink Installed and Started on Flooring for Hallways

    Great-room-hall-framing-started


    Next week, we will carry on with that arm and then design the framework for the Crossroads and even perhaps the framework going up to the Front door region, all before we put down any more floorboards. We will see!