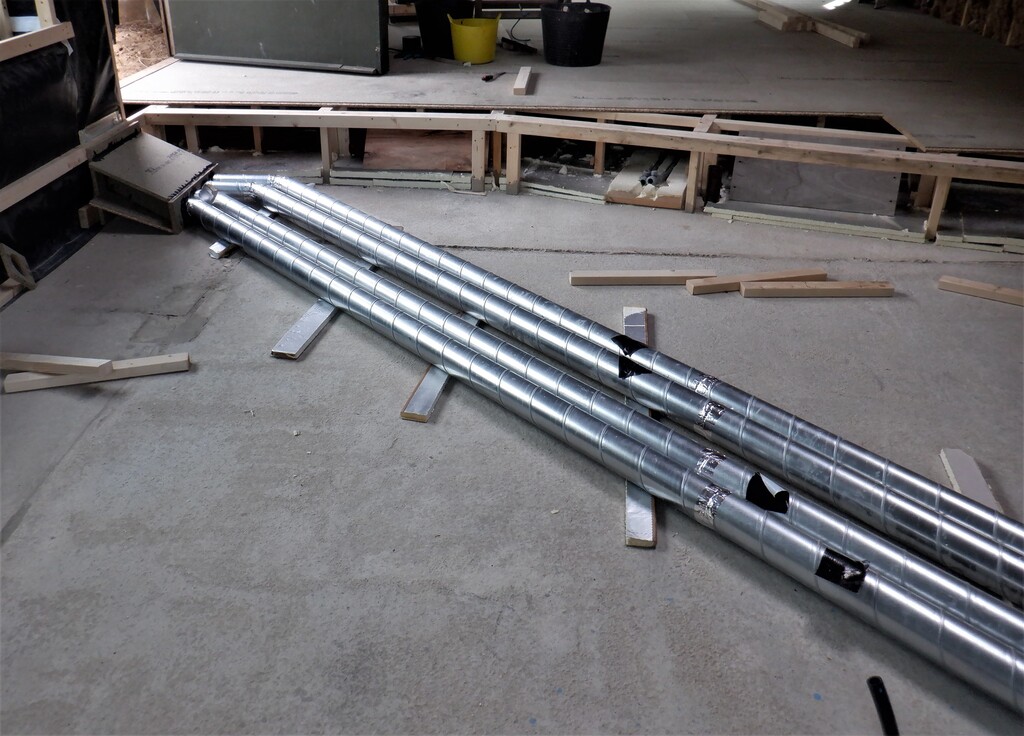
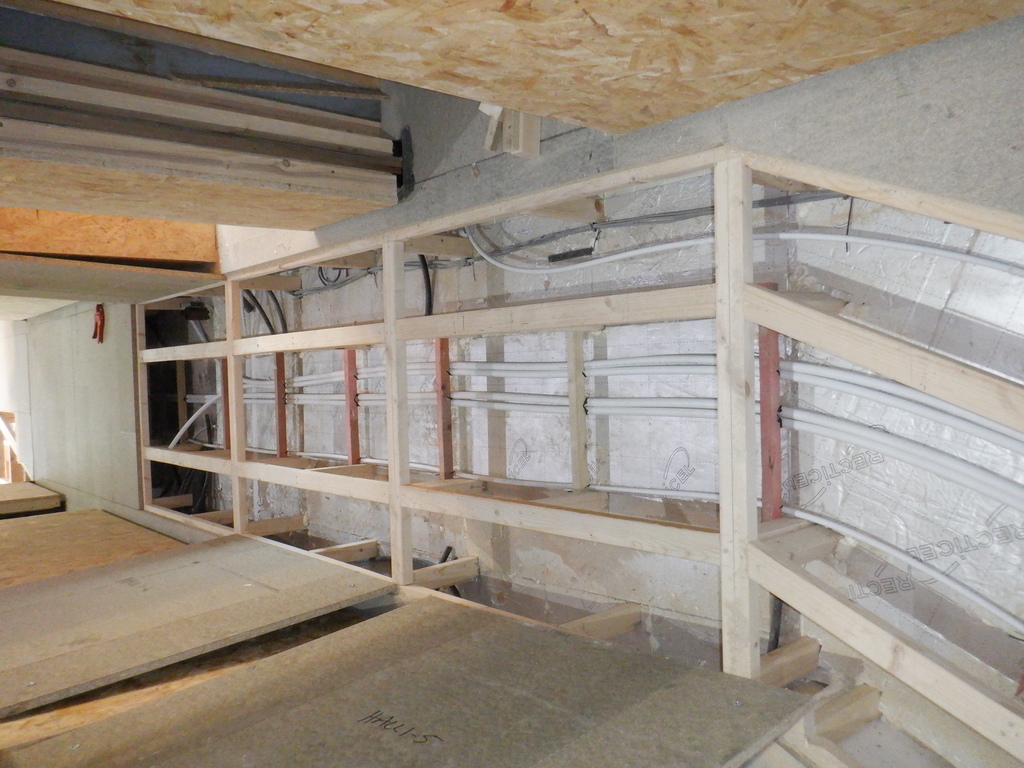
We started the second stage of building the flooring for the Great Room by fetching down from our upstairs timber storage, 10 nice straight pieces. We then marked the 600mm markings on eight of them which will be where the support legs will go. Then, we laid out these eight lengths, ready to be our joists for the framework, putting them down on the concrete itself. We did this because we needed to get the air ducting laid and positioned so it connects to the exhaust air from the Conservatory and routed diagonally across the room and up to the First Floor to join into the main Air Duct that will travel through the house towards the Utility Room. This bridging section going underneath our floor needs to fit in between all the support legs, hence why we had marked out those positions and we soon realised that we had to shift things around a bit. The set of eight joists were spaced so that the bigger gap was next to the Kitchen side of the Great Room but we discovered that one of the joists and its support legs landed right over a joint in the concrete itself. So we moved everything over by 300mm so that the bigger gap is now over next to the Conservatory side of the room and that made it much neater. Then we could see that the metal ducting, two joined together making four lines stretching diagonally across the room was going through the support legs locations too. This meant another adjustment in our arrangement but this time, we shifted the support legs positions along the joists by 300mm which also turned out to be an advantage by avoiding another joint in the concrete slabs but in the other direction this time.
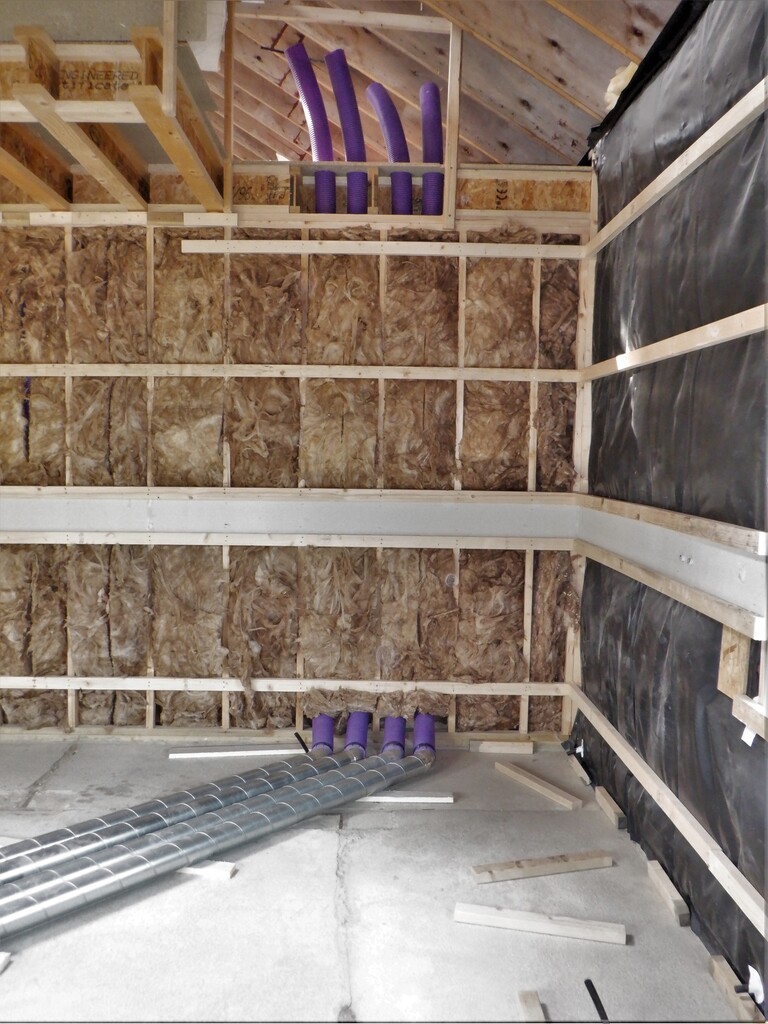
So this allowed us to then construct another Air Splitter module that joined to the chimney that is coming down inside the wall between the large window and the Conservatory French doors, bringing the old exhaust air from that room. It was a case of carefully cutting and slicing several pieces of our chipboard pieces and shaping them so that we could plug in the set of four metal pipes into this module and draw the air away. It was quite fiddly but we managed it after a couple of days of work.
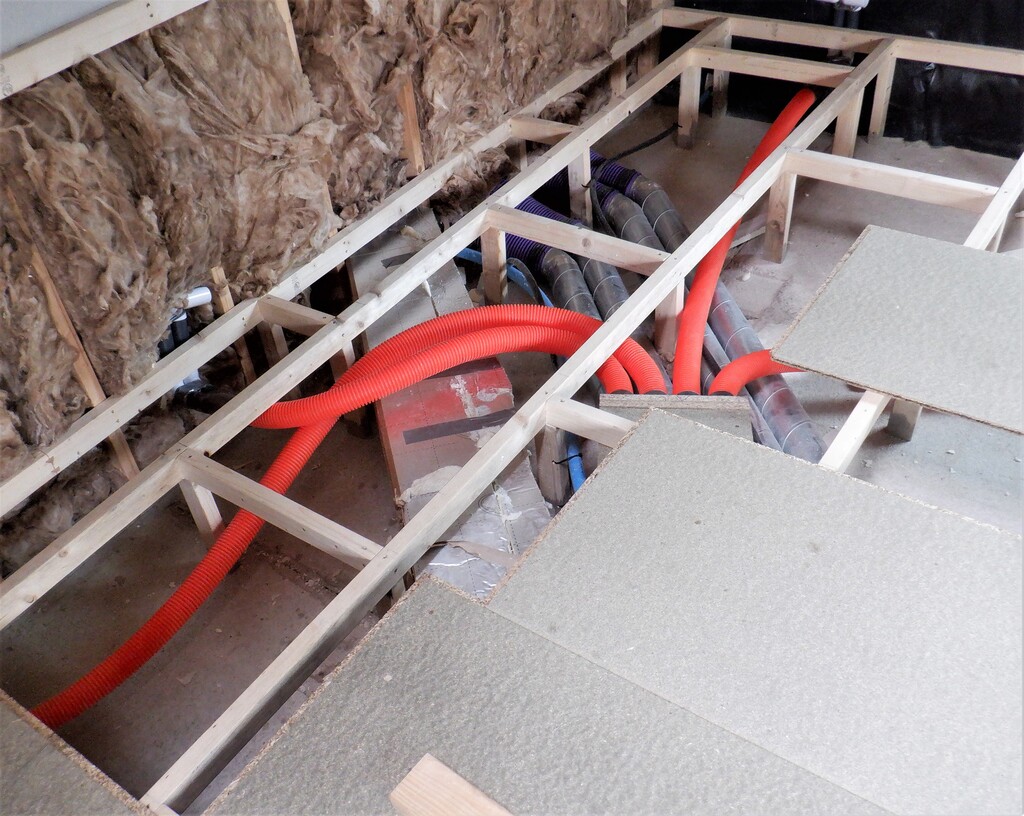
Then of course, we had to remove all our CLS planks out of the way so we could lay down properly the eight metal pipes, join them to the four purple flexible pipes coming down inside the Kitchen wall and four double length joined and trimmed with small pieces of short pipes to finally connect to our new splitter module. We sealed all the joints with aluminium tape and Stixall glue.
Conservatory-Air-crossing-GR-and-ascending-to-FF-void-1
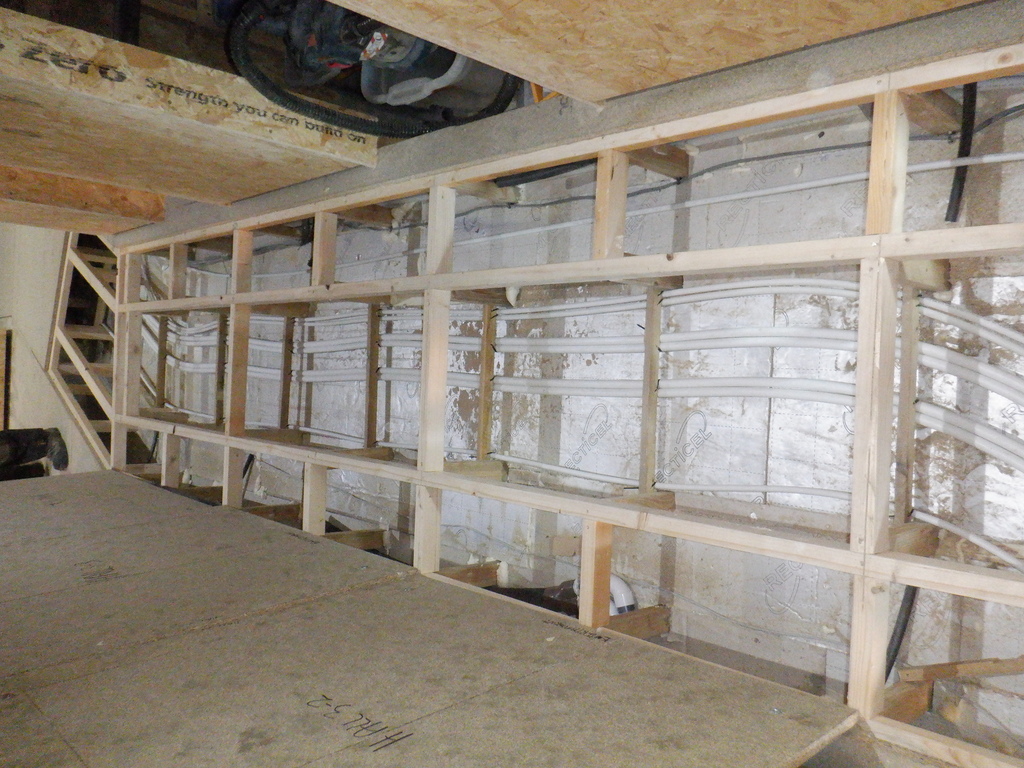
Conservatory-Air-crossing-GR-and-ascending-to-FF-void-2
We now have that particular air ducting completed and we can continue to build the floor framework over the top of it. It took us the next two days to complete that wooden structure, putting in eight joists and a collection of posts and noggings and it went in quite well. The metal tubes were successful in their location, only had to move a couple of legs a centimetre or two to avoid them.
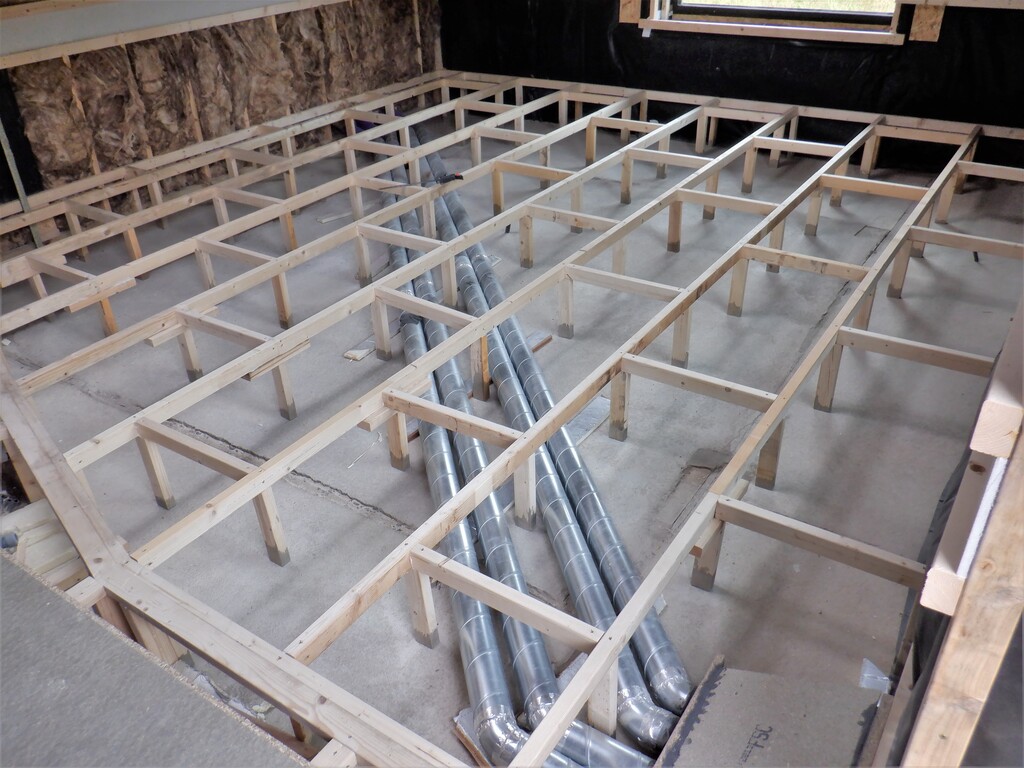
GR-Floor-grid-complete
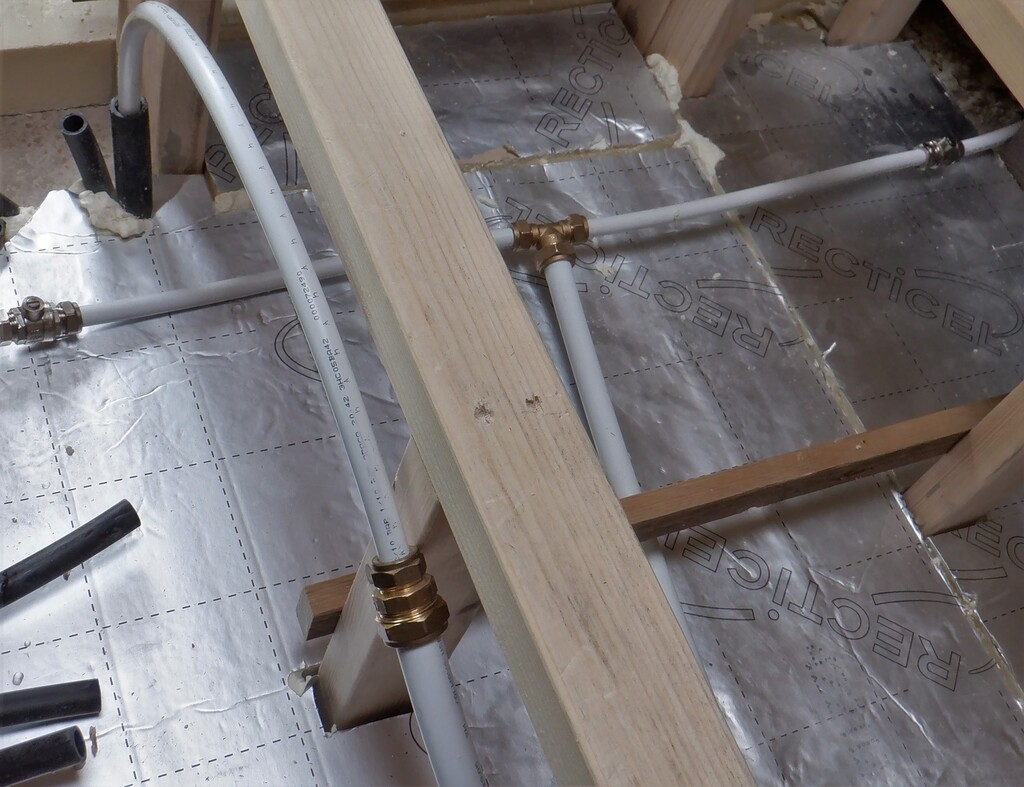
Next, we put in the conduits for the temperature probes that surrounds the Energy Module, another six of them, to add to the other four plus the other local ones already in place so we can put in sensors to monitor the performance of this large tank. Then, all the water type pipes were laid in, four of them using 15mm direct water connections going to the external world in various forms and then two more thin irrigation waterlines going up to the Eves, so these were 20mm conduits to help feed this pipe through. Next, was the hot water twin pipes, travelling on its last stage of its long twisty journey around the house, to go diagonally across the room, next to the metal air ducts, poke through the kitchen wall and arrive inside the plumbing box located in the Kitchen where the sink and other water related services are.
The cold water, the 32mm header tank water supply, then came across the room and join alongside the hot water to enter the same plumbing box and then finally, a single 15mm mains water pipe coming all the way from the Utility Room and also coming around to enter into the plumbing box too. This will provide fresh drinking water for the Kitchen.
Finally, one more 15mm water pipe was inserted into the Energy Module, threaded down a sticking up 25mm pipe coming through the concrete and going back to the Utility Chamber to join with its twin, to get married to a larger 22mm pipe going off to the Utility Room. We also inserted a second 22mm water pipe alongside this one, but starting slightly further down the hall where our second largest Energy Module is located under the Kitchen and Bedroom One, both going all the way to the Utility Room.
GR-EM-Fill-connections
EM-Pipes-running-to-the-Utility-Room-1
EM-Pipes-running-to-the-Utility-Room-2
The last job to do under the floorboards is to put in the air pipes to provide fresh air for this half of the Great Room, another eight air distributors located around the edge of the room, two along the Kitchen wall, three along the “A” wall and the final three along the Conservatory wall. These outlets are fed and grouped into four separate 50mm conduits that goes back to a splitter module which has a 100mm conduit connected to it and the other end coming from the Utility Chamber, ready to be connected to the main Air Duct.

GR-PA-Air-distribution-point
GR-Hot-Cold-water-Fresh-Stale-air-all-in-one-place
Finally, we carried on laying down the floorboards for the rest of the room, again, not glued down, or screwed either. We knocked each row securely against the rest of the floor, to encourage the joints to close up nice and tight. But the last row is only a half width piece and we have not cut an accurate piece to go into this space, but just laid down a couple of left-over half boards to fill the gap, to make it safe.
GR-Floor-finished
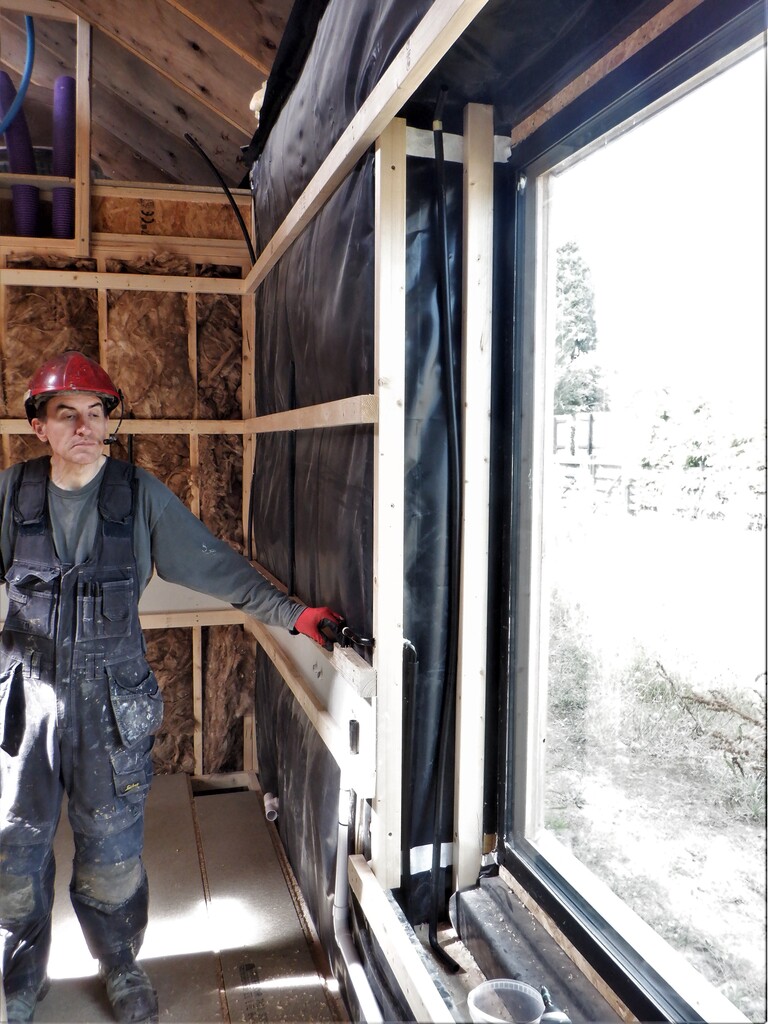
One of the last task to do while we remembered, was to insert a collection of conduits and pipes around the windows so the wires and cables can carry on along all the Utility Channels. We did also the conduit that goes down into the bottom module underneath the window where the blind mechanism is to be located.
GR-Window-conduits
This concludes the work for the Great Room for the time being!! We won’t get back here until we have fully finished filling in the Roof Rafters and putting up the ceiling panels etc. After that, we can lift the floorboards and “throw” all the PU foam rubbish under it! Next, we will make a start on the Entertainment Room while we wait for this insulation PU foam pieces to arrive.
Leave a Reply
You must be logged in to post a comment.