We are at the stage of designing and building our water tanks, one cold and one hot. Because, we have a limited target volume to locate these tanks, we decided to make our own tanks, using glass fibre and polyester resin. We have used this kind of construction material a number of times before so we calculated the amount of material we would have to buy, in order to build the three tanks we are wanting. But first, we needed to make sure that it works out properly so we are doing a Test Tank first. Actually, it will become a plant pot for a tree that came at Christmas time!
It will also be part of a boiling water test as well because we need to make sure that our hot water tank will hold the hot water without softening the walls.
So we ordered 33kg of glass fibre matting, 35kg of ‘normal’ resin and 30kg of ‘special’ heat and chemical resistant resin, plus also 20metres of woven glass cloth as well.
The Test Tank measures 450mm on a side, making a cube. We want to have a lip around the top so we can see how well it forms, ready for a lid to seal down on it, on our larger tank later on. The Test Tank won’t have a lid.
So we need a mould, to take the eight layers of matting and two layers of cloth, to make a wall thickness in the order of 5mm thick.
This mould will have to be constructed in such a way, that it can be disassembled afterwards, as the completed tank will be solid and sticking to the mould.
So we used sheets of 11mm OSB boards, sliced it up into four sides and one base. Two of the sides were slightly narrower so that the overall dimensions came out the same on all four sides. Also, these two narrow sides had a saw cut sliced almost all the way through the 11mm thickness, to make it much easier to drive a crowbar into the gap between the finish tank and the mould and be able to bend the sides inwards. We did the same for the base as well. We then screwed little battens around the edges to hold the corner edges together, but done in such a way so that the pre-cut sides can move inwards. It was a careful process of making sure that we could ?undo? the mould, in the correct order.
Finally, we put on a larger ?lid? on the mould so, when the mould was turned over to sit on this so-called lid, we had a space to form the lip of the tank as well. We rounded all the edges using a 12mm quarter turn shaped router and also applied a little bit of plaster to provide a gentle bend for the lip too.

Now, we wrapped all over the mould a complete layer of parcel sticky tape because we discovered that the parcel tape offers a very very non-stick surface against the polyester resin. We did some quick test using various grades of sticky tapes, as well as some very thin plastic film material and this is how we discovered that standard parcel tapes works the best.
So this is what we did with our Test Tank, wrapped it up in this sticky tape. Mind you, we only had the ‘clear’ sticky tape and it was quite difficult to see where we have been or not. So, we ordered the brown stuff !!

Next, is to prepare the glass fibre and have them ready, in a pile of torn pieces. But, before that, the 33kg roll of matting needed a carrier so we could pull off the roll the required length. We quickly assembled a wooden carrier using left-over OSB 18mm pieces and a length of broom handle (we had some left-over of those too from a previous project, so we didn’t have to use a domestic broom!)
The roll is a metre wide so the carrier is 1200mm wide, with a two battens loosely sandwiched together at the top, for the glass fibre matting to slide in between. This allows us to press down on the upper batten and grip the glass fibre and tear pieces off.
So we tore off twelve pieces measuring 450mm long, and four pieces of 900mm long. These form the bulk of the walls but we wanted to put an initial layer of the woven cloth on the mould first so that this offers the maximum strength bending around the corners of the tank. We unrolled the cloth and cut a single piece 1350mm by 1000mm long. Then, we draped it over the mould and carefully cut the overlapping folds, to remove the triangles so the cloth would lay down flat.
We did a second one so we could put that cloth piece on as the final layer, to encapsulate all the strands of glass fibre that comes in each matting sheet. These matting sheets are made up of a random sprinkling of 50mm long glass fibre strands, held together with a very light glue that will instantly dissolve when the resin is applied.At this stage, we decided to put in colouring dye into the resin so we went for a muddy brown colour by mixing four teaspoons of red powder and four teaspoons of blue powder dye and this made a muddy brown colour, suitable for being a flower pot !
The final steps of preparations, was to get several pots of acetone ready for cleaning our rollers and other tools, a pile of paper wipes and a collection of mixing trays etc.
So, we started at 11:25am and mixed our first batch of resin with the hardener, using 1% ratio of hardener so we had plenty of time to apply the mixture before it started setting. The garage temperature was about 15°C so 1% will give us a good 30 to 40 minutes of handling time.
We coated the mould with the brown resin, using a fluffy roller to transfer the liquid over, and then draped the cloth over. We slid the cloth around and made sure that it went from edge to edge and that the two sides folded in and overlapped properly. Then, we rolled on more resin liquid until the cloth was entirely coated in resin. Then, we got our four larger pieces of matting, and one by one, laid each over the mould, tearing one edge so that it can rotate around the mould and the loose flap goes over the top. We put plenty of resin all over the surfaces. We used the aluminium roller to work the resin liquid into the individual strands of glass fibre, and also, to force out any trapped air.
Next, we took the narrower strips and went horizontally around the mould, repeating the process of loading lots of resin on each piece of matting and eventually, we put on a total of eight layers. We also put on the second woven cloth material near the end of the process.
It took us two hours to do this Test Tank.

We gave it a couple of days (over the weekend) for the resin to cure and harden before we tackled the task of dismantling the internal mould and generally, it was not too difficult. We unscrewed various screws and then used a crowbar to lever the two side walls that had the ?almost? cuts in them and this then allowed the other two walls to come out and finally, we got the crowbar into the cut line in the base and managed to lever each half out. Then, we pulled off the parcel sticky tape which got left behind on the inside of the finished tank, it looks like that the resin had quite an attraction to the glossy side of the parcel tapes, more than the sticky attraction to the wooden surfaces anyway. It wasn’t a problem as we could peel off the tape fairly easily, leaving behind a brown cubic reinforced glass fibre plastic tank. It needed a bit of trimming around the lip because we had a ‘dam’ to make the lip flange, but it ended up with too much glass fibre and resin. So, we just laid down a small piece of 6mm thick MDF board on the floor and, positioned up to the edge of the flange (the tank is upside down) and used our wiggle saw to slice off the lumpy bits.
We also ran the sand paper over the surfaces, to rub down little spikes of resin and fibre and also rubbed the edge to round the corners and the square edge.

The final stage of this test, is to put in water, both cold and hot water, and see if it holds it without leaking.
This Test Tank holds about 90 litres so we got the garden hose and filled it almost to the top and sat it in our Garage and left it for a few hours while we got on in making the next mould for the larger header tank.
Unfortunately, we had a leak!!
A very very small one! But still a leak!
It is amazing to how water can get through 10 layers of glass fibre and resin. The leak is actually on one of the rounded bottom edges and we believe that we were not careful enough in making sure that these rounded edges were carefully loaded with extra resin, to make sure even those fibres are saturated.
We learnt a valuable lesson and this is what this Test Tank revealed to us!
We will have to patch the leak before we can perform the hot water test and we will do that later on.
It will also be part of a boiling water test as well because we need to make sure that our hot water tank will hold the hot water without softening the walls.
So we ordered 33kg of glass fibre matting, 35kg of ‘normal’ resin and 30kg of ‘special’ heat and chemical resistant resin, plus also 20metres of woven glass cloth as well.
The Test Tank measures 450mm on a side, making a cube. We want to have a lip around the top so we can see how well it forms, ready for a lid to seal down on it, on our larger tank later on. The Test Tank won’t have a lid.
So we need a mould, to take the eight layers of matting and two layers of cloth, to make a wall thickness in the order of 5mm thick.
This mould will have to be constructed in such a way, that it can be disassembled afterwards, as the completed tank will be solid and sticking to the mould.
So we used sheets of 11mm OSB boards, sliced it up into four sides and one base. Two of the sides were slightly narrower so that the overall dimensions came out the same on all four sides. Also, these two narrow sides had a saw cut sliced almost all the way through the 11mm thickness, to make it much easier to drive a crowbar into the gap between the finish tank and the mould and be able to bend the sides inwards. We did the same for the base as well. We then screwed little battens around the edges to hold the corner edges together, but done in such a way so that the pre-cut sides can move inwards. It was a careful process of making sure that we could ?undo? the mould, in the correct order.
Finally, we put on a larger ?lid? on the mould so, when the mould was turned over to sit on this so-called lid, we had a space to form the lip of the tank as well. We rounded all the edges using a 12mm quarter turn shaped router and also applied a little bit of plaster to provide a gentle bend for the lip too.
Box mould constructed
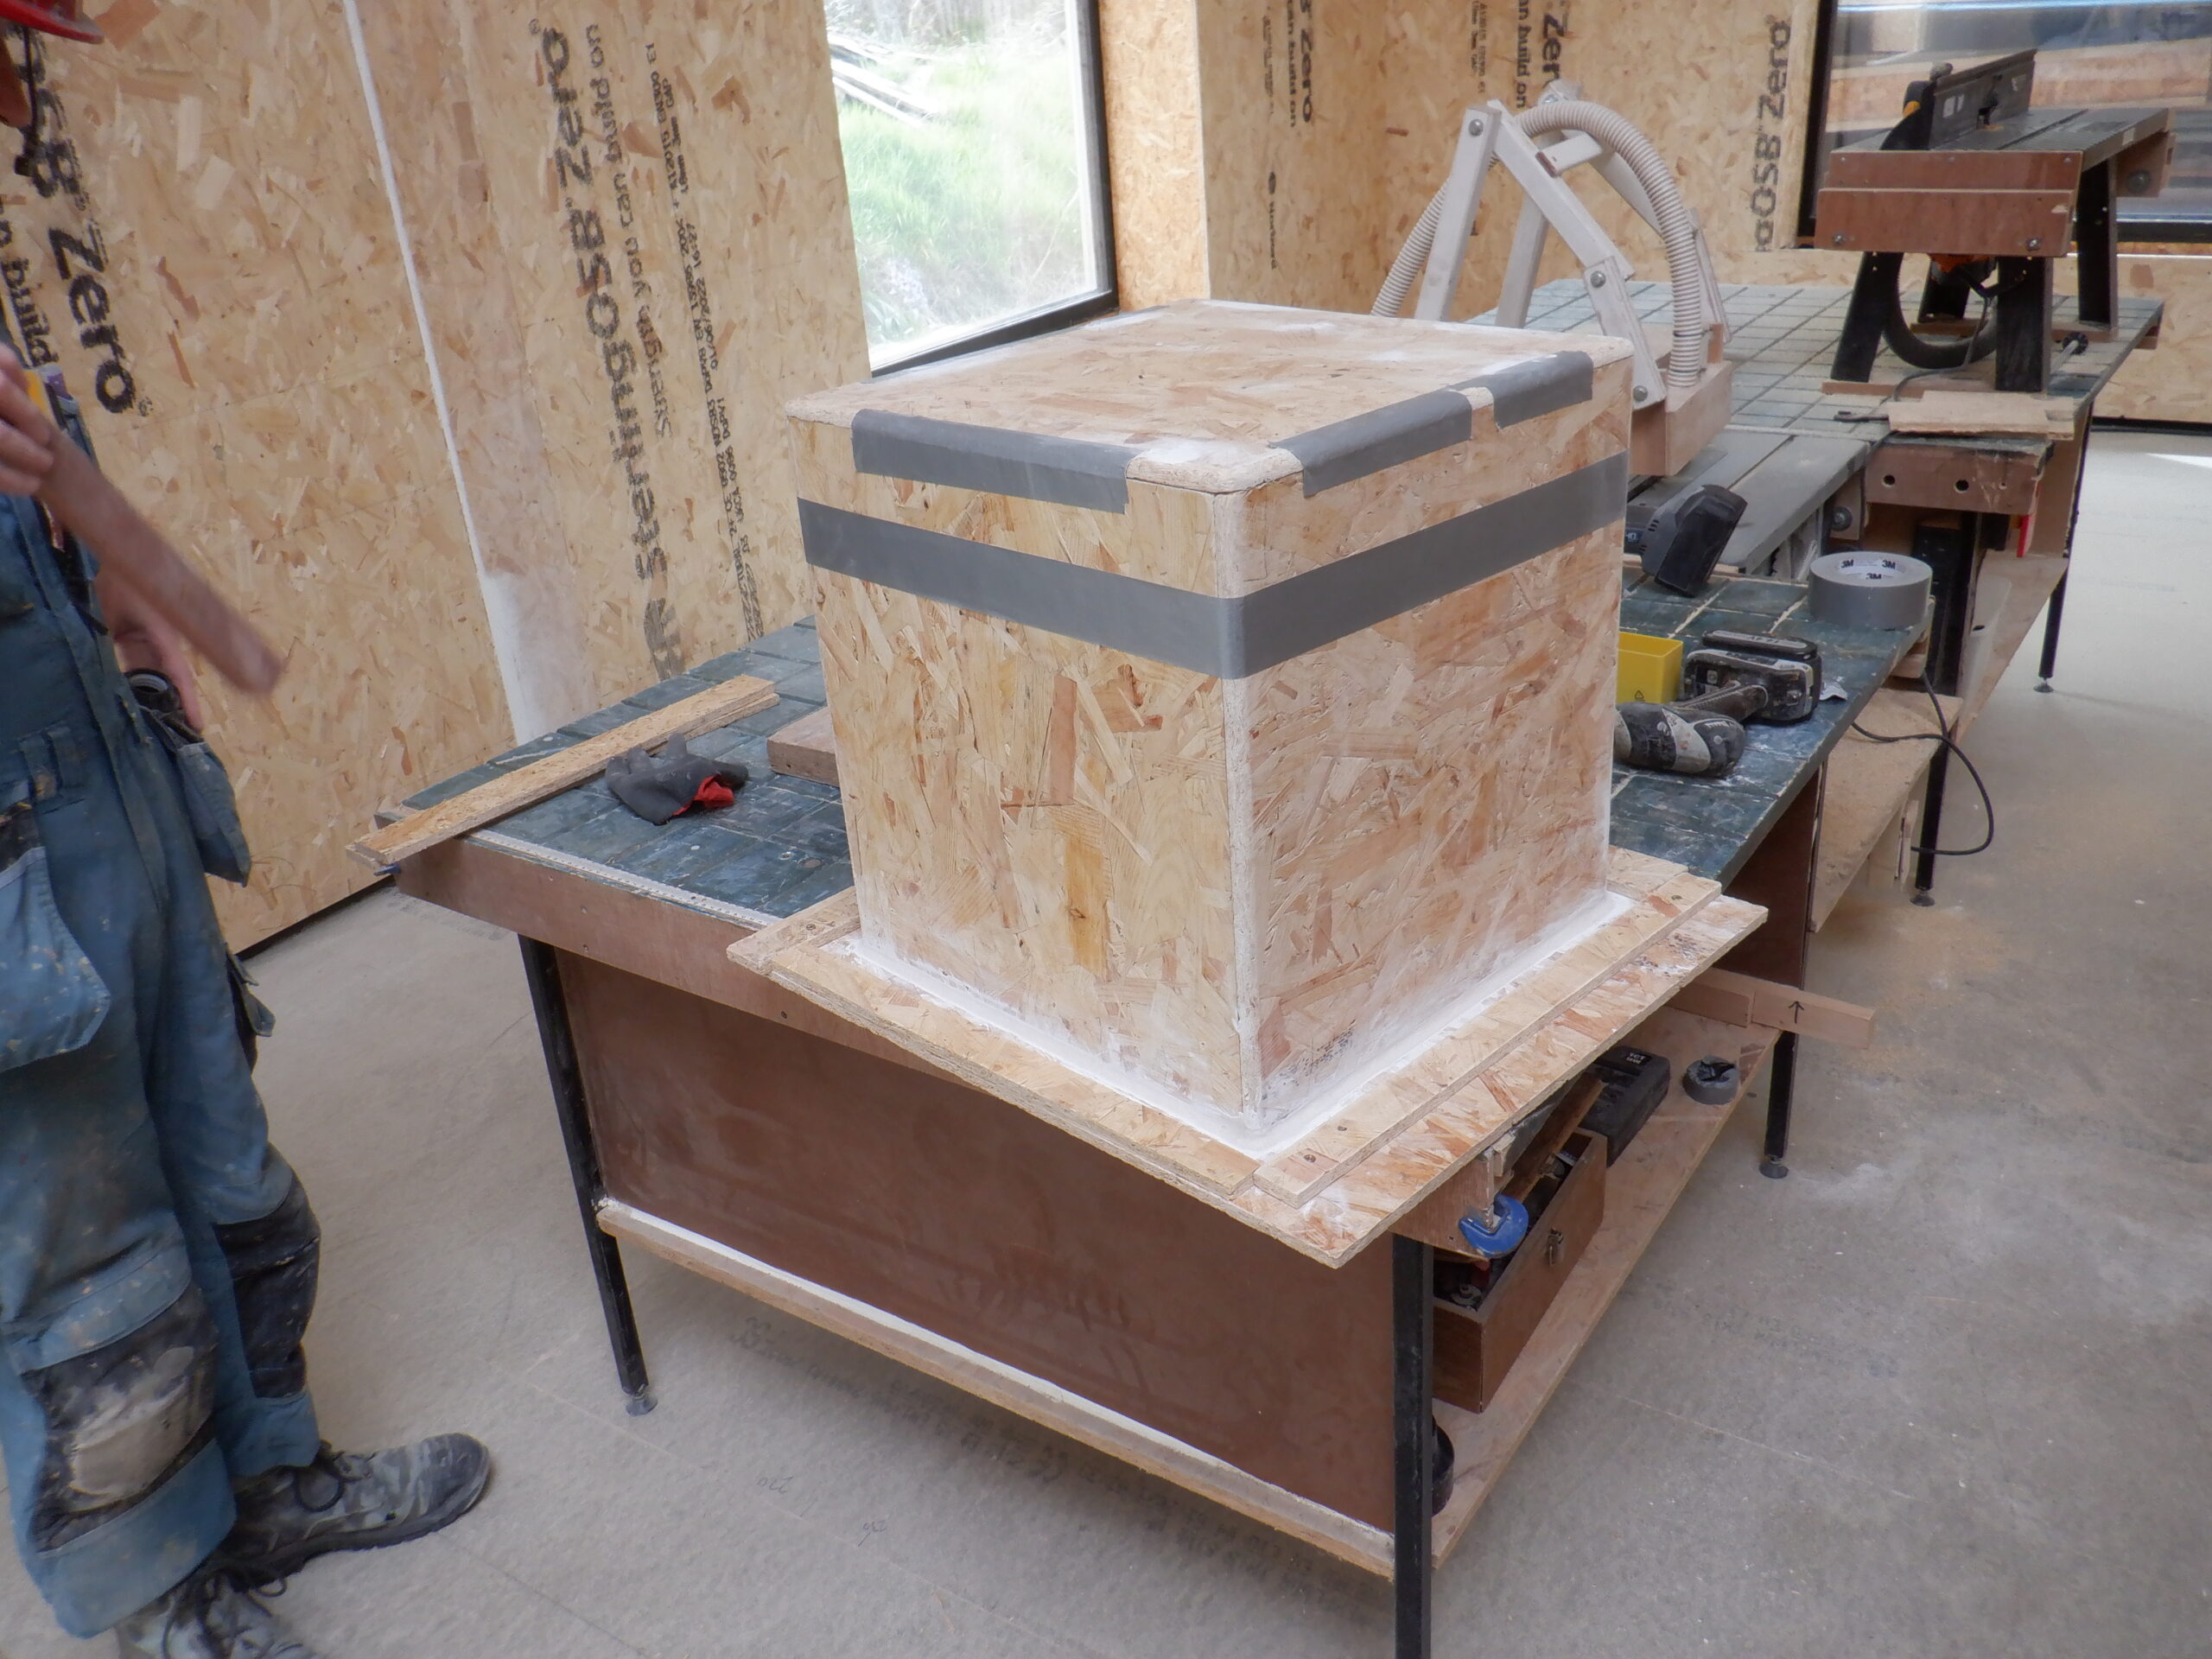
Now, we wrapped all over the mould a complete layer of parcel sticky tape because we discovered that the parcel tape offers a very very non-stick surface against the polyester resin. We did some quick test using various grades of sticky tapes, as well as some very thin plastic film material and this is how we discovered that standard parcel tapes works the best.
So this is what we did with our Test Tank, wrapped it up in this sticky tape. Mind you, we only had the ‘clear’ sticky tape and it was quite difficult to see where we have been or not. So, we ordered the brown stuff !!
Covered in tape
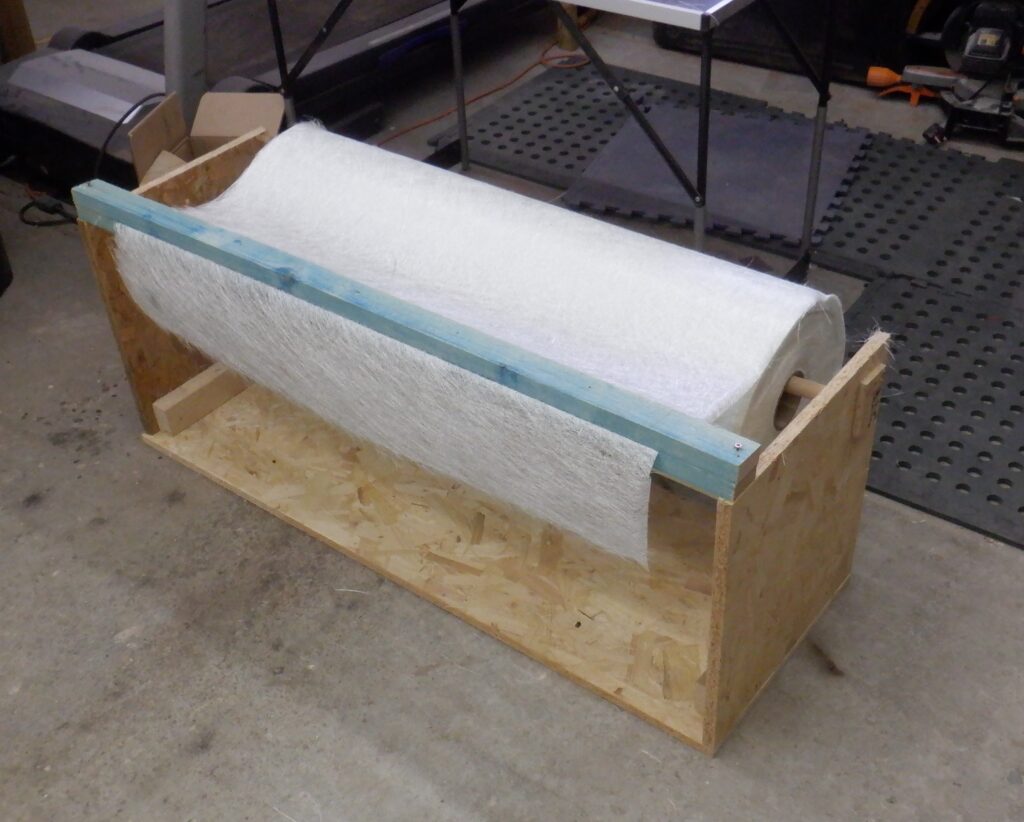
Next, is to prepare the glass fibre and have them ready, in a pile of torn pieces. But, before that, the 33kg roll of matting needed a carrier so we could pull off the roll the required length. We quickly assembled a wooden carrier using left-over OSB 18mm pieces and a length of broom handle (we had some left-over of those too from a previous project, so we didn’t have to use a domestic broom!)
The roll is a metre wide so the carrier is 1200mm wide, with a two battens loosely sandwiched together at the top, for the glass fibre matting to slide in between. This allows us to press down on the upper batten and grip the glass fibre and tear pieces off.
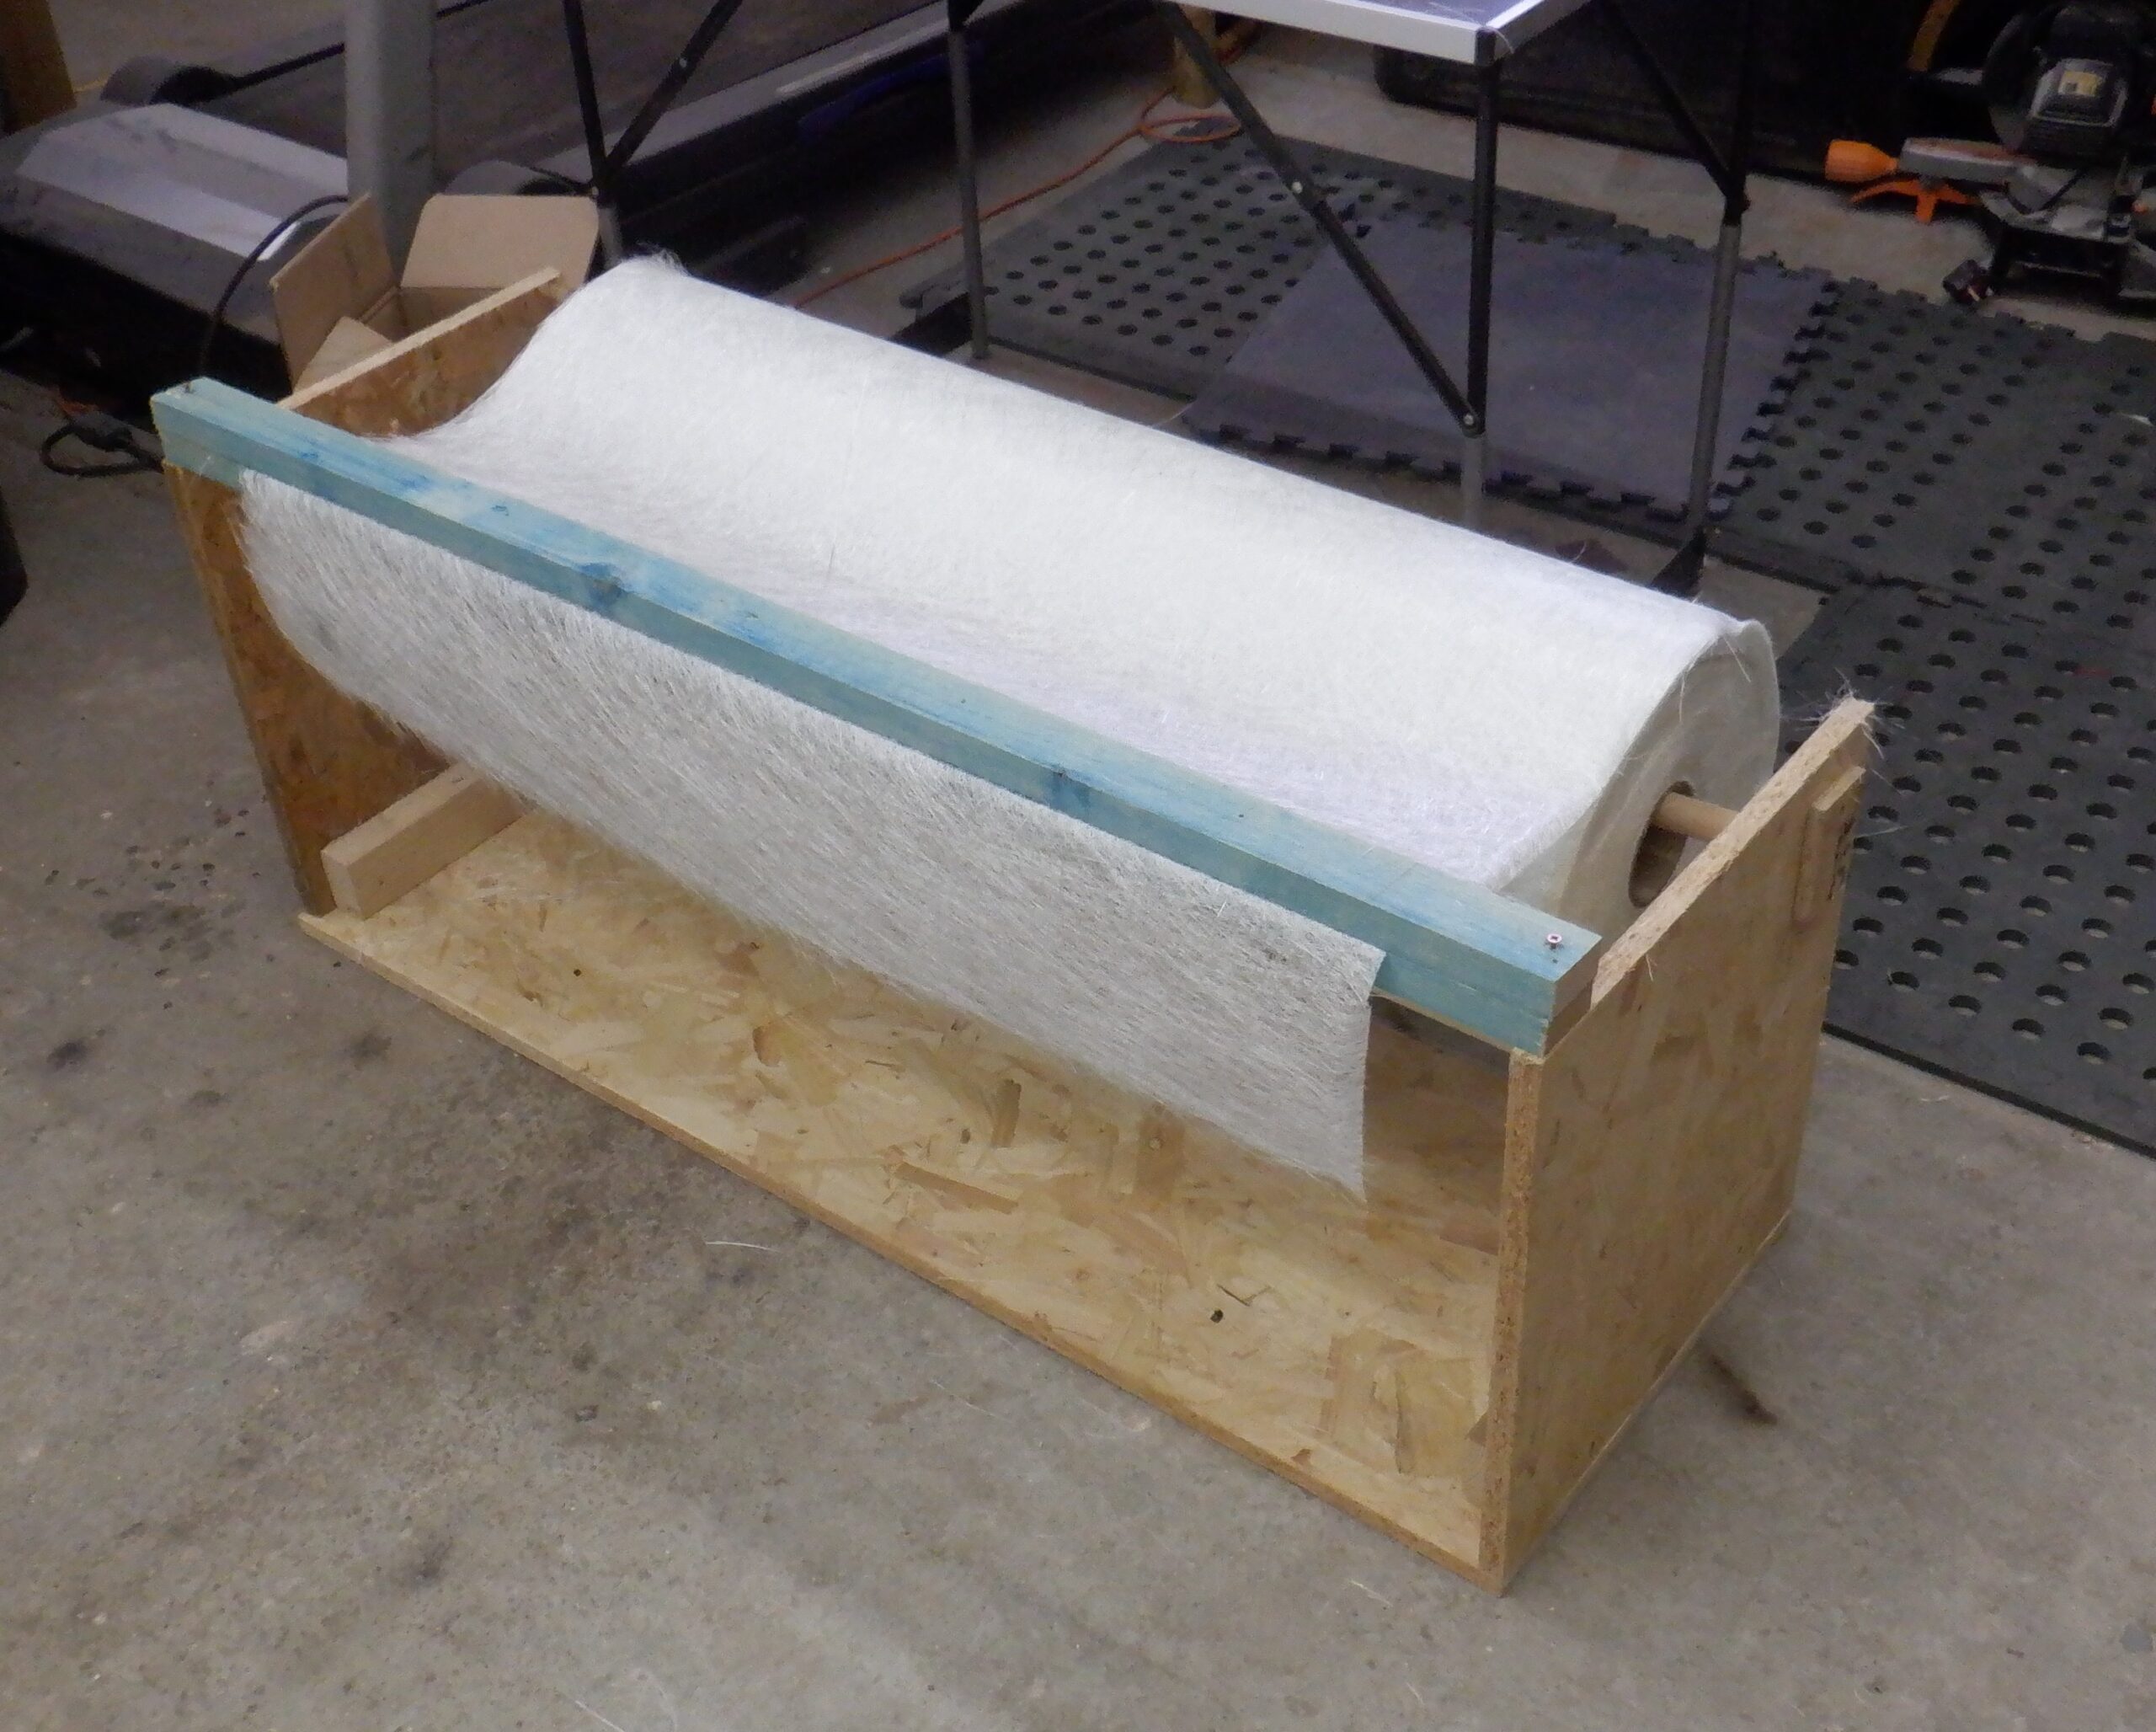
33Kg of Glass fibre Mat
So we tore off twelve pieces measuring 450mm long, and four pieces of 900mm long. These form the bulk of the walls but we wanted to put an initial layer of the woven cloth on the mould first so that this offers the maximum strength bending around the corners of the tank. We unrolled the cloth and cut a single piece 1350mm by 1000mm long. Then, we draped it over the mould and carefully cut the overlapping folds, to remove the triangles so the cloth would lay down flat.
We did a second one so we could put that cloth piece on as the final layer, to encapsulate all the strands of glass fibre that comes in each matting sheet. These matting sheets are made up of a random sprinkling of 50mm long glass fibre strands, held together with a very light glue that will instantly dissolve when the resin is applied.At this stage, we decided to put in colouring dye into the resin so we went for a muddy brown colour by mixing four teaspoons of red powder and four teaspoons of blue powder dye and this made a muddy brown colour, suitable for being a flower pot !
The final steps of preparations, was to get several pots of acetone ready for cleaning our rollers and other tools, a pile of paper wipes and a collection of mixing trays etc.
So, we started at 11:25am and mixed our first batch of resin with the hardener, using 1% ratio of hardener so we had plenty of time to apply the mixture before it started setting. The garage temperature was about 15°C so 1% will give us a good 30 to 40 minutes of handling time.
We coated the mould with the brown resin, using a fluffy roller to transfer the liquid over, and then draped the cloth over. We slid the cloth around and made sure that it went from edge to edge and that the two sides folded in and overlapped properly. Then, we rolled on more resin liquid until the cloth was entirely coated in resin. Then, we got our four larger pieces of matting, and one by one, laid each over the mould, tearing one edge so that it can rotate around the mould and the loose flap goes over the top. We put plenty of resin all over the surfaces. We used the aluminium roller to work the resin liquid into the individual strands of glass fibre, and also, to force out any trapped air.
Next, we took the narrower strips and went horizontally around the mould, repeating the process of loading lots of resin on each piece of matting and eventually, we put on a total of eight layers. We also put on the second woven cloth material near the end of the process.
It took us two hours to do this Test Tank.
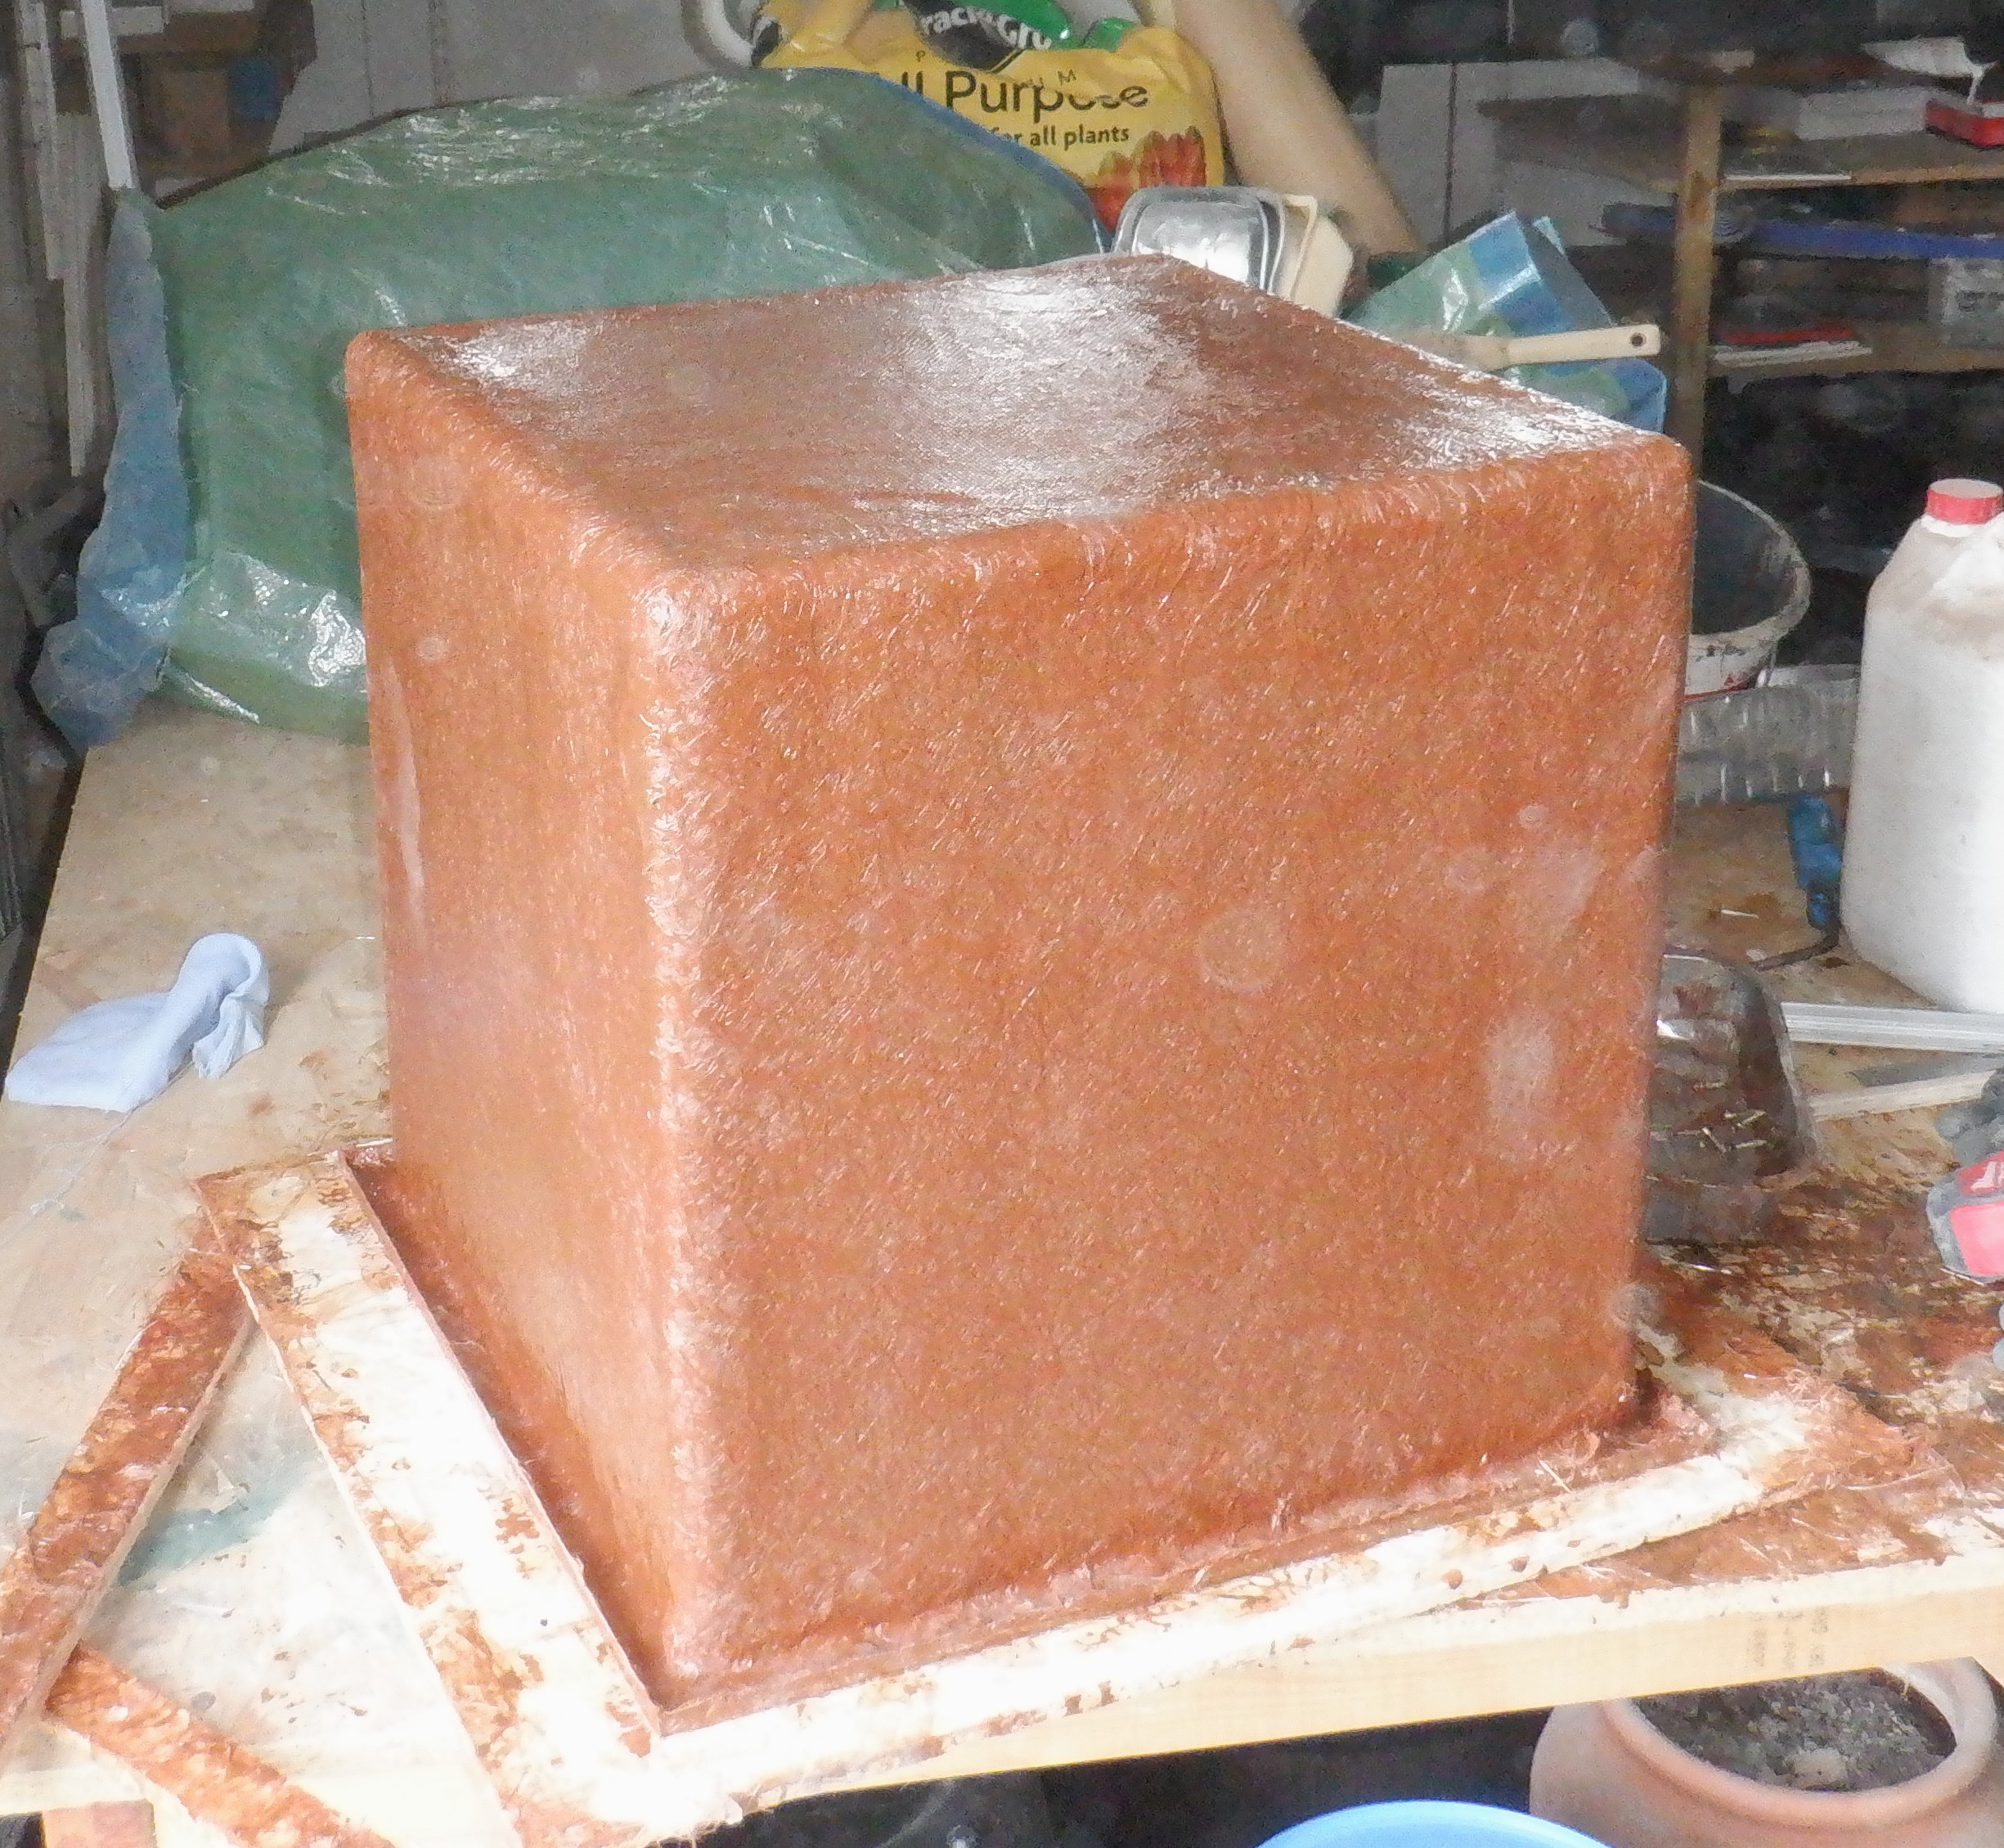
Test box fibreglassed
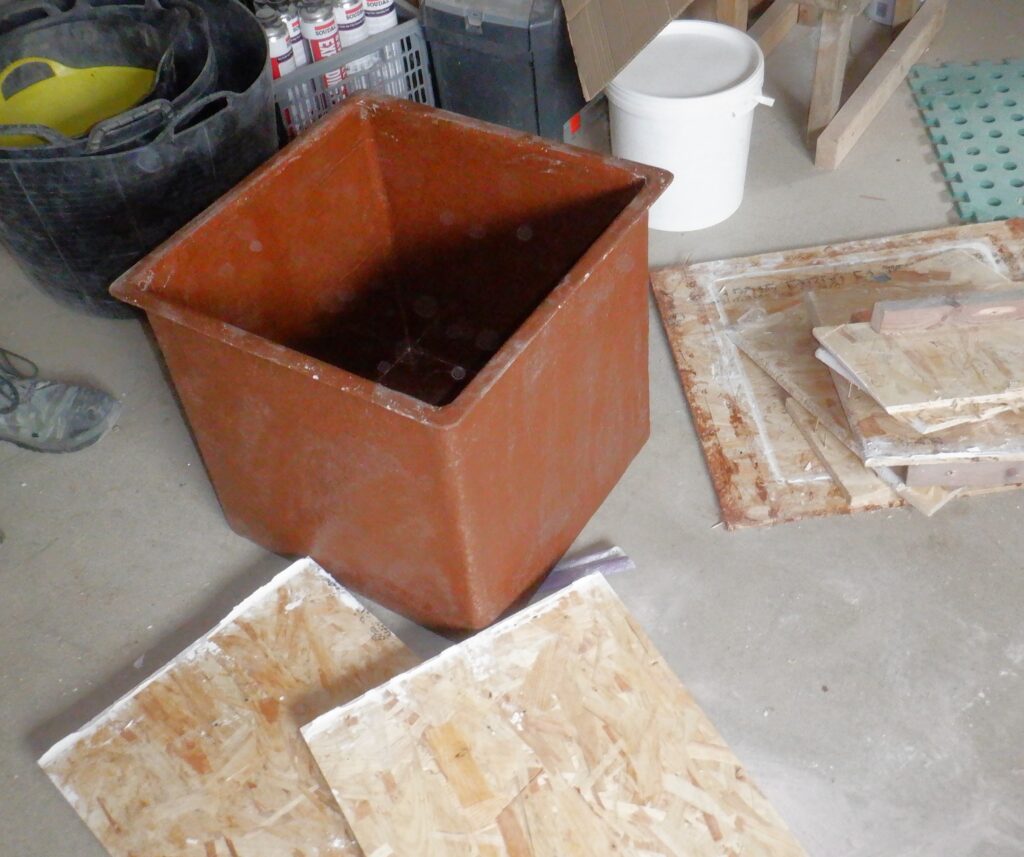
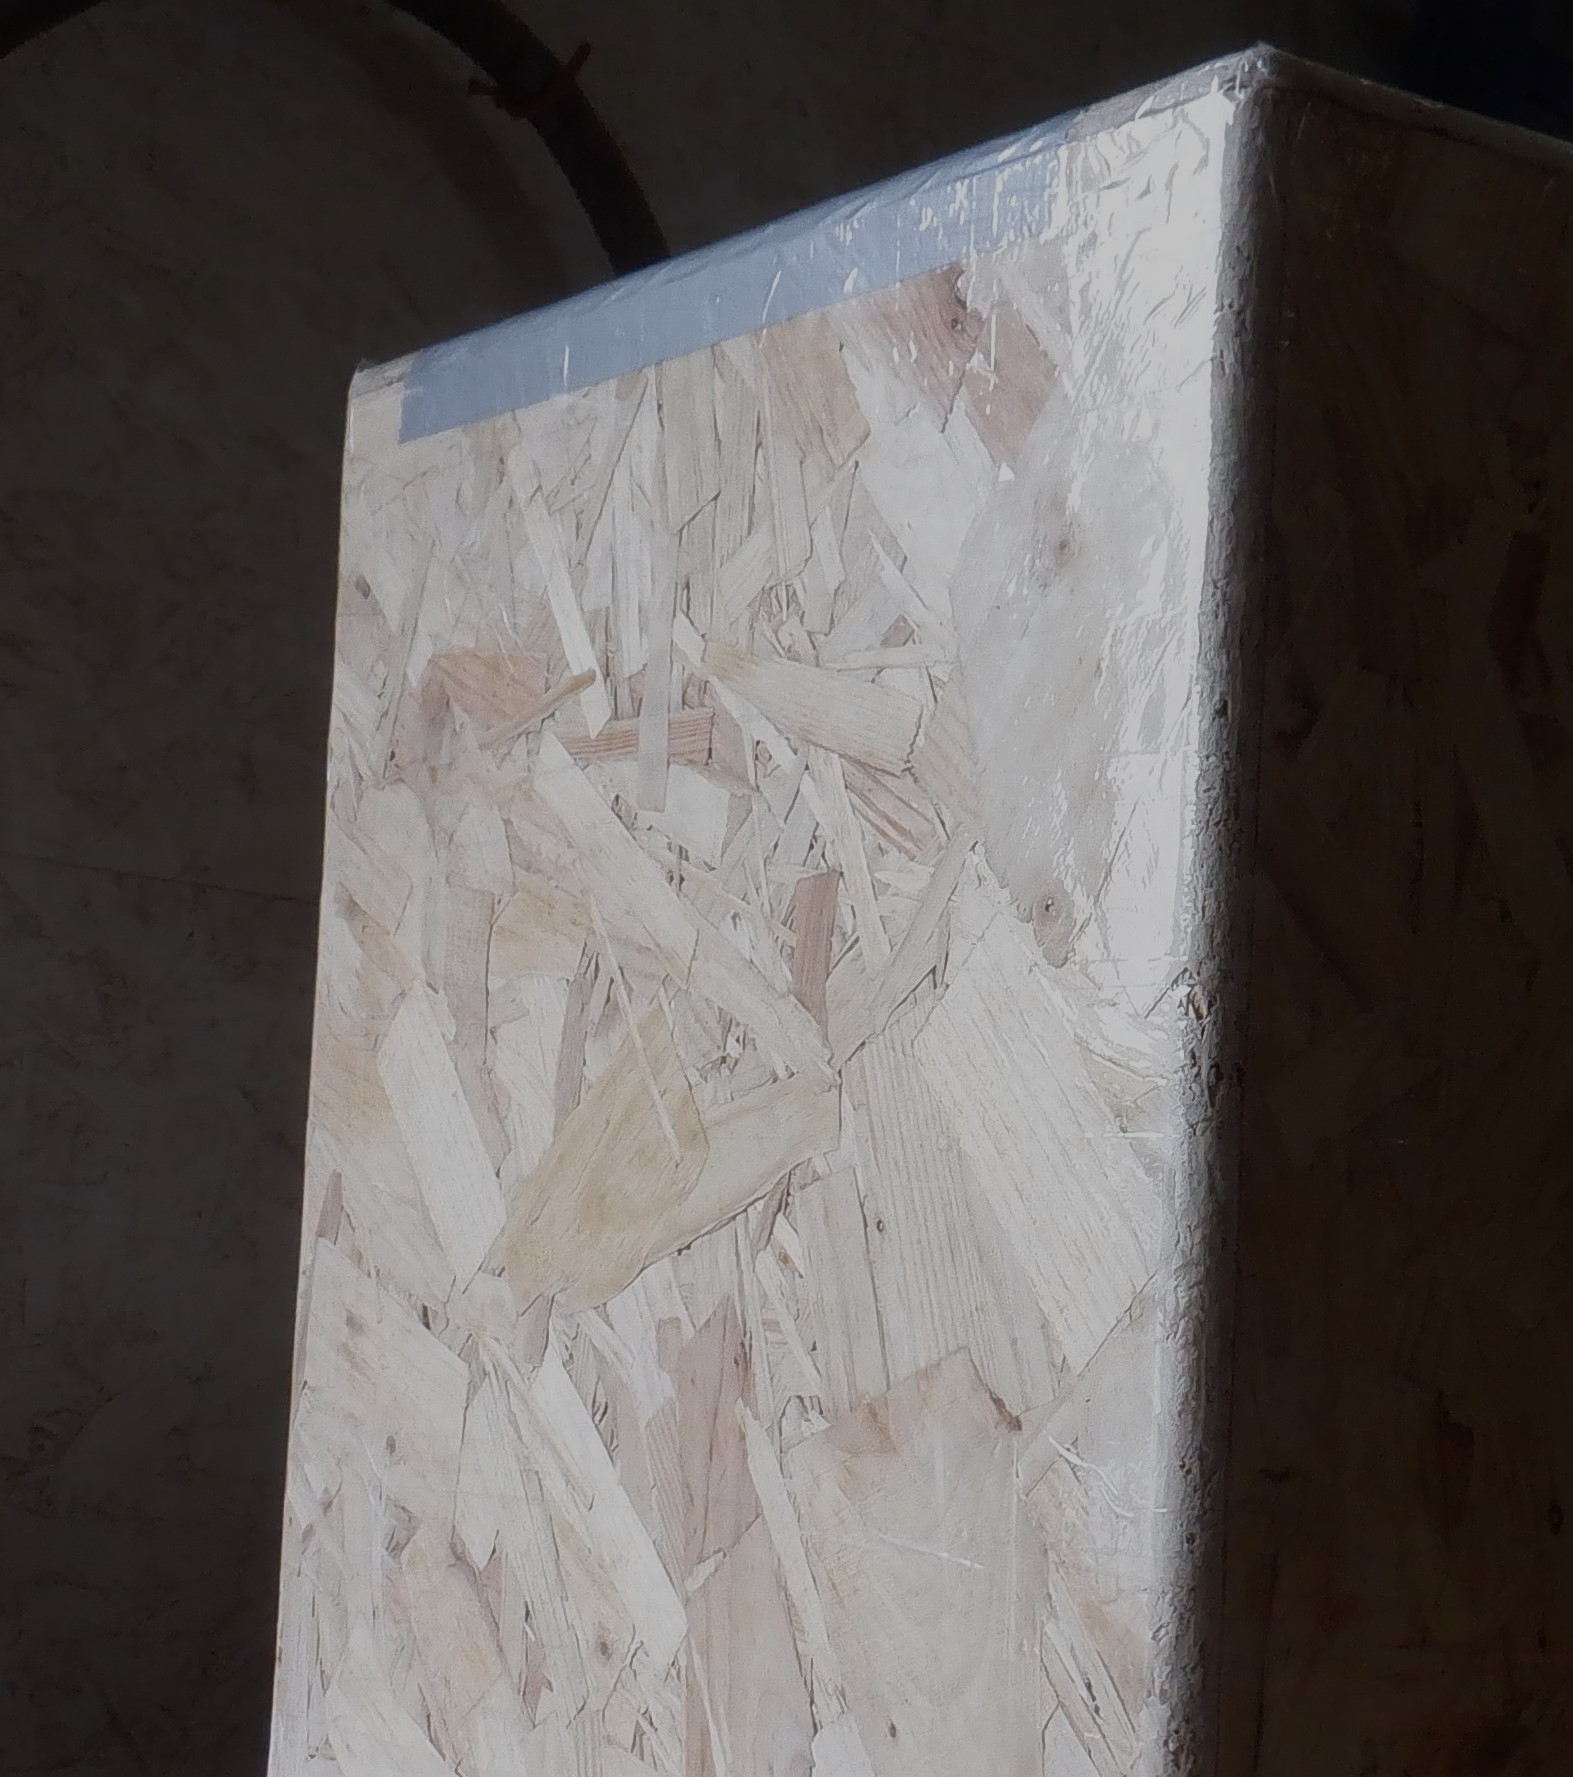
We gave it a couple of days (over the weekend) for the resin to cure and harden before we tackled the task of dismantling the internal mould and generally, it was not too difficult. We unscrewed various screws and then used a crowbar to lever the two side walls that had the ?almost? cuts in them and this then allowed the other two walls to come out and finally, we got the crowbar into the cut line in the base and managed to lever each half out. Then, we pulled off the parcel sticky tape which got left behind on the inside of the finished tank, it looks like that the resin had quite an attraction to the glossy side of the parcel tapes, more than the sticky attraction to the wooden surfaces anyway. It wasn’t a problem as we could peel off the tape fairly easily, leaving behind a brown cubic reinforced glass fibre plastic tank. It needed a bit of trimming around the lip because we had a ‘dam’ to make the lip flange, but it ended up with too much glass fibre and resin. So, we just laid down a small piece of 6mm thick MDF board on the floor and, positioned up to the edge of the flange (the tank is upside down) and used our wiggle saw to slice off the lumpy bits.
We also ran the sand paper over the surfaces, to rub down little spikes of resin and fibre and also rubbed the edge to round the corners and the square edge.
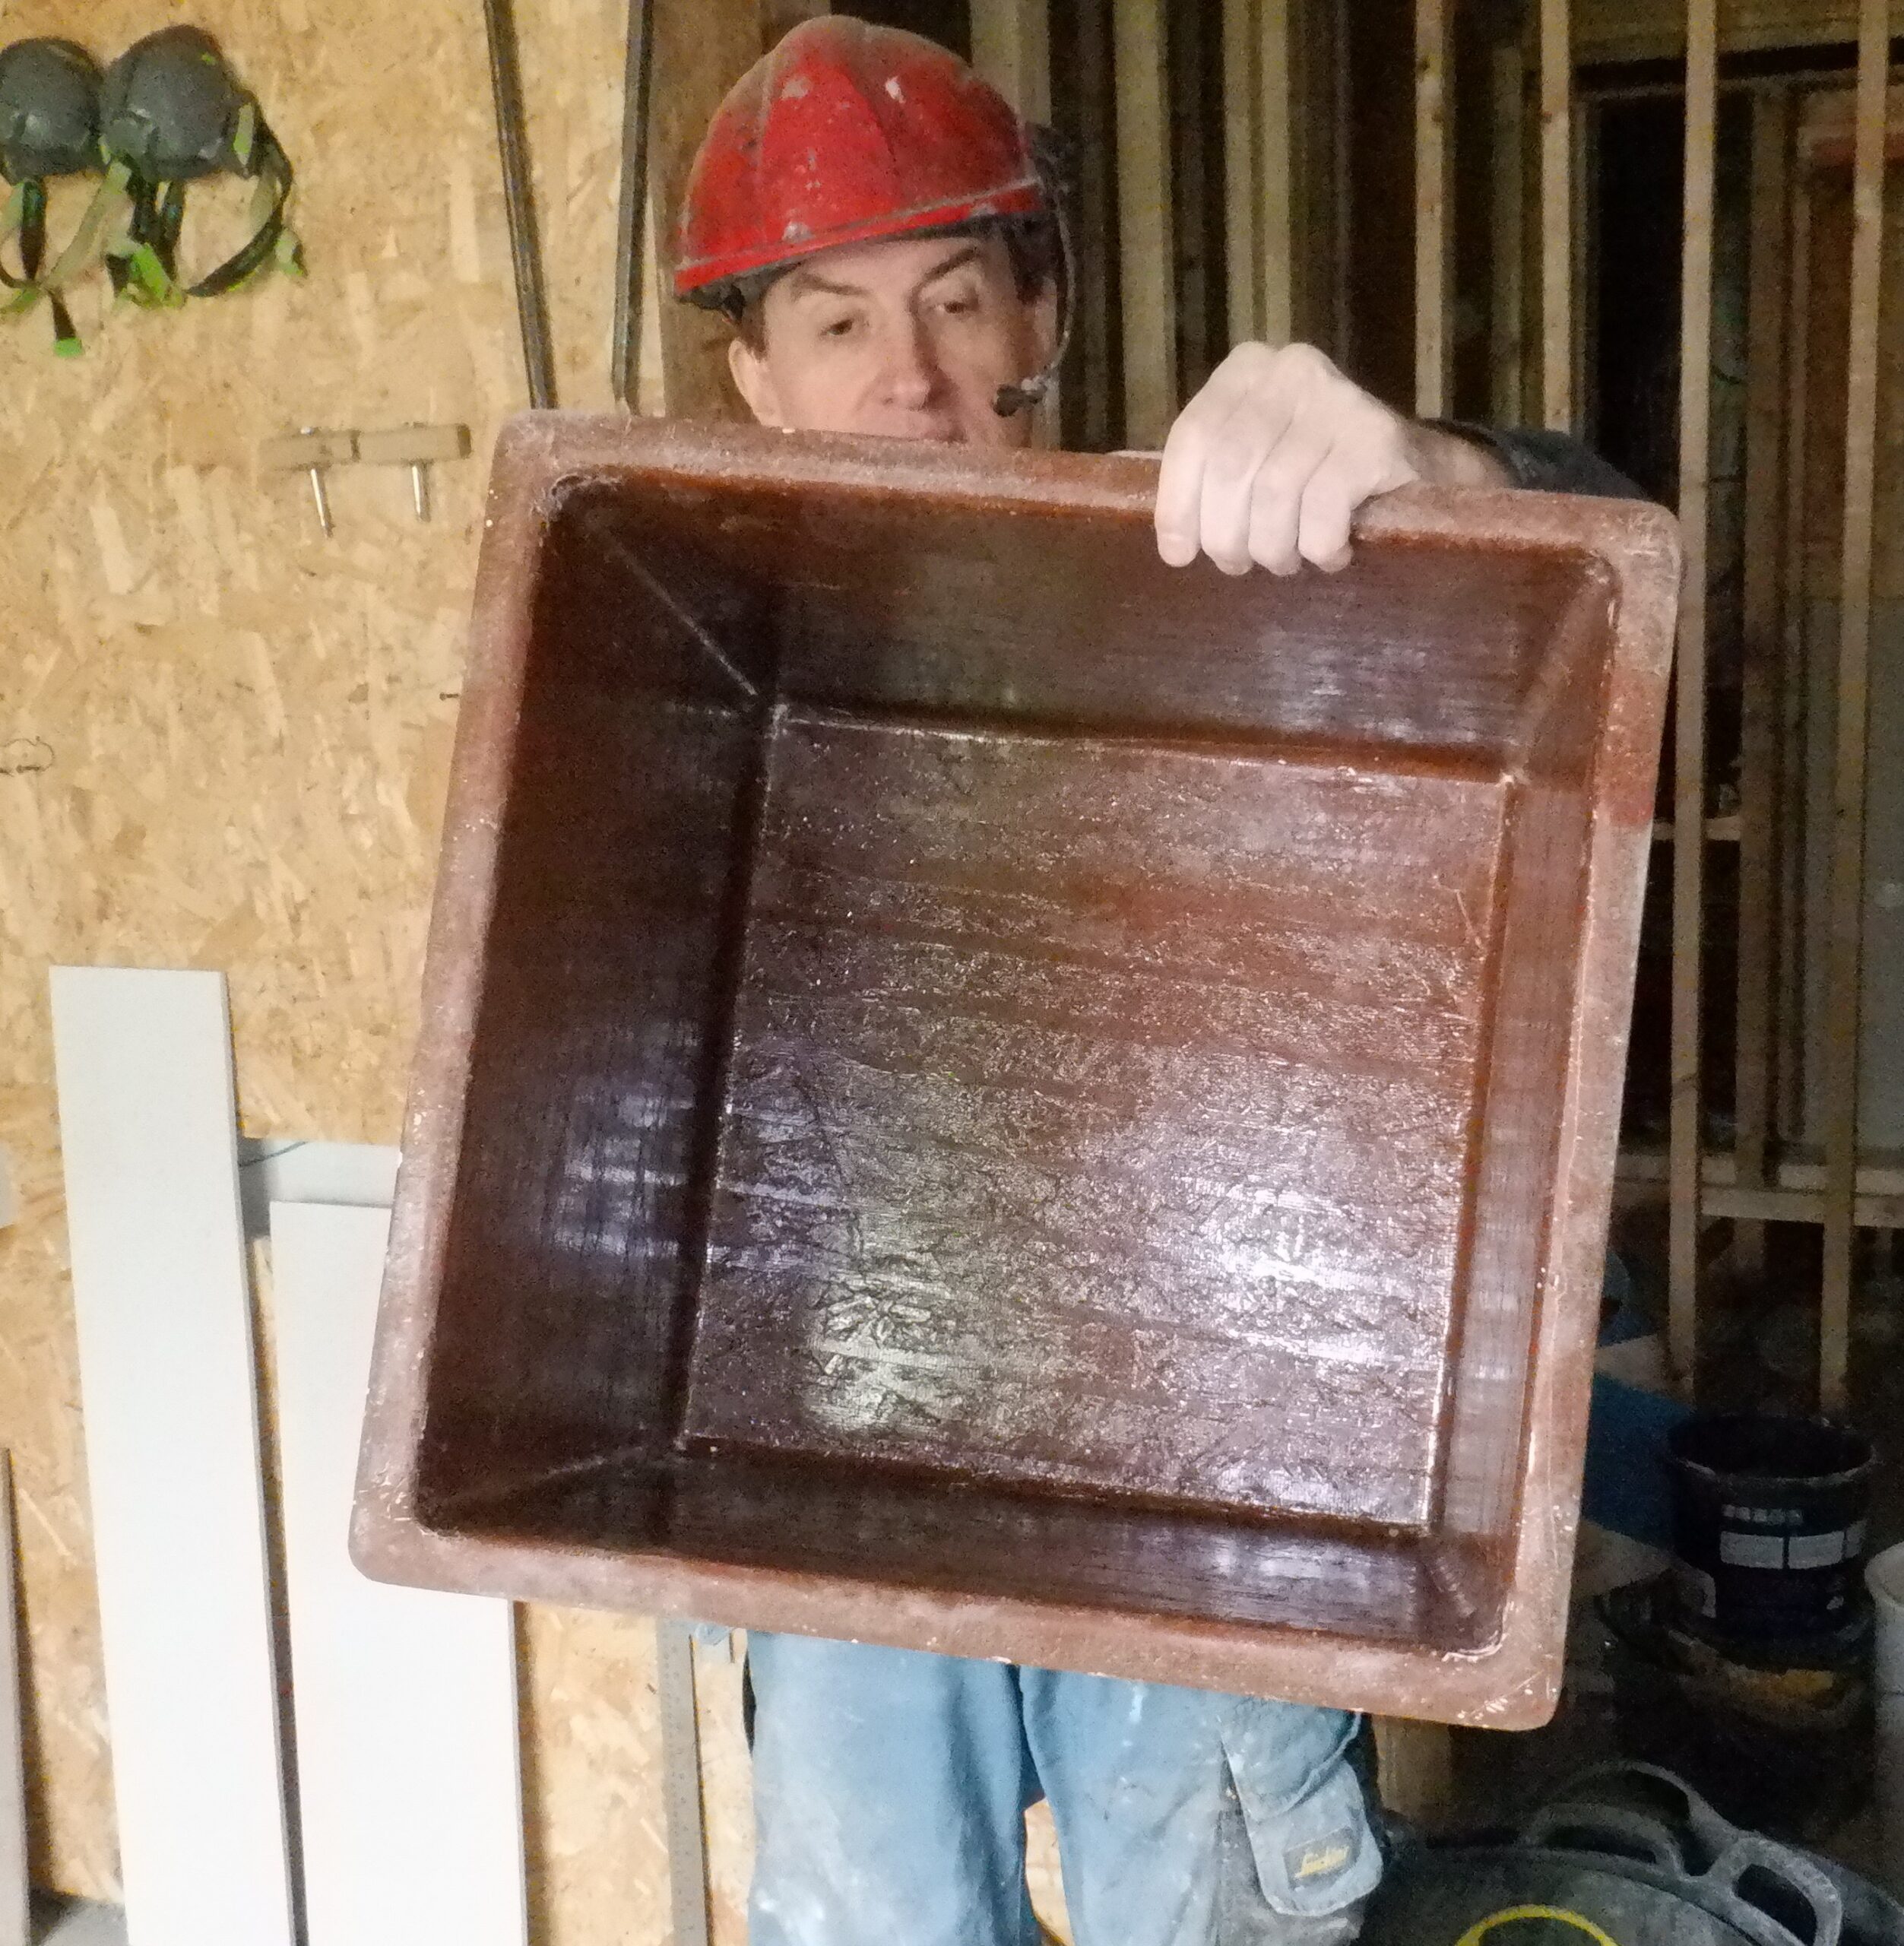
Test tank demoulded
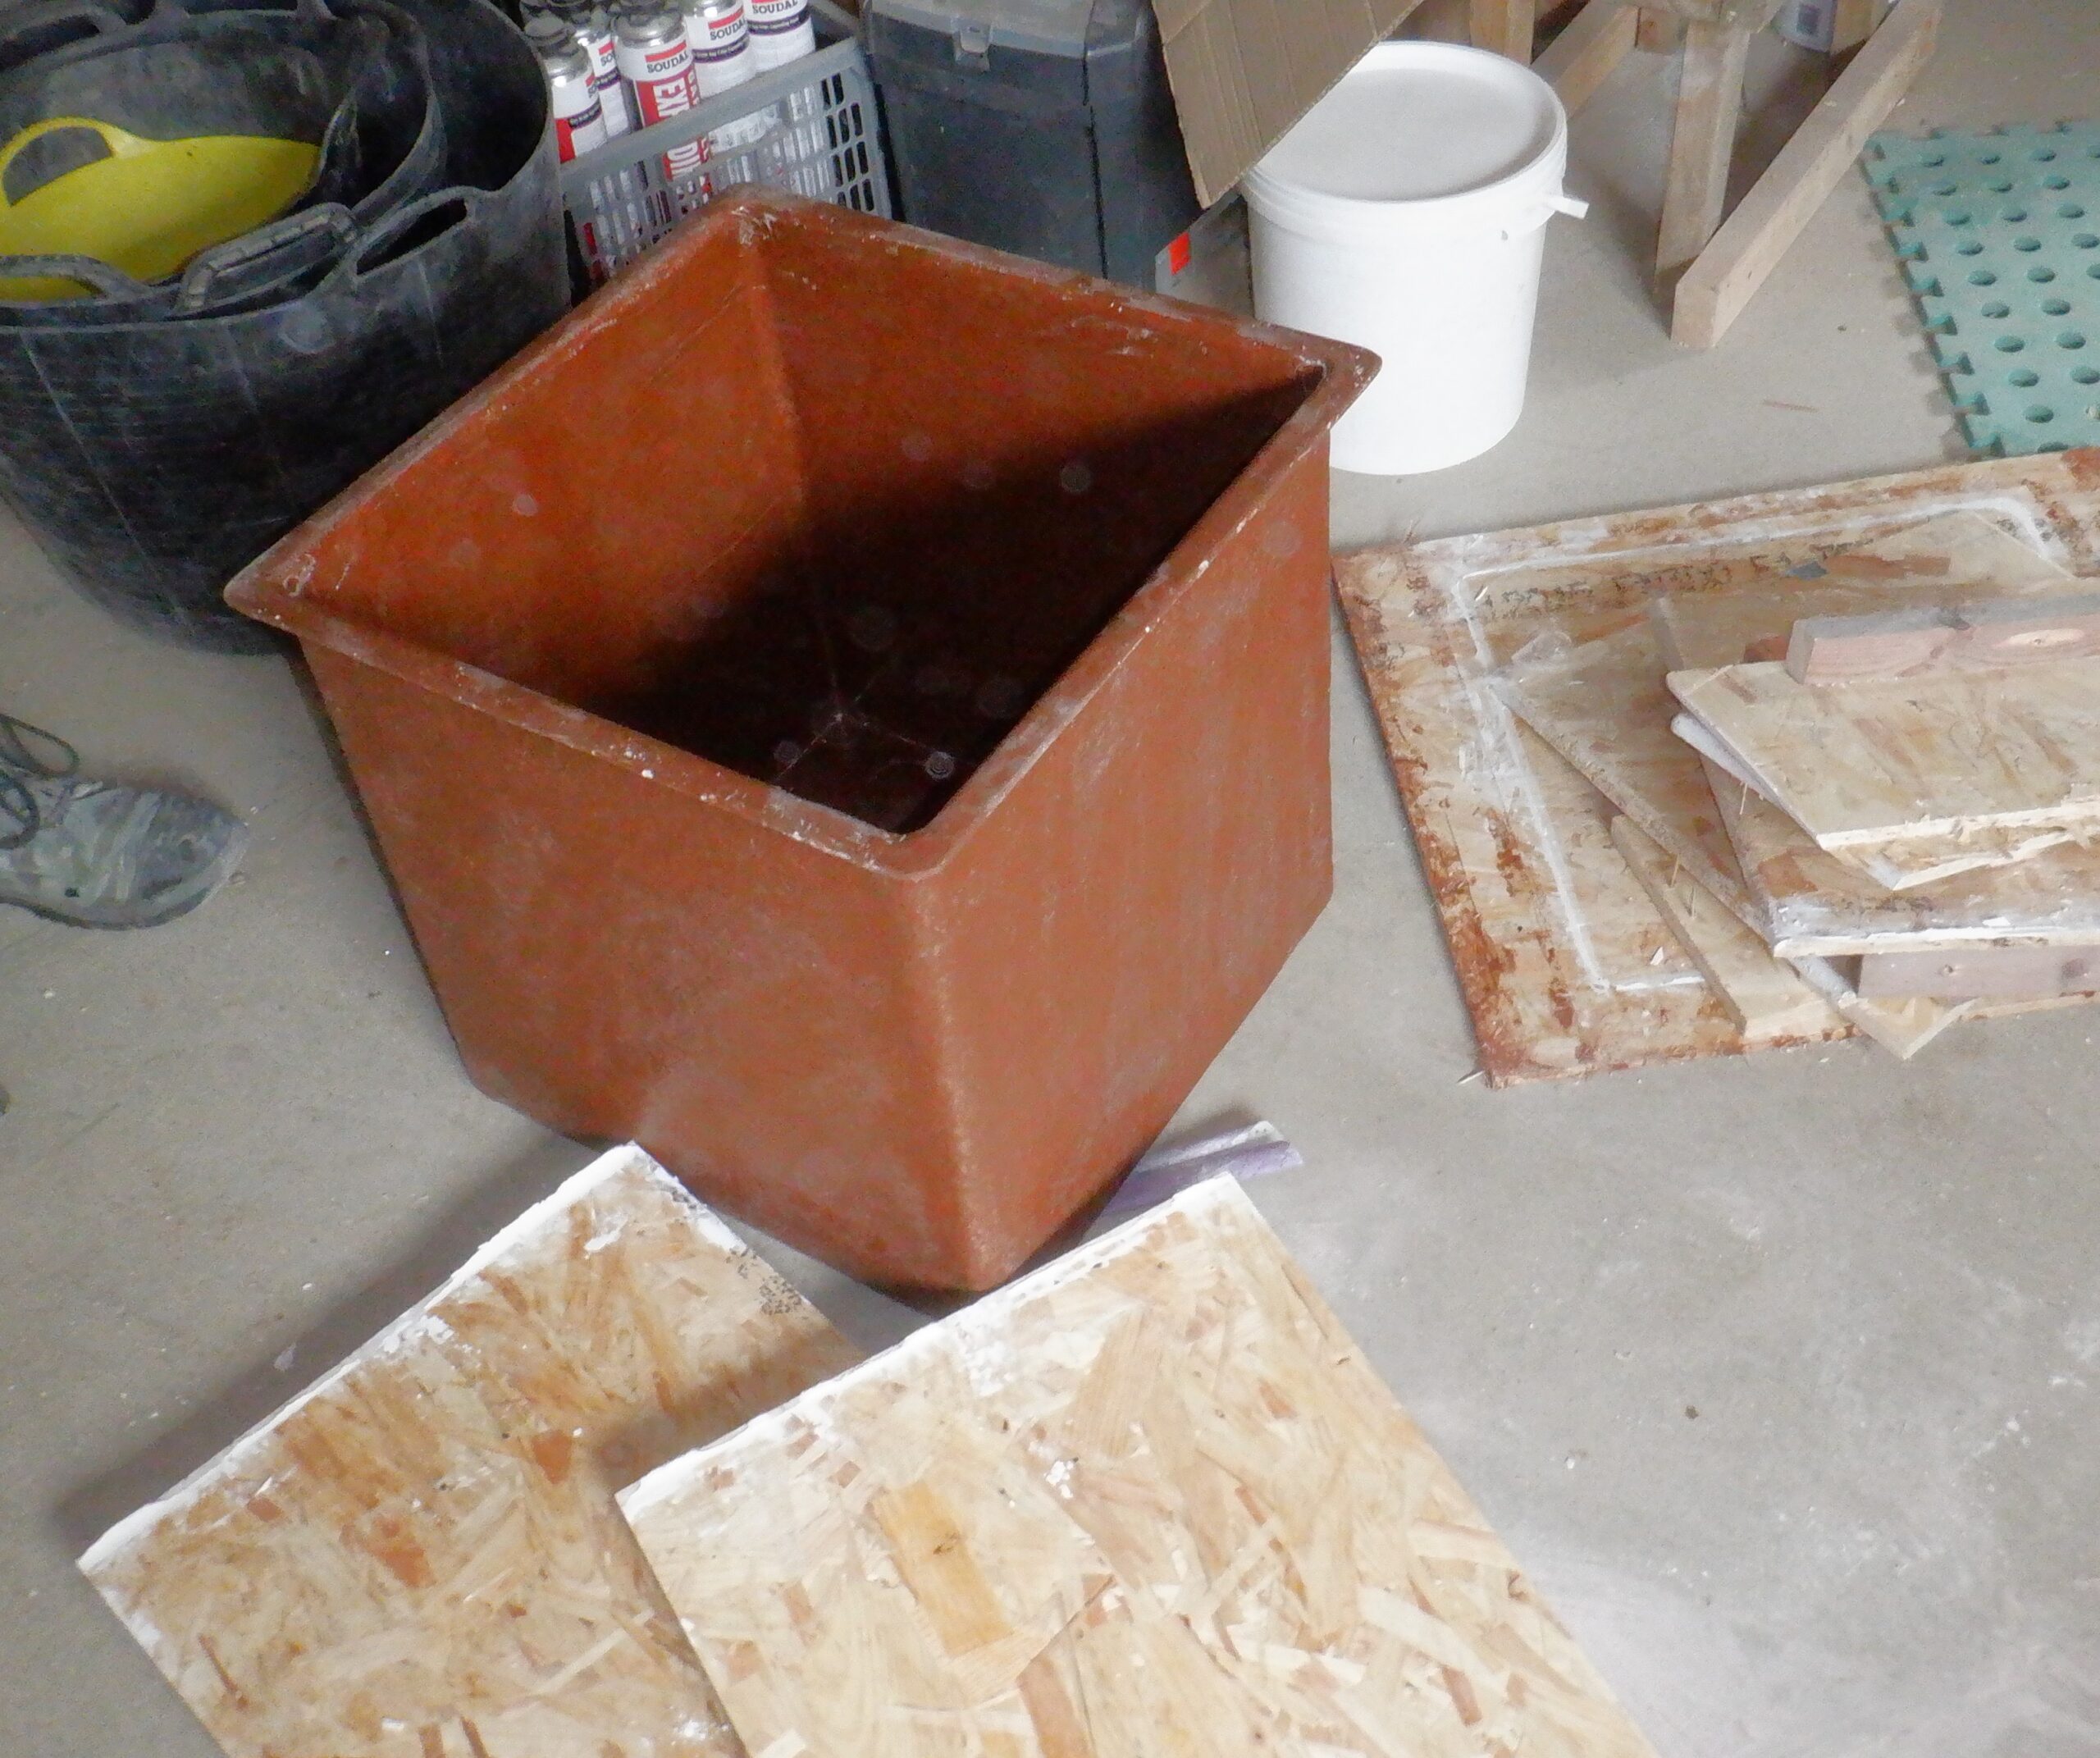
Test Tank
The final stage of this test, is to put in water, both cold and hot water, and see if it holds it without leaking.
This Test Tank holds about 90 litres so we got the garden hose and filled it almost to the top and sat it in our Garage and left it for a few hours while we got on in making the next mould for the larger header tank.
Unfortunately, we had a leak!!
A very very small one! But still a leak!
It is amazing to how water can get through 10 layers of glass fibre and resin. The leak is actually on one of the rounded bottom edges and we believe that we were not careful enough in making sure that these rounded edges were carefully loaded with extra resin, to make sure even those fibres are saturated.
We learnt a valuable lesson and this is what this Test Tank revealed to us!
We will have to patch the leak before we can perform the hot water test and we will do that later on.
Leave a Reply
You must be logged in to post a comment.