Category: Build Progress

  • Construction of External Wall Begins!

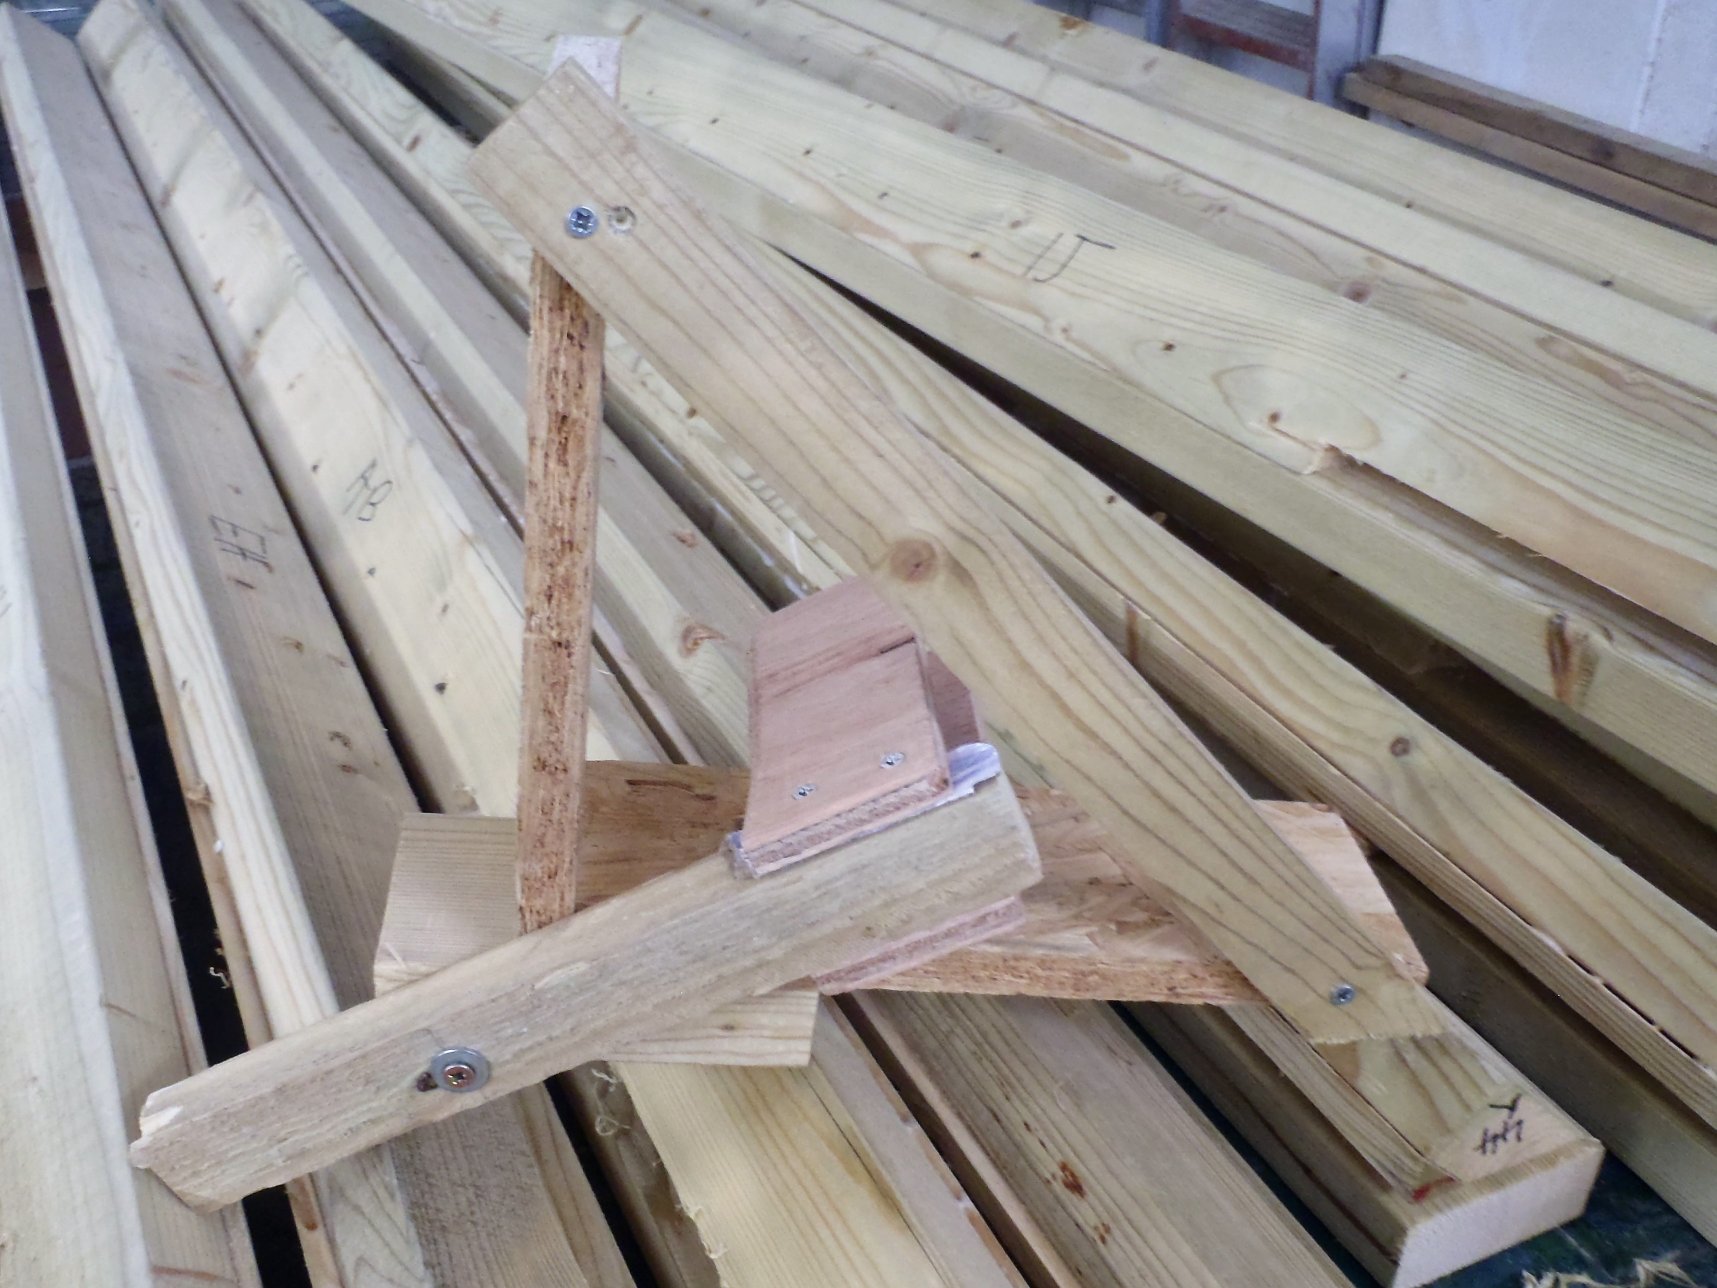
    With a slightly shortened work day, we started assembly, adjusting and building the External Wall of our house at last!

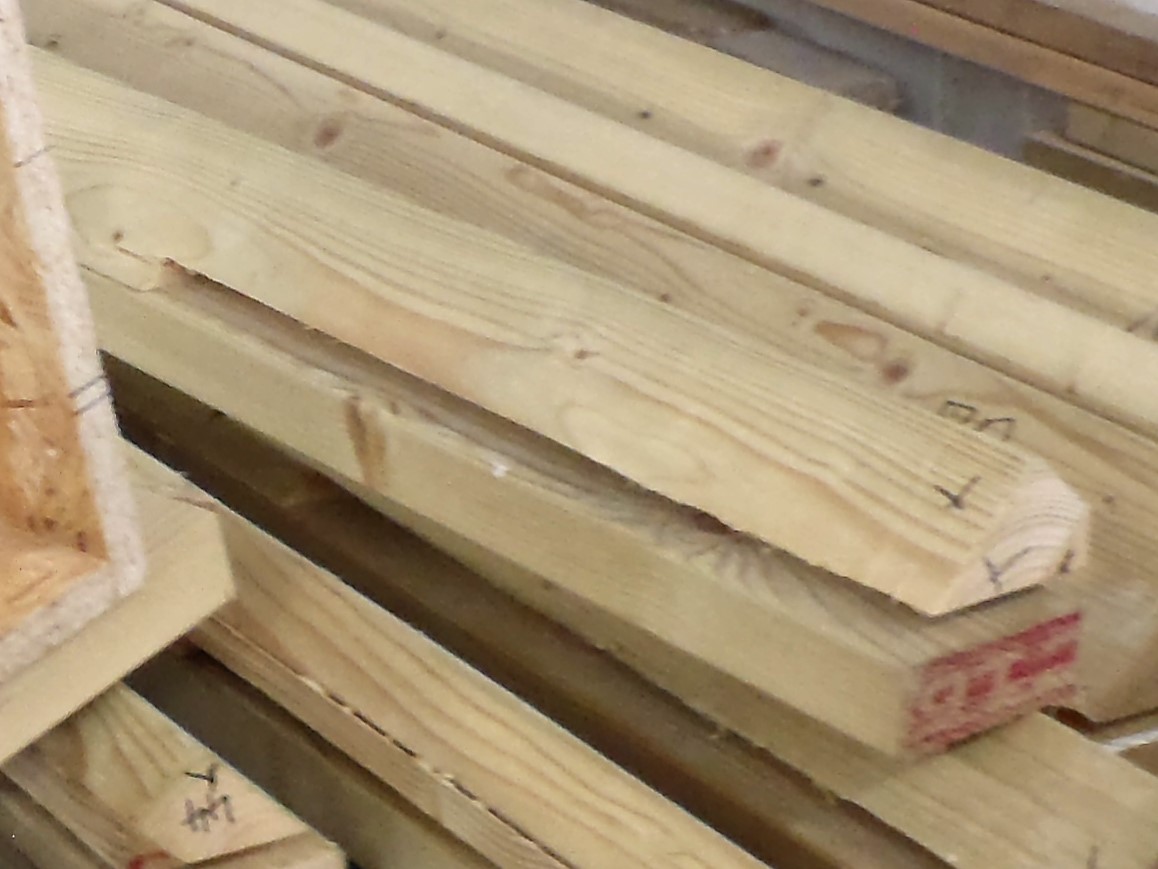
    The first job was to adjust each and every Leg so that it is vertical as possible. We did this by shortening the inner post (the 63mm CLS going down to the concrete) using our little circular saw and a super sharp guillotine to chop and slice little bits off the end.

    The basic operation was to put the Leg in place, then use our accurate digital spirit level to find out how much deviation there was off vertical using the measurement mode of millimetres off vertical per metre of height. We took this figure and divided this by 3 which tells us how much wood we needed to slice off the bottom of the inner post. It is a simple mathematical calculation of angles and height. We verified this was true with our first Leg!! So repeating this process between measuring the angle and slicing little bits off, including using a piece of timber with sandpaper stuck on it to rub the slots down a bit too, we arrived with a Leg which is vertical and solidly sitting on both the outer concrete wall and the inner concrete floor.

    So we decided to begin on wall “H”, the one nearest the Garage that has the “back” door in the Utility room and going pass Bedroom 3. This had 12 Legs to adjust for this wall and then we turned the corner onto wall “I” at the back of the house near the start of the swimming lane. This wall has 7 legs in it and we did 3 of them before we stopped for the day early.

    We had to remember that the two windows and one door in wall “H” needed left-handed Legs (the plywood webbing is on the other side of the two posts) and on wall “I” had one left-handed Leg as well. Also, wall “H” is the major support for holding the First Floor Joists as they runs side to side down the length of our building. Wall “I” has ordinary Legs that only needs to provide support for the upper floor boards themselves.

    Tomorrow, we will do the other 4 Legs of wall “I” and then go back to the beginning and actually glue and nail each Leg into place and install the top-plates (the front horizontal rail, made of the 89mm CLS pieces and the inner rail made of the 63mm pieces). This will anchor and bind all the Legs together along wall “H” and wall “I” around the corner. Having this right angled turn will provide a very strong bracing force to keep the section of the walls solid and unmoving. We are Getting There at Last!

  • Second Layer of Top-Plate for External Wall done

    Today, we started off in the workshop to build the combined Top-Plate for Wall “E” which has another extended beam coming out to support the porch we got hanging over our back door beside our Garage. It Is made of 3 layers, just like the front door porch, but much longer as wall “E” is 4 metres long.

    While the glue was drying, we went outside, still working in a chilly wind, using our Router to cut extra slots in both the 89mm timber pieces and the 63mm timber pieces, for all our doorways and internal corners that has extra Legs. We also discovered and corrected several misaligned slots on the 63mm bottom-plate that is down on the concrete floor.

    After lunch, we went around sorting and cutting another layer of the flat horizontal timber pieces that forms the Top-Plate to sit on top of the Legs. It is the 2nd layer to overlap and reinforces the joints in the first layer. Both layers are glued and nailed together to form one continuous solid framework to hold and lock all the Leg Elements that forms our External Wall structure.

    We did the 89mm CLS pieces that goes on the outer post of the Leg and then the 63mm CLS timber pieces for the inner posts.

    One little job we did afterwards, was to reduce the width of our ramp we got positioned beside the back door (nearest the Garage) so when the Wall Legs are installed, we still can fit the ramp in place!

    Now back in the workshop, we constructed a plump-bob gadget to hook over the outer Leg so we can get a good accuracy in making all the Legs as vertical as possible.

    But it was interesting to discover that our best spirit level (a digital £75 device) is actually as good as our plumb-bob gadget! It says on the label that the spirit vials are 0.5mm accurate in every metre. Which we never truly appreciated before so we now can use our spirit level instead – after all that work! Grin!

    Tomorrow, we will start the process of adjusting each Leg one by one to get them vertical before we glue and nail them into place, just in case we discover something odd and have to make some adjustments etc.

  • Sorting and Cutting Timber for the Top-Plate of the External Wall

    Today, on a chilly and windy day, we took the timber that had already regular slots cut into them, and sorted and cut them for the Top-Plate of the External Wall.

    We first went around doing the outer leg position, the 89mm wide CLS pieces, making sure that they go from corner to corner and covering the windows and doors without any breaks, they also have to align with the slots in the foot plates. We had pre-prepared 20 lengths of the 89mm CLS with slots and we ended up using all but 1! We had lots more offcuts because being up on top of legs, we couldn’t just fit in little pieces so we made sure that any smaller piece always went over 2 legs positions for a better connection and strength.

    Just before lunch, we brought in 4 more new lengths of 89mm CLS timbers from our pallet and delivered them into the workshop. After lunch, we chopped them up into 6 pieces as follows:

    • 2 x 1266 mm
    • 2 x 2685 mm
    • 1 x 2565 mm
    • 1 x 2745 mm

    We then glued 2 set of 3 pieces into a single timber piece which will form the Top-Plate for the Front Extension, on wall “B” and “D”, which are the two short sides. These will form a contiguous “beams” that comes out the Front Extension and go out to support the Porch Roof that extends 1200mm beyond the front door area.

    Front-porch-beams

    Front-porch-beams

    Then we carried on with sorting and cutting the timber, this time for the inner leg position, the 63mm wide CLS pieces.

    Top-plates-cut-to-size

    Top-plates-cut-to-size

    After-aligning-with-foot-plates

    After-aligning-with-foot-plates


    Tomorrow, we will go around with our Router machine and cut the extra slots around the doorways and some of the corners that has extra legs surrounding them, in both the 89mm and 63mm CLS pieces we have done today.

  • Corner Posts All Done

    This afternoon, we glued and nailed the last “wing” onto our pieces we made yesterday to produce the completed Corner Posts at last!

    Corner-posts-complete

    Corner-posts-complete

    This finishes off the long job of making these Corner Posts and now we can start looking at building the Perimeter Walls themselves at last .. weather permitting!!

  • Day 3 of Corner Posts Creation

    On this bank holiday Monday, we carried on with the creation of the 12 Corner Posts for the Perimeter Wall.

    First of all, we set up the circular saw to maximum height in the vertical position, and set an end stop at 450mm from the centre of the saw blade. We then pushed through each of the 12 pairs of “wing” pieces through the saw until they hit the stop, we then flipped all of them over (and reversed the saw machine too) and cut the remaining way through. The loose piece was then chopped off to clear the area at the top of each Post to allow for the plywood webbing to come down when the rafters are fitted into place.

    Slot-ready-for-rafter

    Slot-ready-for-rafter

    After lunch, we adapted  and modified our right angle jig template so that the central 89mm CLS timber is always held and pointing in the correct direction into the very point of the corner.

    Angle-adjustment-jig

    Angle-adjustment-jig

    Then, we took all the lesser angled “wing” pieces (the 33°, 36°, 40° and 44°) and glued and nailed each onto a full 89mm CLS timber piece.

    First-side-attached-to-corner-legs

    First-side-attached-to-corner-legs

    on Wednesday, we will use our new jig template to glue and nail the other “wing” onto the half completed Posts. It has taken a long time to do these Corner Posts but they are one of the main structural elements of the wall to help support the major Rafters (the long hip ridge and valley lines) in our roof so it must be done good and proper!

  • The Twelve Corner Posts Creation Continues

    Today, we took all our sawn up lengths of the 89mm CLS timber, and marked them up to make sure we had the correct end as the top of the Post. Every corner is unique so we had to be very careful to get each post with their “wings” on the correct way around.

    It was a fiddly job but it had to be done.

    After lunch, we then glued all the little triangular cut off pieces onto the Wings so it filled and extended the surface where these Wings will connect onto the central 89mm CLS element. It was a long operation of running the glue down the exposed surfaces and nailing it together to form one solid, approximately triangular shaped element.

    We had worked out how to slice off the 11mm section at the top of these Wings which will allow the plywood webbing from the Rafters to slide pass and be glued and nailed onto the top of these Posts later on.

    Pile-of-corner-angled-pieces

    Pile-of-corner-angled-pieces

    Next week, we will carry on with the creation of these corner posts by combining the new Wings we made today and glue and nail to a clean 89mm CLS length of timber to provide the completed solid Posts that sort of looks like an arrow but not really – Grin!

  • Parts for the Corner Posts Sliced

    It was another day of working in the Workshop while the cold rainy weather front slowly drifted down from the North. Today, we created the Parts that will make the Corner Posts for the External Wall.

    These posts have three parts to them, two “wings” joined onto a central body, looking like an “arrow”. The orientation of the body part is at different angles, depending on where on the roof that post is situated. We got the computer to draw and calculate the angles and print the results on paper for us to refer to and tick off each corner as we have done them.

    But first, we collected another 20 lengths of the 89mm CLS timber from our pallet and chopped them more or less in half. This and the 3 odd ones we had leftover from yesterday, we now have 43 pieces ready for the next stage.

    Chop-saw-in-Action

    Chop-saw-in-Action

    Parts-for-corner-posts

    Parts-for-corner-posts


    Then, we made some improvements to our Modular Workbench System by putting in locking nuts and bolts onto our fence strips. We wanted to lock down the fence so it couldn’t wiggle or ride up during any operation we might be doing. Every position of the fence needed a nut to be installed into the surface of the work top (a total of 20 of them) and the fence has 2 bolts to screw down where ever it is located.

    After lunch, we slid in the circular saw module and tilted the blade over to various angles to rip cut down the lengths of the 89mm CLS pieces, according to our printout. Each Corner Post has these wings that attached to the central Body and it is the central Body that is angled each time depending on its location around the wall and the roof it is supporting.

    So for example, if the body part needs to be set at a 33° angle, then the two wings has to have the corner bits sliced off, one is a 33° bit and the second wing will have 57° sliced off, so when these two wings are combined together , they form a 90° right angled corner (33° + 57° = 90°).

    The trick is to pass through the circular saw, one piece of CLS timber lying flat and the another CLS piece going through vertically, making the two opposite angle cuts without having to adjust the saw blade each time!

    Rippping-the-angle-

    Rippping-the-angle-

    We tested this technique out using short bits and glued and nailed it together as you can see in the photo below.

    A-Sample-corner-post

    A-Sample-corner-post

    The 12 corners have the following angles:

    • 2 x 33°
    • 4 x 36.5°
    • 2 x 40°
    • 4 x 44°

    We have created the 12 sets of the parts, ripped cut down too length and ready for the next stage. The next stage is rather tricky, as we need to place these wings onto the central body part, glue it using our non-creep structural wood glue and nail it together to hold it while the glue dries and cures. We made two little jigs to form right angled templates to hold the three parts together whilst being fixed.

    This will be quite fiddly so we need more practice and learning how best to do it. That’s the job for another day!

  • All The Perimeter Legs Now Created

    Today, we carried on making our Legs that will create our External Wall of the house. We got the glue dispenser going, connected up the nail gun and started loading pieces of timber into our jig.

    We made 22 right-handed “first floor” legs – this means this size of Leg will support the First Floor Joists on the inner 63mm CLS posts. We put to one side 3 pieces of the 63mm CLS for making the left-handed legs later on when we adjusted the jig.

    We moved these completed legs out to our trolley to go alongside the Great room legs.

    Legs-which-support-the-First-Floor

    Legs-which-support-the-First-Floor

    After lunch, we carried on and made another 34 right handed “non-first floor” legs – this time, these sizes of legs only holds up the floor boards on the first floor level, and hence these has longer inner posts.

    Again, we moved these out to the trolley to keep the workshop from being overly cluttered.

    Legs-which-dont-support-the-First-floor

    Legs-which-dont-support-the-First-floor

    Now, we turned around the jig, adjusted the end stop so that we now can make the left-handed version for going around the edges of windows and doors, on their left sides – surprising enough!

    We finished off the day by creating 3 plus 9 of these left handed legs and moved all out to join their siblings on the trolley. So we made 33 Legs for the Great Room, 43 Legs which runs on the front and back walls and 27Legs that supports the first floor, mainly along the side wall nearest the garage and the side sections of the extension.  A Grand Total of 103 Legs in all!

    We wrapped it up with a tarpaulin to keep the rain off.

    Trolley-full-of-legs

    Trolley-full-of-legs

    And then .. We hauled it .. We tried to haul it .. We Could NOT haul it!! Not at least  by human power alone – OOPS! We had to get our ratchet come-along winch to crank it across the softer ground to get it off our drive way so we can get our car out!! We calculated the weight of the 103 Legs and here is the summary of the results:

    • 770kg of the CLS timber
    • 190kg of the plywood webbing
    • 15kg of nails!

    A grand total of 975kg or virtually a ton!! Eek!! No wonder we couldn’t move it!!

    Tomorrow, we will make the 14 corners posts (most of them are quite complex), and also cut up some extra pieces ready for filling in some extra support where needed, as instructed by our Construction Drawings.

  • Rain Changed Order of Work and We Created Heaps of Leg Parts

    Since there was a big threat of rain arriving in the early afternoon, we changed our planned task for the day and instead went into more Factory Production mode to produce more Leg Parts.

    First of all, we went outside in the morning, while it was still dry and sanded each slot in the slot cutting template to widen it very slightly. We had found that the slots were just a bit too tight for easy insertion when we was trying out a completed Leg.

    Then we cut the regularly spaced (at 612mm) slots in a further 12 lengths of 63mm CLS timber, to add to our previous 8 lengths we had done earlier, making a total of 20. This means we are ready to put on the top-plate for the inner posts for the Installation of the Wall Legs.

    We repeated the process of cutting slots for another 20 lengths of the 89mm CLS timber, so these are also ready for the top-plate on the outer posts. The only outstanding job is to cut slots for both the 63mm and 89mm pieces to cater for the doorways and at some corners where extra legs are needed.

    Slots-cut-into-CLS-for-top-plates

    Slots-cut-into-CLS-for-top-plates

    Just before lunch, we carried into our workshop a heap of the 63mm CLS timber, another 65 lengths, ready for chopping into the required lengths.

    Stack-of-Timber-to-cut-into-legs

    Stack-of-Timber-to-cut-into-legs

    After lunch, armed with a piece of paper with our measurements and tally numbers, we went to chop 43 lengths of the 63mm CLS to exactly 2900 mm long and a further 25 lengths of 2660 mm pieces, these will form the other two sizes of the Legs to complete the circuit of the External Wall.

    We had to fetch another 5 more 63mm CLS and 3 more 89mm CLS timber pieces to make up the numbers. The 89mm were chopped to produce the 2393 mm outer wall legs.

    The-parts-for-68-legs

    The-parts-for-68-legs

    Finally, we swept up all the sawdust to tidy up the workshop and then tied into bundles all our offcut pieces and moved them outside to go with the other off-cuts already out on the pallet.

    The-off-cuts-from-the-legs

    The-off-cuts-from-the-legs

    Tomorrow, we will continue in the workshop whilst the rain and winds blows down from the North, and make more Legs!! Oh yes, we earlier moved out the previous created Legs and put them on the large platform trolley and covered them in a tarpaulin, so they are ready to be transported around the house when the weather changes to being dry!!

  • Wood Preservative Treatment For All Cut Ends and Slots

    Just dashed outside this evening to quickly (an hour’s work) treat all our cuts ends and slots with chemical Preservative to make sure that no rot will occur in the years ahead.

    Using our can of the clear preservative liquid and a paint brush, went around coating all the doorways, windows, corners and slots in the outer 89mm CLS line of timber sitting on the concrete Perimeter Wall.

    This task was done today so the chemicals has a chance to soak into the wood fibre and dry overnight before we start our installation of our new Legs tomorrow.