We started on our next task on Wednesday, to design, create the parts and then build the staircase, all in just four days!
The first job was to get our two remaining pieces of the LVL timber, some 6metres long and sliced a shallow angled cut at the beginning of both planks. This end will be sitting on the concrete on the ground floor and rise up towards the first floor, at an angle of 36degrees. At 4936mm along up the bottom edge from the concrete, we then cut a triangle birds mouth where it will hook on to the first floor and its floorboards, so that the top step will exactly be the same level of the flooring when we get around to building the rest of the flooring layers and carpet etc. These two very long elements are called Stringers. Everything will be mounted to these stringers hence why these pieces of timber are 240mm wide, 45mm thick and laminated like plywood to make a very strong structural framework for the whole stairs.
Ply-wood-for-the-stairs-1
Ply-wood-for-the-stairs-2
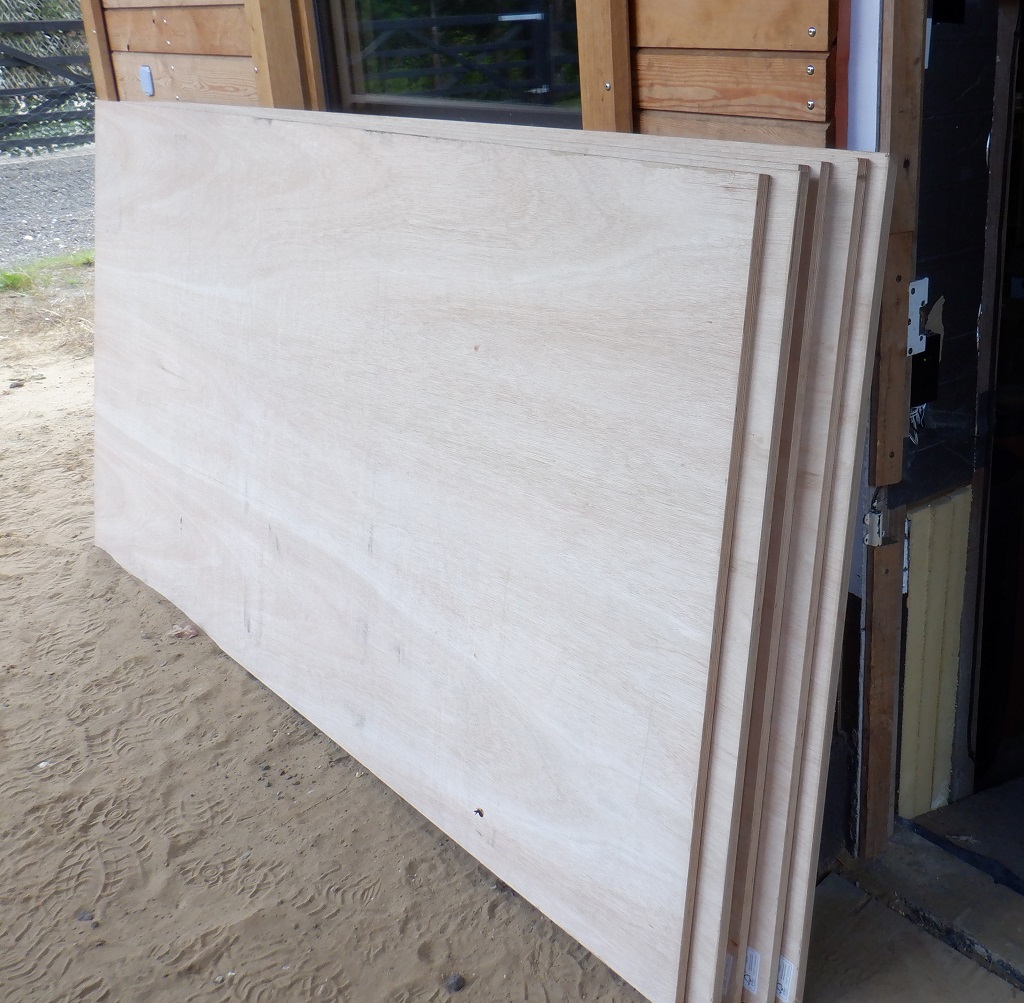
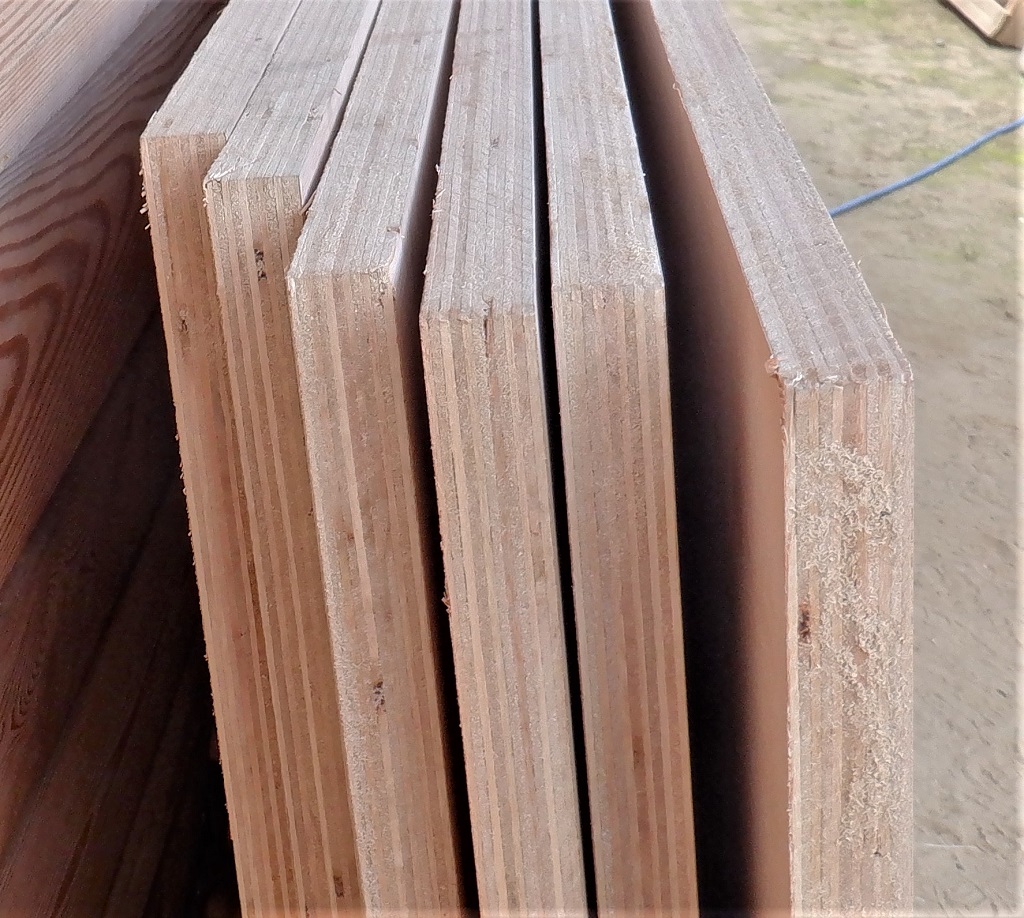
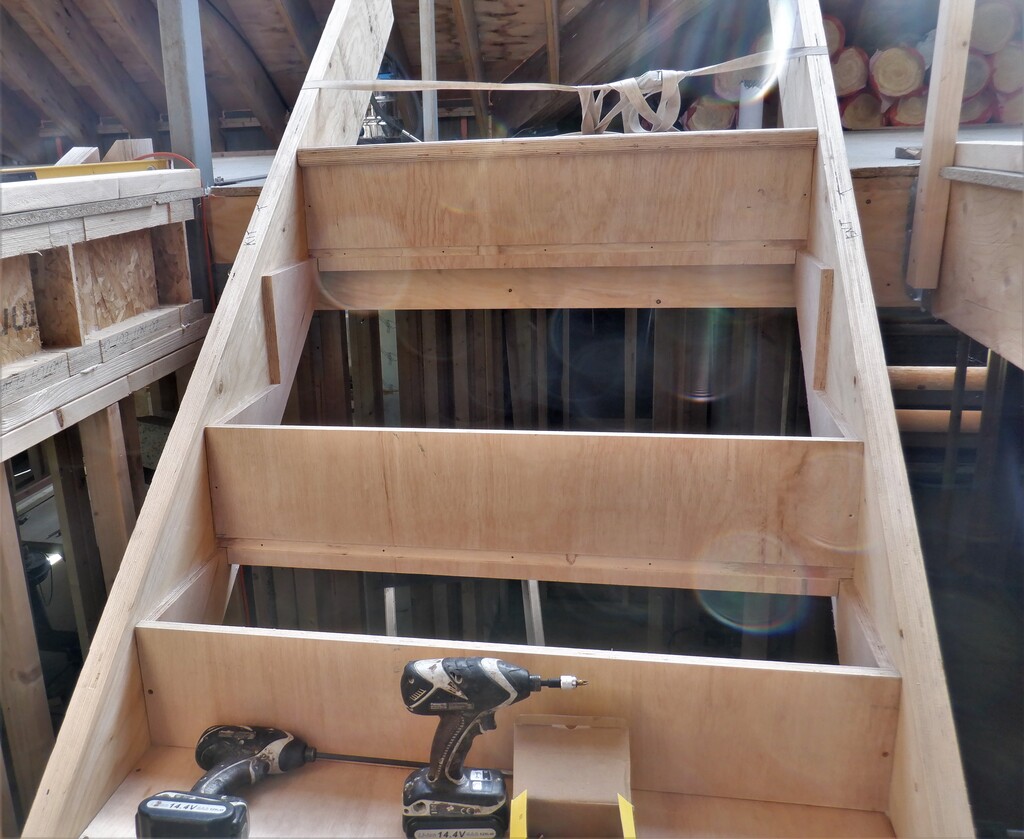
The rest of the day was spent in taking four sheets of our newly purchased high grade 18mm hardwood plywood, with 13 layers and good quality veneers and sliced it up into a series of strips, four long strips of 205mm wide and 2.44metres long, then sliced the remainders into exactly 950mm wide. We used our big saw mounted into our workbench. The next set of cuts was done to the 950mm wide pieces to make sixteen 300mm deep planks, these being the “treads” of the stairs and followed by fourteen 225mm high pieces, these being the “risers”. Using various left-over pieces, we made sixteen narrow 27mm wide strips and then glued each one to each Tread piece thus making a thicker edge to each step, deliberately overlapping the front edge so we can trim off the excess and the dried glue to make a smooth finish.
The following day, Thursday, we took our four narrow strips and paired them up and proceeded to mark along one edge exact measured marks, taking from a spreadsheet printout showing the calculated distances from each step to the next one. Then using a right angle framing square, we precisely positioned a diagonal piece of straight wood and clamped it to the framing square so that first side was 270mm long and the second side was 195.4mm. This jig was aligned and slid along the edge of our paired strips to every previously marked positions, to draw the right angle triangle down on the plywood, to which we positioned our next piece of equipment, the track saw to carefully cut out each of these triangles, to end up with a long series of pointed staircase like steps. These four prepared sawtooth like strips were then glued and and nailed to our stringers that will form the basic structure to hold the treads and risers that will form the whole staircase.
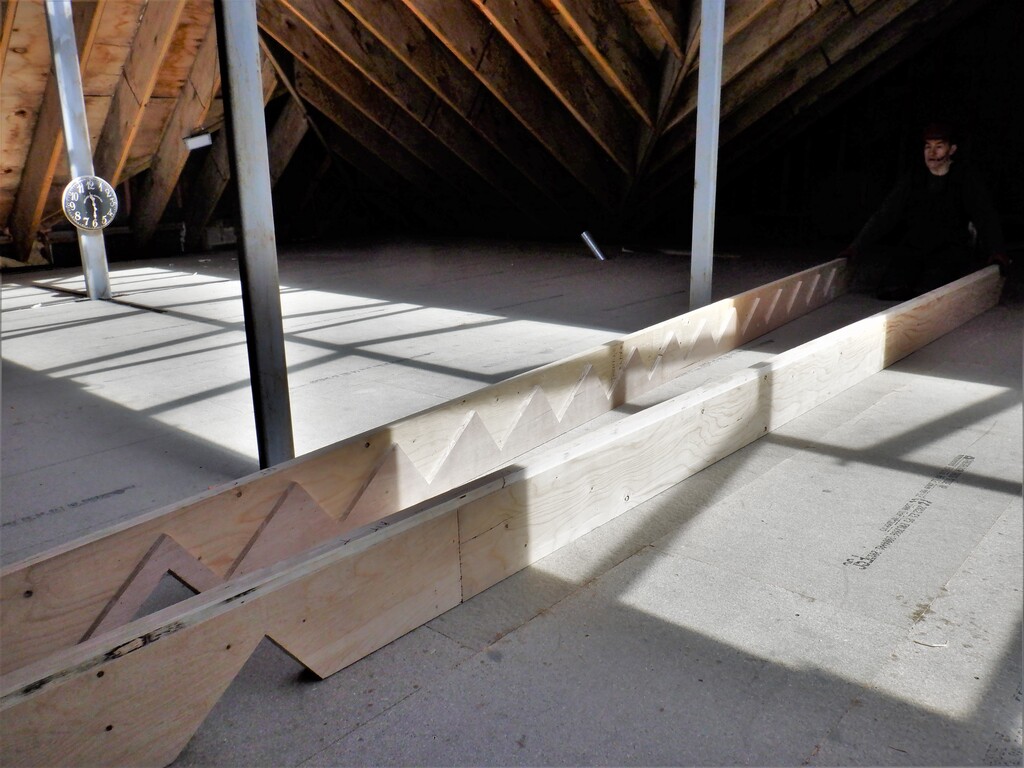
Stringers-with-tread-supports-glued-on
The rest of the afternoon was spent setting up the router machine and fence to guide through the 16 treads and 14 risers. The first little job was to use the straight cutter with a top ball bearing, to run all the treads that had the extra bit glued on and cleaned off the dried glue and excess material to make a smooth flat edge ready for the bullnose. The last bit of the day was setting up a 18mm wide straight cutter and position the fence so we can slice a 5mm deep slot for the riser to fit into on the underside of the tread, just behind the bullnose, exactly 25mm in from the front edge and proceeded to get that done.
On the Friday, we carried on with the routing operations, this time, to cut a bullnose on the tread front edge. We did some test pieces with different radius cutters doing a 9mm, 12mm or 18mm radii. The thickness of the front edge is now 36mm (double layers of 18mm plywood) and we found that the 9mm radius was too small and the 18mm is too large so we settled on the 12mm. so the 16 pieces were sent through the router on both sides to generate our bullnose.
In the meantime, the LVL stringers were cleaned up to remove the excess glue that has bubbled out from the step support plywood
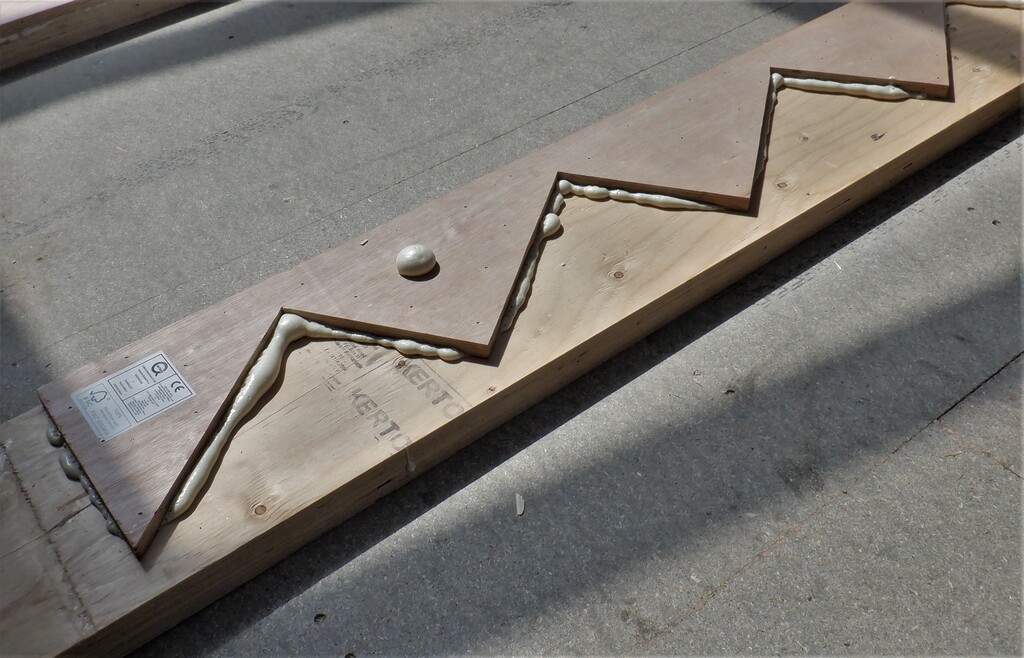
Glue-exuding-from-plywood-joints
The last task for the treads were to drill clearance holes along the front edge in the middle of the slot (to join and tighten onto the riser piece) and two more clearance holes on both left and right hand sides to fix the tread down. That finished all the preparation tasks to the 16 Treads.
For the 14 Risers, first we aligned them all together into one neat pile and clamped them all together, making sure they are all squared up. Then we sliced a small notch out of the bottom corners, some 20mm wide and 25mm deep. This notch will allow the risers to fit down below the Tread level and allow a slot to be positioned 25mm from the bottom edge that will support the back of the tread piece. Talking about this slot, that is our next job, setting up the router this time to cut a similar 18mm wide slot and 5mm deep (just like the other slot underneath the tread) but cut horizontally near the bottom of the riser, as mentioned before, 25mm off the bottom edge. Finally, five more clearance holes was drilled along the slot to help draw in the tread and ensure a tight joint for the glue to work at its best performance. Oh yes, two more holes were done, one on each left and right side to secure the riser.

Stair-treads-and-risers
By the end of Friday, we had done some test fittings and there were concerns over the stringers not being straight and a little twisted and bowed and the tread and riser combination were not sitting in neat and square (It might be ‘engineered’ timber but it’s still only wood).
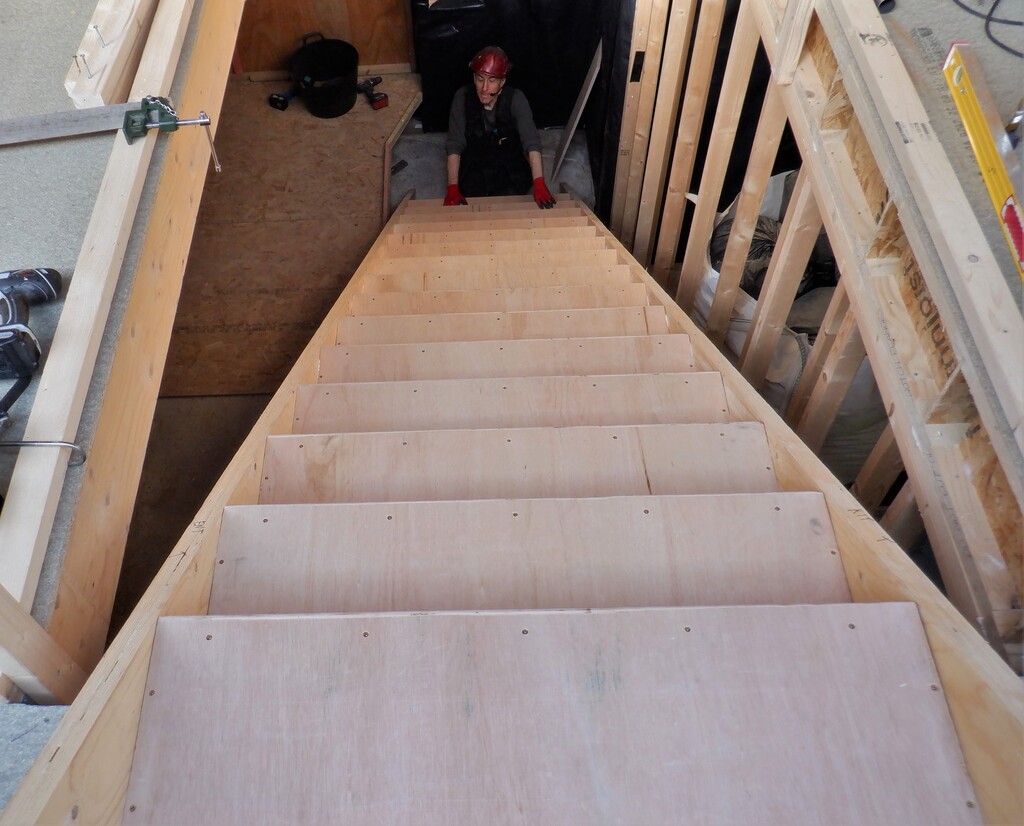
So on Saturday, we verified that our two stringers matched together (bringing them together and inspecting the support steps etc) and also confirmed that the a riser placed in the top most step position was right angle to the first floor stair hole itself. We also got out several large clamps and straps to squeeze together the two stringers together tight to a tread plus riser pair and all is actually looking ok after all. We left on a strap fully tight at the top of the staircase and decided that we would start at the bottom to fix each tread and riser pair in place, for real, using screws but no glue. We used the clamps for each pair to make sure everything is good and tight before screwing in the screws, but we did have to trim a tiny bit off the back edge of some treads to make everything fit snug in the two slots. We continued with this process, going up until we got over half way and decided that everything is coming together good and looking neat and smart so we felt that we could commit ourselves to permanently gluing everything together so we undid the screws out of the treads but left the screws in each riser to help hold the two stringers in alignment.
Stair-under-construction
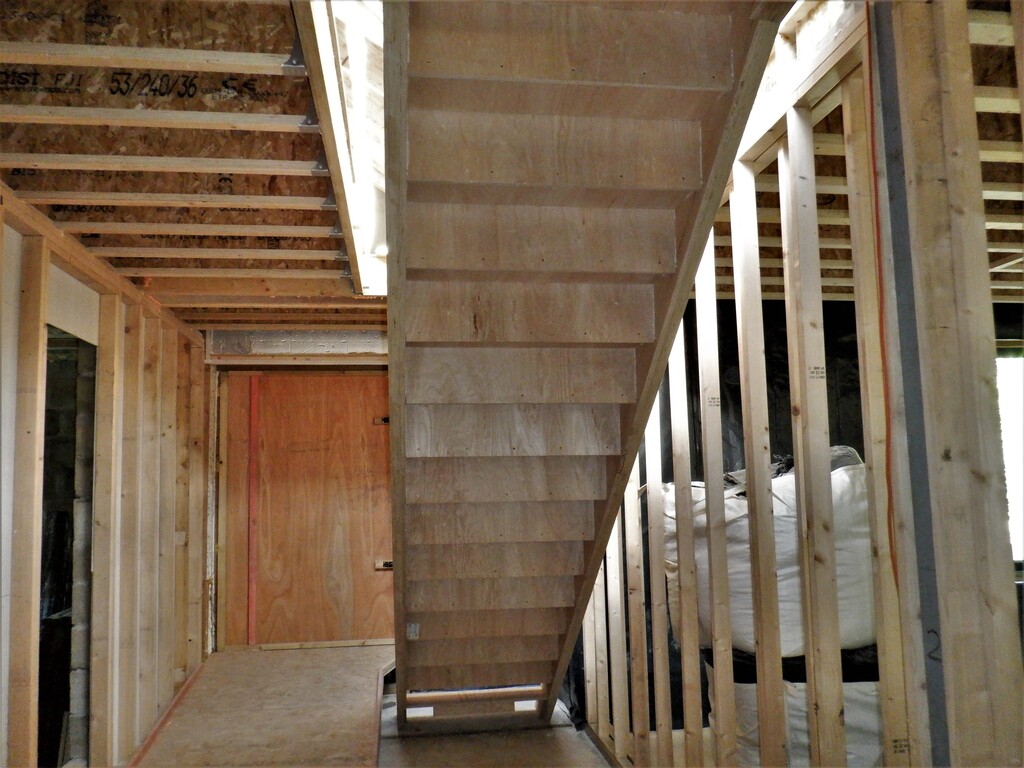
So we proceeded from the beginning again and glued everything, fitted each step into place and applied all the screws this time, including the five screws in the back of each riser to anchor the tread into the slot. We only had to use the large clamp once or twice again as we went up and finally reach the top by the end of the day.
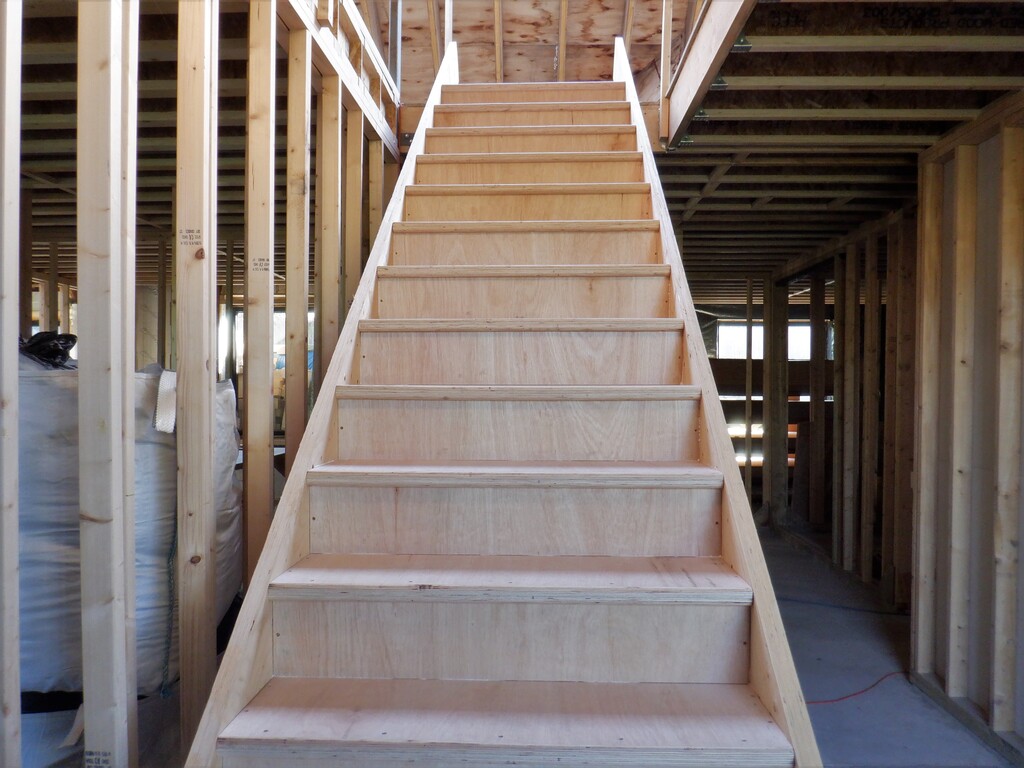
Looking-up-the-stairs
Looking-down-the-stairs
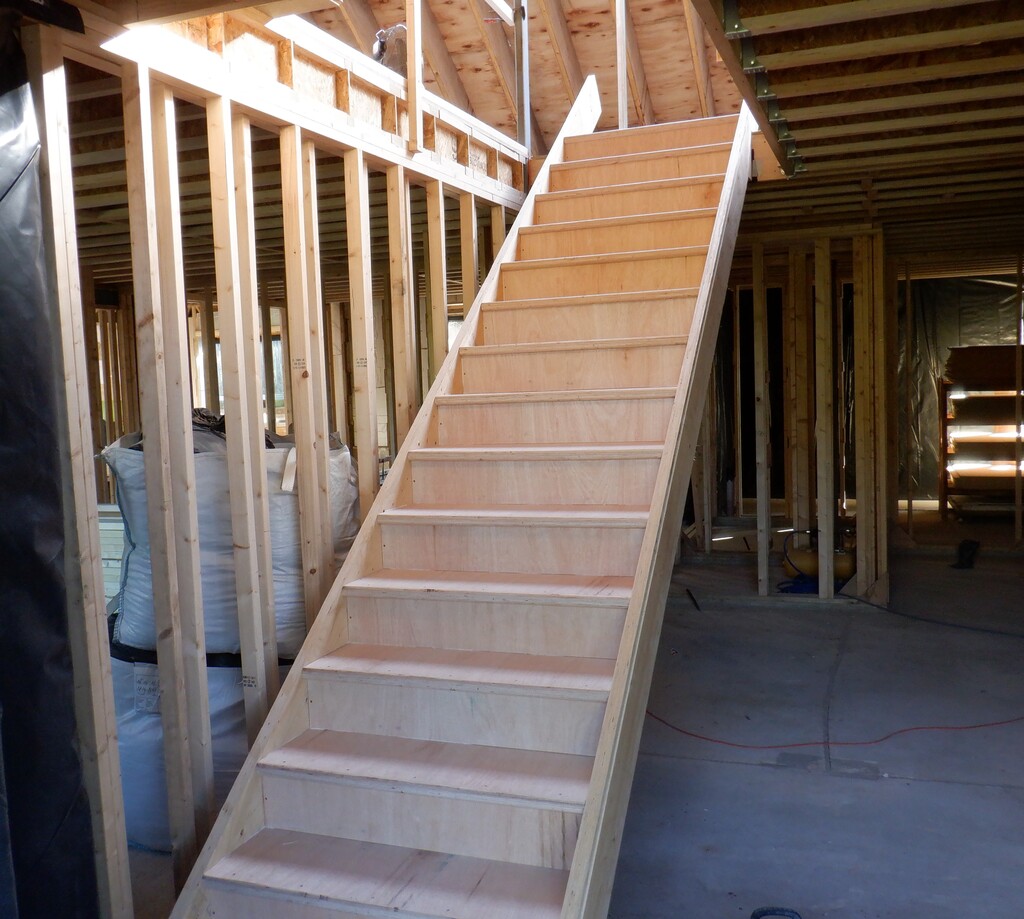
The-stair-body-completed
The-back-of-the-stairs
We have completed our steps for our staircase! We can now get up and down much easier, we can show our visitors our first floor without asking them to climb a ladder and also we can carry up larger and heavier items to get them out of the way while we are working on the ground floor. Yippee!
We will be adding hand rails and balusters later as part of installing the stair lift.
Leave a Reply
You must be logged in to post a comment.