This is a long single report to cover the work during the month of December on Bedroom Two and other jobs. We wanted to get going on creating Bedroom Two so we could move the final loads of PU foam rubbish we got stored outside in the alcove in between Bedroom One and the Great Room’s windows before Christmas arrived.
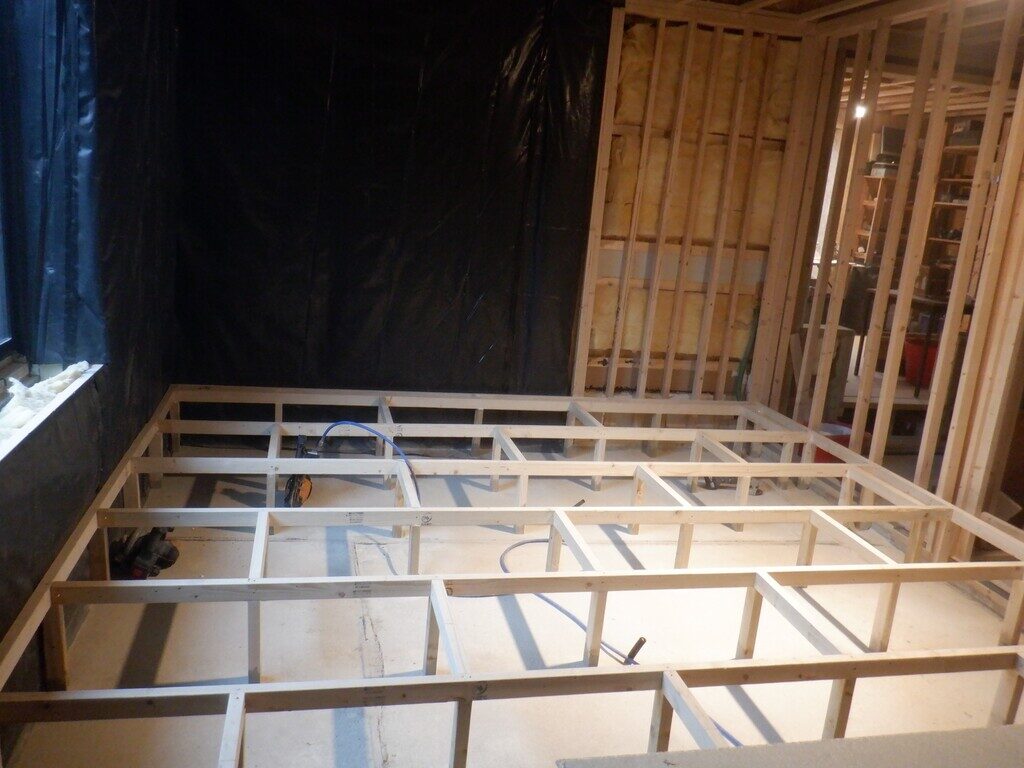
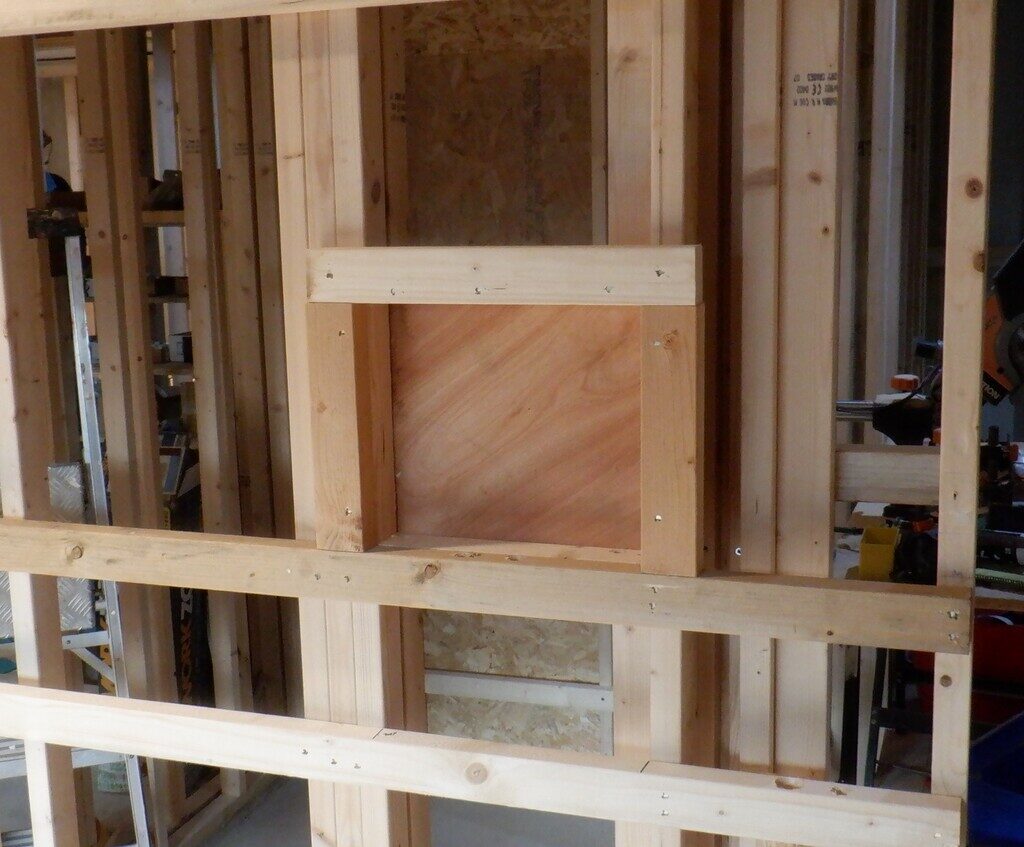
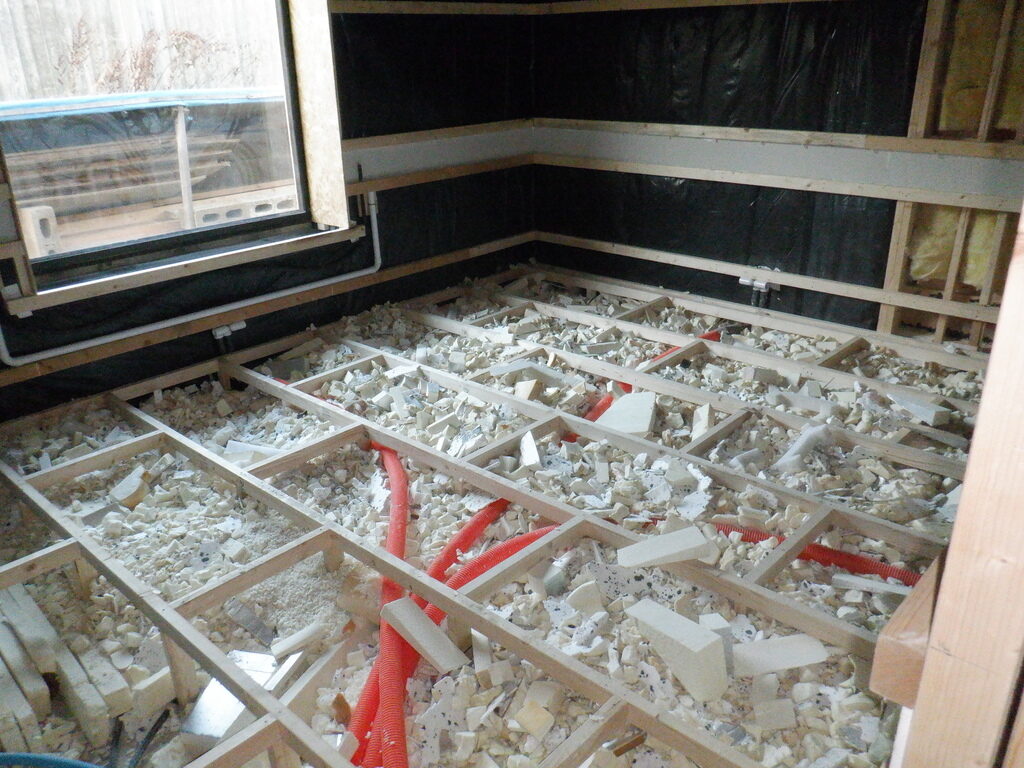
So one of the first steps was to clear everything out of the room including the huge pile of sheet materials, which got all moved into Bedroom One. Then the horizontal rails, using more of our 63mm CLS timber pieces, were positioned on all the four walls, using the green laser level to ensure consistent height, the level of our flooring. Next, was putting single piece CLS timber across the room, spaced apart by a uniform 600mm distance, each piece being just over 3700mm long. Each one having a leg fixed at every 600mm along the joist for support. A section near the on-suite doorway was doubled up around the floor joist support because this will have a removeable lid to gain access to the control devices and plumbing modules that will serve the various features in the ensuite.
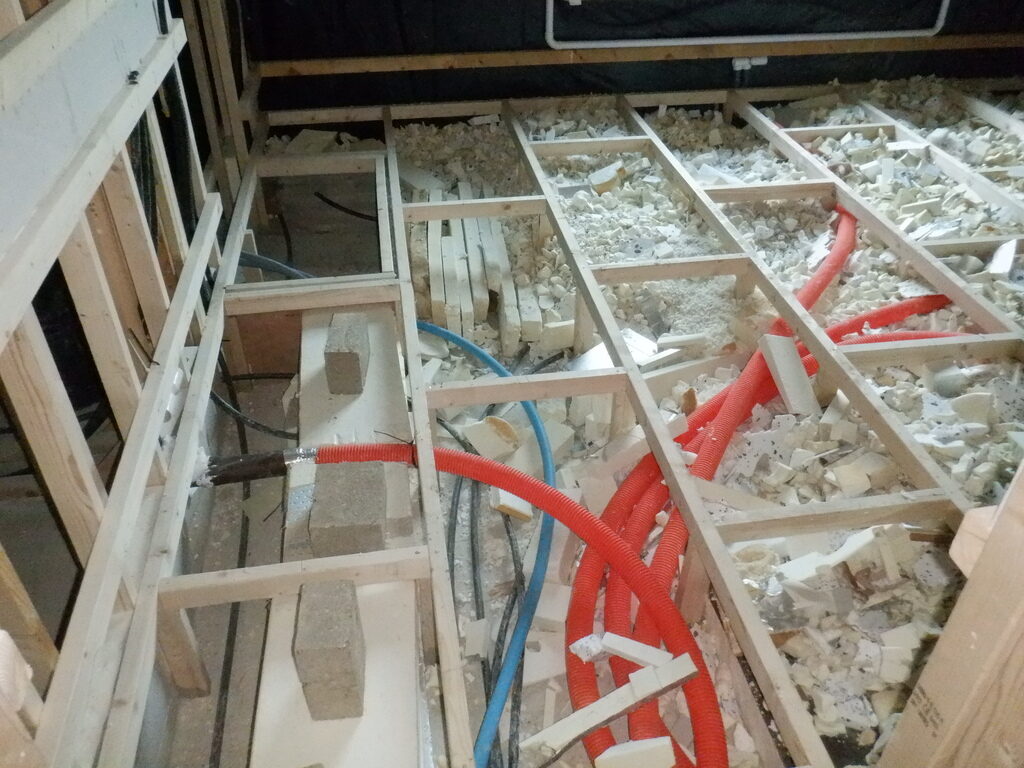
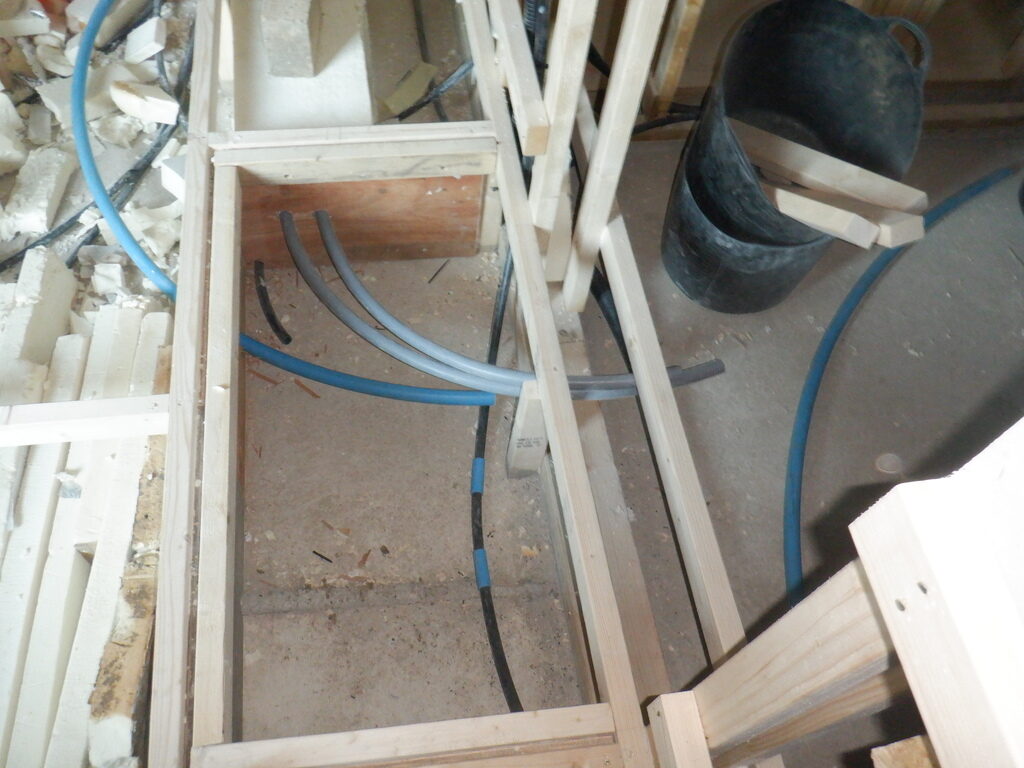
Then we laid down six sheets of OSB boards to provide a temporary floor surface for us to move around more easily and we carried on nailing up more horizontal rails all the way around the four walls like before. This forms the Utility Channel structure that allows us to route wires and cables around plus also in and out of the room. A half a dozen conduits had to be inserted into the new Utility Channel to route the cabling around windows and doorways, plus also to provide a connection to various features like the shower mixer, the vanity unit and the toilet itself. A control box provision was also created near the room’s entrance and this section will contain the computer equipment and other electrical safety devices that this bedroom will need.
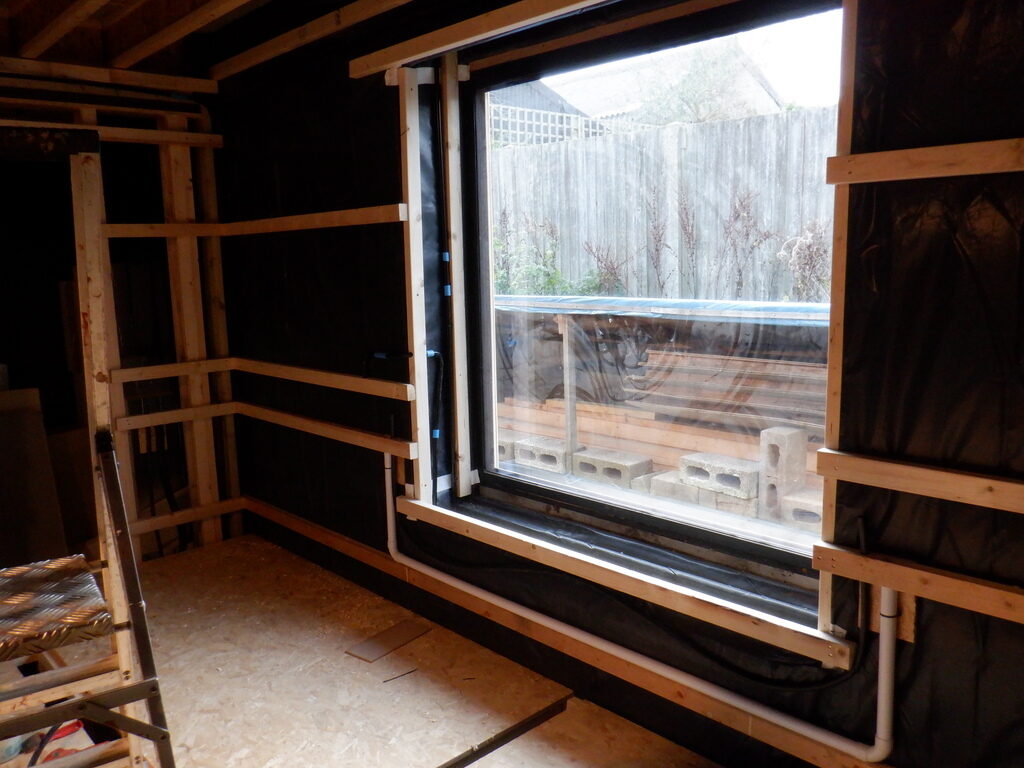
The window’s sill was finished by creating a chamber underneath the window seat that will hold a place for the window blinds mechanism and possibly a secret storage location too. Another conduit was inserted so wires could travel in and out of the window seat chamber, to the Utility Channel.
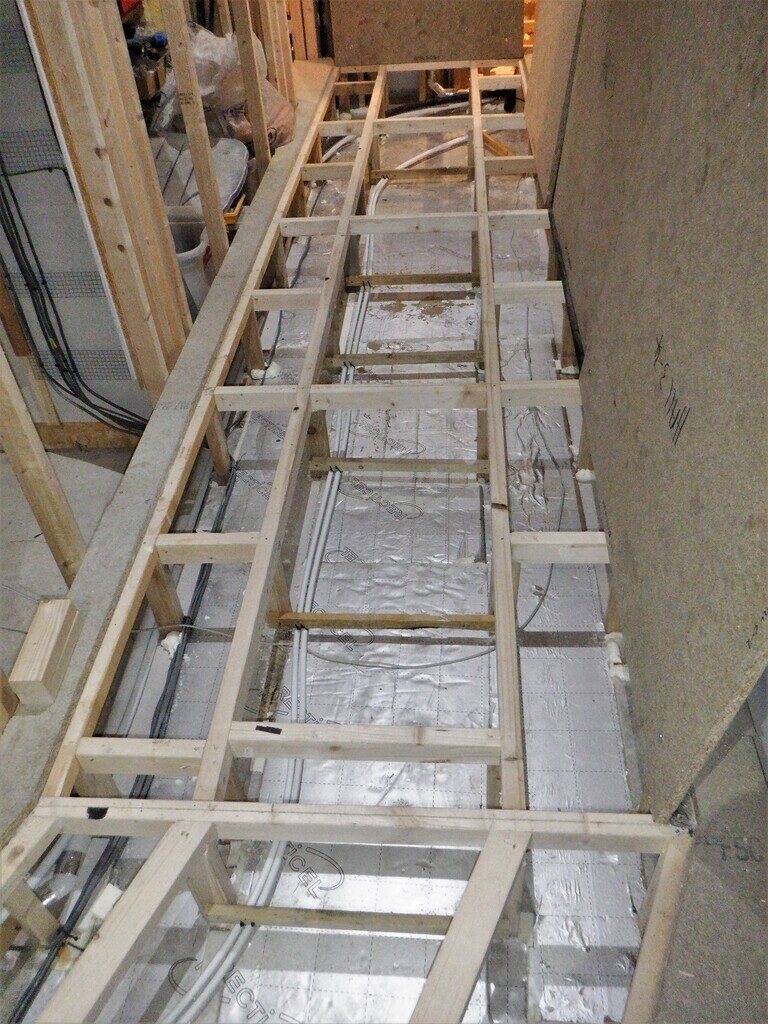
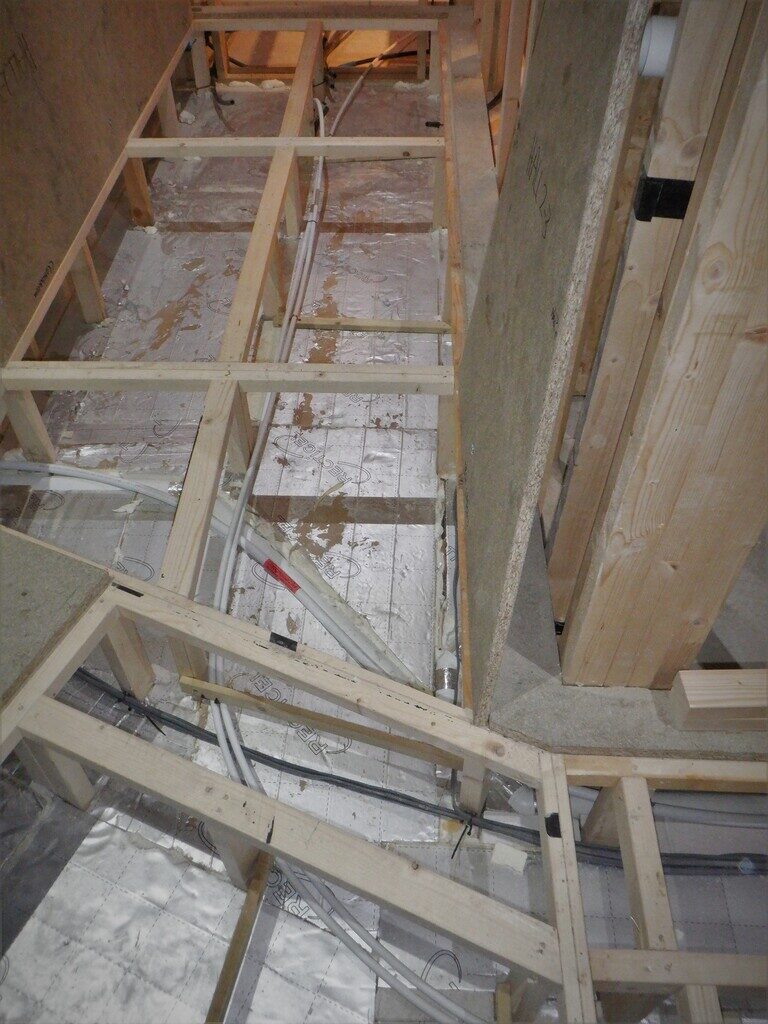
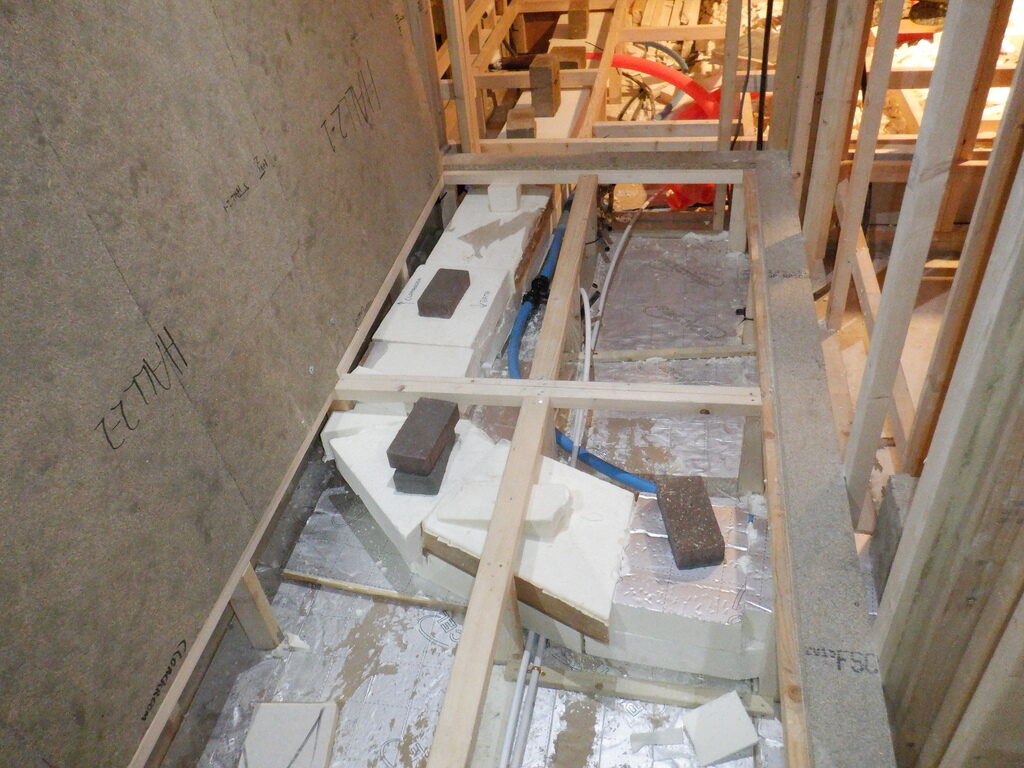
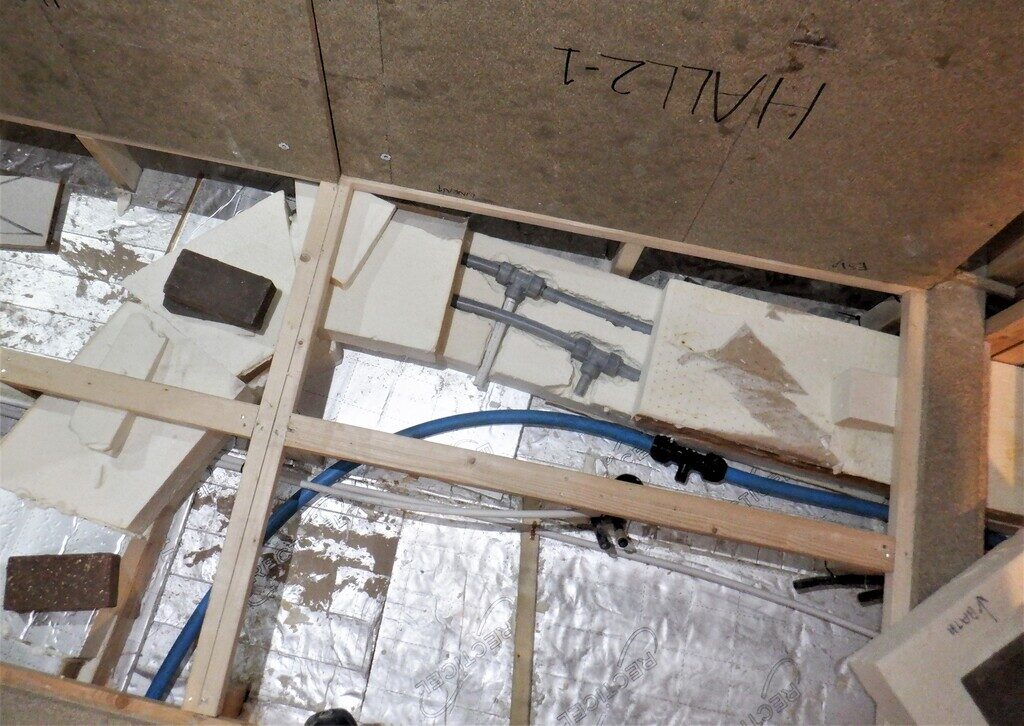
The next job was the plumbing running along under the hallway flooring. We needed to route a couple of 15mm water pipes from the Energy Module situated under Bedroom Two and travel all the way back to the Equipment Cupboard in the Utility Room in a neat manner. We screwed a regular set of horizontal battens across the middle set of legs that will do a double role of holding up the air duct but also provide a mounting point to keep the collection of plastic pipes neat and tidy using cable ties pushed through a drilled hole in the batten.
We continued in placing more conduits, this time under the flooring for things like the temperature sensors that surrounds the buried Energy Modules plus also a watering system for routing water to any hanging baskets from the gutters outside. We had to put in extra conduits from Bedroom Three to serve the ensuite because we had forgotten to make the connections when we were doing that bedroom earlier the year. Another conduit was laid in for our compressed air, to route it up to the top of the sliding door so it can power the movements of the doors. We put in a complete circuit of conduit around above the window and doors and this will contain the hearing loop wire to provide extra audio connections for deaf people. This circuit comes in and out of the control box.
Then the load of PU foam rubbish was brought in and laid down in the floor space, to provide insulation against the cold concrete, especially near the outside walls but also to provide some insulation against the buried Energy Module which will get warm during the summer and autumn months and we don’t want too much excess heat getting into the room.
We managed to completely empty our large external “bag” of rubbish bits and pieces and we now have been able to collapse and tidy away the plastic tarpaulin we used to construct the temporary bag. The alcove, situated around the back of the house, outside the windows of Bedroom One and the Great Room is now all neat, ready for us to dig a hole to install a couple of electrical junction box plus also an external mains electric socket.
Then we created four standard air dispersers, which were fixed to the bottom near the middle of each wall, then connected to flexible orange 50mm (the interior dimensions) twin-wall plastic conduit, going from each wall and back over to the doorway, ready for the main air splitter chamber.
The circulating hot water was next, to continue the twin lines of 28mm diameter water pipes coming from Bedroom Three, going across Ensuite Three, through the Bathroom, turning into Hallway Two and heading into Bedroom Two to arrive at the access chamber just outside Ensuite Two.
But first, we needed to get the waste plumbing pipework sorted for Ensuite Three and the Bathroom so we installed a boss fitting to the sewage stack, right down at the bottom nearest to the concrete, to allow the maximum amount of liquid level drop coming from the various waste outputs like the basin and the shower plus also the bath too. The shower’s waste is the critical one because we wanted to install a heat recovery system to recycle the hot energy from the waste water and put as much of it back into the fresh clean water going to the shower. To achieve this, the module will need space and time to maximise the energy transfer from the waste water to the clean water, before the waste water flows out and down the sewage stack.
So we put in a couple of 40mm waste pipes, with a gradient to make the water flow towards the sewage stack and got three connection points ready for future installations.
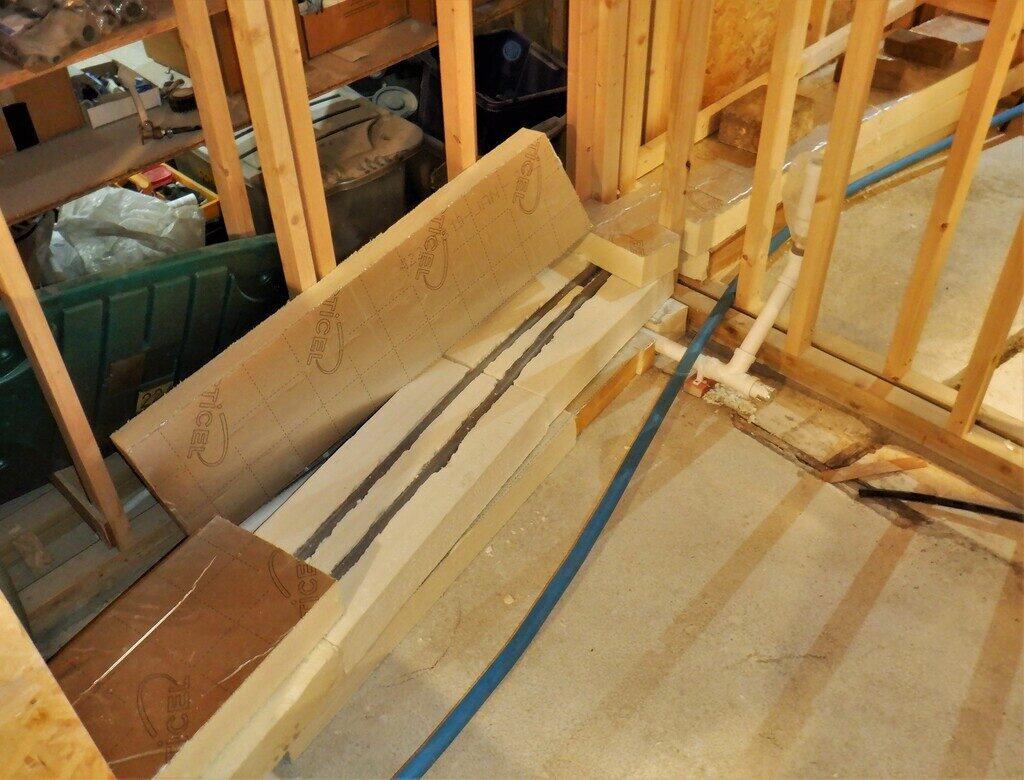
After that, we laid down a layer of 90mm thick PU foam boards going across the Ensuite and the Bathroom, 250mm wide, following the path of the Hot water. On top is another layer of PU foam, this time 100mm thick which had two grooves sliced out to encapsulate the 28mm wide plastic plumbing pipes. The path is a straight line across the two rooms but also keeping tightly to one edge so to avoid the sunken bath tub itself, where the sloping ends will be. The second layer continued into the Hallway Two section, turning towards the next plumbing destination, the ensuite in Bedroom Two. The hallway section will have many different control modules and plumbing units, having to serve plenty of surrounding rooms like the Bathroom, the Cloakroom and even to the upstairs toilet and shower too. The 28mm pipes finally continued into Bedroom Two and currently terminates inside the service chamber outside Ensuite Two. The whole lot then had a third layer of more 100mm thick PU foam to cover the plastic pipes and insulate the hot water that will be circulating continuously, to minimise the time to get any warm water coming out a tap or shower. This is very similar to a traditional central heating system and its circulation hot water and using heat exchangers or radiators to “transfer” the heat into the clean cold water or fresh air.
One of the last things we did before we closed down for Christmas was to run alongside the hot water, a cold water feed. This time we are using a bigger 32mm diameter polyethene pipe, a blue one, to provide the clean water to all the various outlets distributed around the house. It ran alongside the PU foam, following the same path and it also is currently terminates in the ensuite in Bedroom Two.
The next job when we restart in the new year, probably about the 2nd week of January after a couple weeks of holiday, is to make an air disperser unit and put in an extra electrical conduit beside the window to have ready a connection for automated curtains and lighting if we want to have such a thing.
