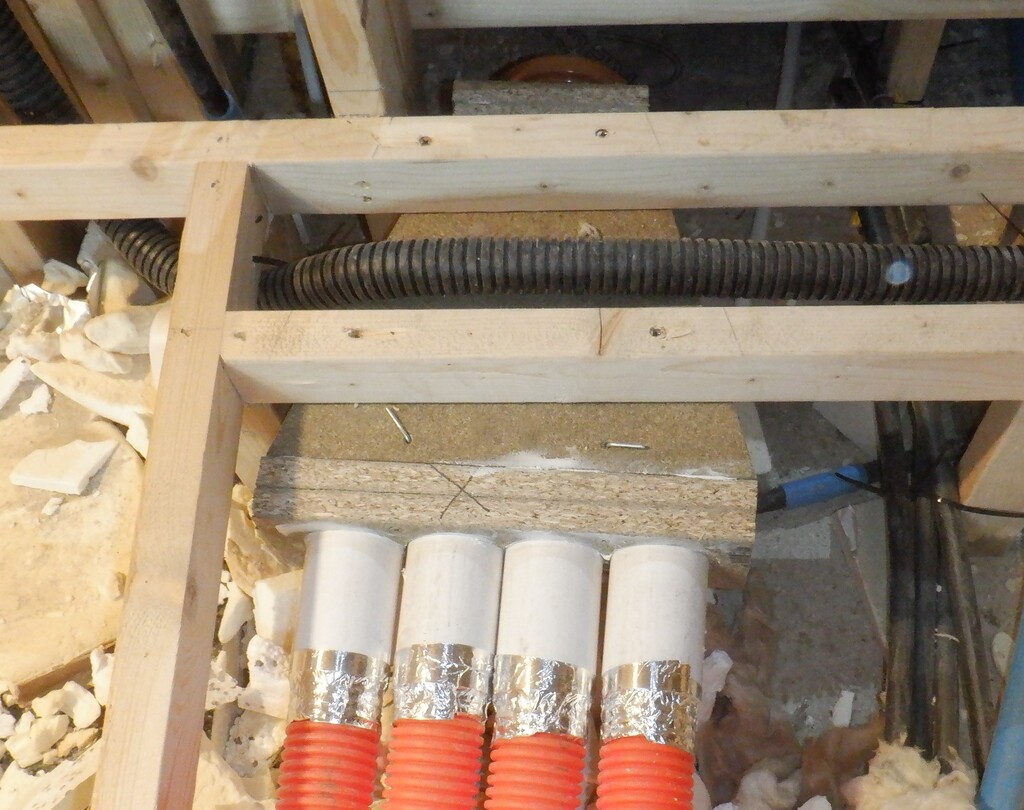
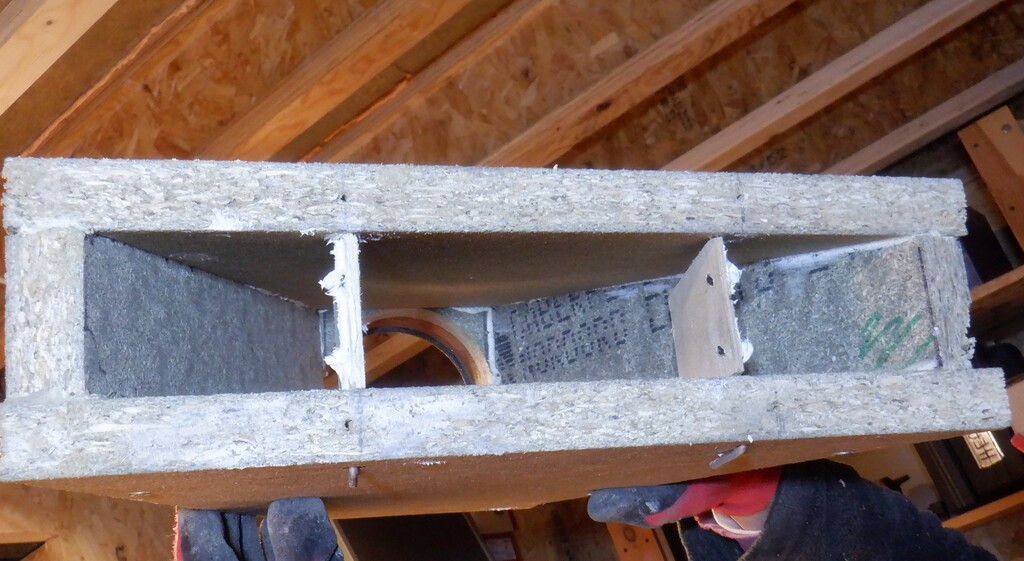
We started the new year of 2022, after we had our mini break, by resuming the construction of Bedroom Two. We needed to finish the floor and to that goal, we created our next air distributor module. Using more left-over floorboards, we made a triangular shape that takes in the incoming air through a 110mm wide socket and goes out four 50mm outlets. It measures 300mm deep so it has time to compress and spread the air out and we also included two manually adjustable flaps to deflect some of the air from the outer most outlets so we can balance the air flow down all four different length ducts to the dispersers locations.
Diverter-box-installed
Diverter-box-with-flaps
After it had an overnight of drying and curing, we installed the module in the doorway and then connected up the four orange 63mm flexible ducts and we tested it. Using our mobile Air Generator, we blasted air into the distributor module and out at all four wall dispersers and measured the air flow rate coming out the two sideway facing tubes. With the Air Generator running at maximum speed, we were getting values of 40km/h for the shortest conduit length and 30km/h on one of the longest lengths. We noticed that the rate coming out of the right and left arms of the disperser were not exactly the same which was curious, must be something to do with the way air twirls inside the conduit etc but it did seems to be always the right arm having the higher rates. Anyway, we turned down the fan to its minimum speed to get closer to “normal” flow rates, and then we balanced as best as we could by adjusting the two flaps so all four dispersers were outputting approximately similar air flow rates. Even this test, the air flow rate being used here, is far more than what will be the everyday background rates as for example, this bedroom is about 36 cubic metres of air and we desire about 1 complete room change of air for every hour. That means 36 cubic metres or 36,000 litres of air need to flow in (and out) of the room per hour, this means 10litres per second in total going into the distributor module but splits up into our eight dispersers which means approximately 1.5litres per second for each arm. Our test we did today actually had about 12litres per second of air coming out of each arm and that was the lowest fan speed and it was only a gentle breeze coming out. This means that to satisfy our requirements of 1 room change of air per hour, the air flow is going to be very very gentle indeed for our background flow rates but we can increase the rate when we need to, perhaps to remove solar heat coming in our large windows.
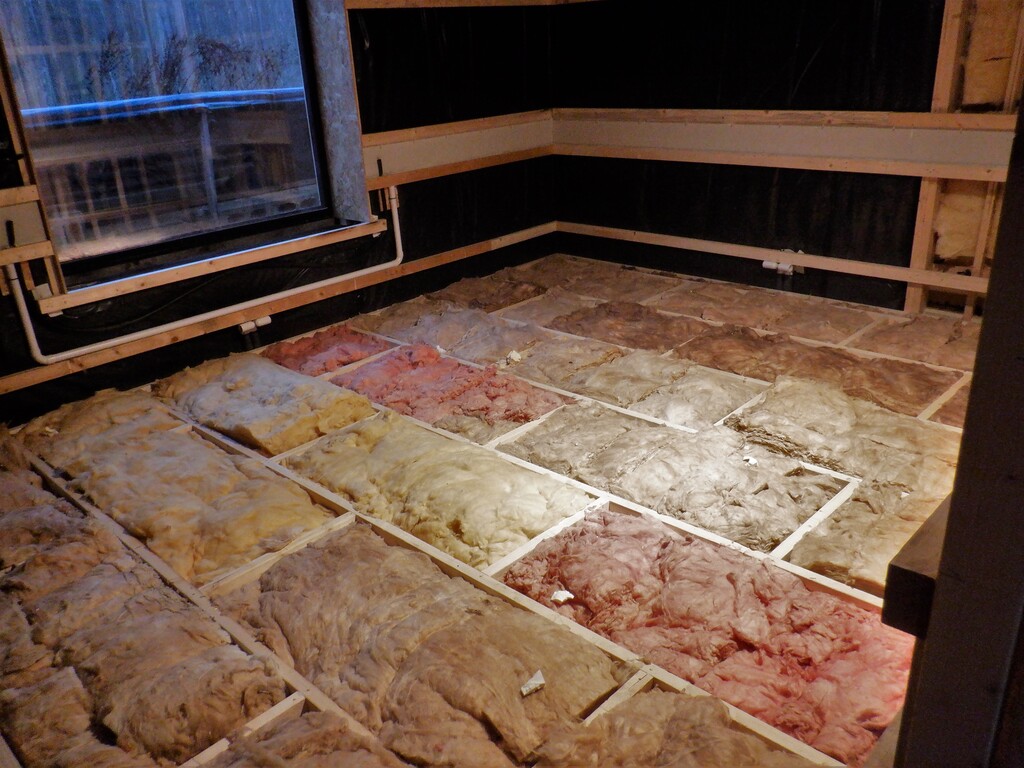
After all that mathematics, we got back to the nitty gritty work of putting in horrible glass wool insulation into the floor space to fill up the remaining air volume above the PU foam rubbish. We used all our left-over chunks of rock wool we had lying around for years and spread it out so it fills it up to touch the underside of the floor boards when it goes down.
Final-floor-insulation
Then we had to grab 14 more sheets of our 22mm thick floorboards from our outside piles under the tarpaulin but we discovered that our tarpaulin, even though it was double layered, was letting a small amount of rain water through and wetting our chipboard floorboards. It is quite annoying and it is so difficult to keep such material dry. We pulled off our 14 sheets we will need and even though it is wet, it doesn’t look too bad. we used our trolley to transport that load into the house via the front door and laid them all out all over our hallways to dry off overnight before we actually laid them down. We have two sheets that has been indoors for a few months since doing the hallways and we will compare them.
The main pile outside, we put on two more fresh plastic sheeting to try to reduce this water problem and also we laid down a sacrificial OSB board to act as a protective layer to stop sharp claws from birds and cats in making holes in our plastic tarpaulin but we have decided that we will have to move the entire stack all into the house as soon as we have finished Bedroom Two.
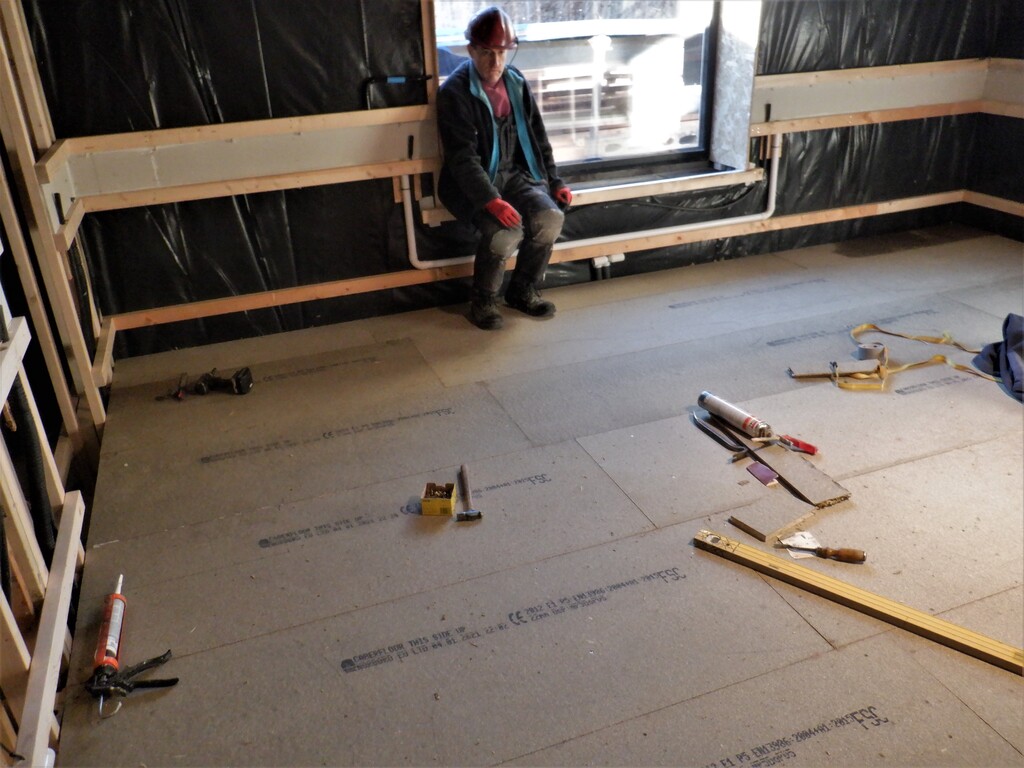
Anyway, we proceeded to cover the floor with these 22mm thick chipboard sheets, needing just over two lengths to do each row.
We got it all done but it was noticeable that some of the boards had small swollen sections caused by the rainwater so we will have to sand the whole floor later on to smooth it off and get it ready for the future underlay and carpets.
Bedroom-2-Floor-installed
The next job we tackled was to start building the wall finishing layers, including the air channel running around at the bottom. We inserted a line of 150mm high MDF 6mm thick cut sheets to provide a chamber for the air to flow along sideways and drift gently into the room. We did have to make some adjustments to the air disperser because it needed to sit further backwards and avoid being squashed by the main OSB boards when those are mounted on the framework. The disperser under the window was especially tight and we had to split into the vapour barrier membrane and remove some of the glass wool and even a bit of the PU foam insulation too. We recovered the slit with another layer of the black plastic and resealed it with our conformable extra sticky tape. Then we inserted two vertical pieces of plywood behind the CLS horizontal rails around the air disperser and then a 25mm thick batten piece to anchor the disperser back into place.
Then we continued inserting our MDF pieces and completed all the round the whole room, just skipping pass the two doorways, and cutting small rectangle holes to let the air dispersers through. Finally, the top and bottom edges were sealed using black modified silicone glue to both fix the board into place but also to seal it against any air leakages.
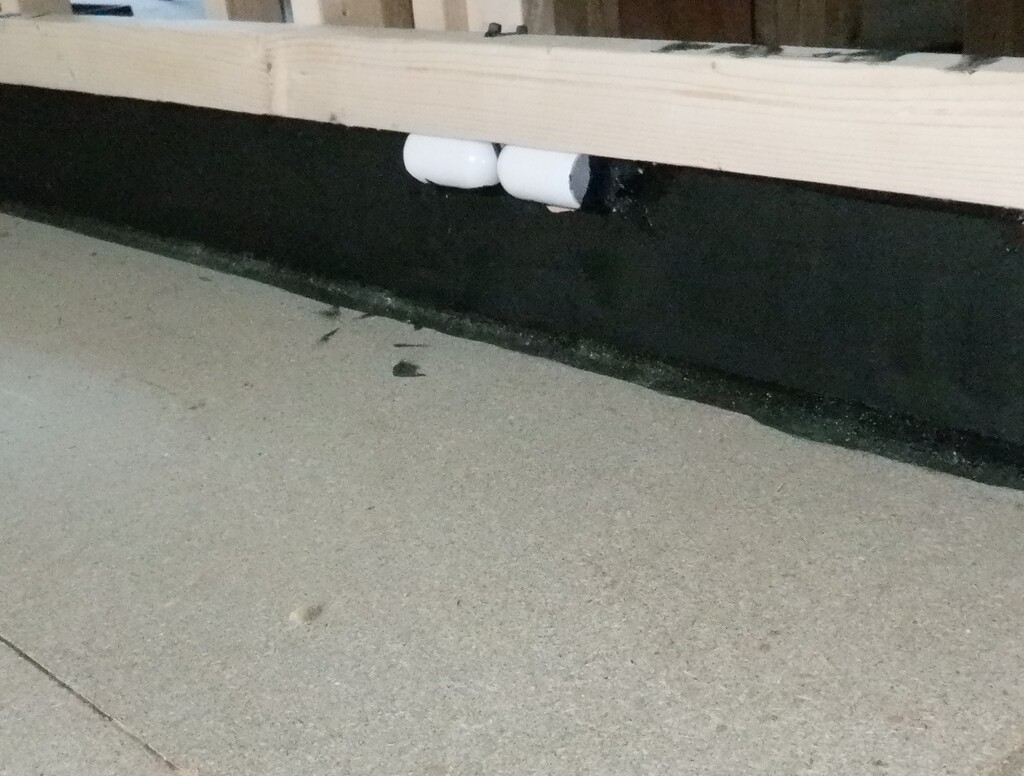
Air-channel-installed-and-painted
While we waited for the black sealant to dry and cure, we got on with the two remaining walls inside the Tech Cupboard, putting more 18mm thick OSB sheets. Then, we glued and screwed a collection of 63mm CLS timber pieces around the circumference of the little room at the floor level, then put in two cross rails going front to back and finally put in three further cross rails but this time going side to side, all glued and left to dry and cure overnight.
We nicked one of the floorboards we had lying in our Utility Room, acting as a temporary floor covering so we swopped that one with our left-over rather damp one and use the good one to put in the flooring inside the cupboard, cutting around the metal leg of the Skylight and making room for the cables running down the walls and down under the floor.
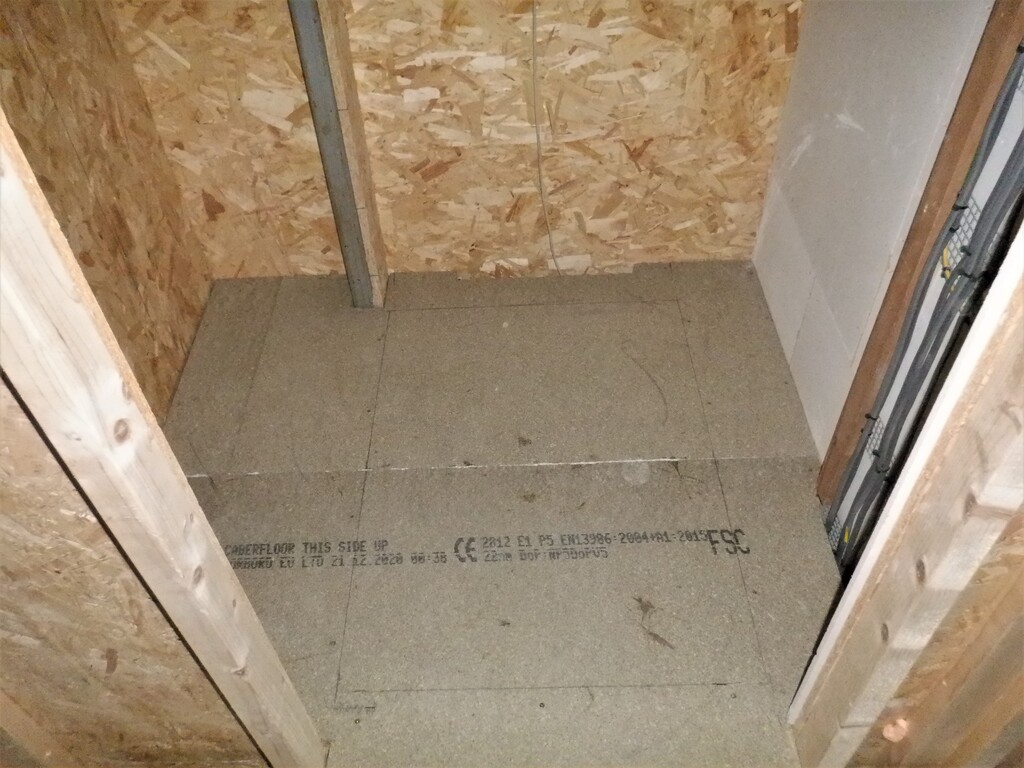
Tech-cupboard-floor-laid
We went back to Bedroom Two, continuing with the walls by applying black paint along the bottom of the Air Channel to hide any bright gleam when the carpet is laid down. Next, and finally for the week, we put up two rolls of 100mm thick glass wool insulation and inserted layers inside the structure of the walls between Bedroom Three and Bedroom Two, providing more sound insulation, followed by horizontal strips of the wool insulation to fill the gap up between the horizontal rails, to also reduce any hollow sounds too.
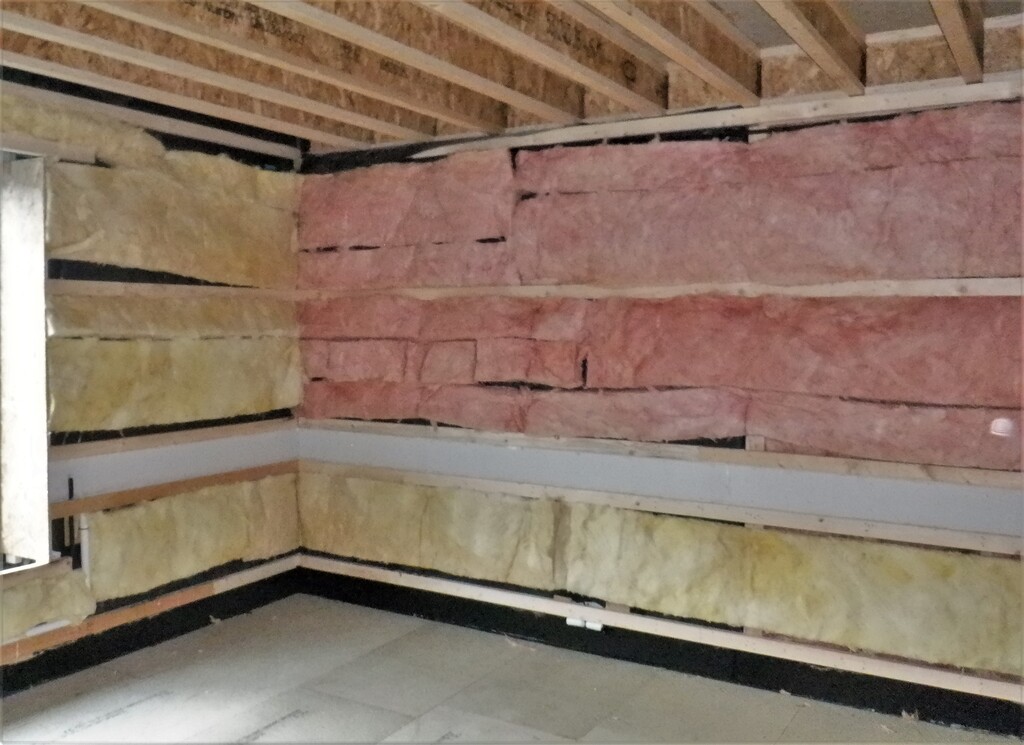
Final-insulation-in-wall
We ran out of 100mm thick wool so we will need to order some more rolls to finish off this room but also to fill in all our other rooms too. That will take a few days to arrive so we will get on with the next job of putting up some of the wall panels that have a complete coverage of the glass wool like on the window wall and one of the short walls or we continue with our software and hardware development.
Leave a Reply
You must be logged in to post a comment.