While we still wait for our cheap insulation foam rejects to arrive, we got on with doing the Entertainment Room, which is our last ground floor room that we haven’t done yet. The Entertainment Room already has an internal walls and a ceiling, made using concrete blocks and suspended beams respectively. So, after emptying all our use full stuff ( i.e. “junk”) out (and putting it all in our Great Room and Kitchen), we proceeded to survey the state of the concrete walls, to see how flat and straight they are. They do wiggle in and out a little bit, according to our green laser line generator. We set the laser on the floor, right at one end of the wall and positioned it 50mm away from the surface. Then, adjusted the angle of the laser until we also have the beam just 50mm away from the surface at the other end of that wall. We did spot checks all over the surface to find how well, or badly, the individual blocks were set. We did this same procedure for all four walls and the results are as follows:
- Large wall opposite the doorway: minimum=36mm and maximum=52mm
- Left wall opposite the window: minimum=37mm and maximum 51mm
- Doorway wall: minimum=32mm and maximum=50mm
- Window wall: minimum=34mm and maximum=50mm
Some of the worse offending blocks were in the upper corner where we were finishing off a row and near the top as well, and we couldn’t keep it straight. But it is not that bad, so we can handle that by putting spacers behind all the horizontal rails as we screw them into the concrete blocks.
The room is 4.75metres long and 3.78metres wide (approximately 15½ feet by 12½ feet) and we took careful note of where the joints between concrete slabs were, and decided that we would run eight long rails to minimise wastage and offset the first rail 400mm from the doorway side of the room, and then the usual 600mm spacing after that, terminating with a 300mm gap to finish off. The Energy Module is located about 3100 to 3200mm from the window wall and we want to make sure that we can build a small liftable hatch so we can service the equipment and inspect the underground tank via its inspection port. We have gone for a regular 600mm spacing along the long direction which will avoid all the joints in the floor slab.
We cut two CLS planks to fit across the narrow sides of the room, marked off the rail positions (starting from that 400mm point and multiple 560mm after that one), drilled a set of 6mm holes in between those marks and making sure that we avoided the air disperser location which will be in the middle of the plank and we don’t want a screw going through our plastic module. We set up the laser in the middle of the room and set the height of our flooring framework to be at one block level, which is about 225mm, instead of the usual 378mm. We have decided to lower the floor level inside our Entertainment Room because it has already an lowered ceiling (the sound dampening concrete block and beam construction) so to make the room feel not so claustrophobic and maintaining the same 8feet clearance, we lowered the floor as well by six inches. There will be a slope built at the doorway so there won’t be any sudden steps etc. just a slope which will stretched out some two feet, starting from the Hall side of the doorway and stick into the room by about 400mm, to make is more friendly for anyone but especially for wheelchair users too.
The next job is to cut four cavities into the concrete blocks themselves, to allow for our air dispersers to be routed from underneath the flooring and bypassing the floor joist and let the air into the Air Channel. We used a diamond cutting disc to slice 50mm into the block and then chiselled out the chunks. We made it 120mm wide to make room for the twin plastic pipes to fit. We will also spray some PU foam to help stick it into the wall and insulate it a bit from the cold concrete blocks. The slot is about 250mm high and it was very very dusty, generating a huge cloud of grey concrete dust. We were wearing very good dust masks thank goodness!
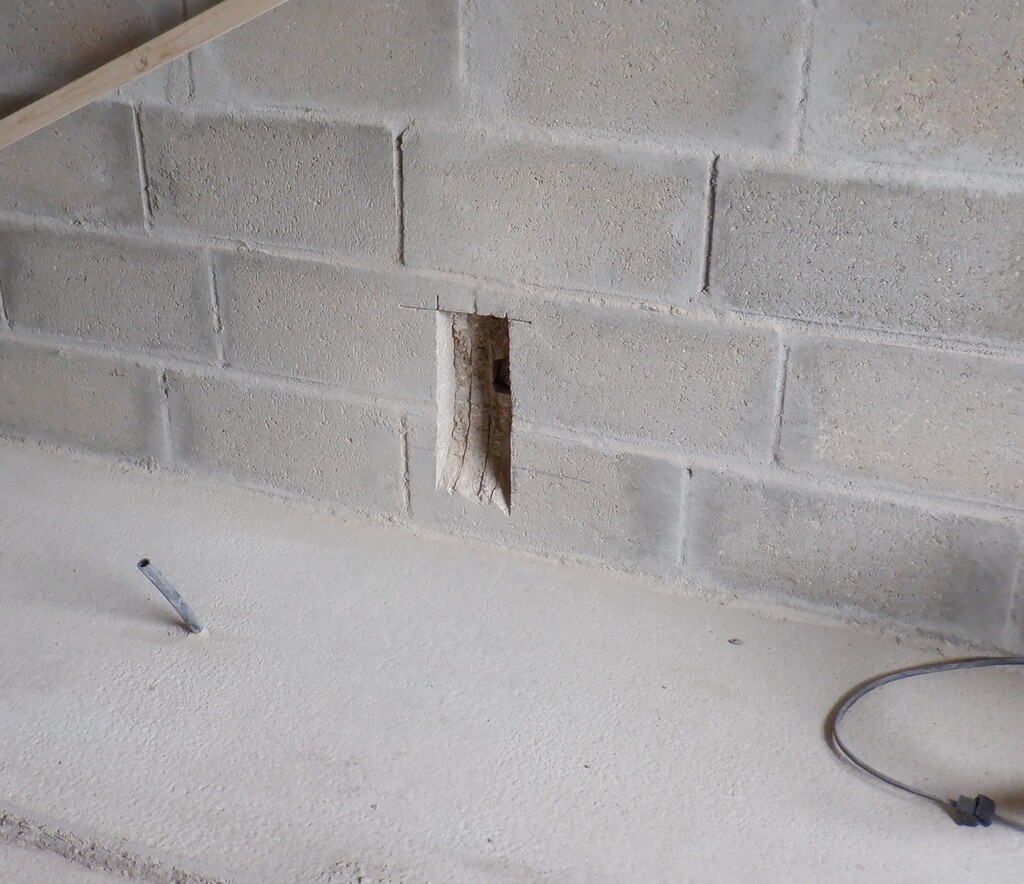
Channel-hacked-the-the-Entertainment-wall
We also made the four dispersers as well, doing the usual method of trimming down the elbow corners and gluing it all together. So we could test the new slots to make sure that they had room to fit properly.
We went around drilling all the necessary holes in the concrete walls for all four sections of the floor joist support batten, putting in a 7mm plastic wall plug and screwing it down tight using 100mm long 6mm screws whilst putting the air distributers in. We also put on a large washer to help spread and grip the wooden pieces tight to the walls, especially that we had a larger clearance holes through the wood so we could tap the joist a bit up or down, to get it as accurate as possible against our green laser line level.
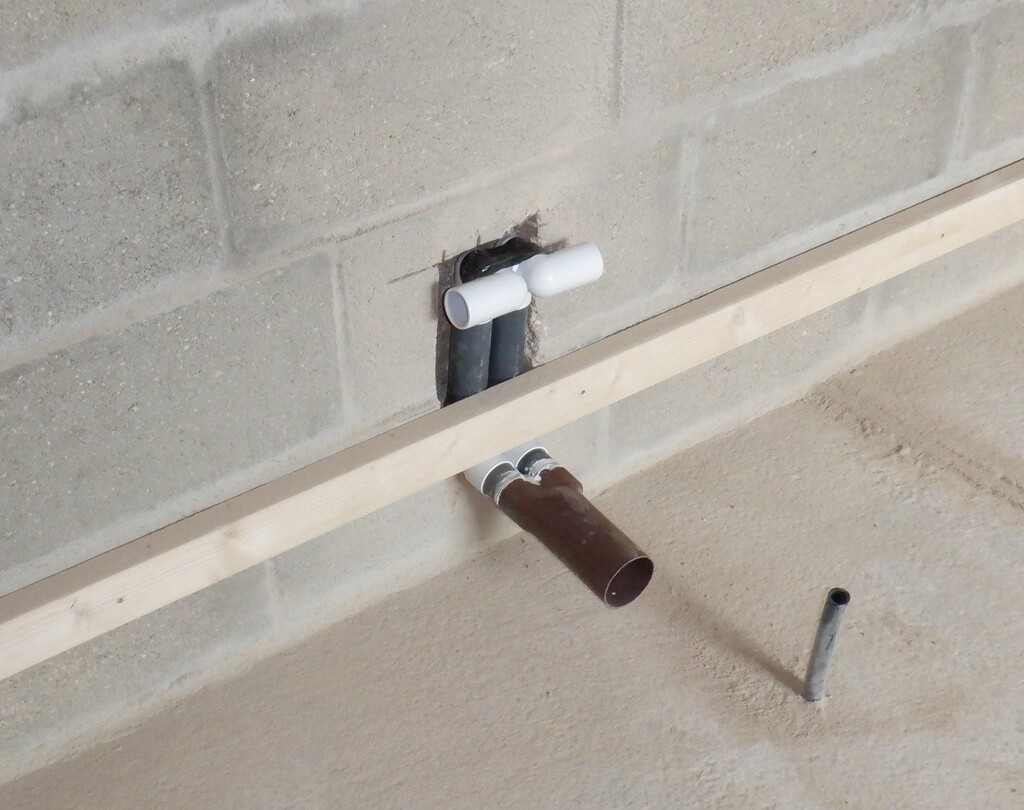
Air-distributer-in-the-channel
Next, we chopped up 62 legs that the whole floor will need, with 19 of them having one corner sliced off to allow for the mortar on the bottom of the walls. All of them were then dipped in our coloured timber preservative liquid, to make sure that the timber will last for decades, even if we had a water leak so it won’t affect the wood.
Then, we started by the doorway and put in the first rail at 360mm spacing and cut a piece 4665mm long and put in seven legs along its length and two specials for the ends. Using this rail, we then built the ramp for the doorway using three pieces of CLS timber, with angles cut on their ends to connect to the bottom rail and also joining up onto the hall framework too. We also put in trimmed filling in pieces in between these sloping rails, with the surface planed so it matches the slope in general, so that the top and bottom edges of the ramp will be fully supported. Finally, we stuck in two additional legs to help support the two outer sloping rails so the joints will not creak in the future. We topped the whole thing off by laying down a floorboard piece, measuring 880mm wide by 590mm long, with a shallow 18degree angled cuts for the top and bottom edges so that we don’t end up with gaps in our flooring.
Then, we continued with mounting the rest of the floor joists, six more rails, each having seven legs under each one and we got that all done, including the horizontal noggings every 1200mm.
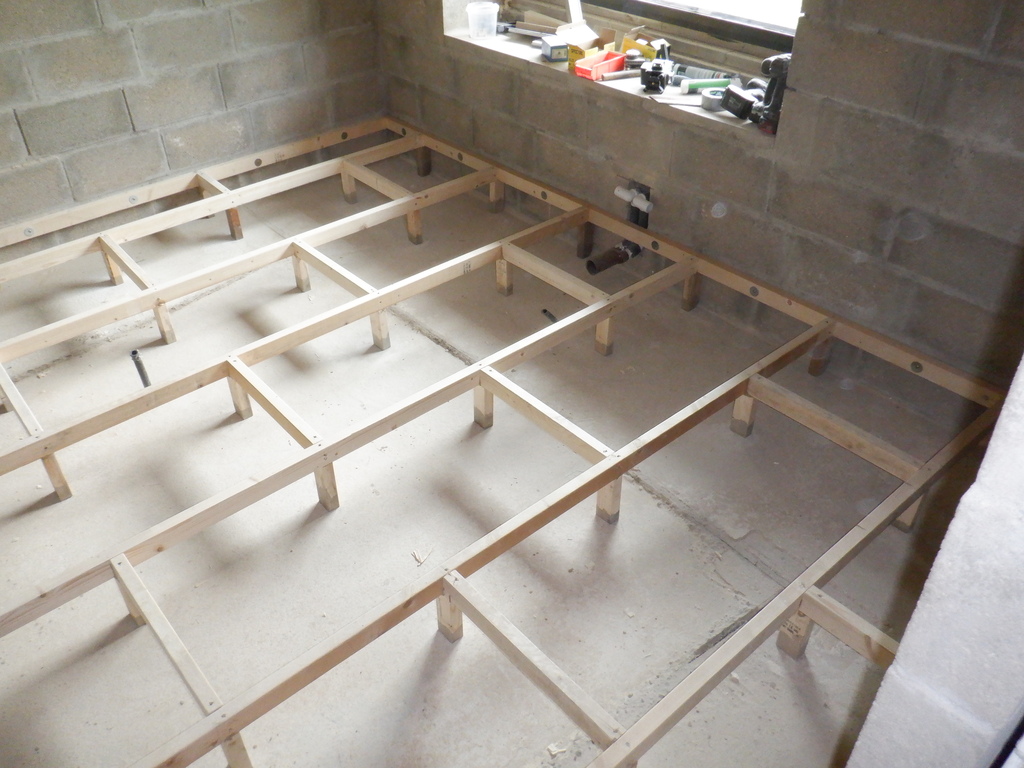
Entetainment-Floor-grid-1
Entetainment-Floor-grid-2
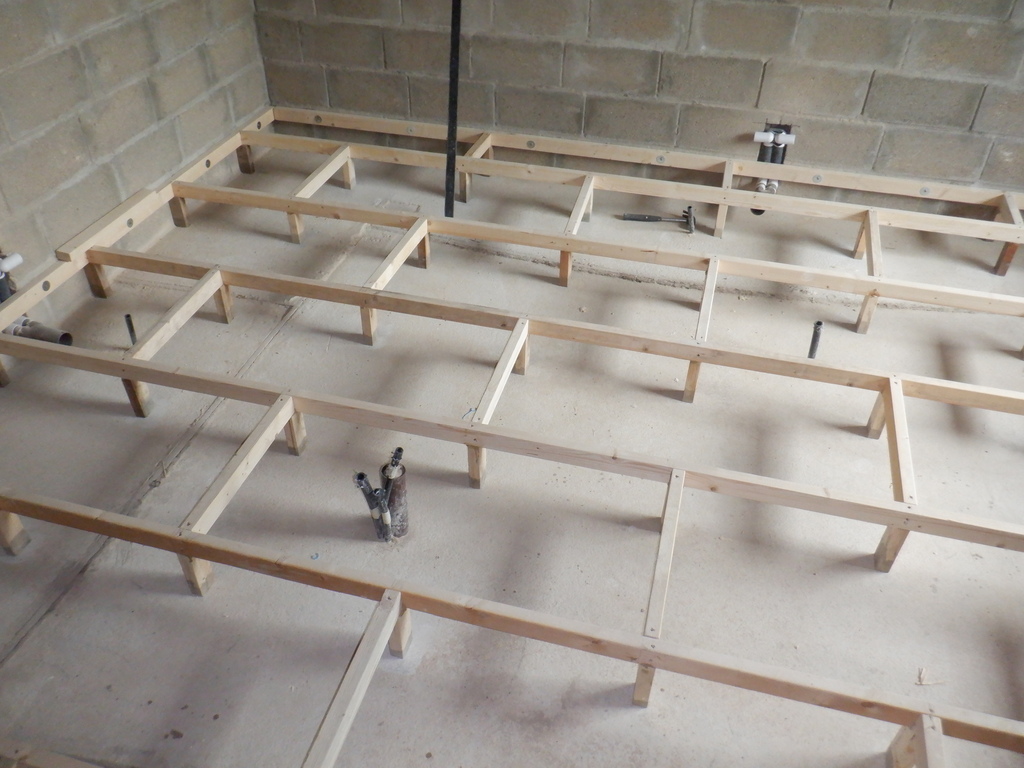
Next, we built a box around the Energy Module collection of pipes and conduits coming out of the concrete floor slab so we put in four plywood pieces around the four sides, lined the bottom with 50mm of PU foam and put in additional rail around the top edge so our lid can sit on something solid.
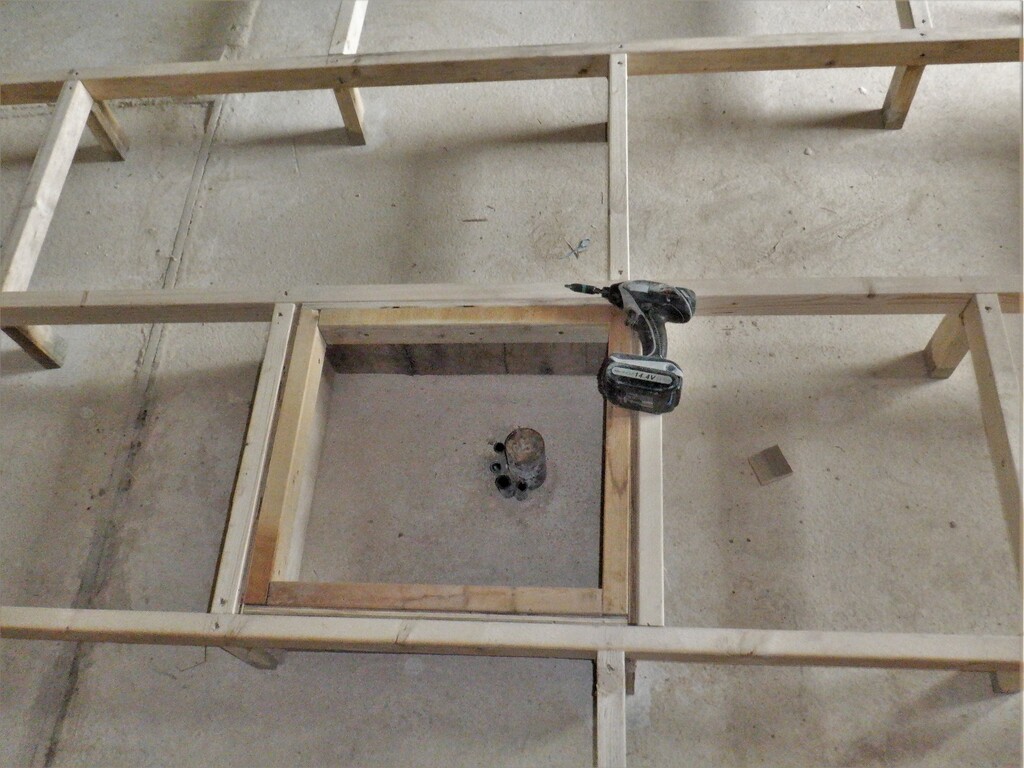
Energy-module-equipment-box
The conduits for the temperature probes were threaded around the legs and framework so that all four of them were routed over to the plumbing box and poked through the plywood sides, ready for threading the actual temperature sensors down the conduits and measure the state of of the environment around and inside this Energy Module.
The filling pipes were fitted, being 15mm water pipes, and they were routed towards the hallway. This meant that we drilled a couple of 65mm diameter holes through the concrete blocks and pushed in some short length of pipe insulation to protect the energy in the water when it is transferred from inside the Energy Module and the Utility Room.
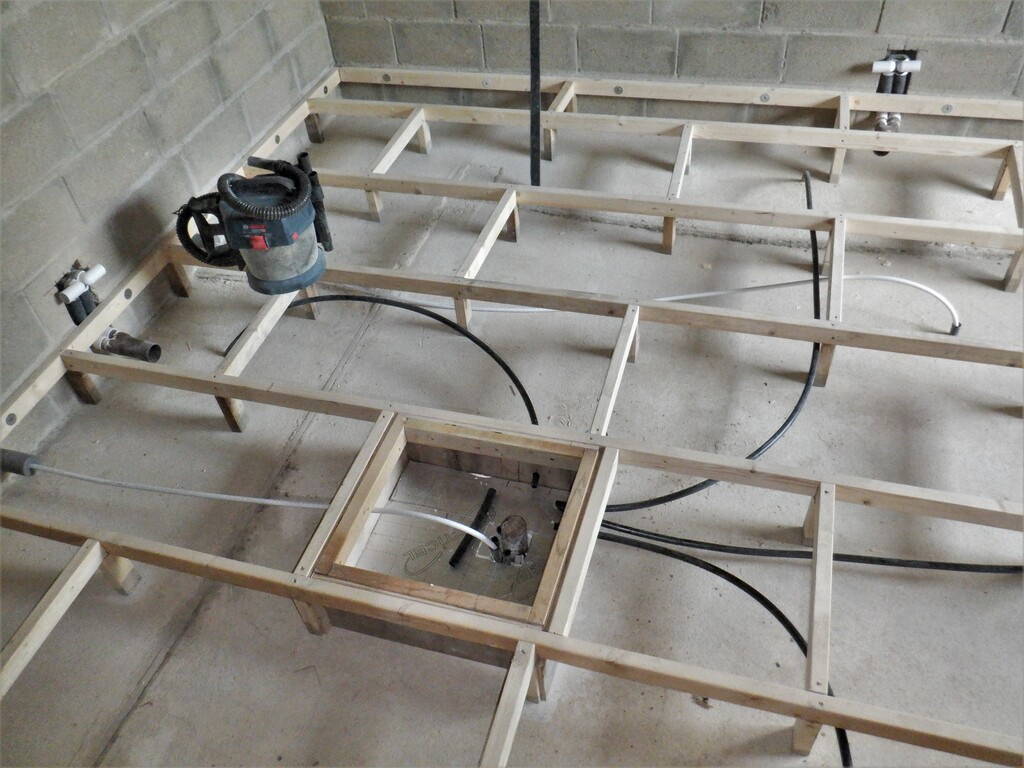
All-the-pipes-and-conduits-in-place
Then, we built another air distributor module to be connected to a 100mm feed off the main air duct back in the Hall, coming down the hall towards the front door and then turning into the Entertainment Room under the doorway itself. The distributor module is the usual affair of one 100mm input pipe, being squeezed and spread out to four 50mm connections, to be sent around the room.
Oh yes, we just remembered that we needed a data conduit to be fitted to our central plumbing box and routed the other end out in the hallway under the doorway. This will allow us to feed a couple of cables through to connect our house network and provide electrical power to the little computer that is monitoring the vital signs of our buried Energy Module.
This concludes all the bits and pieces going under the floor so we loaded in two layers of 200mm thick glass wool strips, laid flat. These strips would be 400mm high but when laid down, they only just came above the wooden rails which is 235mm off the floor, which is good to provide a much better sound absorbing layer.
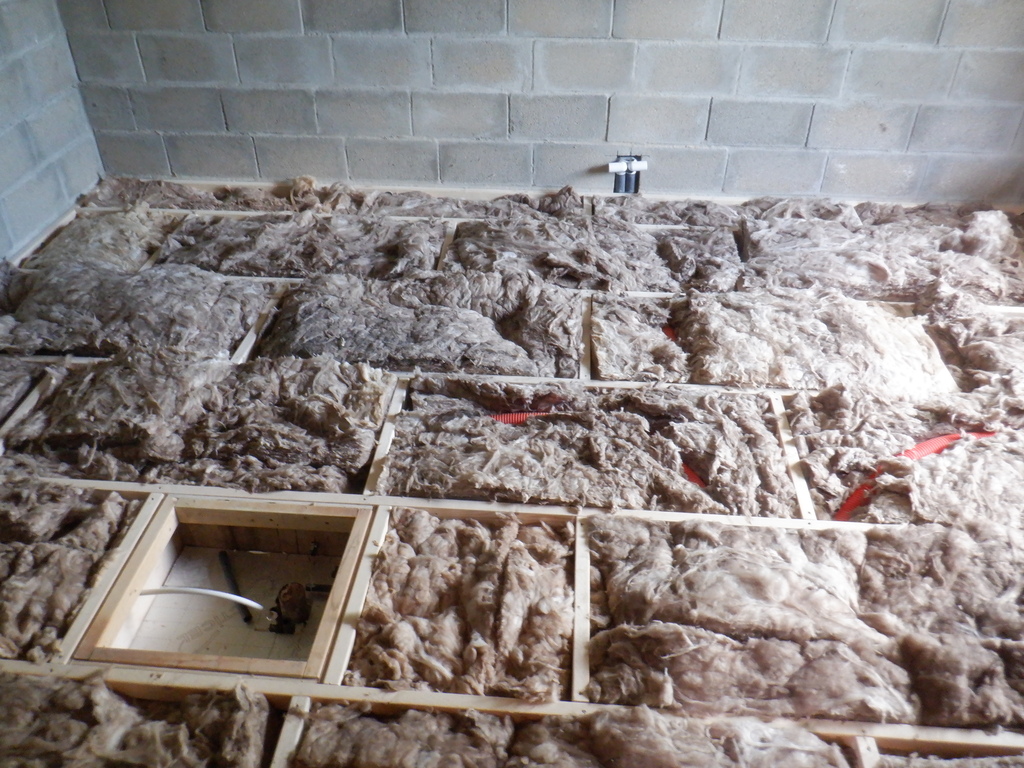
Insulation-in-the-floor-1
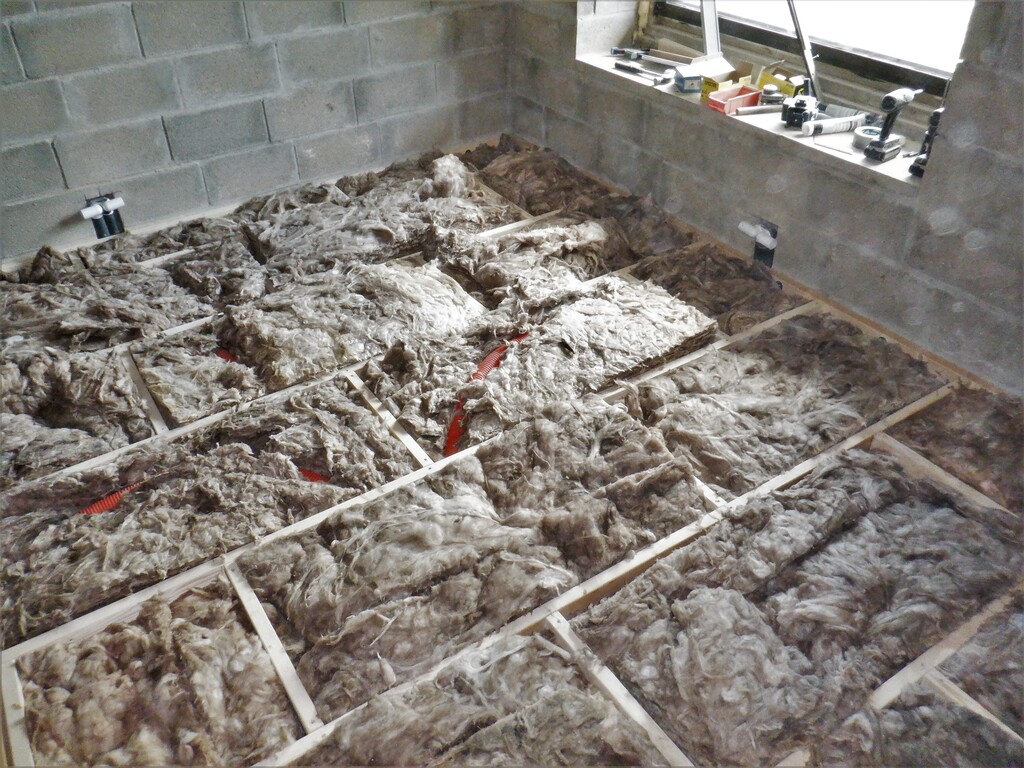
Insulation-in-the-floor-2
Now, we went ahead and laid down the 22mm thick floorboards, starting left of the doorway and worked our way across the room towards the window. The floorboards were glued and screwed down nice and solidly. The width of the room meant that we had to throw away fairly large pieces especially when we came to the ramp where we decided to start over again with a full length board, to make sure that the floorboards in the doorway is well supported.
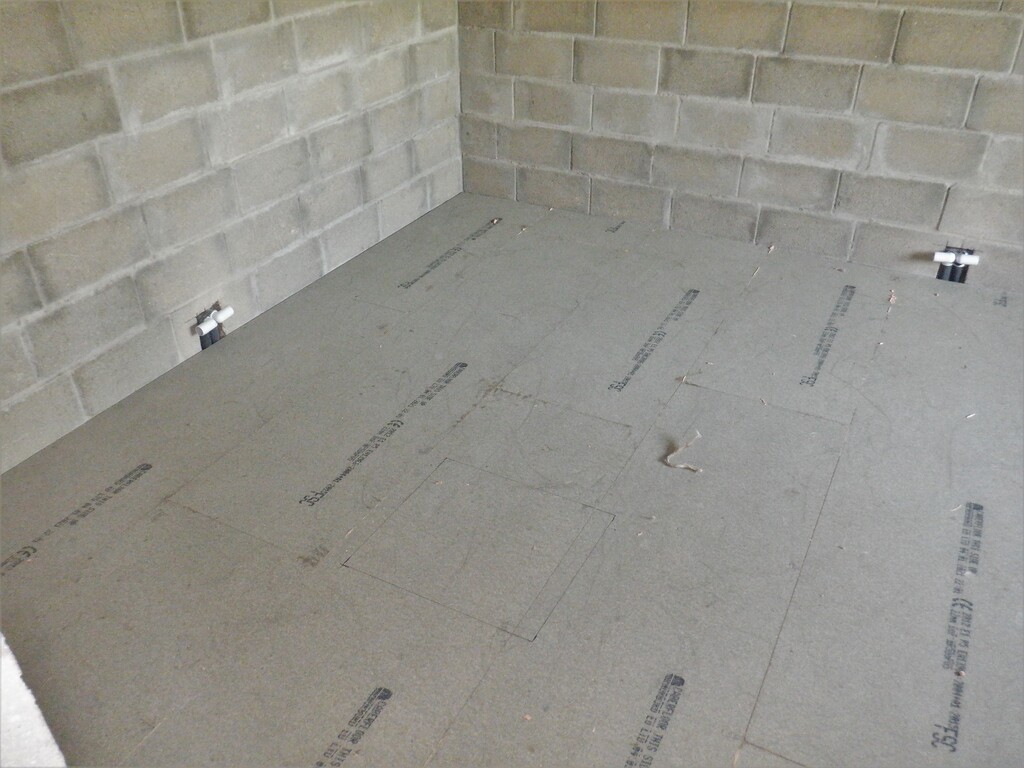
Enetertainment-room-floor-finished-1
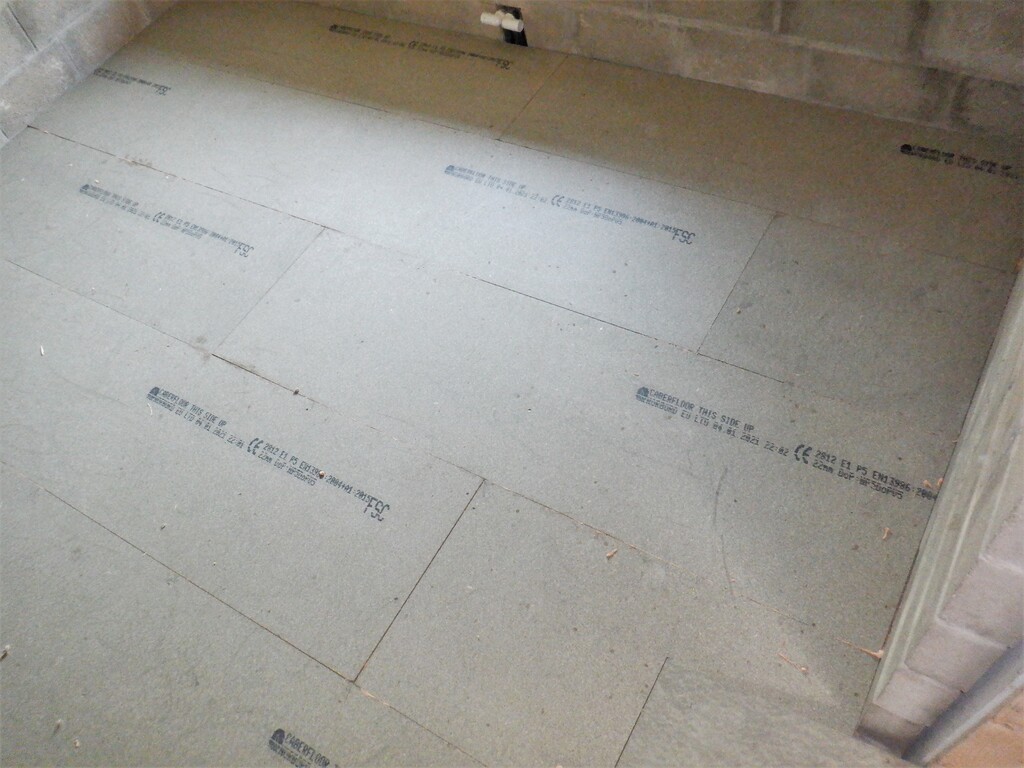
Enetertainment-room-floor-finished-2
This concludes this stage of building the Entertainment Room, we will carry on with putting up the wall rails, getting them levelled and flat including putting in the Utility Channel and the OSB wall boards and may even get the ceiling done too.
Leave a Reply
You must be logged in to post a comment.