Category: Temperature Probes

  • Overhanging Roof Panel and Felt Repair

     Today, we tackled a bigger problem with the overhanging roof section along the front of the temporary living quarters, especially over our front door! The wooden sheets that makes up the roofing structure has disintegrated in two particular sections. One larger one over the aforementioned front door overhang, and a much smaller section half way along the roof line. It is another example of the original roofing felt failing under the onslaught of the sun and allowing the water to get in and rot the wood underneath.

    We had to saw away a large section to get back to reasonable sound quality wood and replace it with a new fresh piece of a 11mm OSB board. That was a piece measuring 4 feet wide by 20 inches deep. The smaller section was only 2 feet wide by a foot deep.

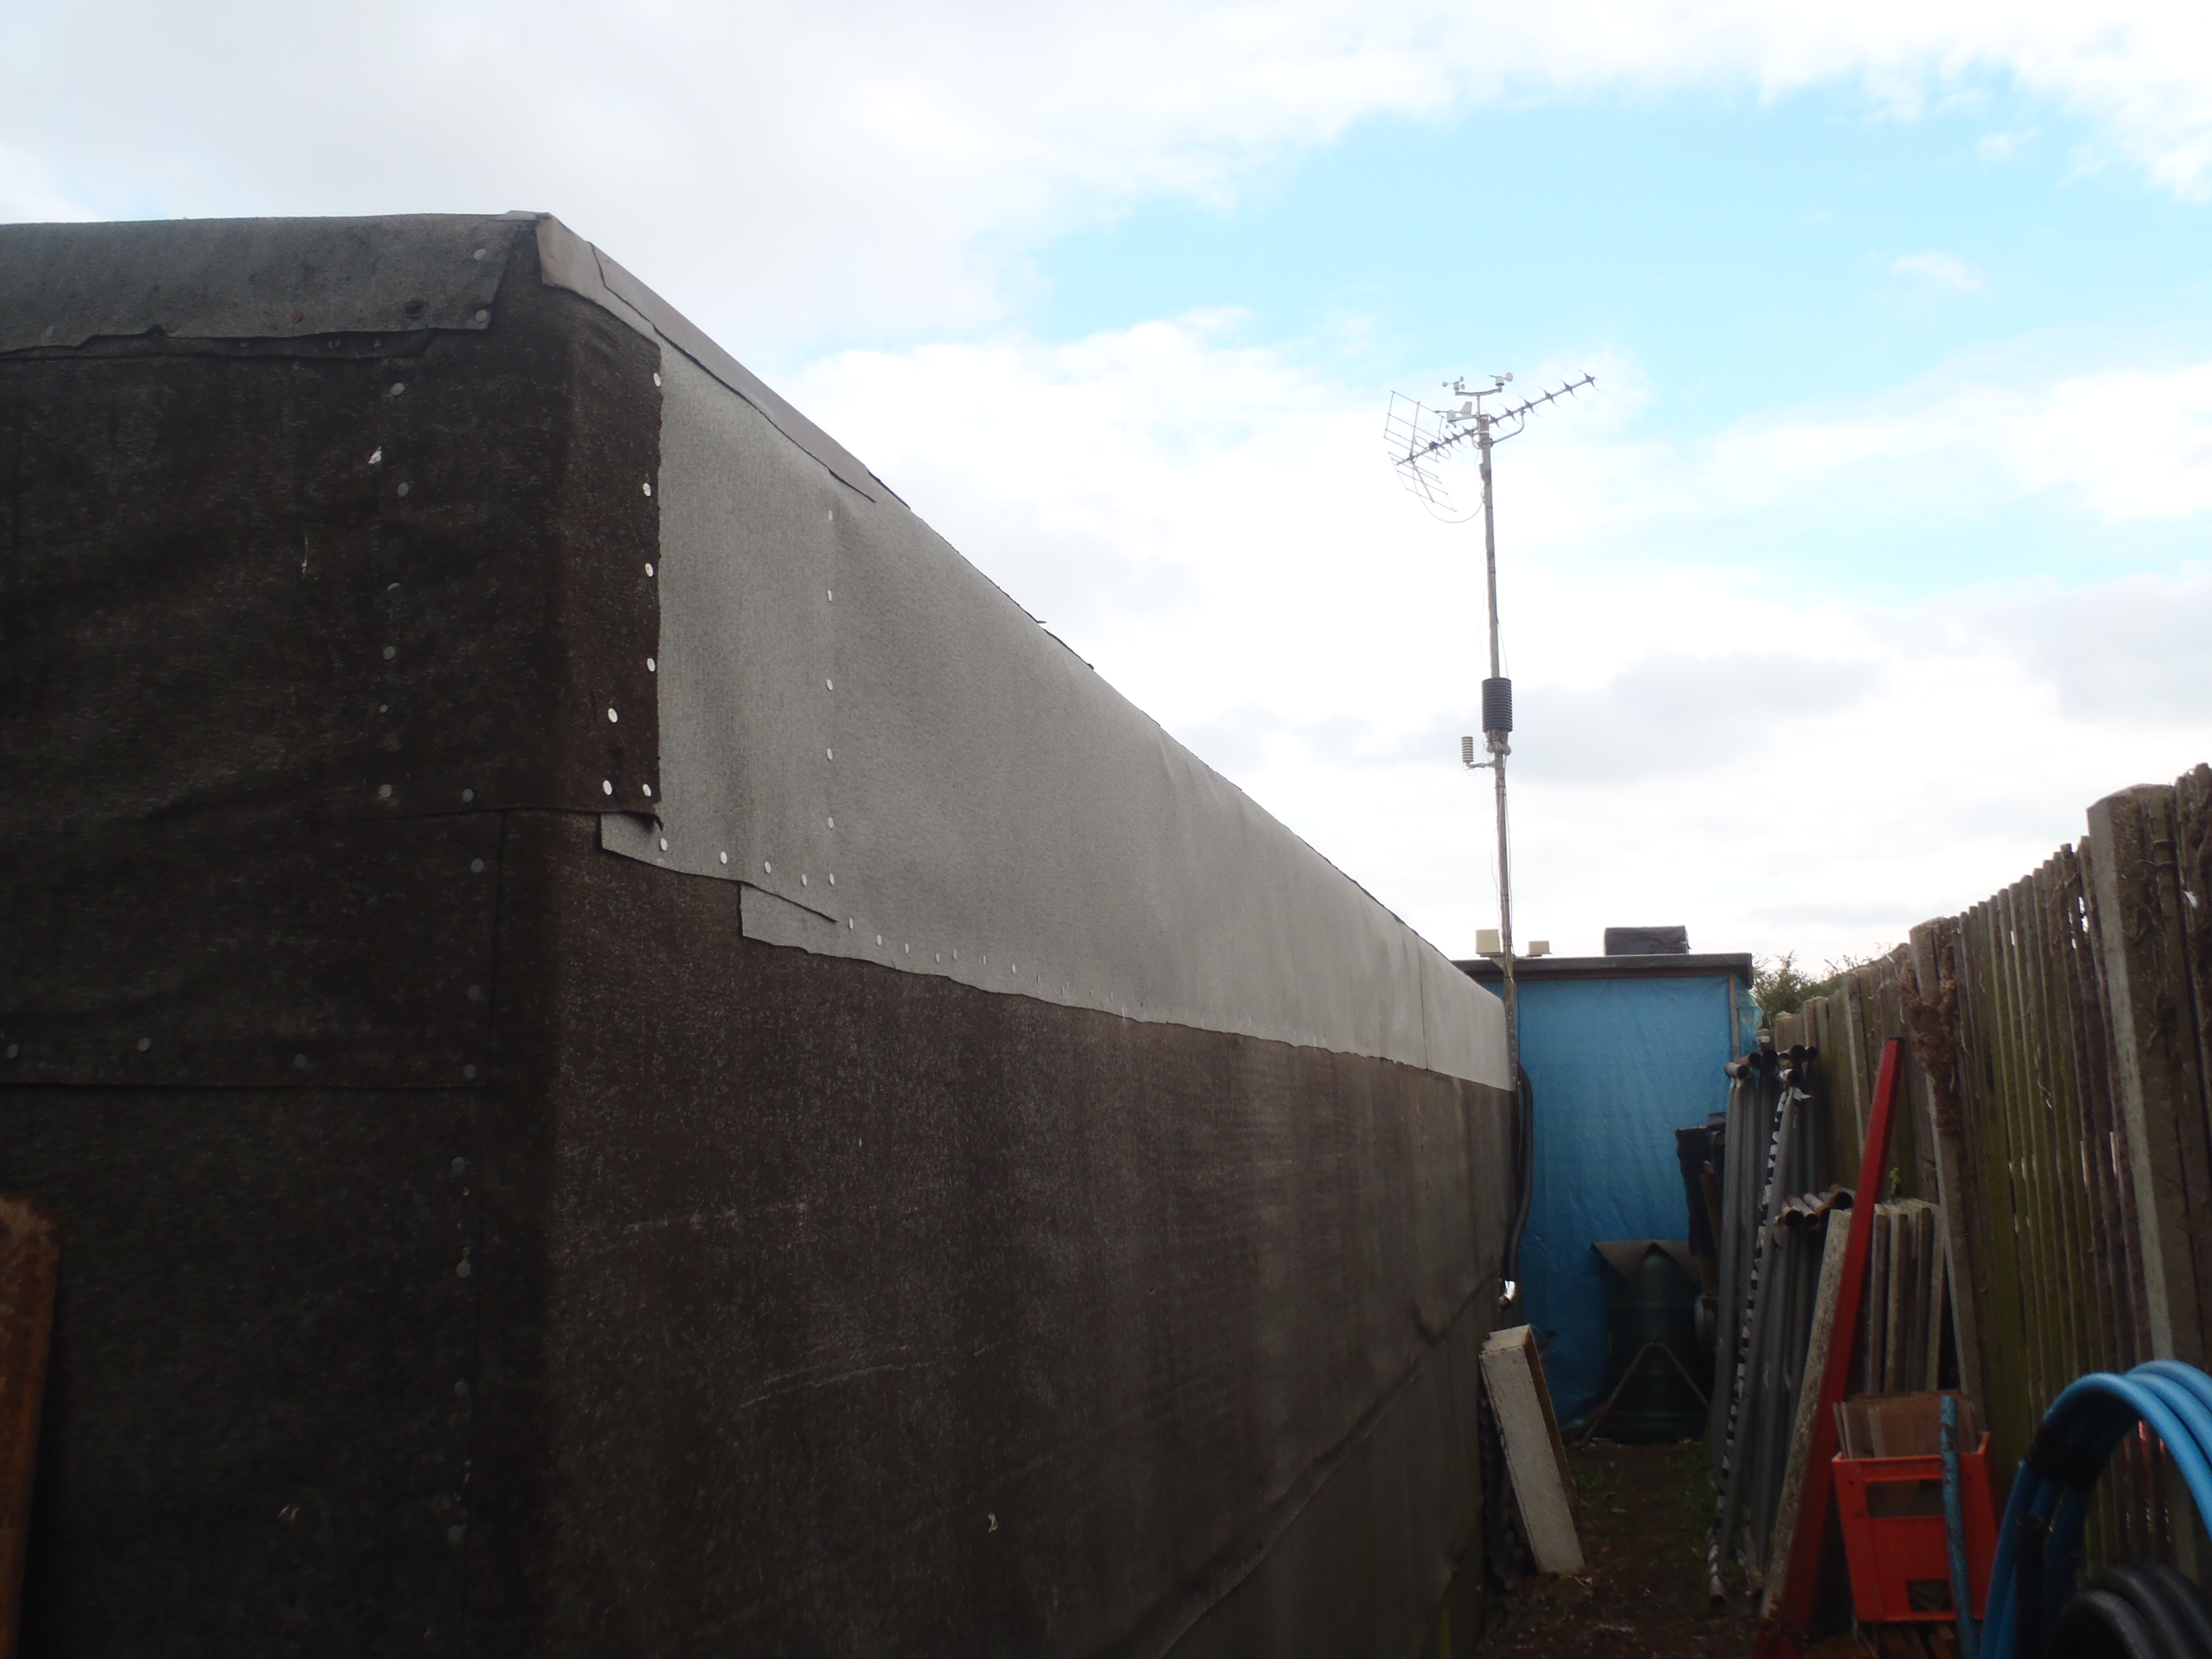
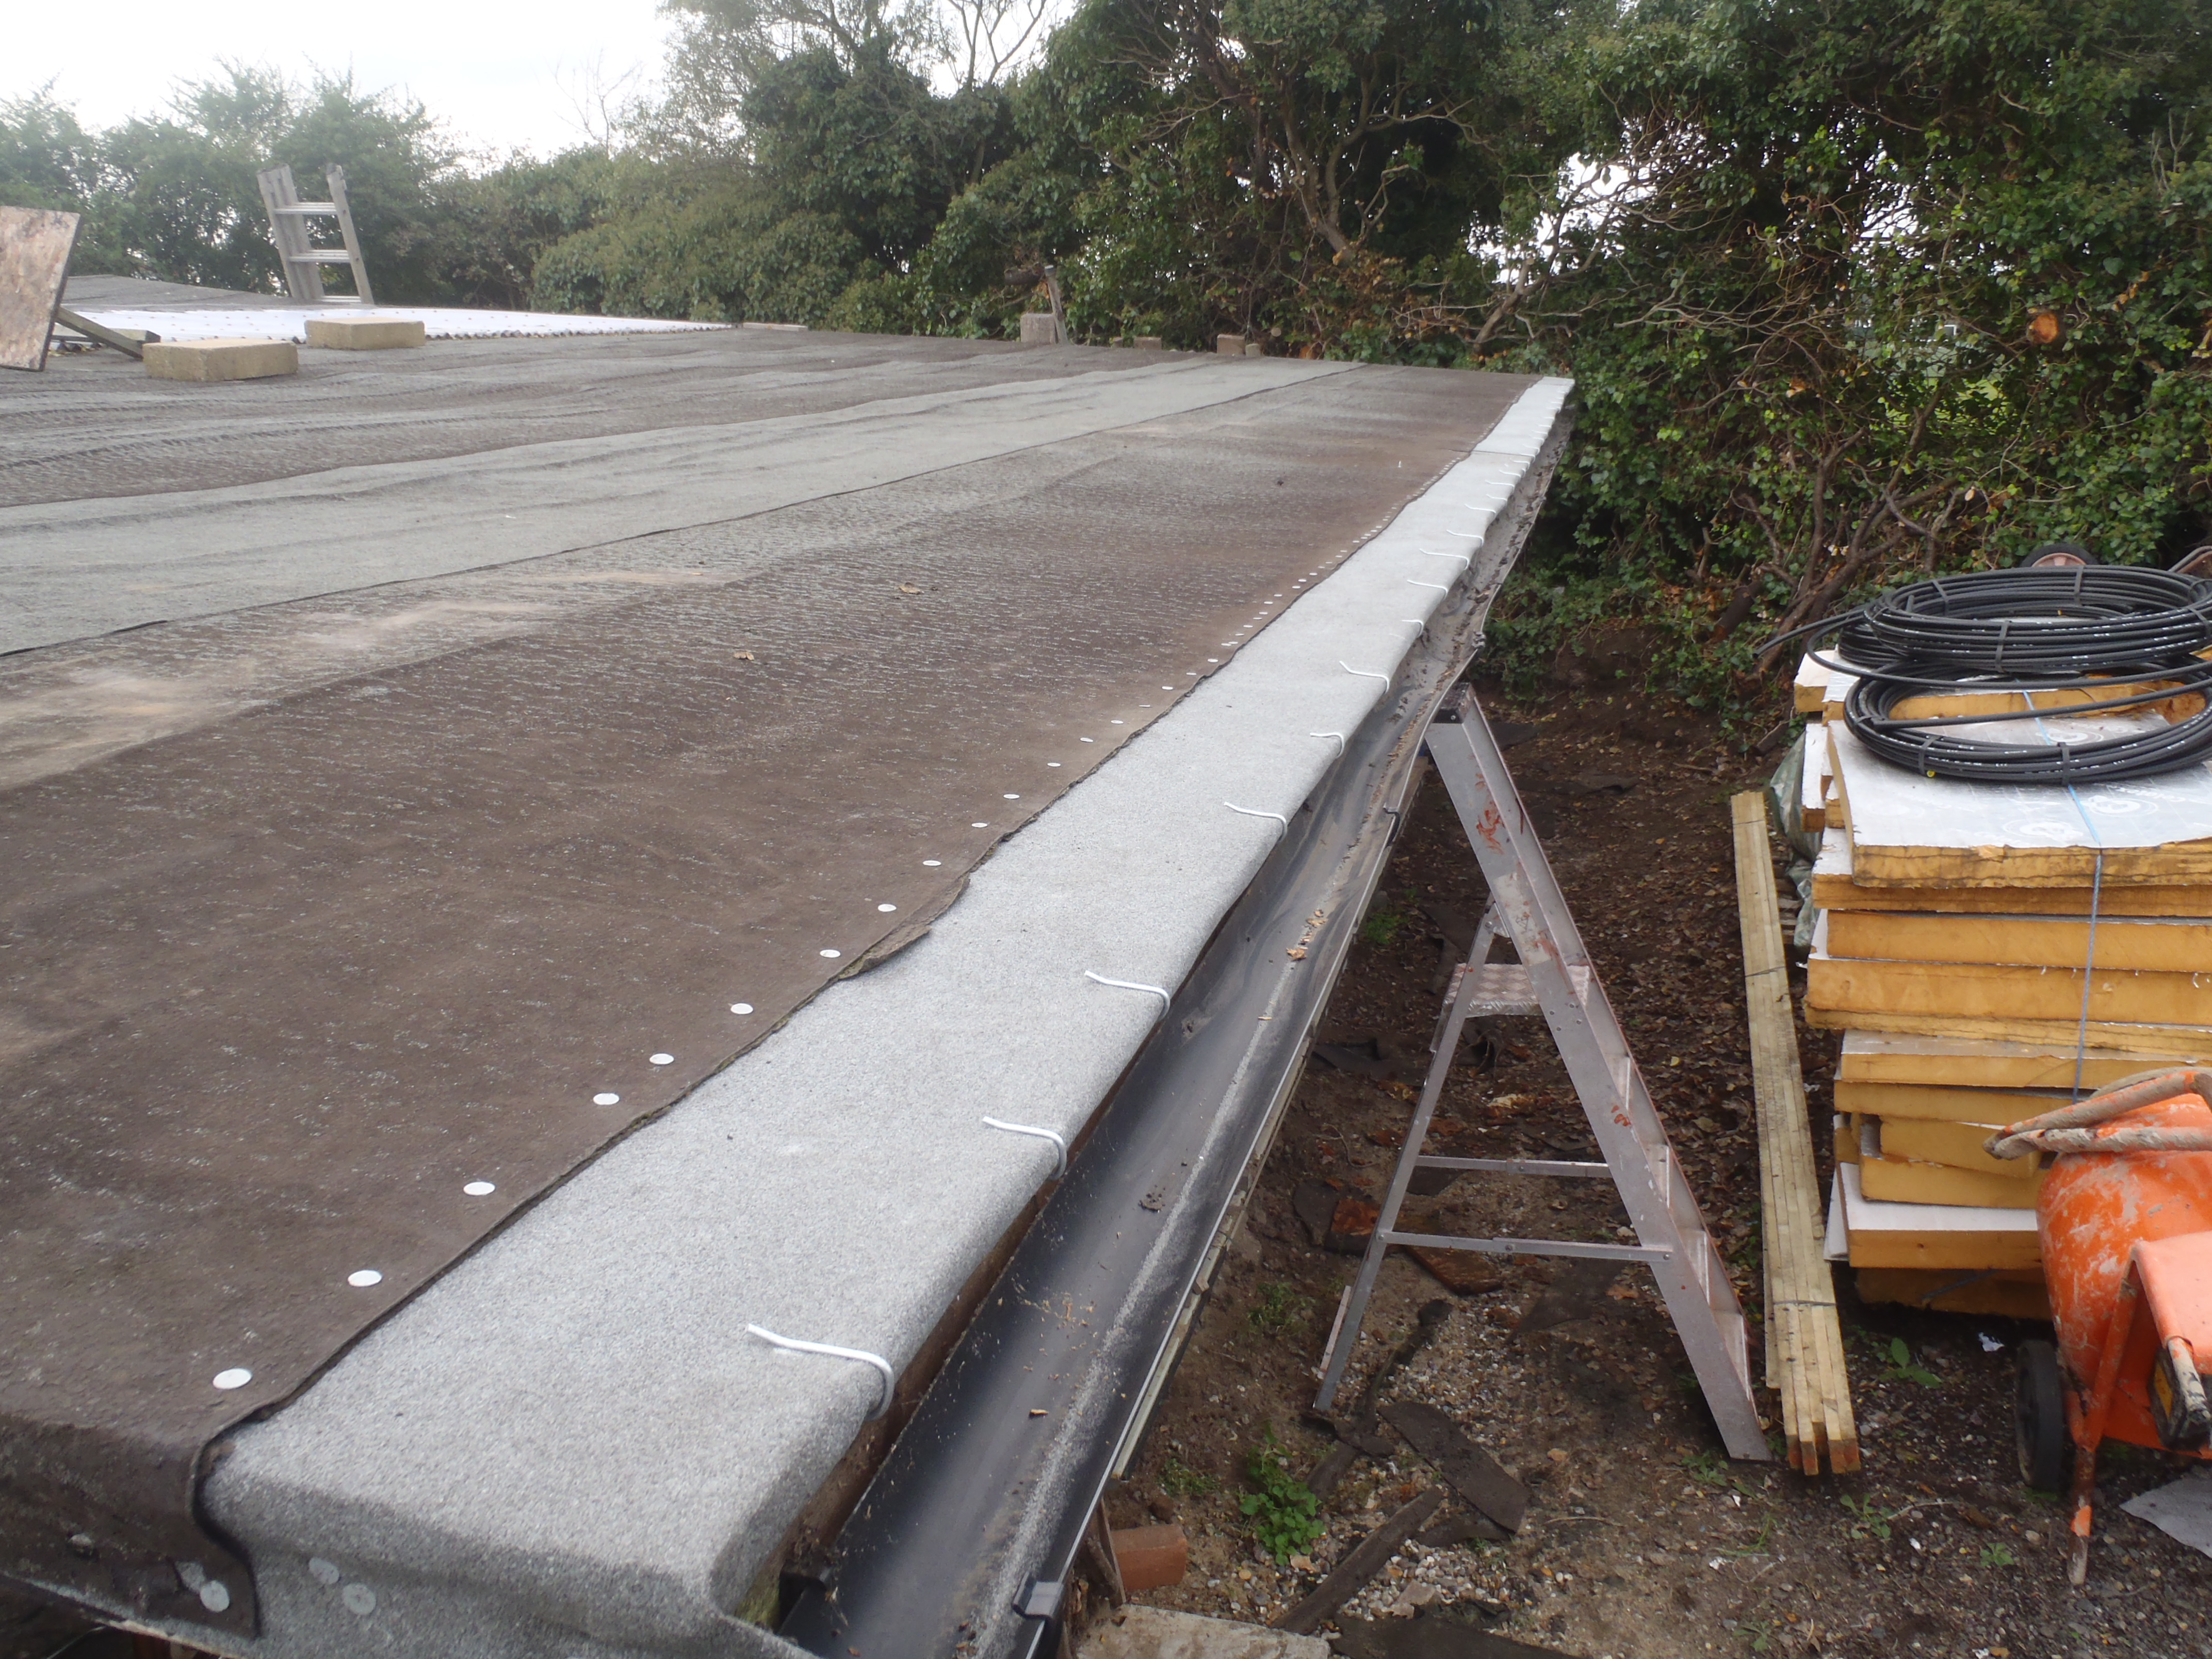
    Then, we replaced the disintegrated roof felt on the front edge with fresh stuff, sliding it under the next strip up the roof and lining it up so it is just hanging over the guttering.

    Temp-Living-Repair-repair-and-refelt-front-overhang

    Temp-Living-Repair-repair-and-refelt-front-overhang

    We then used 3mm wire to make little clips to fold over the trailing edge of the felt and anchoring it down to stop it flapping in any winds. We nailed the overlapping joint as usual, but the wood is wet and soft so we had to use the wire clips to secure the trailing edge, and we hope it will stay put! We may have to screw down short but regular batten strips (screwing into the chunky facia board) if we find the metal clips are not holding well enough.

  • Roofing Felt Repair

    This afternoon, we went along the temporary living building and repaired the section of roof adjoining the top of the wall, at the back nearest the fence. It is the side that faces the afternoon sun all year around and so the roofing felt has got thin and fragile. We had made minor patches to fill holes but this time, in strong winds, it ripped a rather larger section. So we bought a new roll of standard shed roofing felt, the cheapest going and cut a strip off to slide under the roof’s felt, around the corner, down the wall and overlapping the felt still hanging further down the wall.

    Temp-Living-Repair-renew-felt-at-rear

    Temp-Living-Repair-renew-felt-at-rear

    We nailed along the overlapped joint on both the wall and on the roof too. The felt still on the wall is the original stuff we put up way back in 2003 or so and it is looking ok! Because likely, it has been in the shadow of the fence most of it life and not greatly affected by the power of the sun. We only want it to last the stated 5 years this time!!

  • Day 3 of Installing the Underground Temperature Probes in and around the Energy Modules

     We finished off the task of installing all the temperature probes’ conduits, around the two biggest Energy Modules, namely the one stretching across from the Kitchen, through the Hall and into Bedroom 1 and the other module stretching the full length of the Great Room.

    Day-3-Installing-Temperature-probe-conduits-Morning

    Day-3-Installing-Temperature-probe-conduits-Morning

    Day-3-Installing-Temperature-probe-conduits-Afternoon

    Day-3-Installing-Temperature-probe-conduits-Afternoon

    Day-3-Installing-Temperature-probe-conduits-Finished

    Day-3-Installing-Temperature-probe-conduits-Finished


    We installed a further 21 conduits today, plus the other 12 we did over the last 2 days, makes a total of 33 conduits, each having at least 2 and maybe 3 temperature sensors in each pipe, thus we will have nearly 100 heat monitoring probes underground, under our house, to measure the distribution of the heat going in and out of our 5 Energy Modules. The modules themselves also has several temperature sensors in each too .. and plus we have more planned to be installed outside the perimeter of our house as well – Phew!

    Measuring-Temperature-conduits

    Measuring-Temperature-conduits

    We then measured all the locations of the 33 plastic pipes sticking out of the ground and will keep a record of these data points on our computers so we can provide a graphic output showing the actual temperature readings on a map of our house .. all in real time .. when everything is working – grin!!

  • Day 2 of Installing Conduits for Temperature Probes around Every Energy Modules

     Today, we carried on with the installation of conduits for the Temperature Probes around all our Energy Modules, but after we made a new drilling tool using a steel 32mm diameter pipe and welded four fat nails to the end.

    So using our new tool, we drilled and inserted 20 mm plastic pipes around the Energy Modules under Bedroom 3 and Bedroom 2 plus the one under the Entertainment room too.

    Day-2-Installing-Temperature-probe-conduits-2

    Day-2-Installing-Temperature-probe-conduits-2

    Day-2-Installing-Temperature-probe-conduits-1

    Day-2-Installing-Temperature-probe-conduits-1

    Day-2-Installing-Temperature-probe-conduits-3

    Day-2-Installing-Temperature-probe-conduits-3


    Mind you, even this all metal tool suffered, one of the nails bent right over and in bending it back again broke off!! But it is doing the job .. as long as the pipe is kept clean. We eventually resorted to using our pressure washer to blast clean the pipe 2 or 3 times whilst drilling a single hole, sometimes the sandy soil is quiet sticky and clogs up the inside of the pipe quickly.

    Tomorrow, we will continue with the last two Energy Modules, our biggest ones, with an additional 20 more conduits to do!

  • Installing more Conduits for temperature Probes around Energy Modules

     This afternoon, after we have finished the task of leveling  the ground, we started installing more conduits for our temperature probes that will measure the performance of our Energy Modules and how the ground around them is changing over the course of the seasons and the year and beyond.

    We are using a DIY vacuum cleaner and a long hollow plastic pipe with nails attached on the end, to drill and suck out the sand and soil to form a deep narrow hole. We then insert the plastic 20 mm pipe with one end melted and squashed flat to form a waterproof tight seal. We are drilling down 1.5 metres so we will have a temperature probe located 500 mm below the level of the Energy Module and then another probe higher up so it measures the mid-point of the Energy Module too.

    Drilling-a-probe-hole

    Drilling-a-probe-hole

    Sometimes, it is jolly hard to drill down because we hit a gravel layer in our sand dunes which we think were the original seabed layer when this whole area was under the sea!

    First-3-temperature-probes

    First-3-temperature-probes

    Tomorrow, we are going to change our drilling tube over to a metal one so we can weld on more strongly the “spikes”  (heavy duty nails!) to survive the bashing and turning actions. the plastic version is ok but it is already showing signs of wear and tear so we found a metal pipe lying around and we will use that instead!! Yes Another homemade tool – smile!