Category: Maintenance

  • Proceeding with L to N Roof Sections

    For our week’s work, we got on with the next three sections, the L, M and N which forms a U shaped inset. We first got all the tile battens up on L section and then used up the remaining full length battens we had up on the platform to do the first eleven lines on the M roof, all by Monday lunch time.
    We then started putting up the slates on the L slope, to have a change of job as it can get painful on our muscles in our legs having to crouch down, especially doing the slates.

    N-End-of-Day-2

    N-End-of-Day-2


    Being such a short section of the roof, we are having to stop and start a new diagonal strip of slates quite often (starting at the valley and stopping at the hip), and that slows us down considerably. By the end of Tuesday, we estimated to have put up only about 280 slates for a day and a half of work.
    N-End-of-Day-3

    N-End-of-Day-3


    Wednesday saw the “almost” completion, with another 300 slates, of the L strip of roof, only leaving a small triangular bit right up at the top of the valley. We needed to cut and trim the third small length of the fibre-glass trough to fit, modifying one batten to make sure the trough will go as high as possible to ensure capture of all the rain water.
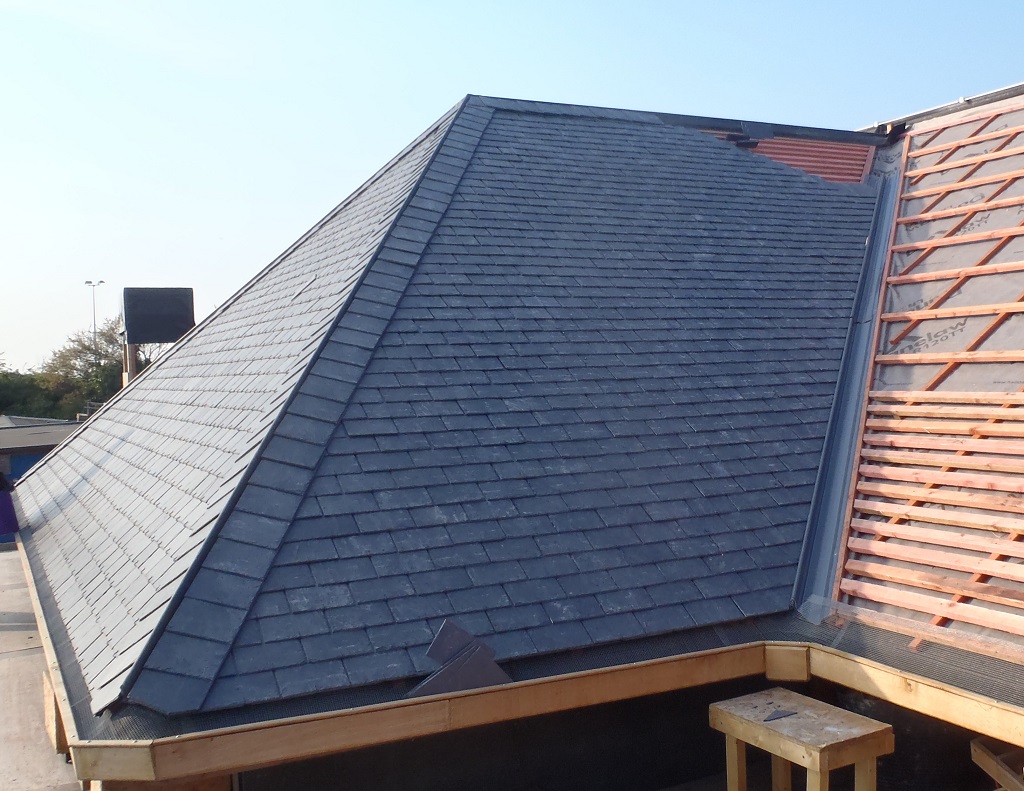
    N-End-of-Day-4

    N-End-of-Day-4


    On the next morning, on Thursday, we trimmed off the bull nose middle part of the trough and reapplied a new layer of fibre glass woven mesh and dark grey resin to seal up and form a solid waterproof trough again.
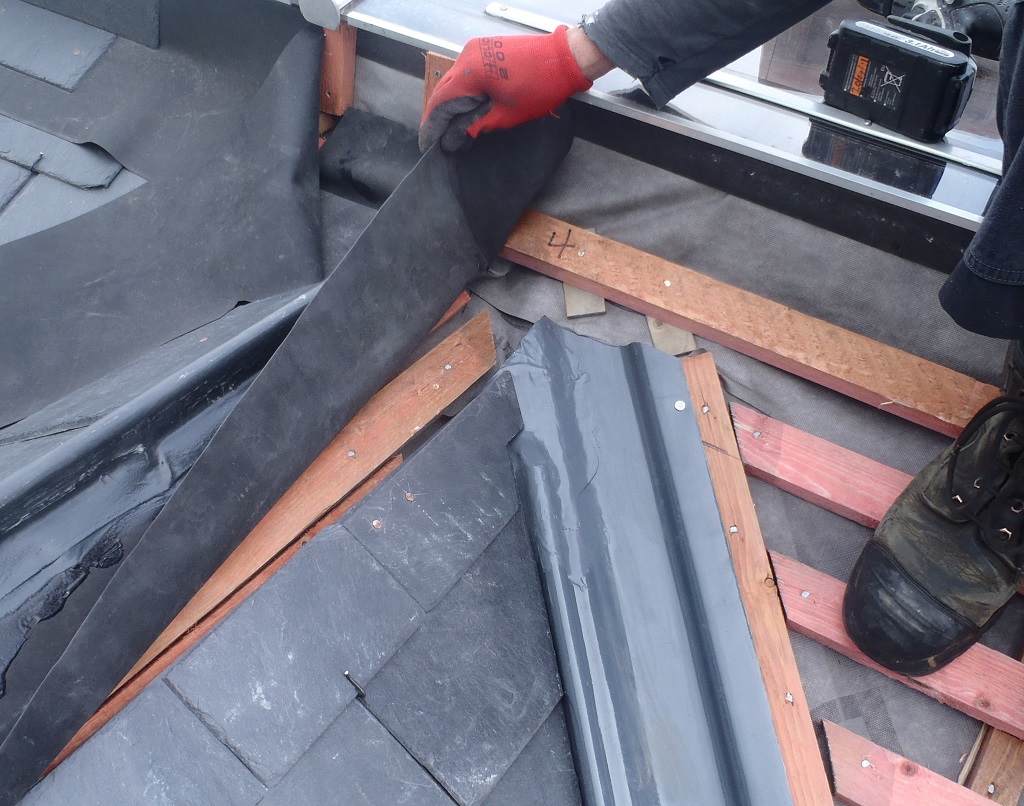
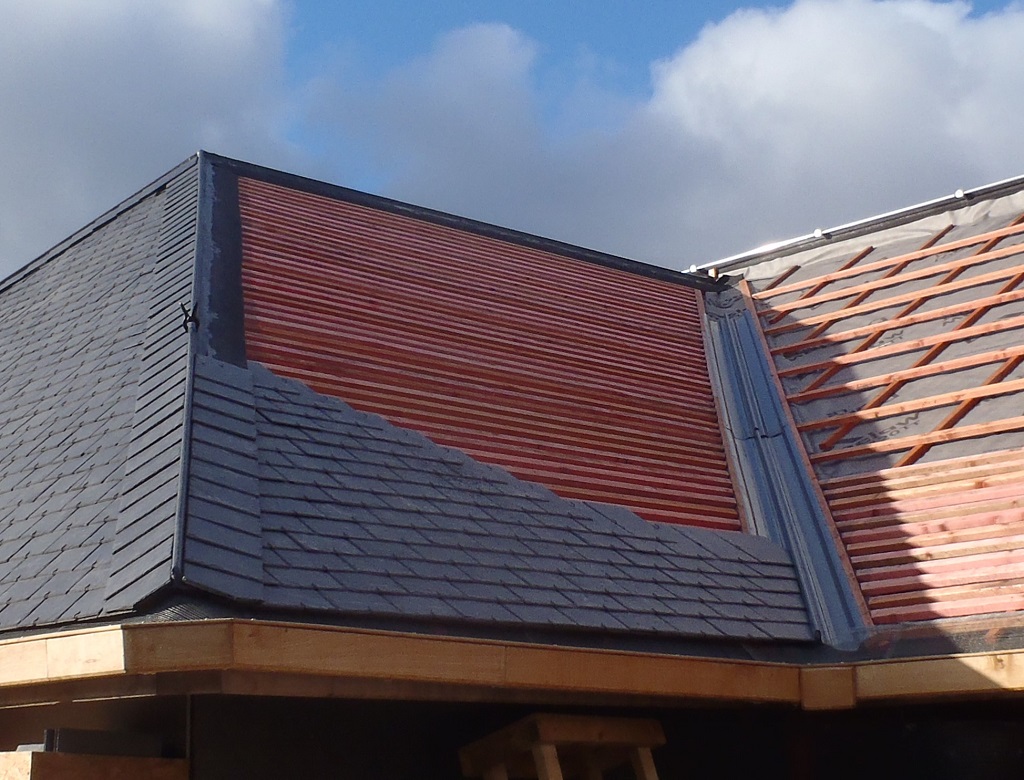
    Top-of-N-M-Valley

    Top-of-N-M-Valley


    While the resin was hardening, we spent most of the day (running late into the afternoon because we thought there was going to be a heavy rain shower mid-afternoon plus also we had a meeting to attend) putting up lots and lots of tile battens up on the M section. We used thirty or so full length battens to cover almost the whole of this section and only has the left-over bits to fill in next week.
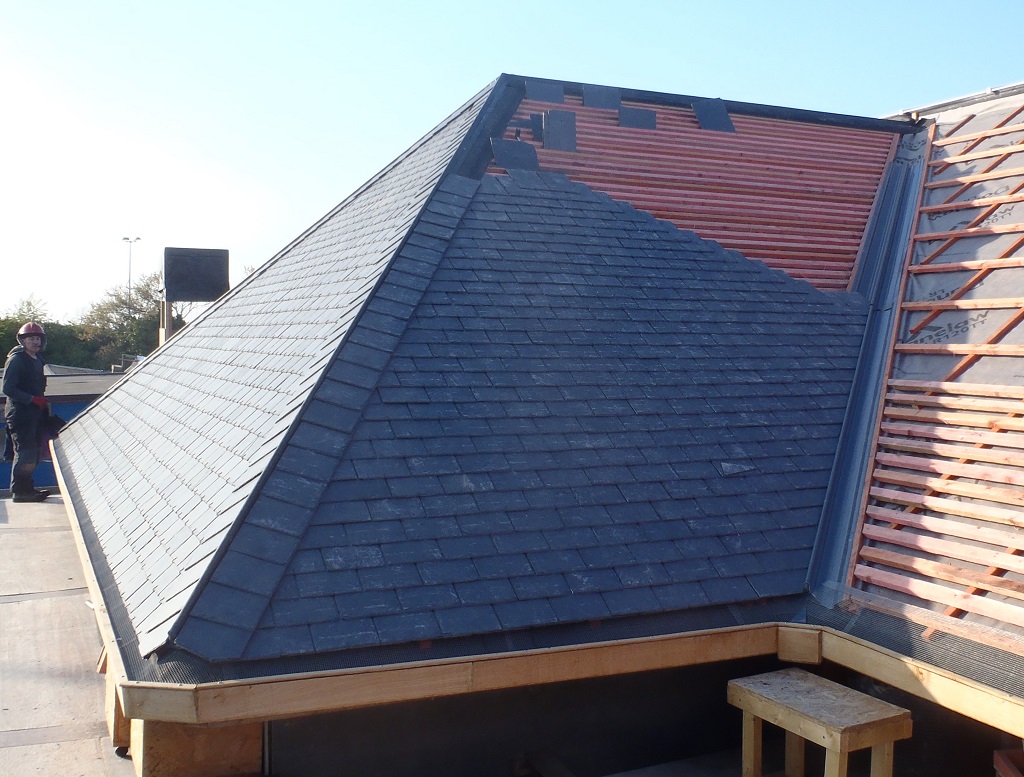
    After our late lunch, and no sign of the rain, we took out our new modified trough out and fixed it into place and then continued putting in the final fifty slates or so to completely finish the whole of the L section, including nearly all the flashing tiles too. The final part of the intersection of the four roof sections will be completed when we reach it with the slates on M next week, as we need to know exactly were the slates meet.
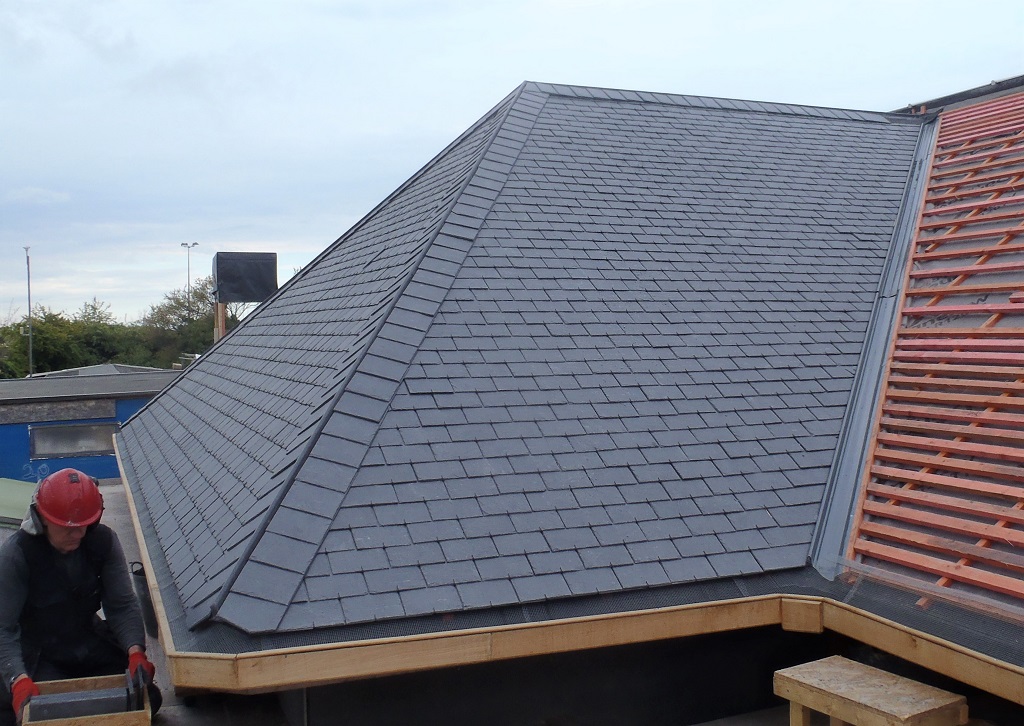
    N-Complete-Nearly

    N-Complete-Nearly


    The next two days (Friday and Saturday) were washed out so we didn’t fancy working in the wet and slipping on the battens. We will resume next week on Monday and finish putting the tile battens on M and then start slating that segment next. We have covered about twenty percent of the roof (4 segments) so far but it will jump to about thirty-three percent when we get both the M and N sections finished, which hopefully won’t be too long in coming.

    And we have resumed shooting daily videos of our work so here are the time lapse versions for you to watch…


  • Grease Loaded into All Joints!

     This afternoon, Stephen performed some basic maintenance tasks on the mini-digger and loaded grease into all the joints and moving parts. The digger needs re-greasing fairly regularly, every 20 “clock” hours approximately.

  • Wheel on Trolley Fixed and Resprayed!

    This morning, on this lovely Sunday morning, we did some maintenance tasks,
    like for example, repair the puncture we got in one of the tyres of the
    large flatbed trolley.

    Large-Trolley-Old-Tyre

    Large-Trolley-Old-Tyre

    It was a devil to get the tyre off the metal wheel rim, but after surfing
    the net, we wiggled and heaved and levered the tyre off and pulled out the
    inner tube. The little hole in the inner tube was located and patched up.
    The tyre itself was thrown away as the rubber has cracked under the pressure
    of heavy loads we had on the trolley over the years, and this was what
    caused the puncture where the inner tube was “bursting” out!!

    We also gave the whole metal wheel a thorough rub with an angle grinder with
    the wire brush attachment and now is drying in the lovely sunshine with a
    fresh coat of black metal paint!!

    Large-Trolley-New-Tyre

    Large-Trolley-New-Tyre

    One done and three to go! But first, we will order some spare inner tubes,
    just in case we mess one up trying to get the tyre off etc.

  • Started Filling in Trenches!

    This afternoon, we started putting all the dirt and soil back into all the
    trenches of our three sewage pipe runs. We began at the trench cutting
    across our driveway, so that area can be made safe again for us and
    visitors.

    But we hit a slight problem with the petrol engine driven vibrating machine,
    it wouldn’t run for any length and Stephen took it apart to clean out the
    tubes and pipes etc. It now runs nice and smoothly again!!

    Shaun was clearing the driveway of piles of dirt and also scraping a layer
    of soil off the surface where silt have accumulated over the last few years
    when we had a river of rain water washing down the Loke carrying dirt and
    silt from the area, and depositing it on Our driveway!!

    Tomorrow, we will get on with the filling process in earnest!

  • Big Trolley repainted

    We bought a big hand trolley (2.4 m x 1.2 m, 1000 kg load)  back in 2002, and have used it extensively since. The steel frame has been desperately in need of a de-rust and repaint for a few years now! When we had finished using the trolley as the base of the soil sifter, we removed all the wooden framing and platform and started to remove the old paint and rust with a wire brush on a angle-grinder (this was in December last year) and then we left it in the workshop until today.

    We finished wire brushing and cleaning it this morning and then painted it this afternoon (we will probably only give it one coat as it really was very rusty and will need to have the platform support frame replaced in a few years (if we don’t discard it as no longer needed)).

    Large-Trolley-Re-Painted-2

    Large-Trolley-Re-Painted-2

    Large-Trolley-Re-Painted-1

    Large-Trolley-Re-Painted-1


  • Mini Trolley Repaired

    Stephen repaired the mini trolley on Thursday afternoon and this Morning. The rear wheels were completely broken and the axles bent badly. The front wheels which had been already reinforced (after being bent while moving a load of concrete blocks – 13 of fat ones!) survived but the axles were bent as well.

    The bent axles were cut off and replaced, then the new metal was painted. The broken edges of the plywood top were trimmed off.

    We bought two new wheels (which were re-enforced by welding 4 struts from the central hub to the disc and rim, see pictures) for the rear wheels.

    Then everything was re-assembled and the trolley was good as new!

    Small-Trolley-Wheel-Before

    Small-Trolley-Wheel-Before

    Small-Trolley-Wheel-After

    Small-Trolley-Wheel-After


  • Mini Platform Trolley Mended

    We repaired the bent wheels! The front two wheels suffered under the strain
    of hoisting the concrete blocks! We were (and still are) loading 10 blocks on the trolley (this weighed in at about 270kg!) and that started the problem but really it was when we put on 13 blocks (a total of 351kg!!) .. that did the real Damaged!

    I welded on some extra steel pieces to reinforce the axle to the
    flange of the wheel. We only hope now that the ball bearings will survive!!!

  • Dumper Truck is down in the Dumps #2

    Yippeee! We managed to jump start the dumper truck! We tipped the load and drove it back to the house to connect the battery charger!

    Phew! That is a great releif and thanks to our cousin Neil over in Blackpool for his 20 years of expert knowledge of heavy machinery and everything with a engine in it. Cheers Neil!

  • Mini Digger & Dumper truck Maintenance

    Stephen spend the morning doing the regular maintenance, pumping grease into the joints and bearings including doing the dumper truck as well. But Stephen decided to tackle the longer running non working sideways control of the arm which we will need when we start digging the trenches. He traced the wiring from the switch on top of the joystick and to the solenoid that operates the pump that controls the rotation of the arm side to side. It was another similar problem with a power interruption to the switch so he repaired it with a clean new wire. It now works!!