Category: Phase 5

Building the internal framework of all the rooms, 1st floor joists and gallery.
This also includes building the sound proof Entertainment Room.
Plus also installation of insulation, OSB boards and construction framework for upstairs rooms too

  • Stud Wall Built and Covered in Fermacell Boards

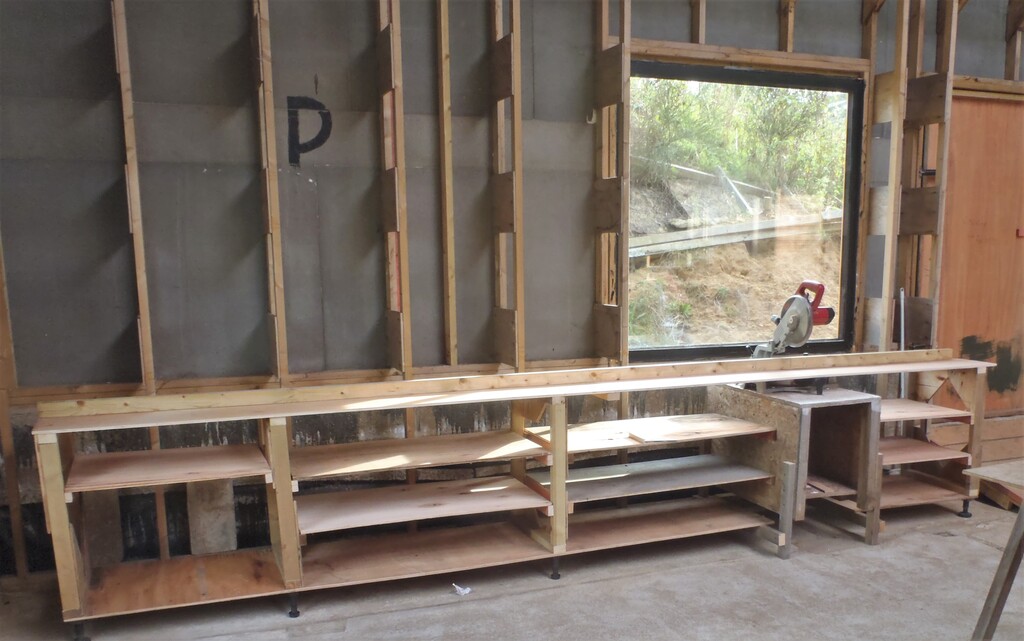
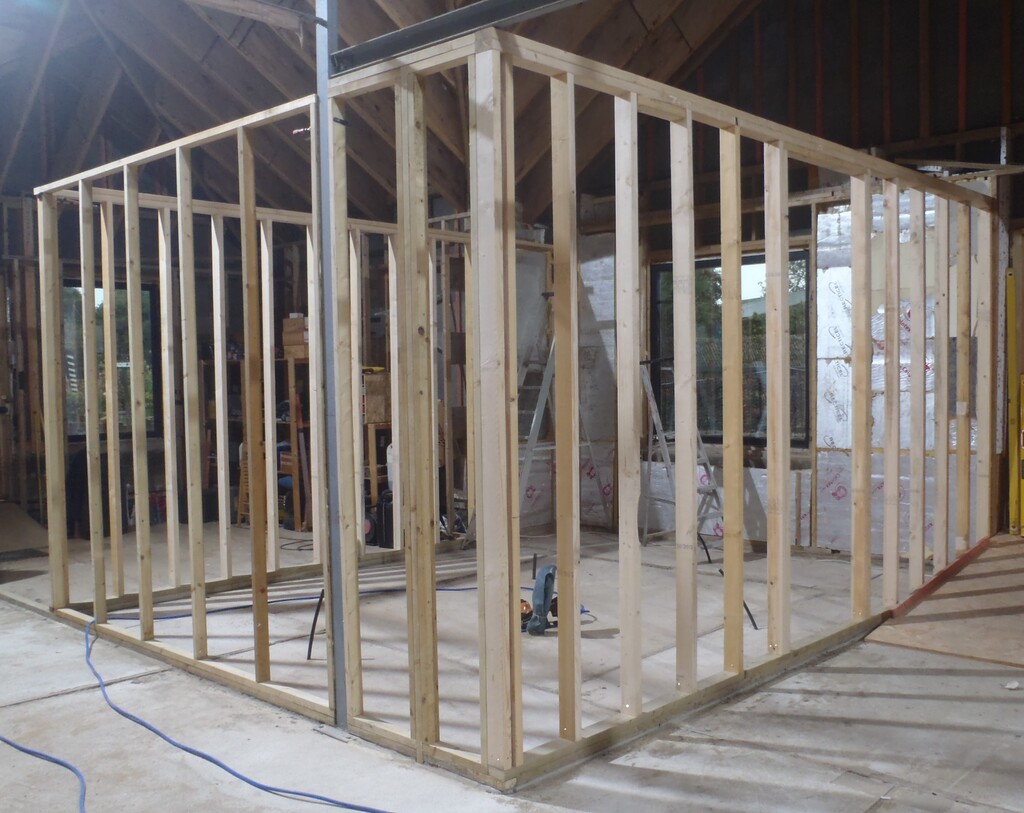
    This week, we started on building our timber Stud Wall that surrounds the concrete shell that encloses the Entertainment Room. But before that, we created another piece of equipment down in our Great Room area, to help us chop up the various timber planks into precise lengths required for each wall around the house (see Chop Saw Plank Slicing Station).
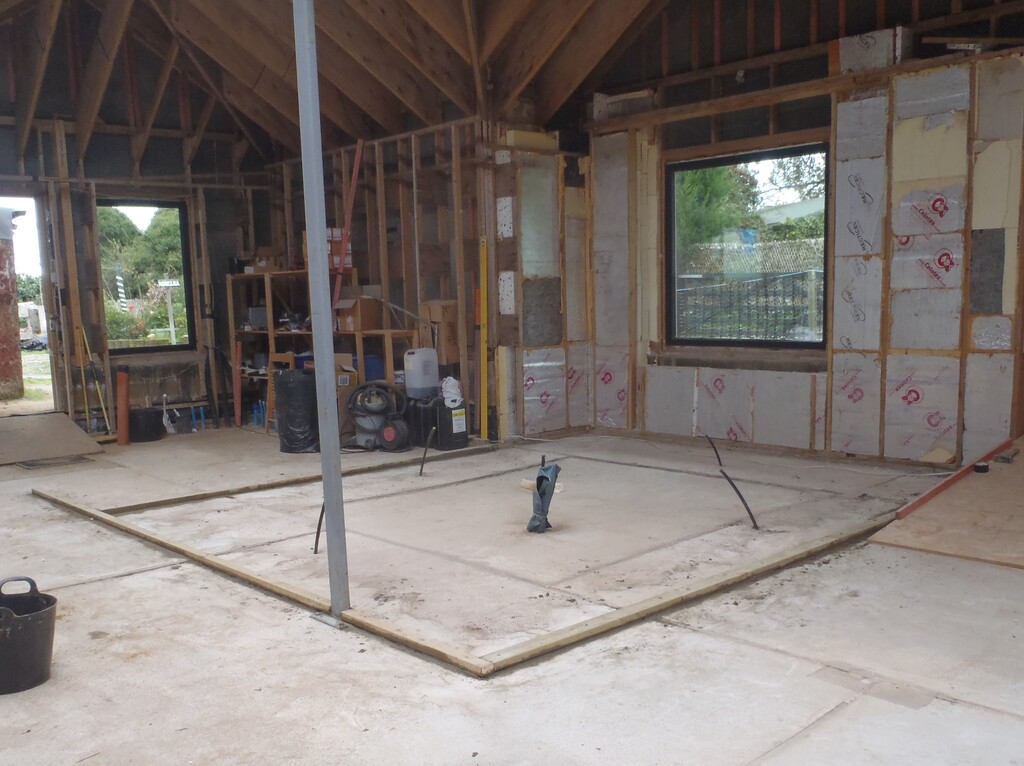
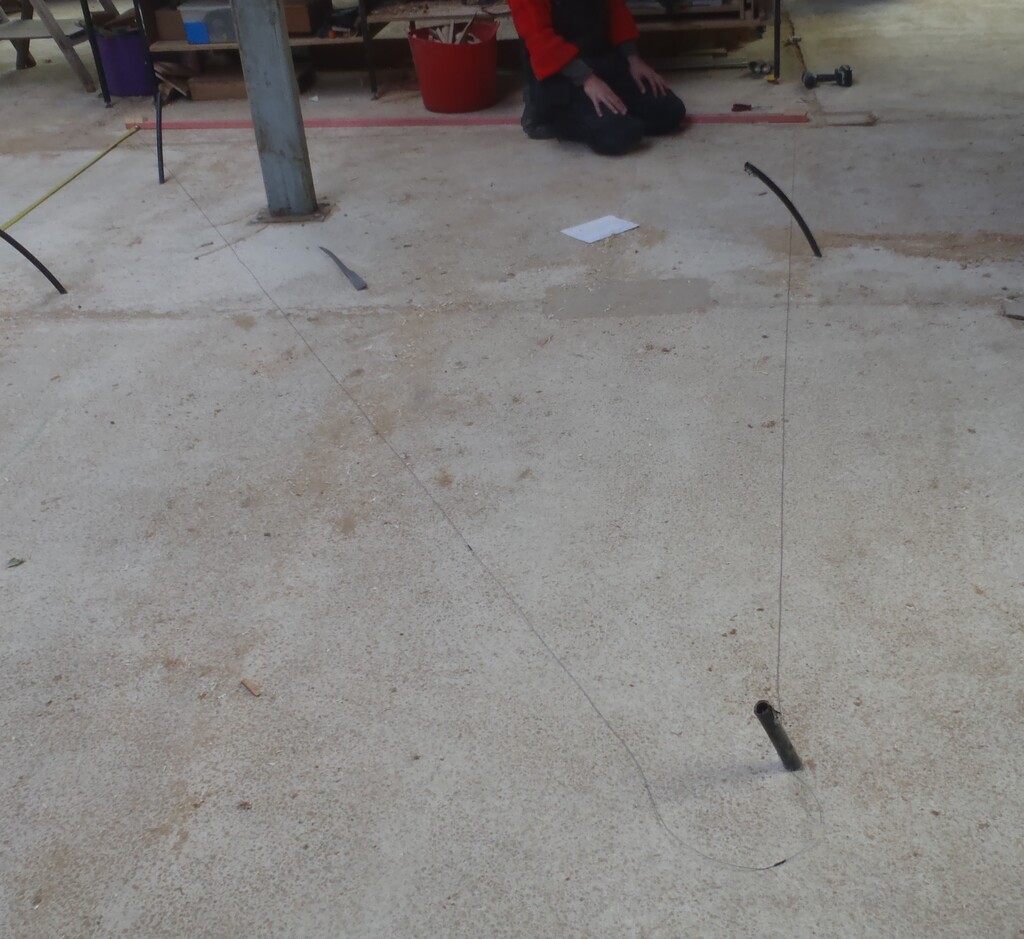
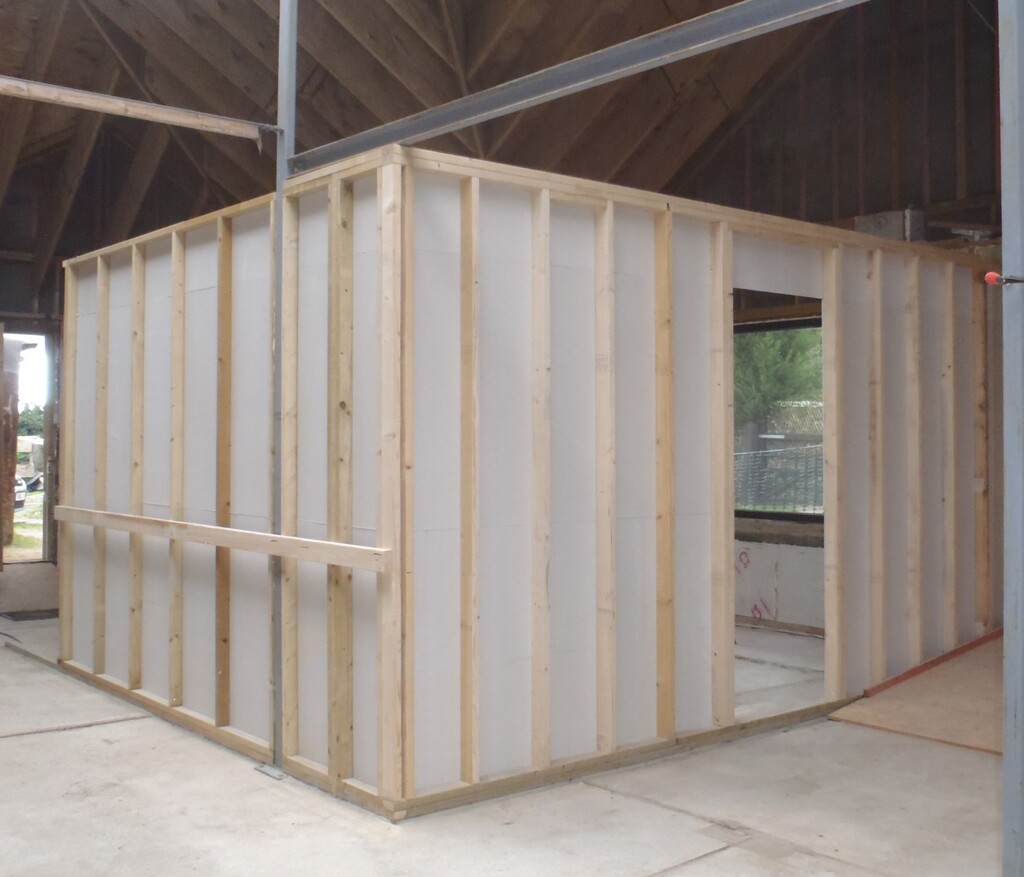
    We marked out on the footplate the spacing for all the stud posts for each section of the wall, requiring a 400mm separation of the posts for the 89mm wide walls (the left and right sides of the room joining the Utility Room and hall leading from the front door) and a 600mm spacing for the end wall opposite the window. We duplicated these marks on another set of horizontal planks we made, ready for the top plate that goes on top of the stud posts.
    We then chopped up twenty-one 89mm CLS and eleven 63mm CLS planks measuring 2638mm long, then two 2600mm long pieces, both being the 89mm CLS width and finally, an one off 2804 length of 63mm CLS.
    We proceeded to nail each post into place using 90mm ring-shank nails and put on the top plate planks on too. We also glued two of the 63mm posts to the steel leg (holding up the Skylight and roof).

    Stud Wall Built and Covered in Fermacell Boards

    Entertainment-Studs-Finished


    The last job of the week was to nail up sheets of the fermacell boards on the inside surface of the stud walls to improve the sound deadening potential of the whole Entertainment Room. We placed each sheet horizontally, over two and bit rows and applied to all the edges with PU construction glue to ensure a continuous uniform and solid barrier.
    Stud Wall Built and Covered in Fermacell Boards

    Entertainment-Fermacell-all-installed-1

    Stud Wall Built and Covered in Fermacell Boards

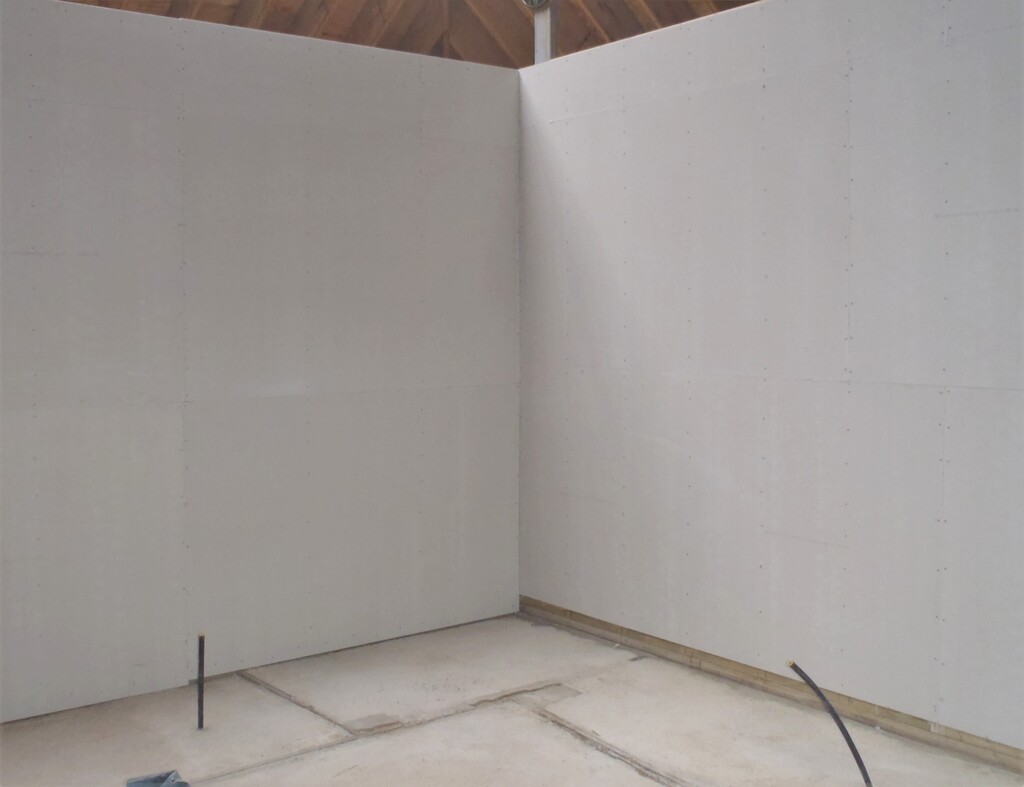
    Entertainment-Fermacell-all-installed-2

    Stud Wall Built and Covered in Fermacell Boards

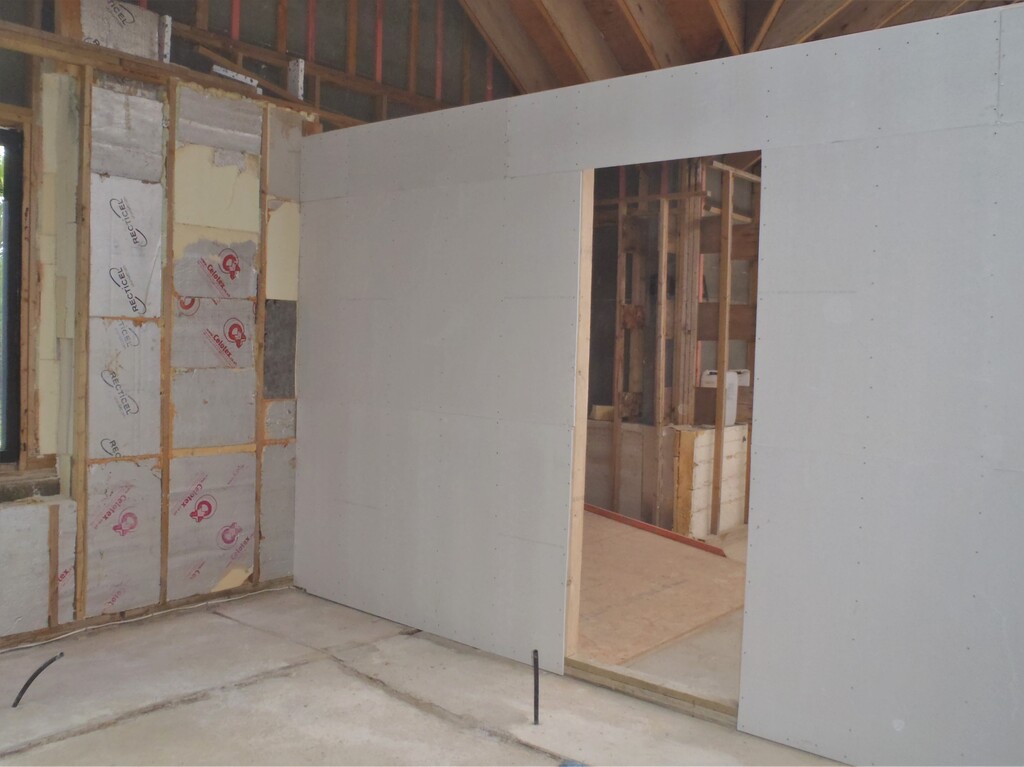
    Entertainment-Fermacell-all-installed-3


    We are now ready for the concrete blocks and beams which will hopefully will be delivered Monday and Tuesday, just before the lock down is enforced. That will keep us busy for a few weeks.

  • Chop Saw Plank Slicing Station

    We started the week by creating a new piece of equipment, this time, a plank slicing station down in our Great Room, using our large chop saw and a length of 63mm CLS timber and two pieces of plywood strips to build a long 4.8metre long straight channel. The chop saw was placed about three quarters the way along towards the right hand end so we can put a end block clamped to the CLS fence and we then can consistently chop up many planks into the same length. To aid in measuring planks we attached a 3m measuring tape to the top of the CLS.

    Chop Saw Plank Slicing Station

    Saw-Station

    Chop Saw Plank Slicing Station

    3m-Measure-along-the-Saw-station-fence


    We also sub-divided the space underneath into shelves so we had loads more storage space for various building materials and pieces of equipment.

  • Setting out the Entertainment room

    For the start of our new week, for the start of the work inside the house, we got on in sorting out the area where the Entertainment Room is situated. There is going to be a concrete shell to provide some level of sound proofing so the rest of the house is not disturbed by crazy noises, loud bangs and awful discordant sounds from musical instruments etc.!
    But we have to make some adjustments to the framework around the window first, to make room for the 100mm wide concrete blocks that will go up on either side of the window to form a barrier to keep the noise in. We moved a pair of inner (63mm CLS) legs sideways 150mm and glued together three layers of the 63mm CLS timber horizontally going over the window that forms the lintel to hold up the first floor. Also, we sliced away some pieces of the insulation to make room for these concrete blocks too.

    Setting out the Entertainment room

    Gluing-lintel-reinforcements

    Setting out the Entertainment room

    C-Window-ready-for-Entertainment-walls


    Next, we decided that we needed a larger tool to help mark out the layout of the stud walls (see Created Large Right Angle Framing Tool ) and using this piece of equipment, we marked out the outline of the wooden stud wall that surround the concrete shell.

    At this point, we put out our laser level gadget and proceeded to measure the relative height differences around the perimeter of the room, to judge where the highest and lowest points were. We had set of numbers ranging from 108 to 122mm which means a different of 14mm between the highest spot and the lowest spot.
    Then, we measured and cut up a series of 89mm and 63mm CLS planks to form the bottom layer of the stud walls where we drilled clearance holes through and then using our SDS mains powered machine, drilled the required holes into the concrete, ready for the self-tapping concrete screw bolts.

    Setting out the Entertainment room

    All-fixing-holes-drilled

    Next, we blasted all the holes with compressed air to clear the drilling rubbish out, collected up a trug full of soft sand (from our own sand pit, using a medium holed sieve to avoid larger stones) and got a bag of cement we had lying around that hadn’t gone hard yet. We started with four scoops of sand and put in two scoops of cement, a couple of finger pinches of fine plastic fibre and got it nice and moist. But we discovered that there was too much fibre in it, it was clumping together!
    So, following the earlier survey results, we decided to put in 2mm of mortar at the highest spot, just enough to wet the surface and sit the plank down. We put in enough underneath and then thumped the wood down along the length and using our laser level machine again, settled the whole plank flat. This spot is then the reference point to get all the other pieces of timber footplate all at the same flat level. This was duly done and left it to set hard overnight.

    In the morning, we came along to scrape any excess mortar away, to tidy up the surfaces on the timber and on the concrete alongside where the concrete blocks will be placed. The next task was to slice up more planks to form the second layer, making sure to overlap all our joints to reinforce the total strength of the footplate. We proceeded to drizzle PVA glue over the wood and screwed the two layers together.

    Setting out the Entertainment room

    Double-wall-plates-fixed

    We had finished by early afternoon and we spent the rest of the day looking at making another piece of equipment to help us produce regular and precise lengths of timber, for legs, posts and top plates that will form the internal walls of the house.

  • Created Large Right Angle Framing Tool

    We needed a tool to set out the rooms inside the house, as all the walls are right angled we needed something to get long right angled measurements. So we spent a few hours making a large framing square, using the mathematical and ancient truth that a right angle triangle measuring 3m by 4m always forms a 5m hypotenuse. So using a good quality and straight wooden batten, to form the base of the triangle, the 3metre side, we then took a flexible “cord” to stretch out to form the other two sides of the triangle.
    But we were struggling to find a “cord” that will serve the purpose and not stretch alarmingly when tensioned. Ordinary string was no good, even high strength highly woven cord didn’t work (it stretched 50mm over 4m) and we resorted in using a piece of 1mm stainless steel wire (left-over from our bird disruption system up on the Skylight), this only stretched 3mm! Luckily, we had enough to make a 9metre piece with two marks at 4metres and 5metres.

    Created Large Right Angle Framing Tool

    Large-Framing-Square


    So holding the wire out taut, at one of these marks, we can form either a left-handed or a right-handed triangle, which forms a good line perpendicular from the surface we placed the batten against.
    We can mark the floor at the beginning and end points and if necessary, can extend the line out to the required length of the stud wall we are mapping out, and once that task is done, we can wrap up the wire around the batten and put it away in a nice compact package.

    Created Large Right Angle Framing Tool

    All-rolled-up

    P.S. Can you spot our problem in the first photo?


    The wire is looped around the roof post!

  • Concrete Material for Sound-Proofing Shell for Entertainment Room collated and Ordered

    After buzzing around several different suppliers, all across the country, looking for pre-stressed concrete beams and dense concrete blocks (the heavier 20kg ones), we chased down various prices, ranging from the wow high price to a super low price but a heavy delivery charge (eeek!), we have finally settled an agreement with our local builders merchants Jewson, to supply us with ..

    • 10 concrete beams
    • 650 heavy dense concrete blocks
    • A pile of soft sand
    • Some bags of cement
    • A few large heavy paving slabs
    • And a concrete lintel (for our doorway).
    • 50 lengths of 89mm CLS timber

    We managed to get a very good price for the whole lot, that is a fabulous as we get the benefit of having our material delivered using the standard truck with a crane to help unload the 12.7 tons of stuff! It shows that it pays to spend time shopping around even if you end up back at your local business (but you know what price to negotiate too) Phew!

  • Ordered Concrete Beams and Blocks plus Sand and Cement for Entertainment Room

    Today, for our Entertainment Room, we calculated the number of concrete blocks and concrete floor beams needed to build a sound reducing barrier around the walls and ceiling. There are twelve rows of standard dense concrete blocks, a lintel for going over the doorway and eleven 4 metre long concrete beams, the smallest one available (the 150mm by 120mm wide version) because it is just a false ceiling and not holding up any loads apart from itself. The concrete shell is approximately 5metres long by 4metres wide and 2.6metres high, just shy of the first floor joists.
    The total number of blocks is around 635 but we ordered 650 to have some spares. We also ordered a ton bag of soft sand and eight bags of regular cement and a concrete lintel measuring 1200mm long, 100mm wide and 65mm thick to go over the doorway, it is rated at seven kilo-newtons (7kN/m) and we calculated that the block and beam ceiling will be 3.6kN per metre , loading over the 900mm wide doorway. That means a double safety factor, without us having to do anything special, just the minimum strength of the lintel we selected.
    We have asked Jewson’s for a price on the whole job and we are waiting for it…