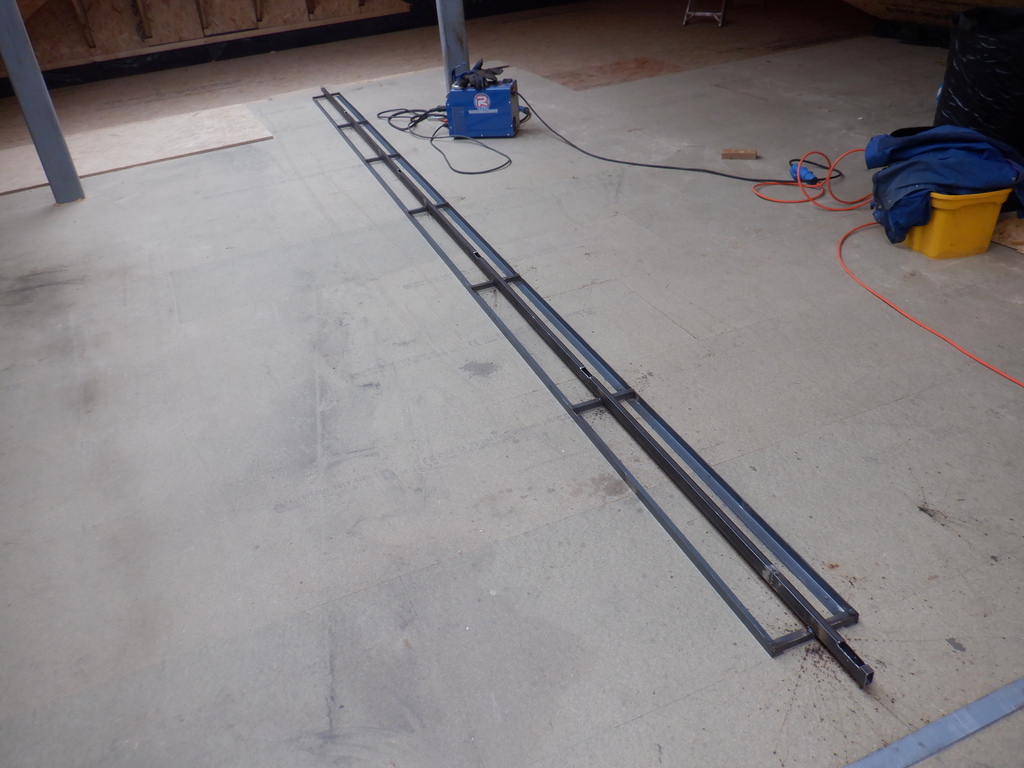
The framework is a set of steel elements, made up of 2 pairs of 40mm heavier duty angle iron forming the basic 6metres rails that will have the ceiling panel screwed to it. Then, a set of seven? short 25mm angle iron pieces are welded between these two main structural elements, tying them securely together, and providing a flat surface to weld the final major piece of metalwork, a tube measuring 40mm high by 20mm wide and being 6.7metres long. We had to extend this tube with an additional 700mm piece, welded onto the end of the 6metre piece. We chose to use this kind of material because it provided a very neat way of attaching our pulleys by cutting a little piece of the tube away, like a door, revealing a cavity where we drilled two holes aligned across the width, to allow a bolt to be inserted and tightened down with a nut. This bolt would hold a ball-race pulley, centred by the use of two little pieces of aluminium round tubing, place on either side of the pulley. The steel rope can then be threaded along inside the rectangular tube, from pulley to pulley, while keeping the rope protected from being snagged up in among electrical cables that will be snaking back and forth between lighting units.
Lighting Gantry 1
Gantry construction
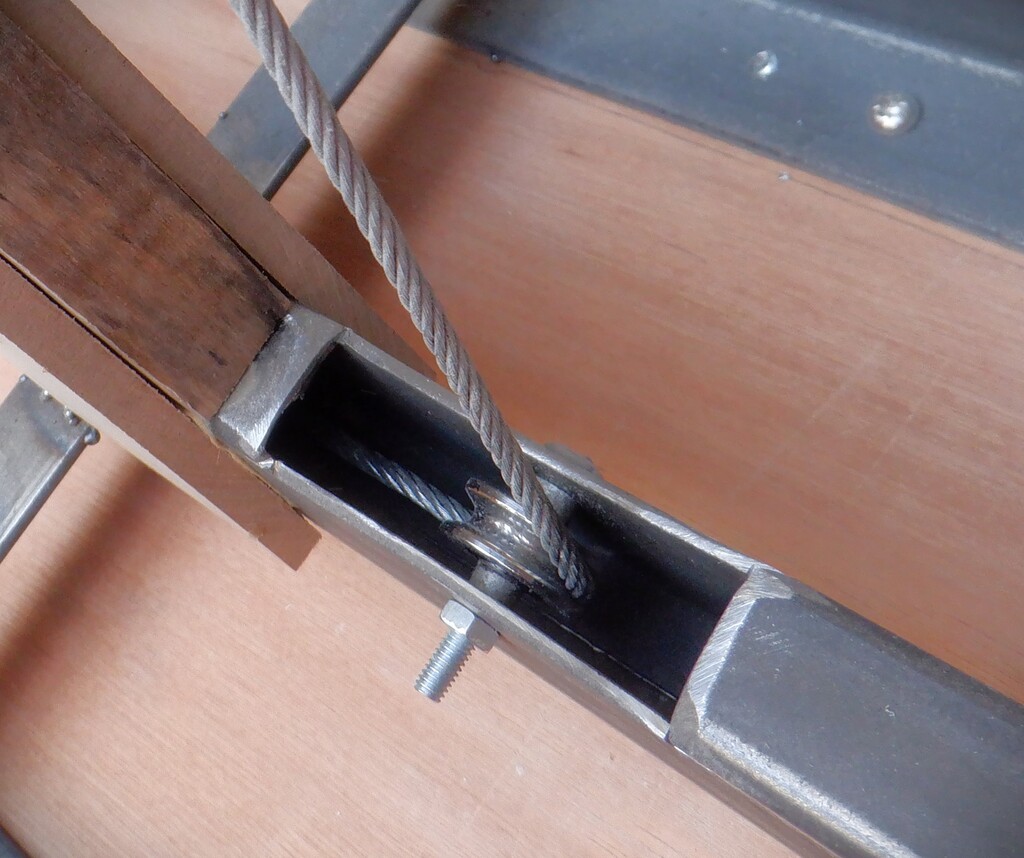
Gantry wire & pulley
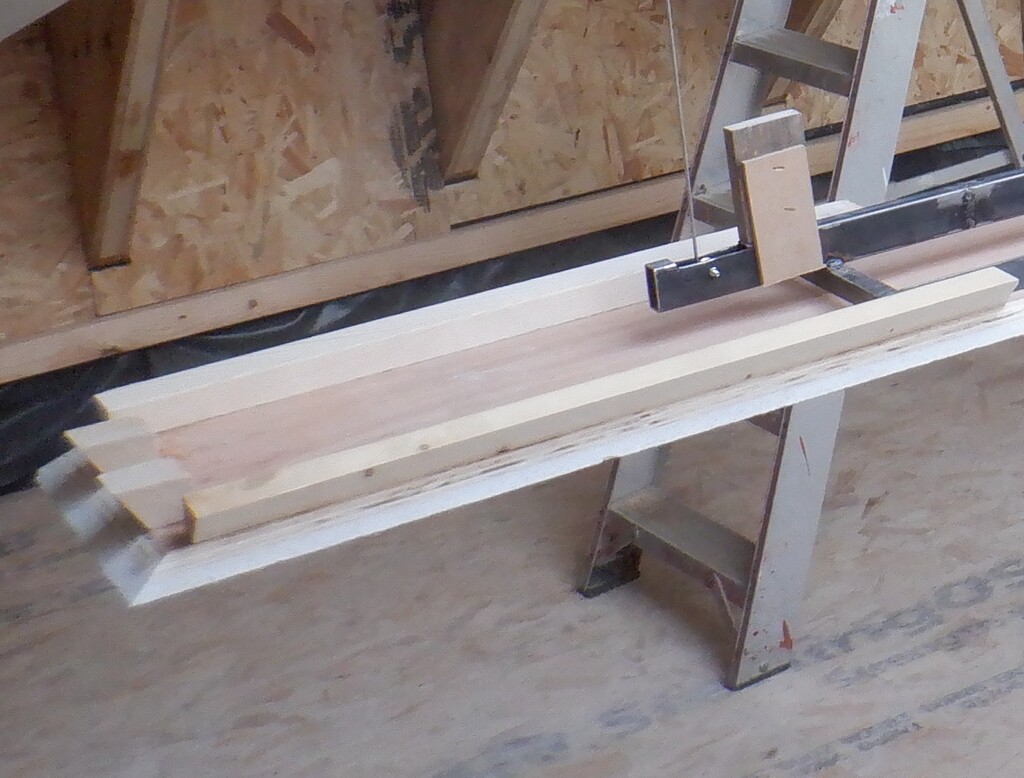
Meanwhile, we got a sheet of 12mm plywood that we had on our rack of sheet material, and a sheet of our “plasterboard” material called Fermacell, which is gypsum mixed with recycled newspaper and squashed very precisely into a 10mm thick boards. We sliced both sheets into 320mm wide strips and then proceeded to glue a pair of each together and stacking them up and adding six concrete blocks on top, to make sure the glue is well pressed while it dries and cures.A week or so later, we took these bi-layered strips, now 22mm thick, and very carefully sliced off both of the long edges, an angle cut of 40 degrees off the horizontal (which is 50 degrees to the sheet). All circular saws are vertical cutting machines and they can only tilt over to a maximum of 45degrees off the vertical, but we wanted to go another 5 degrees further, to make a shallow angle slope. So to solve this problem, we tilted our track up by placing it on a long piece of 63mm CLS timber, giving the machine an additional 15degree approximately. This enabled us to tilt the saw to the required 50degrees (off the vertical, which is the same as 40degrees off the horizontal) and run the saw along the aluminium track to slice the new sloping edges.
We also made sure that all three strips were all 300mm wide.
The next job was to cut one in half, because they would form the two ends and they both needed the short end edges cut off, one of them needing an even more extreme angle of 32degrees off the horizontal, to match the slope of the ceiling at the left end of the lighting module. The other end terminates up against a more pitched roof, measuring at 45degrees so we could cut that edge by using the circular saw in its “normal” mode.
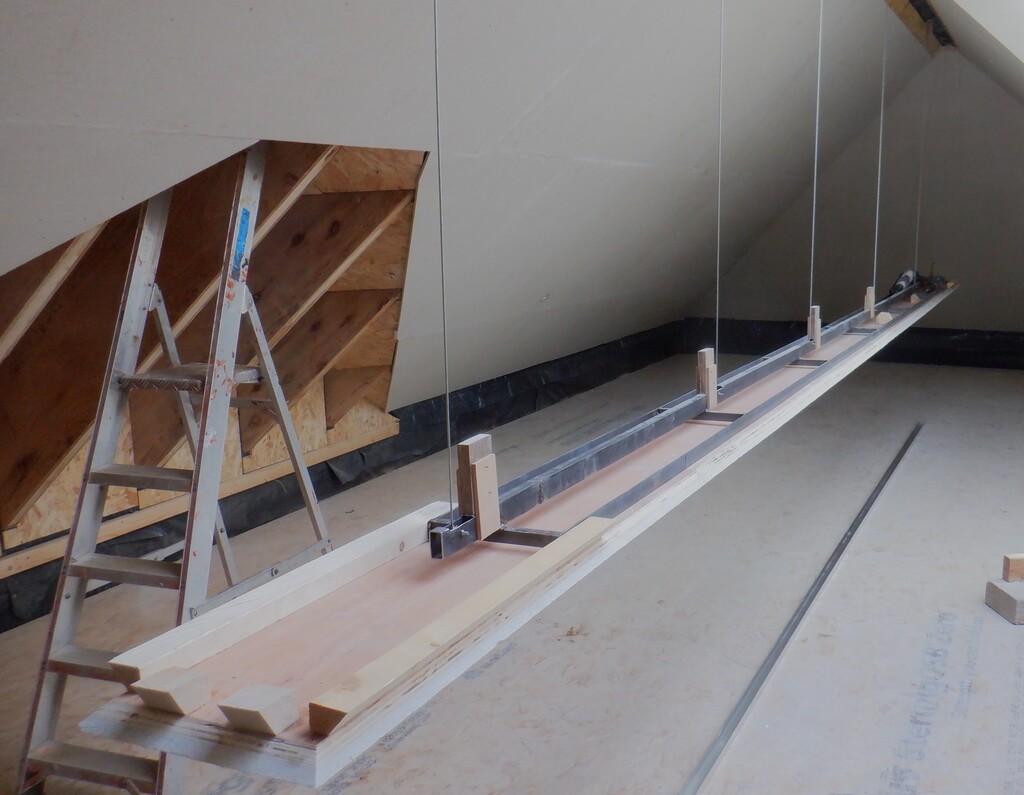
Now we have our two ends, we next needed to cut a tongue and groove ends so that we can connect up each strip and join all of them into a single monolithic strip. But, we had to get the two ends up on the metal framework first so that they were touching the two slopes of the ceiling at each ends, so we can measure the middle two strips so that it all fitted together into a neat single strip.
Gantry hanging
This “false” ceiling doesn’t quite touch the main ceiling around it, because we wanted to provide illumination down the slopes of the roof, to provide a gentle indirect glow shining off the ceiling and into our room. So we are going to install an aluminium channel with LED lights in it along the edges of the gantry. There will also be a dozen or so round lighting units along the bottom of entire mobile module, to provide direct main lighting when we need it. Also, being mobile, we can lower it down and attach other decorative lighting features like Christmas lights etc.
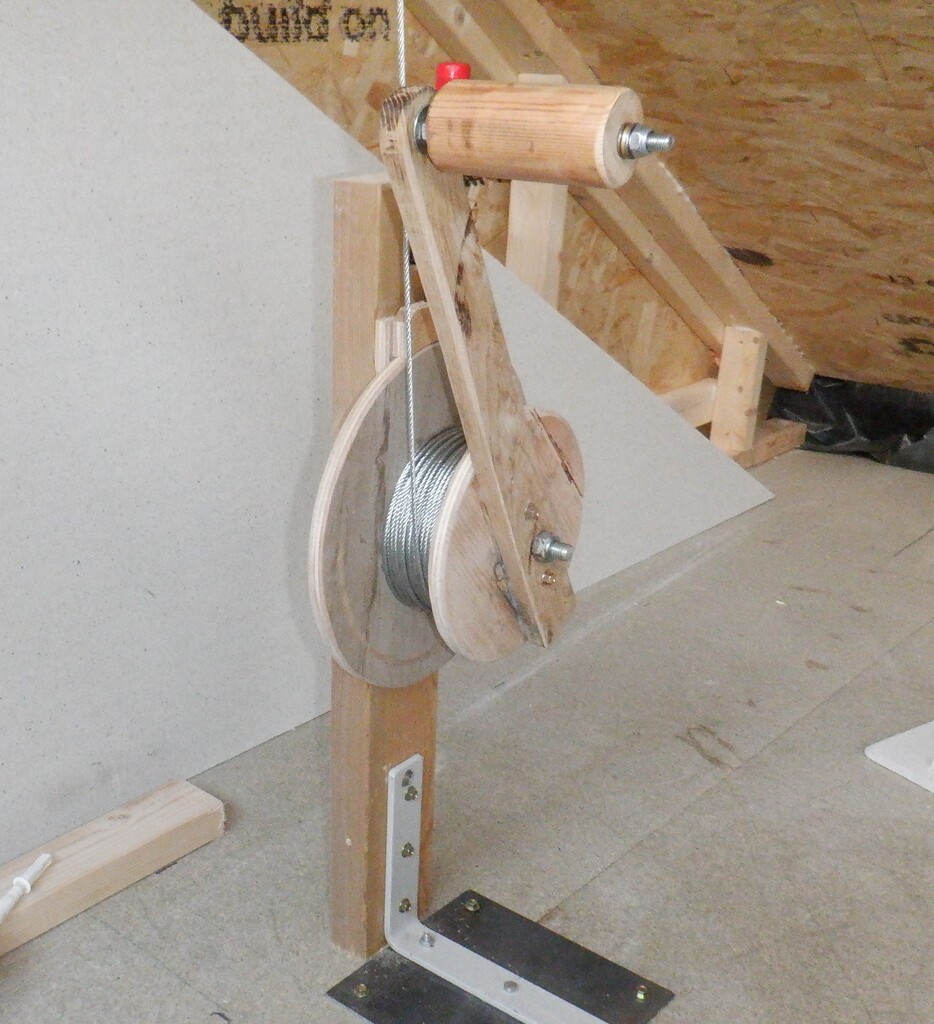
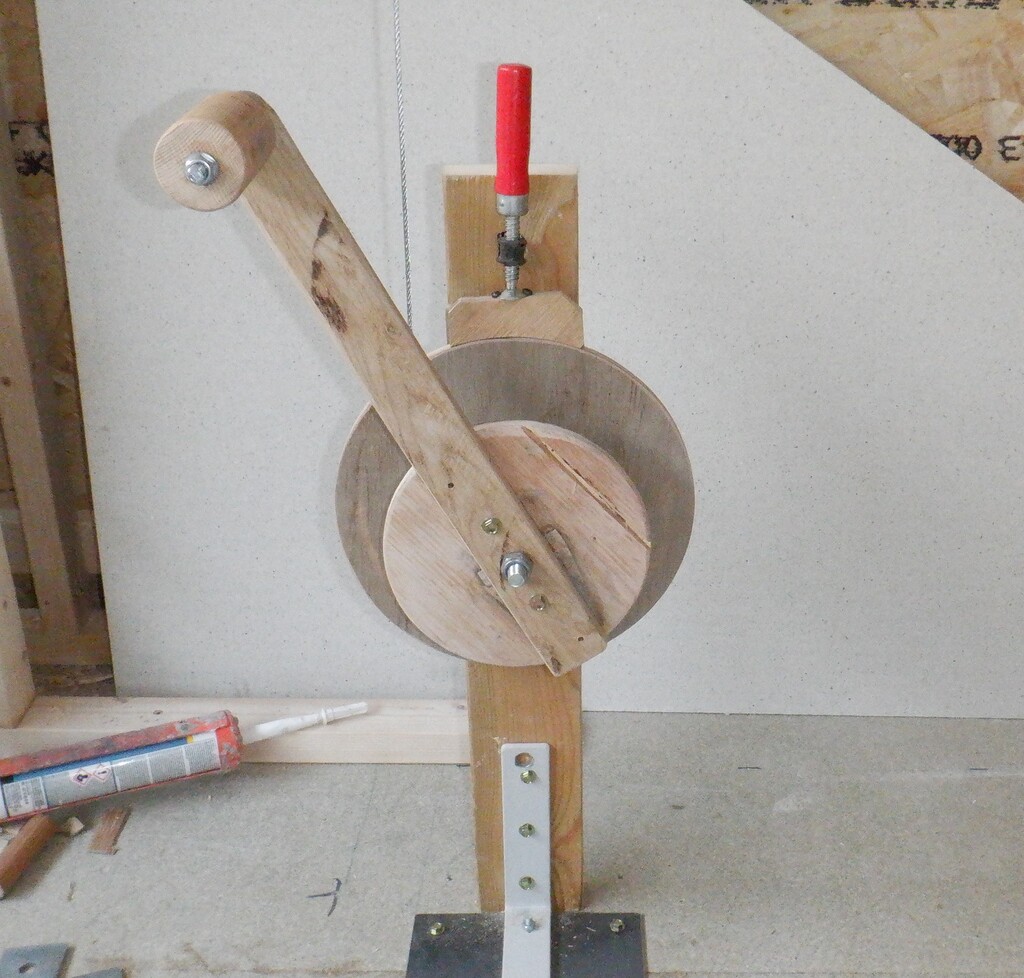
Talking about lowering it down, we have built a winch with a long handle so we can unwind the steel rope more easily, in a controlled manner and take the strain of the weight of the whole module. We also sprayed on lubricating PTFE “oil” on the steel rope so it slips through the plastic conduit much better and don’t wear the plastic pipe away. It will not be that often, operating the wince and lowering the lighting module, perhaps once a year at Christmas time.
In between these times, we put on a safety braking and locking system, to clamp the drum down tight so the lighting module is securely held up and won’t budge.
Gantry winch (1)
Gantry winch (2)
Eventually, we may replace this hand-operated winch, with an powered one. We will see!