Category: Energy Modules

Buried Hot Water Tanks to Collect any spare energy from the Sun via eletric or water thermal.

  • Energy Module Number Four has a leak (probably)!

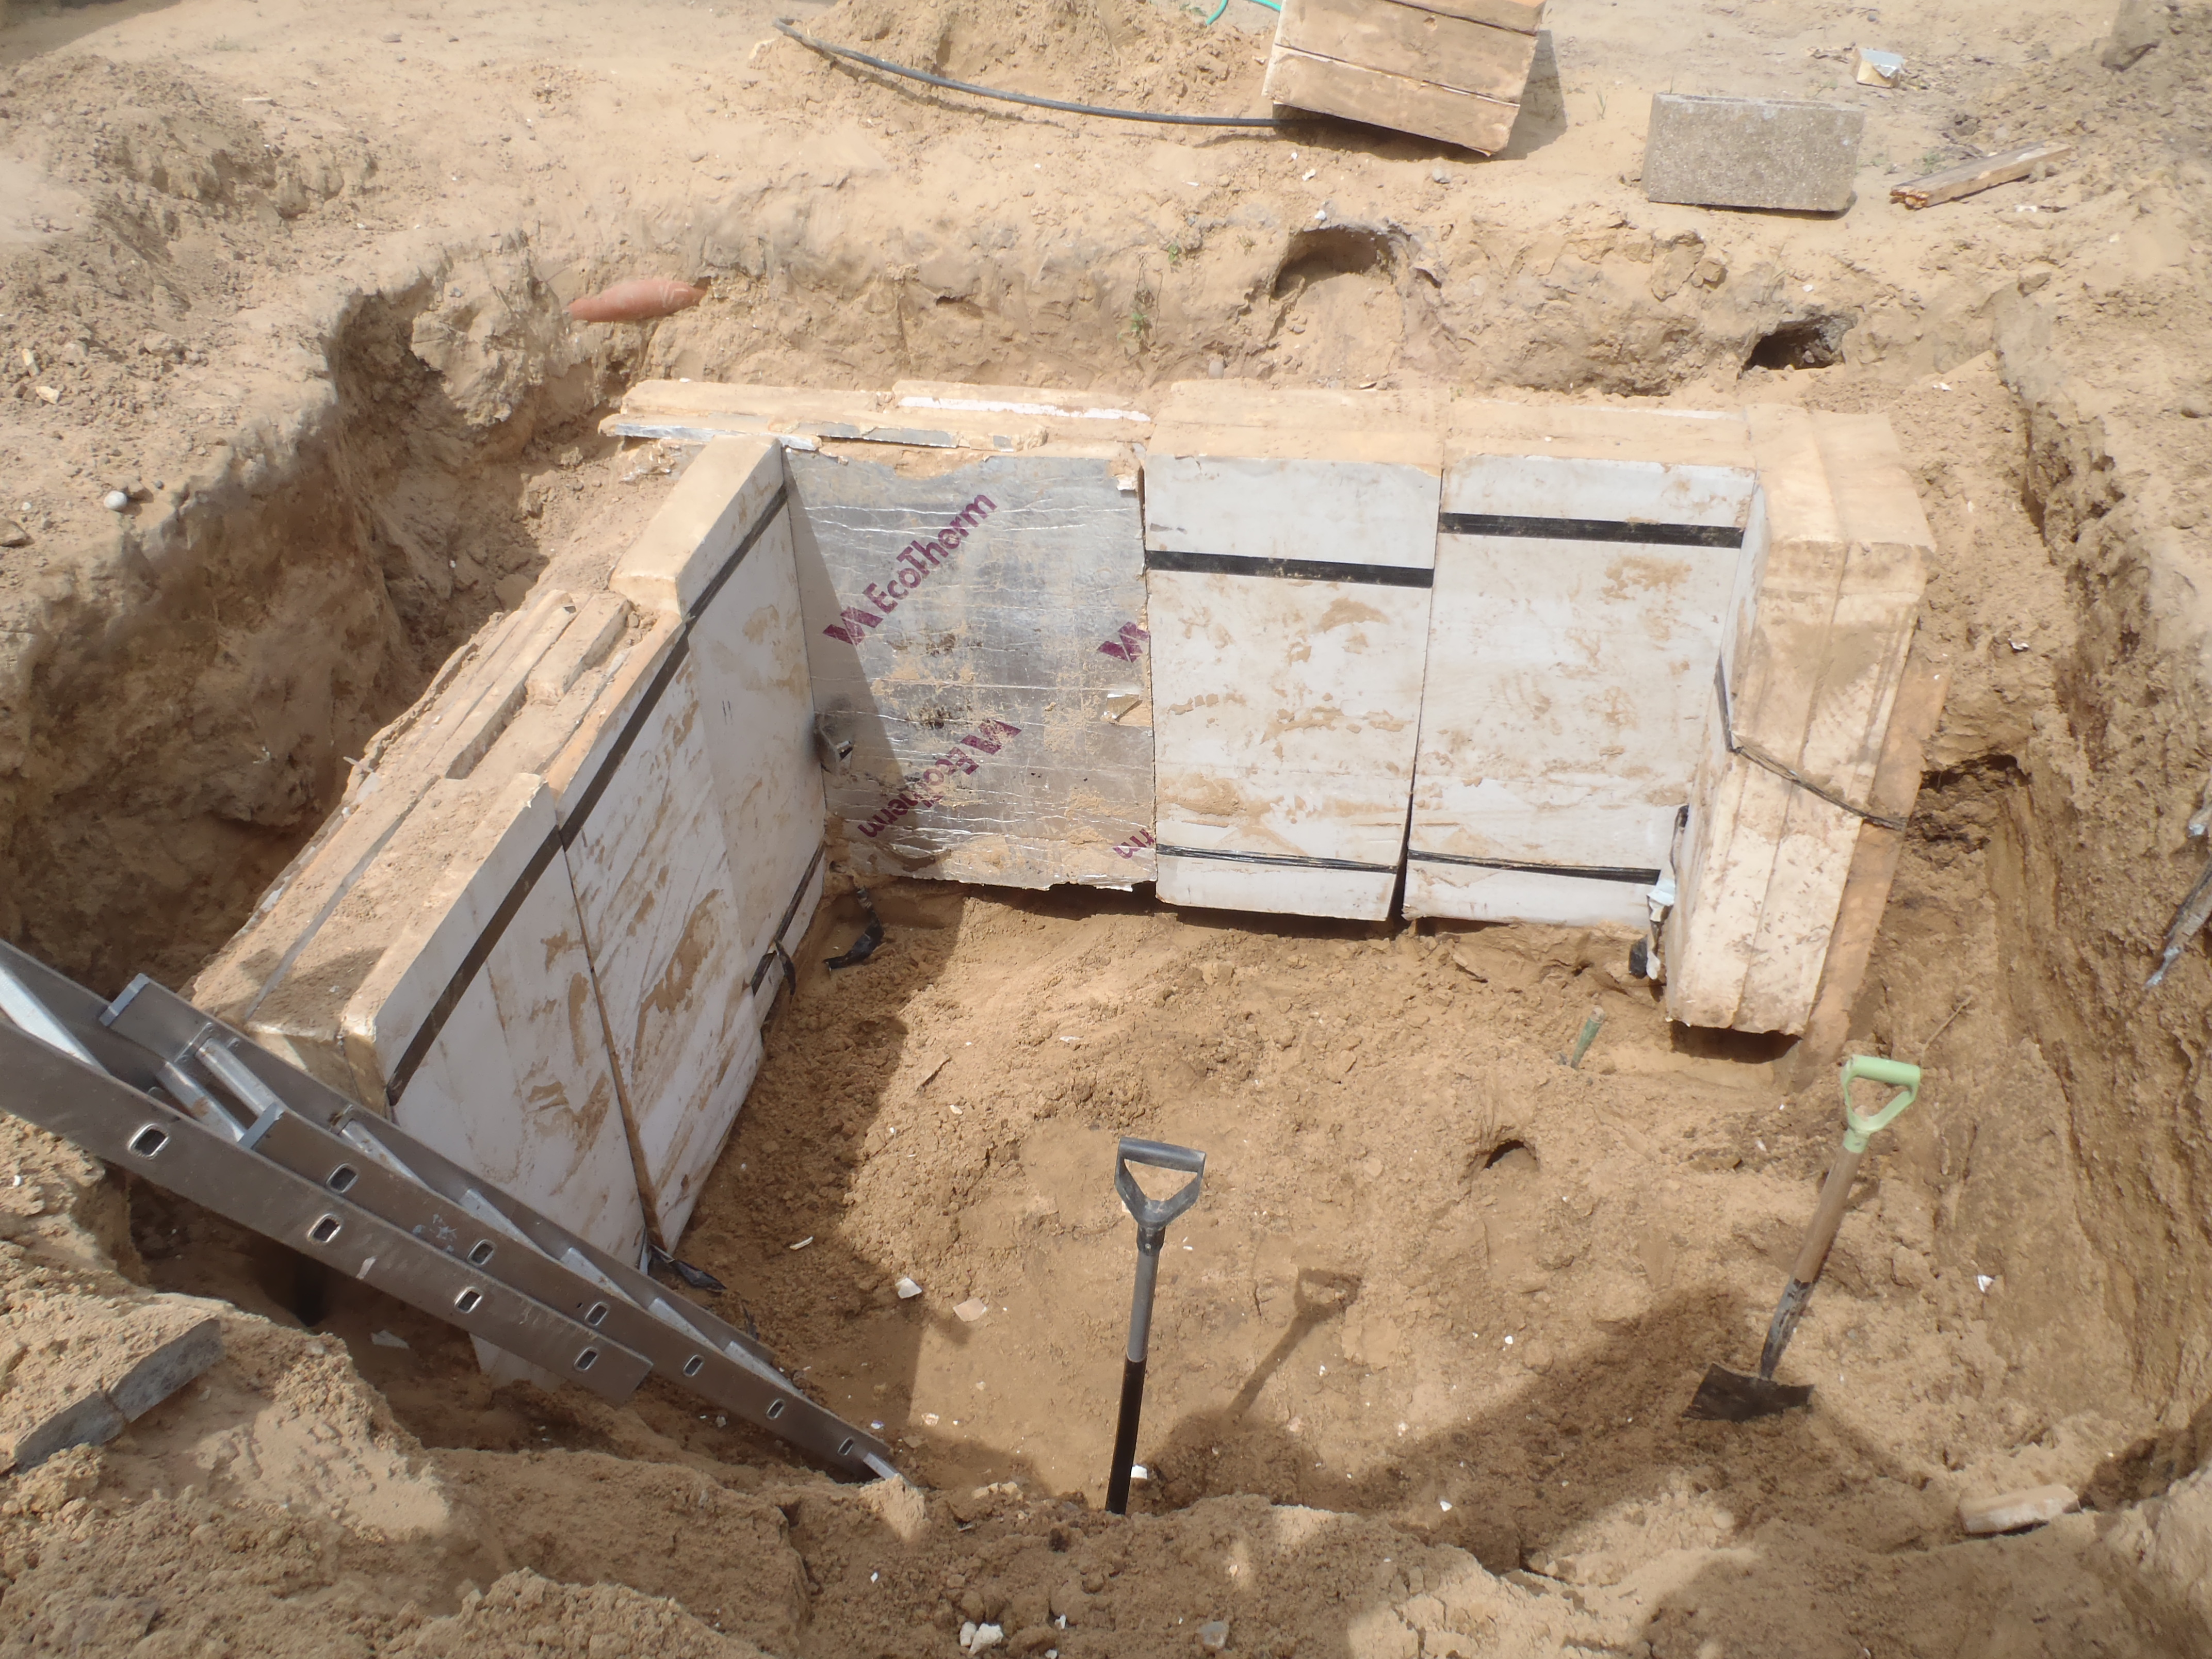
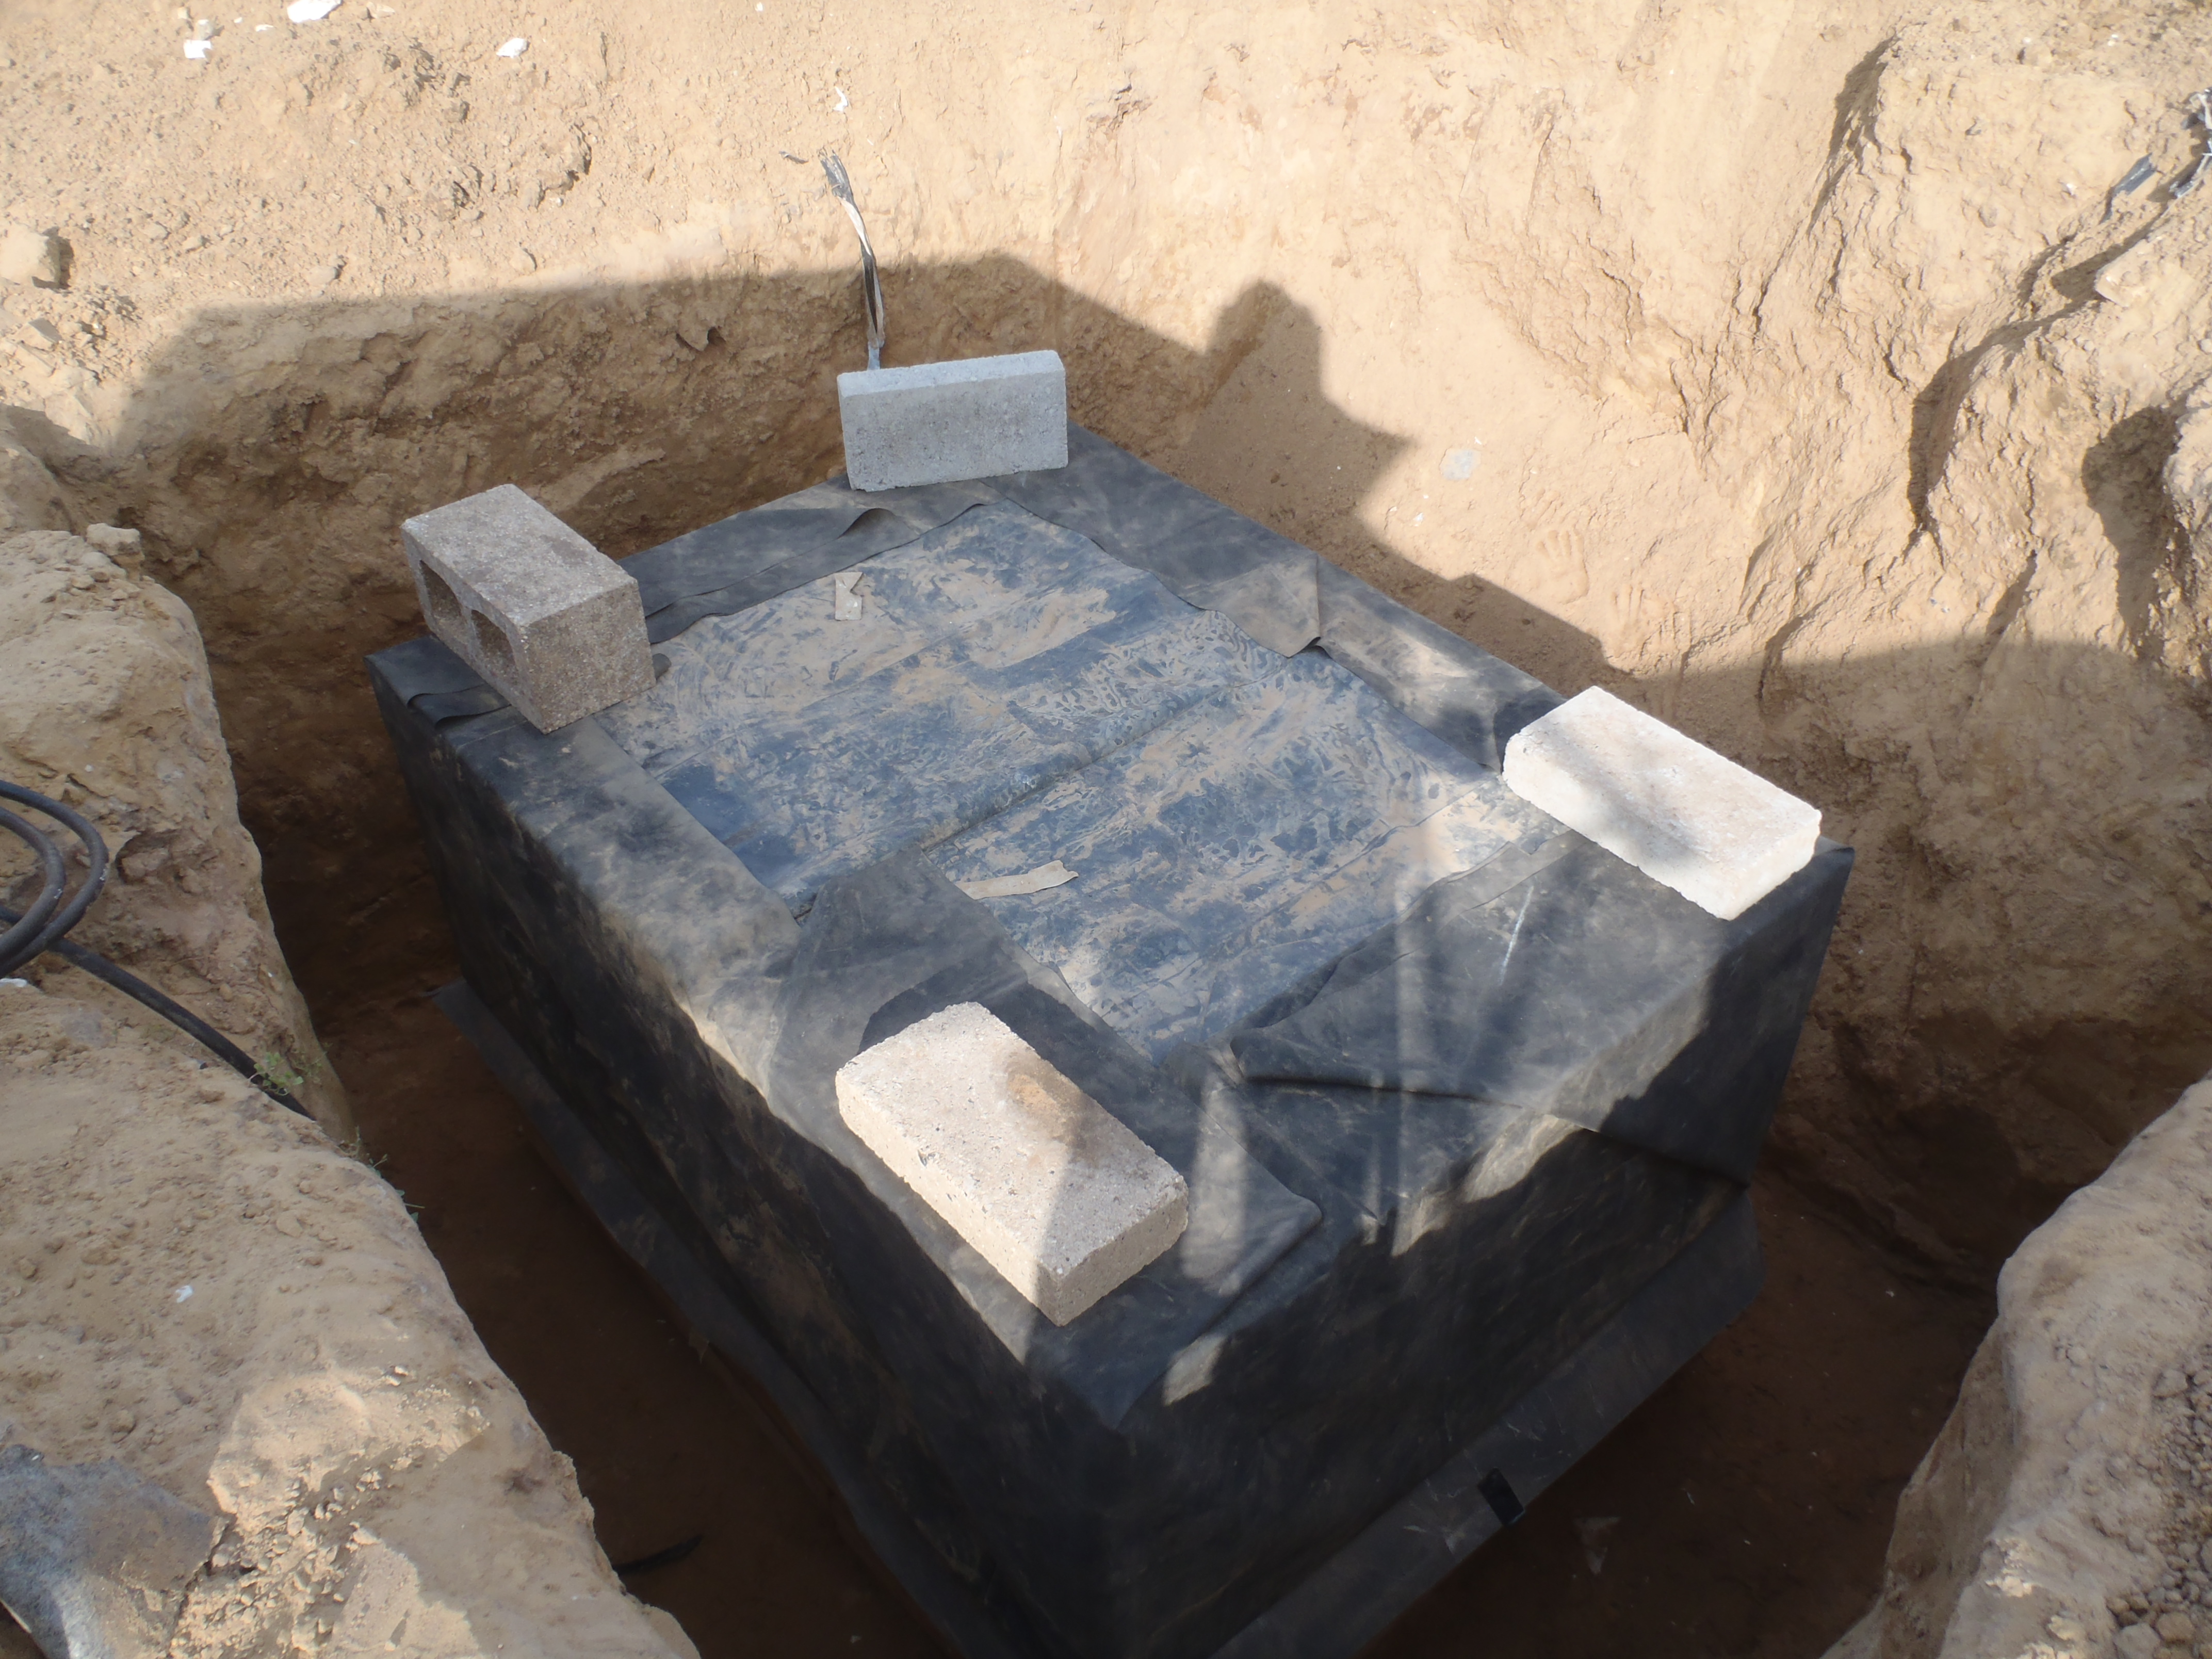
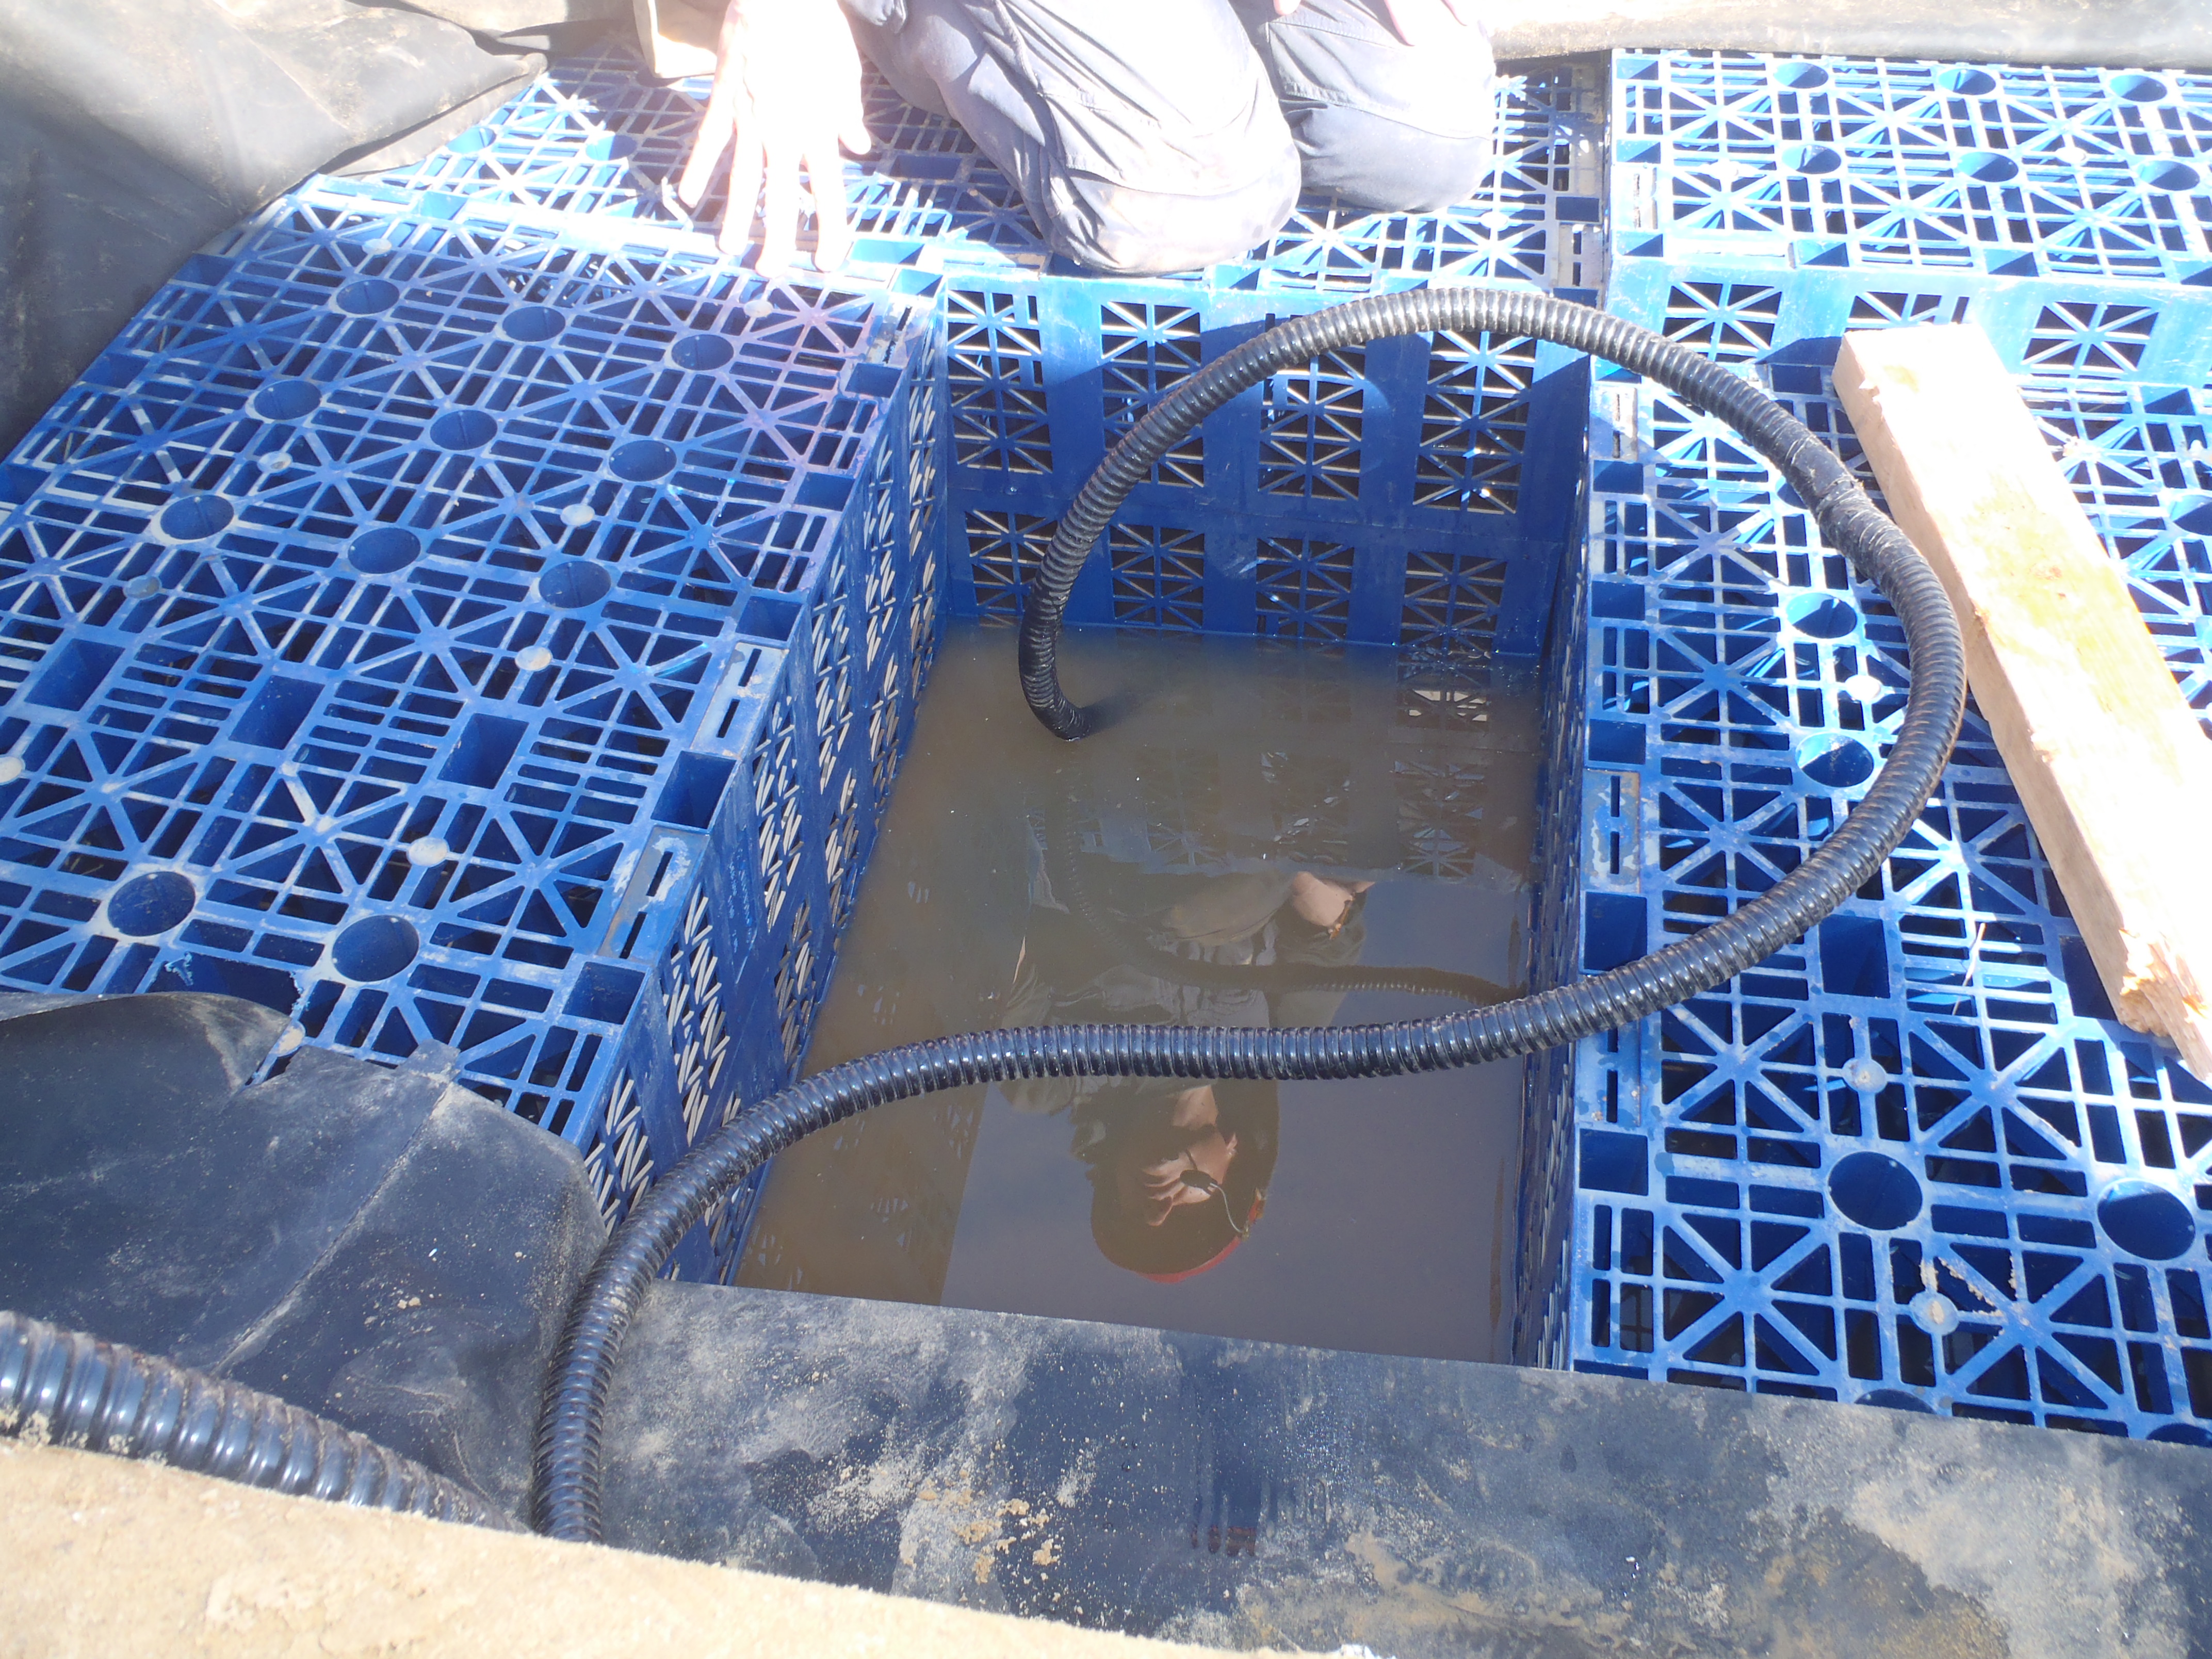
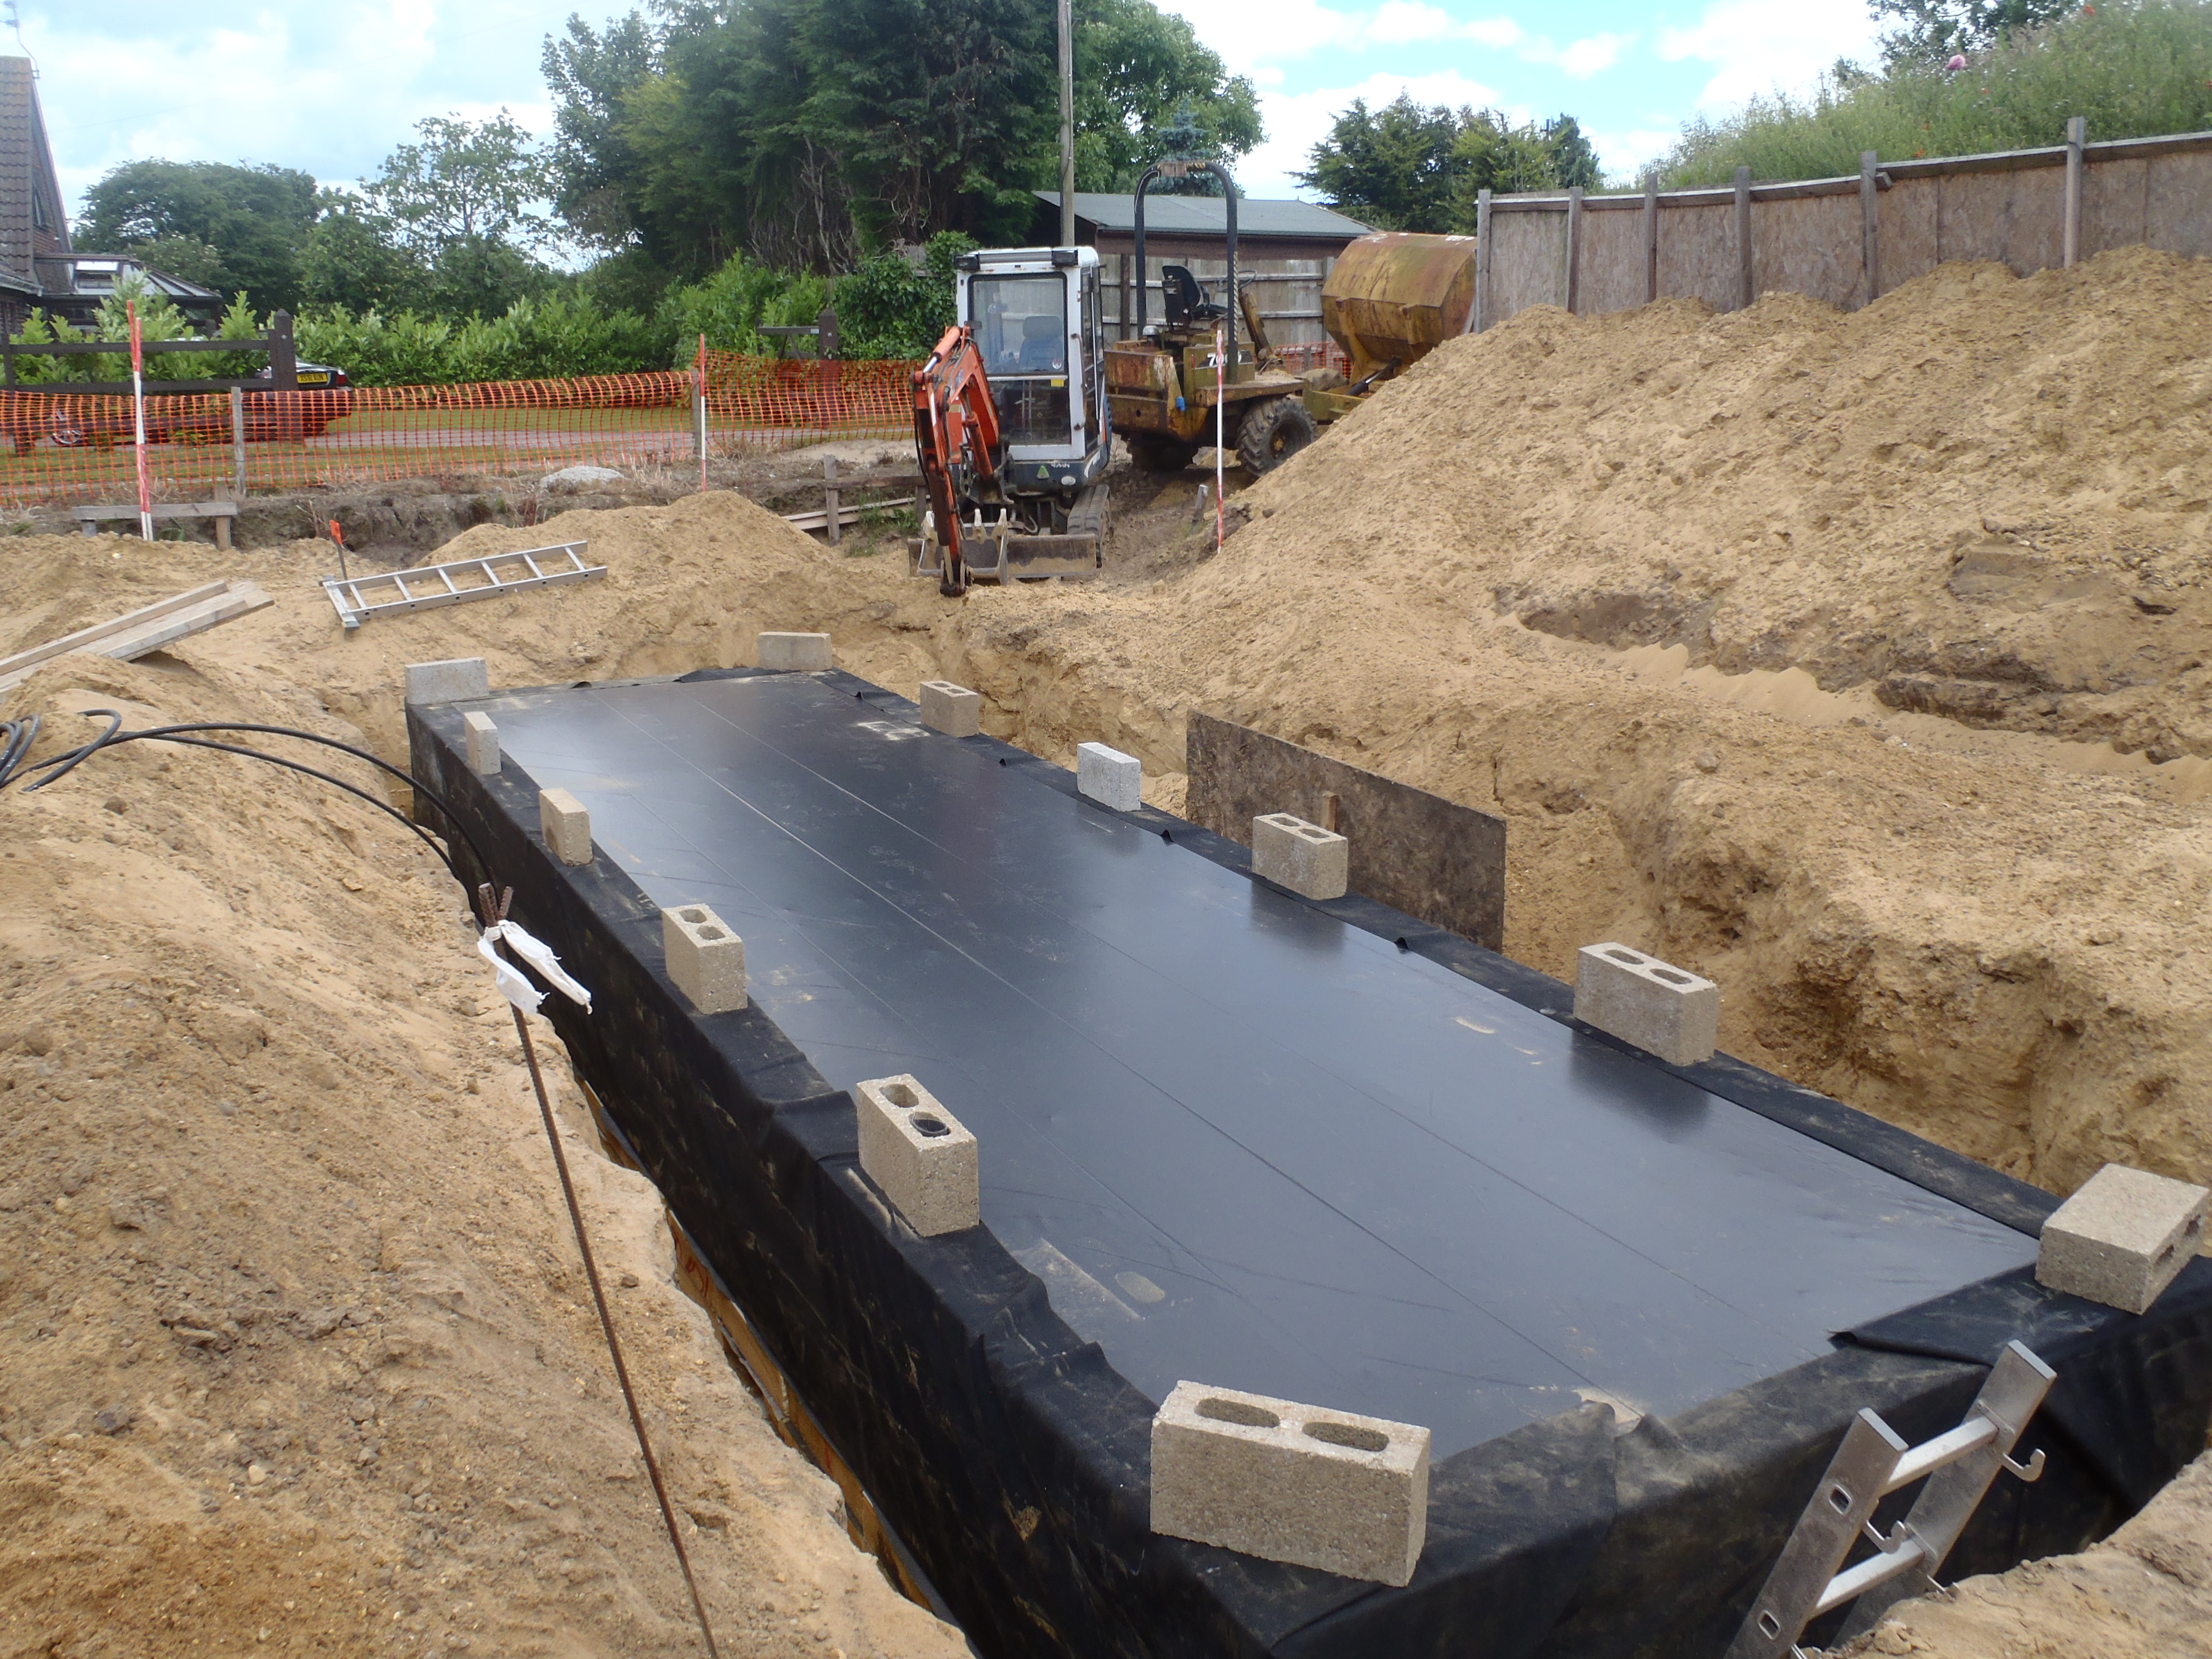
    We discovered a very disturbing problem with one of our Energy Module when we were connecting our newly laid 22mm water pipe running from the Utility Room, to Tank Number Four that lies under the Kitchen and Bedroom One. We noticed that the water level was very low and after measuring it, there was only 130mm of water lying in the bottom, when there should have nearly 800mm depth of water. We are pretty sure that we had filled them up when we installed them years ago, but somehow, we have sprung a leak.

    But, because it was so long ago, we have to make sure we do have a leak actually. To check this out, we connected up our pump that is already located in the bottom of the Rain Water tank underneath the Garage and diverted the pipework into the house, by using one of the existing 22mm water pipe that is travelling from the Garage to the Utility Room (this pipe will be used for transferring the hot water from the Thermal Solar Panels sitting on top of the Garage) and then connected it to our 22mm pipe that goes off to this Energy Module.

    We included a water meter to measure the amount we transferred. We don’t mind using this source of water because it is free anyway, being pure rain water.
    We managed to get it running after the usual hiccups and we put in about 900litres before the end of the day, just to see if we lost it again overnight. We created a little float stick and put on a zero mark beforehand and it is now reading 83mm.

    Energy Module Number Four has a leak (probably)!

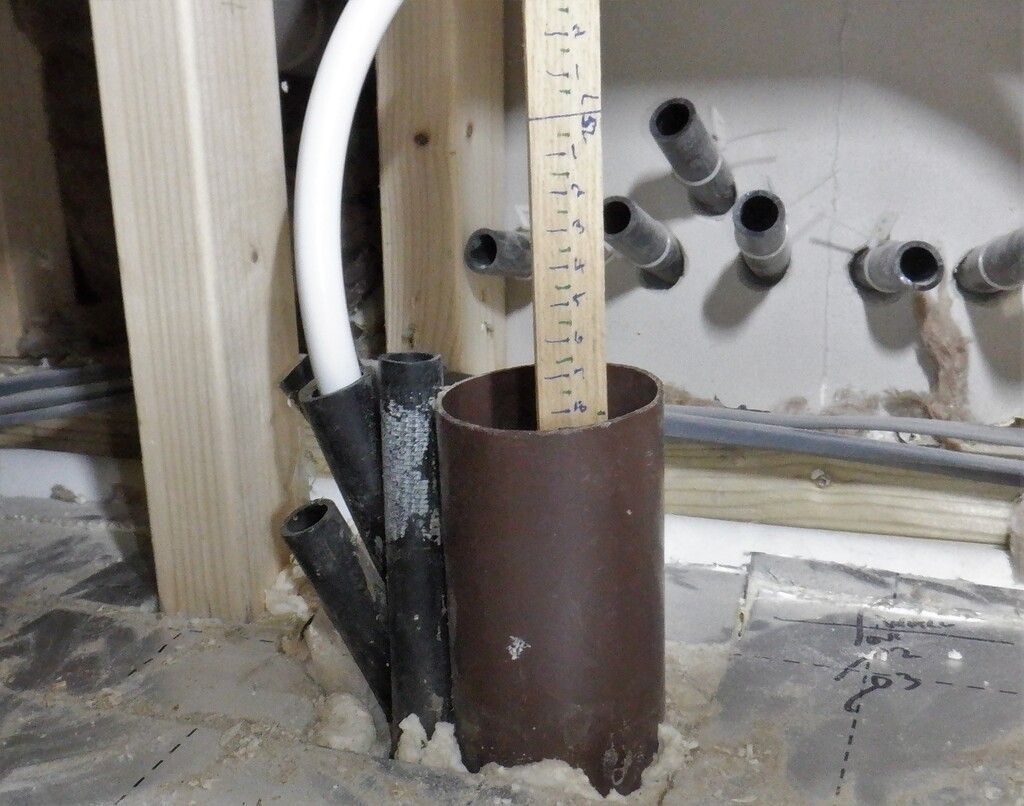
    Leak-measuring-gauge-on-25th


    But, in the morning, Tuesday morning, there was no signs of any leaks. So we continued to transfer more water and by lunch time at 1pm, we got the water level up to 250mm or about 2750litres extra for this experiment. We thought that maybe it needed more head of pressure to ‘force’ the leak.
    But again, 24 hours later, on Wednesday lunch time, it was still floating at the same 250mm mark.
    Energy Module Number Four has a leak (probably)!

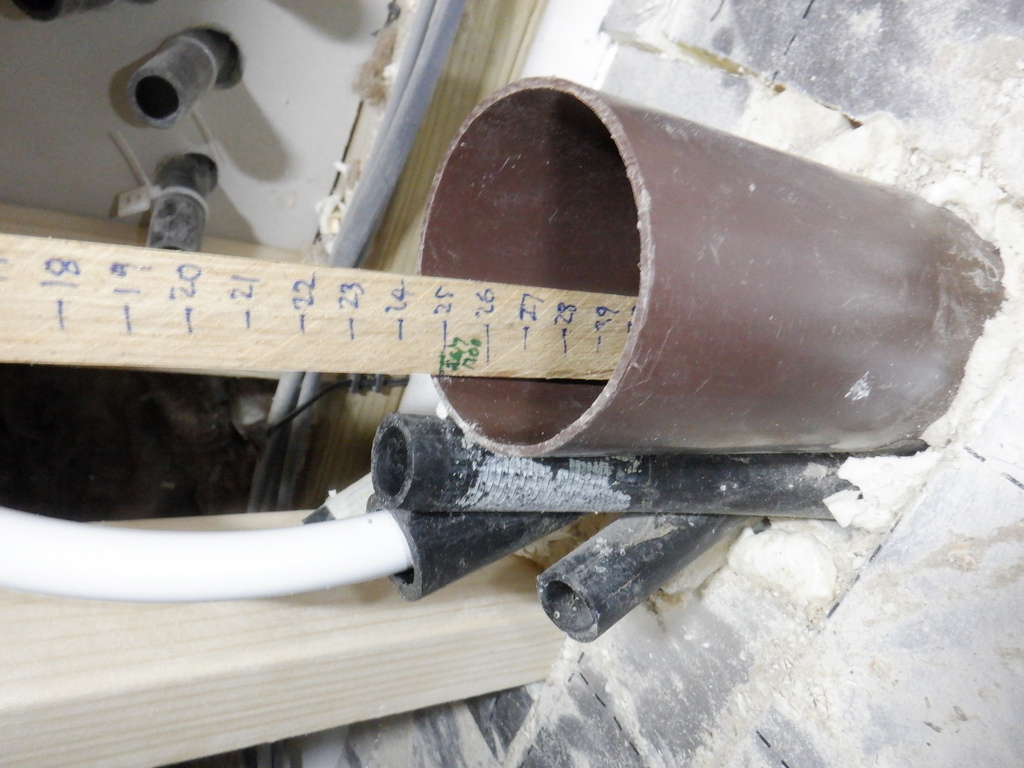
    Leak-measuring-gauge-on-27th-after-second-fill


    So we waited another day and today, at lunch time, we checked the level and it is still holding steady. We are now going to give it a few days and weeks and keep an eye on it to see what happened.
    It must be a very very slow leak and we may be able to cope with that, especially that we have found online a possible solution where a suspended ‘blocking’ particles can plug various leaks in ponds or swimming pools etc. It is not the most ideal practical solution because the instructions says that the water needs to be constantly stirred, to keep the mixture thoroughly suspended, and as you can imagine, our tanks are fully enclosed, have multiple internal ‘baffles’ and are buried under the concrete slab and not very accessible. It only costs about £20 for a bottle so it is perhaps worth a try anyway.
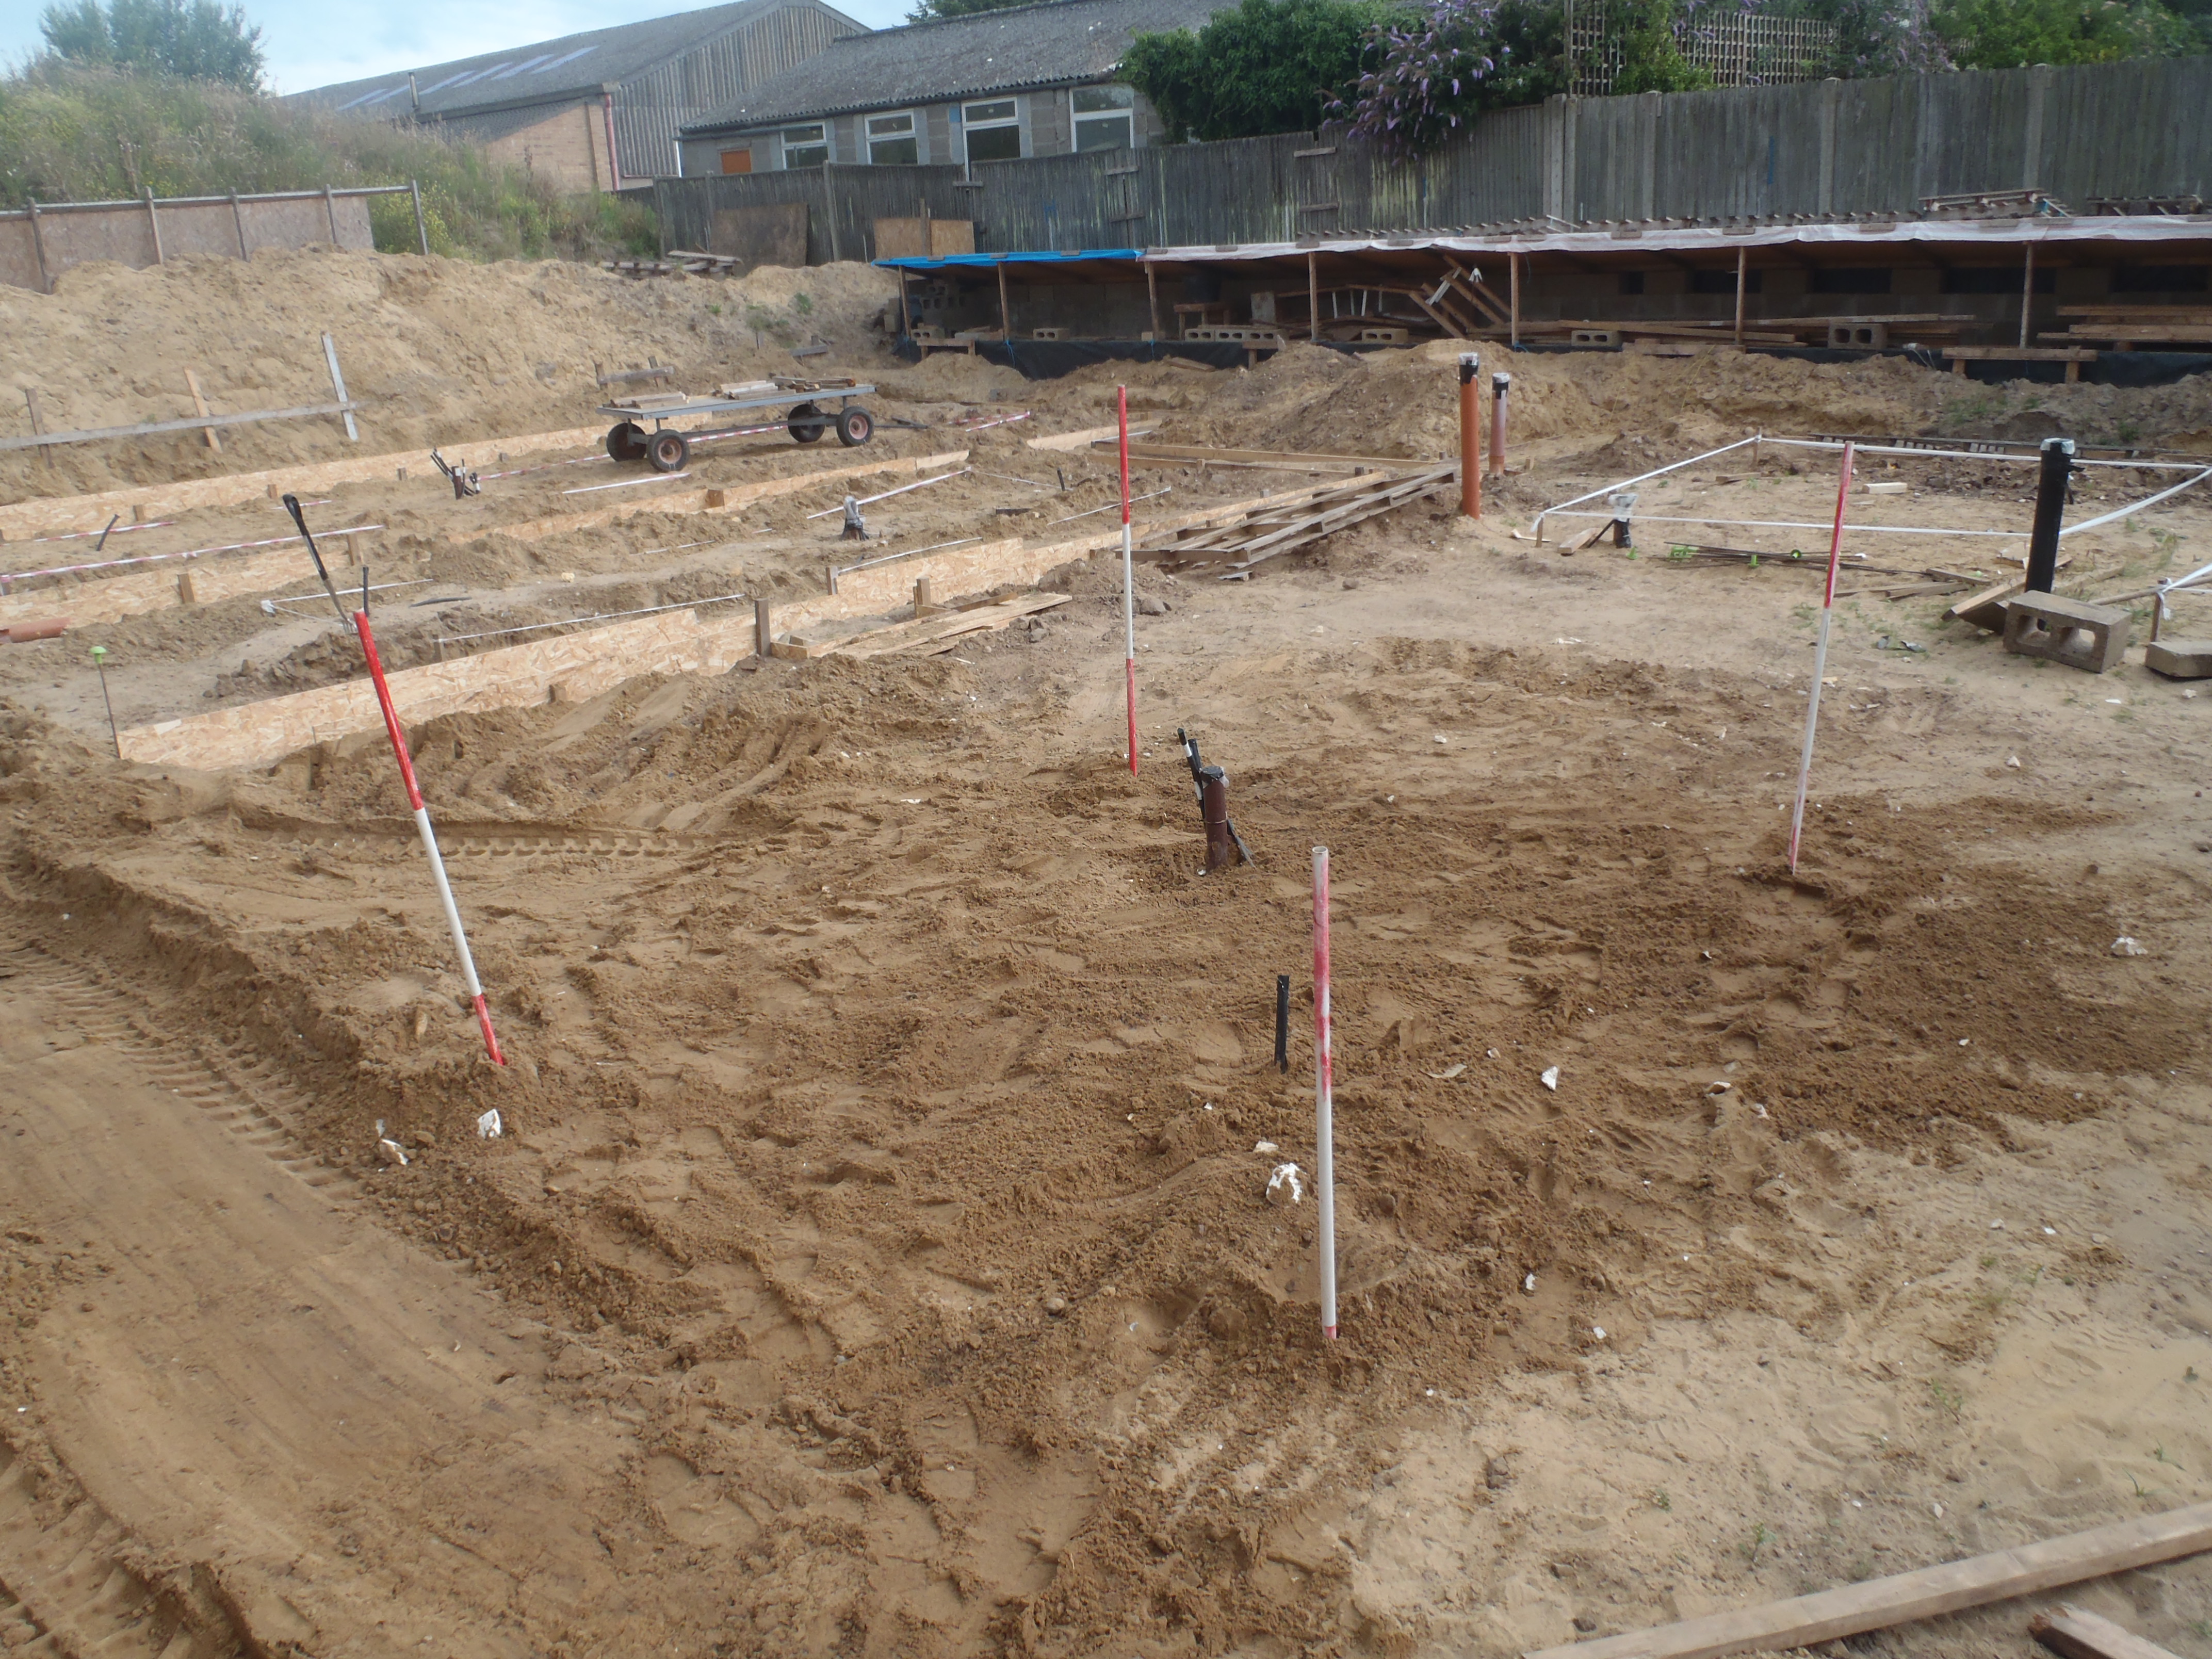
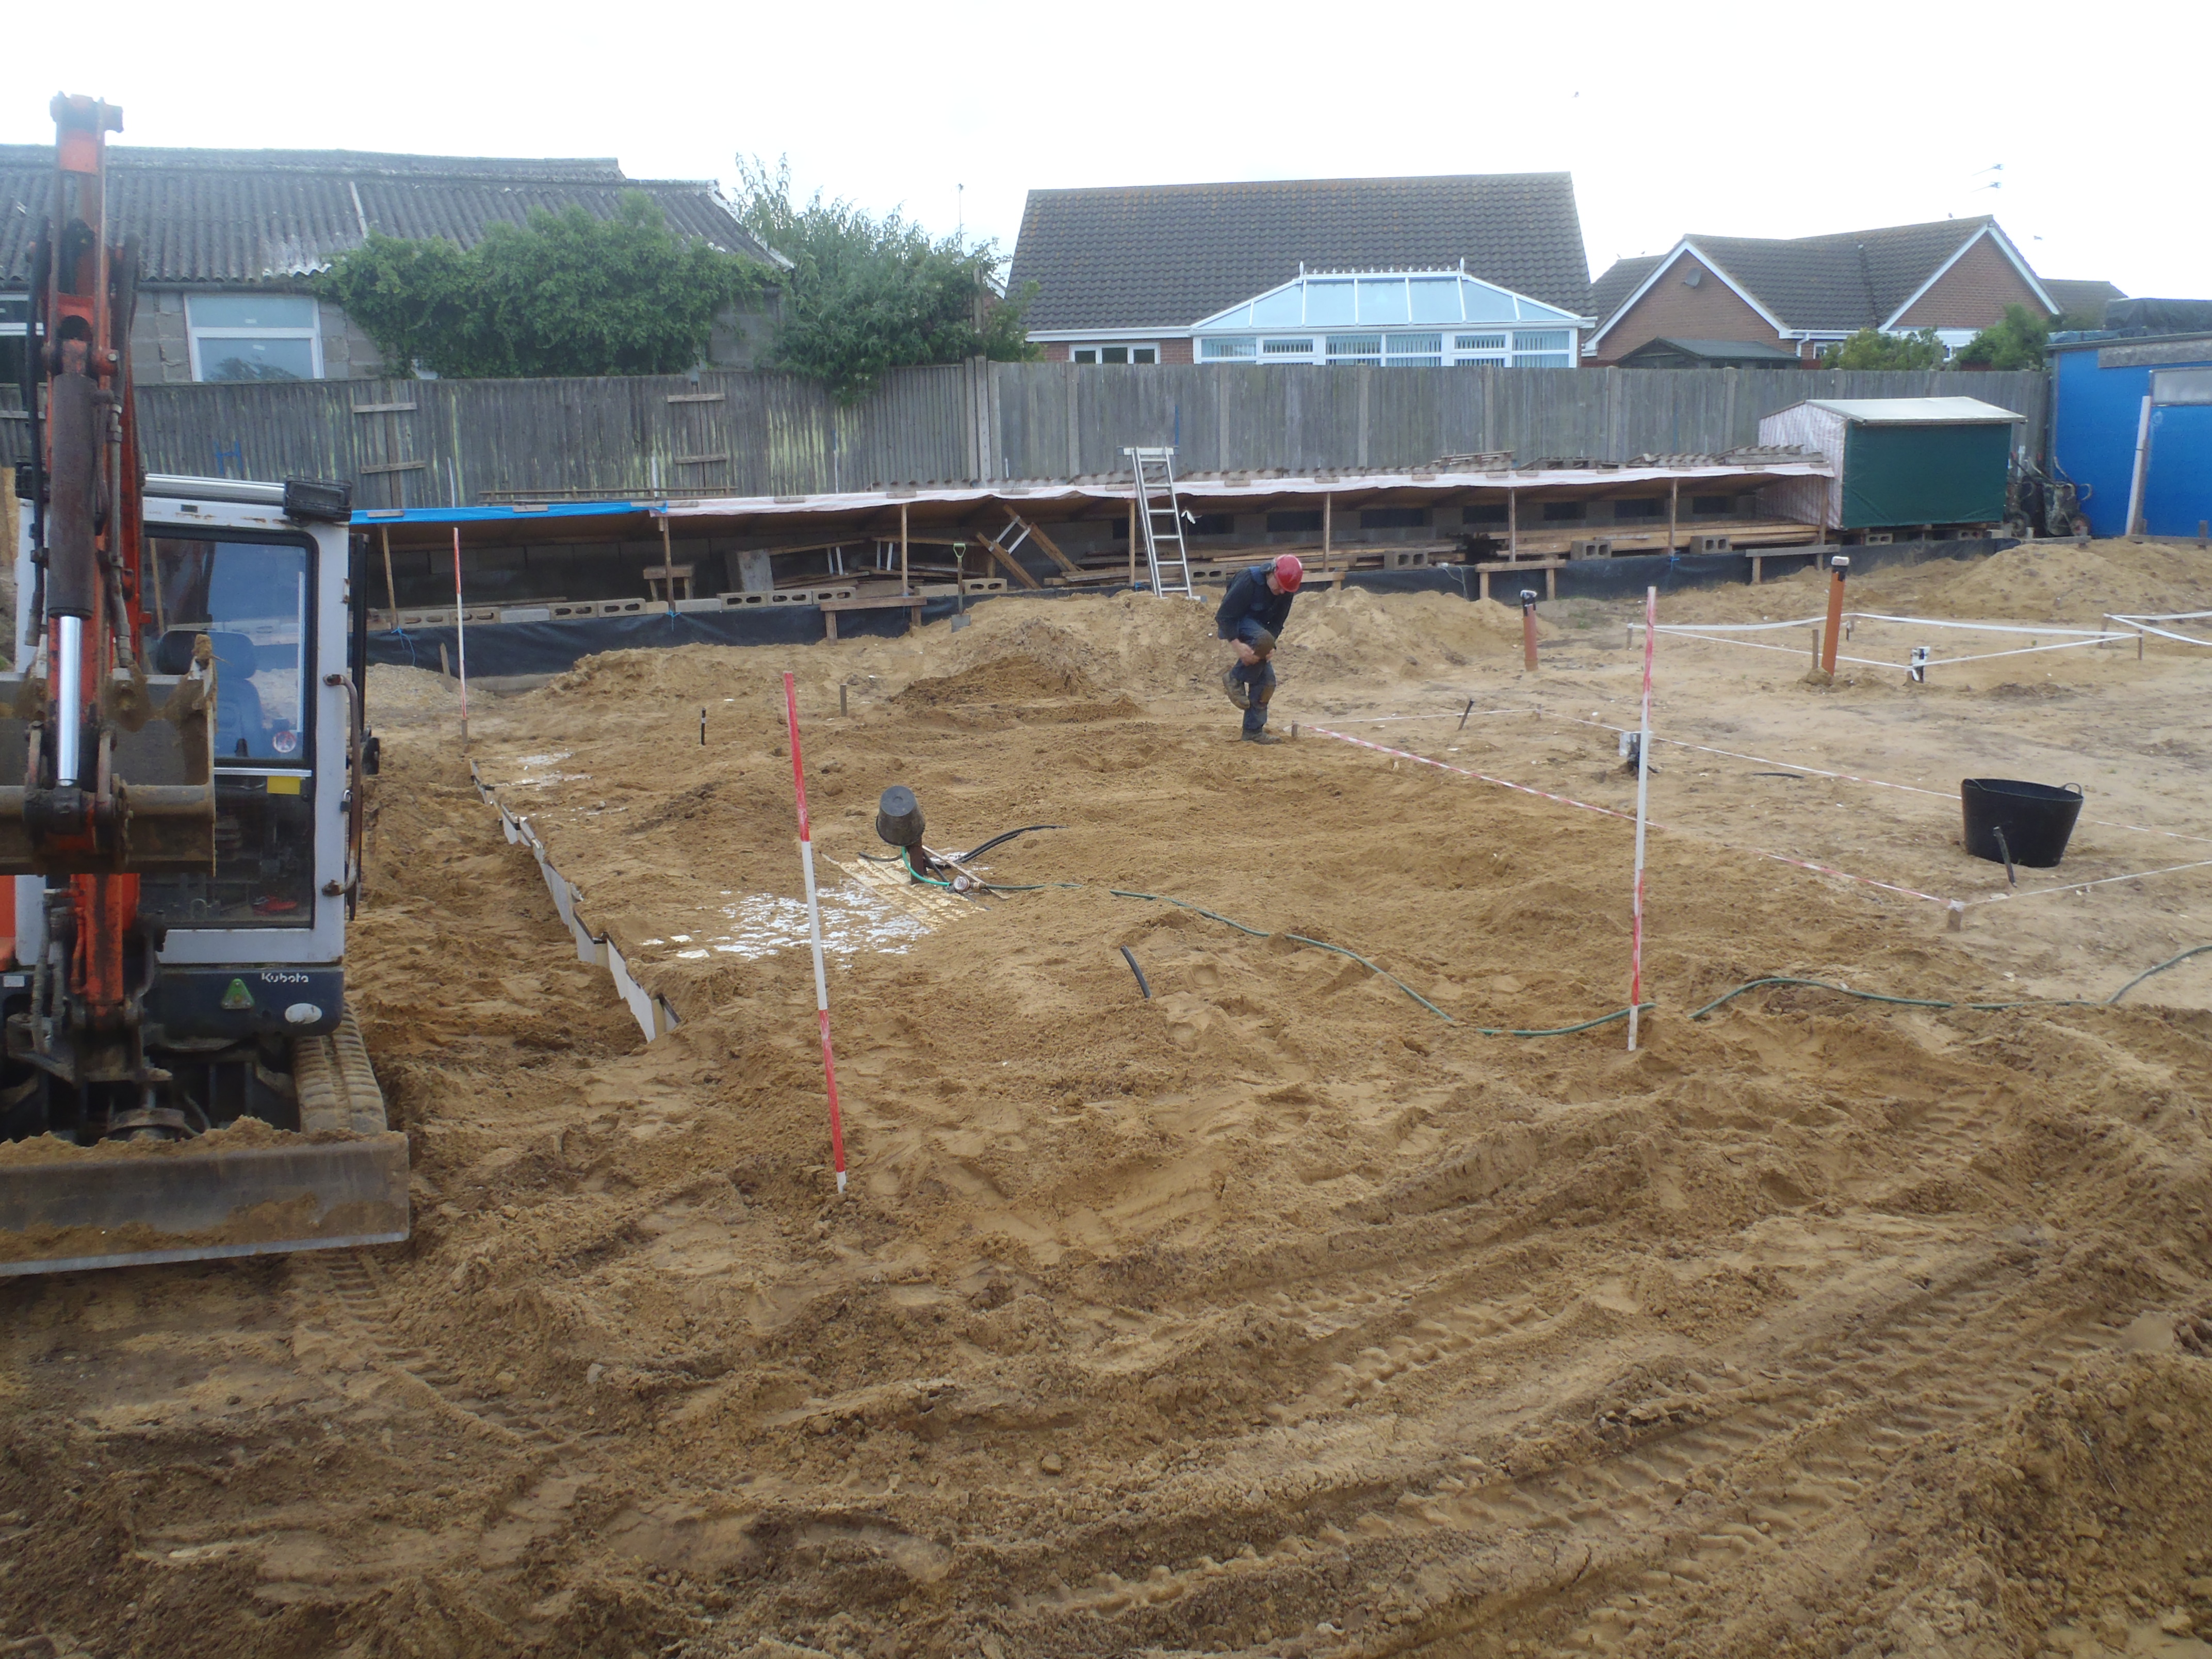
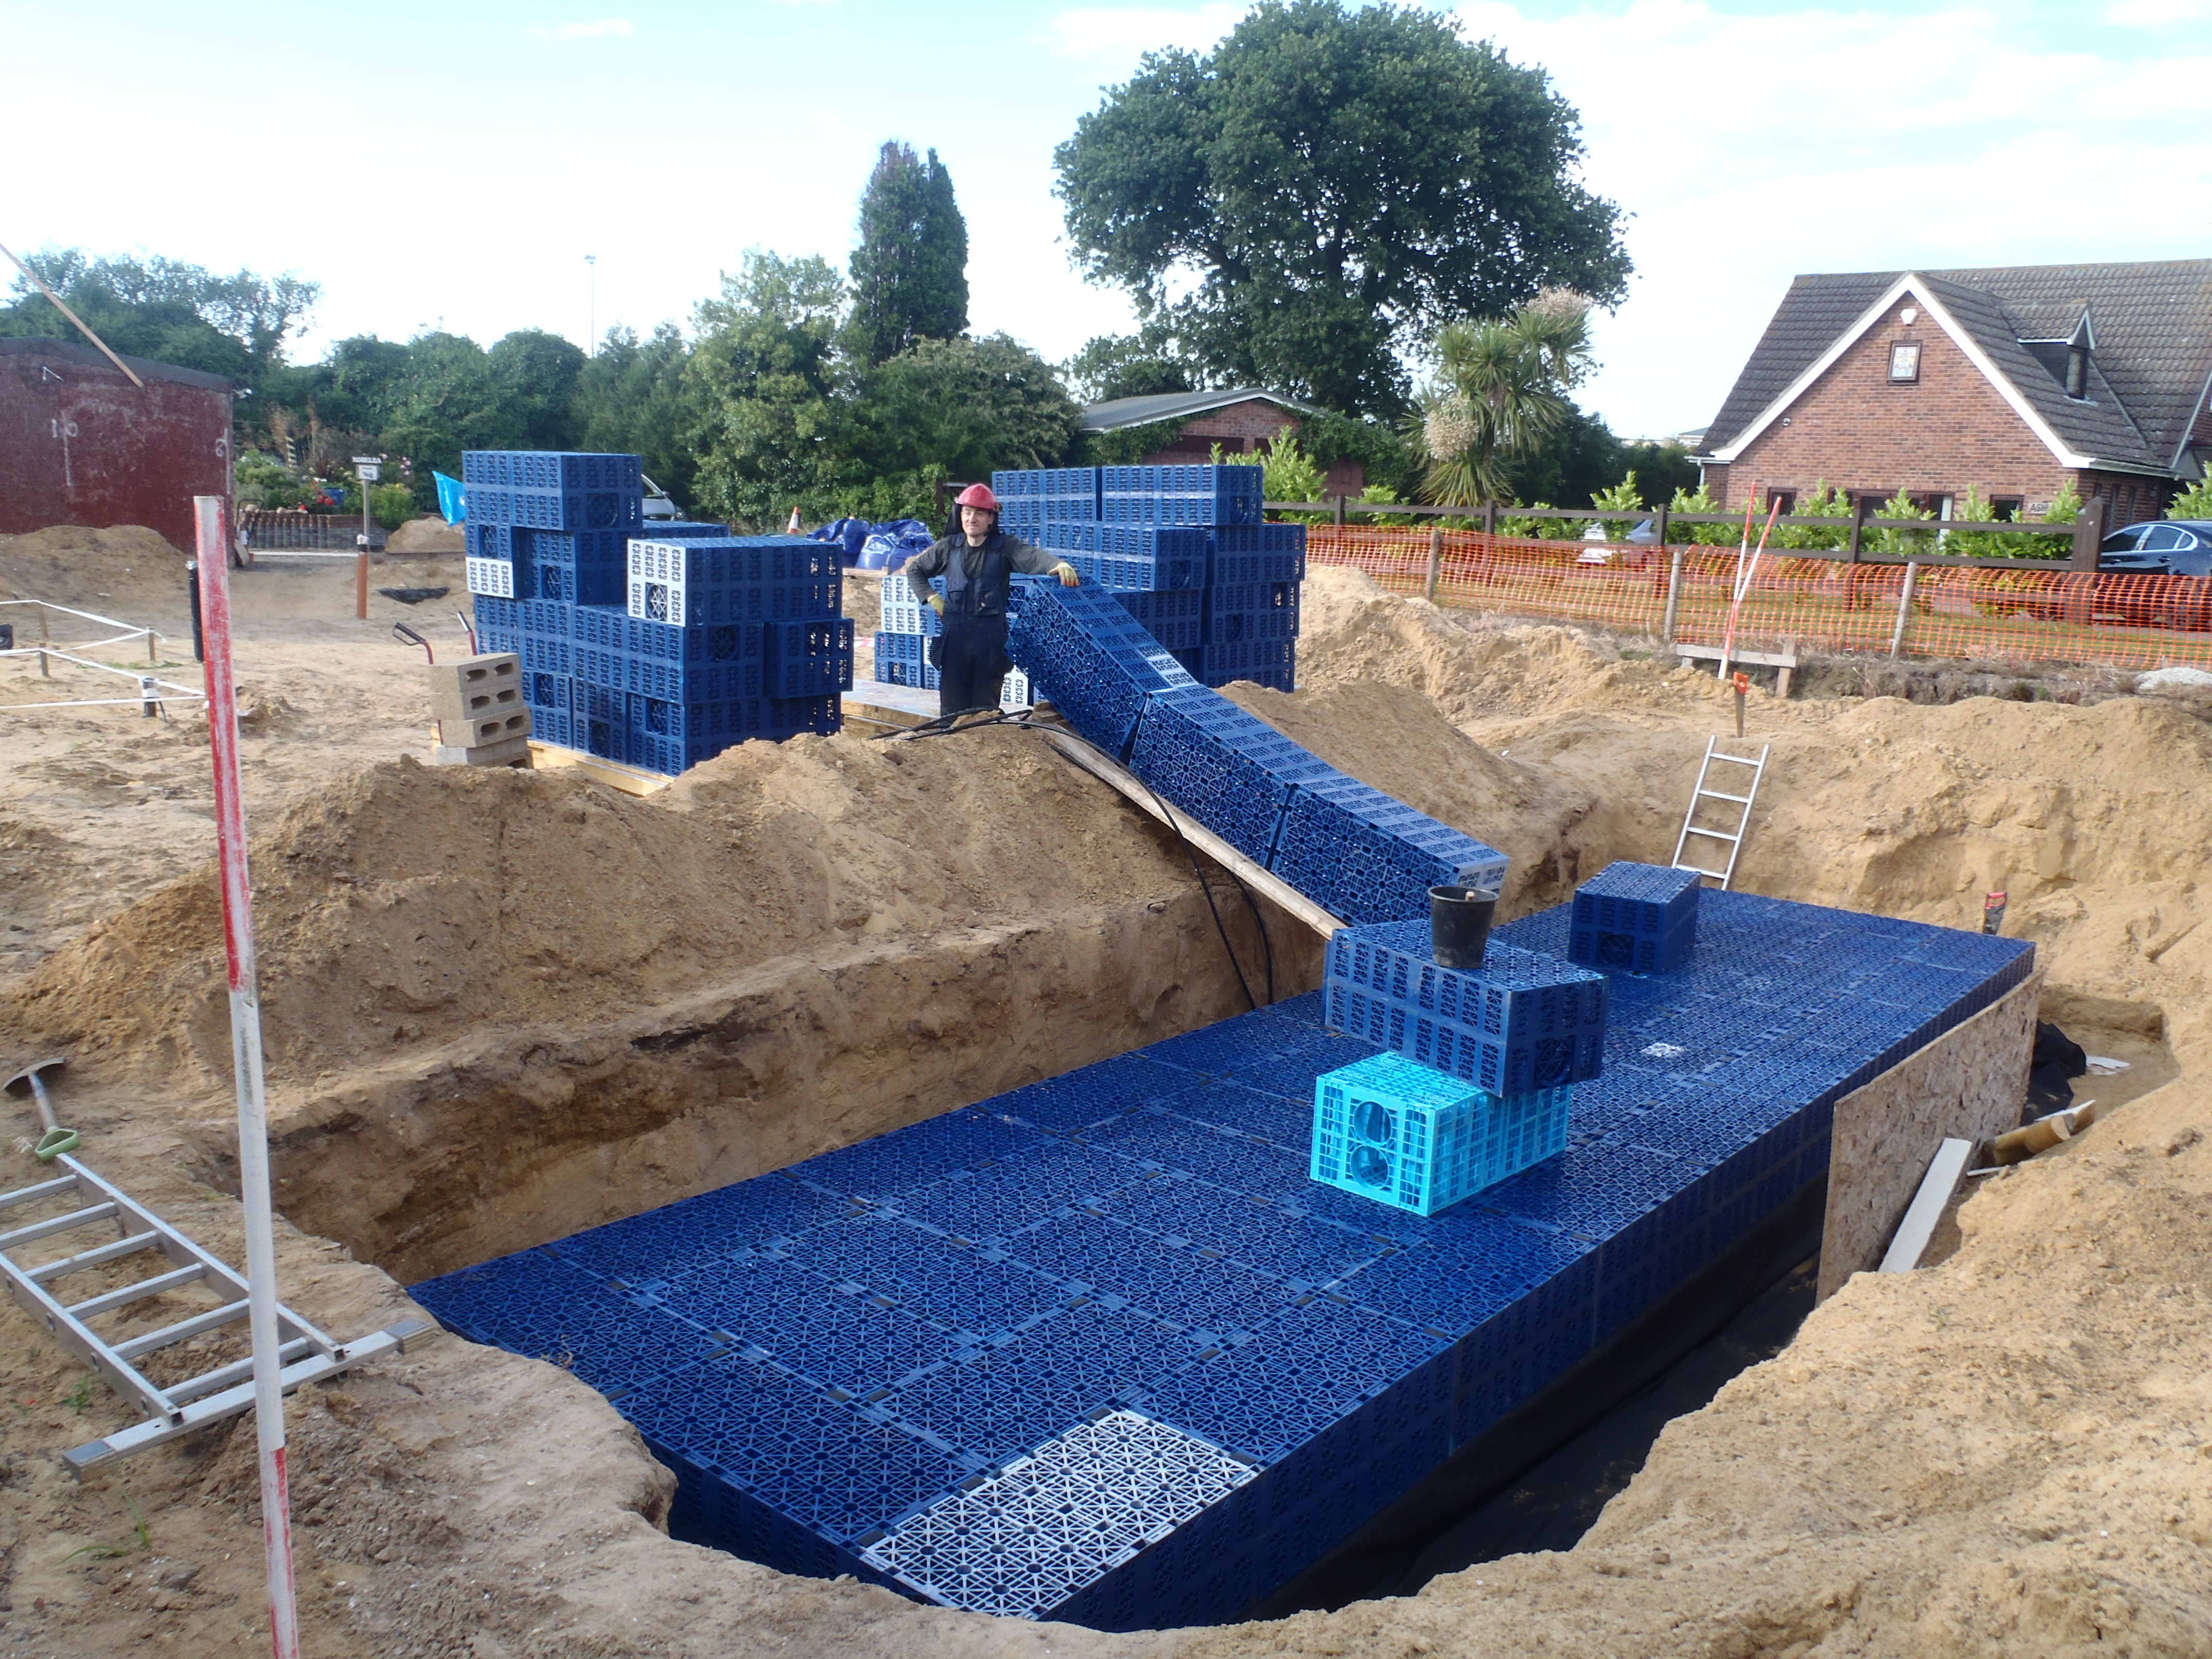
    We have checked the other Energy Modules, and Number Five (the big one under the Great Room), Number Two (under Bedroom Two) and Number One (under Bedroom Three) are all still full. Only Number Three (under the Entertainment Room) is also showing only half full. We will have to do something similar with this Module too later on when we have established the various plumbing connections etc.

  • Module Number 4 Repairs All Done!

     Today, we finished off the re-assembly of the Energy Module number 4, with the placement of the thick insulation boards around the outside of the module and then the lid on top.

    We did have to shift it slightly to make room for these side insulation boards but apart from that, everything went back in more or less.

    Module-4-Repairs-Finished

    Module-4-Repairs-Finished

    The “mess” of everything lying out and about, all went back into the hole and the sandy soil put back on top!

    Tomorrow, we resume doing the foundation trenches.

  • Day 2 of Module Number 2 Repair

     We carried on with the repair work on Energy Module number 4, the module living underneath the entertainment room. We pulled out, on one side, the vertical insulation foam boards and then pulled out the bottom 4 layers, all 480mm thickness!

    Module-4-Repairs-Most-of-insulation-removed

    Module-4-Repairs-Most-of-insulation-removed

    We could now look under the remaining insulation blocks around the edges and we dug out the silt from underneath and then tried to push down these vertical blocks of foam but they started twisting inwards so we ended up having to remove all the insulation anyway!

    We dug out all the loose soil and got it back to the smooth flat bottom. This time, we remembered to drill our hole to push down the temperature probe conduit properly underneath the module!

    Then, we started reassembling the whole unit back together again, keeping all the pieces together as they were originally fitted. We got as far as getting all the plastic crates back in place and it is all wrapped up in the rubber sheeting including the plastic cover too.

    Module-4-Repairs-Tank-and-base-reinstalled

    Module-4-Repairs-Tank-and-base-reinstalled

    Tomorrow, we will finish the repair job and good riddance to the whole saga of rain water flooding our energy modules for the last time – we hope!

  • Repair of Module Number 4

     We switched over from doing the foundation trenches and its shuttering boards, over to repair the Energy Module number 4 that had risen. We thought we might need the use of the mini-digger during the chore of getting the module back into proper alignment and depth again.

    So we started by removing the dirt off the insulation panels forming the lid, lifted that lid off and revealed the rubber / plastic wrapped Aquacell crates.

    Module-4-Repairs-Top-removed

    Module-4-Repairs-Top-removed

    After lunch, we managed to pull out the plastic crates without the sides falling in, but we did have to get the water pump out and remove another 200 to 300 litres of water still in the bottom!

    Module-4-Repairs-Pumping-remaining-water-out

    Module-4-Repairs-Pumping-remaining-water-out

    The problem is that the bottom boards, all 4 layers of it, will need to be lifted out so we can see what has happened and dig out the water borne silt that landed under the module during the thunderstorm flood we had a couple of weeks ago.

    We resume with that task tomorrow or Monday.

  • Emptied Module Number 4

     We started the repair process on Energy Module number 4 (the entertainment room – also the smallest module) by emptying the water out and putting it into our other modules. We had well over 2000 litres to drain. We used a powerful water pump with a filter to suck out and move the water using ordinary hose pipes and we got about a rate of 900 litres per hour so it didn’t take too long.

    Then this afternoon, while we had the equipment out, we also drained the swimming lane and chucked the water down our proper rain soak-away module. The meter reported that we shifted about 1800 litres when the level got to about an inch left in the bottom.

  • All 5 Modules Now In Place!

     At Long Last, we have finished all 5 energy modules, all buried in the ground and all full of water. The only signs of their presence is the red white hazard tapes marking out the locations and thin pipes sticking out of the ground.

    Plot-after-all-Energy-modules-finished

    Plot-after-all-Energy-modules-finished

    It has been a long haul, which included the repair of Number 3 (it got lifted by a flood of rain water), some 50 days of work to install all these Energy Modules, they contain a total of 35,000 litres of water, which can store about 10GJ (giga-joules) or about 2700 kWh of free energy from the sun. It is a big investment of time and money but we should see a payback quite quickly over the first few years of operation once the house is built.

  • Day 8 of the Great Module Number 5 – All Done At Last!

     This morning, we finished off burying the last of our Energy Modules, Number 5, with sandy soil and covering it up too.

    The warning red/white hazard tape was wrapped around the perimeter of the module to keep our heavy machinery off that area.

    Module-5-Finished

    Module-5-Finished

    So We are All Done At Last! Phew!

  • Day 7 of the Great Module Number 5 – Finishing Touches and Filling Almost Complete

     Today, we finished off the installation of the insulation panels on top of our Energy Module Number 5. At the same time, we started pumping water into the module, we will need over 16,000 litres of water to fill it! Also we sliced off the excess pieces that were sticking up above the module level, and inserted the various conduit pipes and inspection tube too.

    Module-5-All-Insulation-and-pipes-done

    Module-5-All-Insulation-and-pipes-done

    We chucked all the “rubbish” bits into the gap alongside the module and buried them with the sandy soil we are pushing back in.

    Module-5-End-of-Day-7-Nearly-finished

    Module-5-End-of-Day-7-Nearly-finished

    Tomorrow, we will finish off the filling around the module plus another whole day of putting water into the tank.

  • Day 6 of the Great Module Number 5 – Assembly Finishes ..

     In a rain interrupted day of work, we finished assembling the Aquacell crates for Energy Module Number 5. Next we put down a plastic sheet to cover the top surface and then we pulled up the rubber sheet and folded in the corners and weighted it down with concrete blocks.

    Module-5-Rubber-and-Dpm-fitted-1

    Module-5-Rubber-and-Dpm-fitted-1

    Then the afternoon session was spent on sorting out the insulation boards to tape into big fat blocks (at least 300mm thick), we needed about 25 of them to go around three outer sides of the module. We were interrupted frequently by very short heavy showers. We got there in the end and in glorious sunshine, we trundled our trolley load of foam blocks to the hole.

    Module-5-A-small-load-of-insulation

    Module-5-A-small-load-of-insulation

    We placed all of them around the tank and piled in some sandy soil to hold them into place and that’s today job done (with thunder rumbling in the distance)!

    Module-5-Insulation-fitted-to-sides-1

    Module-5-Insulation-fitted-to-sides-1

    On Monday, we fill in the rest of the sand around the module and compact it down solid, and then put on the insulated lid and insert the final conduit pipes.. and we will be all done – phew!!

  • Day 5 of the Great Module Number 5 – Assembly Starts..

     We continued with Energy Module Number 5 with the start of the assembly of the actual module itself at last!

    But first, not forgetting this time, we put in the underground temperature conduit pipes, this time two of them as the module is so large, we decided to put two probes underneath the unit to measure the ground temperature. They were positioned 3 meters in from each ends.

    Then We sorted out two layers of insulation boards, one pile of 120 mm thick ones and a second pile of 140 mm thick ones, all being each the 600 mm by 1200 mm size. We managed just, to find 30 of each size! We are really making a large dent in our pile of insulation materials!

    Oh yes, we had also some 100 mm thick boards for going down the middle to make the 2.5 meters wide layers (two lots of 1200 mm and the 100 mm making the 2500 mm total).

    Then the rubber membrane was unrolled and sorted and positioned into place.

    Module-5-Insulation-Rubber-sheet-in-place

    Module-5-Insulation-Rubber-sheet-in-place

    And finally for today’s day of work, we got our ramp and slid down, like a production line, enough Aquacell crates to form the first layer, all clipped together.

    Module-5-Bottom-layer-of-cells-in-place

    Module-5-Bottom-layer-of-cells-in-place

    Tomorrow, we should be able to assemble the 2nd layer and pull up the rubber skin and wrap the module, then start putting all the vertical layers of insulation right around the unit and filling the sand back in to hold it in place. Phew!