Today we started building the heat exchanger module to transfer the energy in the old “waste” hot air to the clean cool fresh air! The new fresh air is coming from underground via the Earth Tubes we installed last year. This cool air will help keep the temperature down during the summer and the heat exchanger to transfer as much as of the useful valuable energy back into our living quarters during the Winter times.
We are making the heat exchanger out of thin layers of plastic films separated by 5mm glazing tapes with gaps at both ends for the four connections! It is slow work building up each layer one by one and we are learning the pros and cons of the materials we are using this time around. We realise that the plastic films might not be stable enough for long term use and it is quite fiddly so we will probably switch back to looking to use thin aluminium sheets instead. We were looking for a cheaper material for our smaller temporary exchanger so We will finish this one and put it into operation to learn the results of the heat exchanging efficiency and other factors!
Tomorrow we will continue the build!
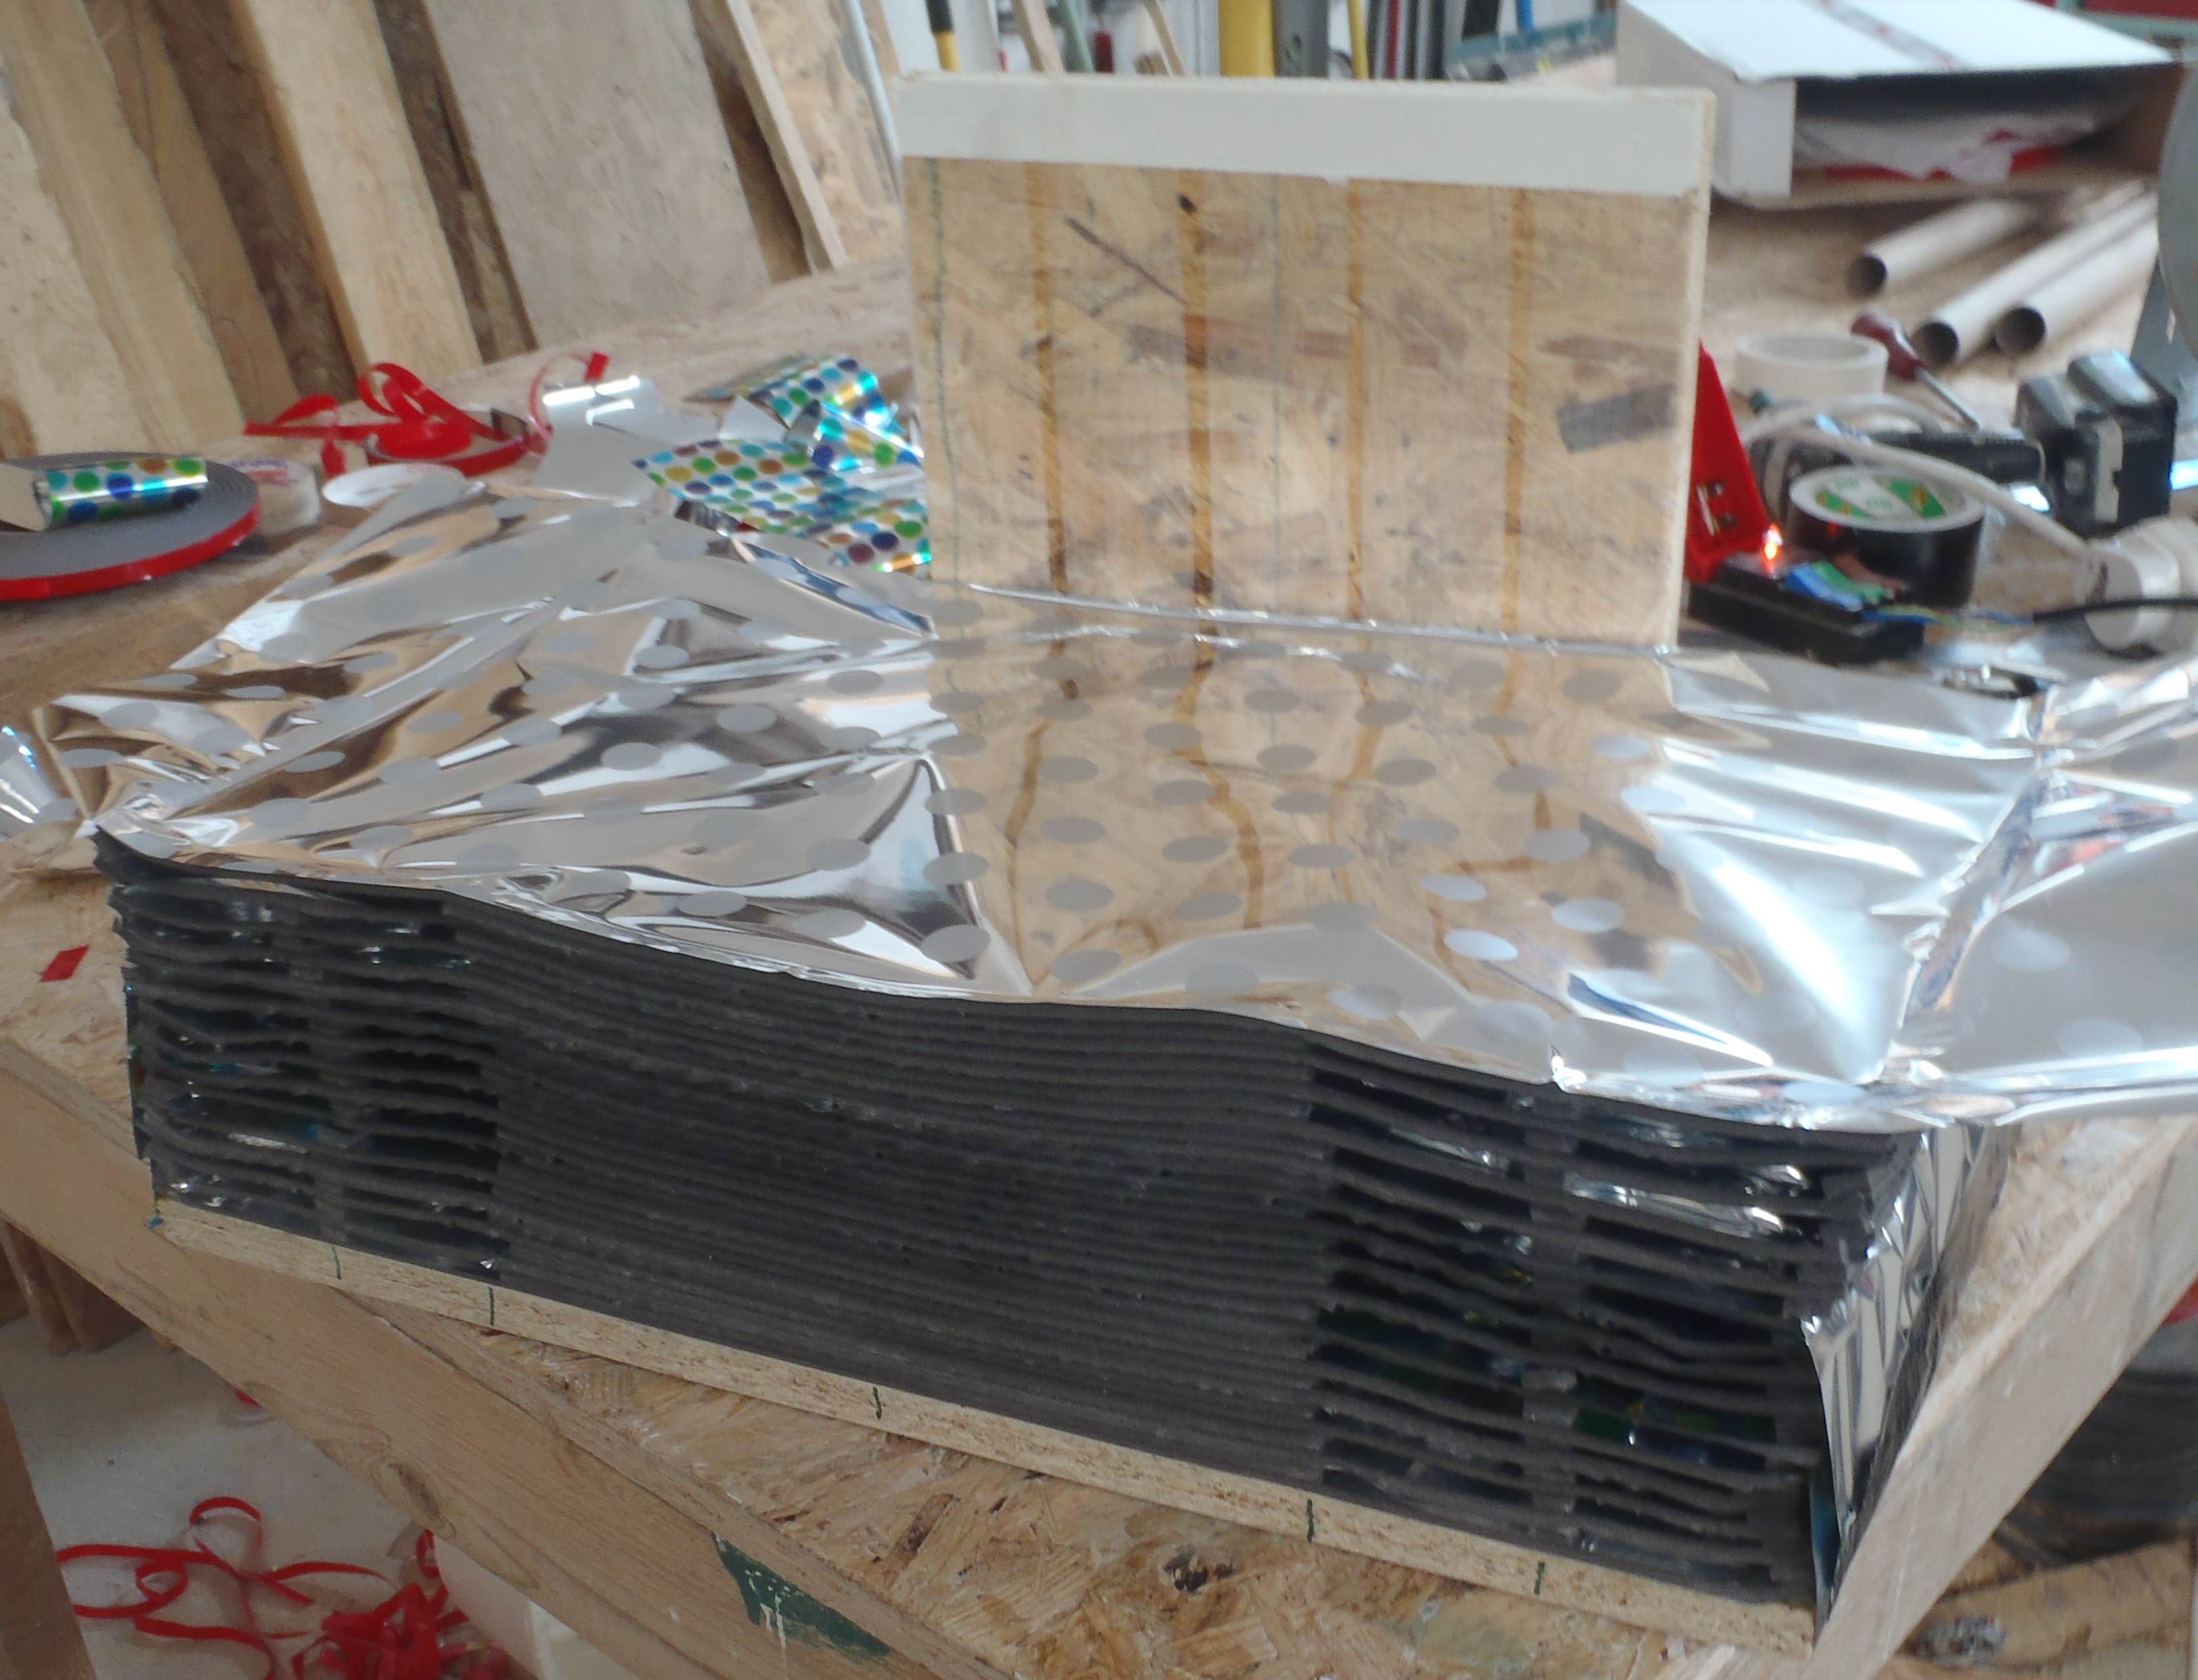
Heat exchanger half built
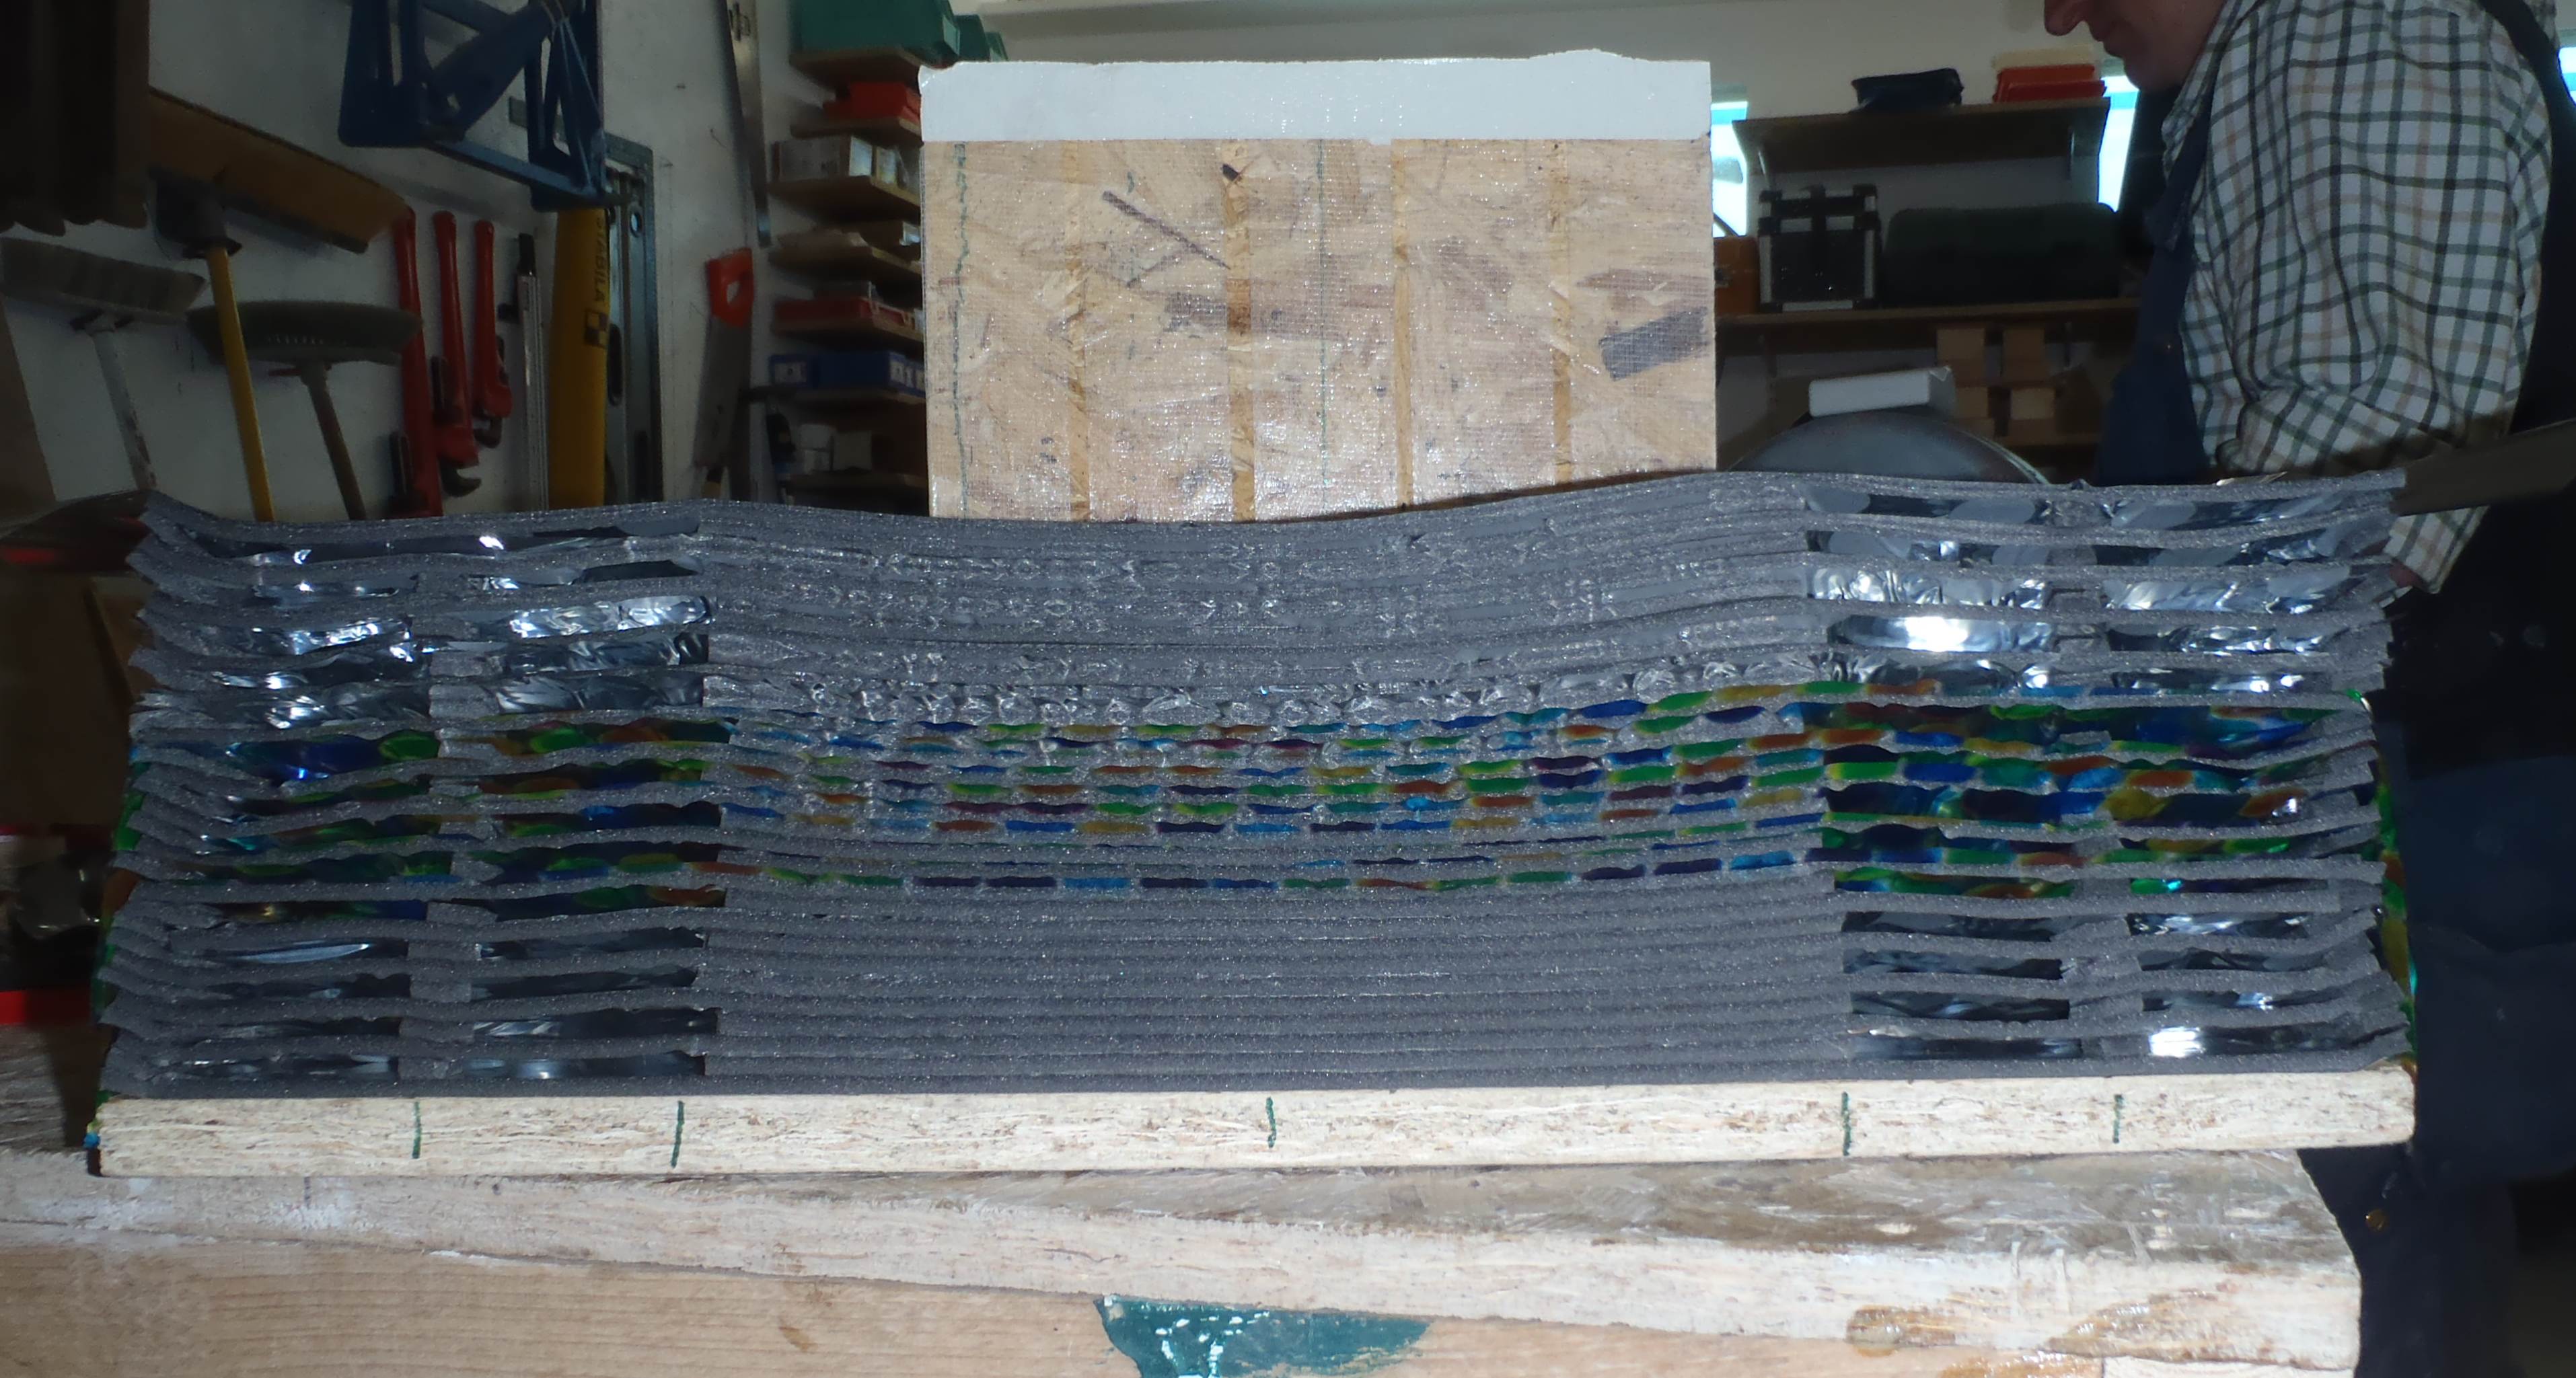
Heat exchanger half built