Category: Phase 4

Construction of External Skin of House: External Walls, Roof and Skylight. Slate tiles on roof and timber cladding on walls.

  • Working “table” for Skylight is Almost Complete

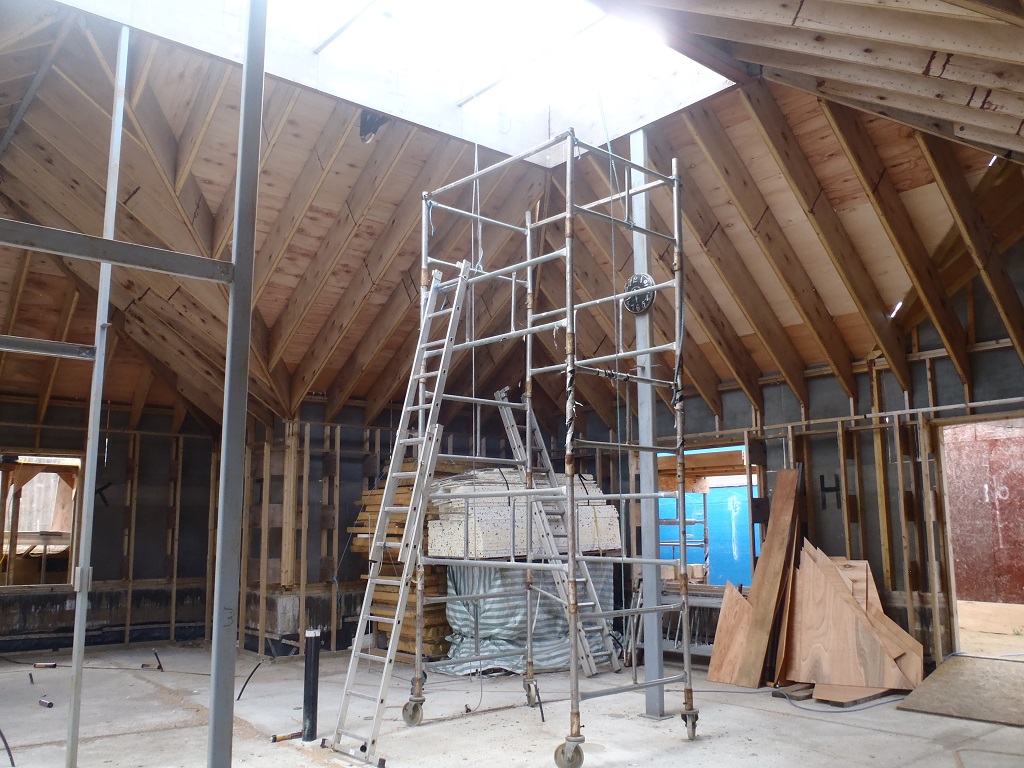
    Yesterday and today, we carried on with the task of creating a “work table” to implement our design for our Skylight, all on the ground floor level instead of being 6metres (20feet) up on our roof!
    We used seven lengths of our untreated regularised 95mm by 45mm timber planks plus two off-cut pieces to make a framework of 16metres long by 2.5metres wide. This framework is held up on 1.2metres high legs, seven of them down each side and secured into place using lots of triangular plywood pieces to lock and stabilised the structure. Then the two lines were separated by a series of horizontal struts, also locked and screwed together using more triangular anchor pieces.

    Working

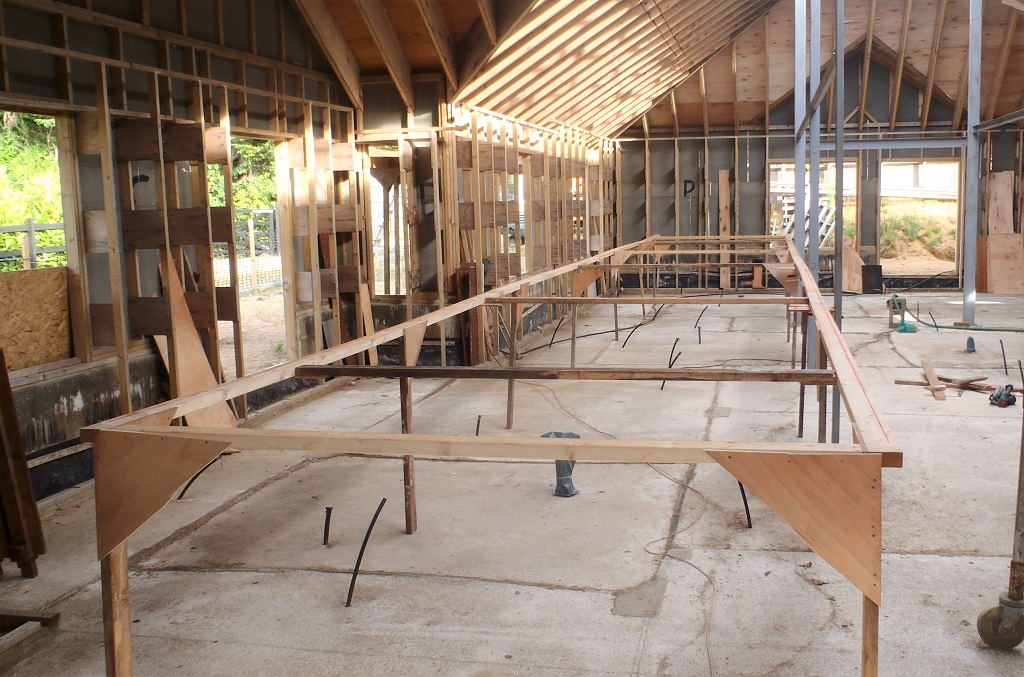
    Assembly-frame-started


    The whole structure was then confirmed to be right-angled at the ends and the long sides were straight (using a string) and then fixed and clamped to the three steel legs which provided a very strong stabilising support for the duration of our work.
    Lastly, we snapped a red chalk line down the length, positioned exactly 2.490metres apart which is going to be our finishing width of our Skylight.
    Working

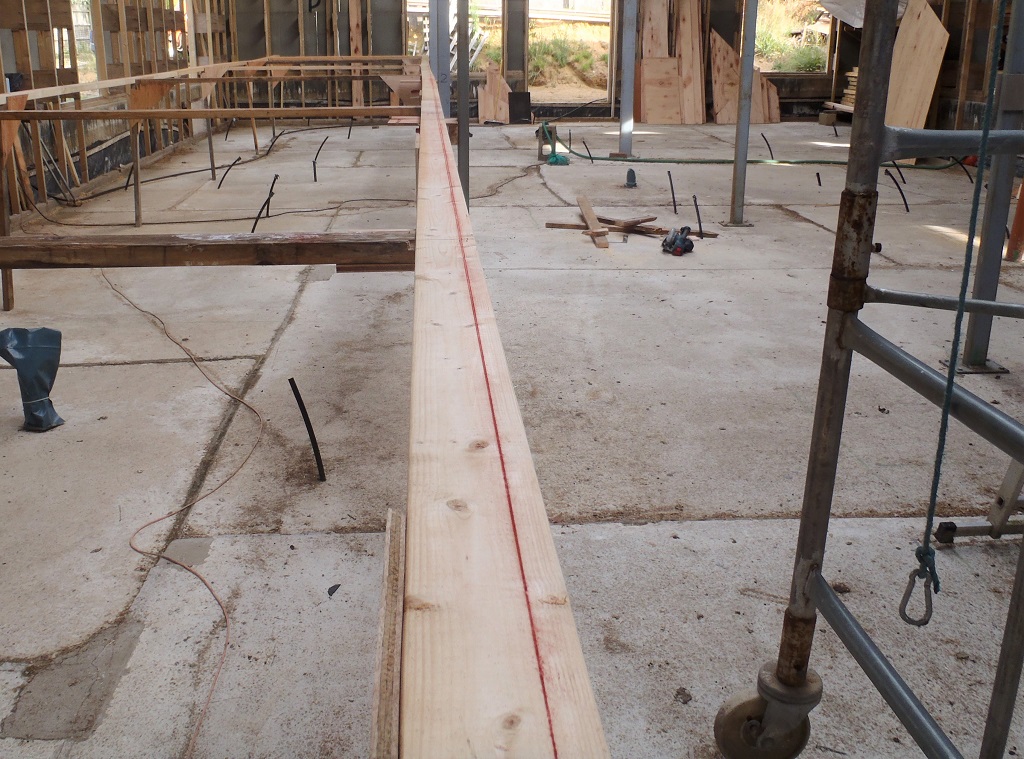
    Straight-line-marked


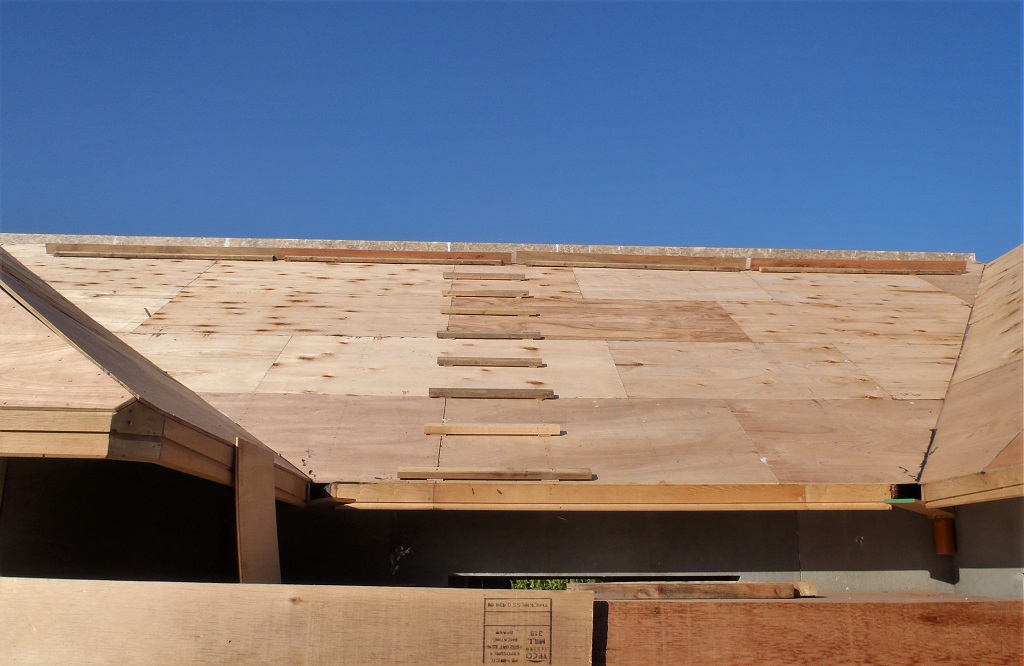
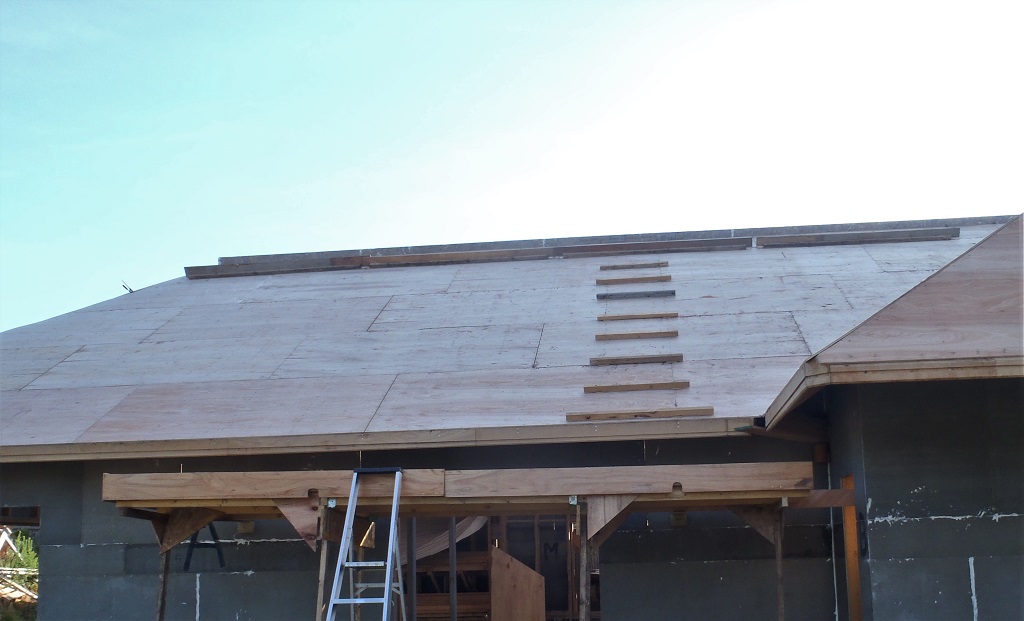
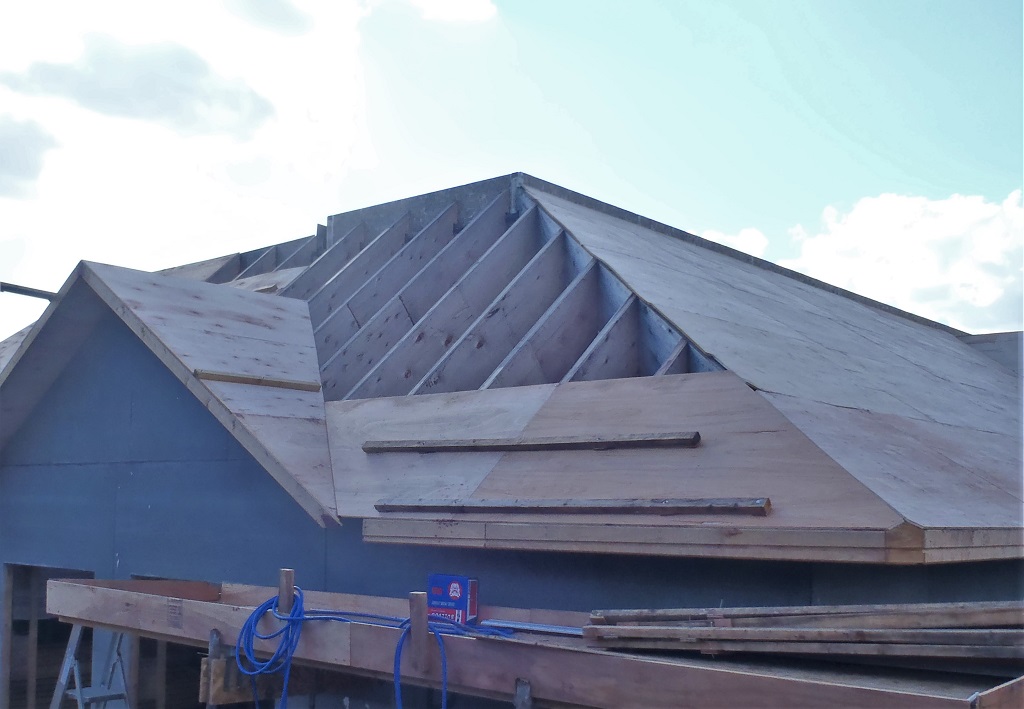
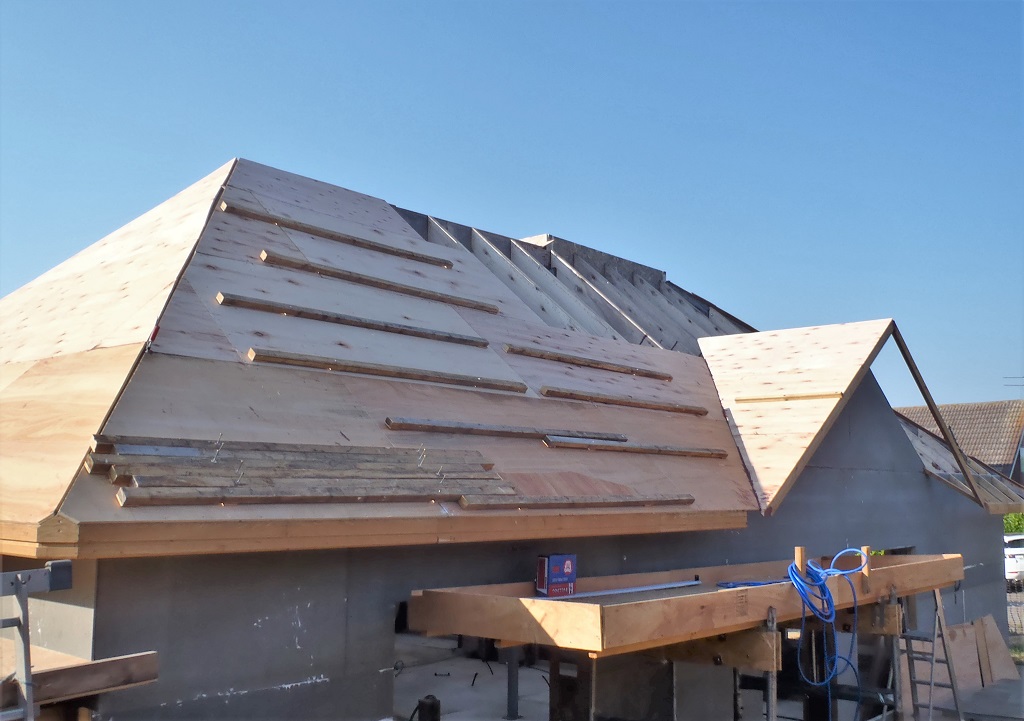
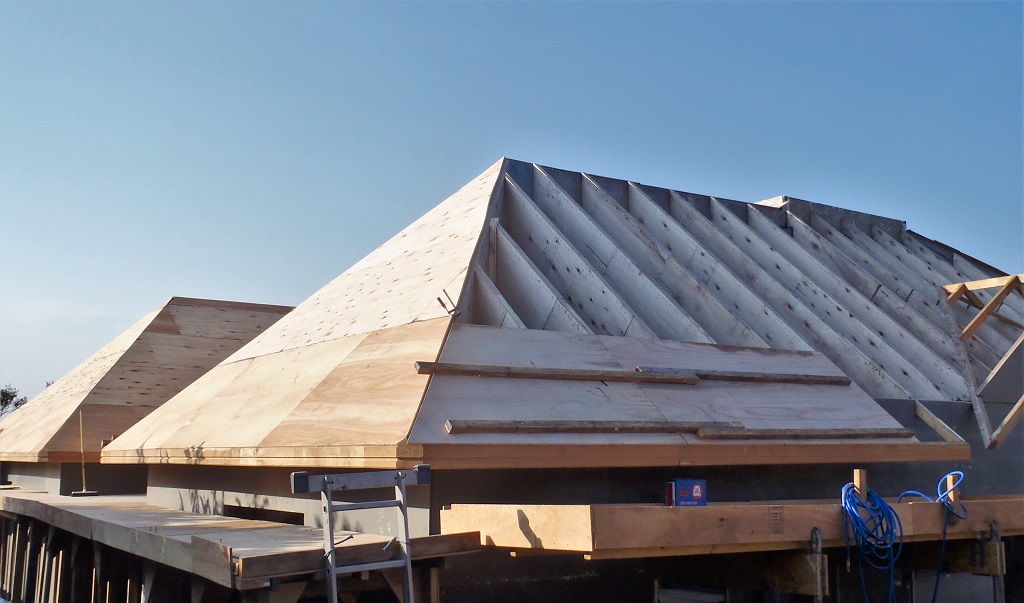
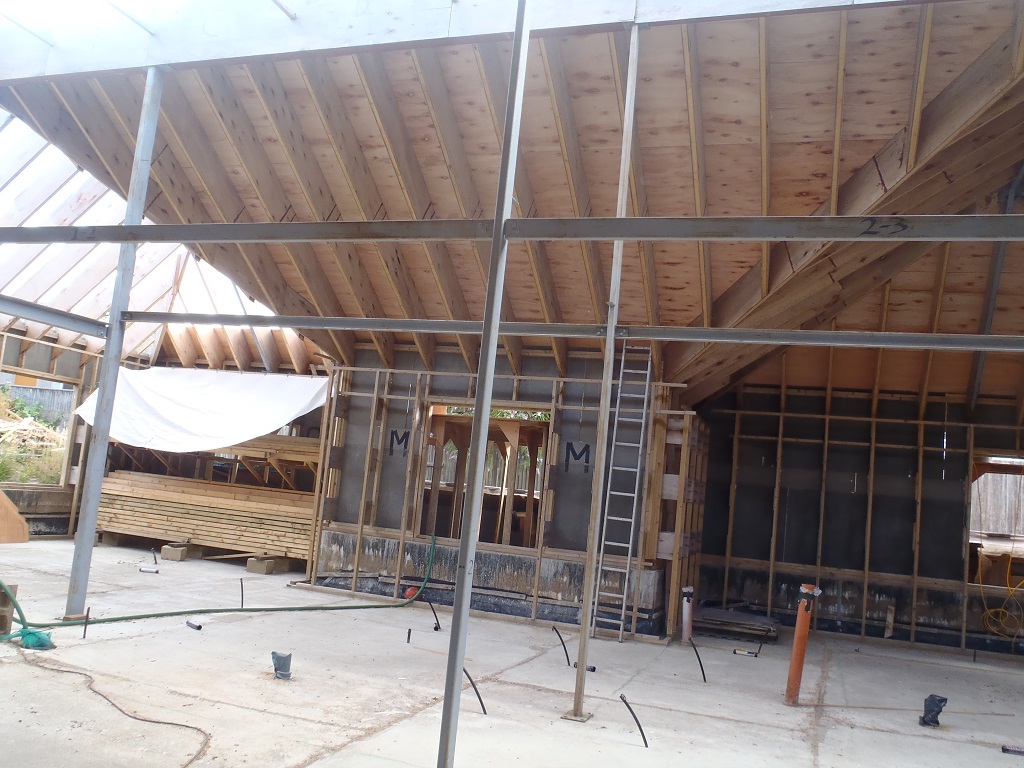
    On Monday, we will go back on the roof and make sure the “real” Skylight is a proper right angle on both ends and measure the total length so we will know exactly where the ends are positioned, including where the nine steel cross ties are relatively located too, just to confirm against our drawings.

  • Preparation Continues ..

    We carried on with the preparation task of getting things tidied up and getting things ready for doing the Skylight. We put up the remaining foot-rails on the roof around the Skylight.

    Preparation Continues ..

    Second-roof-ladder-installed

    Preparation Continues ..

    Rest-of-the-Footrails-fitted


    We then started measuring the “hole” to see what reality is, compared with our drawings. There were variations in the width along the rectangular hole, measuring 2.5 metres in some spots but also 2.495 metres and 2.520 metres in other spots. We decided that we had better pull a string from corner to corner and see whether the sides of the Skylight’s kerb is straight or not. Alas, we discovered that we have a kink in the middle. The string shows that we have about a 45 mm offset on both sides, both leaning towards the swimming lane. Oh No! We will have to take everything apart and straighten out the steel I-Beams and the two middle steel legs!! Only Kidding! It seems that the transition from the heavier wider steel I-Beam to the lighter narrower I-Beam is where the kink is and of course, we hadn’t realised that we had this little kink when we originally mounted and positioned the steel legs in the first place. We calculated that this offset is equivalent to a 0.3° angle, calculating from the length of 7.49 metres against the 0.045 metres kink or about 1 in 200 ratio. We went back to our drawing to put in this kink and it doesn’t really make any different to the shape of the skylight and its glazing panes. We will just build the Skylight with the kink in it and everything should still fit quite comfortably.
    Tomorrow, we will start building the “work-table” down on the ground level inside the house so we can assemble the whole skylight module, test it and confirm our thinking about this kink.

  • Preparation Starts for the Construction of our Skylight

    We carried on with the tidying up and modifying of our old mobile platform to convert it into a fixed platform in the AB corner of the roof so we can have access to this side of the roof and the Skylight while we are working up on top of the roof.
    We also modified our foot rails to include an additional extra wide plywood strip to make the foot-rails more secure and somewhere we can put down tools as we work around the whole Skylight section down the middle of the roof. We have screwed down a ‘ladder’ on the roof to make getting up and down easy.

    Preparation Starts for the Construction of our Skylight

    Mobile-platform-transformed-and-roof-ladder-installed


    We will carry on the preparation work tomorrow and then start sorting out and building some trestle tables to support the framework of the Skylight module down at ground level so we can assemble (and test) it so we can check out the design and implementation of the various parts including the aluminium glazing bars. We need to make a series of trestle tables to hold up this framework (it being about 15 metres long and 2.5 metres wide), plus also to paint the timber and have it all ready for installation when we are happy.

  • Video Footage of the Entire Job of Covering Our Roof With Plywood Boards!

    Here is a video of our roof being covered up with 12mm thick plywood sheets, starting on the “A” roof section and going around anti-clockwise and finishing on the “P”, right back at the starting point.

    We spent a total of 21 days in total (this includes two half days), so about 42 man-days of work (about 180 man-hours), in the whole month of July. The video has been speeded up 600x times faster and it is only 4½ minutes long to watch the whole roof being magically covered up!

  • Finally “P” Is Completed!

    At last, we managed to get back out to work on our roof after all the twirling rain showers we had over the last four days – we had nearly 15mm of rain in total!
    We carried on with covering up the “P” section of the roof, the last little bit left to do, going up towards the Skylight and out along the “O” Ridge we didn’t complete last week (this was because there was a complex bit of joinery where the “M” and “P” all meets at the kerb corner of the Skylight.

    Roof-boarding-Day-21-Finished-P

    Roof-boarding-Day-21-Finished-P


    This concludes the “P” and last section of our roof, all the roof is now covered in a layer of 12mm plywood, ready for the next stage, this being the counter battens and then the tile battens with the breathable membrane between and then the slate tiles on top. But first, the next job is to do the Skylight module down the middle of the roof.
    The rest of the afternoon was spent tidying up all our tools and equipment, including starting to dismantle our mobile extended platform so we can make use of the better quality scaffolding castor wheels to build up our working platforms for inside the house and up on the Skylight.

  • Roof “Q” Is Completed and “P” Nearly There!

    We had a slow start today as we had a series of short sharp thunderstorms and showers with a twirling strong breeze so didn’t get going until about 11am. We did as much as we could on the “P” section of the roof on this side of the “Q” roof (the section facing backwards towards the Swimming Lane) and then moved the mobile platform tower along to the very front of the building and we carried on the other side of the “Q” (the Conservatory) and did the first row of with the posh plywood on the smaller last section of the “P” roof. And finally, we installed the three rows to cover the second half of the “Q” section. It is a bit more tricky as there isn’t a lot of room to work in.

    Roof-boarding-Day-20-Continuing-P-Q

    Roof-boarding-Day-20-Continuing-P-Q

    Roof-boarding-Day-20-Continuing-P-Q

    Roof-boarding-Day-20-Continuing-P-Q


    So on Monday, we should get the rest of the “P” roof done and that will be definitely that! Not Bad at all!

  • Half of “P” and Half of “Q” DONE!

    Another day spent on the job of covering the roof with plywood boards, but we are making good progress. We have completed half the “P” section of the roof (in terms of total surface area) and definitely half the “Q” is DONE!

    Half of

    Roof-boarding-Day-19-Continuing-P-Q


    A day of other comitements tomorrow but we will resume on Saturday and maybe get it all finished by the end of the day! Yippee!

  • “O” Is Completed and “P” Now Begins

    We moved on to doing the next roof section, the “O” steep roof but it was quite small and only needed three boards to complete it.

    Then it was time to start work on the last major section of the roof, the Great Room “P” roof section. But first, we had to move our mobile platform from one end of the house beside the Garage (on the “H” and “I” corner of the roof), all the way along the front and down the side so we can get access to the roof and then moved all our equipment and tools around on to it.

    Next was the task of drilling the little clearance holes behind the Fascia board so we can run a conduit or a water pipe so we can self-water any hanging baskets etc. or have sensors or LED lighting up in our eves. We also made sure that there was no excess sticking up pieces of webbing on the rafters so our boards will lay flat and get a good glue bond.
    Finally, we had time to start the first row of posh plywood boards and put up two of them to get us going.

    Roof-boarding-Day-18-Finished-O-Started-P


    Tomorrow, we will continue with the “P”, running up the “Q” and down the other side and in a few days, we will have the whole of “P” and “Q” done and that would be it – at last!

  • Roof “M” and “N” All Done!

    Under a slightly hazy sky, a lot more wind, temperatures hovering around 28°C hence the blazing Sun wasn’t so harsh, we continued to work on the three roof sections which form the three sides of a rectangle. We got done the bigger area, the ‘M’ and also the ‘N’ section all completed and so, along with the ‘L’ segment finished yesterday, all three are now done.

    Roof

    Roof-boarding-Day-17-Finished-M

    Roof

    Roof-boarding-Day-17-Finished-N


    We can move along to the much simpler ‘O’ section which won’t take too long and we will be back on the mobile platform to start work on the biggest roof section, the ‘P’ along with its companion the ‘Q’ dormer roof (will connect to the Conservatory) and that will take a few days but we could see the whole roof being done by the end of July (Tuesday)!

    Roof

    Roof-boarding-Day-17-Inside-H-I

    Roof

    Roof-boarding-Day-17-Inside-JK-L

    Roof

    Roof-boarding-Day-17-Inside-M


  • “L” Complete, “M” nearly and “N” Progresses!

    What a blistering hot day! Our Thermometer recorded 28°C today!
    Under that heat, we continued putting up plywood boards and we got the ‘L’ section completed, almost all of the ‘M’ and we are making progress on the ‘N’ too.

    Roof-boarding-Day-16-Finished-L

    Roof-boarding-Day-16-Continued-doing-M

    Roof-boarding-Day-16-Continued-doing-M

    Roof-boarding-Day-16-Started-doing-N


    We stopped a little early today, about 5:30pm, because of the heat, especially in this region as it is a trap of three sides, holding in the heat! We were drinking lots of cold water in our vacuum pint tumblers but it was still very hot.
    Tomorrow, we will try and get this region of the roof all done before the forecast of rain arriving in the afternoon (only 30% chance) but whatever happens, we will progress and soon get along to the ‘O’ section and finally the large ‘P’ roof around the corner with the little ‘Q’ sticking out dormer.