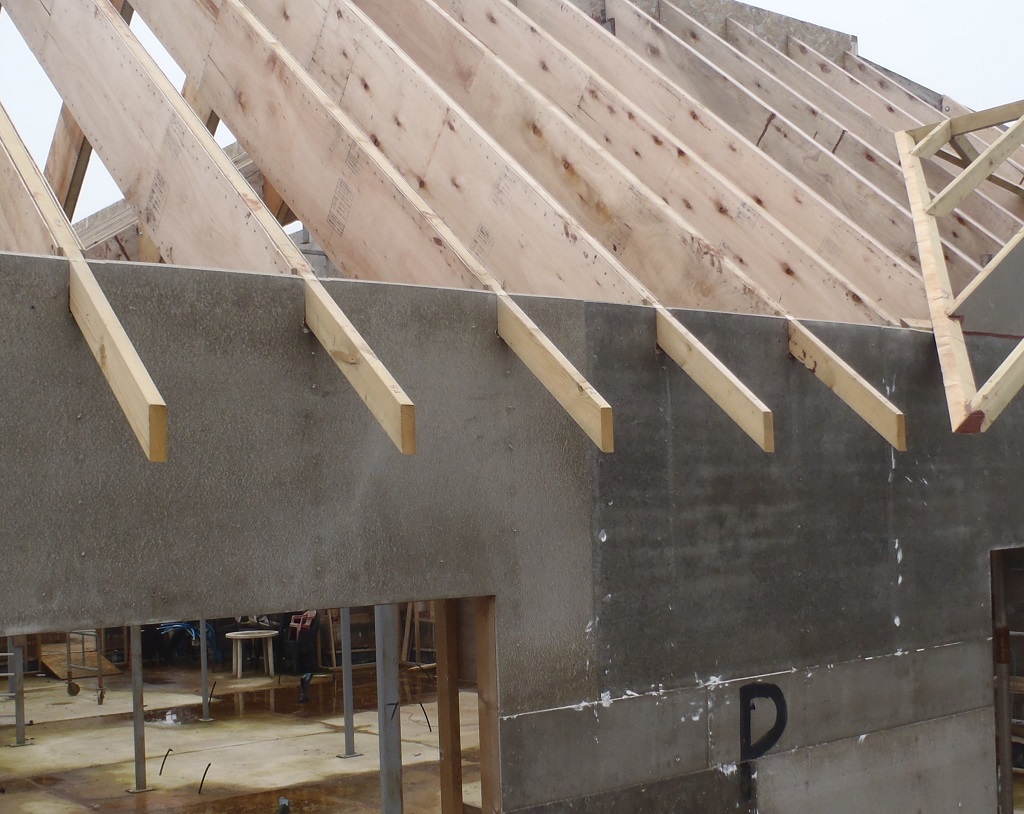
The task of trimming the tops off the walls in between the rafters continues today and now the majority have been done with only the inside corners left to do (these were more awkward and needed a think to how to do it). All the outside corners were done with little difficulties.
Then swopping over to our big brother router machine, we then went around to trim all the outer corners where the cement boards had overlapped each other and was sticking out proud. It was something that we needed to do since last year but we knew the opportunity would present itself and today was the day!
Tomorrow, we will adapt our template with a new design to allow us to trim the tops of the walls at each of the five inside corners and that would be that.
Author: Shaun
-
Walls All Trimmed Almost!
-
Cement Boards Get their Top Edge trimmed down to the Rafter Height
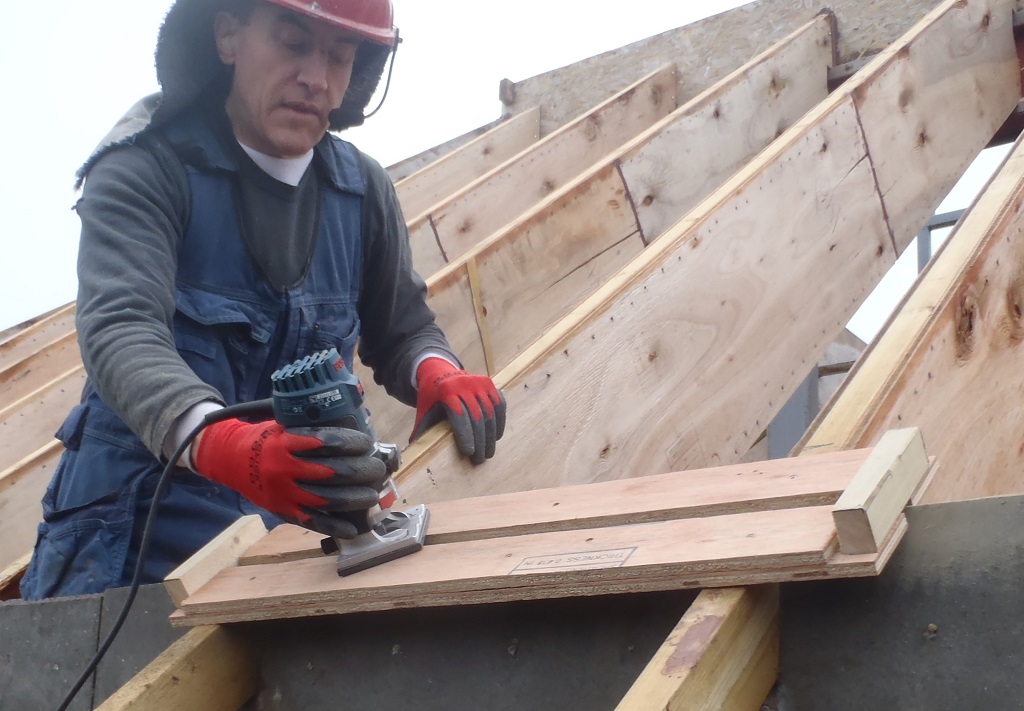
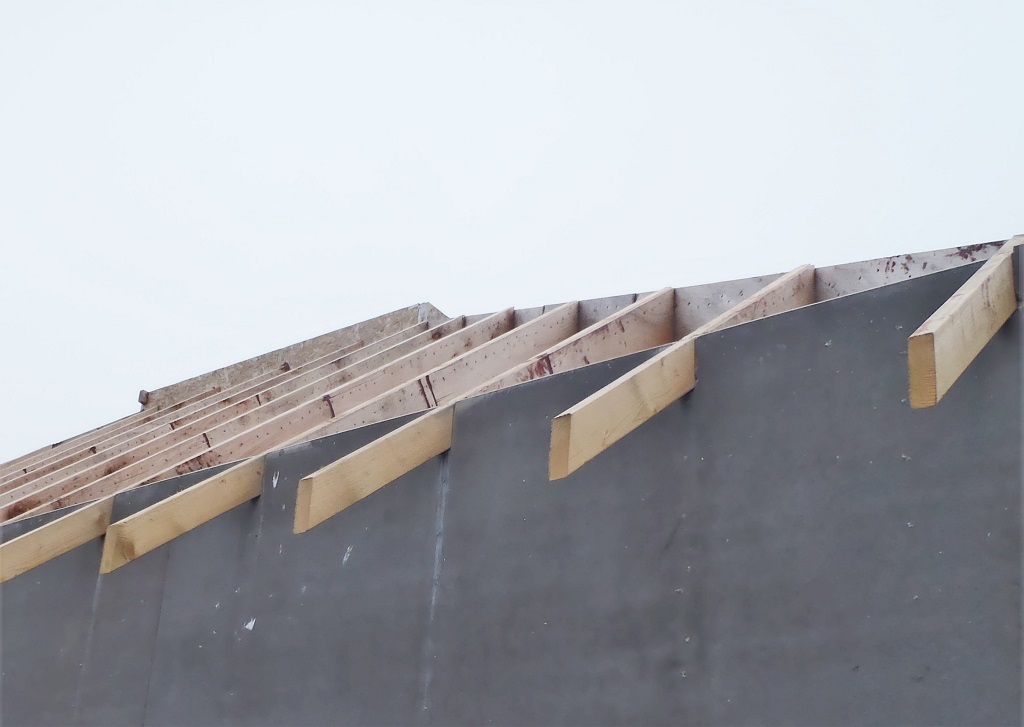
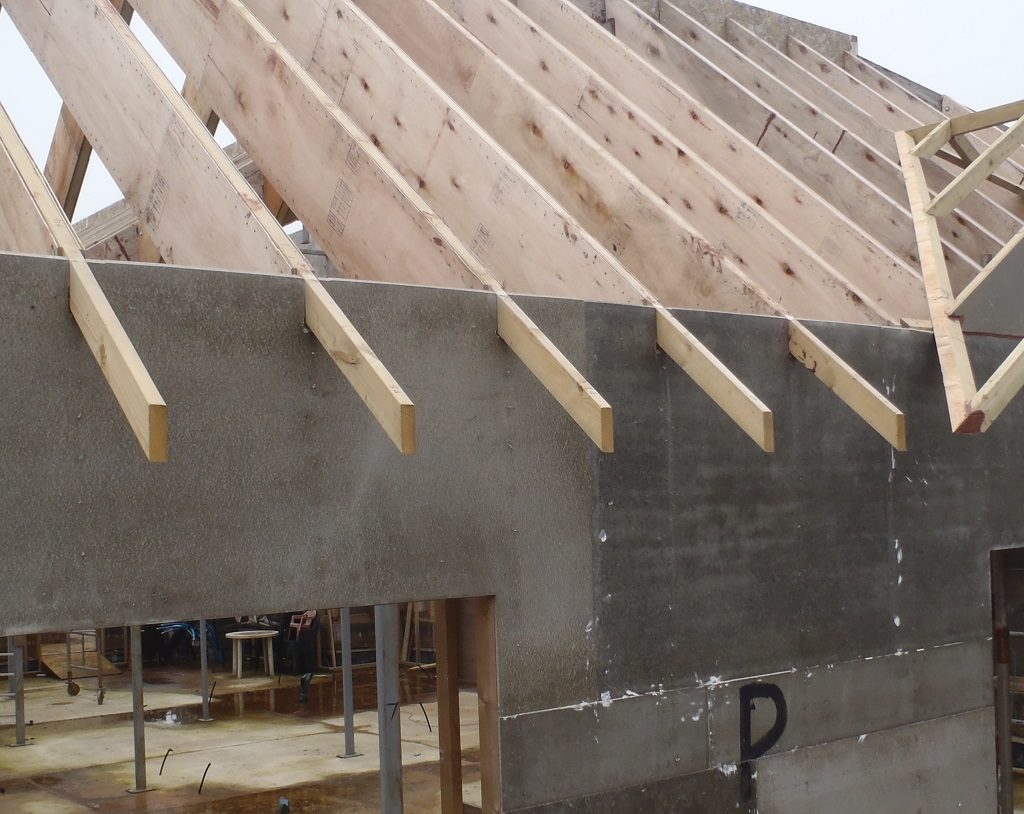
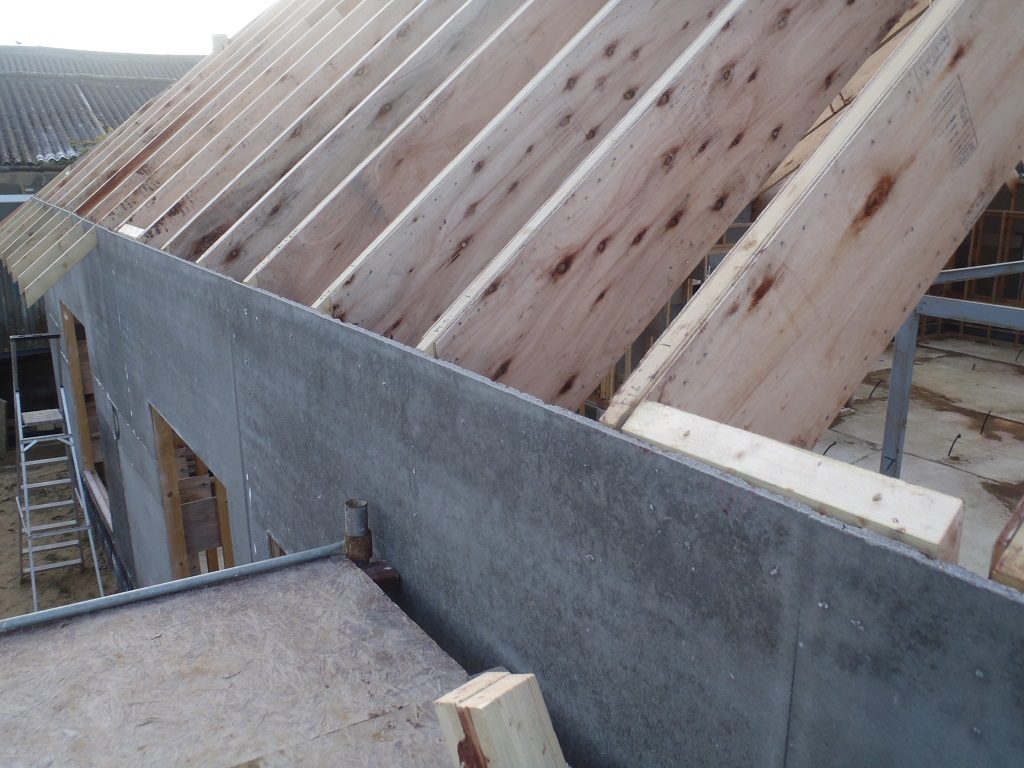
Today, the task of trimming the tops of the walls has started, where the excess amount of the cement boards sticking above the height of the rafters is sliced down so all is at the same angle and same height.

Top-wall-trimming-Jig
Using our medium sized router machine, our template we made a couple of weeks ago and the tall step ladder, we proceeded around the edge of the building to run the router back and forth between the rafters and trimmed off the unwanted cement board material.

Trimming-cement-boards-1
Trimming-cement-boards-2
Trimming-cement-boards-3
Tomorrow, we have about a quarter to go to complete the circuit and that will be that! -
Some of the Oak Timber Planed on One Edge
Today was the day where our Oak Timber started the process of being regularised. The first process is to plane one edge straight, there are 90 pieces to process and 35 of them have been done.

Oak-facias-Day-1-of-edge-planing
It was a case of learning the technique and making sure the finish edge is flat and straight.
Once this edge is made flat, we can set aside the 32 planks to slice in the circular saw to achieve the desired width of 90mm which are for the four pillars to form the corners of the Conservatory and 11 planks of 175mm wide to make sills for the garage windows.
The rest is for the Fascia which needs to be 150mm wide and some of them will need two pieces glued together, in order to get up to this width. -
The 40mm Thick Oak Timber Being Processed To Generate the Fascia Boards
Yesterday and a little bit late this afternoon, we have started processing a some of our Oak Timber to create the Fascia Boards for our Roof.
We brought (yesterday’s shorter work day) into our workshop all the planks of the 40mm thick Oak and have it all laid out on the floor. It adds up to about a ton of timber!
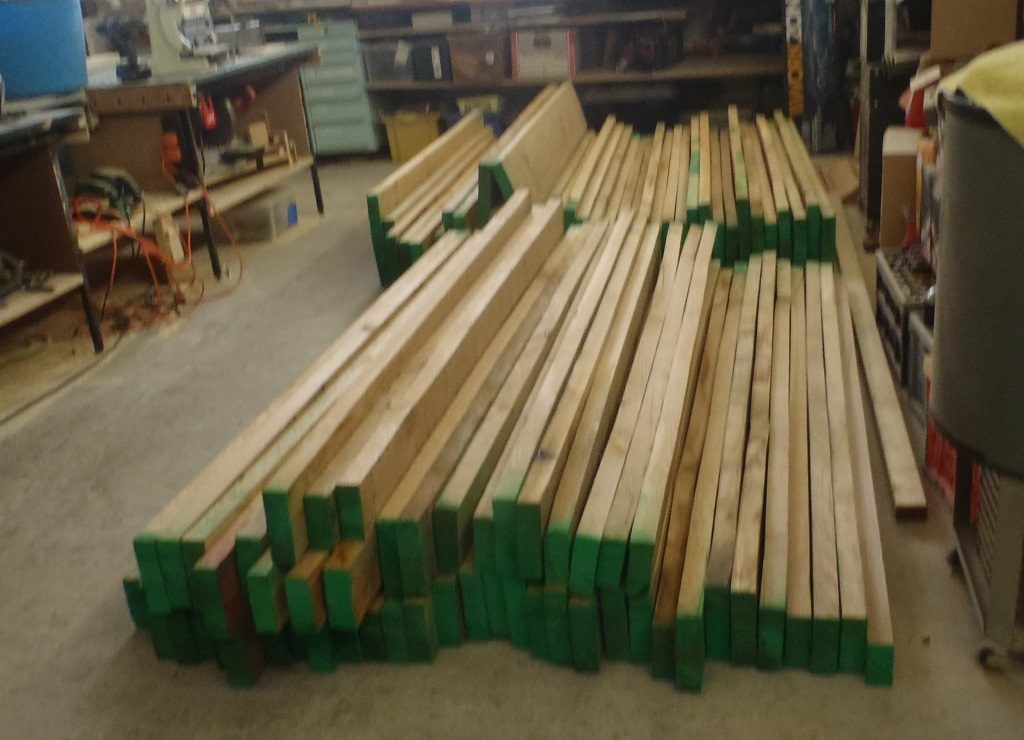
Pile-of-40mm-Oak-planks
Then, today, we started the task to plane all the planks, using our big planer machine, on one edge to establish a flat straight edge. We noticed that the width of the rough sawn timber is not parallel and there is some variation. We didn’t have time to do many so we will learn more tomorrow to how this variability will reveal itself in the bigger picture and change our calculations of which planks of Oak will be put aside for other part of the building etc. We need about 80 metres of 150mm wide boards to do the Fascia and the rest will form parts of the conservatory and Garage Windows. -
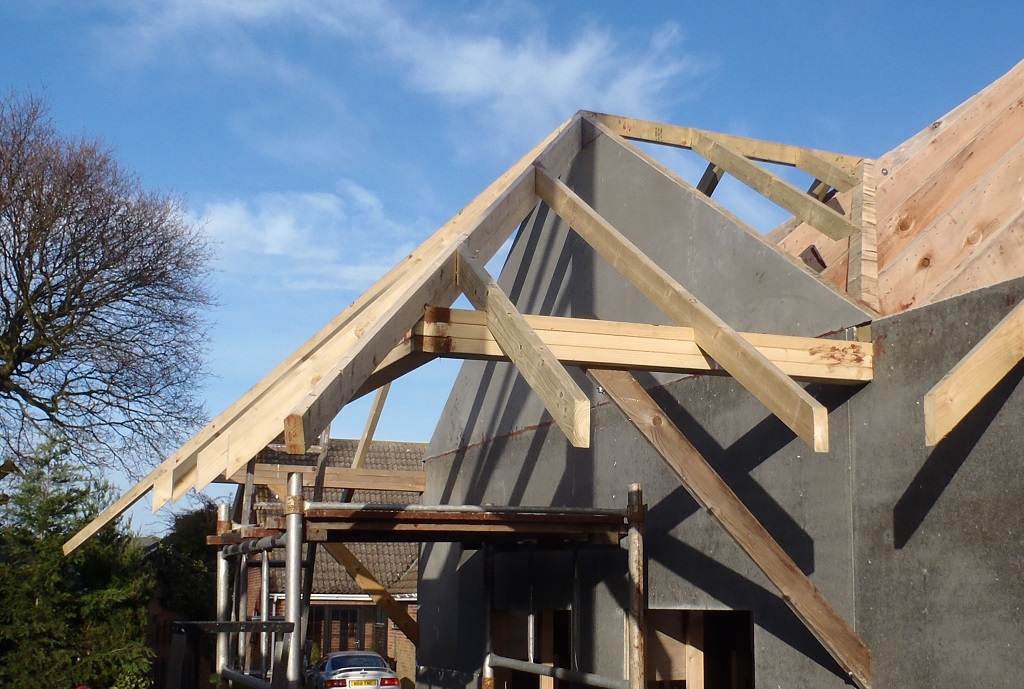
Conservatory Dormer Roof Framework Now Complete
Taking advantage of the better weather today, we went to finish off the task of installing a couple of sheets of cement boards to complete the gable triangular section of the wall.

Cement-boards-on-Q-Gable
Then we tidied away the remaining spare cement sheets and stored them in our sheet material storage tent. We have six sheets left for future jobs like the rain filtration unit.
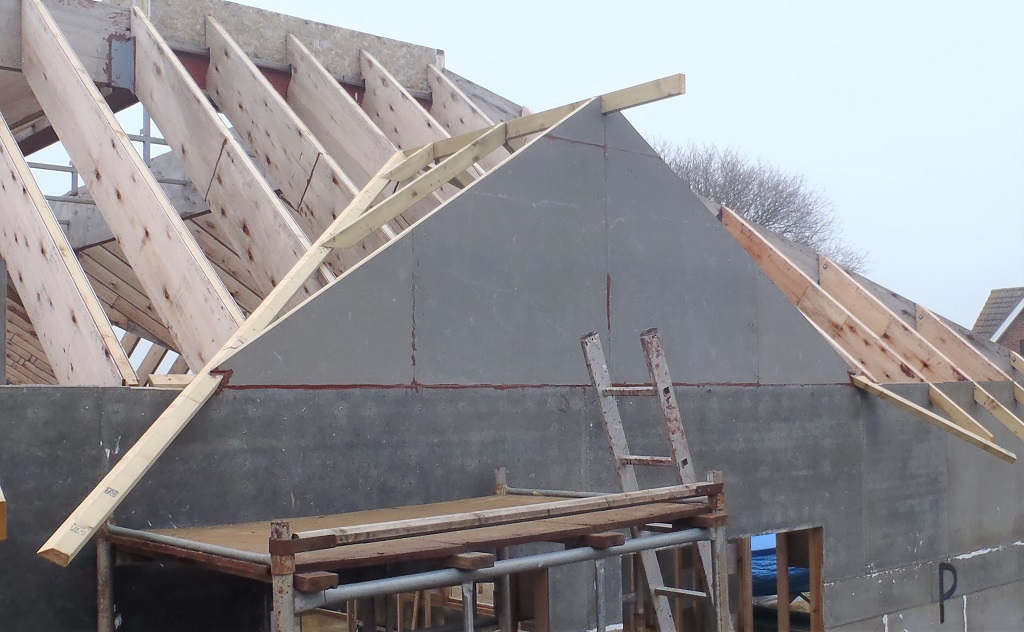
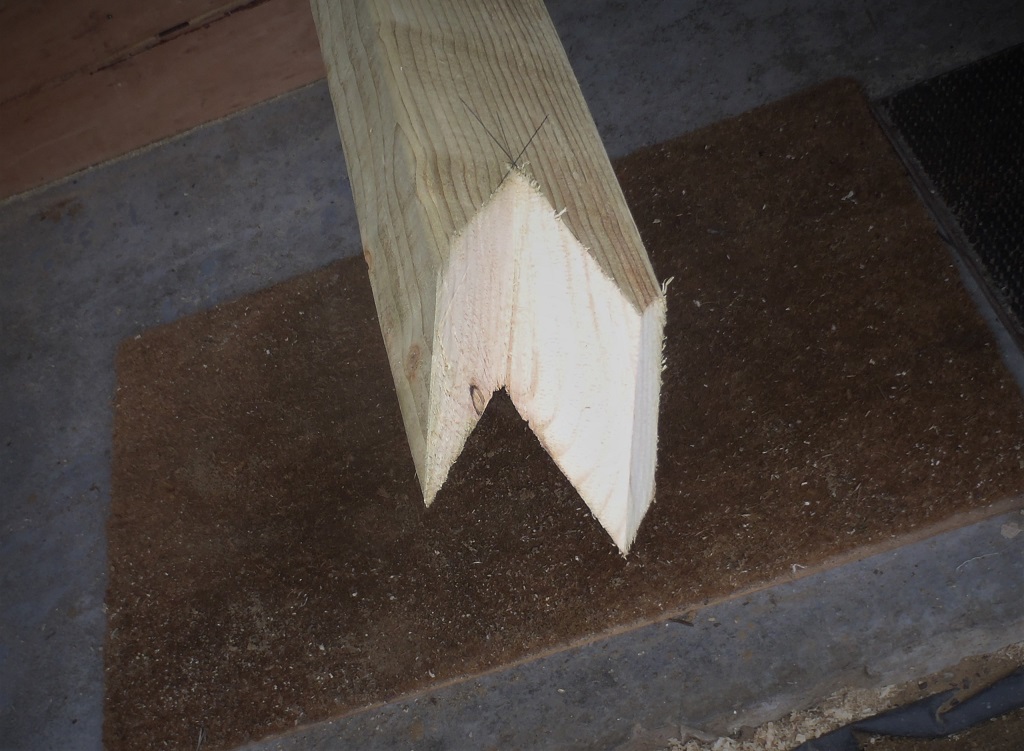
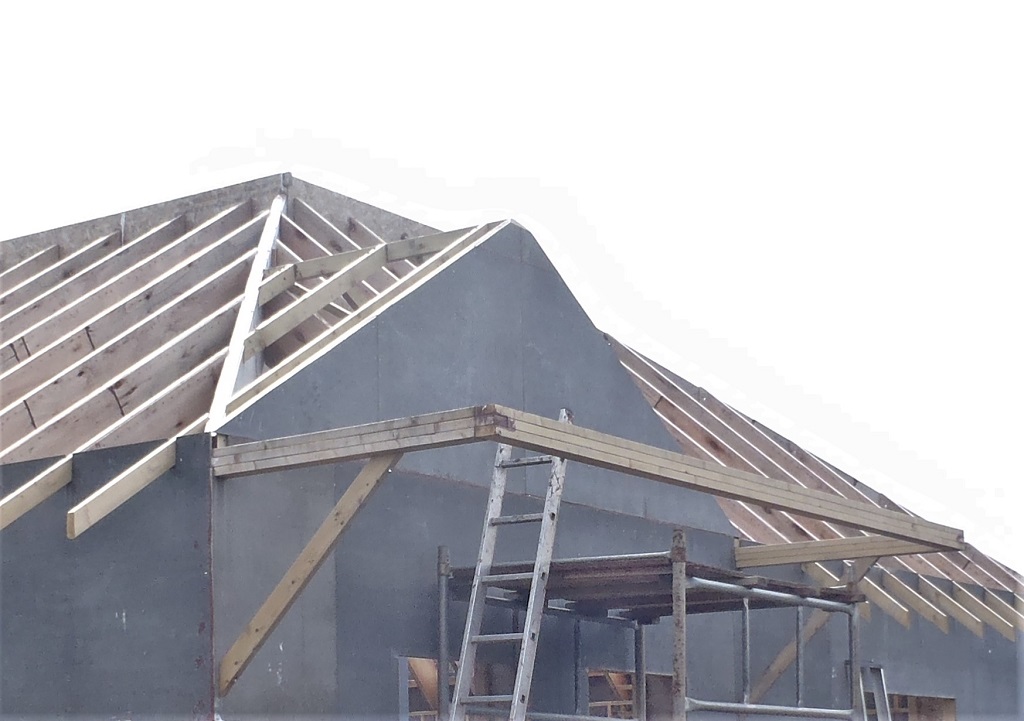
After lunch, we sliced and cut two long diagonal 95mm by 45mm thick timber rafters to conclude the framework for this dormer roof structure that will connect to our Conservatory (which will be built in a couple of years). There was quite a complex joint to make to connect to the sloping valley rafters sticking out of the building(as the picture reveals below)
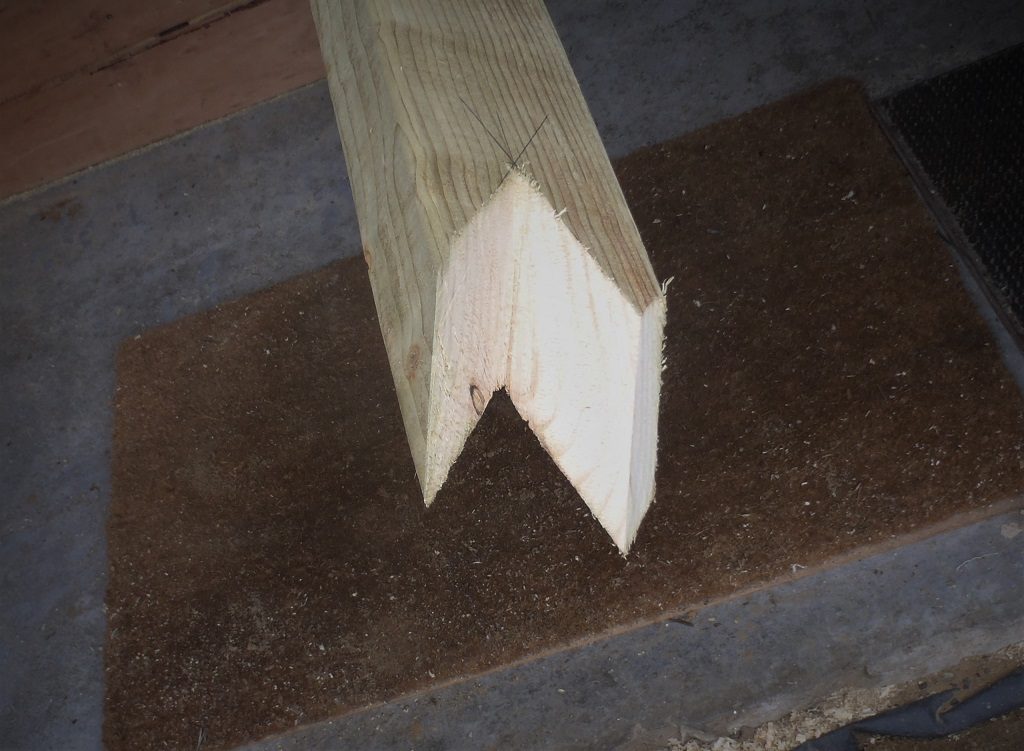
Joint-on-end-of-Q-facia
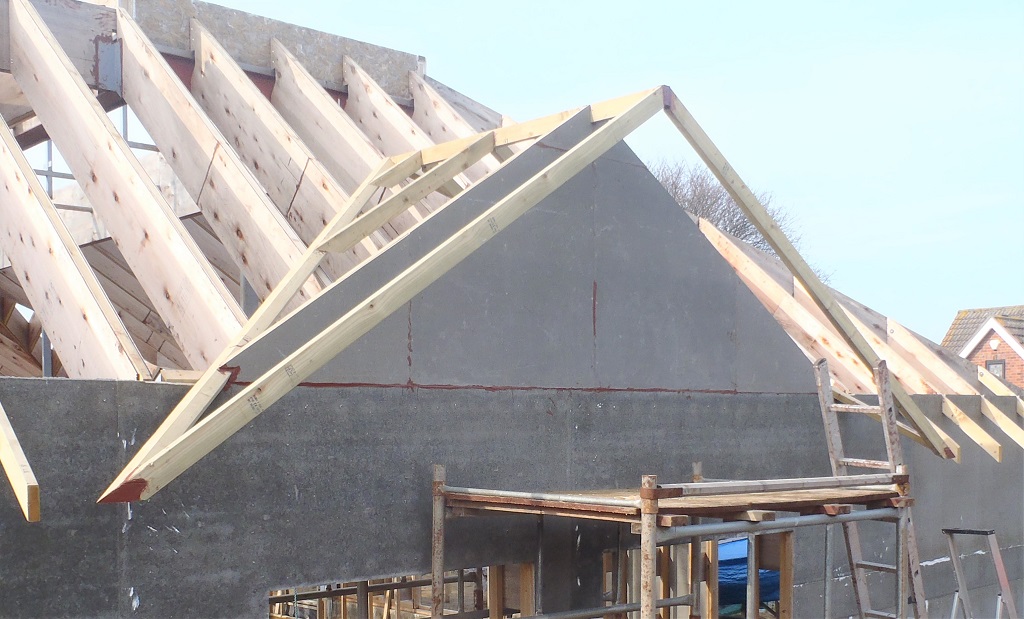
Then these two final pieces were carefully fitted, making slight adjustments until all was good and tight, at which point, they were glued and screwed together. The excess valley beams were sliced flushed afterwards.
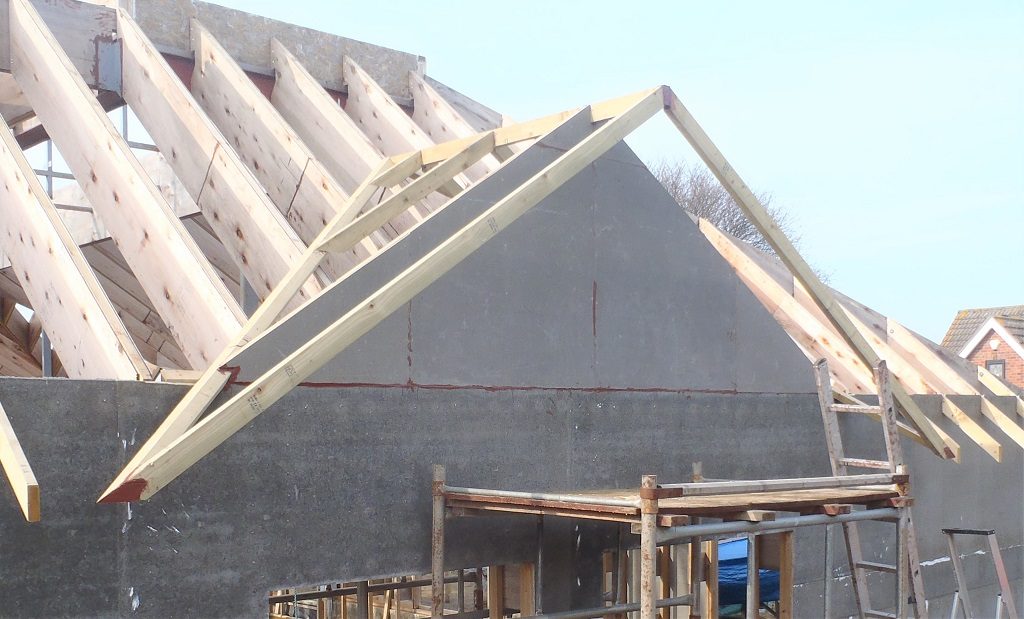
Q-Framing-complete
This concludes the building of the framework of the whole roof and the next job is to produce the Oak Facia boards that goes all the way around the edge of the roof. -
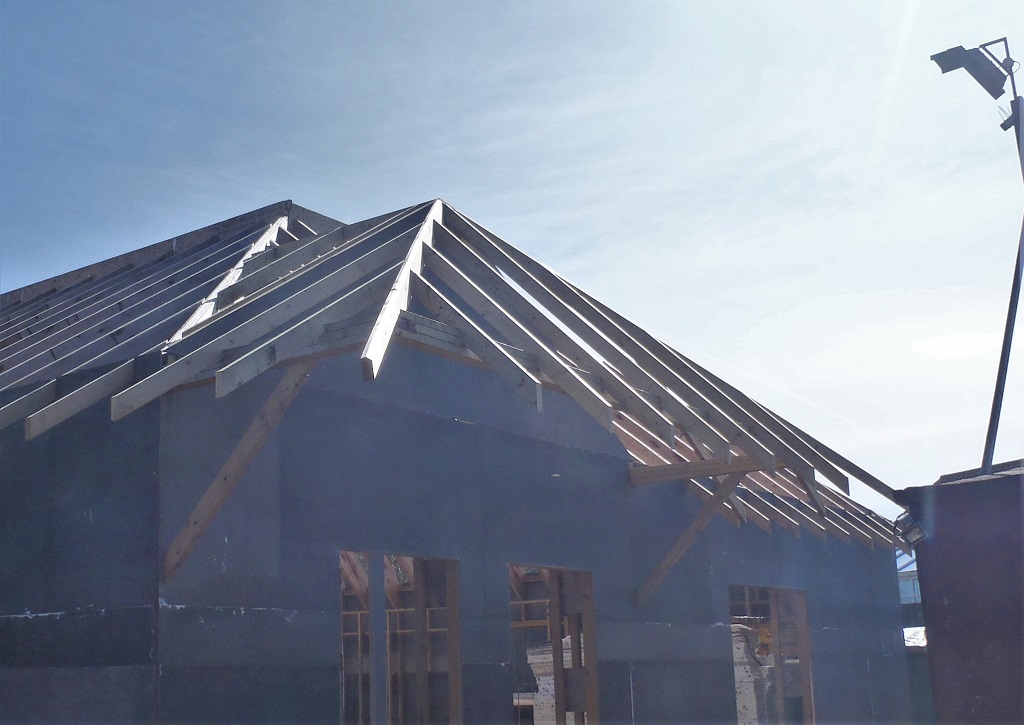
Framework All Completed for Conservatory Roof Interface Dormer
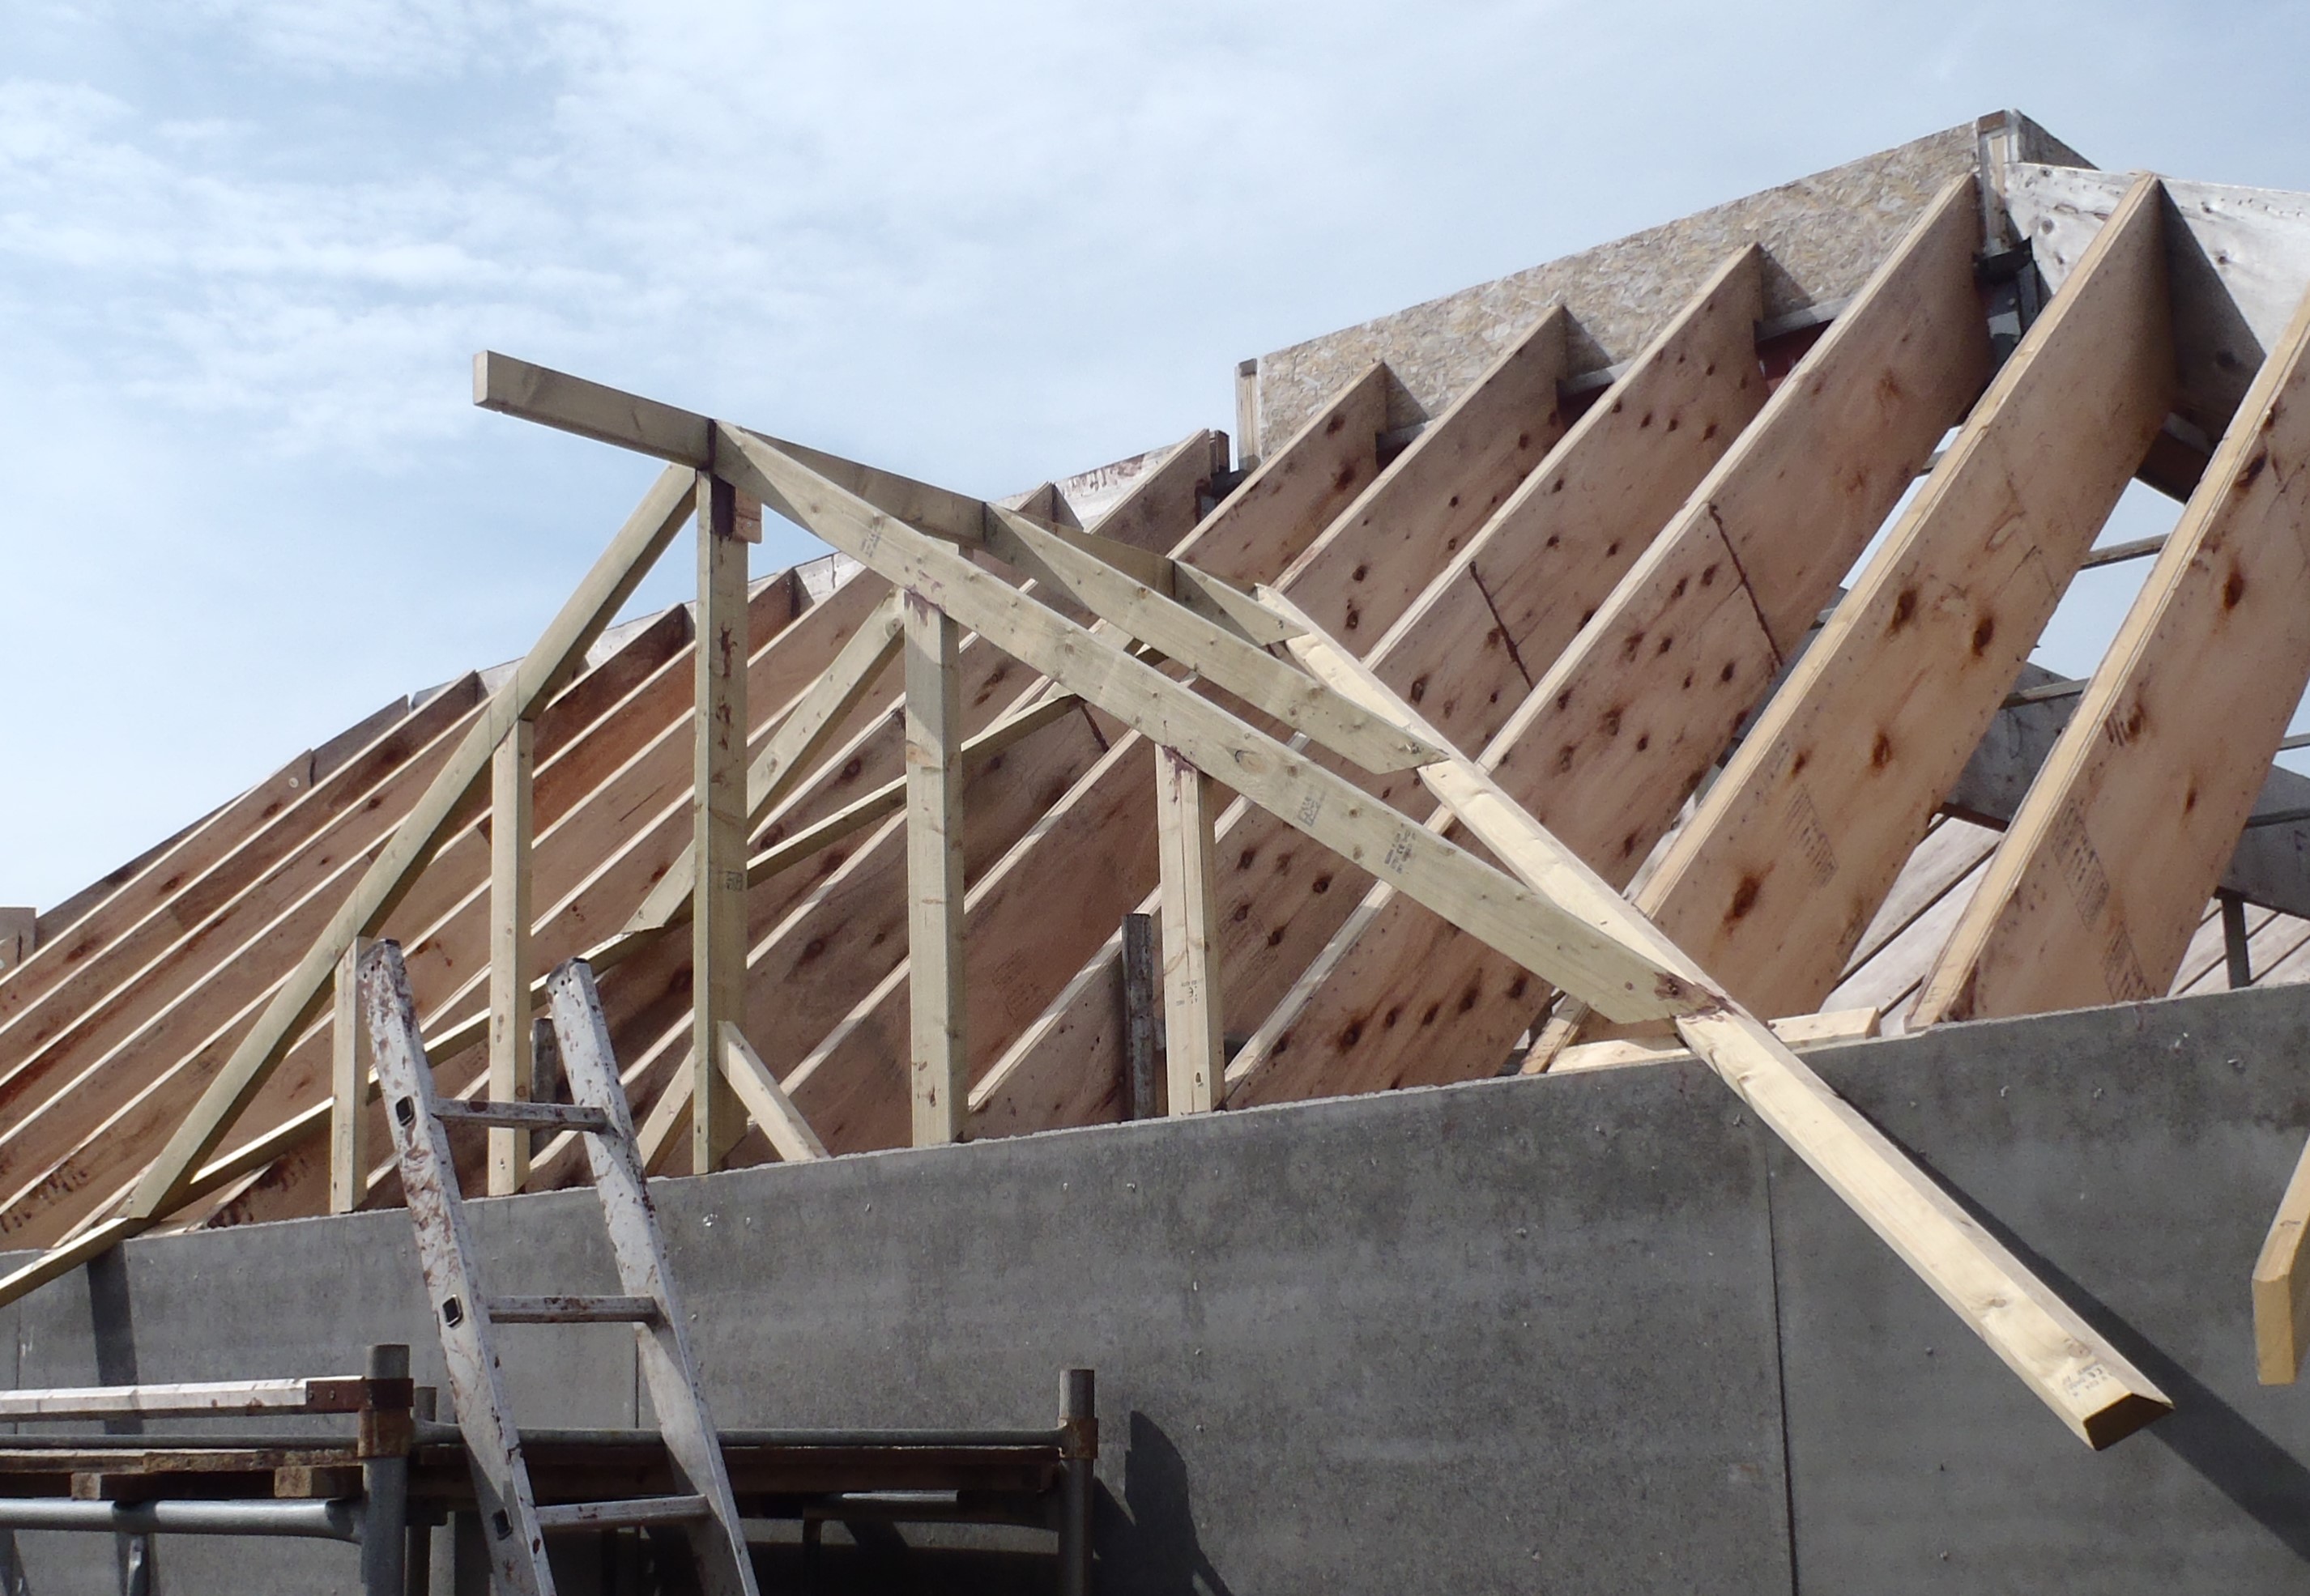
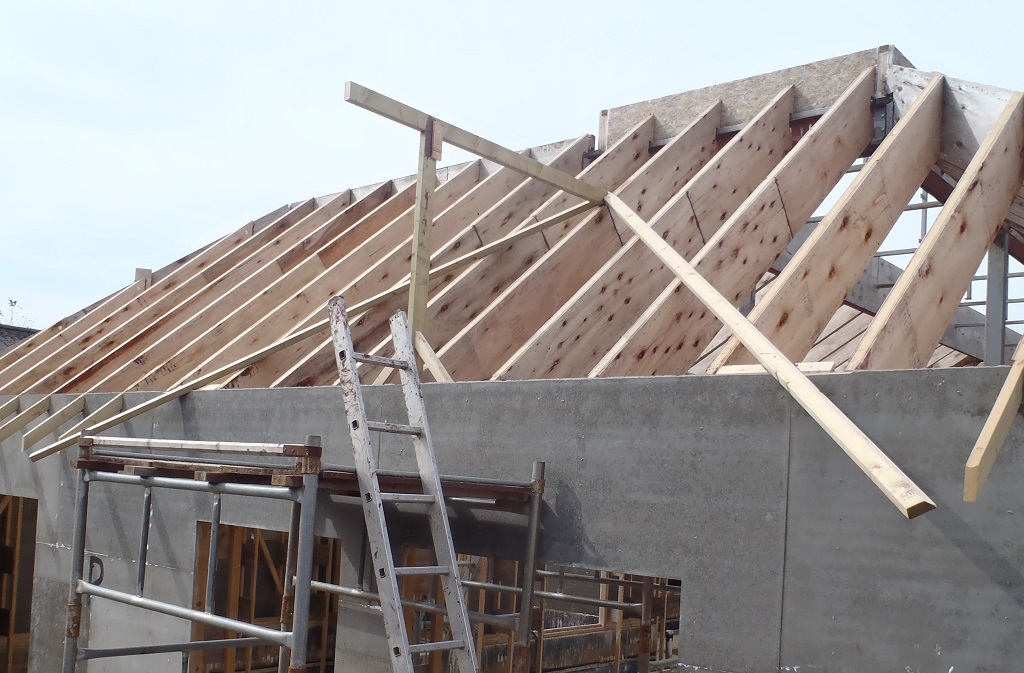
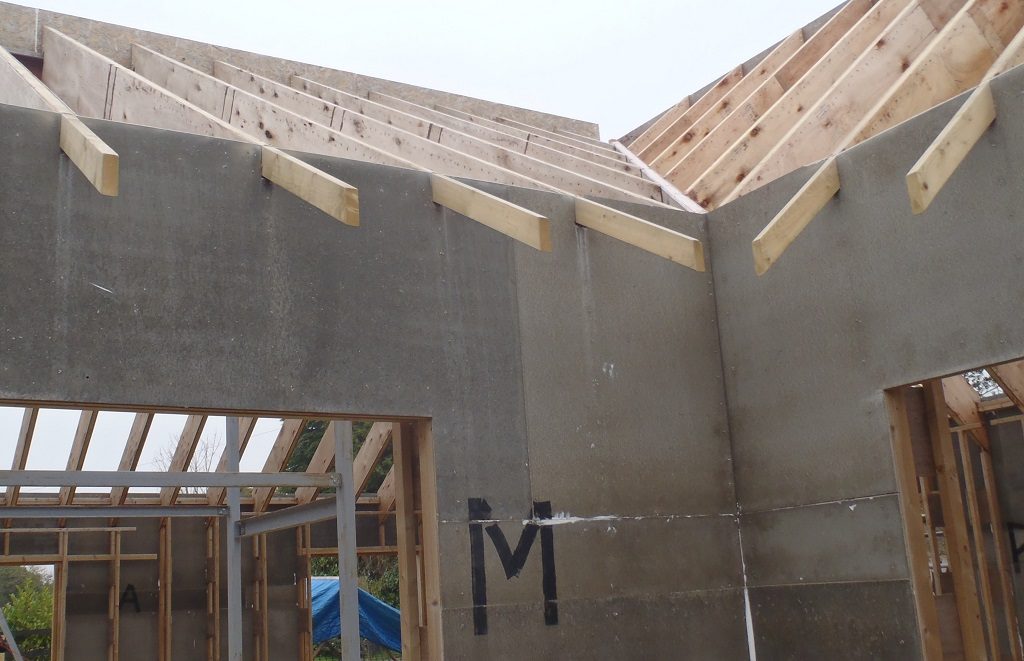
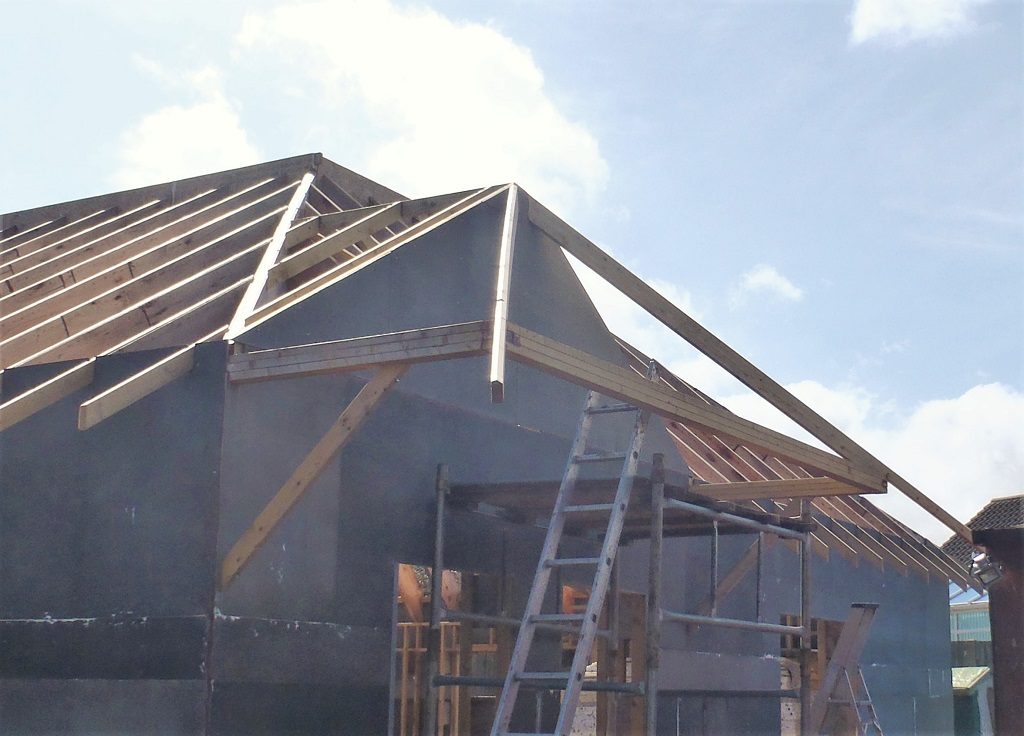
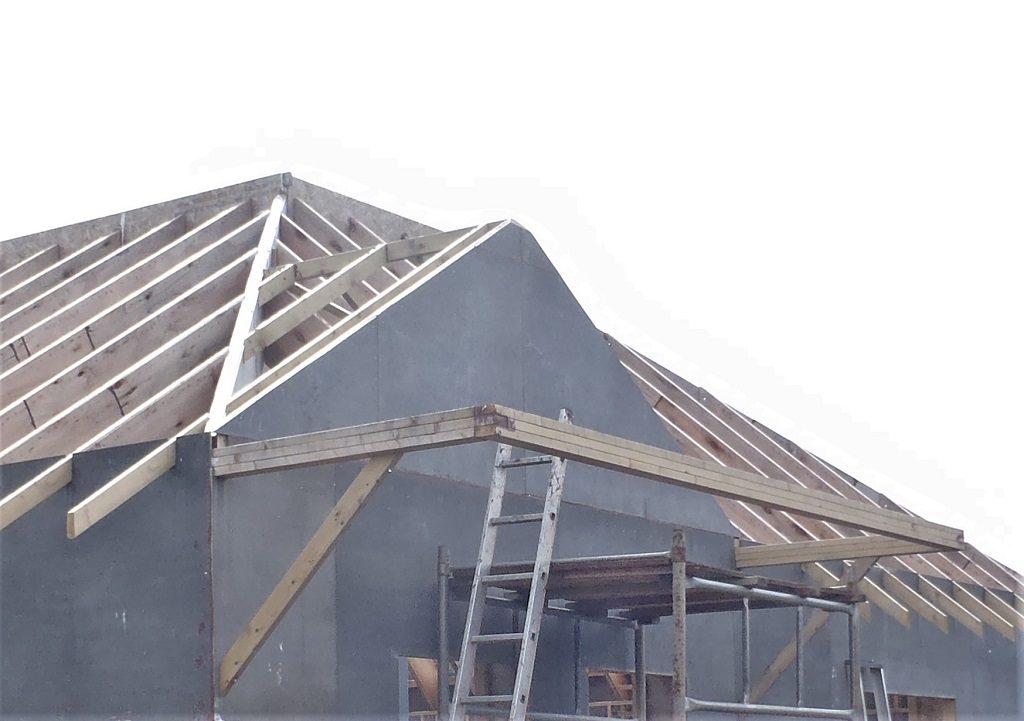
Today, we proceeded to cut six rafters to fill in the sloping sides of the dormer roof structure, and then four vertical posts to fill in the gable flat extension of the wall going up.

Q-Roof-framing-complete-1
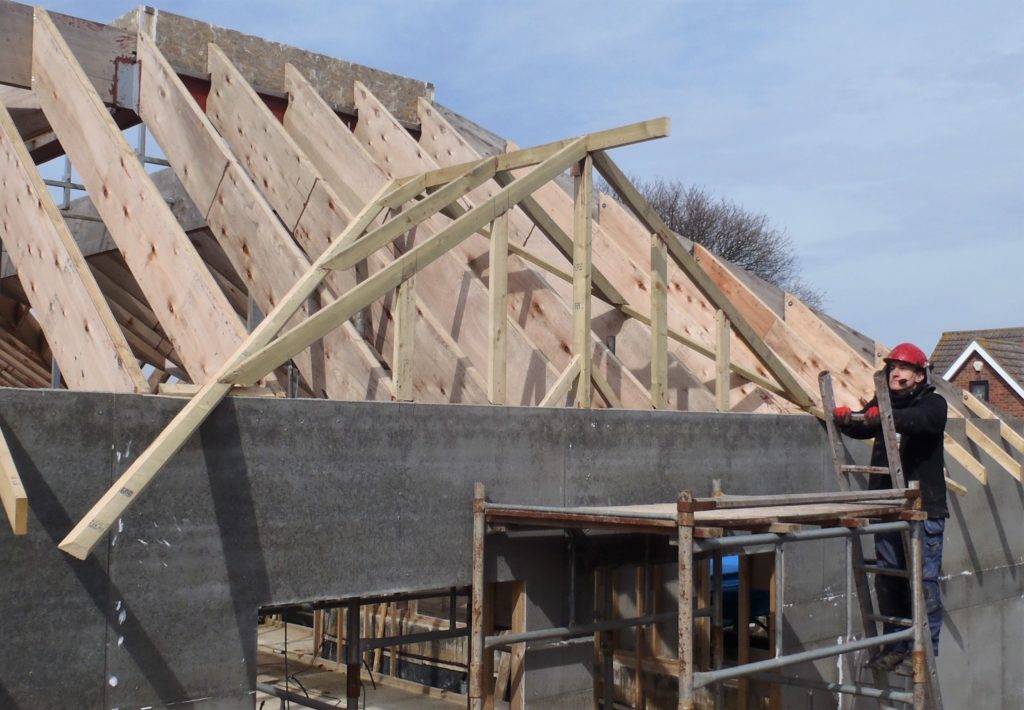
Q-Roof-framing-complete-2
On Monday, we will put up two cement boards on the gable wall to get that covered up and then we will need to add the last rafters on the front which will be the actual interface to the conservatoryThe we can start looking at the Facia boards and the guttering.
-
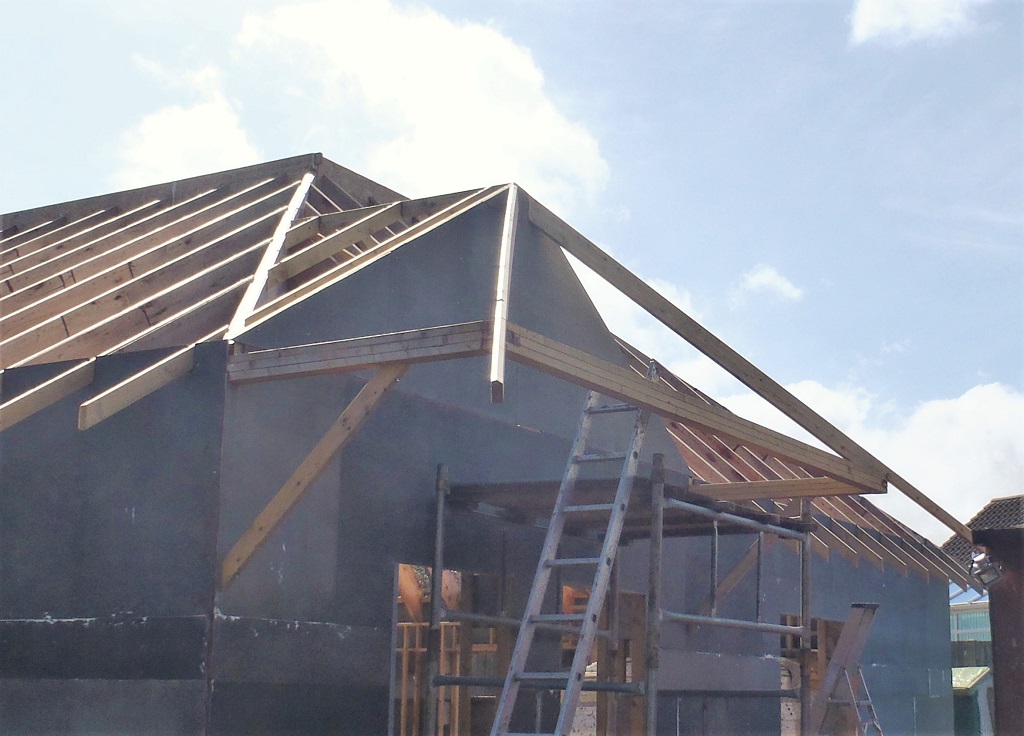
Conservatory Roof Dormer Framework Building Up
This morning, we carried on with the manufacturing and installing of framework pieces to build up the “Dormer” roof section ready for the Conservatory. The two long valley rafters were finished and got installed up on the “P” section of the roof.
We had to file away the edge of the cement board so these diagonal beams can reach pass and over to where the guttering will be.
Next, we cut the horizontal ridge beam which had a complex joint to connect to the two diagonal valley rafters
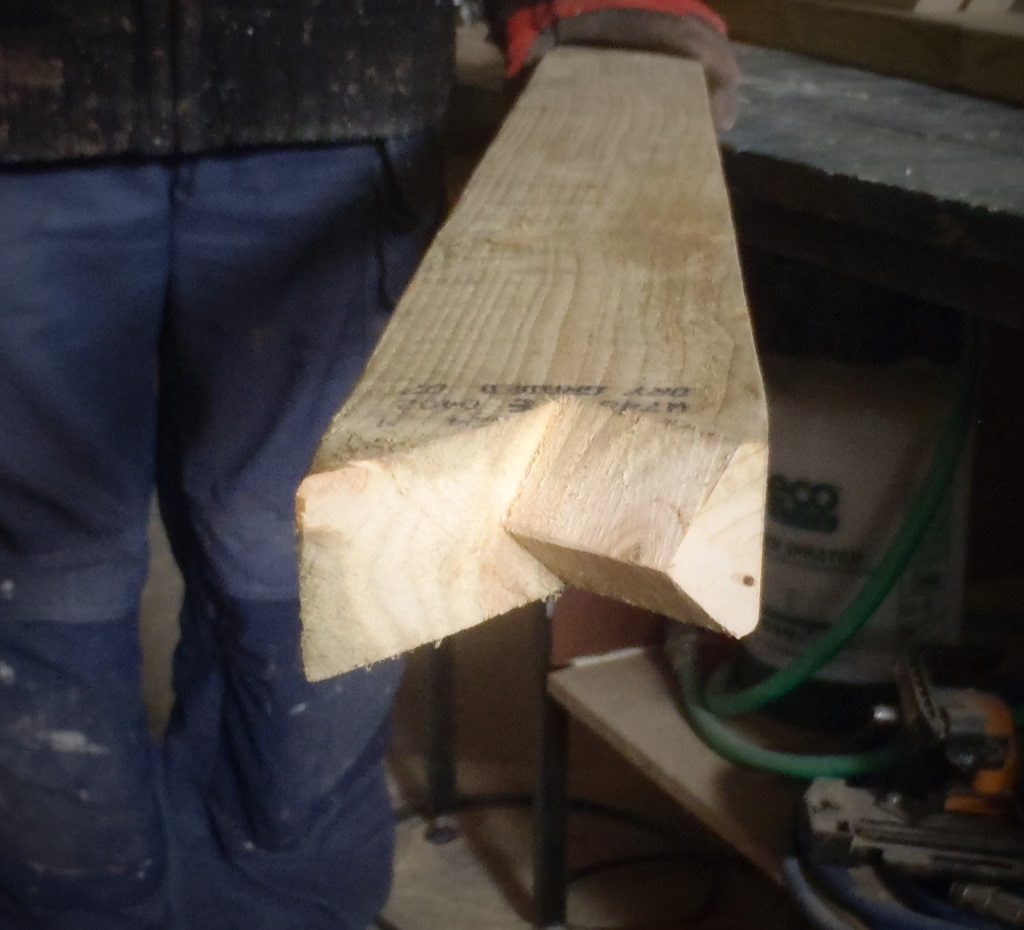
Q-Ridge-end-joint-detail
And a vertical post from the main wall of the building. All was glued and screwed into place.

Q-Valley-rafters-and-Ridge-installed
It was a short day today but tomorrow, we will continue with this job by making a set of rafters that will come down from the Ridge beam and sit on top of the valley beams! -
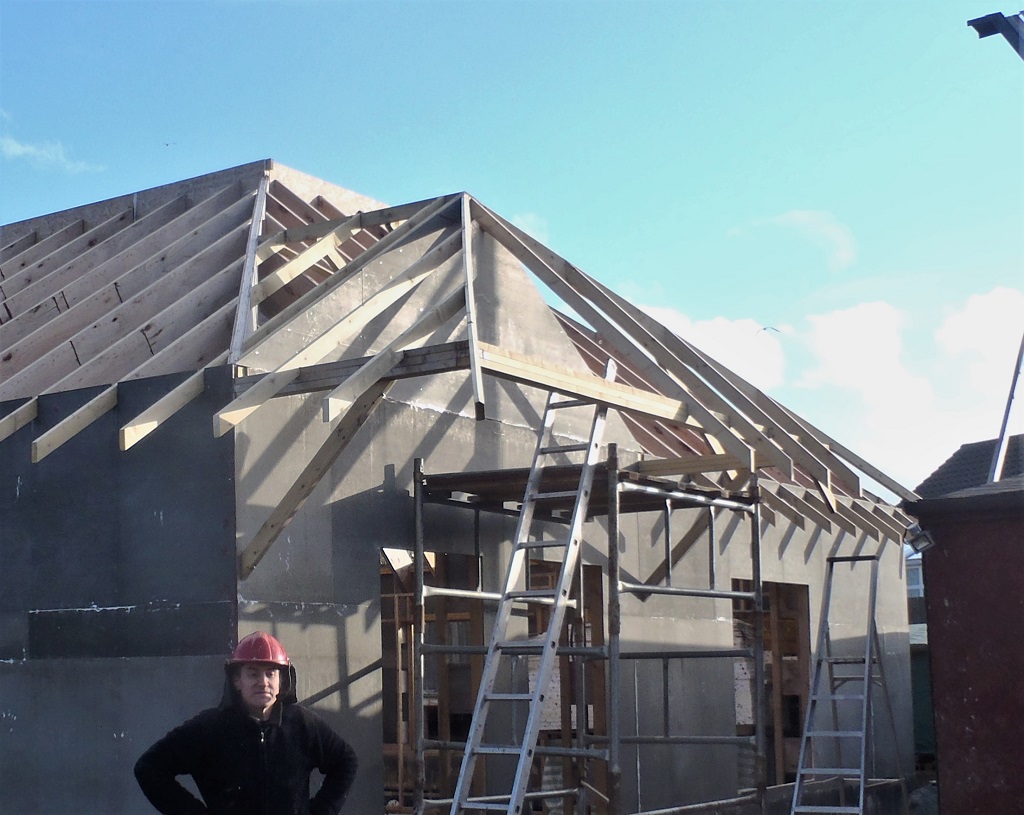
Side Porch Completed and Conservatory “Dormer” Now Under Construction
After a delayed start, we got the final three “F” rafters cut and installed up into the Side Porch Roof structure.

Side-porch-framing-complete
Then we dismantled the scaffolding tower to move it to the far side of the house where we will have our Conservatory. This will join to the house with a ‘seamless’ transition, so the house roof needs to have a dormer formed where they join which will extend out to the main house gutter line. We are calling this section of the roof the “Q”, connecting onto the “P” roof!
After a very late lunch, we ripped sawn down the length of two 95mm by 45mm timber to produce a sloping edge with a 40degrees angle. These will be the Valley rafters on either side of the dormer roof framework.
And finally, to finish off the day, we took a couple of short pieces off the ends of the newly created valley rafter and glued and screwed them in between two rafters to help support the dangling end of the valley as it comes off the roof to join onto the back of the facia board.
Q-roof-framing-started-with-two-filler-pieces
Tomorrow, we will carry on creating more pieces to form the “Q” framework, with a flat gable end which will be covered up with cement boards as usual, but with an extra sticking out portion which will interface onto the glass roof of the Conservatory (built much later on!!). -
Side Porch Almost Finished With Rafters Installed
We resumed our work on creating the two diagonal Hip Rafters, putting in the bird mouth and slicing the bevel ends and getting both up and installed.
Side-porch-Hip-Rafters-installed
Then we measured the position for the four side rafters (two on each side for the E and G sections), cut in the 32degrees angled bird mouth using our standard template and then slicing another shallow wedge off the top ends. These were also taken outside, glued and screwed up into place!
And finally, we started on the “F” set of rafters (F1 to F7), doing the middle F4 first and then measuring either side of this central piece so we can get the exact spacing correct (being 611mm centre to centre) and proceeded to cut 45degrees bird’s mouth this time (after adjusting our template accordingly). We managed to complete F5 to F7 along with F4.

Side-porch-nearly-finished-1

Side-porch-nearly-finished-2
All is looking quite neat and tomorrow, we will complete the other three rafters (F1 to F3) and after that, switch over to making the Conservatory “dormer” framework which is the last piece of work to do to the roof before we start working with our Oak timber and manufacture the Facia board around the edge of the roof. -
Side Porch Gable Wall Covered With Cement Boards and Two Diagonal Hip Rafters Created
This morning with patchy sunshine but quite warm, we went and glued and screwed up a collection of cement boards to cover up the gable wall framework we installed last week for the Side Door Porch. The 12mm thick sheets, two of them, had a groove routed along the long edge and then cut in half so we could handle them by ourselves, as they are very heavy, about 50kg per full sized sheet so even half length, they are still 25kg!!
We put four of them up in a line, on the existing tongue edge of the cement boards lower down, and sliced off the over-lapping sticking out bits.
Side-porch-Gable-boarded
This afternoon, we got our Hip Rafters that we had made a couple of weeks ago, and planed the two sloping angles along the top edge. We did this using our mobile electric planer which took about an hour to do. Then we sliced the top end off to form the angled vertical end and got out our Bevel Slicing Machine to take off a very thin 58 degree wedge. The drawing indicated that the length from the top down to the bird’s mouth (2970mm) and we cut the little notch. Then going outside, we cut a little flat notch bits off the outer corners of the sticking out framework parts of the Porch. We stopped as it was past our end of work day time but also we had a delivery to interrupt us too!! We will carry on tomorrow!