The Sun Corridor now has a new floor!
In order to make as much of the space useable as possible for each of our rooms, we brought up the level of the floor. The only compromise we decided on is a gentle slope down towards the front door to minimise the step up when anyone comes in via the front door.
It was a fairly simple construction of 4 lines of CLS timber (38mm x 63mm) supported by little legs every metre.

Corridor supports
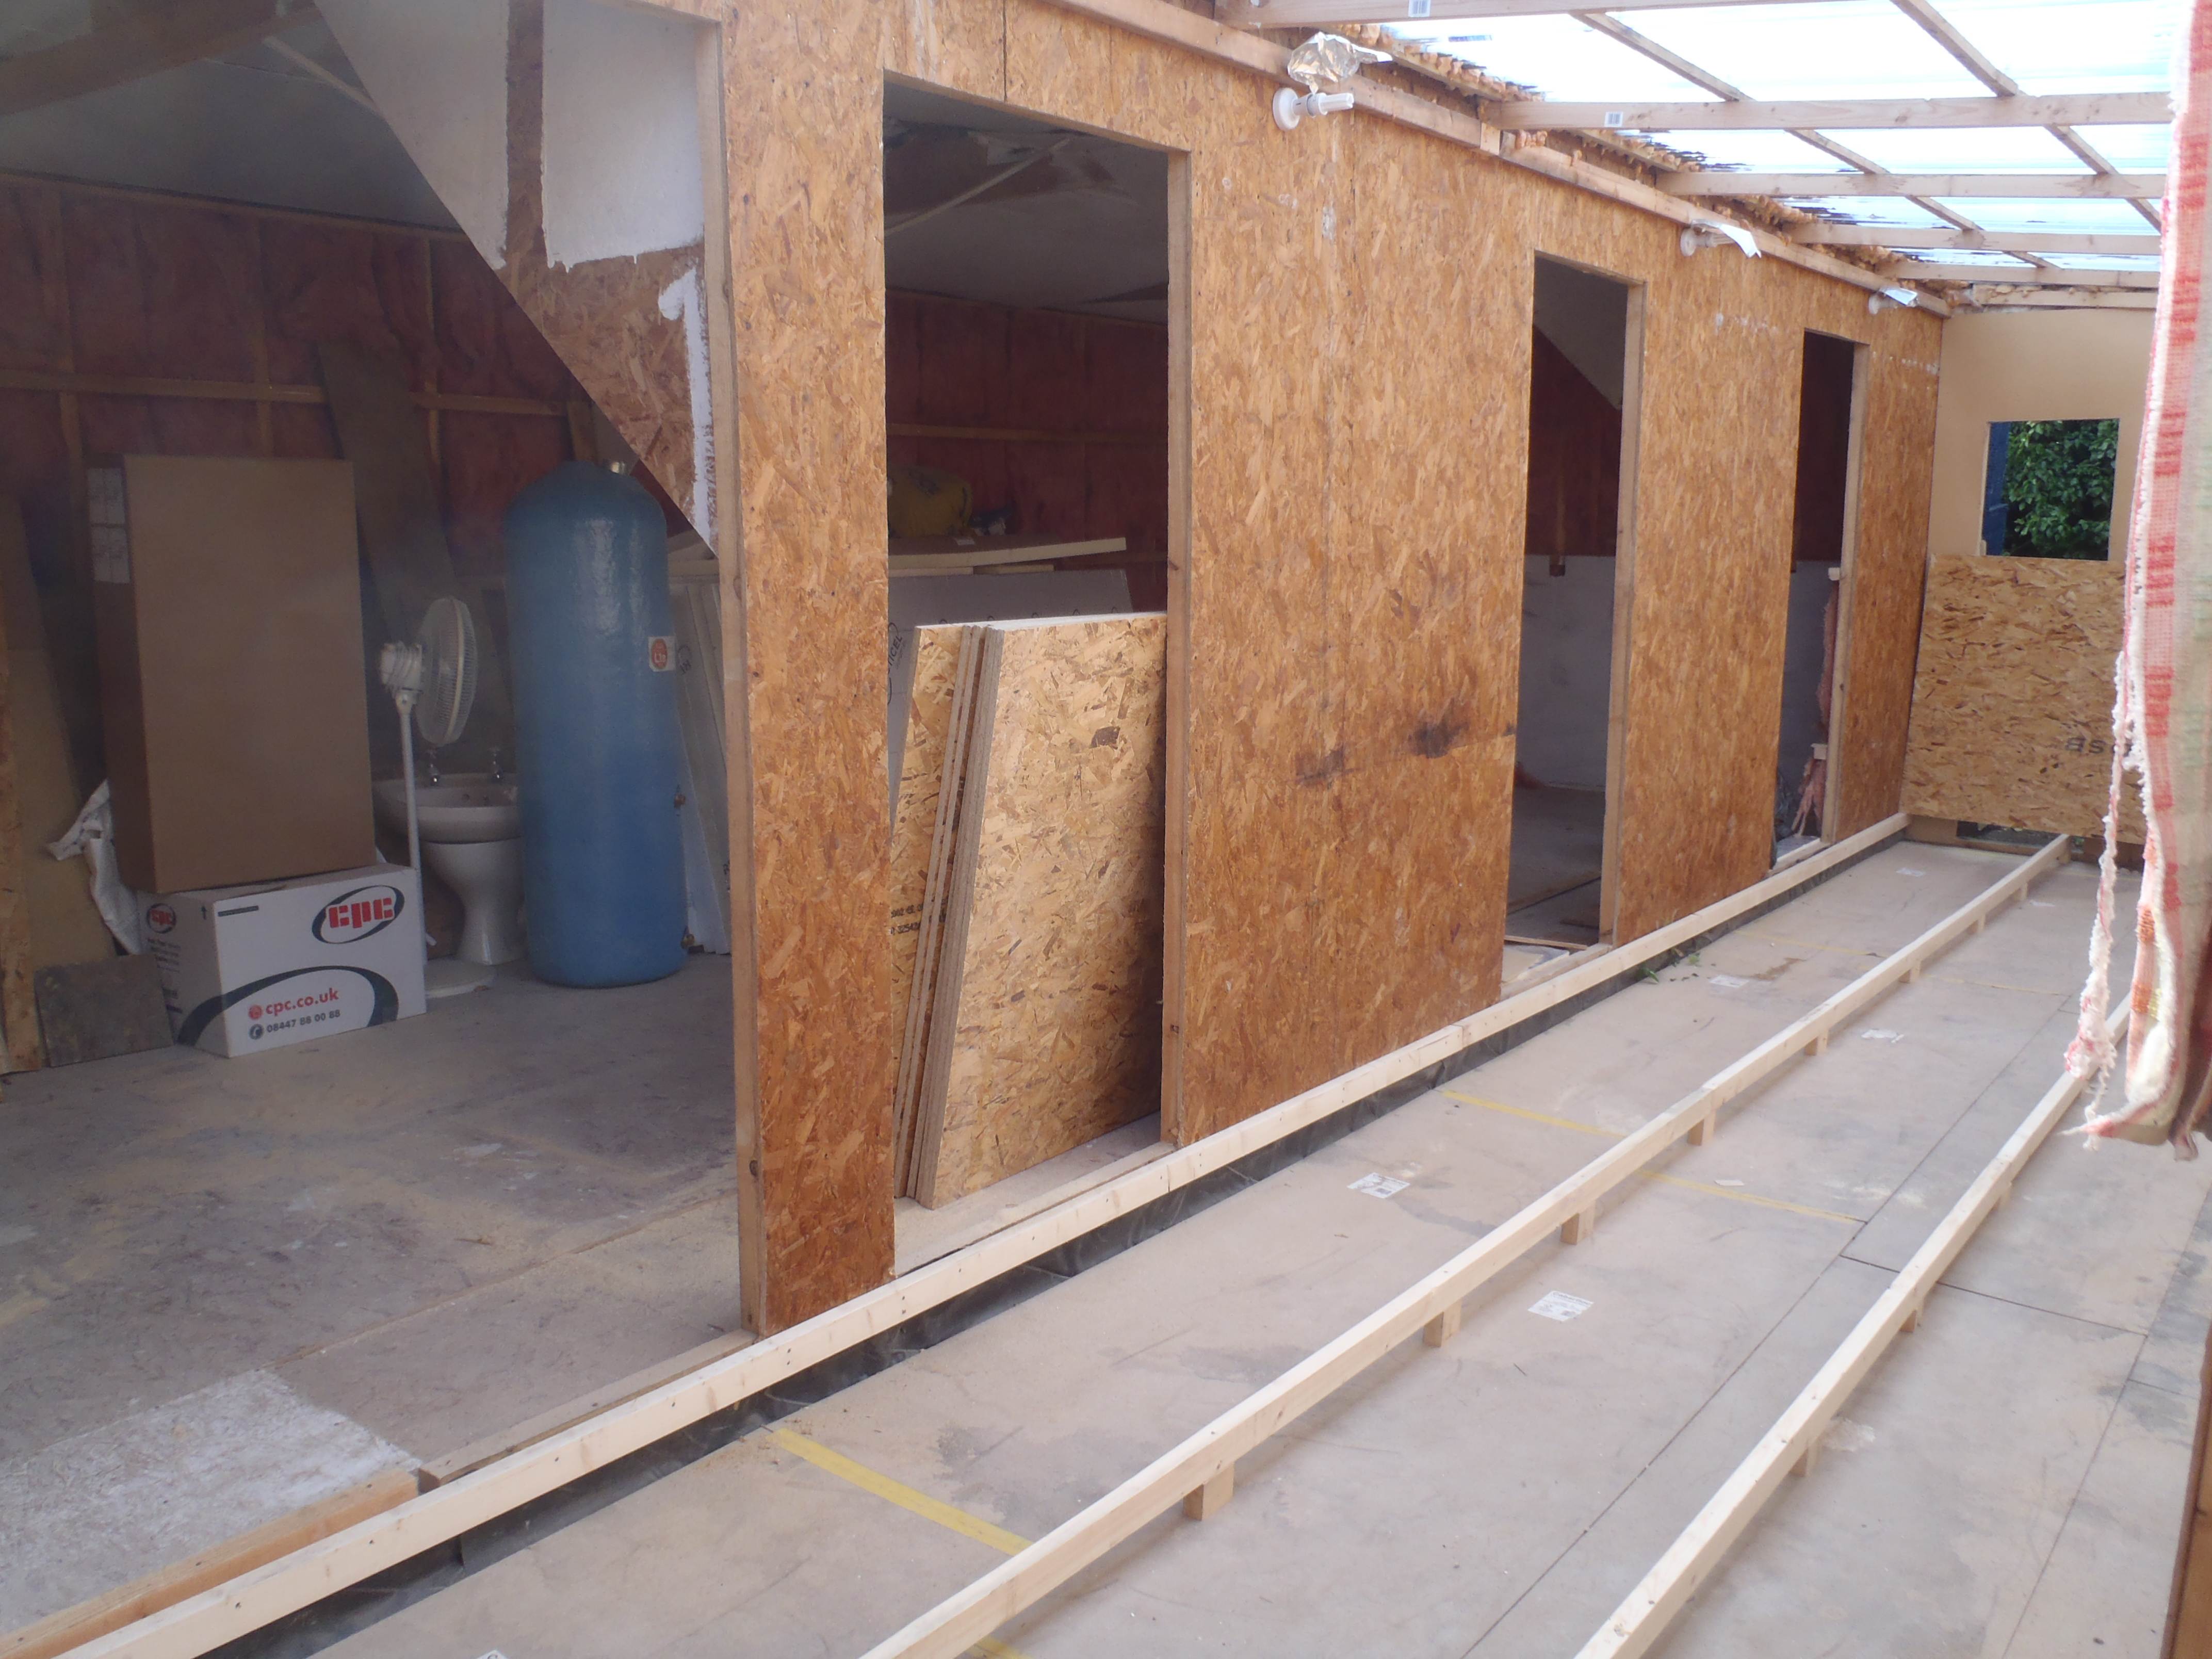
Corridor supports
Then 8 sheets of 18mm OSB boards laid on top. The gap inside was filled up with recycled glass wool bits and pieces to provide a little insulation.
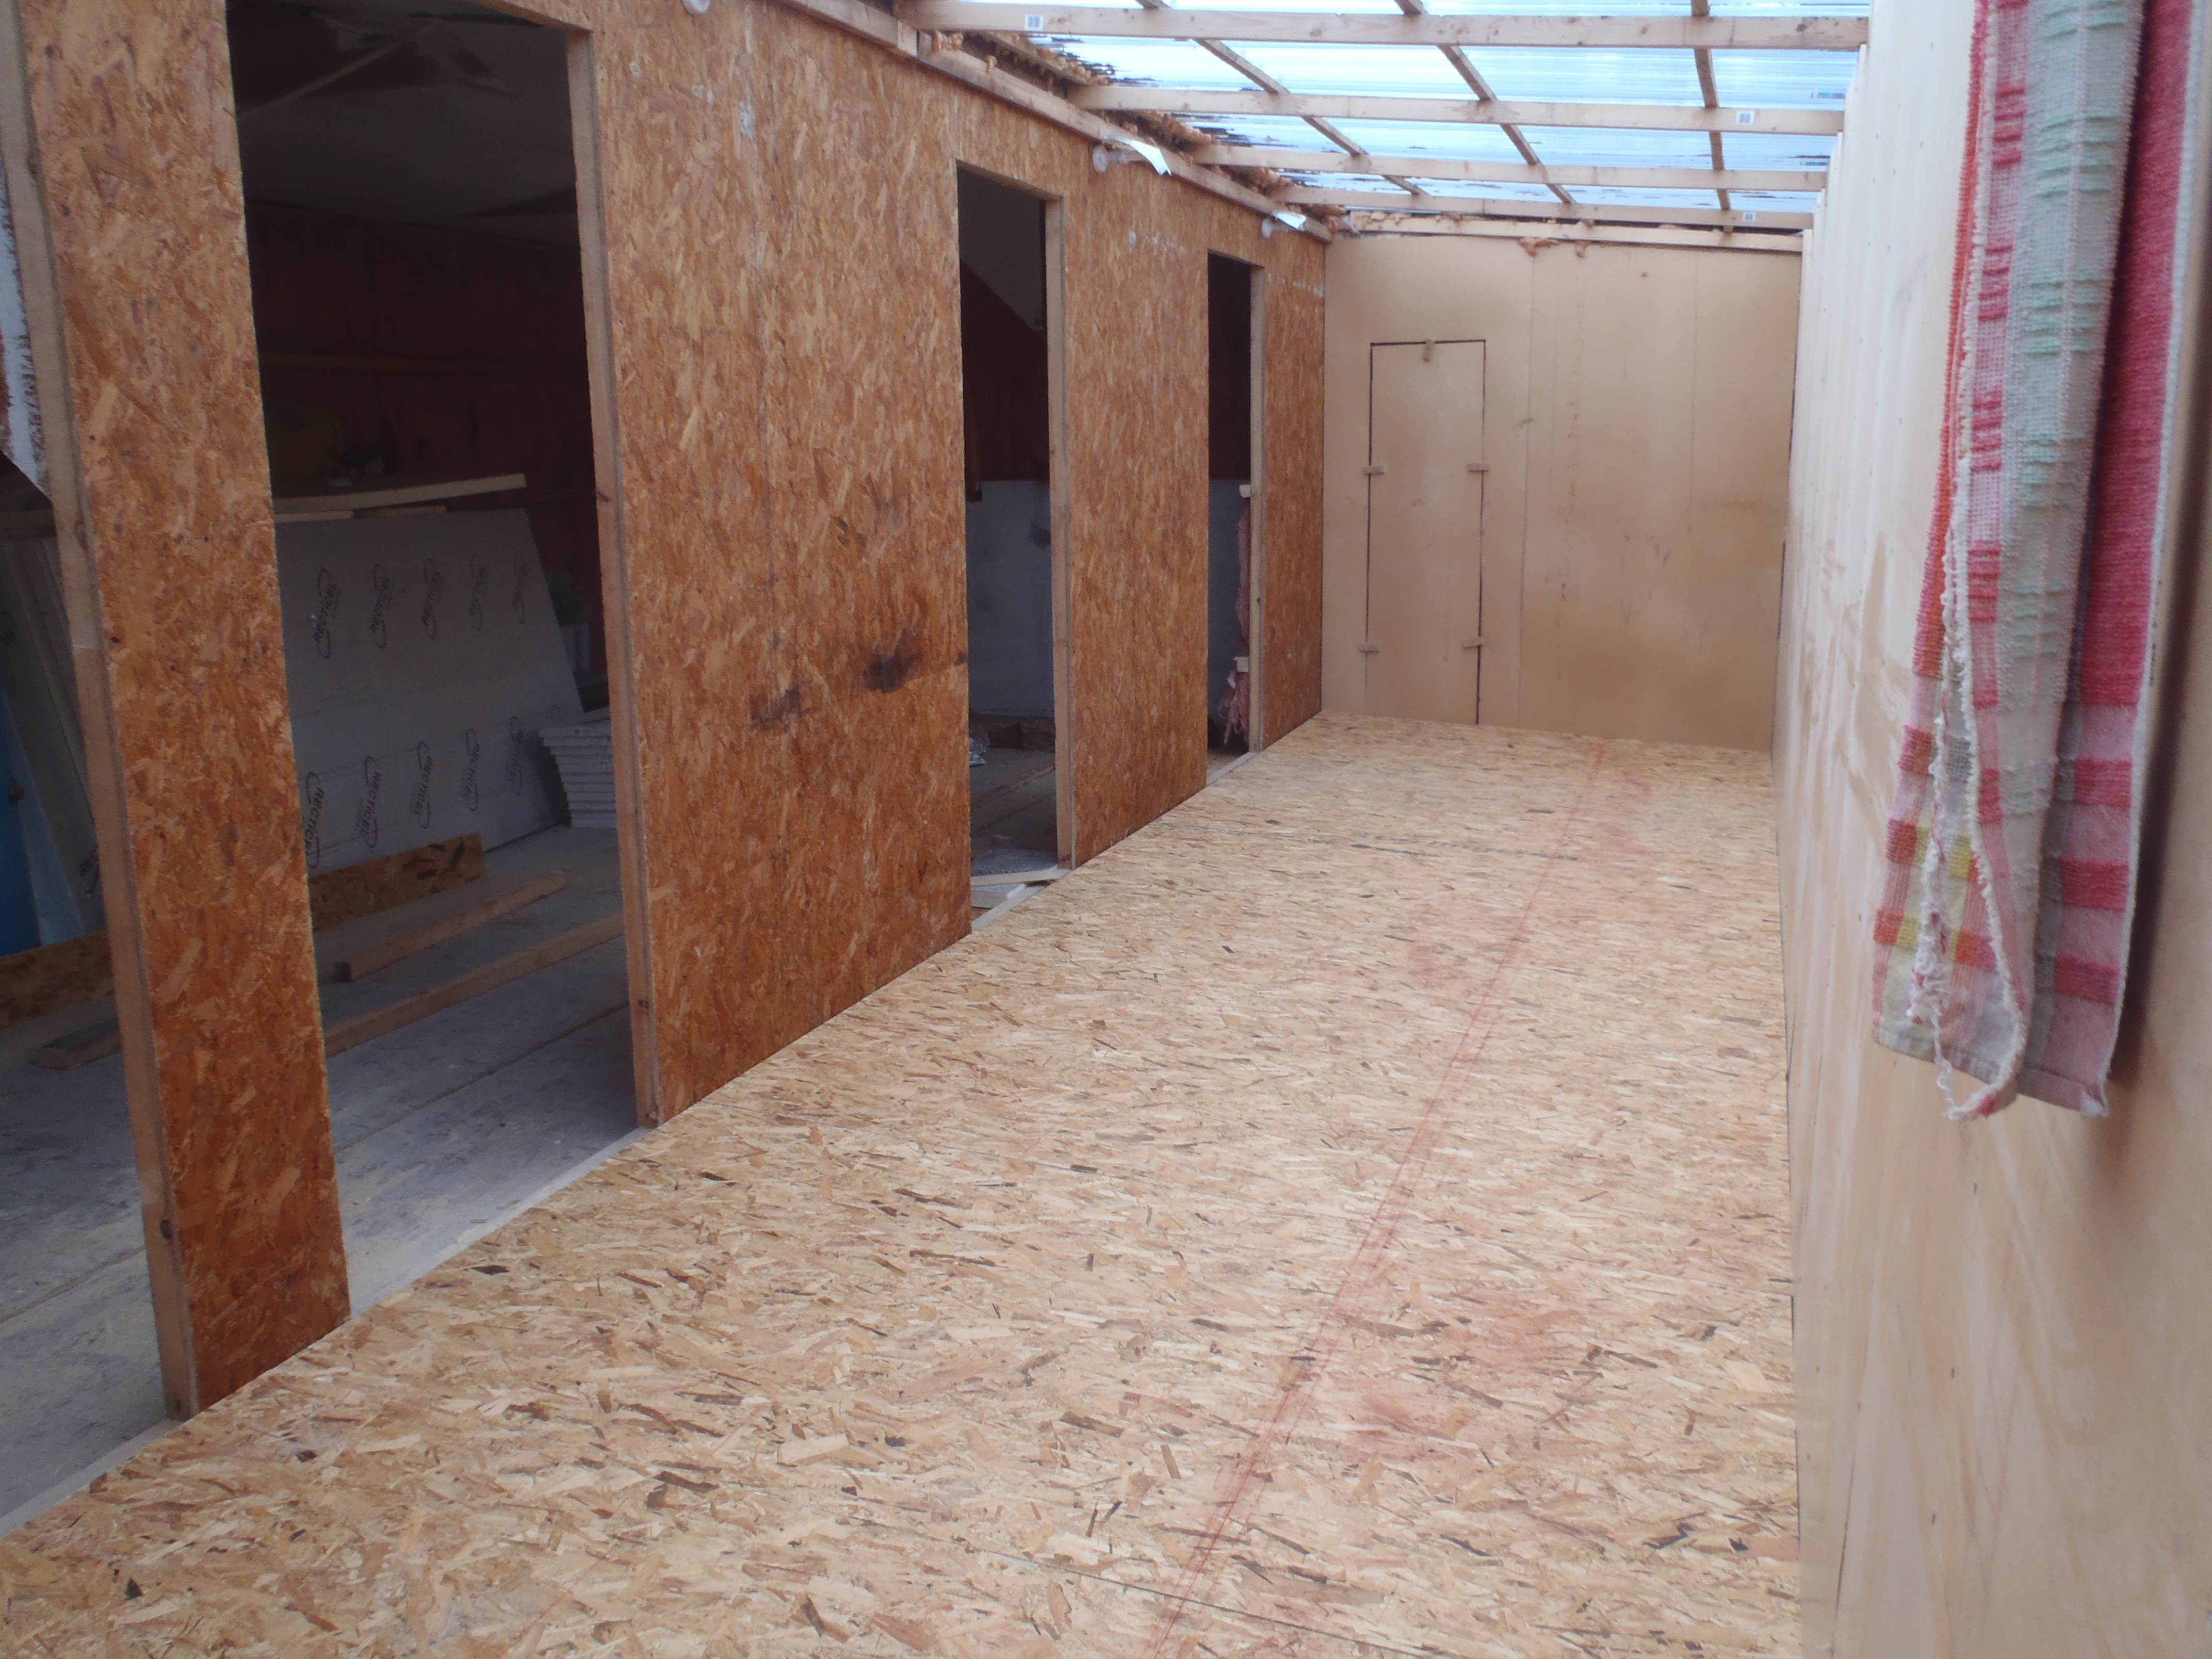
Corridor floor down

Corridor floor down