Category: Walls

  • Templates Created and Larch Planks Starts Going up on Walls

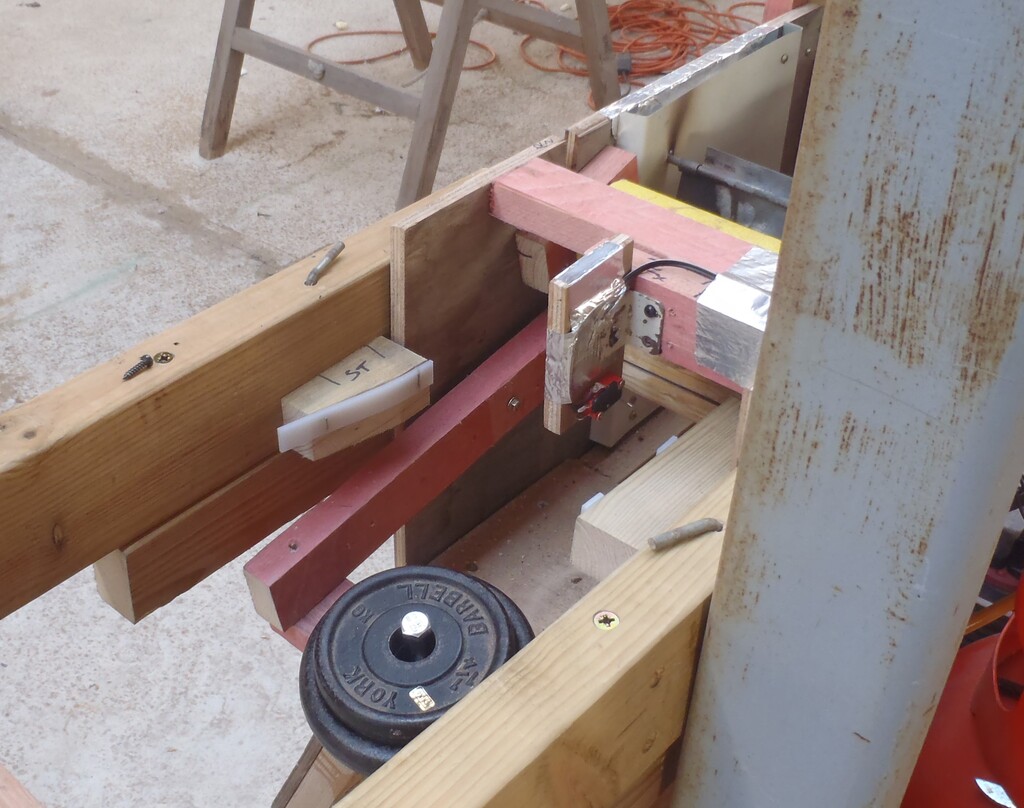
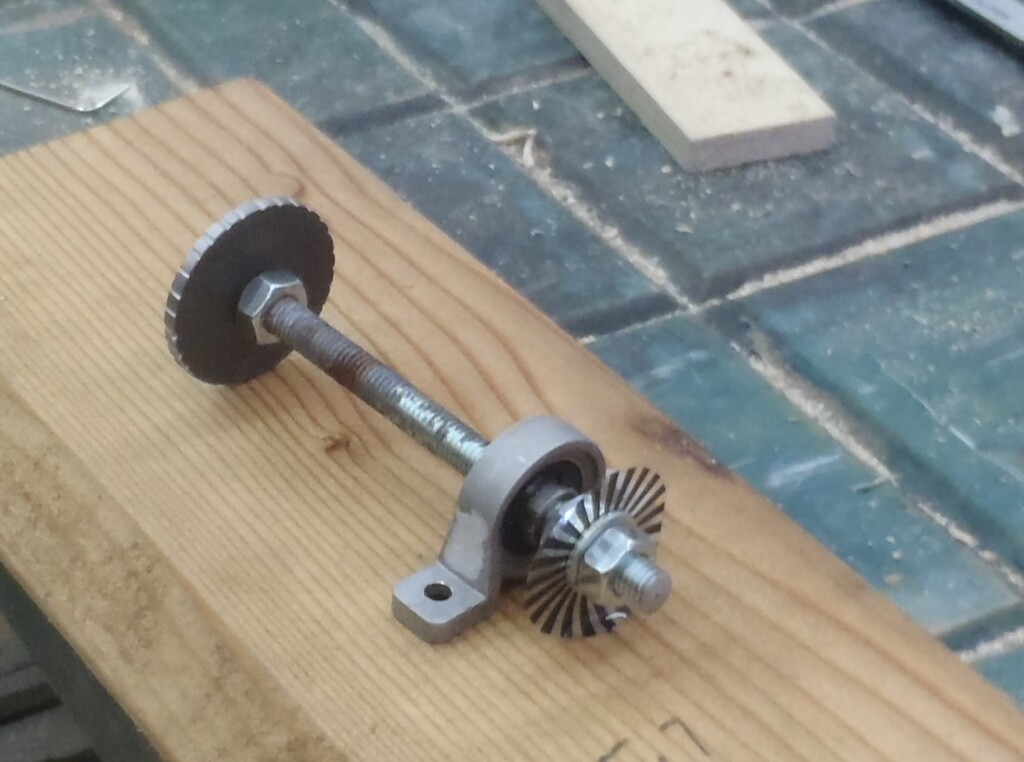
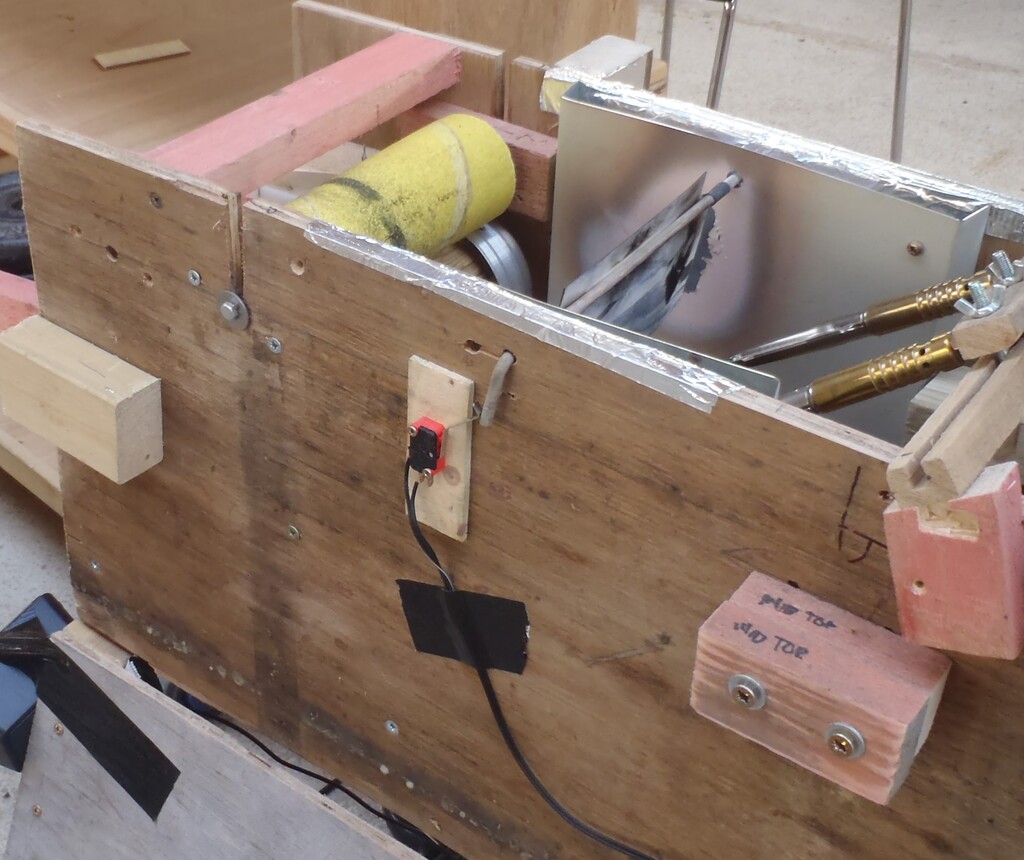
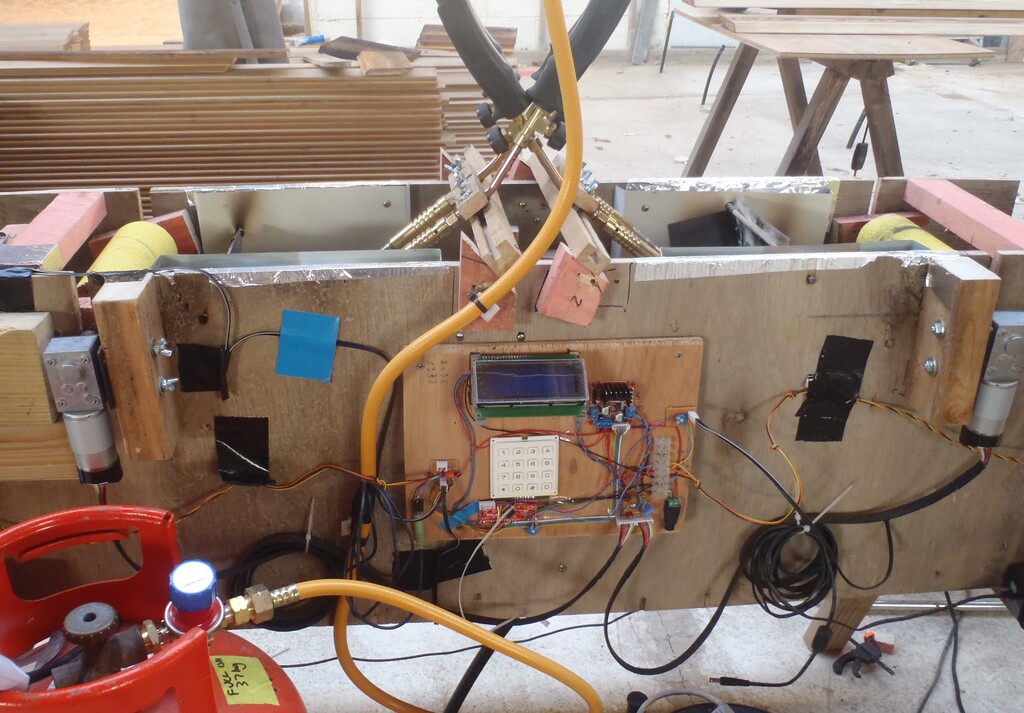
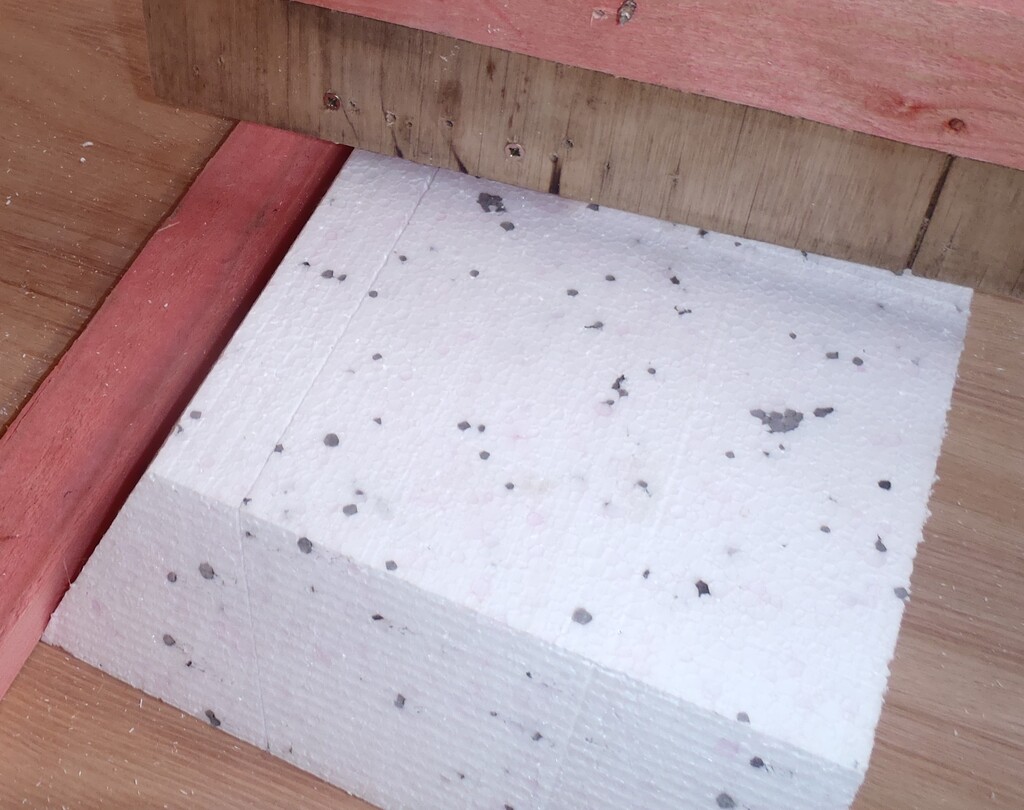
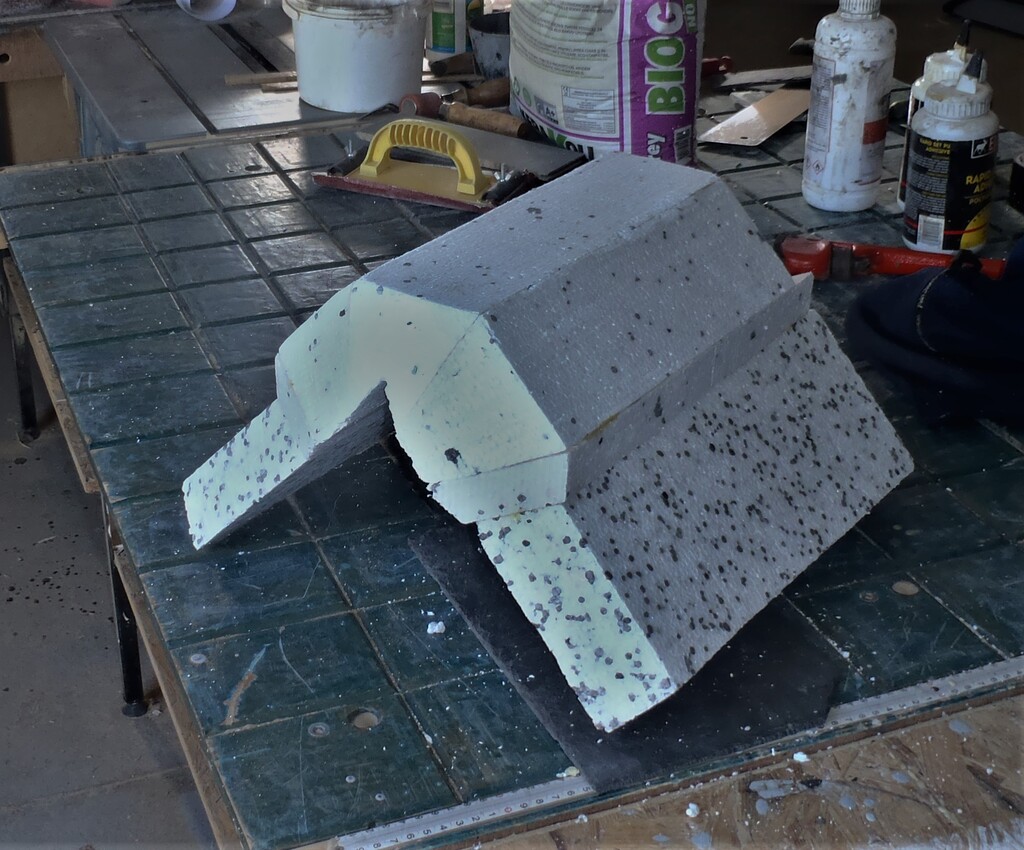
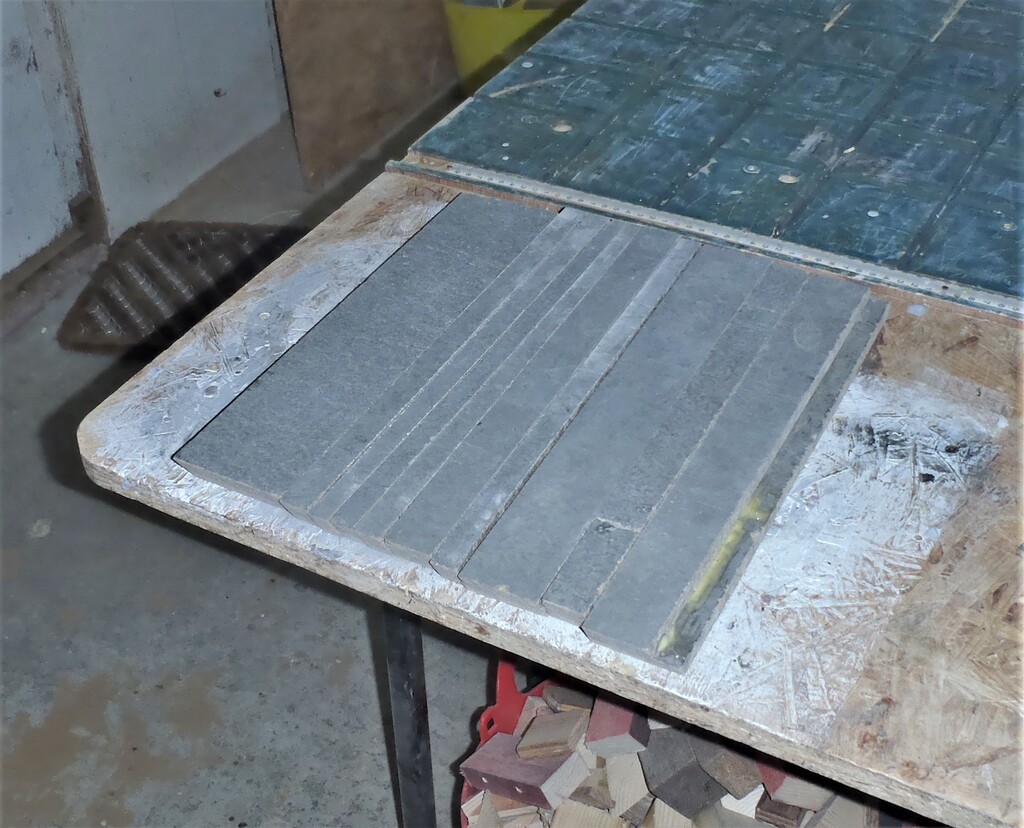
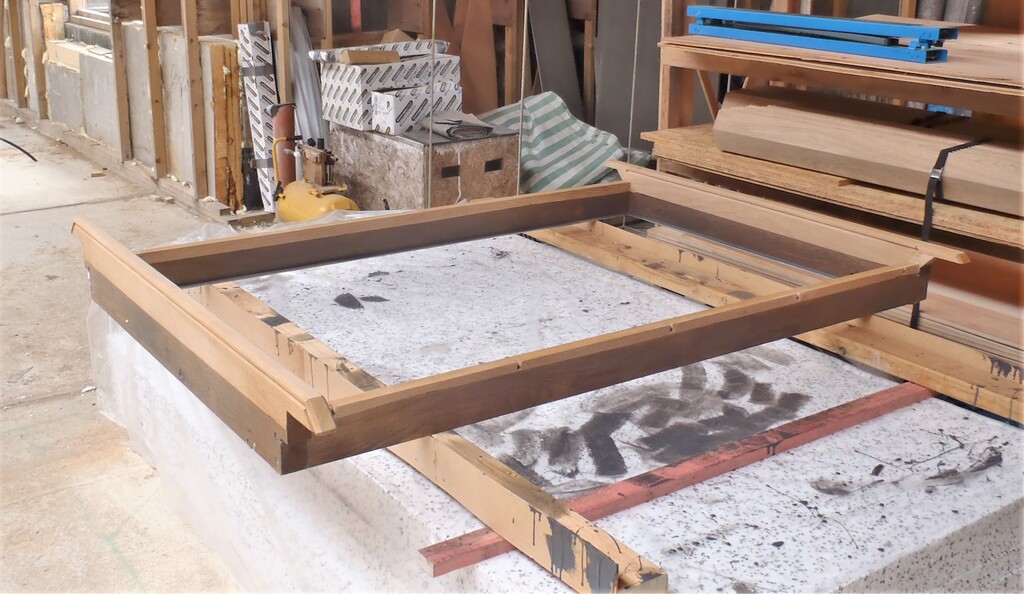
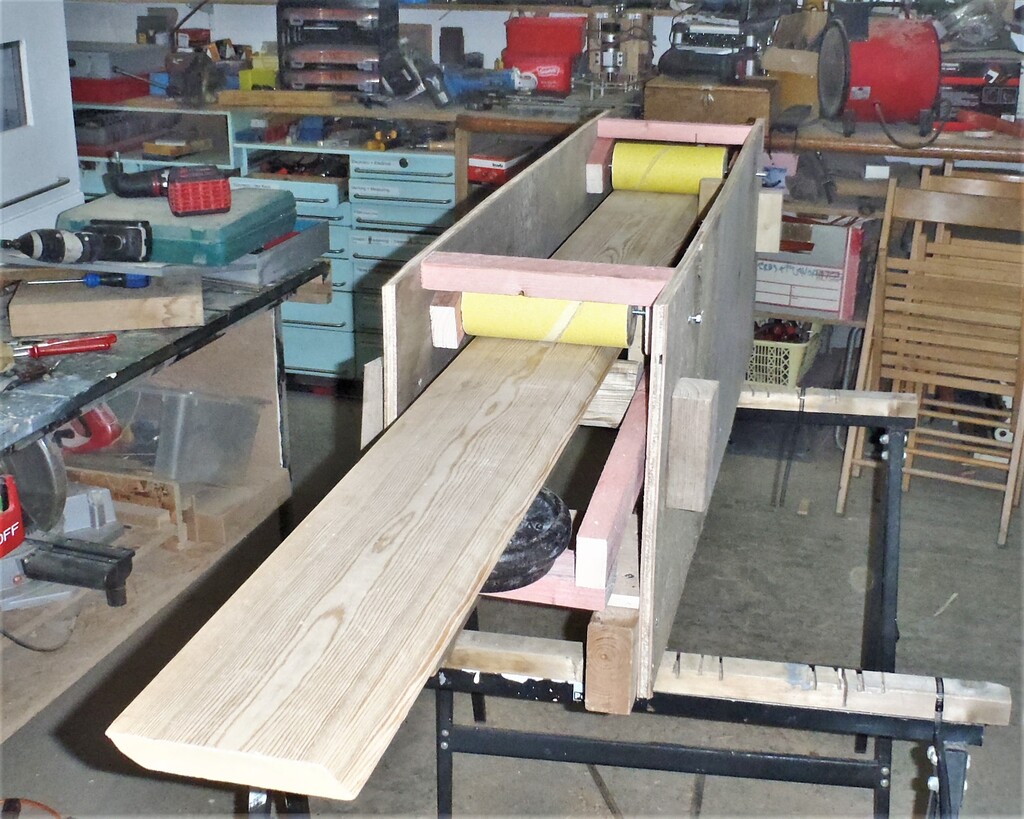
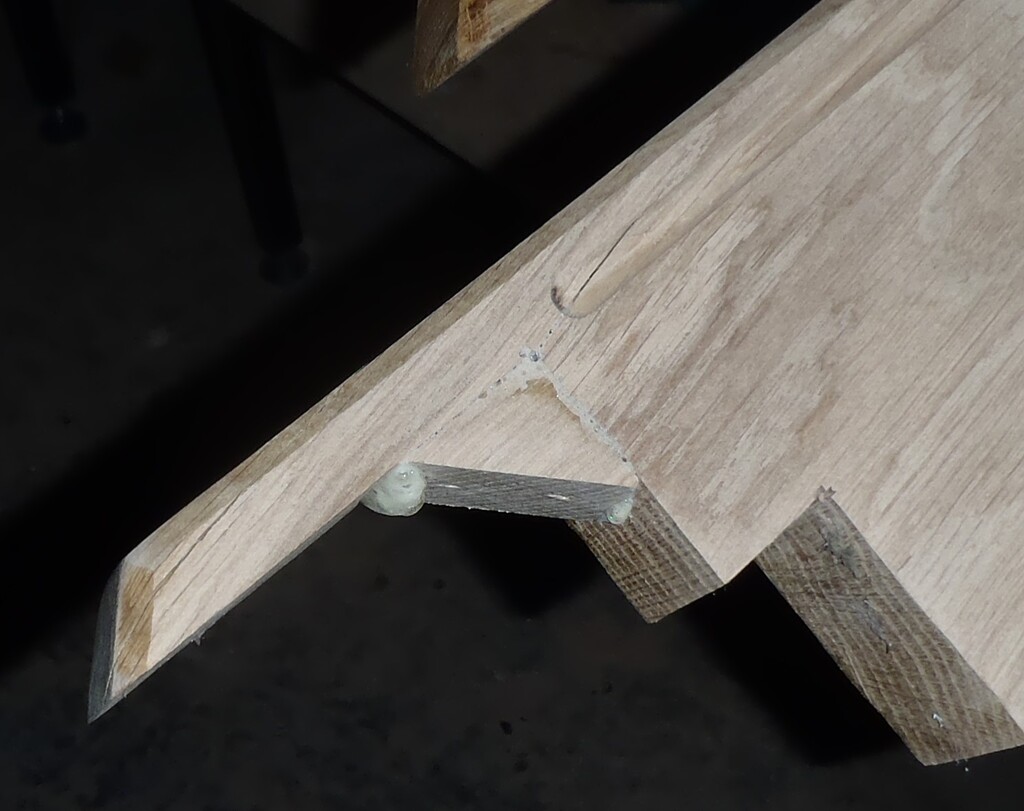
    At last, we can actually see the Larch cladding timber going up on our walls this week! But first, we made a couple of templates; a lap joint cutting guide to produce a 50mm wide half lap joint for two pieces running on the same row, so we could screw both “ends” of the two planks into the single upright batten.
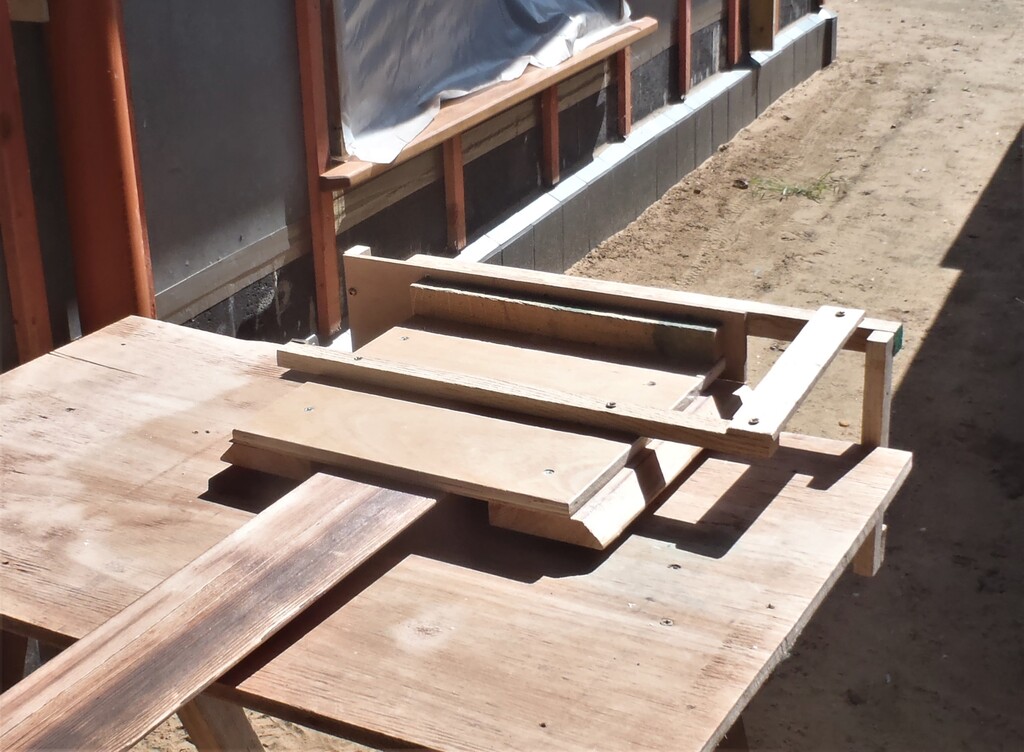
    Templates Created and Larch Planks Starts Going up on Walls

    Lap-joint-jig


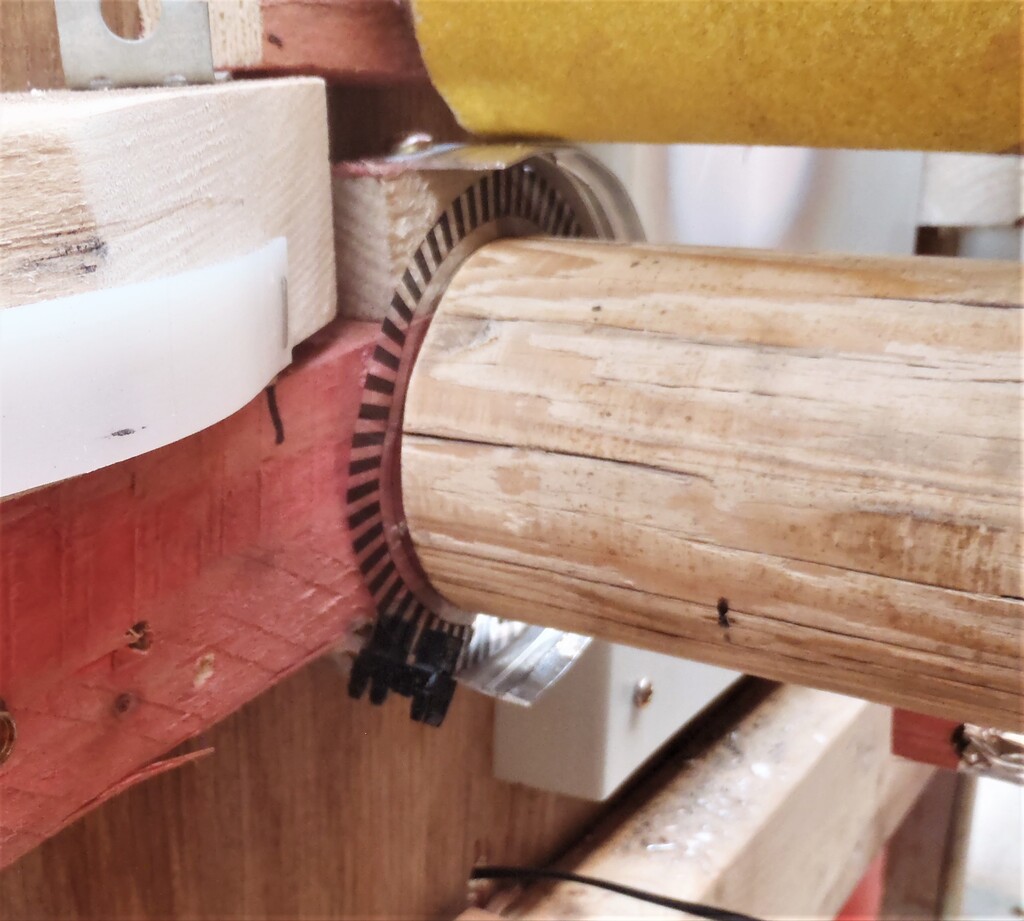
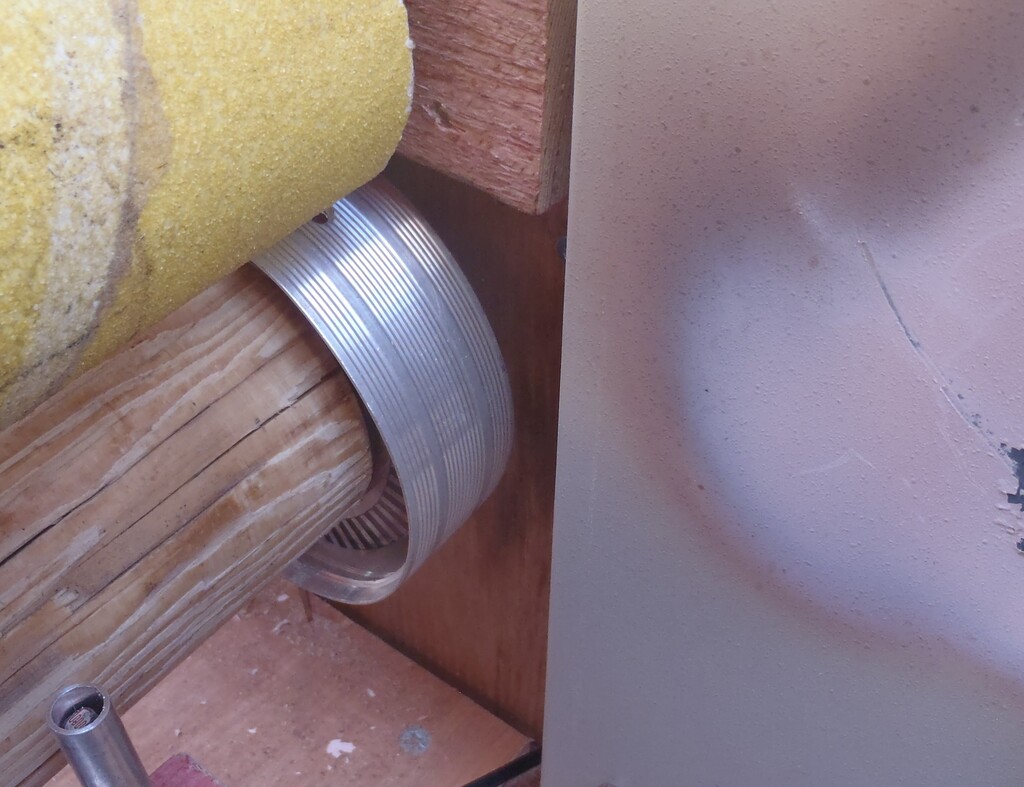
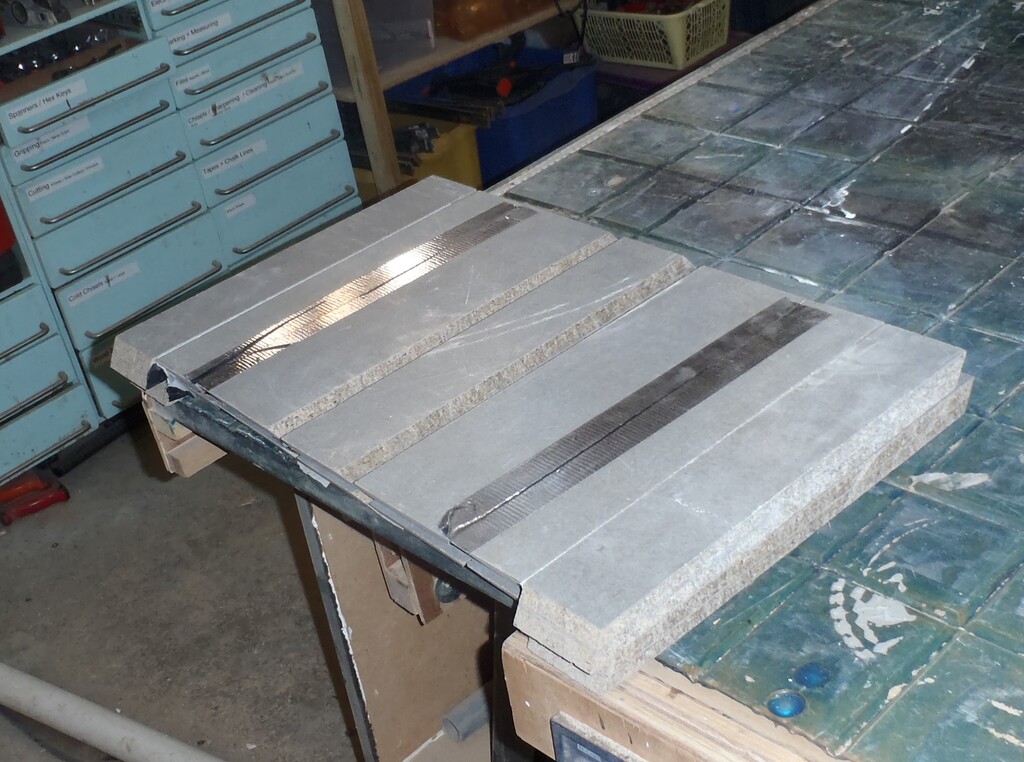
    It uses our two battery powered circular saws; one to rip across the end at 50mm deep cut and just shy of half way through the thickness (10mm out of the overall 20mm thickness) and the other saw to cut across the face at 10mm deep to complete the removal of the piece. Then we flip around the second plank (end over end; rather than edge over edge) and repeat the process using the same template. This produced two mirror image cut away ends that merges together almost seamlessly.
    Templates Created and Larch Planks Starts Going up on Walls

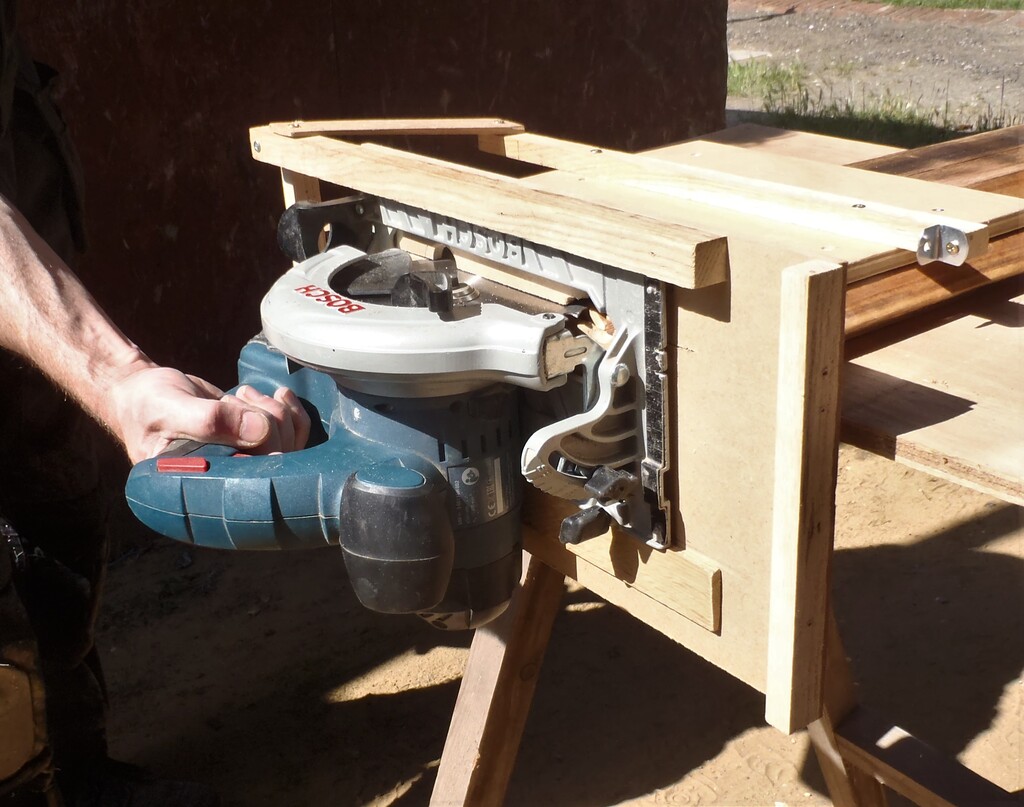
    Cutting-accross-the-end-

    Templates Created and Larch Planks Starts Going up on Walls

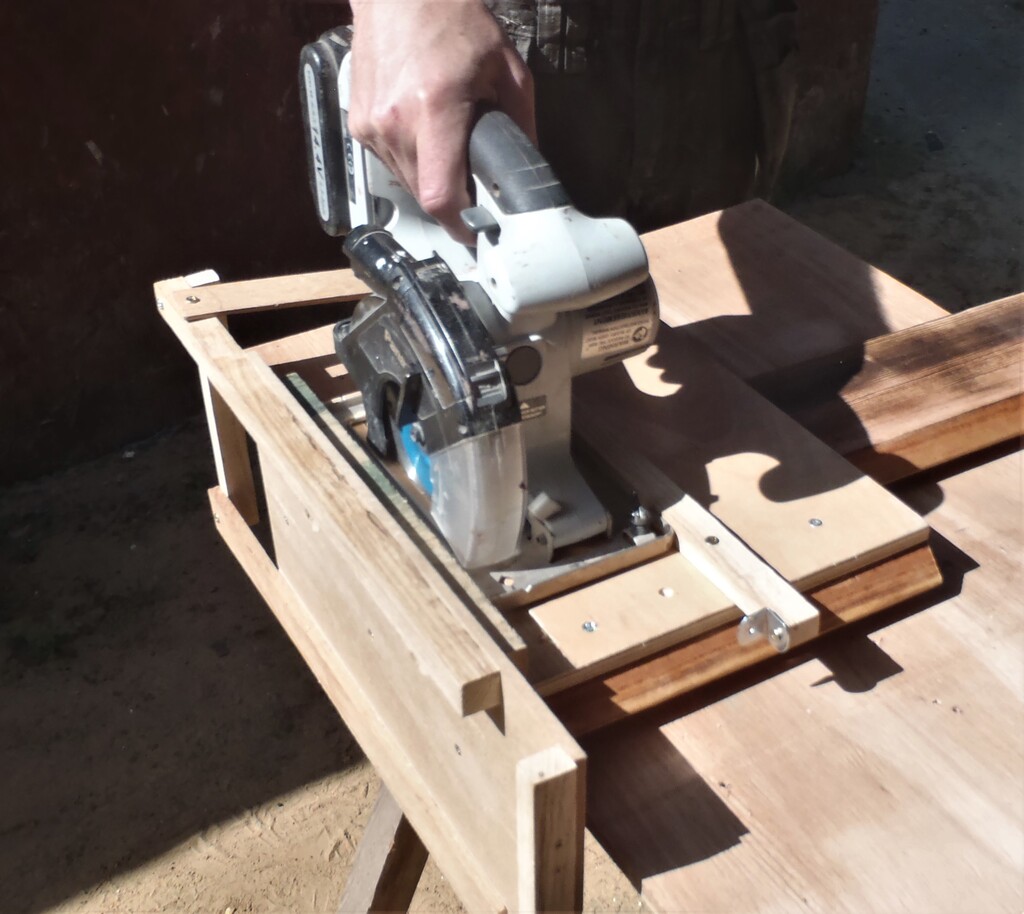
    Cutting-across-the-face
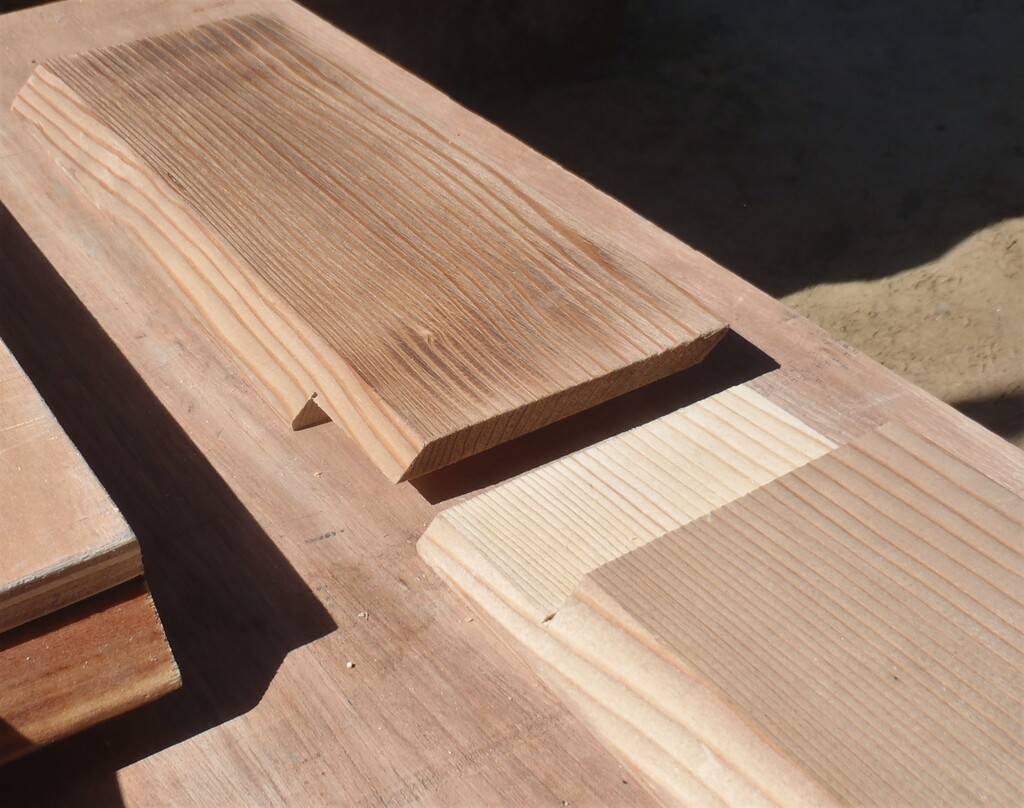
    Templates Created and Larch Planks Starts Going up on Walls

    Makes-two-half-laps

    Templates Created and Larch Planks Starts Going up on Walls

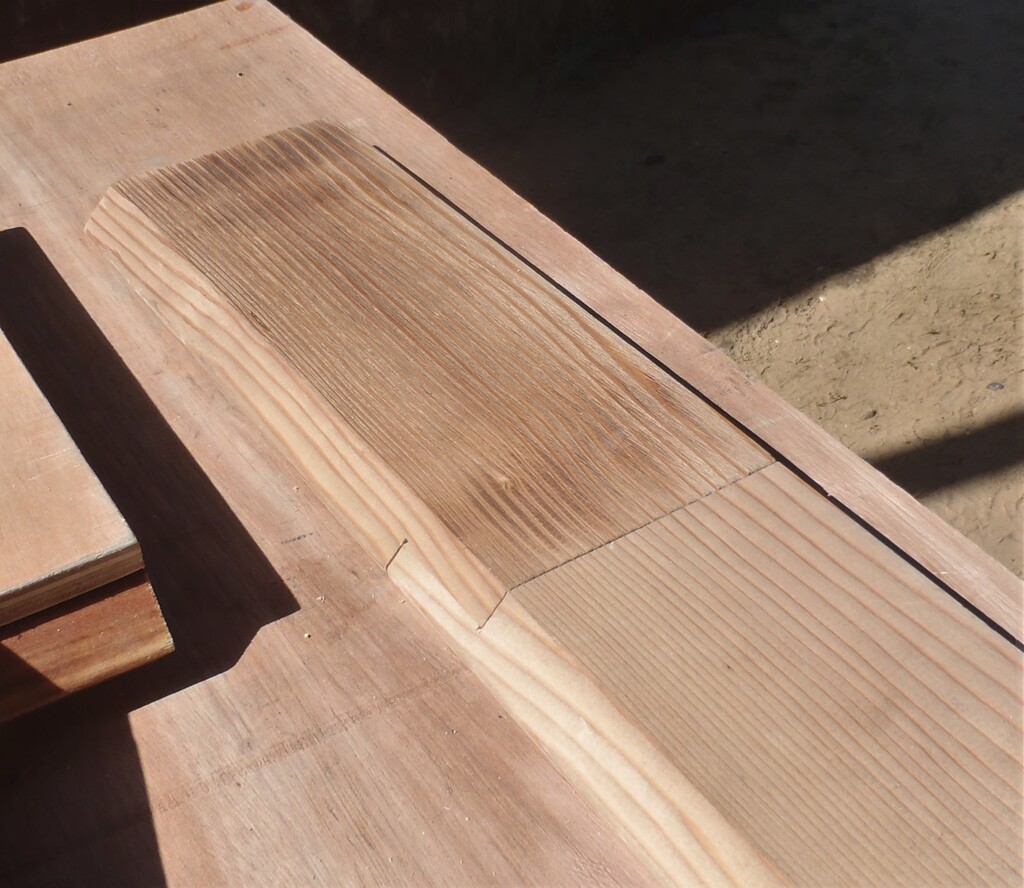
    Which-come-together-neatly


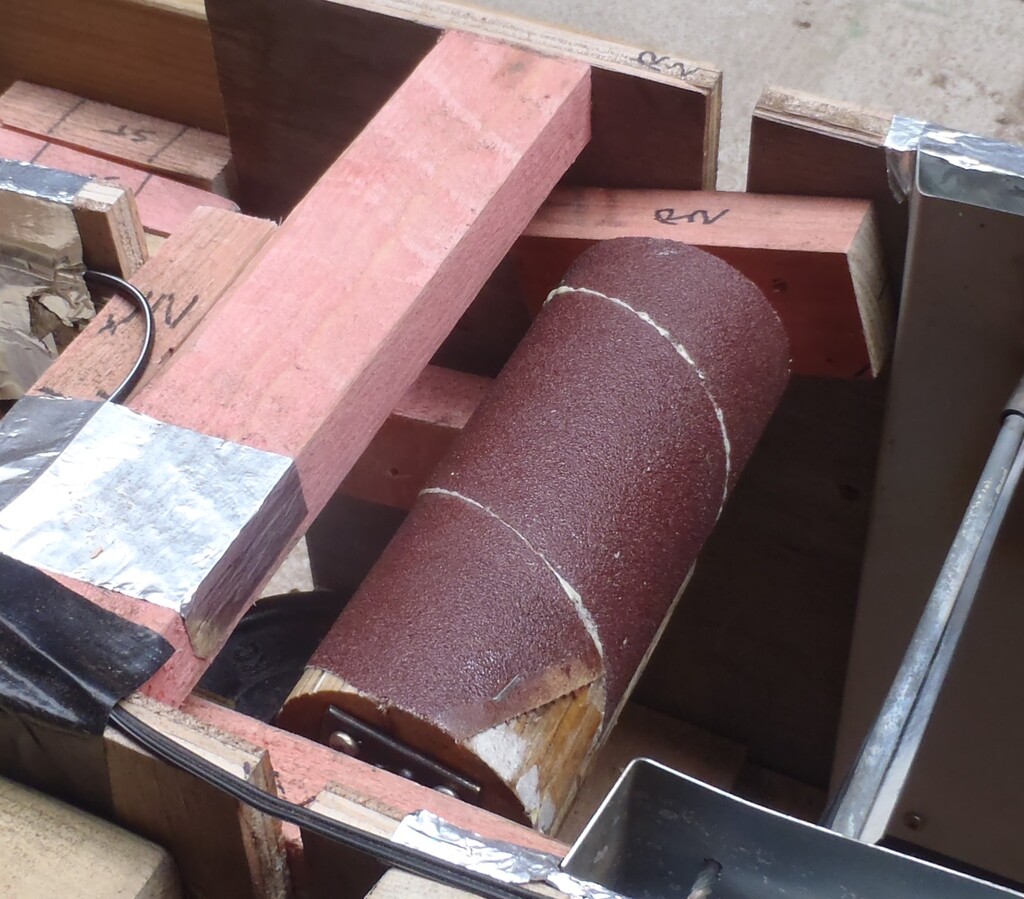
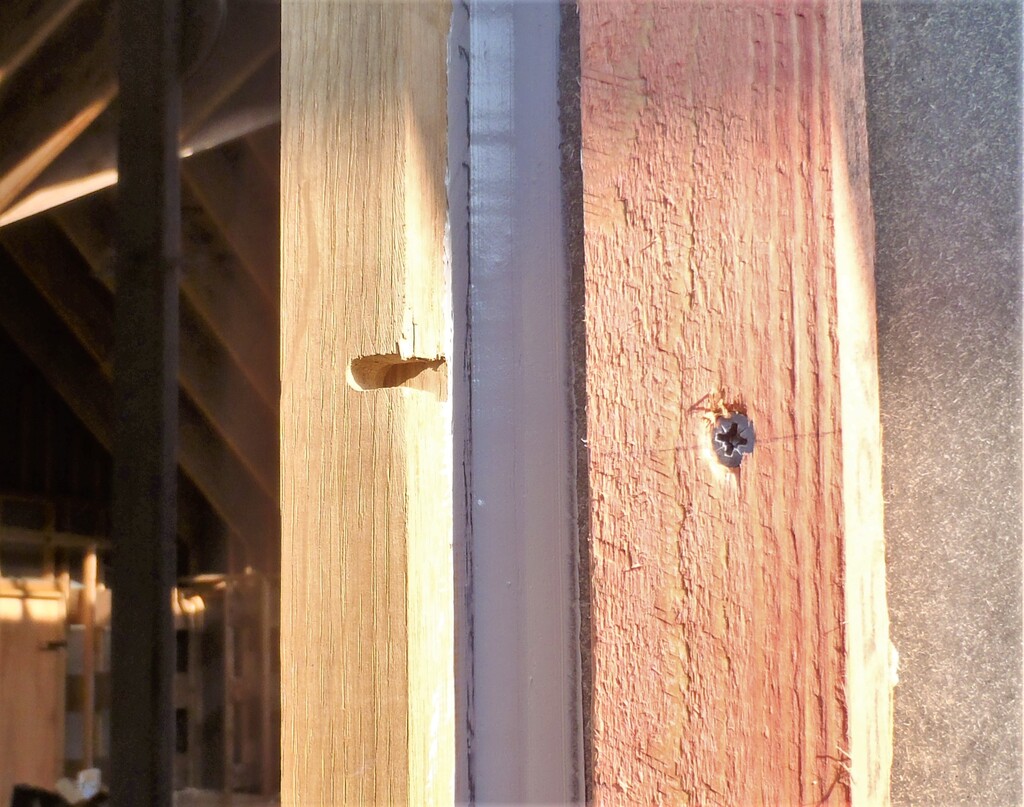
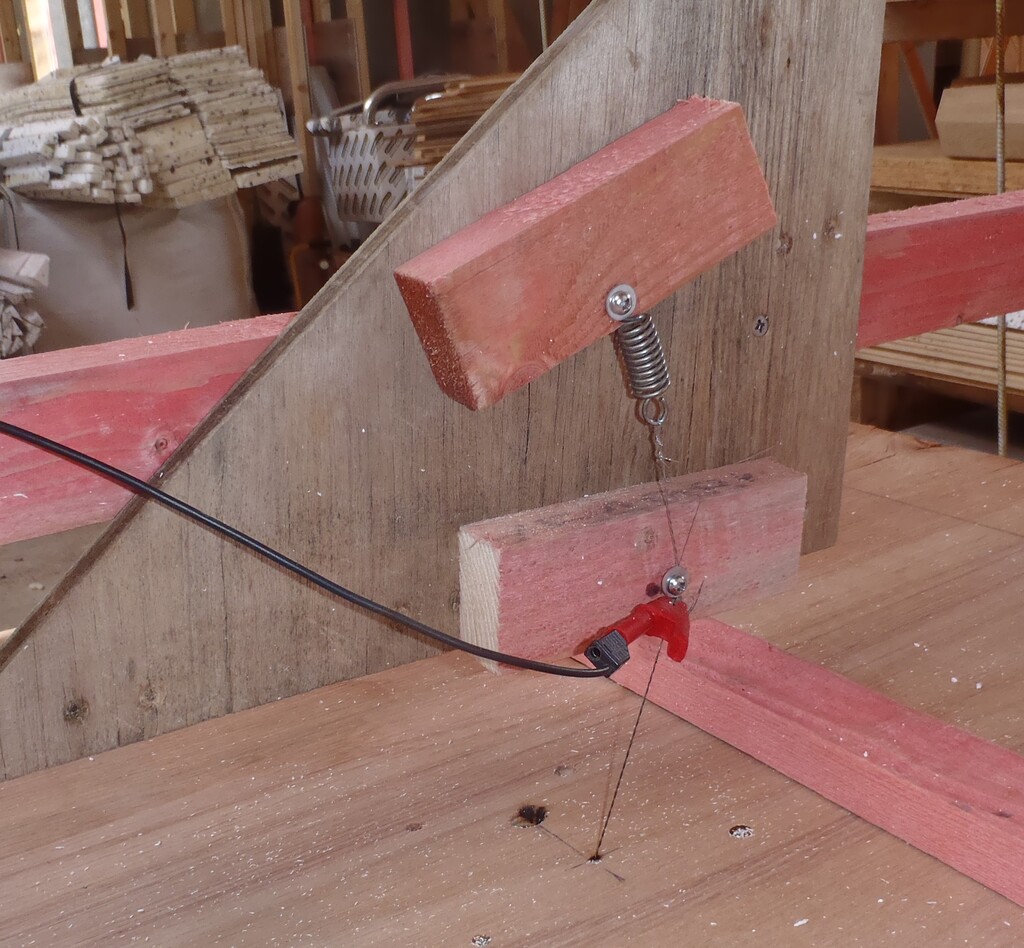
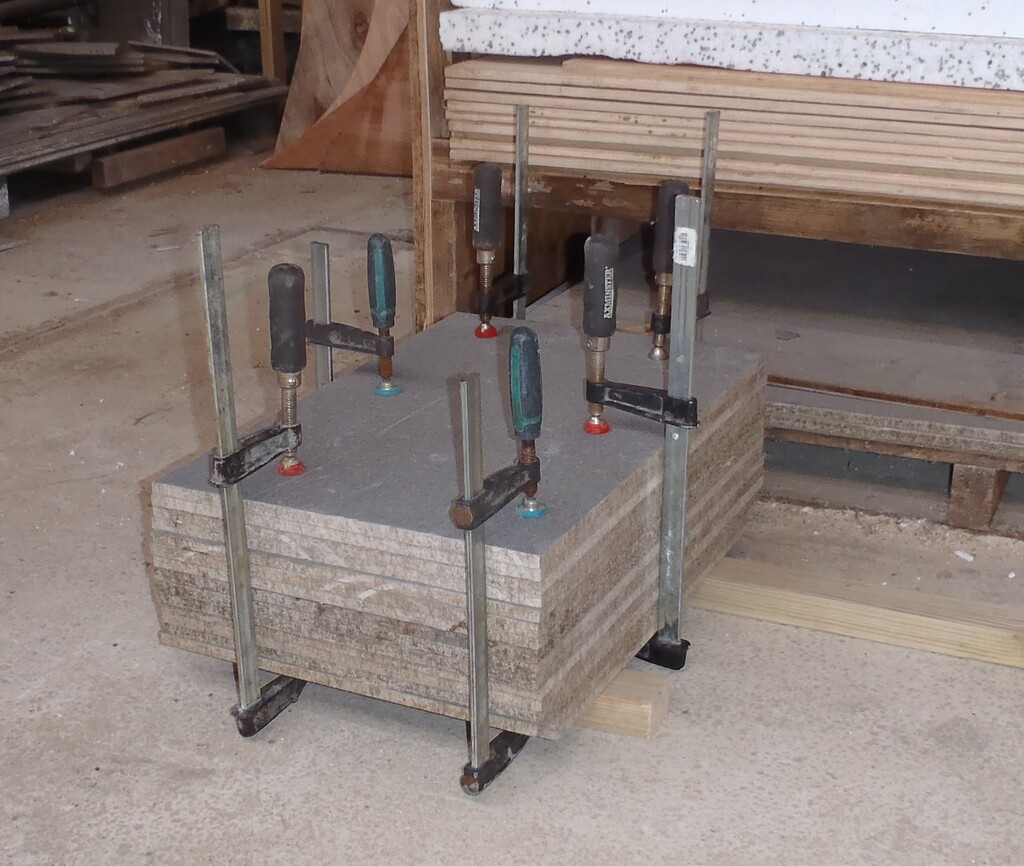
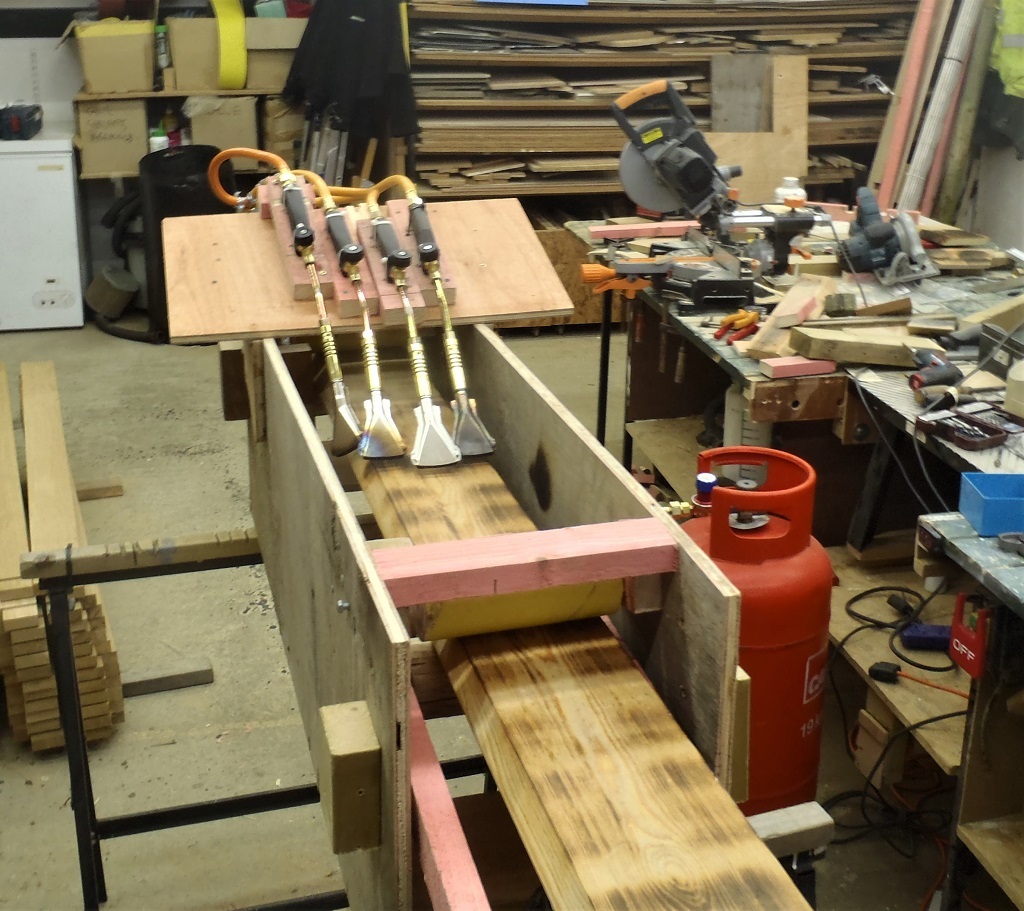
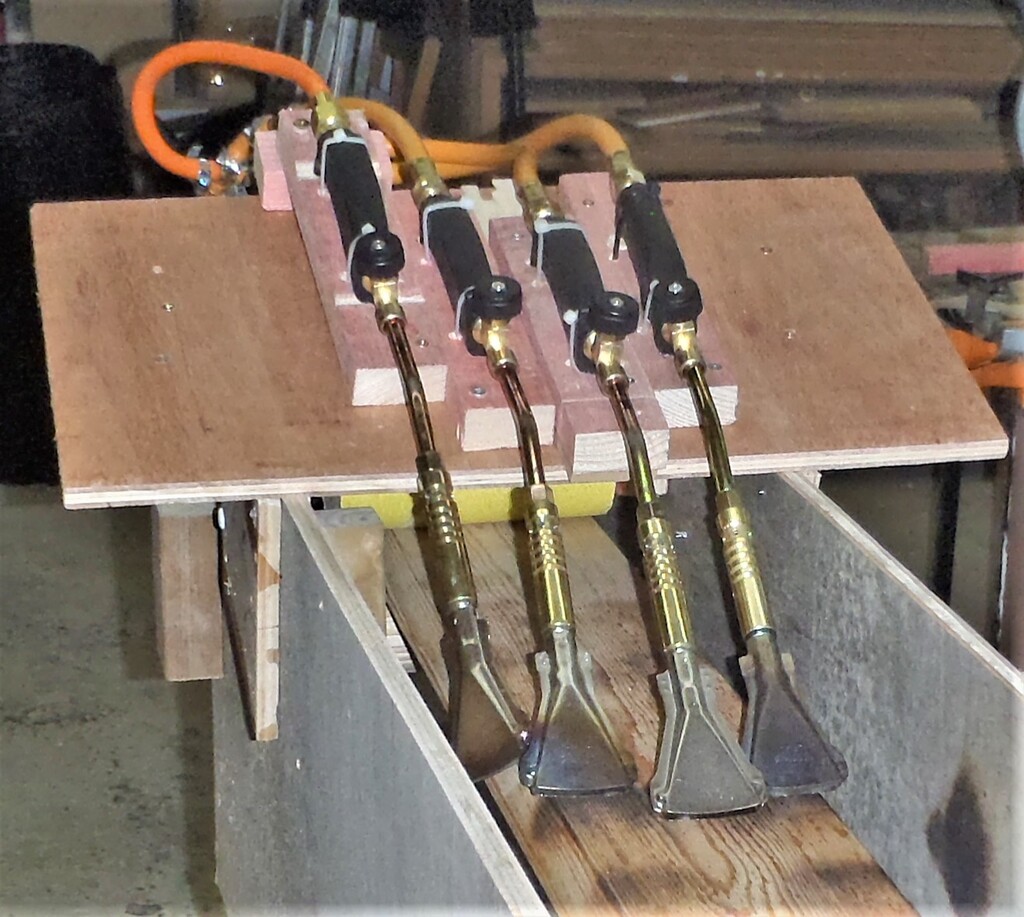
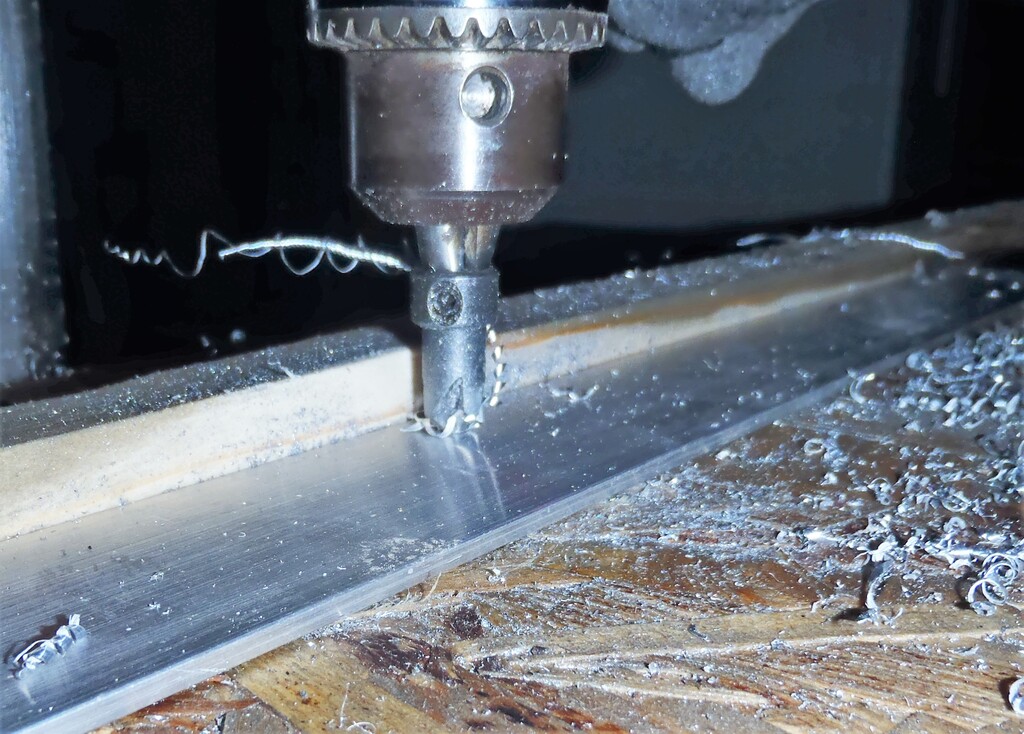
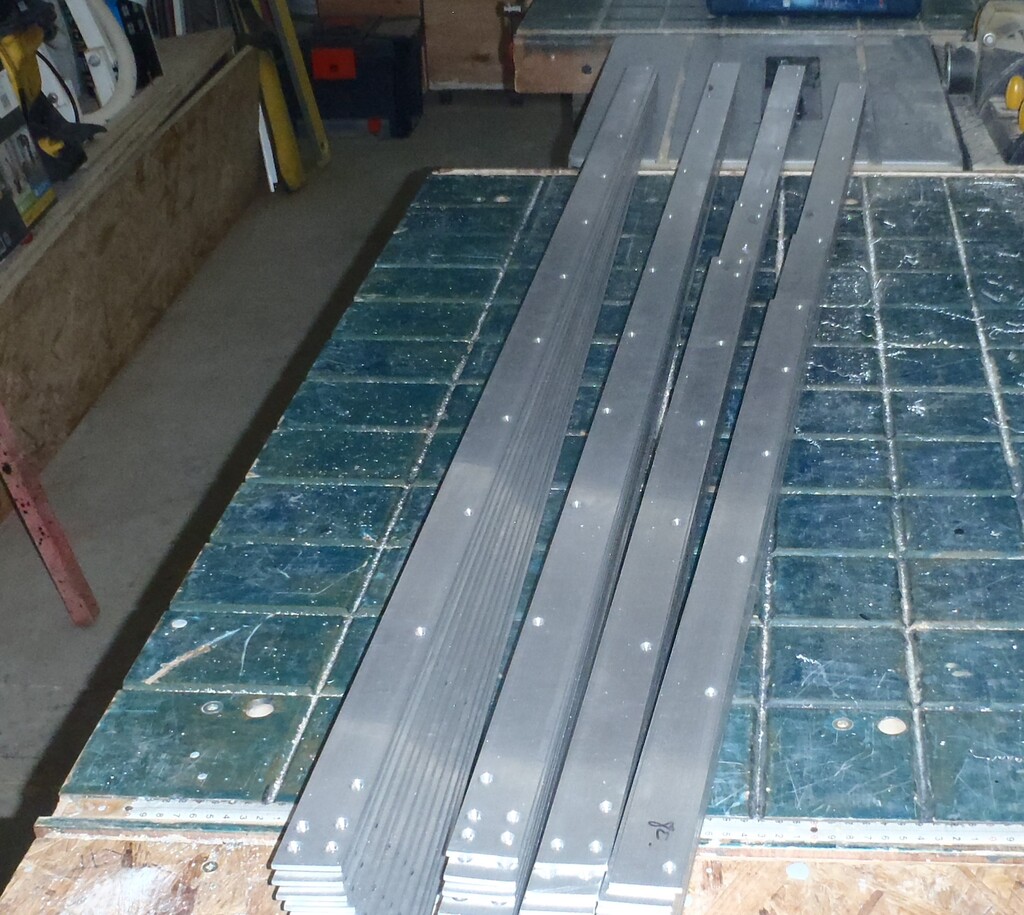
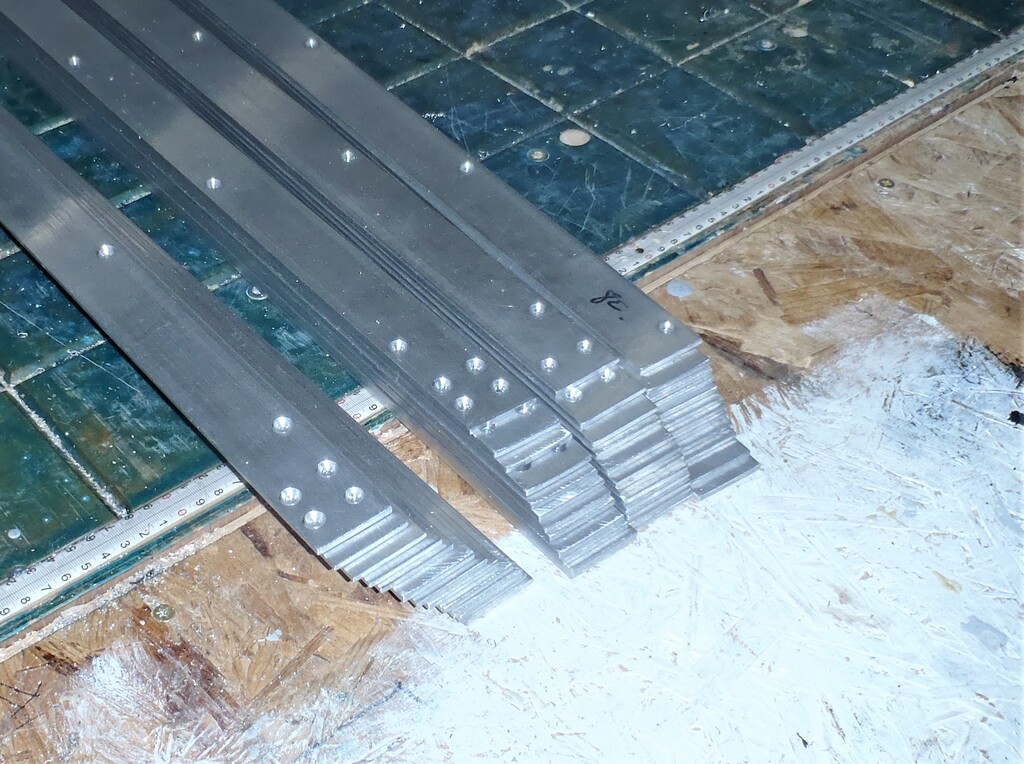
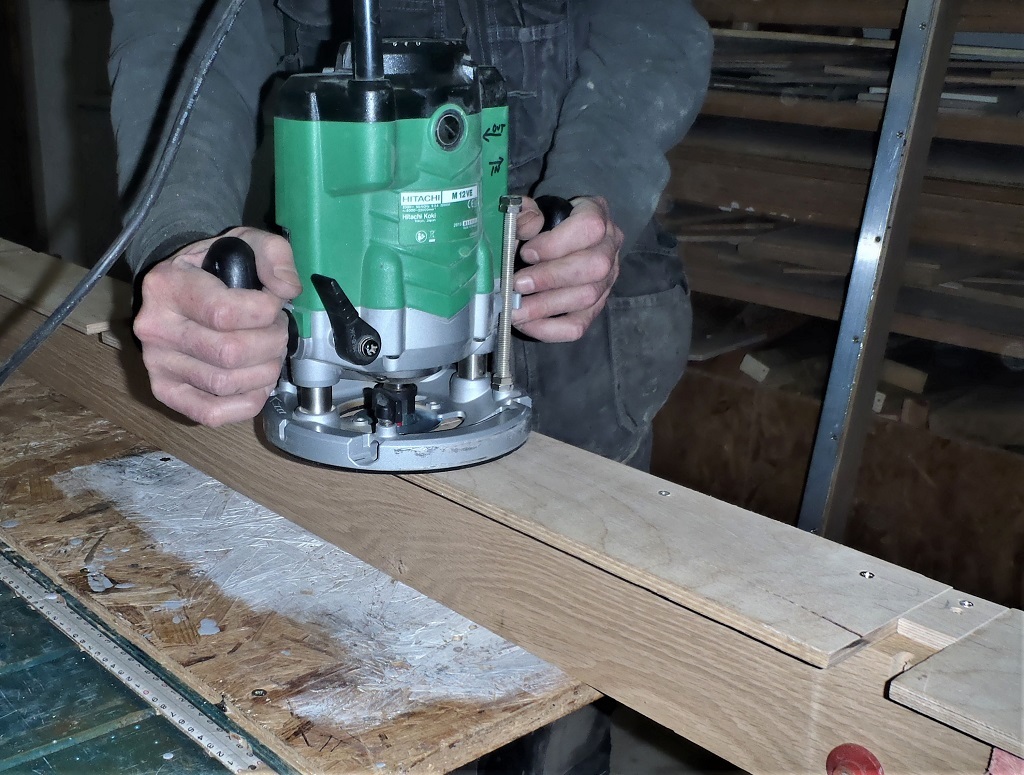
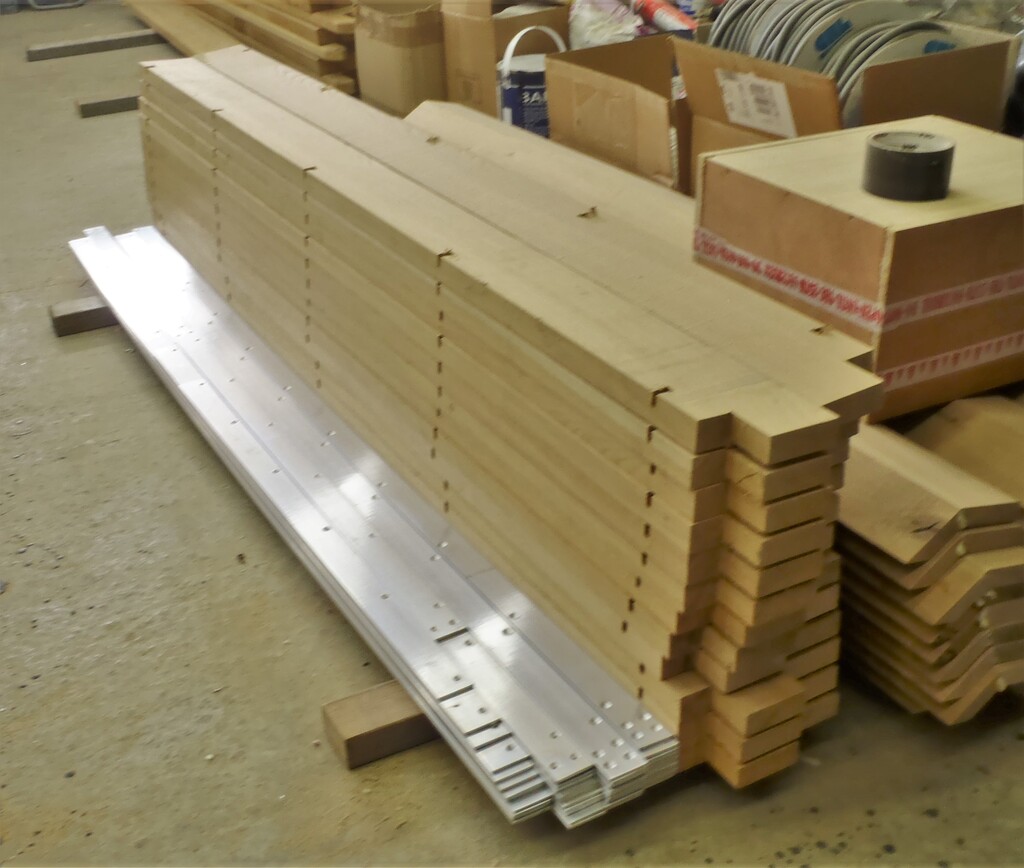
    The second template tool were three metal plates with guidance holes drilled into them. There are three versions; one for each plank width. These helpful guides will keep our placements for the mushroom headed stainless steel screws at a regular and consistent location when fixing all the cladding planks up on the walls and their battens.
    Templates Created and Larch Planks Starts Going up on Walls

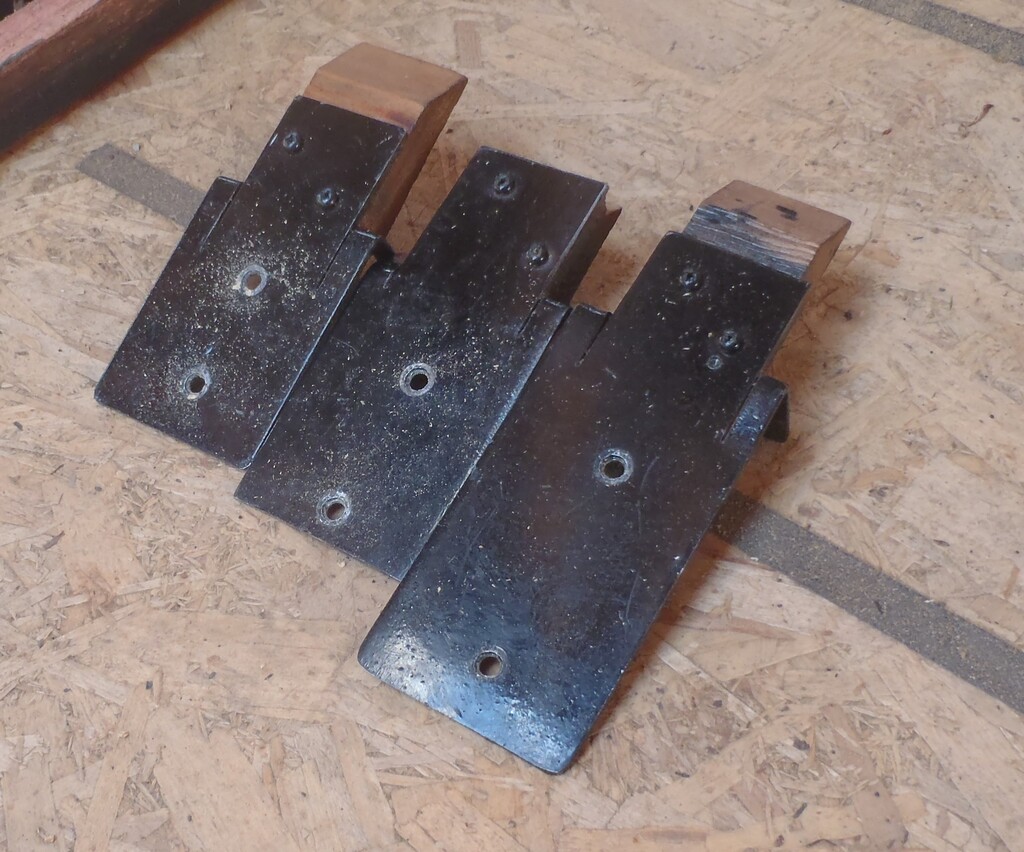
    Fixing-hole-drilling-jig


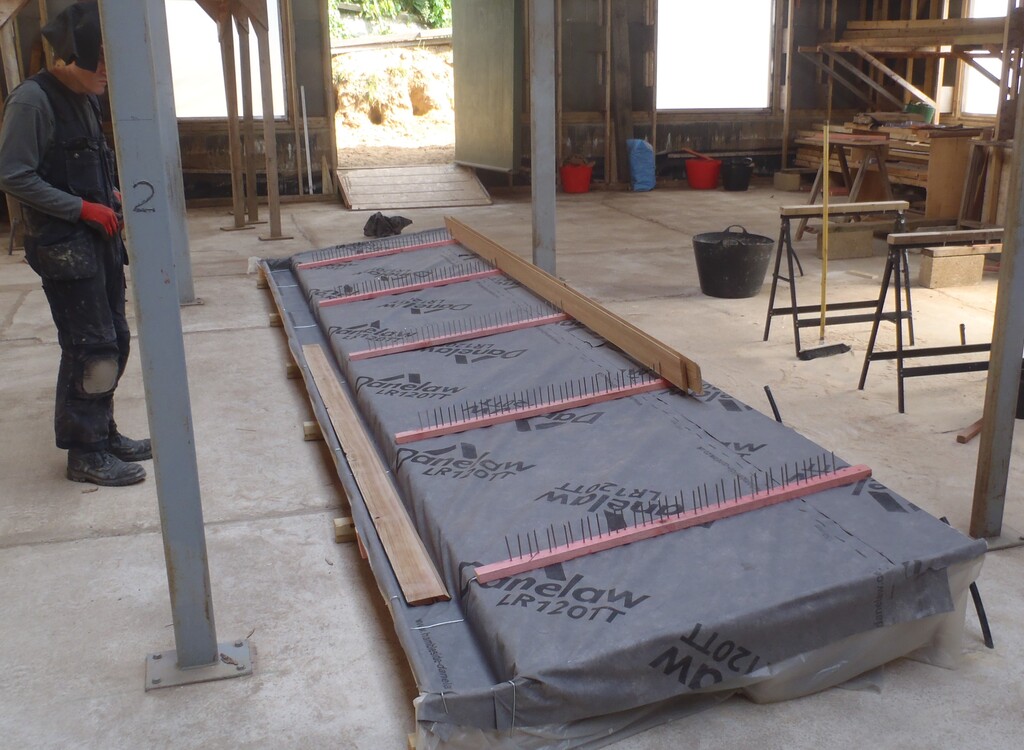
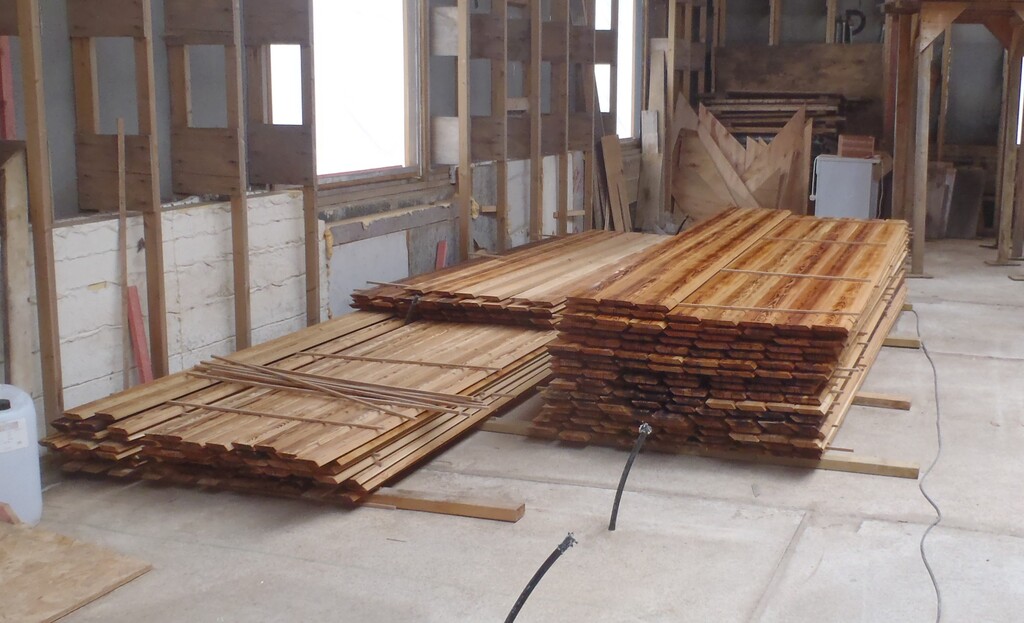
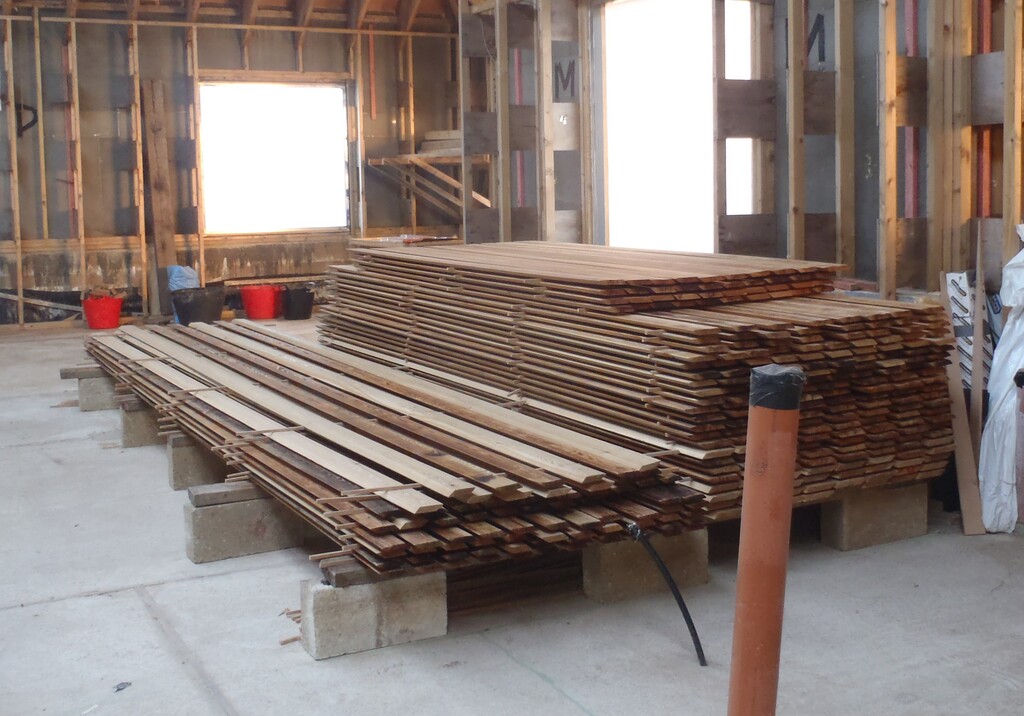
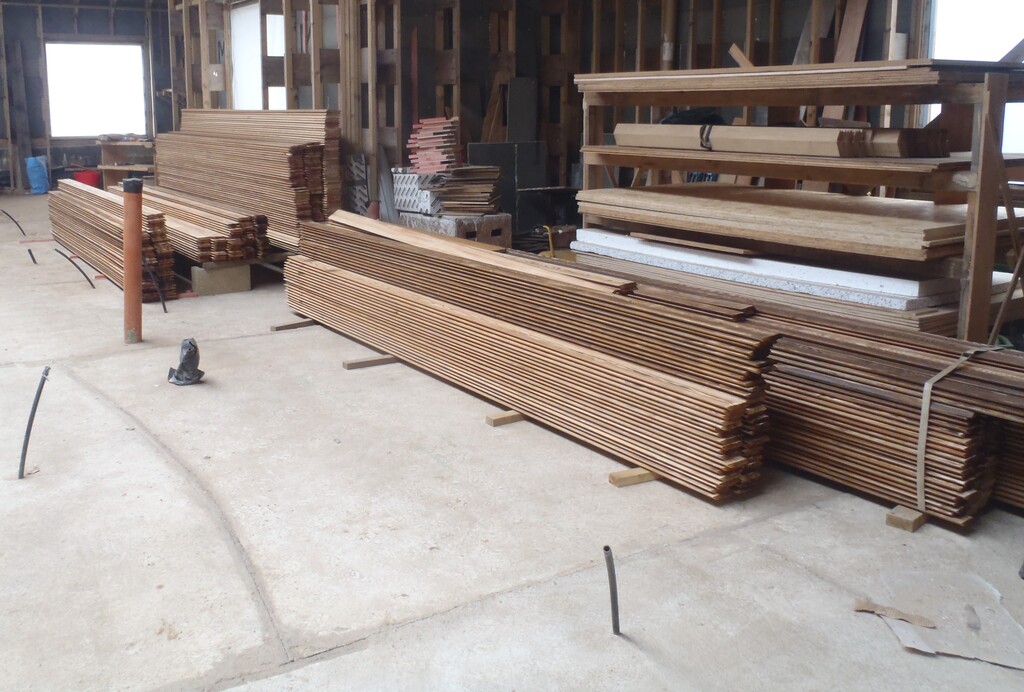
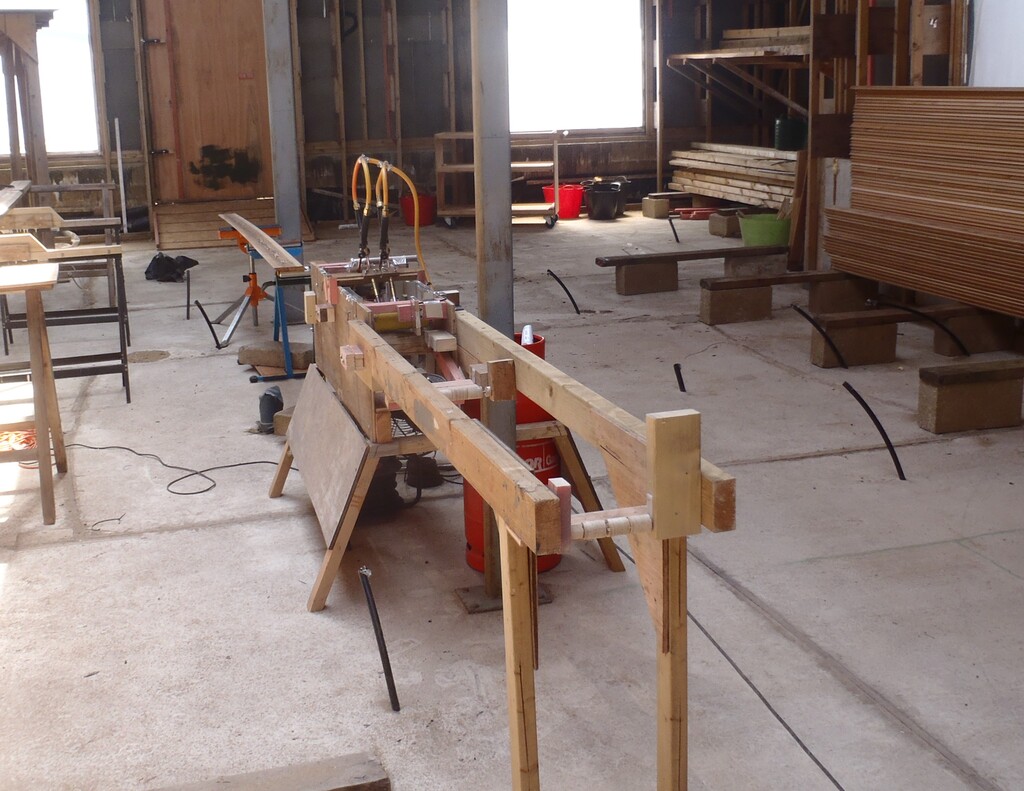
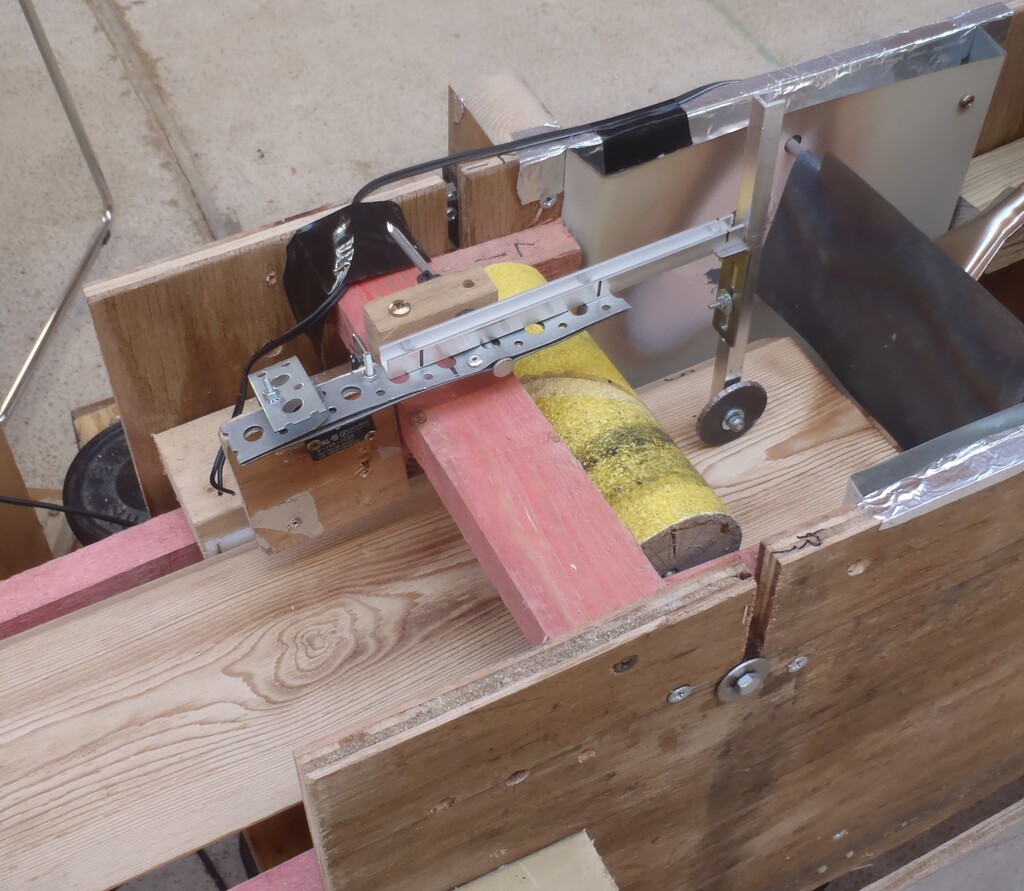
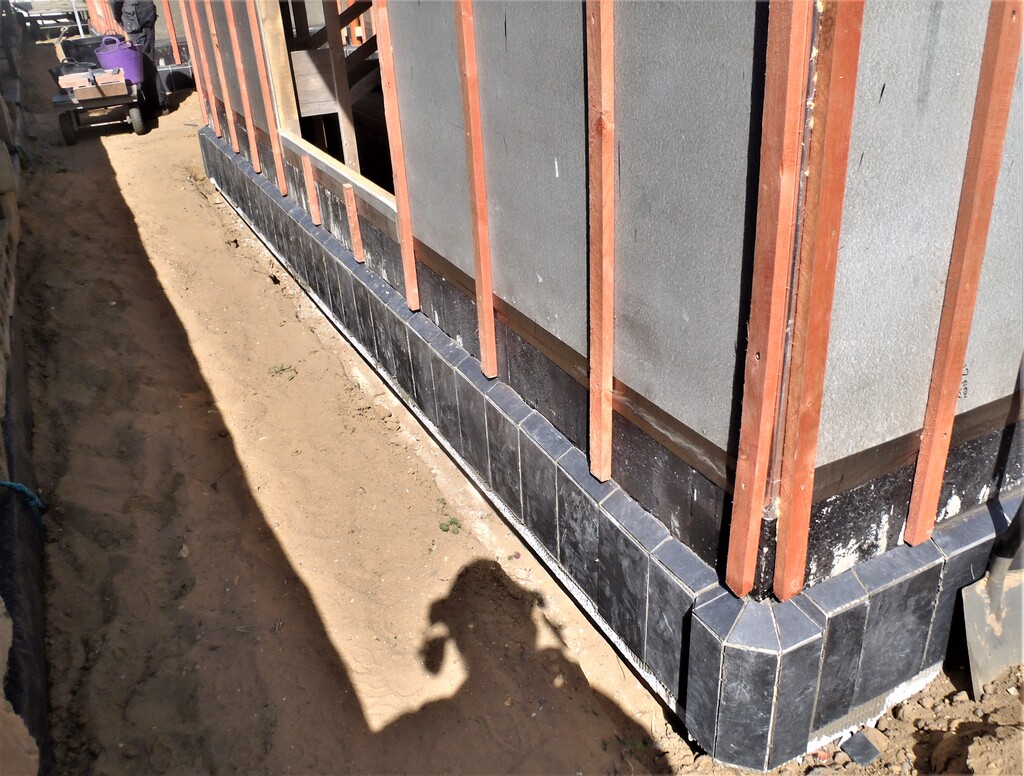
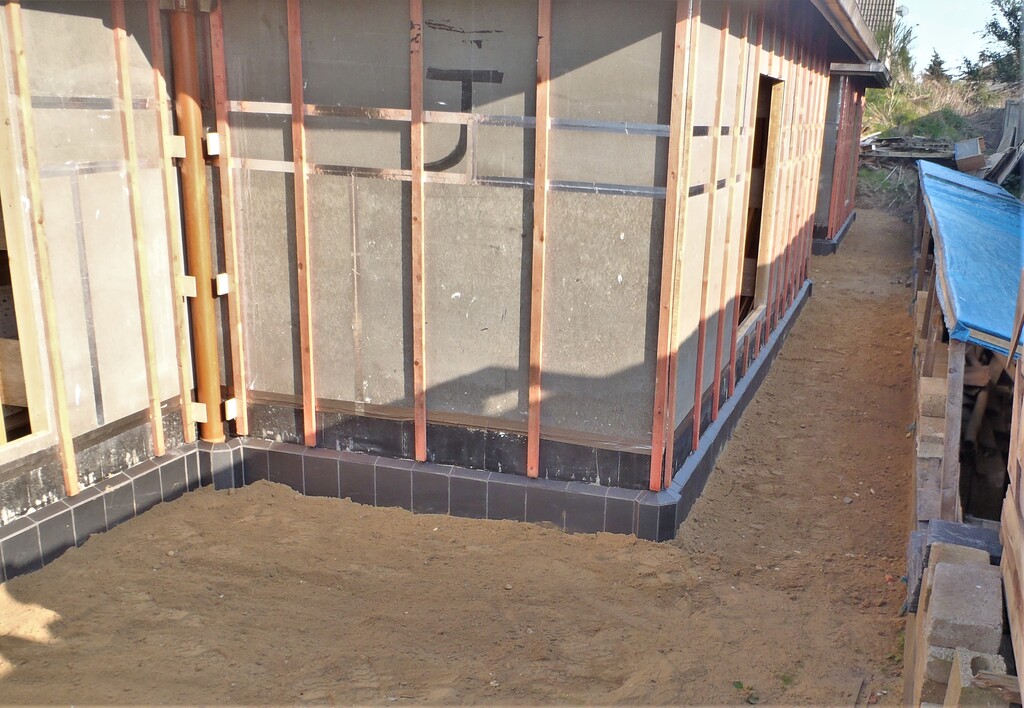
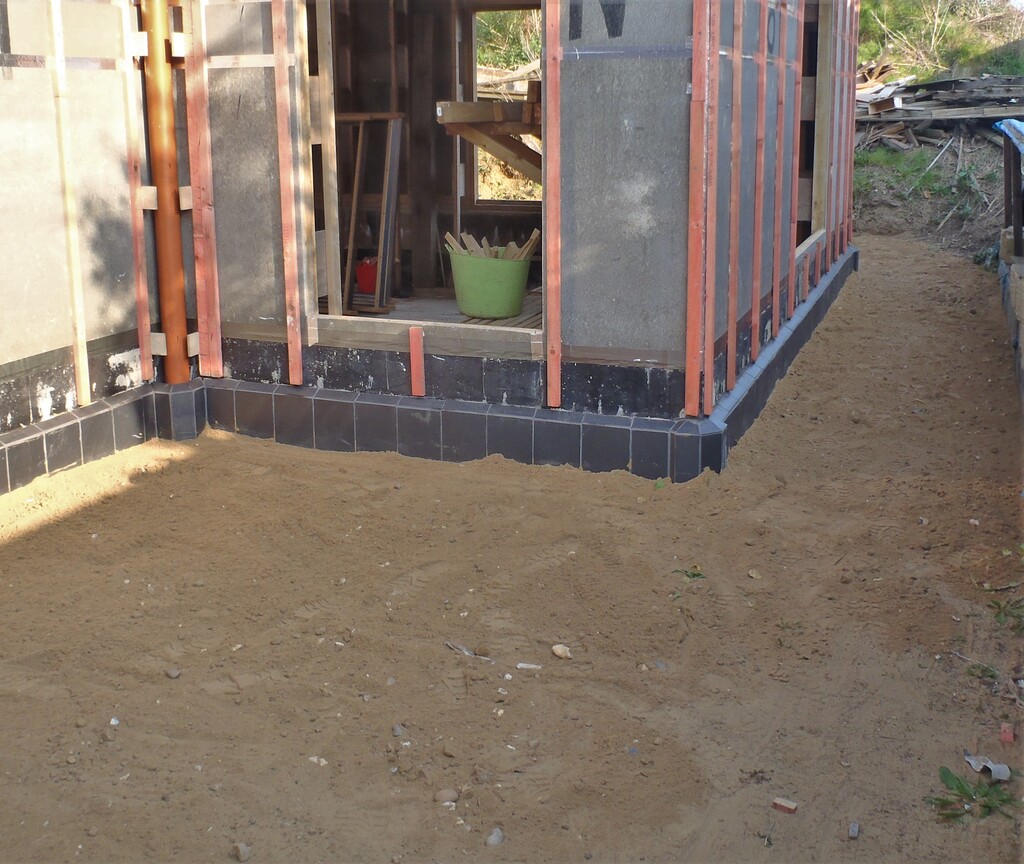
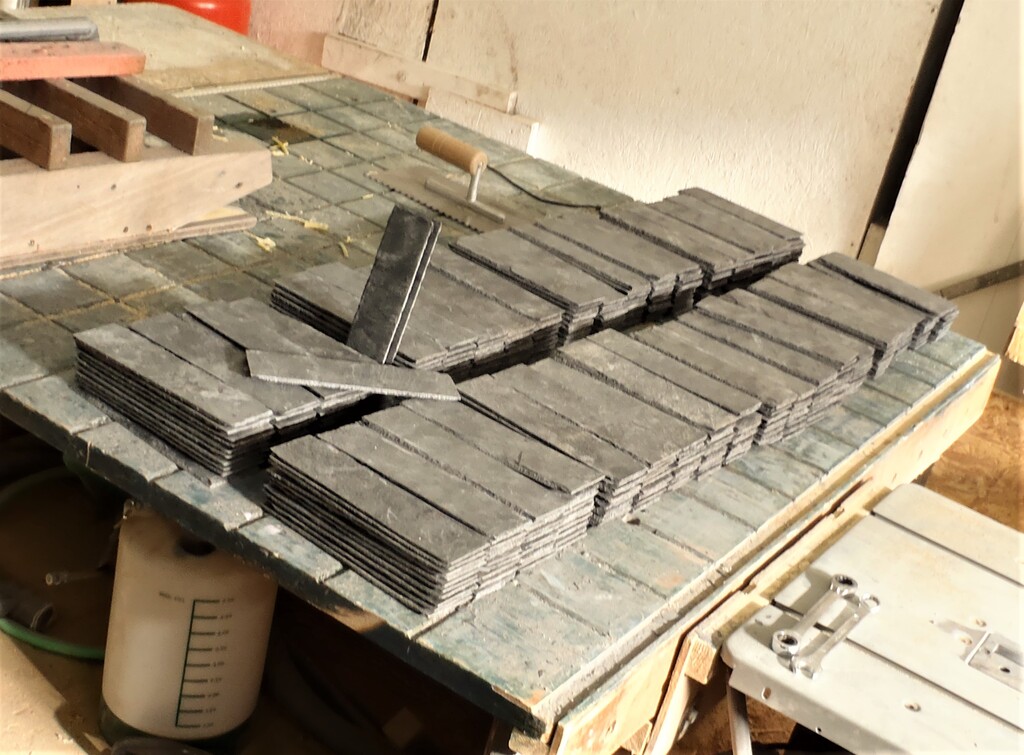
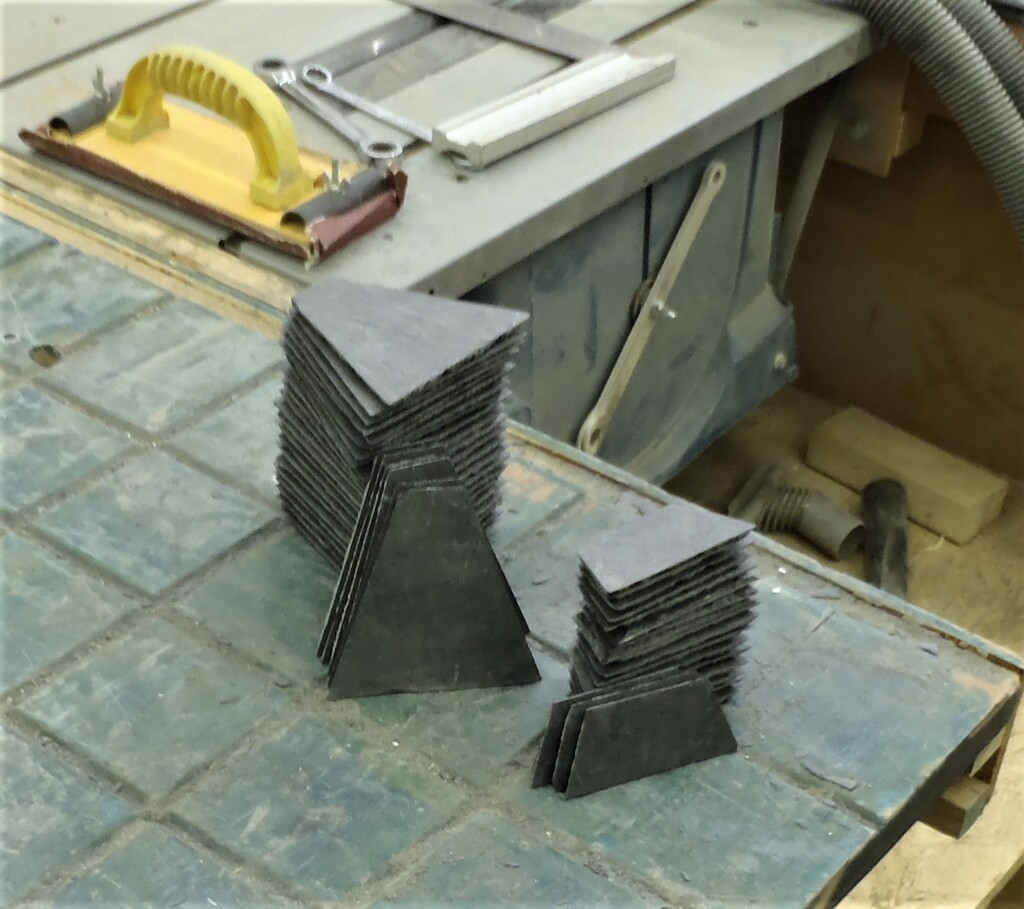
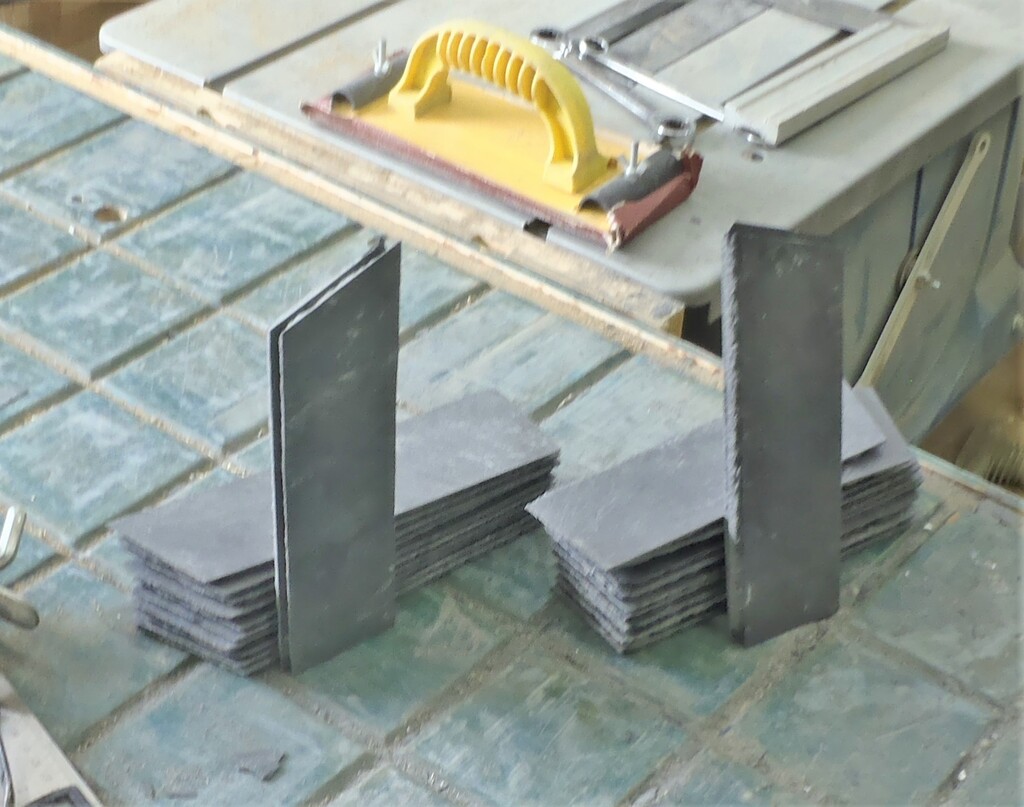
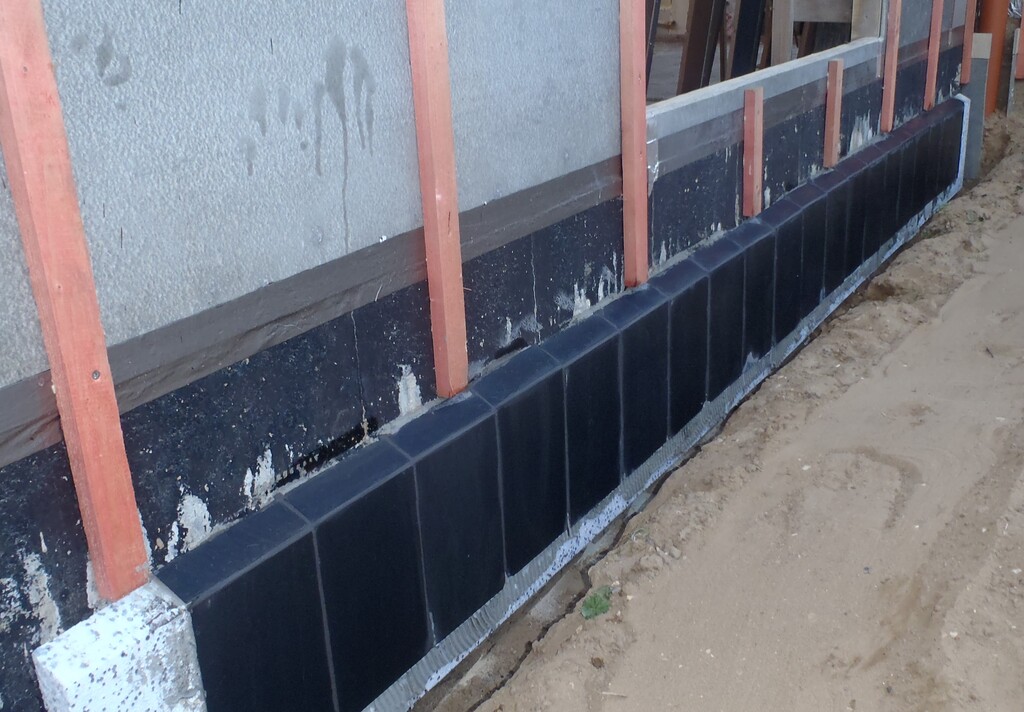
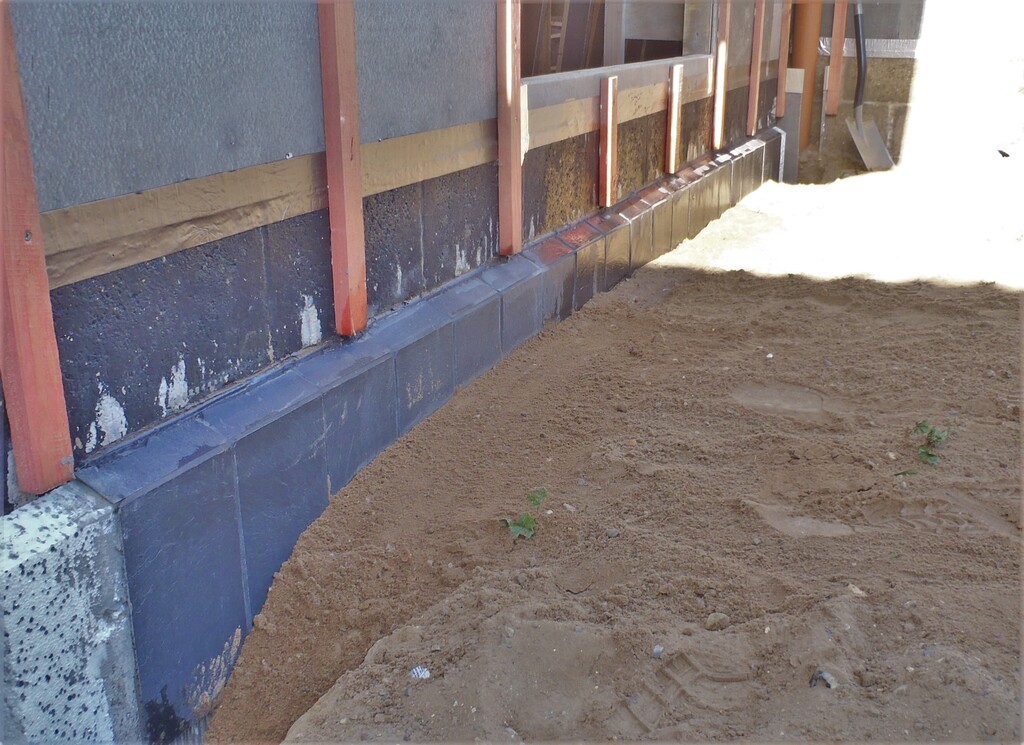
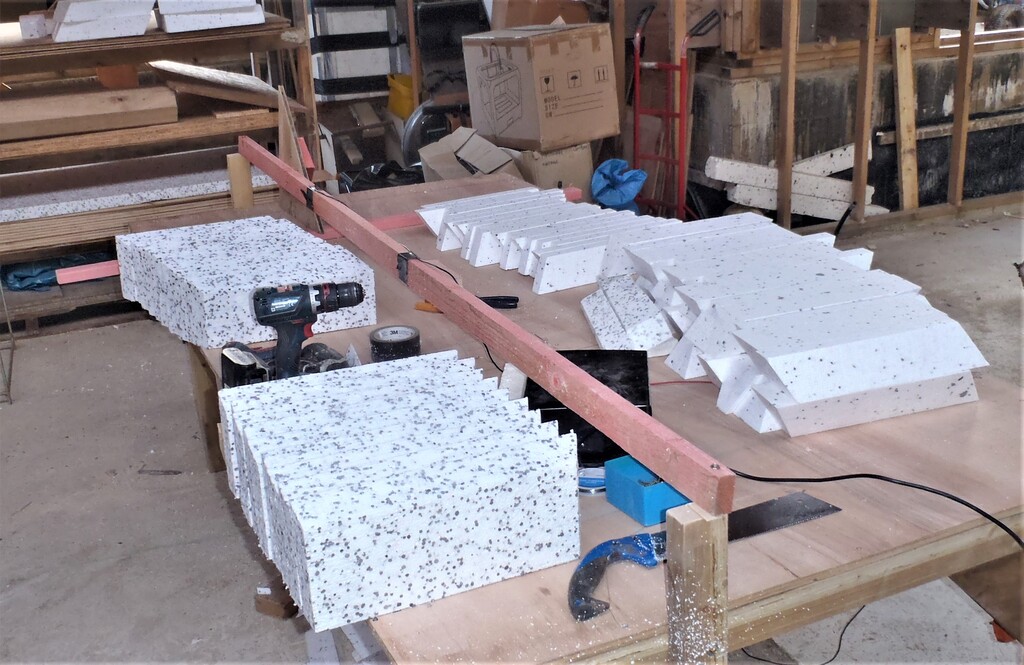
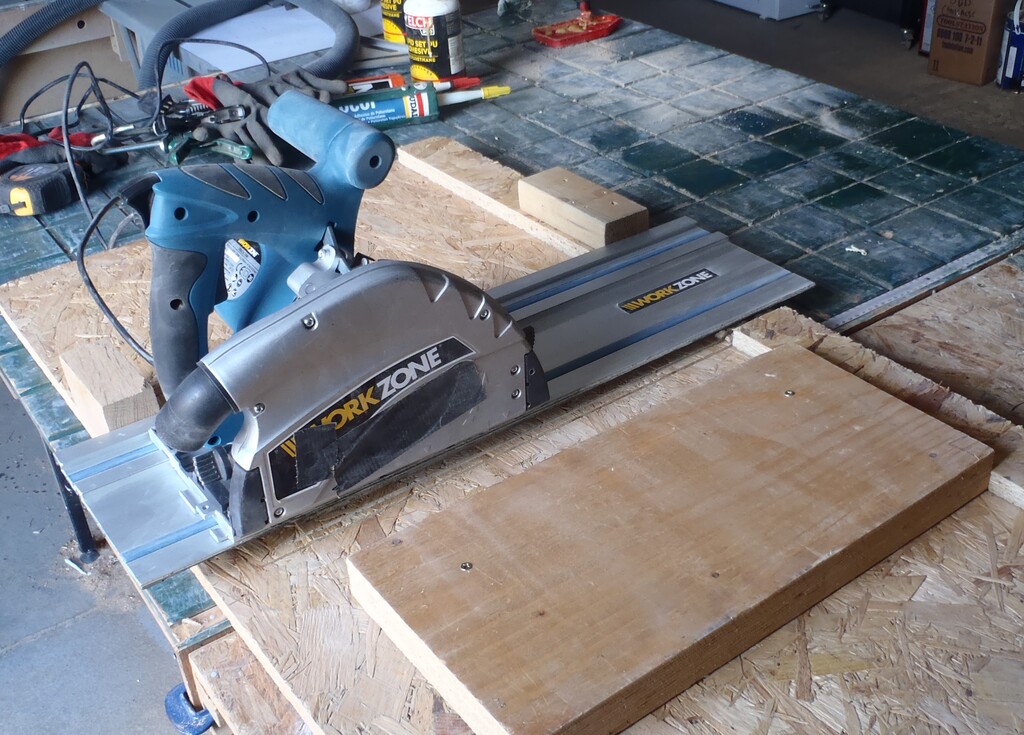
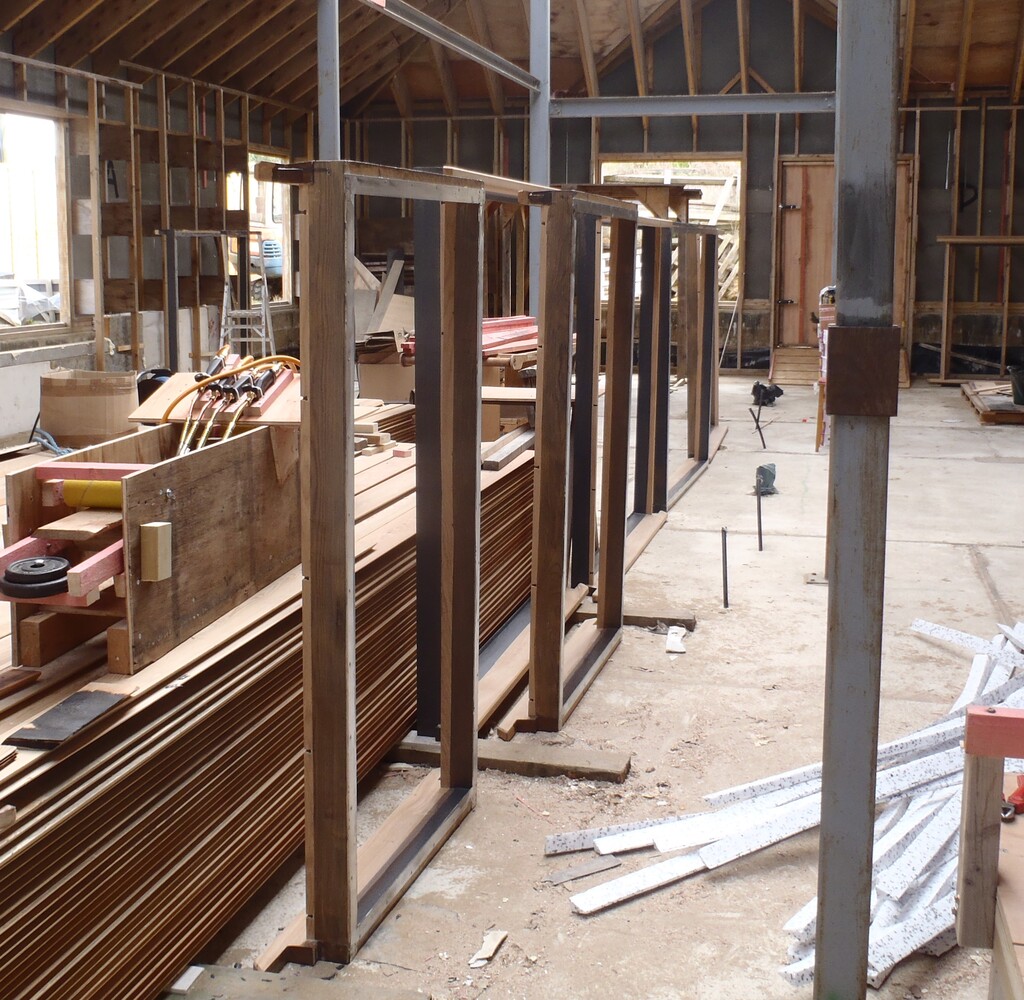
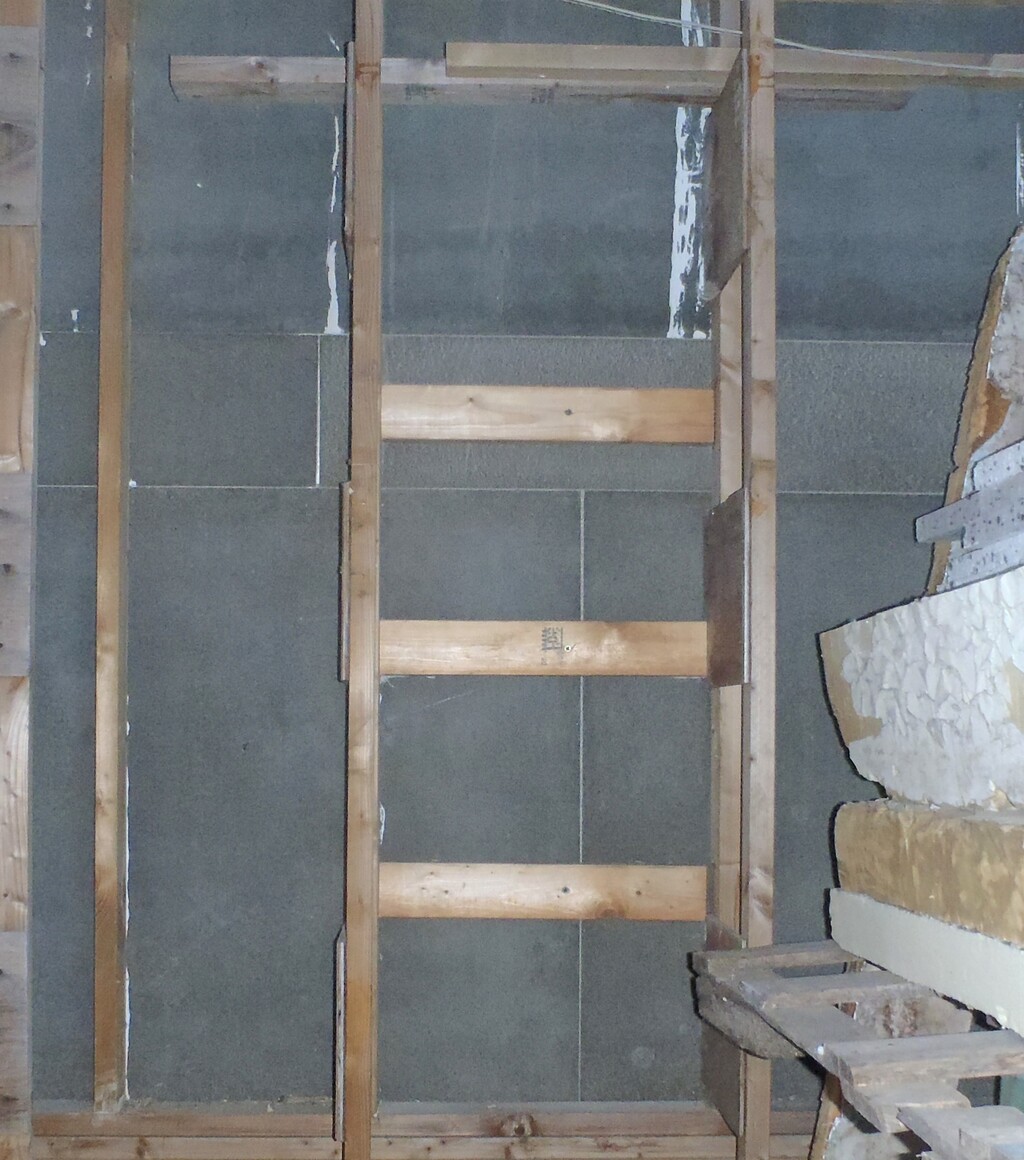
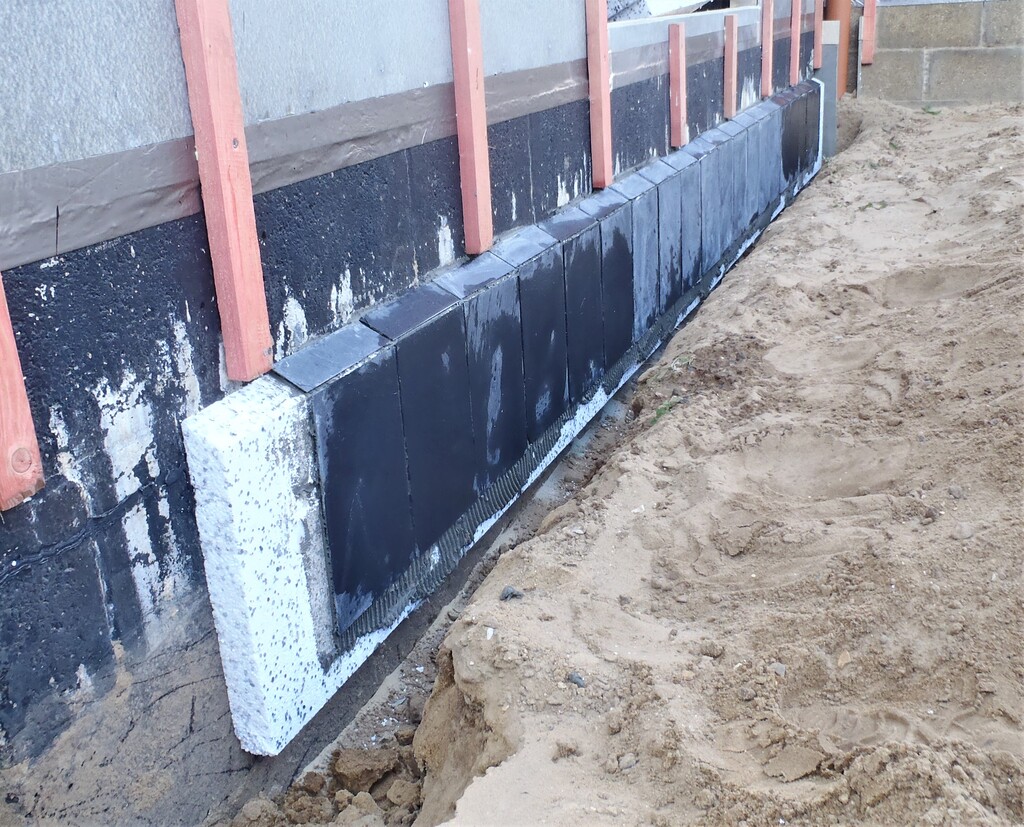
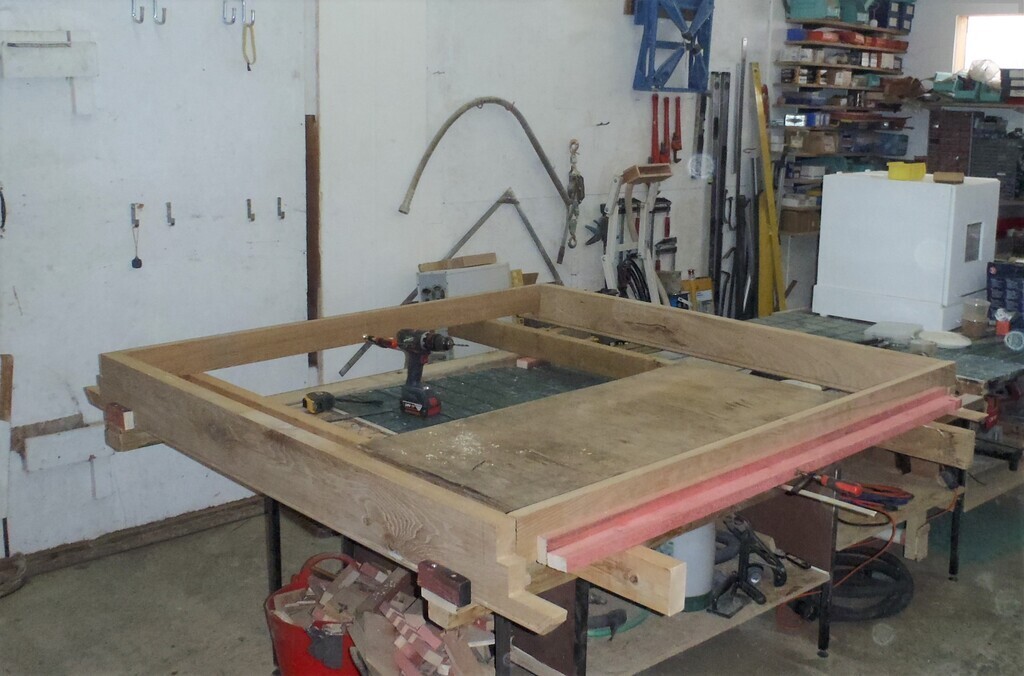
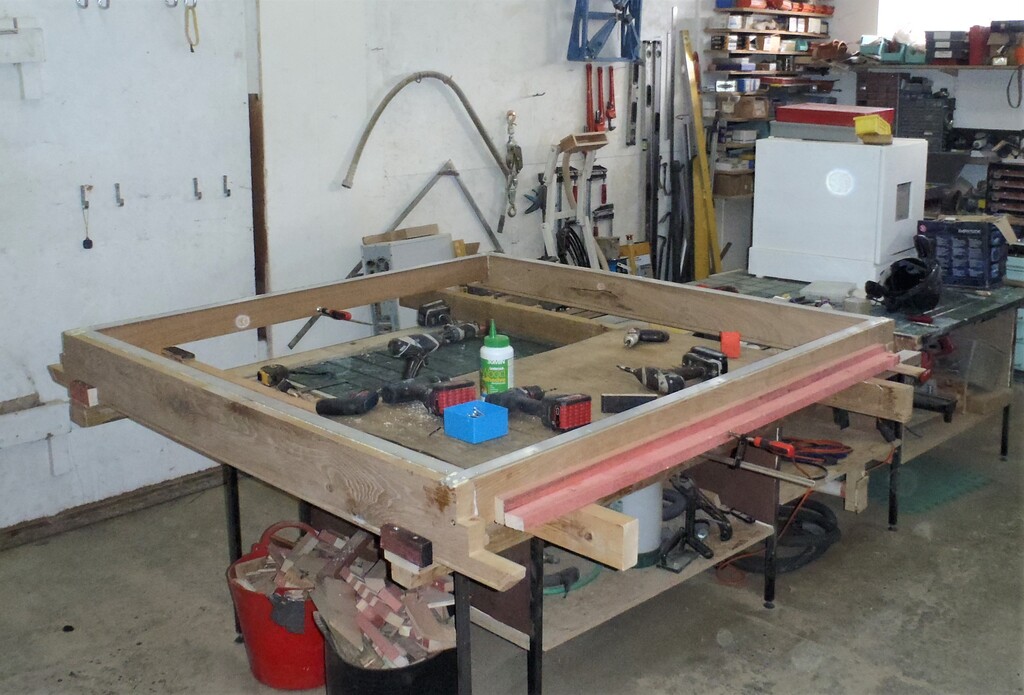
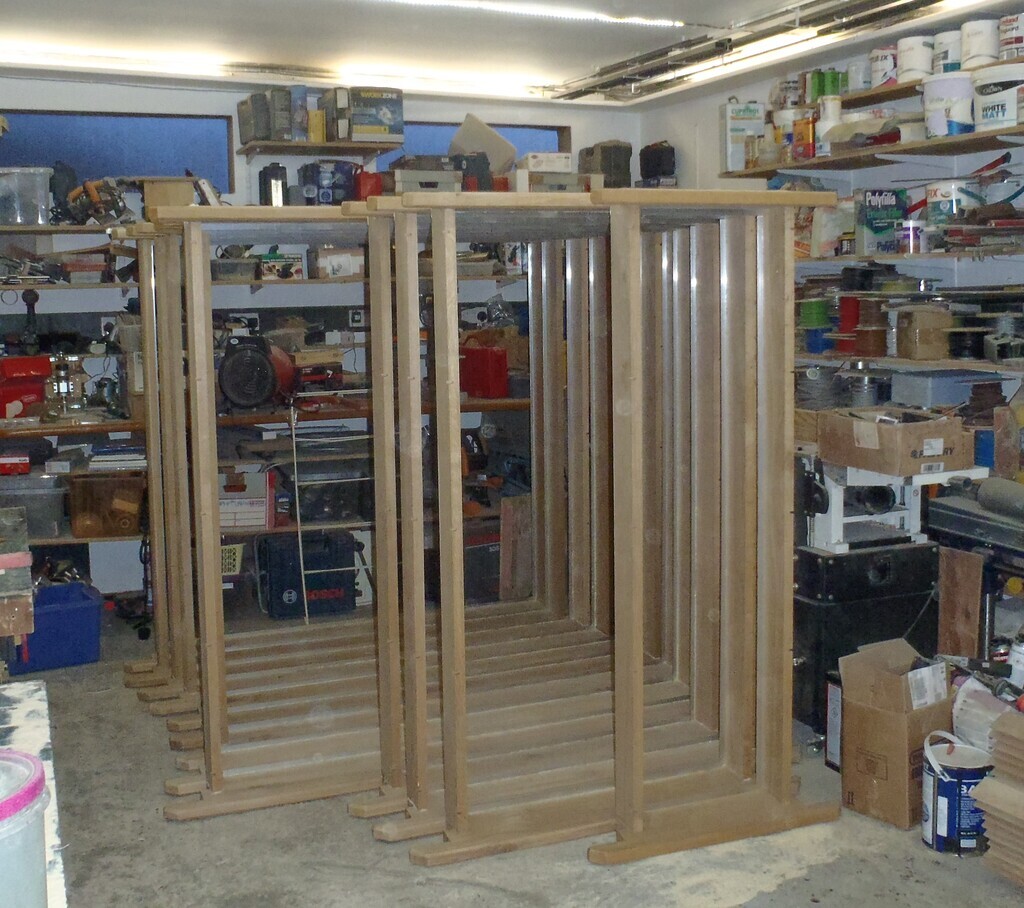
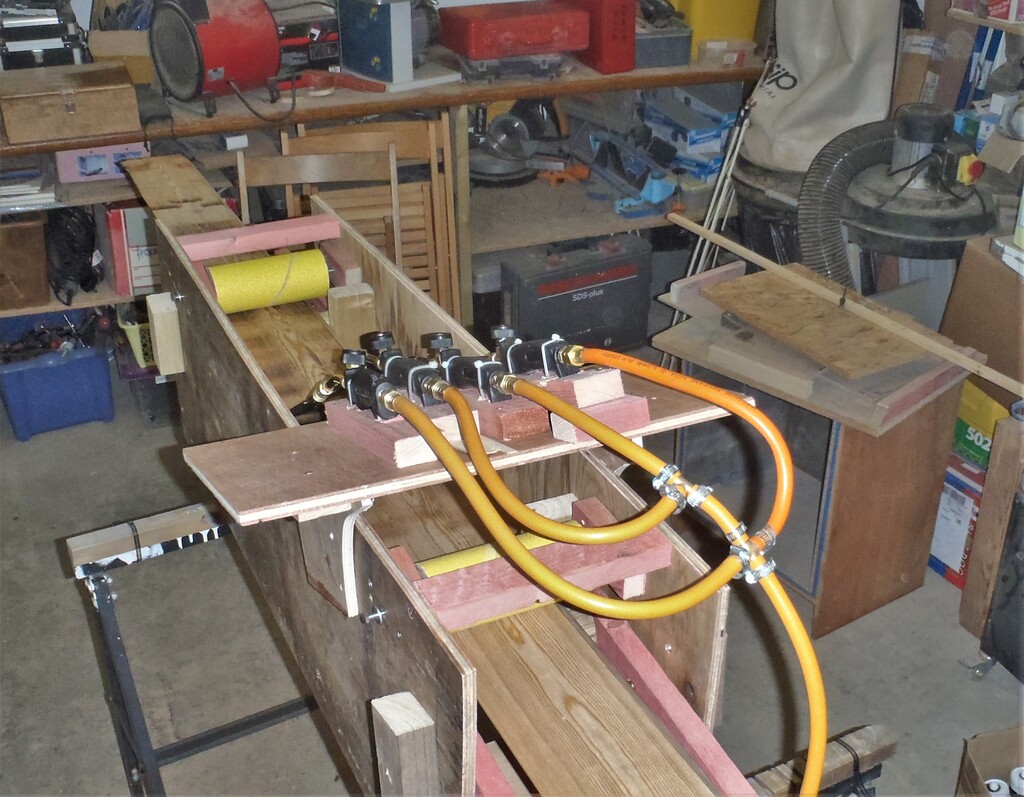
    Skipping pass some external interruptions we had this week, we went to the far back left corner of the house, to the Great Room wall section, P1, to start there. The wall is 4800mm long with a large window in it so we can learn how to proceed, setup working platforms (two trestle tables joined together using two CLS 63mm planks and covered in plywood left-over pieces) and carefully see how we put up each plank in turn. The spacing between each row of cladding is achieved using a 9mm thick plywood for the bottom row against the slate ribbon and a 6mm piece of MDF to separate each row going up the wall.
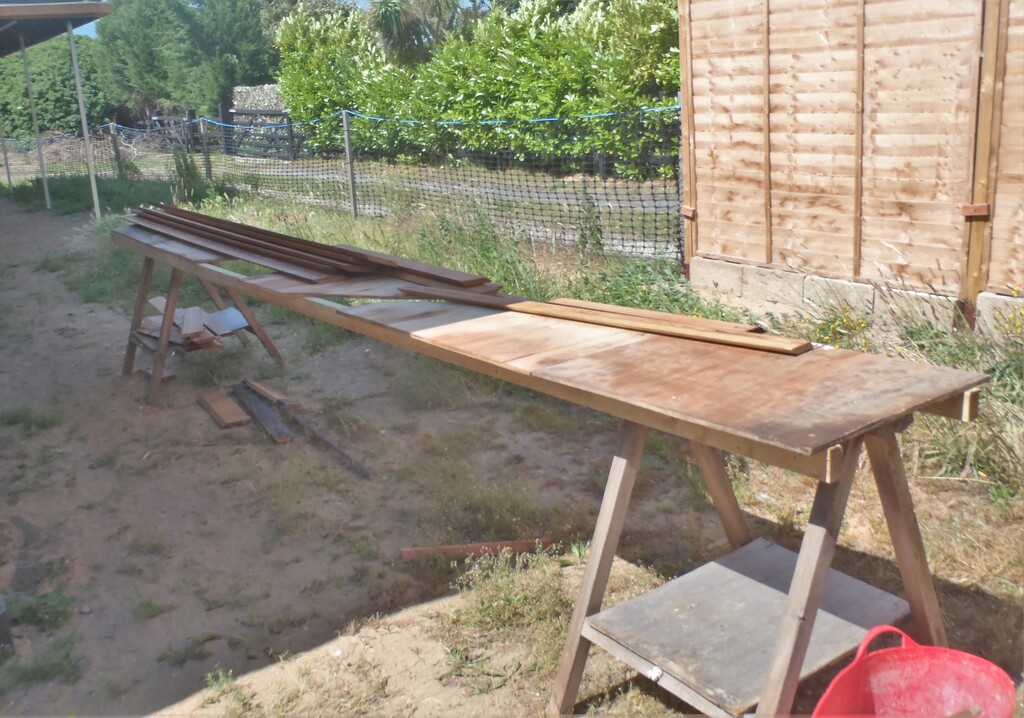
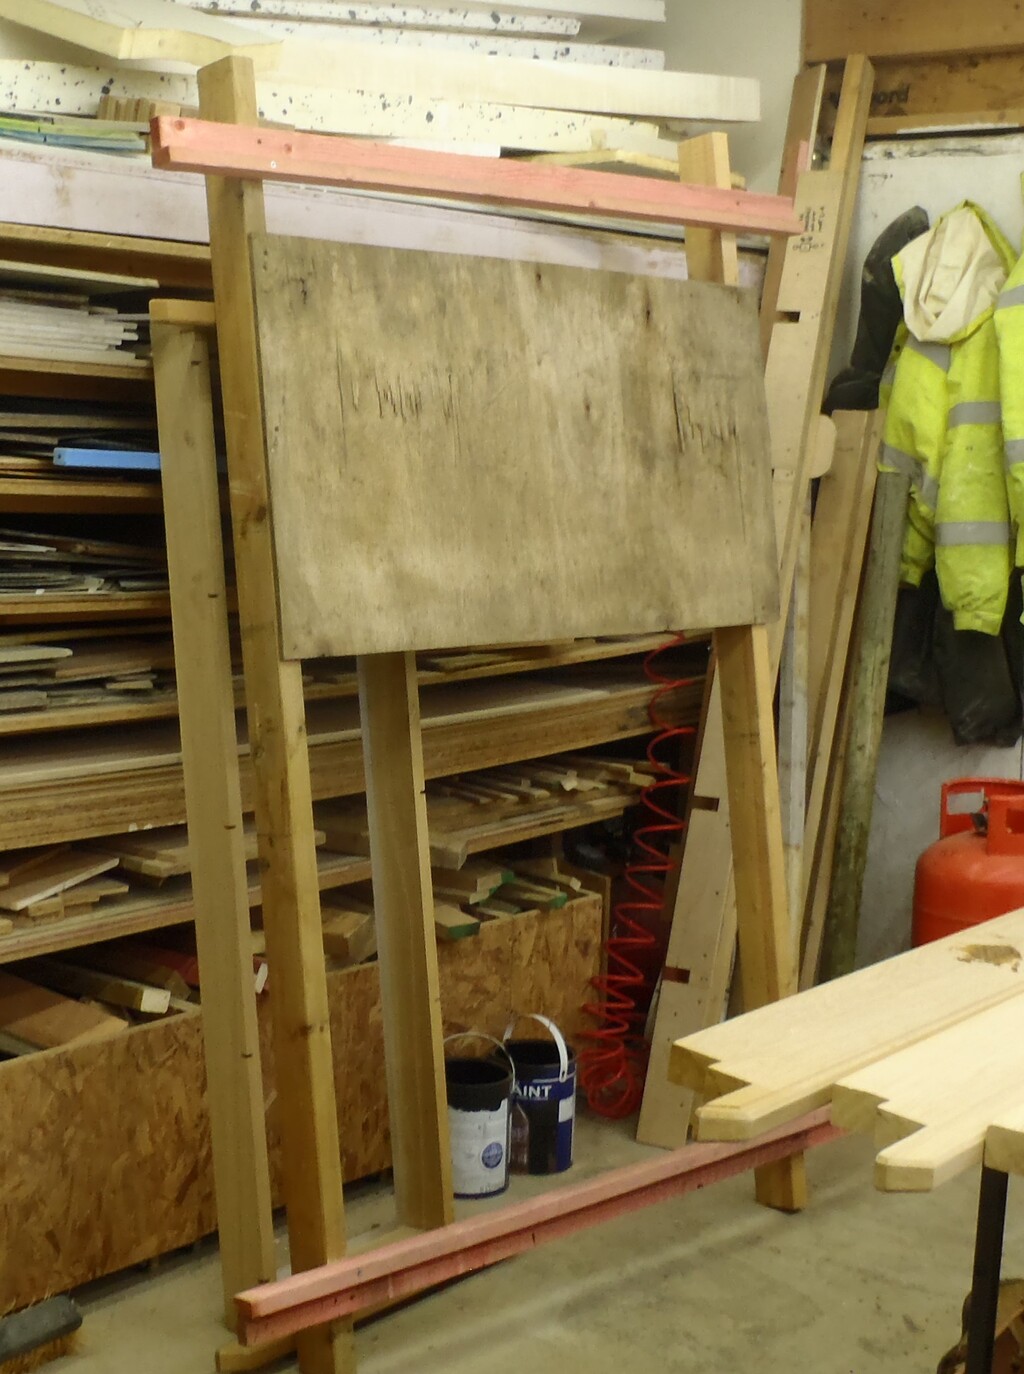
    Templates Created and Larch Planks Starts Going up on Walls

    Cutting-bench


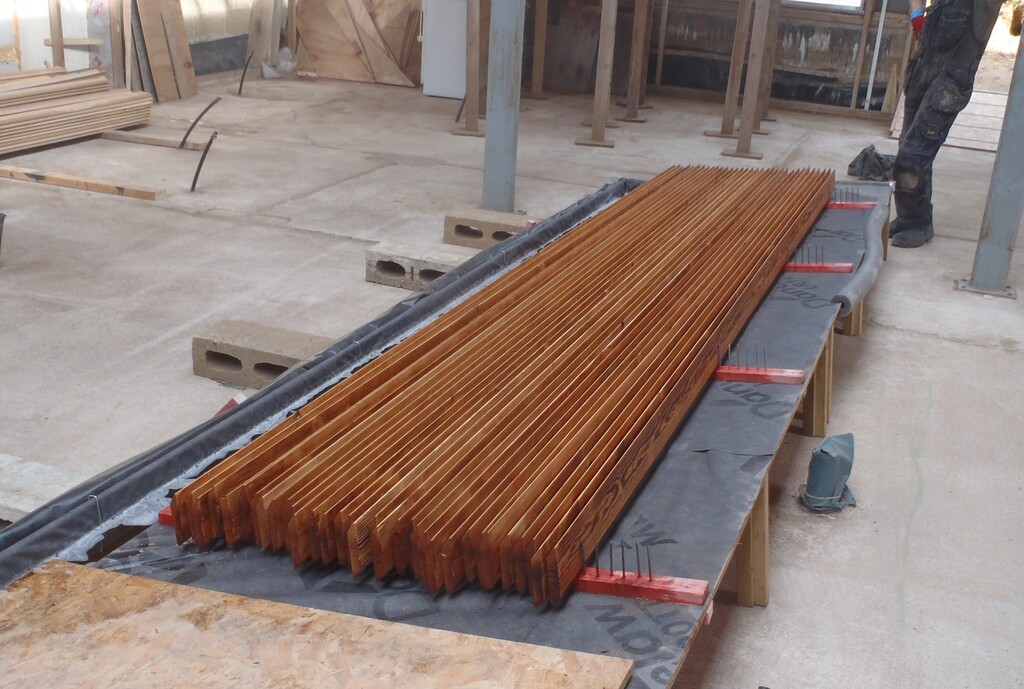
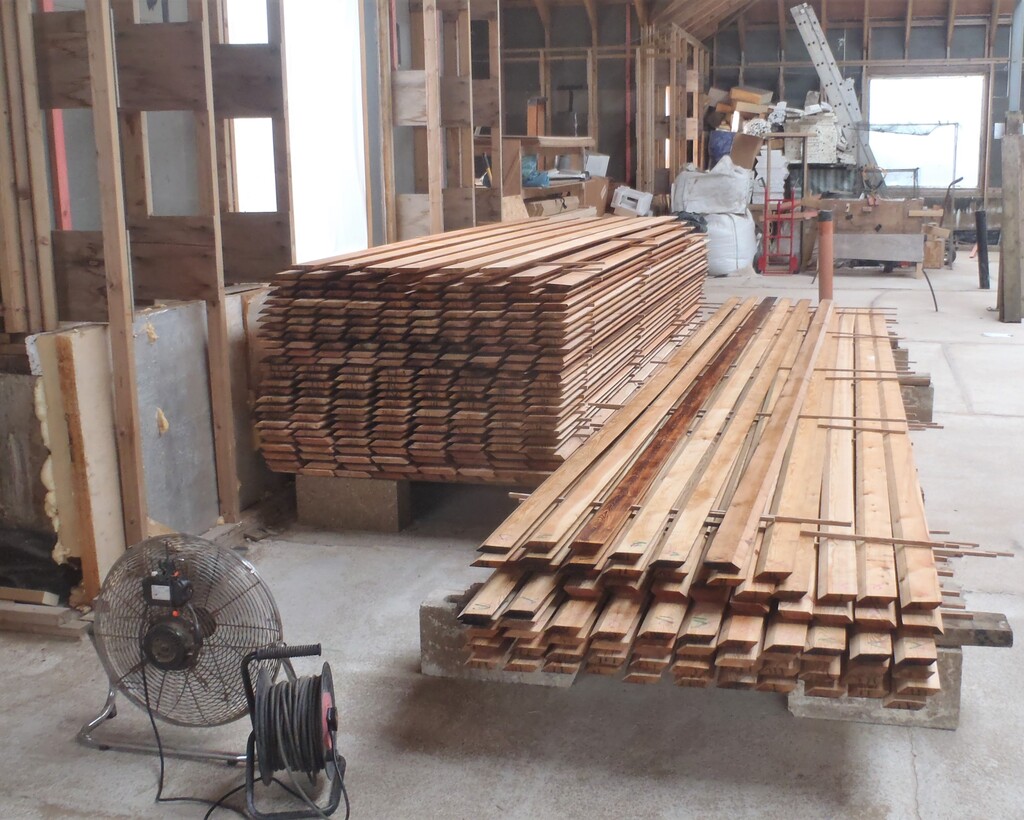
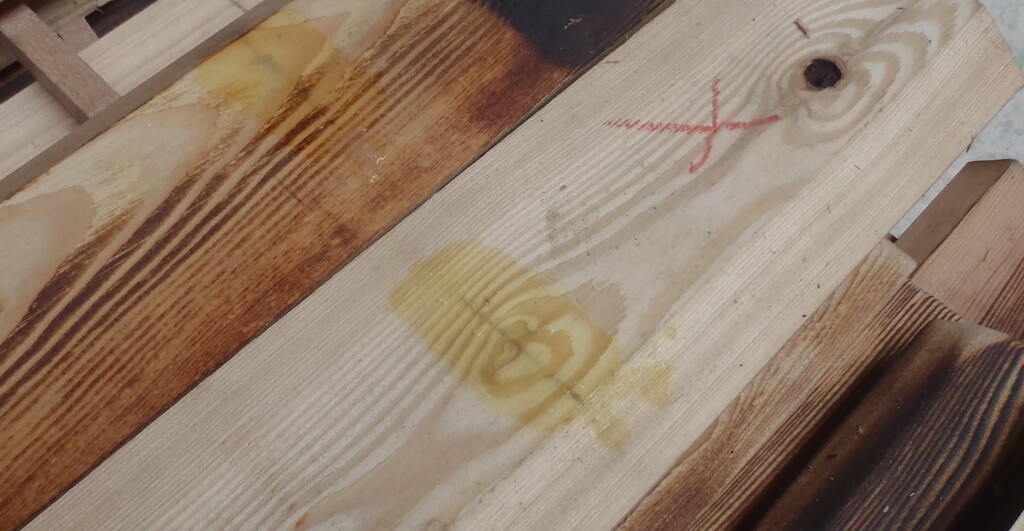
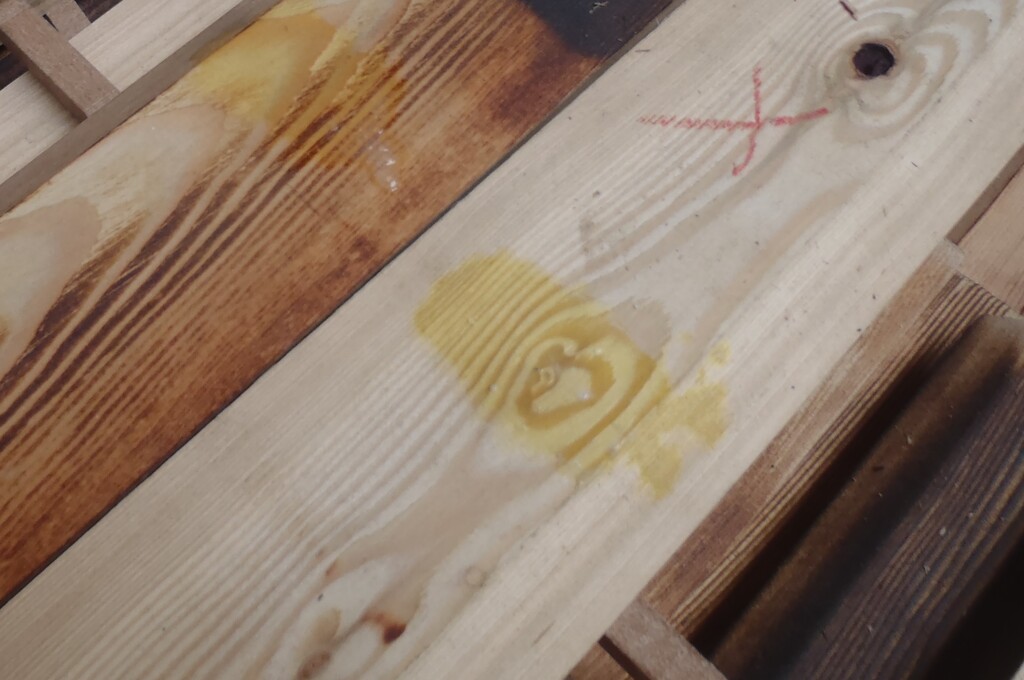
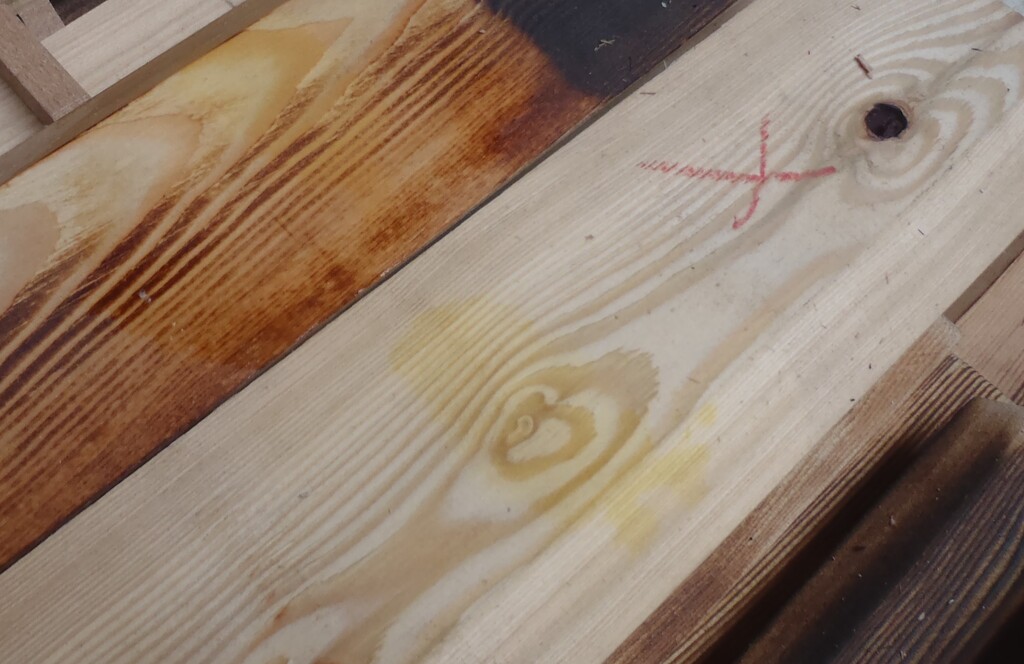
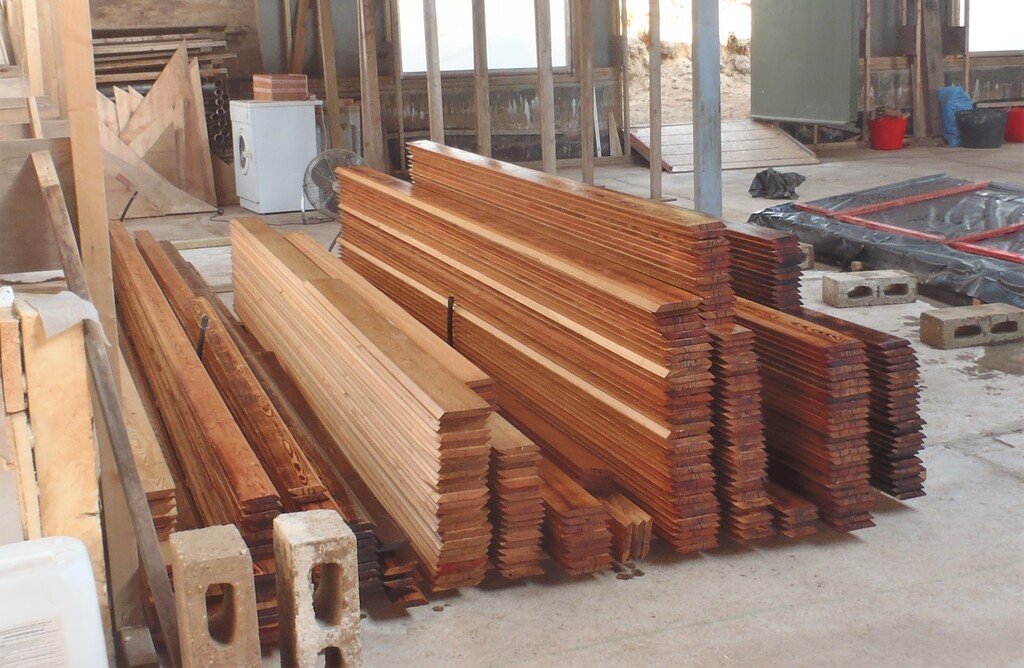
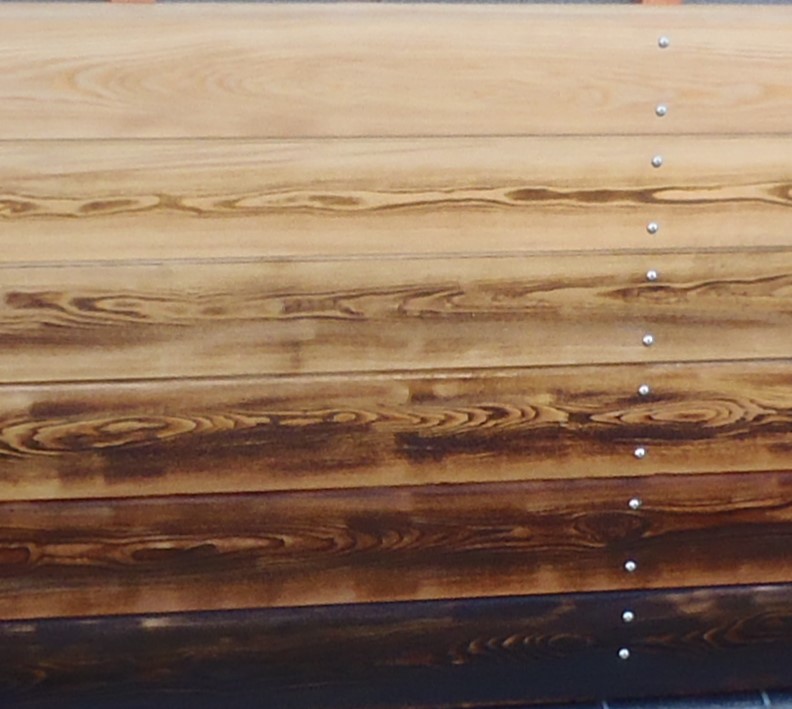
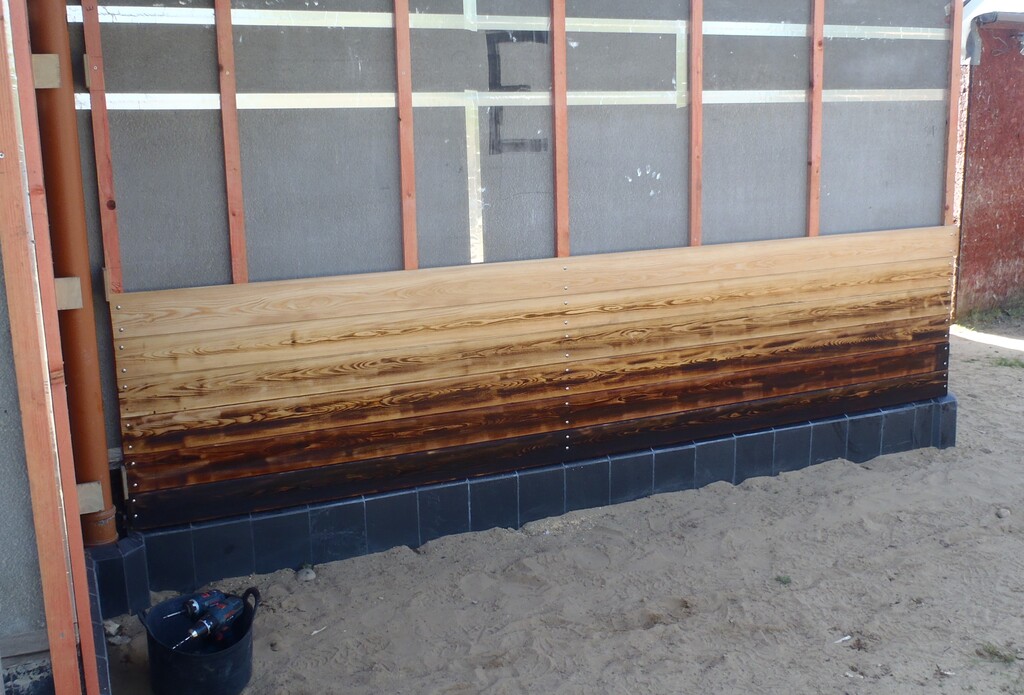
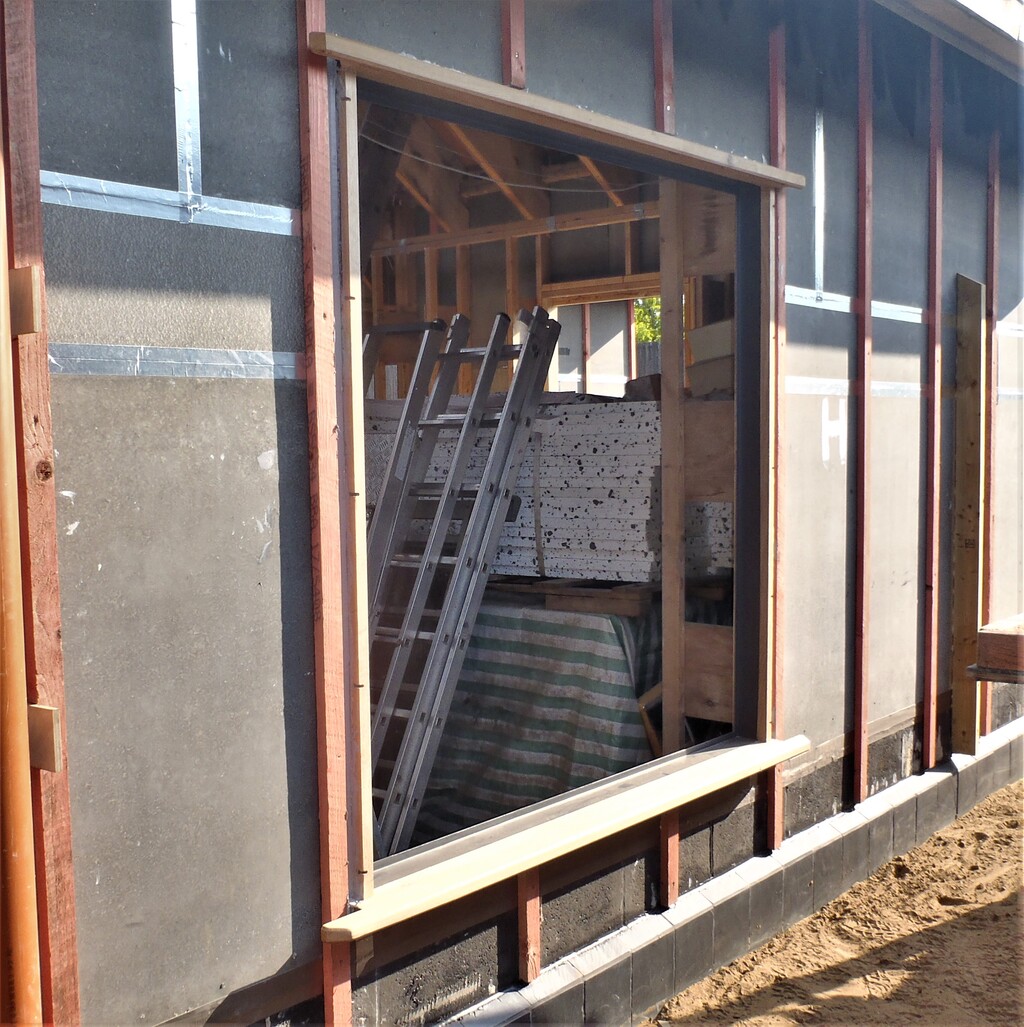
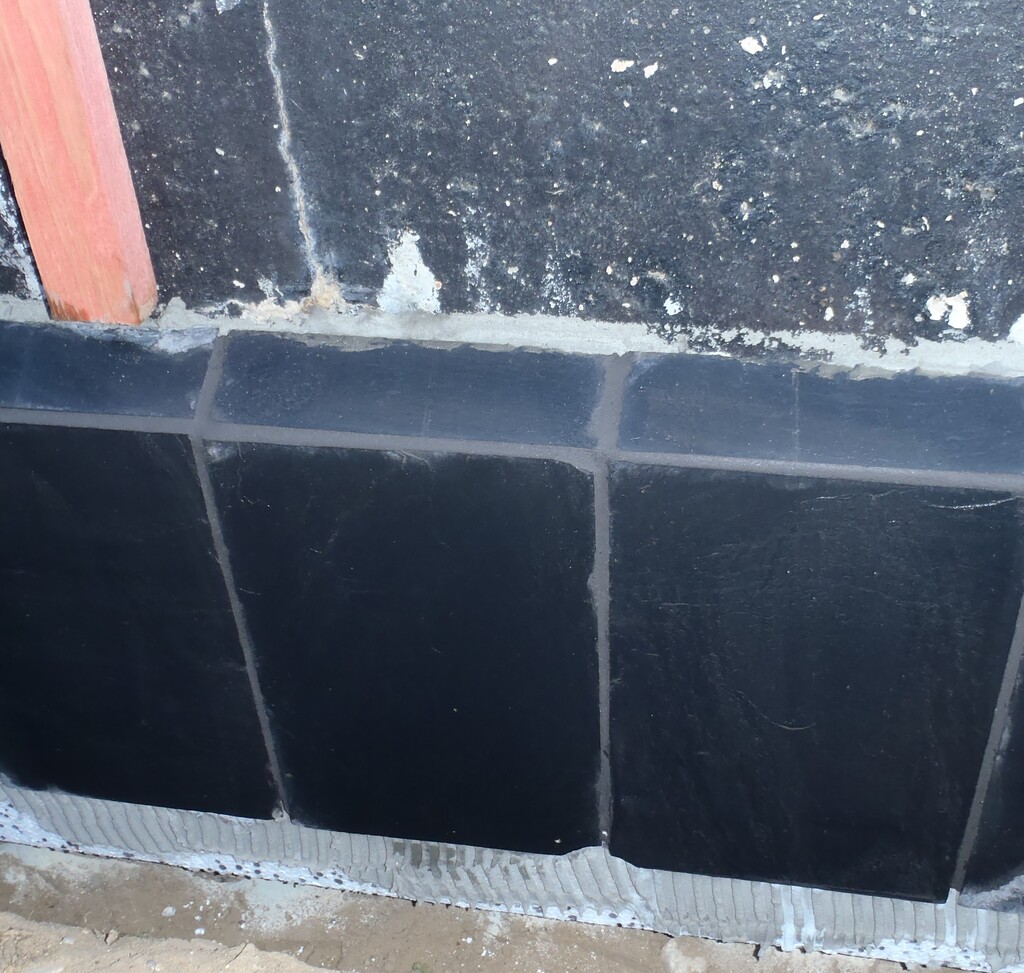
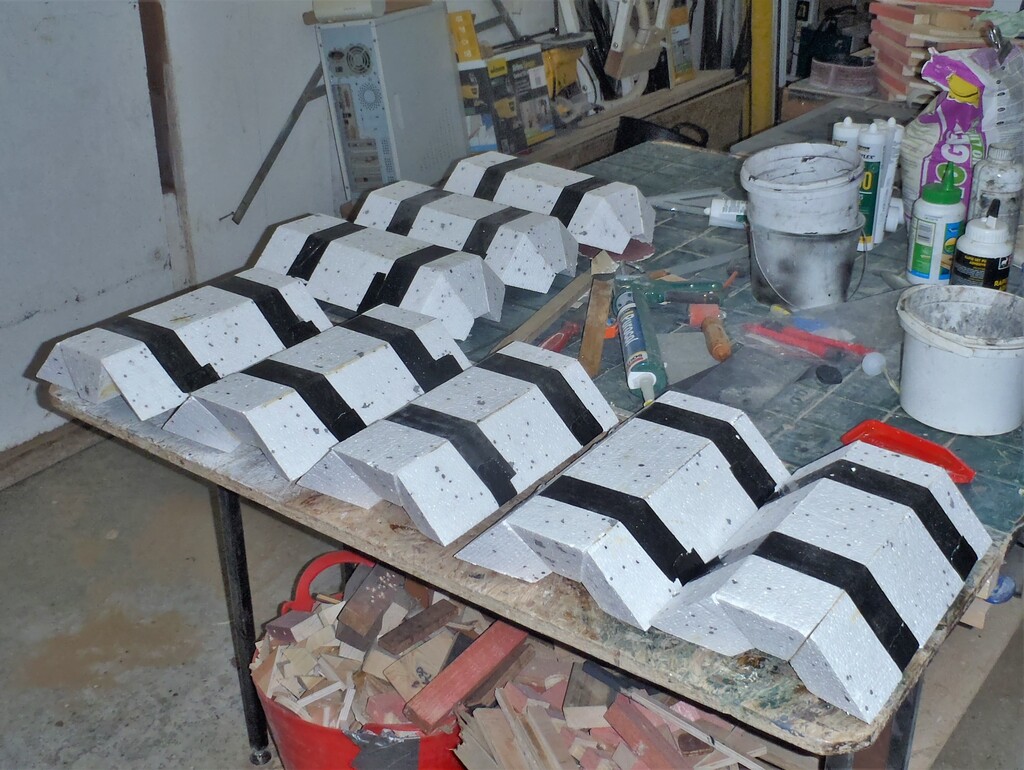
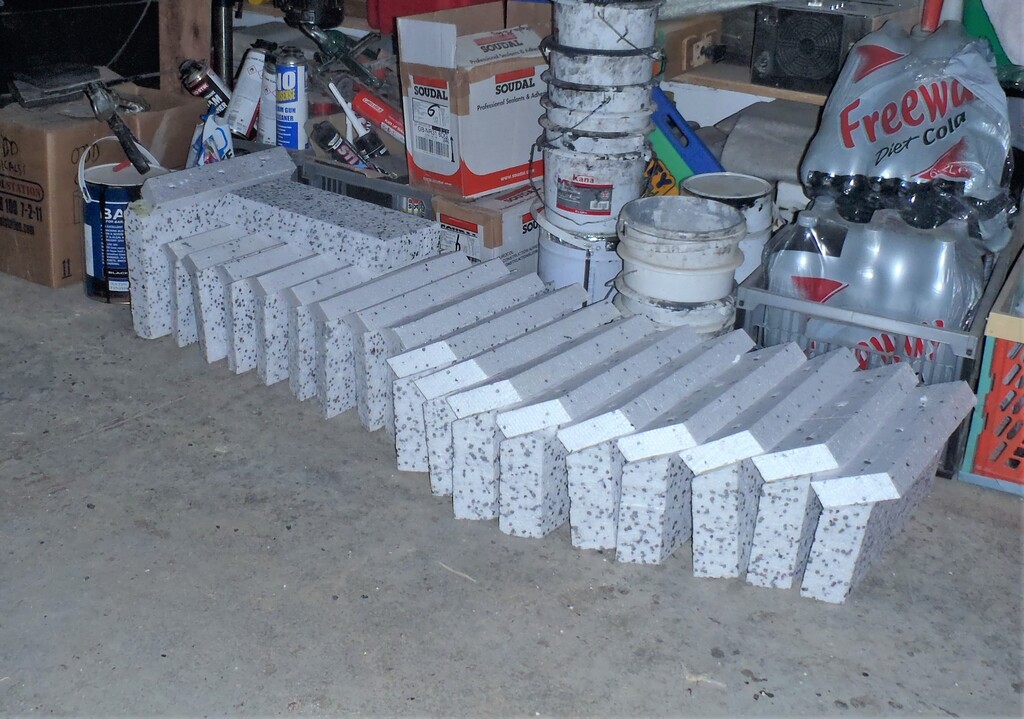
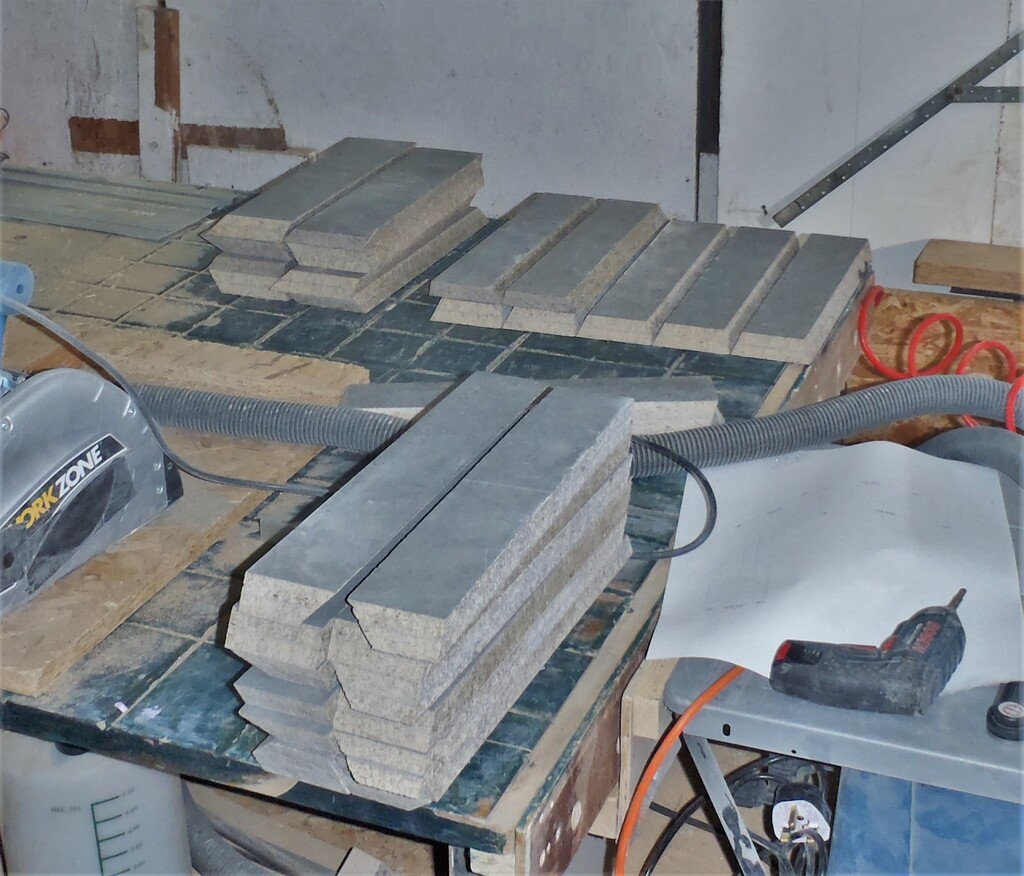
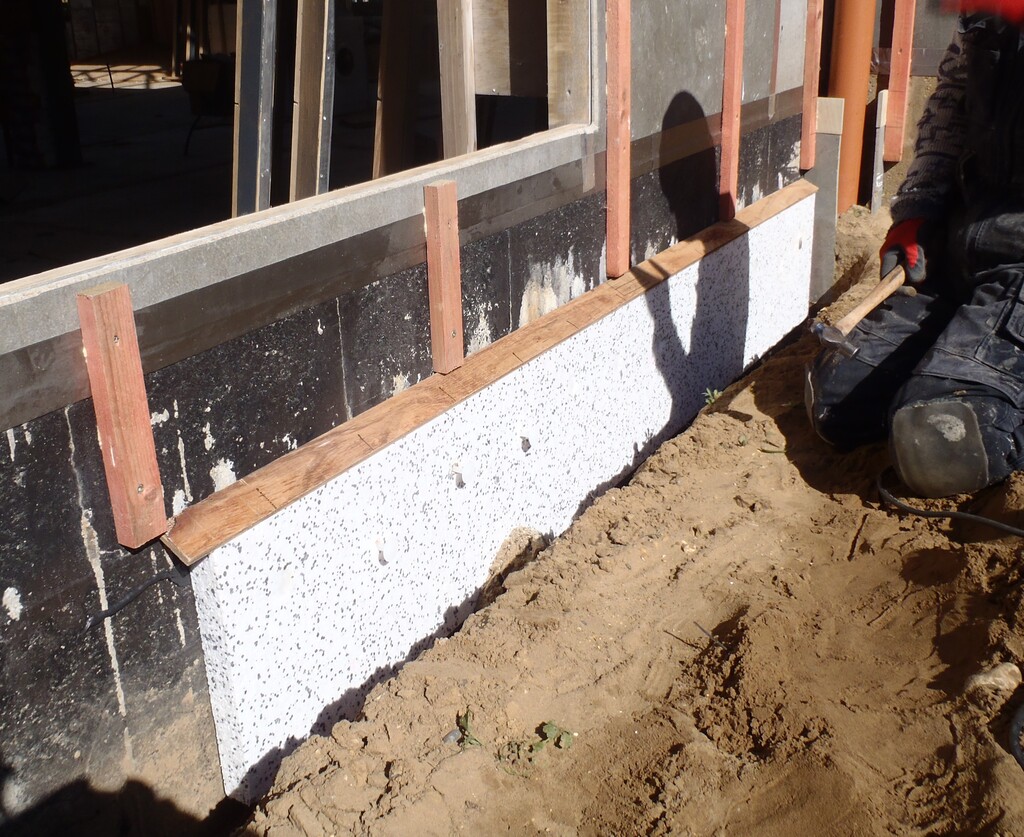
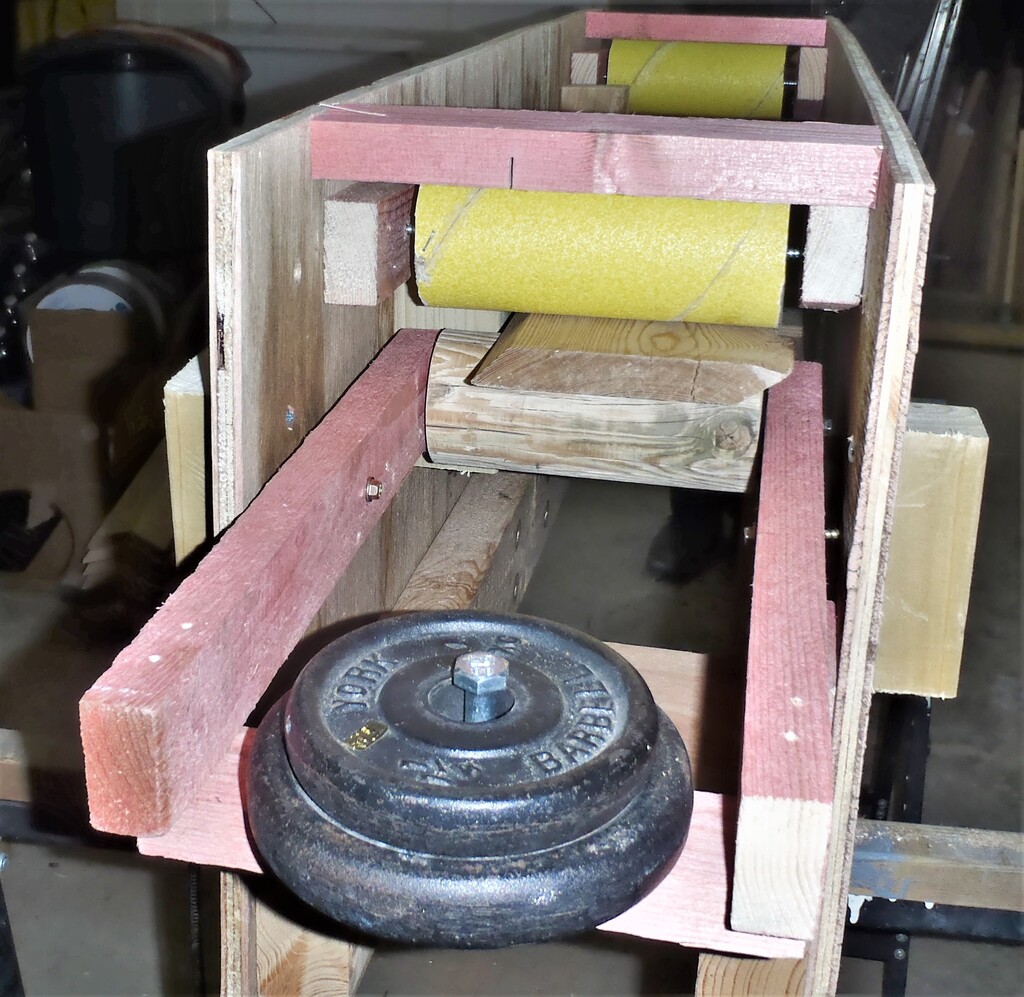
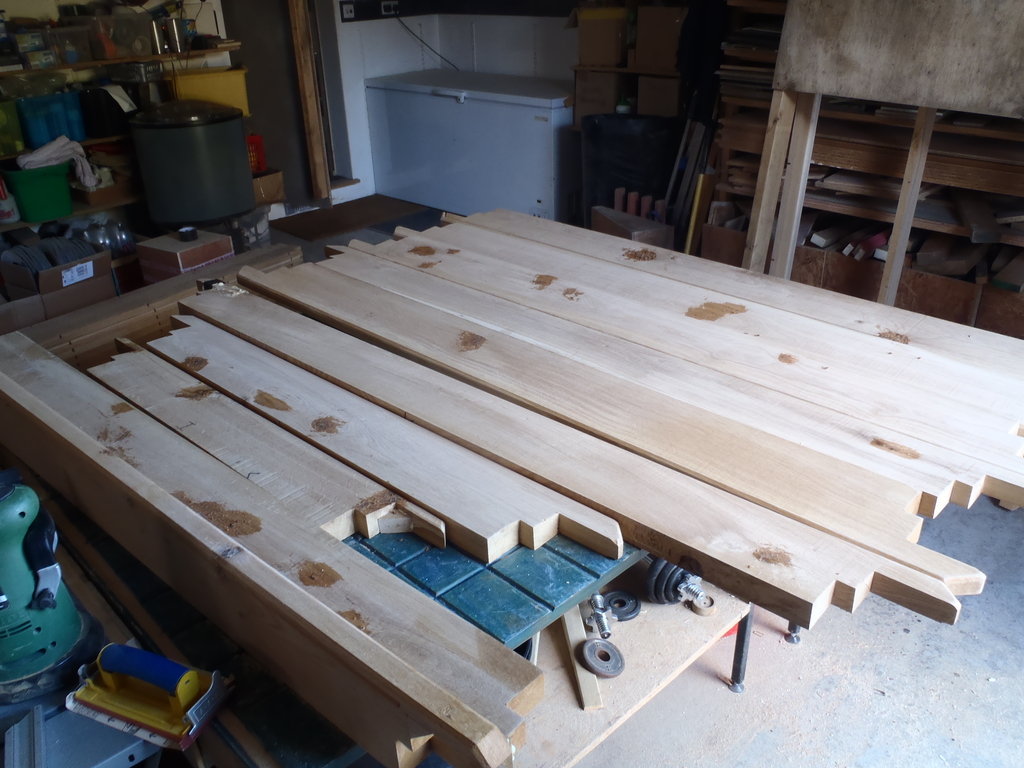
    We decided to start at the bottom of each wall, with the widest Larch timber (burnt to a level 3) and then followed by the 2nd row of a medium plank (with a burn level of 4 – darker) and then finally the darkest (burn level 5) plank using a narrowest plank to meet up with the window sill. We arranged it so that the joint between this row and the fourth row is just hidden by the Oak sill itself so we had to remove s small area (the upward slope) of the Larch timber and it all fitted very well.

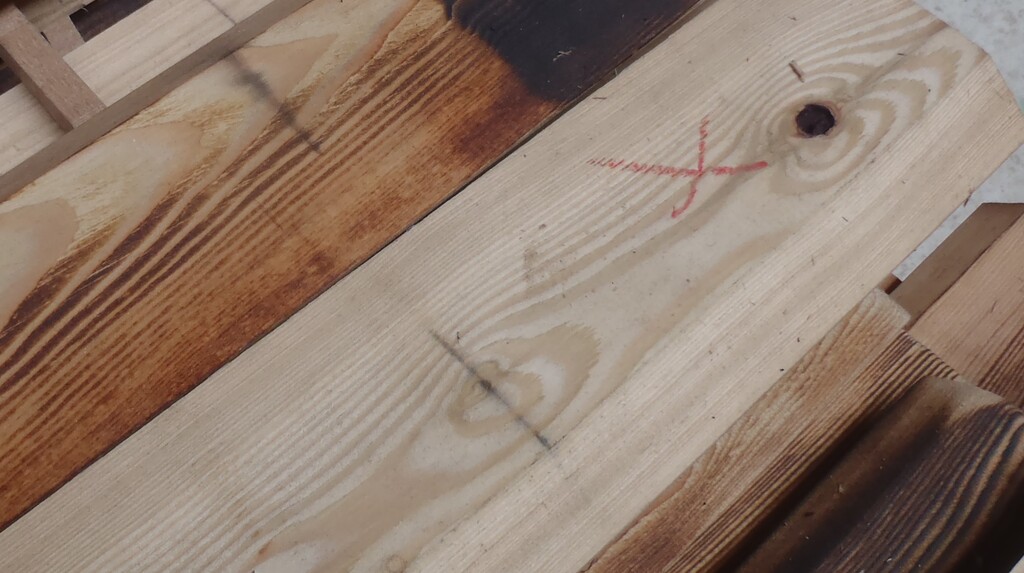
    Then we got our spreadsheet and randomised the order of the 12 planks that go between the bottom and top of the windows, to mix up the three different widths, to make it more interesting and more variations around the house. We decided that we would mark on the batten on either side of the window, the exact placement of each row so we can be reasonably assured that our last plank will align to the top of the window in a consistent manner. This in fact exactly what happened and we now have both sides of the window populated with planks spaced apart by an average of 11.5mm over 15 planks.
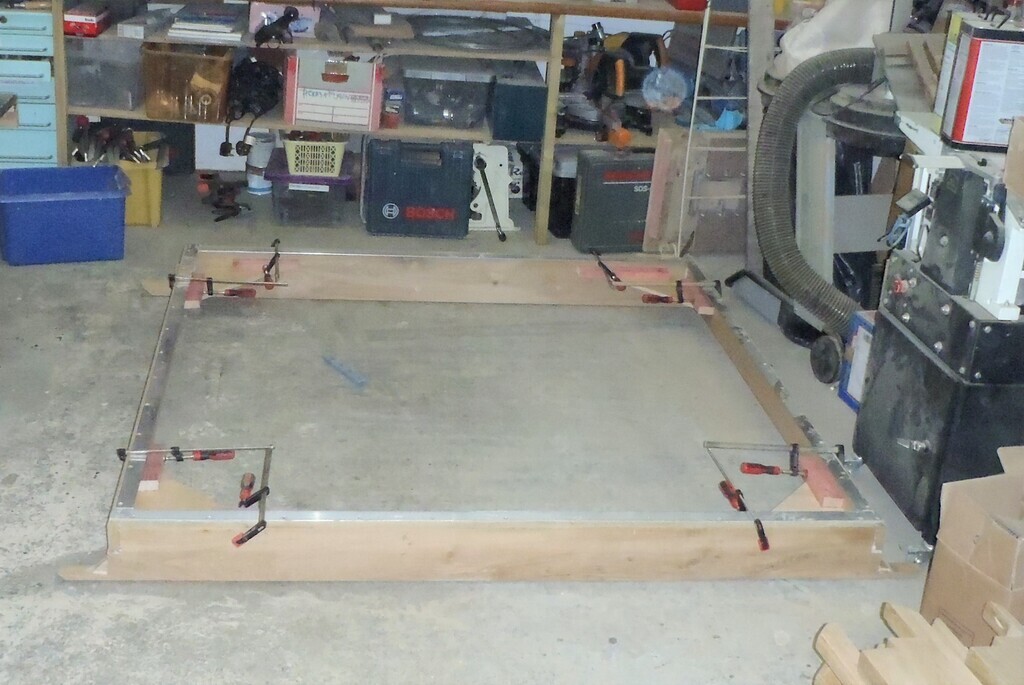
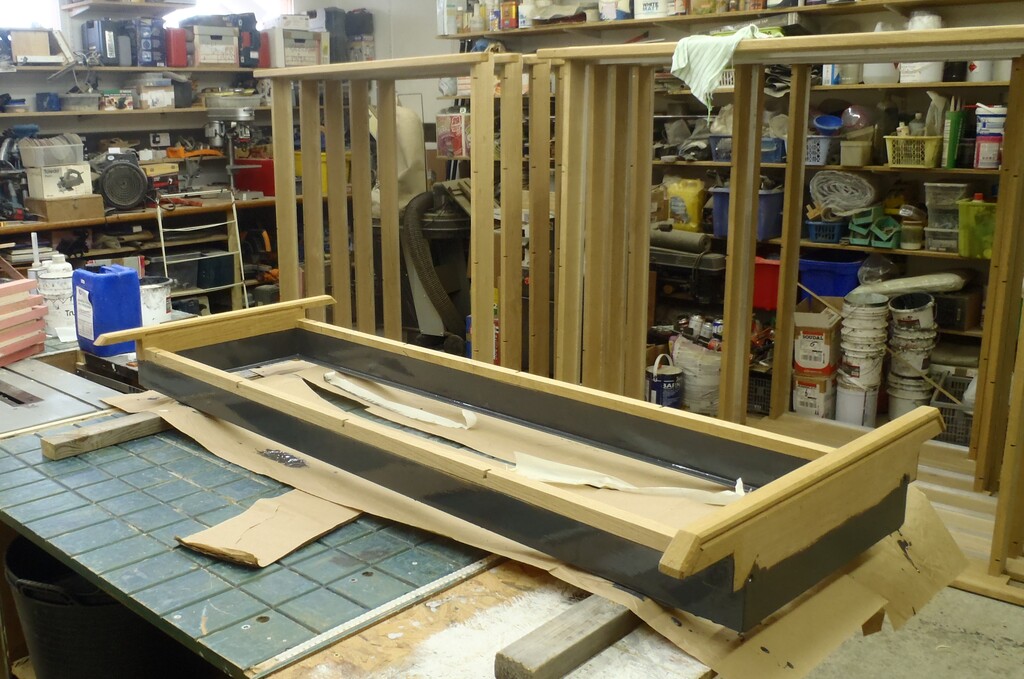
    As we got higher and higher, we realised that we needed a better means of working and reaching up that high so we took one of our three large platforms and chopped the legs down so it provided enough height to enable us to reach up inside the eves.
    Templates Created and Larch Planks Starts Going up on Walls

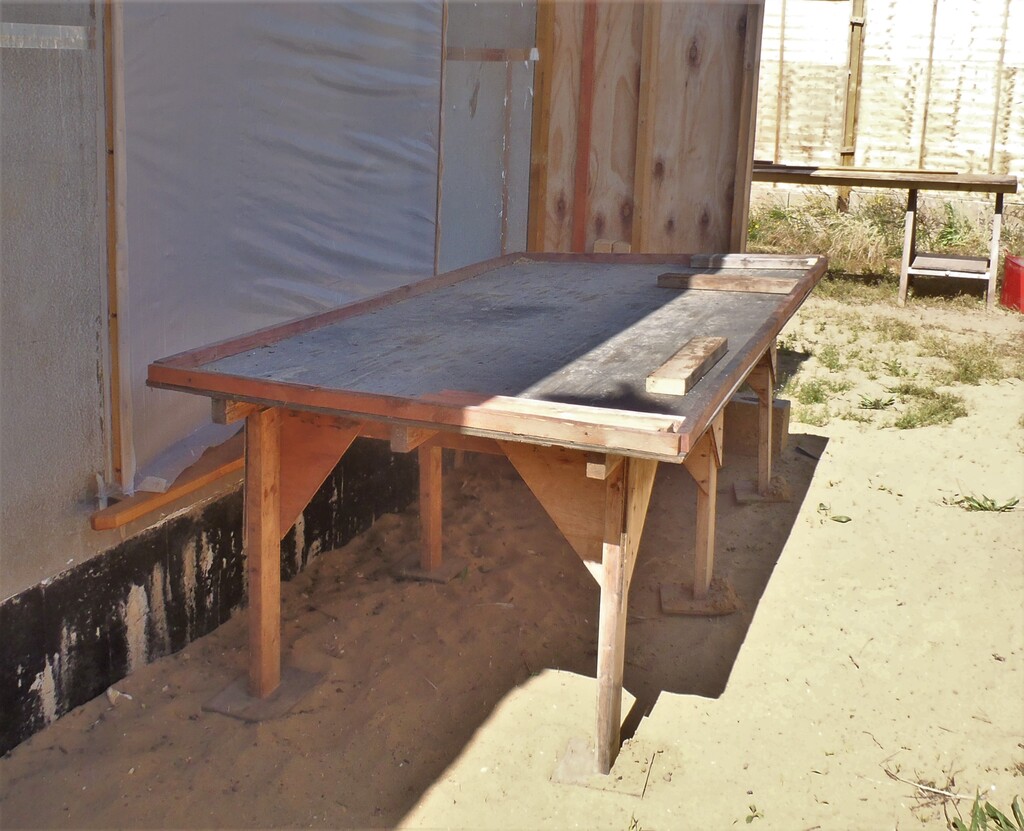
    Lowered-working-platform


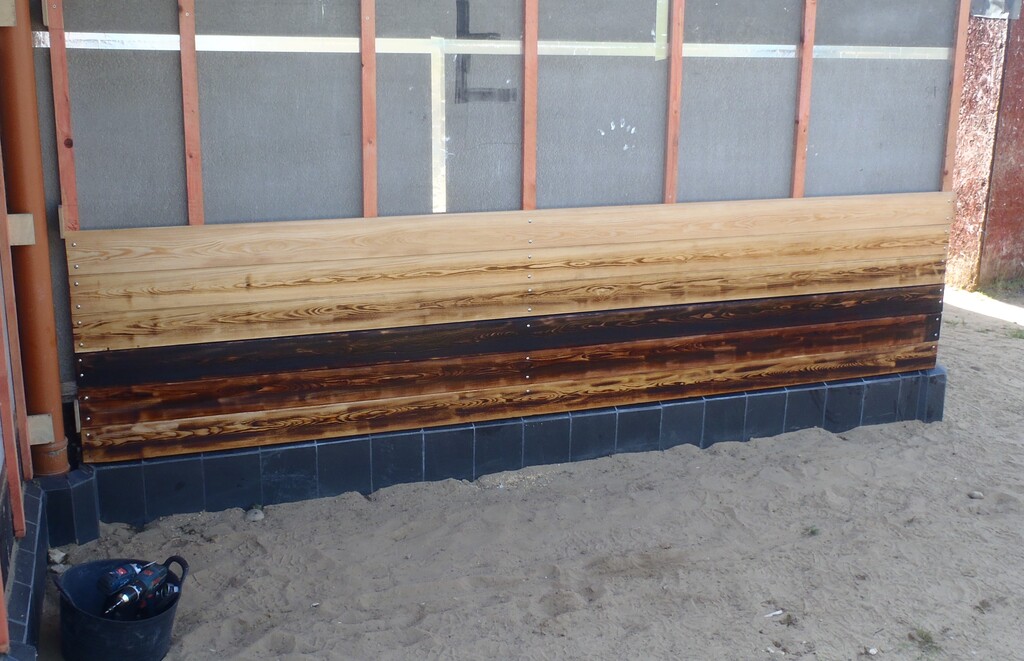
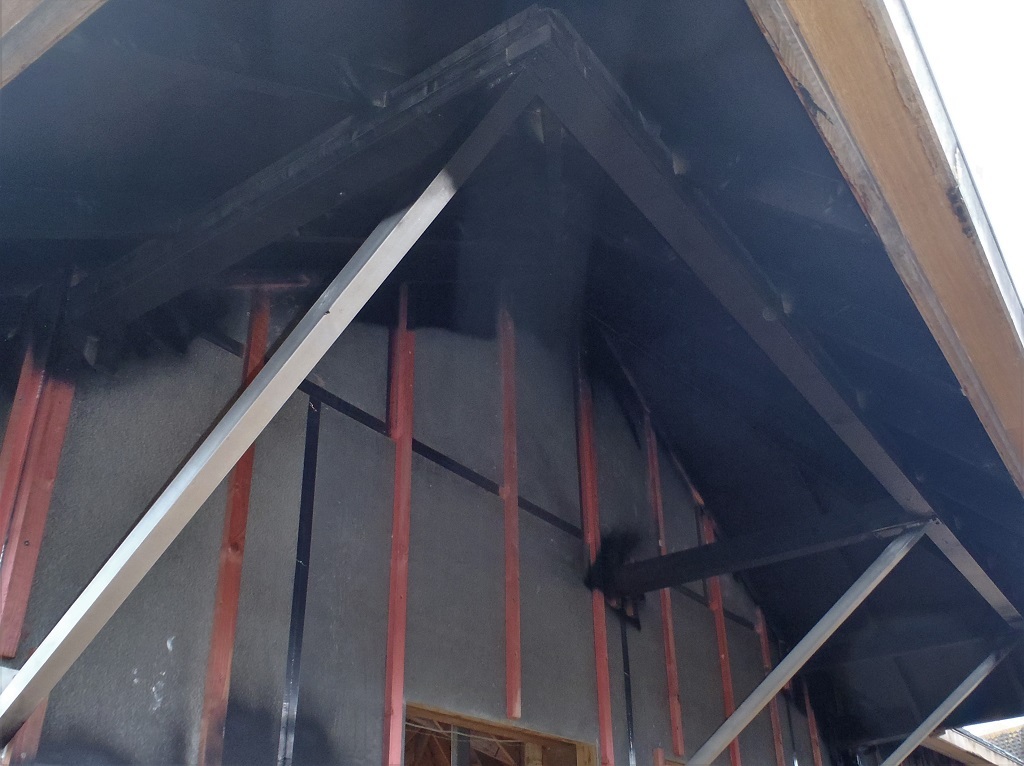
    We finished off the main area above the window and stopped just short of the rafters. We left the gap between each rafter exposed to see if it really needed filling or not.
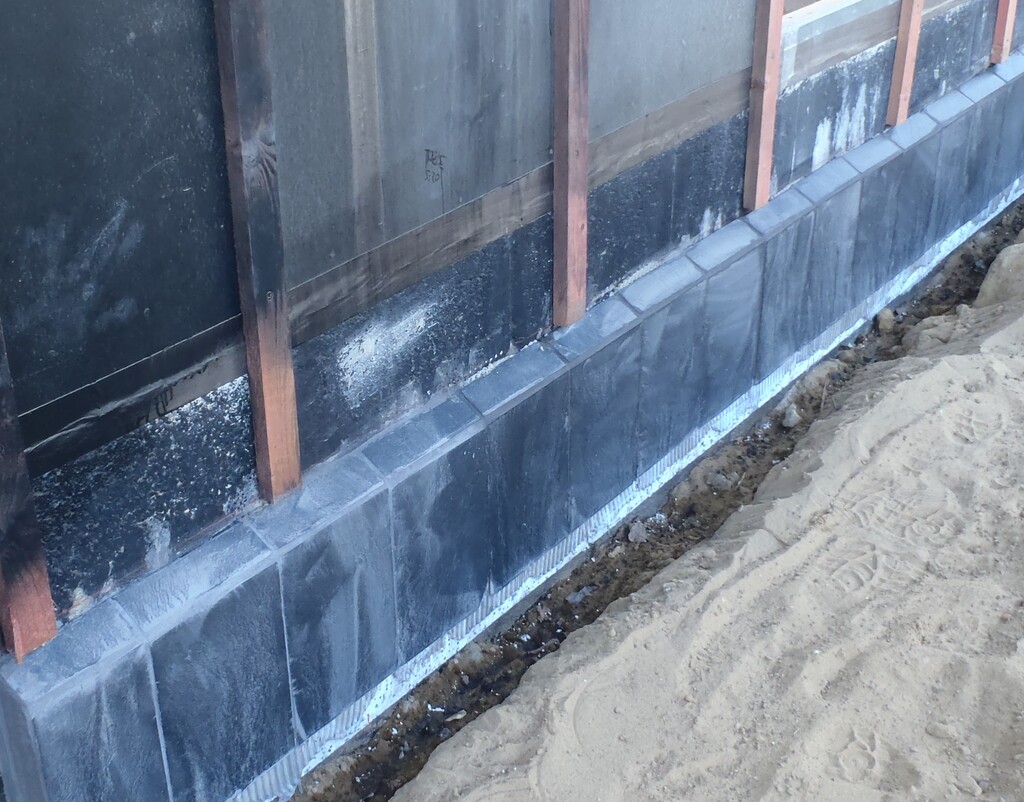
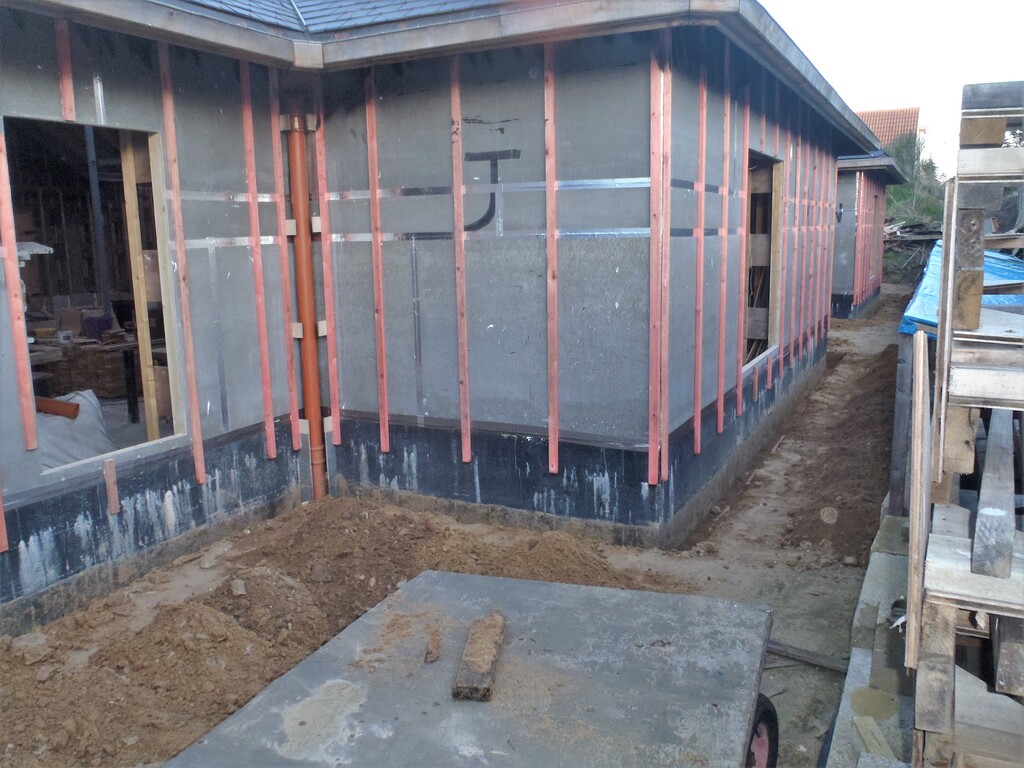
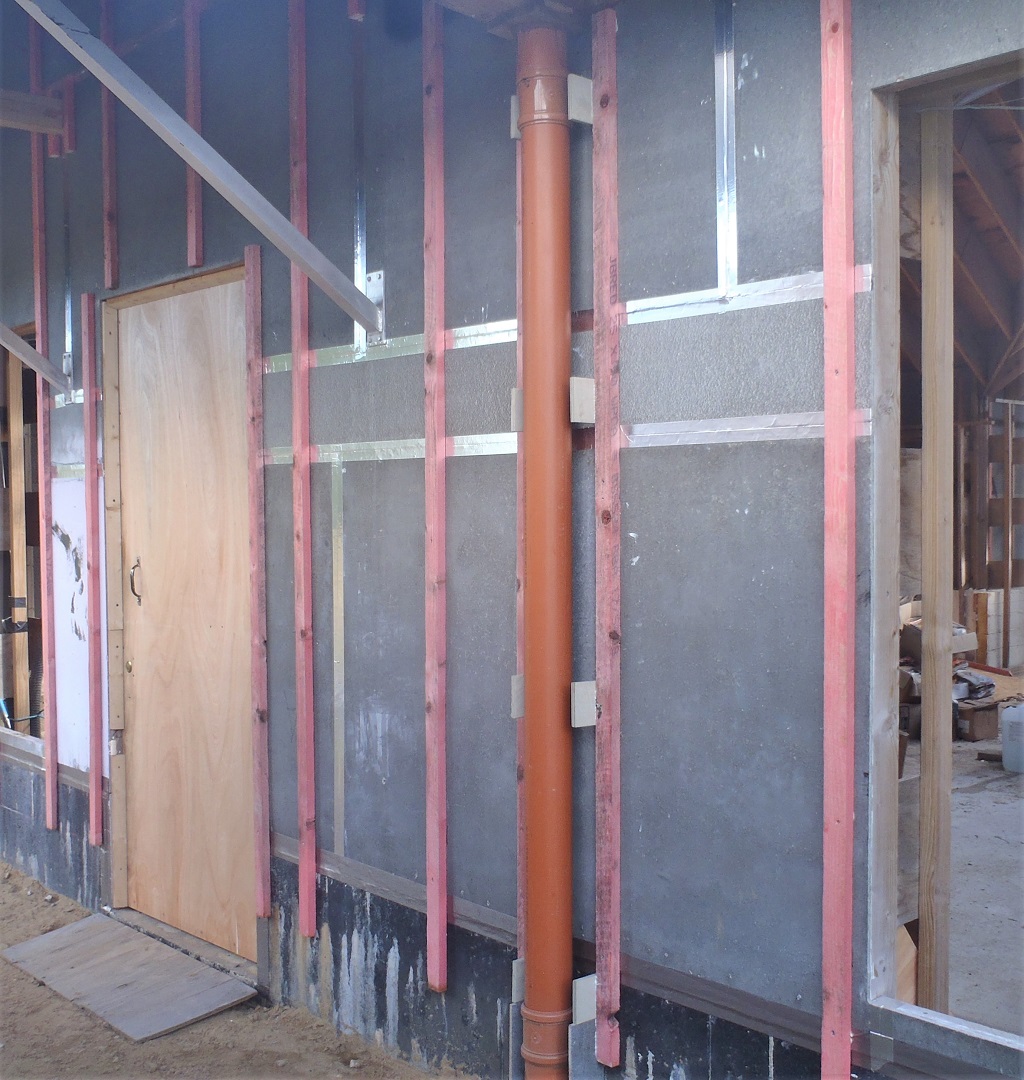
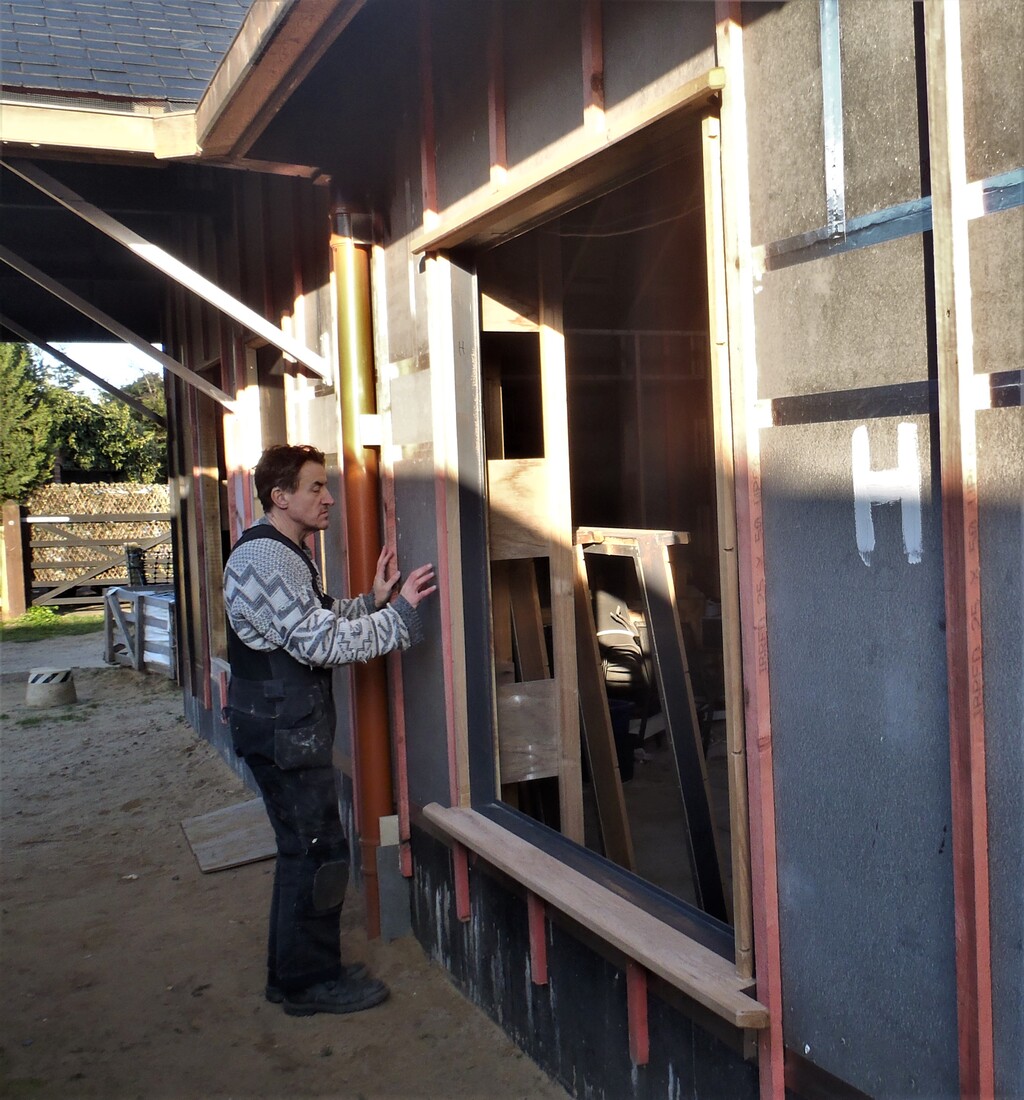
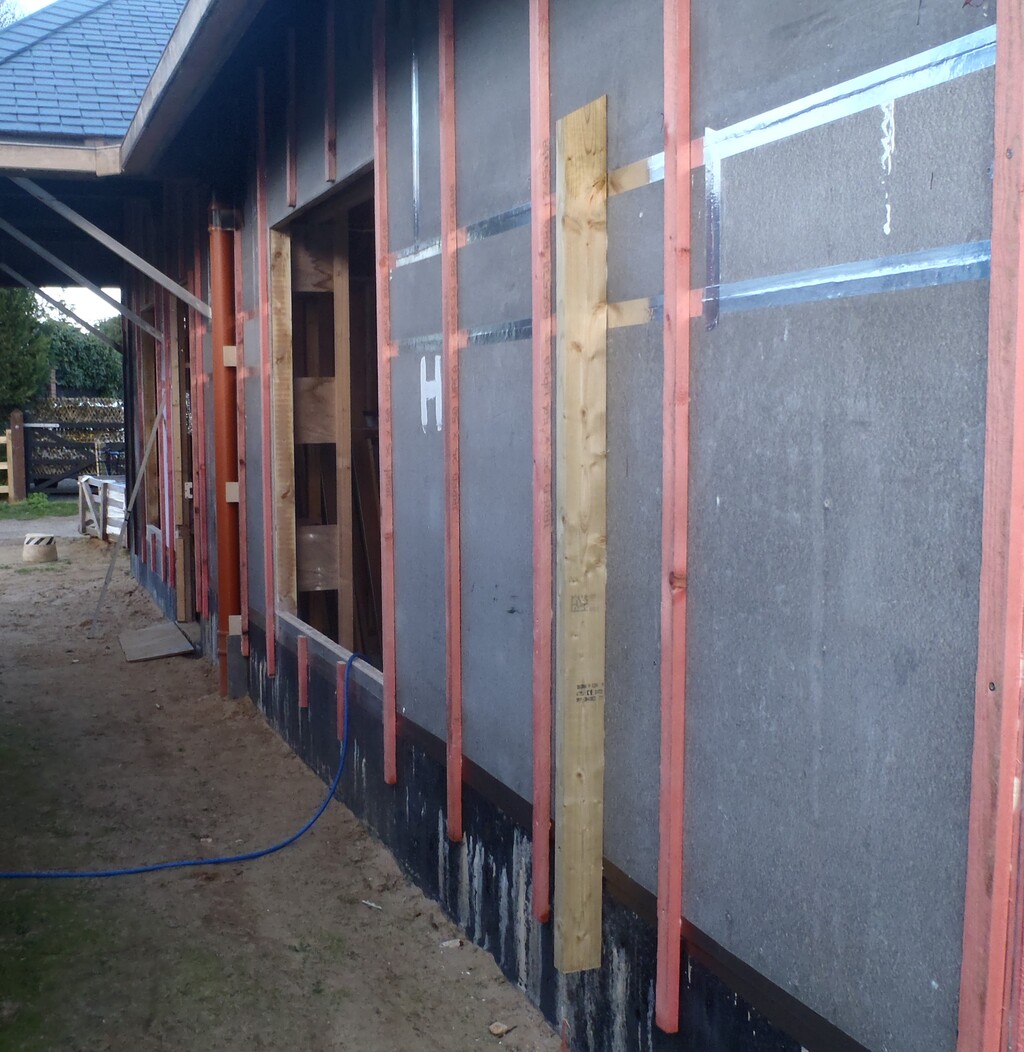
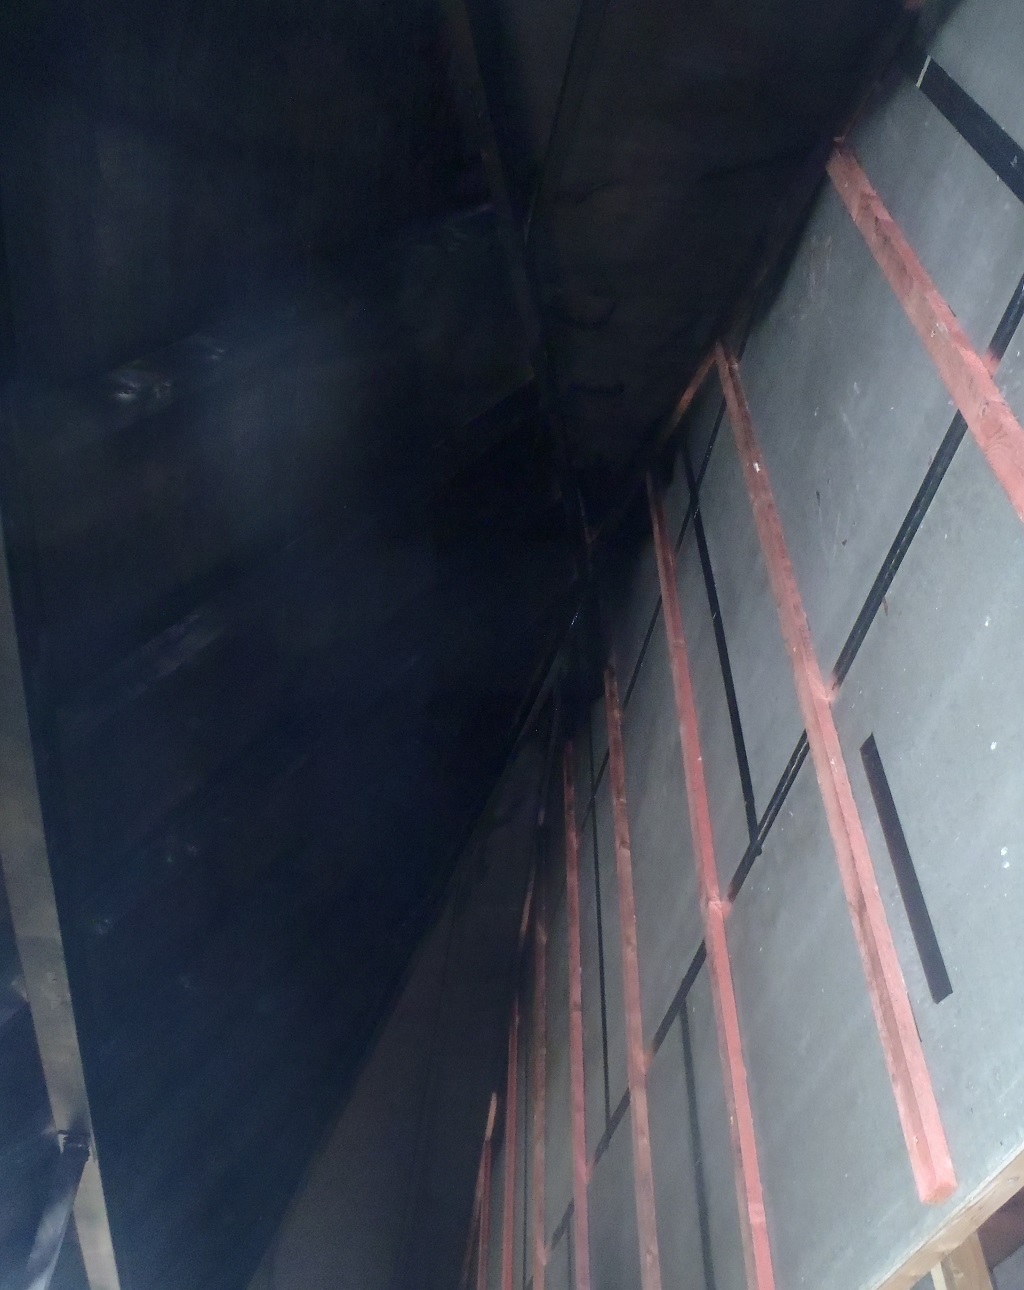
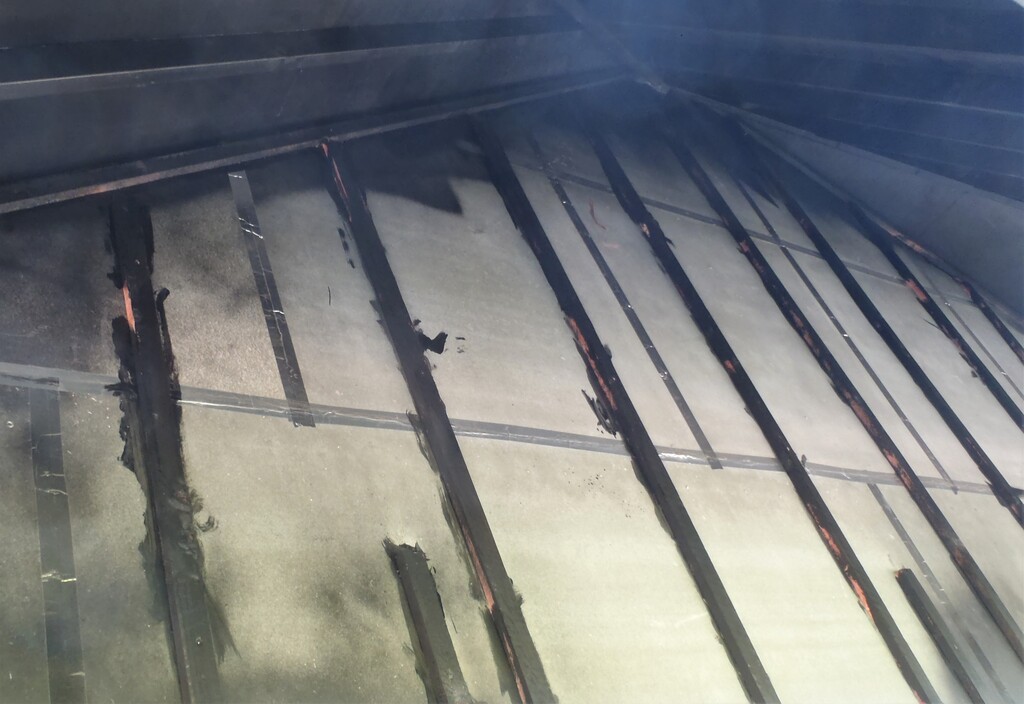
    Also we noticed that we could see the “pink” battens plus also the gap between the Larch planks were much more obvious higher up because we are looking upwards and able to “see” up the slope between the rows of Larch.
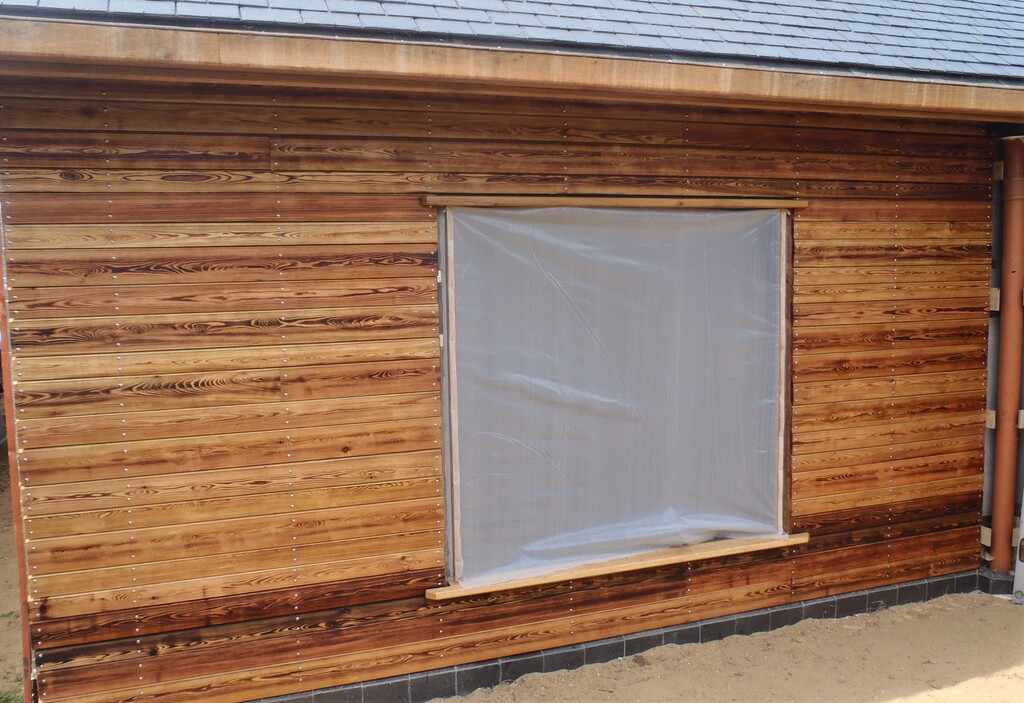
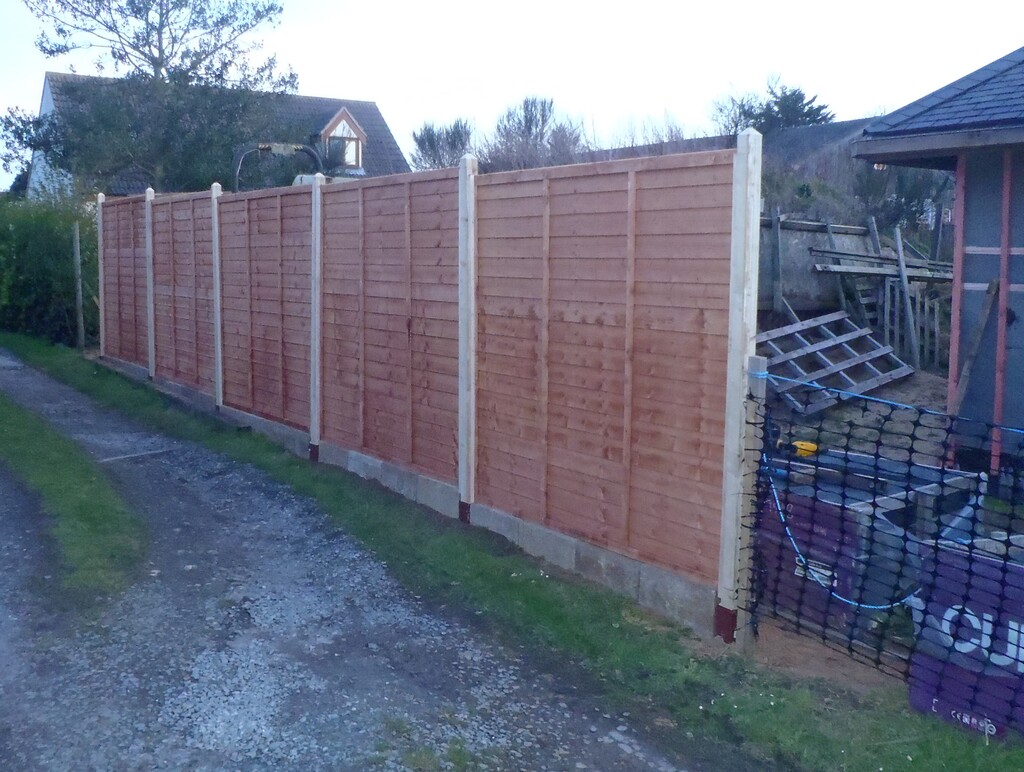
    Templates Created and Larch Planks Starts Going up on Walls

    The-clad-P1-Wall

    Templates Created and Larch Planks Starts Going up on Walls

    You-can-see-the-Pink-batten-between-the-planks


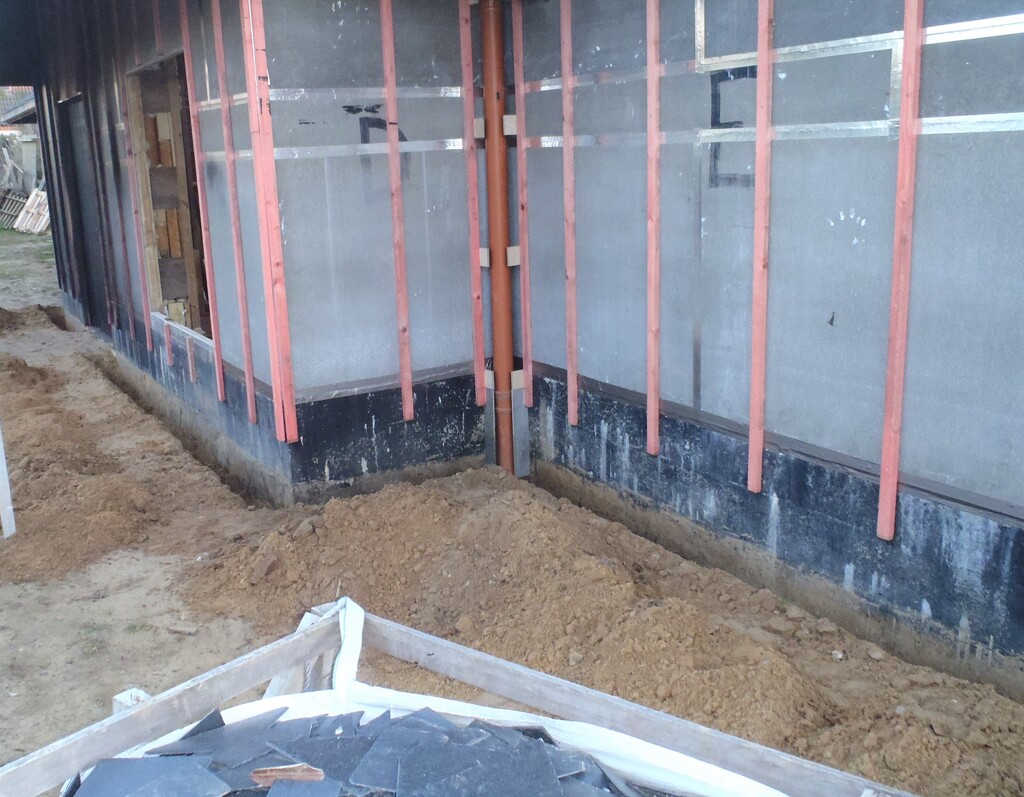
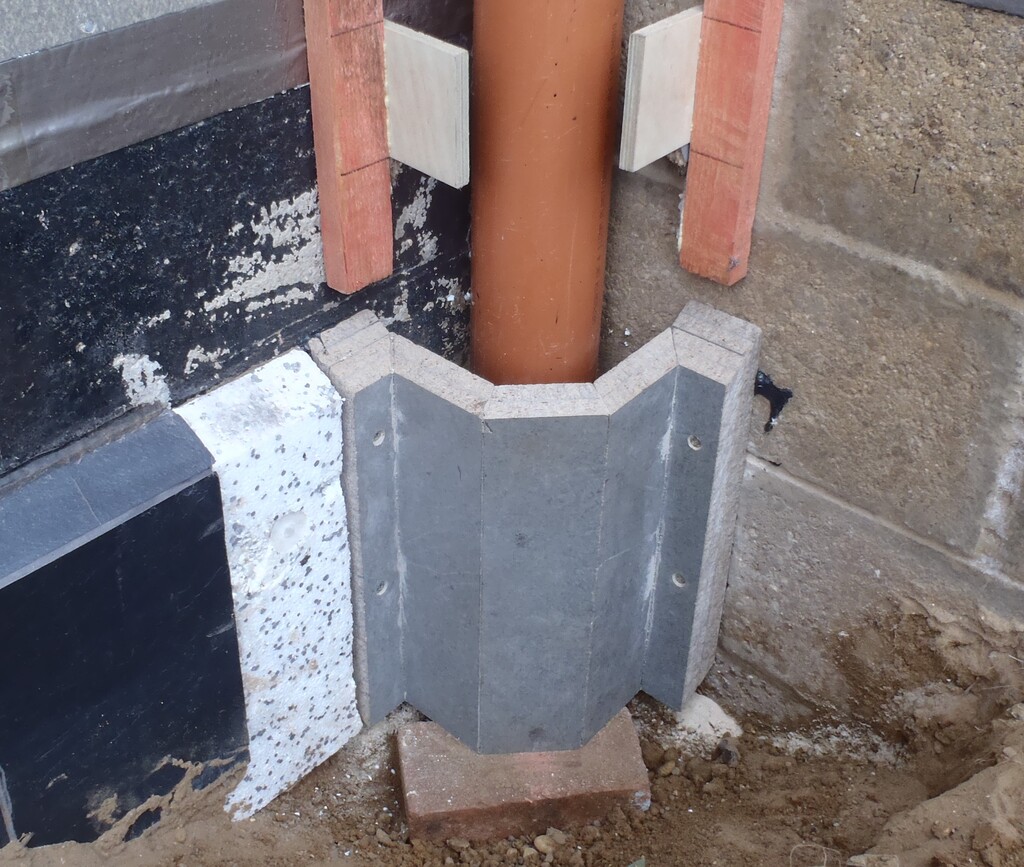
    So we spend a couple of hours painting the top 500mm of the pink batten along the front of the house, including all under the front door porch area with black paint we had left-over and we will also close up the gap of the upper rows to reduce the impact of the joints.
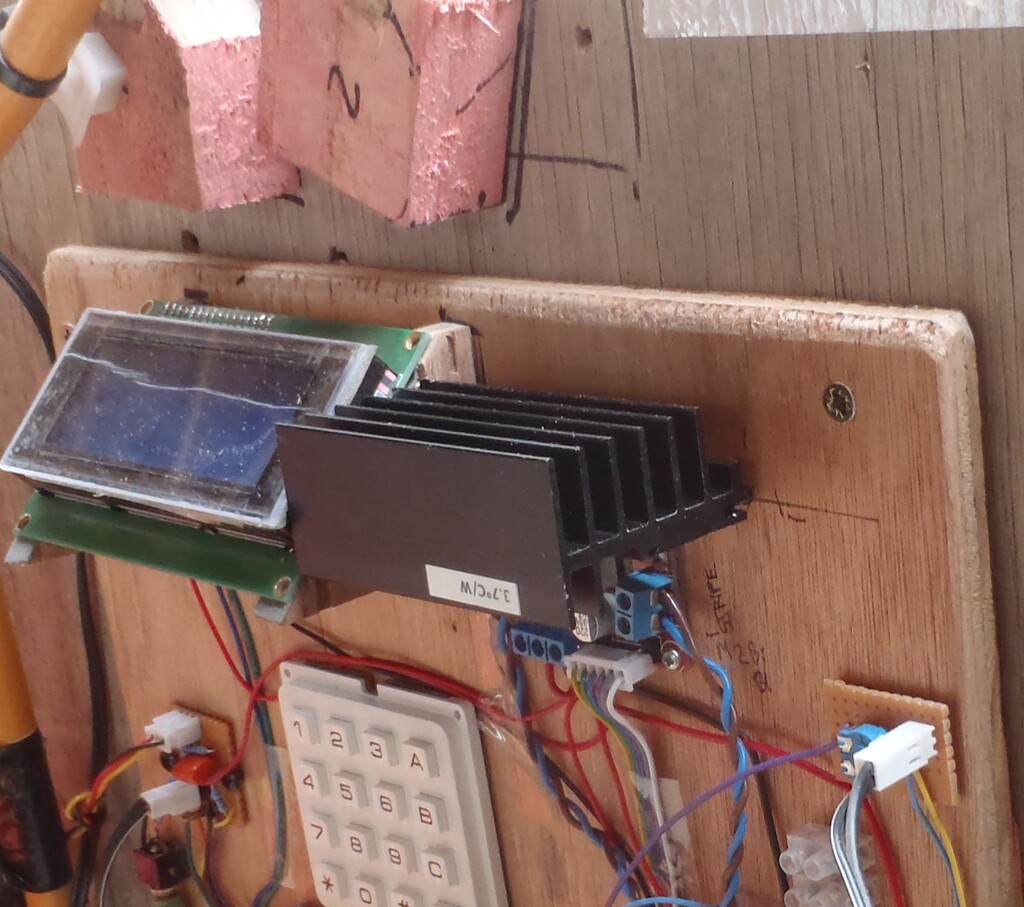
    The final day Saturday, was a rain washed out day so we got on with another job, fitting the filter modules and sterilising unit together, along with a submerged pump to our rain water underground tank. See Rain Water Underground Tank Brought Into Operation.
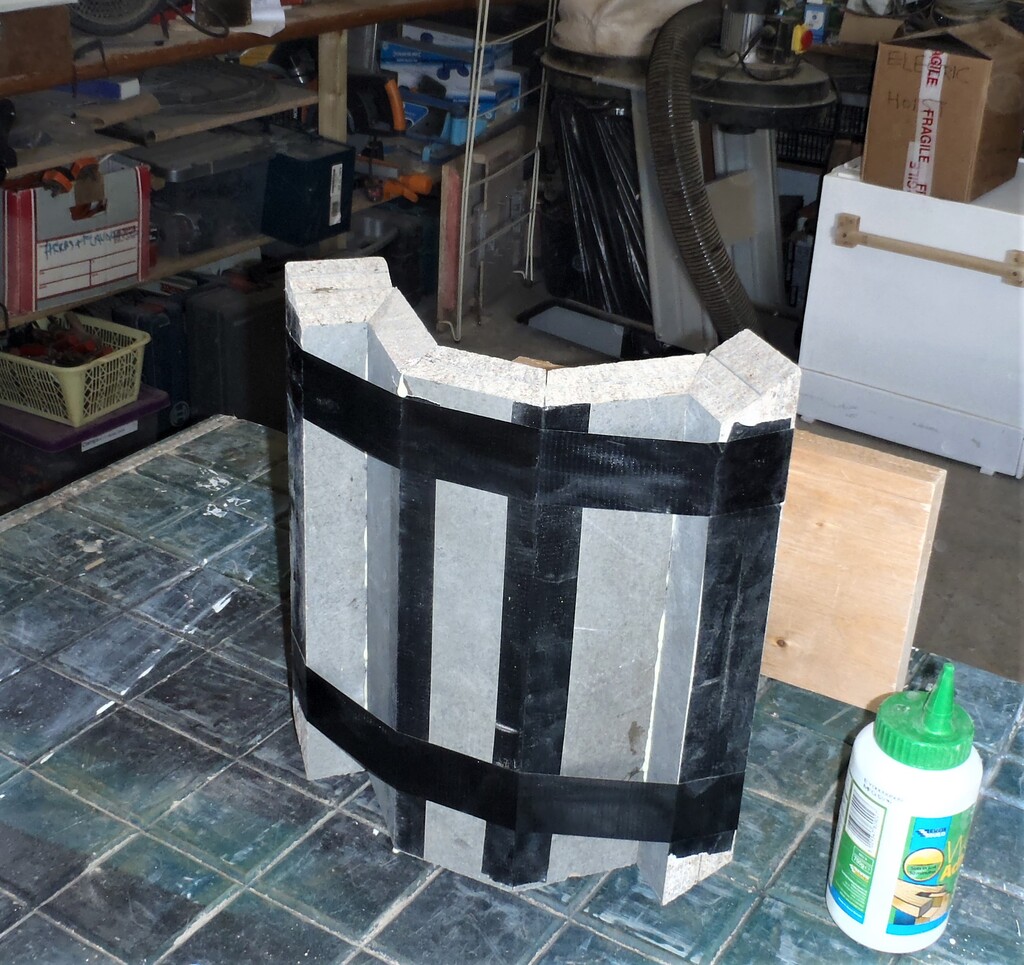
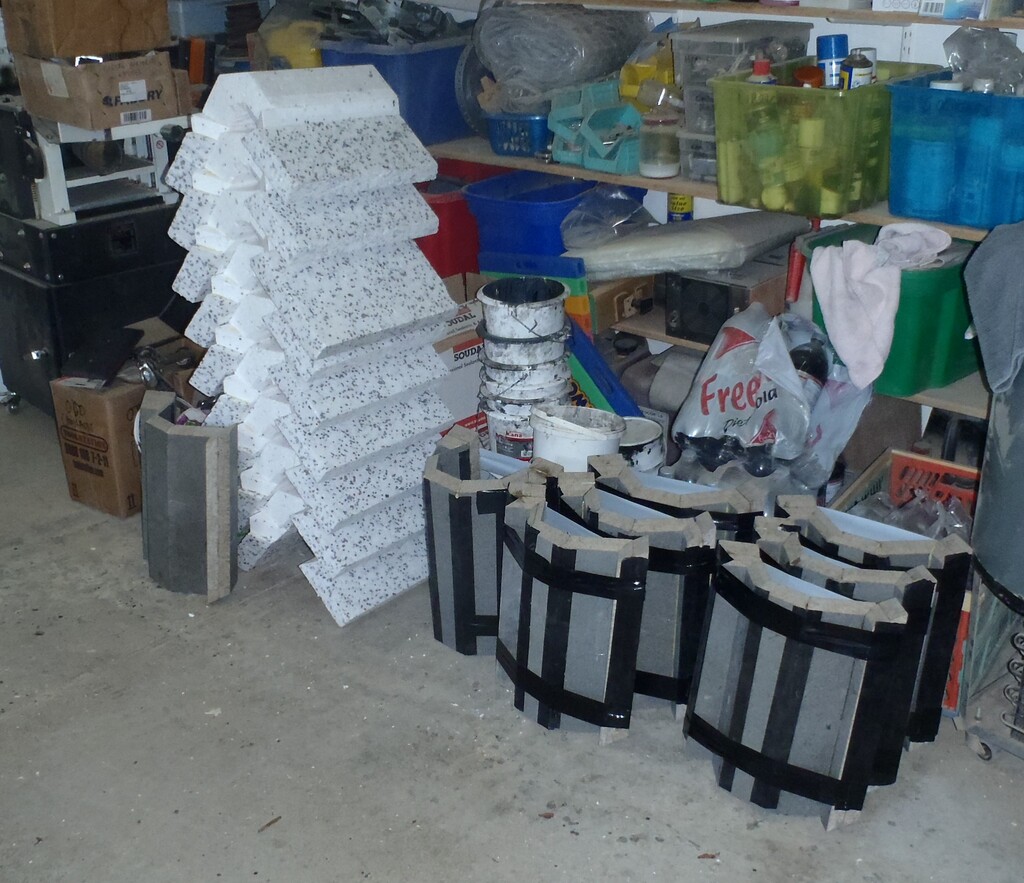
    Next week, weather permitting, we will resume putting up more cladding on the walls but if disrupted by bad weather, then we will do some preparation work to produce more Oak decorative coverings for the corners of the building.
    Templates Created and Larch Planks Starts Going up on Walls

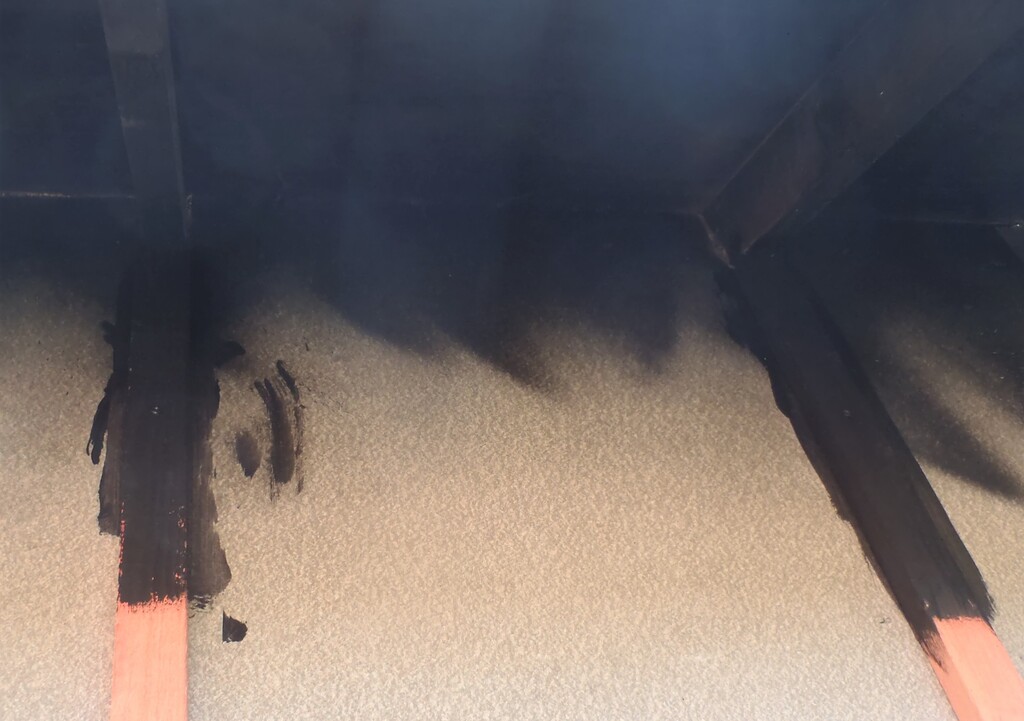
    So-we-painted-the-top-of-the-battens-black

    Templates Created and Larch Planks Starts Going up on Walls

    Right-up-the-porch-wall-


  • First Set of Larch Timber Dipped in Fire Retardant Liquid and Second Set Dipped in Oil

    This week, we finished waterproofing our dunking trough, with two layers of thin plastic sheeting we found in the shed and then covered over with a left-over length of our roofing membrane material to provide a scratch resistant surface as we dip each plank in and out.
    Then we made five spikey drain support strips, spaced apart 1.2metres so we could do every length we had from 3mtres to 5.7metres. Each strip was 1.2metres long and we used forty 100mm standard nails, hammered through the batten via pre-drilled clearance holes, spaced apart by 25mm and this would allow us to handle 39 planks at a time.

    Dunking-tank-ready-for-use

    Dunking-tank-ready-for-use


    The first job was to pour in our Flame Retardant treatment .. no actually, it was to pour in a large trug of water first, about 30 litres and leave it for an hour to make sure we don’t have a leak. We can afford to lose some tap water but not our Flame Retardant Liquid which costs £1000 for three 25litre bottles!! Link to the product
    But we needn’t had feared .. we had No Leaks! Phew!
    So we poured in two bottles of the fire stuff and started dipping. We measured the level in the trough at the beginning and it was 42mm high for 50 litres.
    We began with the widest planks first, the 150mm width and all 4 metres long.
    It was not too bad a process, dip one in, rotate in the liquid to ensure a full coating and then lift out to drain and repeat.
    First-batch-of-planks-Fire-Treated

    First-batch-of-planks-Fire-Treated


    We had started in the afternoon as the morning was spent making the spikey draining prongs. But we wanted to get all 300 planks dipped so that they could and should dry overnight before they get their second and third dunk. It was a very, very long afternoon and we finished just gone 7pm ? Phew!
    Fire-treatment-Day-1

    Fire-treatment-Day-1


    But shock! Horror! We suddenly realised that our nails were corroding and leaving black lines on our nice Larch planks! Oh **** and double damn! The Fire Treatment liquid was water based and we found that the fire proofing chemical was speeding up the whole rusting process! So we needed to clean the nails, dry them off and spray them with black metal paint to protect them. That was done at 9pm! Oh Boy!
    In the morning, Stephen found on the web a solution to remove rust marks from timber by using a solution of Oxalic acid to dissolve the iron oxide and he was all ready to order the necessary chemicals when mum said “look under on the shelf in the kitchen and you will find a fifty year old bottle” and apparently, it was a common laundry solution in getting rid of rust marks on clothing! So making up the required solution, we rubbed the rust marks on the timber .. and they disappeared .. to only leave a bright yellow smear over the spot!! Big Sigh!! What Now??! Roll eyes upwards!!
    Black-Iron-marks-on-the-timber

    Black-Iron-marks-on-the-timber

    Treated-with-Oxalic-acid

    Treated-with-Oxalic-acid

    Marks-are-gone-but-

    Marks-are-gone-but-

    it-leaves-a-yellow-stain

    it-leaves-a-yellow-stain


    It must be the fire treatment chemicals doing it! Oh Boy! We took some scraps of Larch timber and dipped them into the treatment, wiped them with the rust remover to get the yellow smear and then left them outside in the sun to see if they will bleach away. We were also thinking about sanding the surface or wire brushing it or something to get rid of the rust marks etc. That would have to be done later on.

    In the meantime, we resumed the dipping process, but in reverse, taking the planks from the drying pile (yes the planks were all dry!) and gave them their second dunk. By lunch time, we had done all the long narrow planks and to our frustrations, we saw that we were leaving black marks on the planks in addition to the rust marks and realised that the black paint we put on the previous night had not survived for some reason. We threw Our Hands Up In The Air!!! Arrgh! So after lunch, We replaced all the draining prongs with 90mm galvanised air-gun nails and made five replacement draining supports, but spaced apart by 30mm this time, affording us to handle 33 planks instead of the 39 before.
    So, mid-afternoon, we resumed again, dipping all the remaining planks and finished nearly 7pm again!! Were We Whacked!!! Gee Wizz!

    Fire-treatment-Day-2

    Fire-treatment-Day-2


    The third day of dipping, we had some good news to start off with, we saw that the yellow smear had disappeared completely! Hurray!! It seems that the yellow chemical was not very stable, at least, the test pieces we left outside in the sun had lost their yellow!! Yippee!
    With a lighter heart, we got on with the final third dip, putting our third bottle of the treatment in the trough and got on with the dunking process.

    We had been measuring the liquid level each day and we could see that we were using about 20mm of liquid for each dipping session and that was good. by the end of the third day, we had just a few millimetres of liquid left in the bottom of the trough, we had to wiggle the planks and flip them over several times to make sure they were fully coated.

    Fire-treatment-Day-3

    Fire-treatment-Day-3


    We then vacuumed out the remaining liquid, using a fine cloth filter to remove as much of the brown particles that had come off the darker burnt timbers and we manage to rescue about 6 litres, still slightly brown colour but at least, we have some ready to coat on any timber piece we want to make sure it is fire treated.
    That was the end of the third day on Thursday!

    So on Friday, it was the turn of the second pile of Larch timber that is earmarked for the front of the building and didn’t require the fire treatment process and just the oil solution. We poured in two of our four bottles of decking oil into the trough and got on dipping another 300 planks (just shy of 300 actually). It was a bit more slippery! But all were dunked in oil and stacked up over near the front of the building, ready to go outside to be mounted up on the walls.

    Oiled-planks

    Oiled-planks


    That was easy! Sigh!
    The last day was spent doing a major tidy up job in the workshop, taking out the ill-fated nails, putting tools away and sweeping the whole place. We then install the Sun Shield on the corridor and lastly inspected our water tank we got on top of our garage roof. It hadn’t been inspected for several years so while we were up there, we took a look and it was all fine.
    So that concludes our rather adventurous week!! Phew!

  • All Larch Timber Scorched and Chemical Dunk Trough Built

    The last two weeks saw the completion of scorching all the Larch cladding timber. A total of 596 planks of varying lengths from 3metres, right up to 5.7metres and different widths of 75mm, 100mm and 125mm. They all had a position in a list that describes how much scorching each had, from level zero (not touched by any flames) to a deep burn at level 5. We eventually, after having to do running repairs and improvements to the Scorching Machine (a new Motor driver heatsink amd replacement snadpaper on the drive rollers), processed all 441 Planks that needed scorching. Our canister of Butane gas, had 19kg of gas at the start. This went down to just 2kg at the end so how about that then?!

    Replaced-sandpaper-on-drive-drums

    Replaced-sandpaper-on-drive-drums

    New-Heatsink-for-motor-drive

    New-Heatsink-for-motor-drive

    All-the-scorched-planks

    All-the-scorched-planks


    The next task was to do a grand tidy up of the whole area, moving the scorching machine over to be stored away in a corner for emergencies, sweep up the brown “charcoal” dust that was produced by the scrubbing process, probably about good bucket load and a general sweep right across the middle of the building, another 2 buckets of mostly sand.

    Pile-of-removed-burnt-wood-dust

    Pile-of-removed-burnt-wood-dust

    Then, we sorted out all the scorched planks into two main piles, one for fire treatment; these planks are destined for the back of the building nearest to the boundary and the side next to the garage too. The other main pile is earmarked for the front of the building and only going to have the single treatment of being oiled. The two piles are quite similar in size.

    The last day on Saturday was spent building the basic structure of our dunking trough to apply the necessary treatments. It is a long trough nearly 6metres, 160mm wide at the bottom and the two sides gently fans outwards to a height of 100mm. Then a 4foot wide draining board was constructed all the way along one side so we can position the freshly dunked planks up on the slope and reclaim the dripping liquid and recycle it for the next planks.

    Dunking-tank-on-Saturday-13th

    Dunking-tank-on-Saturday-13th

    Dunking-tank-on-Saturday-13th

    Dunking-tank-on-Saturday-13th


    Next week, we will seal the trough with plastic layers to retain the liquid and then start treating the Larch timber.

  • Scorching Machine is Complete

    It took another three weeks to finish off tweaking the design of the scorching machine, with many iterative changes as we test and adapt the machine (As usual things take much longer than you expect, but I have enjoyed the change of work).
    We started by moving the machine into the house (after cleaning up a bit), we then made a extension to the input side to guide and support the plank entering the machine.

    Input-rollers-on-the-machine

    Input-rollers-on-the-machine


    We did some test runs, and we can vary the amount of “burn” from a black highly charred finished to a gentle pale scorching. We have selected 5 levels of speed, all the way from a very slow 10mm per second (very highly burnt) to a much quicker 40mm per second to produce the pale finish. We also have the option of no scorching at all and this being our sixth level.
    Our-six-scorch-levels

    Our-six-scorch-levels


    We put up a block of different burnt timbers on our house wall in the full sunshine to examine it and decide on what patterns we might like on different walls, taking into account their compass orientations, the windows sills and headers etc.
    First-set-of-graduated-boards-on-a-wall

    First-set-of-graduated-boards-on-a-wall

    We-decided-to-flip-the-bottom-rows-

    We-decided-to-flip-the-bottom-rows-


    The next job was to build a spreadsheet of all our walls (fifteen of them), with their compass orientation, whether it is under a porch, then divide the wall up into three vertical sections (under the windows, beside the window itself and lastly above) to allocate what level of scorching is desired and then find solutions to the pattern of plank widths to fit into each section. This resulted in a table of quantity’s vs plank width and scorch level.

    We started to process the wide planks first (they are nearest) and we had lightly scorched (#1) some planks when a plank got stuck. Shaun was running the machine whilst Stephen was wire brushing the finished planks so We did not notice for a while until Stephen looked over and saw the smoke poring out! We shut off the burners and when we examined the machine we found one of the motors had sheared it’s flexible connector…

    Drive-adapter-sheared-off

    Drive-adapter-sheared-off


    We repaired the machine and carried on but a few planks later we had a jam again (the plank sometime wanders off or bends), we caught this one earlier and no damage was done. At this point we decided (being nerds and all) that we would add sensors to the machine to detect any stall and sound an alarm. In hind sight we should just have carried on whilst keeping a good eye on the machine as getting sensors to work reliably took 2 weeks (but that’s hindsight for you)!
    The machine needed to know 3 things – When the plank enters, when it leaves and if its moving. The first two should be simple just put a switch near the plank to be pressed when the plank is in. The movement detector devised initially was a metal wheel on a shaft which had a sensor measuring the shaft rotation, the shaft being mounted on a pivot which kept the wheel in contact with the plank.
    Input-plank-sensor-switch

    Input-plank-sensor-switch

    Rolling-encoder-mechanism

    Rolling-encoder-mechanism


    So having built the sensors and fitted them it took a day to write the software to run the machine and start testing. The metal wheel did not run very consistently on the plank even after filing some ‘teeth’ on on it so after a while a new system was devised to put encoder disk and sensors on the pinch rollers which force the plank against the drive rollers (an all together better way but you don’t always think of the best way first). This was fabricated, installed and worked reliably.
    Encoder-disk-and-sensor-on-a-pinch-roller

    Encoder-disk-and-sensor-on-a-pinch-roller

    Protecting-the-plastic-encoder-from-the-heat

    Protecting-the-plastic-encoder-from-the-heat


    The next problem was that when we turned on the burners the output switch got too hot! Again a different system was needed, we needed to get the switch away from the heat so various pivoted arms where fabricated, tried and modified. But after a long time trying to get them to work reliably we gave up on this idea as well.
    Wheel-lever-output-switch

    Wheel-lever-output-switch


    A non contact sensor was needed and a light sensor placed just below the plank would give different readings to show when the plank was present or not. This was fabricated and fitted and worked! We finally had a working machine and just a bit of fine tuning of the software was done. On the last Saturday a revelation was had! in that there had always been a lever to activate a switch built in to the machine from the beginning. The output flame guard was hinged on a rod which come out the side of the machine and this rod was turned when the flame guard was pushed up by the plank. This rod happened to have a bent end which was ideal for pushing a switch so we fitted a switch so now we have two output sensors which work…
    Optical-output-plank-sensor

    Optical-output-plank-sensor

    Output-switch-using-the-flame-flap

    Output-switch-using-the-flame-flap


    So we finally have a machine for processing the planks, which will probably only take a week!
    Final-Control-board-and-wiring

    Final-Control-board-and-wiring

  • Slate Skirt Complete

    By Tuesday lunch time, we had finished gluing up all the Slates that forms the Skirt on the wall running right around the house. Some 300 slates were stuck onto the polystyrene padding layer so two thirds are above ground and the remainder is in the dirt.

    Slate Skirt Complete

    Slated-along-O-and-around-the-corner-to-P1


    Over the remaining days of the week, we were grouting the slates in sections using a anthracite coloured (dark grey) cement based grout, which we used up 17.5kg of grout. We had to order another 10 kg because we had not realised to how much more grout these slates took to fill the joints (the bevelled edges were facing backwards so had a hollow to fill up). The new supply arrived very quickly on Thursday morning. After each section was grouted we went along and removed any excess grout with a wet sponge, then as each section matured and hardened overnight, that section was scrubbed with a rough ‘scotchbrite’ pad and washed using our garden hose connected to a brush to provide a constantly running clean water.
    Slate Skirt Complete

    Slates-before-final-scrub

    Slate Skirt Complete

    Grouted-corner


    We had a side issue to deal with on Thursday with the repair of the garden shed’s roof, see Garden Shed Repair
    But in the afternoon, we managed to fill in all the way along the front of the building, pushing the sandy soil back into the trench and level off the area in front of the slates
    So by Saturday mid-afternoon, the whole Slate Skirt was all grouted, all washed and the soil pushed in and levelled. Also half of it had the non-drying black mastic applied to the top of the skirt to seal it off against any chance of rain water getting inside behind and perhaps freezing during a bad winter and causing damage.
    Slate Skirt Complete

    The-finished-skirt-1

    Slate Skirt Complete

    The-finished-skirt-2

    Slate Skirt Complete

    The-finished-skirt-3-

    Slate Skirt Complete

    The-finished-skirt-4

    Slate Skirt Complete

    The-finished-skirt-5


    The last few hours of work for this week was to install one of our window frames with our newly arrived grey PU sealant. We made wedges to help jam the frame into the house holes when they are in the correct position and a couple of spacers to make sure the top edge, the header, is held at the right distance away from the wall.
    We first charged all the surfaces (after brushing off all the dust first) with a thin layer of the sealant and then slid the framework into the hole. Then all the outside exposed joints were thoroughly filled in with more sealant and scraped smooth at a slight angle to improve the bulk strength and make it long-lasting. We had allocated three tubes (standard 300ml size) to each of our twelve windows. We had about a quarter of a tube left so instead of using more of the grey stuff, we decided to use some older white PU sealant to put a thin bead around the inside joint.
    Slate Skirt Complete

    First-window-framed-installed

    Slate Skirt Complete

    Detail-of-frame-sealant


    That concludes our work for this week! The last of the mastic application will be put on the next week (we couldn’t do it immediately because the washing operation left the slates and walls still wet) and we will carry on installing more oak windows frames as well.

  • Slate Skirt Continues to Half Way

    We started the week reviewing our complete set of task lists, removing those ones that we have done, and adding new ones plus doing some other chores like shopping. So after lunch, we resumed work on creating the Skirt to run around at ground level. The first job was to mark the wall at each corner (both inside and outside ones) and then snap a chalk line between all these marks so we had a consistent line to follow. Then we installed the eight cement corners, or rather the remaining seven of them that go in the inside facing corners that covers up the downpipe coming from the gutters.

    Slate Skirt Continues to Half Way

    Cement-board-cover-for-G-downpipe


    The next two following days were spent installing the polystyrene corners and strips. The nine outer corners went on first, removing any bottoms of the cladding battens where they were too long (and we resprayed the fresh cut ends with more wood preservative treatment) and in a couple of places, we had to stick on some extra thin padding layers onto the wall surface because the concrete blocks didn’t quite align up to the wooden wall above. Each corner was held on using two plastic nails and mastic along the top to help seal and stick it down. Then the rest of the day and half of the following day was spent putting up the 400mm high strips fitting in between each corner piece. We are drilling a 8mm diameter hole through the polystyrene material and into the concrete block behind and then a plastic nail was hammered in. We are spacing them out at about 200mm apart and our 400 nails we bought was enough at the end of the day, we had about 60 of them left!
    Slate Skirt Continues to Half Way

    Polystyrene-skirt-base-1

    Slate Skirt Continues to Half Way

    Polystyrene-skirt-base-2

    Slate Skirt Continues to Half Way

    Polystyrene-skirt-base-3


    The remaining of the day, the Wednesday afternoon, and a couple of hours on the following Thursday morning, was spent slicing up a load of slates into narrow strips, 55mm high by 200mm wide. These will serve the job of covering up the little slopes along the top on the new polystyrene skirt.
    Slate Skirt Continues to Half Way

    Over-300-strips-of-slate-for-the-tops-of-the-skirt


    Then we made a smaller pile of vertical 95mm wide by 300mm tall pieces which will cover the octagon corners, the face of them, and then even smaller pieces to do the slopes on top too.
    Carrying on with this making slates pieces, the next shape was the narrow vertical strips for the outer corners and their associated little rhomboid piece on top again.
    By the end of the day, we made also the left and right handed narrow strips that has a 20degree angle sliced into them, a whole heap of them.
    Slate Skirt Continues to Half Way

    Octaganal-parts-for-corners

    Slate Skirt Continues to Half Way

    Top-strips-for-outside-corners


    After a morning spent on other chores, we resumed Friday afternoon on finishing off slicing the last dozen or so special shaped slate pieces.
    Slate Skirt Continues to Half Way

    Top-strips-for-inside-corners


    Then we got on with the task of gluing all these slates pieces onto the Skirt! We started along the front of the house at the Conservatory plus around the corner along the “A” wall and in the few hours, we managed to get 30 slates up on the polystyrene strips, plus three corners done too.
    Slate Skirt Continues to Half Way

    Slates-on-glued-on-Inside-corner

    Slate Skirt Continues to Half Way

    Slates-glued-on-Friday


    For the last day of the week, we managed to do a further 150 slates, completing the “A”, “B”, “C”, “D”, “E” and “H” wall sections. Each length of wall was measured and then divided up into slate width plus a gap and then adjusted so that the beginnings and ends had larger even off-cuts pieces and avoid having very small narrow strips. We are mixing about 10kg of the cement based tiling adhesive for approximately every 35 slates, this means we now have used 54kg or just under three bags so far. We have five more bags to go, 100kg in total, so we should have enough!
    The final job was to clean the surfaces and the gaps between the slates, ready for the grouting.
    Slate Skirt Continues to Half Way

    Slates-glued-Saturday-1

    Slate Skirt Continues to Half Way

    Slates-glued-Saturday-2

    Slate Skirt Continues to Half Way

    Slates-glued-Saturday-3


    We will finish off Roselea’s Skirt next week so she can feel good that any dirty rainwater won’t splash up on to her cladding and cause some upsets, disease and rot!

  • Creation of Slate Skirt Progresses

    On Monday we went off to the local DIY store to buy a sheet of 75mm thick polystyrene foam board and we made a little portable “hot wire” cutter! We had to slice up the 8foot by 4foot sheet so it would fit inside our car! We cut 400mm wide strips, three of them and only just got that in!

    Creation of Slate Skirt Progresses

    Portable-Hot-Wire-to-cut-the-thick-Polystyrene-at-BQ


    After another interruption, we resumed work on doing our Slate Ribbon today with the task of grouting the gaps between the slates.
    Creation of Slate Skirt Progresses

    Slates-Grouted-1

    Creation of Slate Skirt Progresses

    Slates-Grouted-2


    First thing this Tuesday morning, we went to apply the black mastic sealant along the top edge of the slates, so any rain water that manages to get pass the cladding, will get diverted away from the wall and not dribble behind our slates. Then after lunch, we scrubbed the slates to get rid of the grouting smears and then put back most of the sandy soil and levelled out the ground. We have left just the two ends to finish off when we have made the special corner pieces.
    Creation of Slate Skirt Progresses

    Dirt-Back-infront-of-the-slates


    Talking about the special corners, that is what we have been making for the rest of the week. All day Tuesday was slicing up our 75mm (3inch) polystyrene foam board into various shapes, all featuring the octagon angle of 22.5 degrees. It was a case of passing through the hot wire which was set at the required angle (either 22.5 or 30 degrees, depending on the outcome required) and producing 27 octagon parts, 18 parallelograms pieces and 9 pairs of left and right hand strips.
    Creation of Slate Skirt Progresses

    Thick-polystyrene-Octagon-parts-being-cut

    Creation of Slate Skirt Progresses

    New-spung-loaded-hot-wire-for-cutting-22

    Creation of Slate Skirt Progresses

    All-the-parts-for-the-external-corners-cut


    After retiring back to the workshop, we proceeded to glue (using PU slow reacting type) to stick together 9 sets of the octagon pieces, three of them, to form a combined 90 degree corner object.
    Creation of Slate Skirt Progresses

    External-corner-Part-1-glued


    The next day, Wednesday, we salvaged a set of 12mm cement board pieces and one whole new sheet, to make a set of double layer sets. We wanted seven sets of 400mm high by 600mm wide and one odd set, also 400mm high but wider. The last one was using the salvaged pieces. We used our battery circular saw out in the house, on two trestle tables and among a cloud of cement dust, we sliced, sliced and sliced away to produce a heap of rectangular pieces. All of them were glued using our old PU slow glue and then clamped together to flatten everything together.
    Creation of Slate Skirt Progresses

    A-pile-of-glued-pairs-of-cement-board


    we then went back to the workshop to glued another 9 sets of left and right hand combined parts using the 50mm thick strips and the special parallelograms using the slow old PU glue (which we finally finished off!). We used 4inch nails, three in each, to secure the two pieces together while the glue cured.
    Creation of Slate Skirt Progresses

    External-corner-Part-2-glued


    For the rest of the afternoon, while the glue needed its full 24 hours before ready to be handled, we went outside to dig and remove away a spade worth width of soil, and down to the rainwater pipes, from the wall of the house, so we are ready to install the polystyrene strips and the new special corners. We got almost all the way around the whole house, working from the back, up the side and half way along the front.
    Creation of Slate Skirt Progresses

    Base-of-the-wall-dug-out-1

    Creation of Slate Skirt Progresses

    Base-of-the-wall-dug-out-2


    Thursday saw the completion of the special corners where we glued the two “wings” to the central module bit, using our usual old slow PU glue.
    Creation of Slate Skirt Progresses

    A-finished-external-corner


    While that was curing, we finished off the digging outside, going along the front and around the corner to the stud wall for the conservatory.

    We had some interruptions in the day but we finished off by surveying all our inside corners and making sure that we had the correct dimensions, but only to discover that our attempt of putting on sticking out plywood strips didn’t quite turn out to be so accurately positioned as we were expecting. It will need a solution so we are back to the drawing board to discuss and analyse the problem. In conclusion, we decided that some will have to be adjusted (which is difficult because they are glued into place, so we will have to saw off the plywood pieces and put on new ones.

    Creation of Slate Skirt Progresses

    Pipe-cover-support-battens-for-G


    On Friday, we had a good tidy up of the workshop so we could use our circular bench saw for the next job, which is to slice the cement boards that we made the other day, with a 30degree angle along the top and bottom edges.
    Then we created a wooden jig to provide a right angle framework to support the track saw so we can achieve good accuracy and consistent perpendicular (right angle) cuts, with various tilt angles.
    Creation of Slate Skirt Progresses

    Cross-cut-jig-for-Track-Saw


    We needed a mixture of 22.5degrees and 45degrees edges, depending on where the piece fits into the overall object when completed.
    There are 10 regular octagon parts, with a face width of 92mm, and then 16 pieces of side wings plus a heap of narrow 50mm wide strips.
    Creation of Slate Skirt Progresses

    All-the-internal-corner-parts-cut

    Creation of Slate Skirt Progresses

    This-all-the-waste-from-the-glued-boards


    The last day, Saturday, saw the completion of slicing operation of the double layered cement boards, into all the jigsaw pieces and then we glued together all the parts to make seven inside corner pieces and one special one for the “G” downpipe.
    Creation of Slate Skirt Progresses

    A-internal-corner-taped-together-ready-to-fold

    Creation of Slate Skirt Progresses

    Internal-corner-Folded-up-and-glued

    Creation of Slate Skirt Progresses

    All-the-corners-made-and-ready-to-install


    We had enough time left in the day for us to go and take our test piece that we made before lunch with fast acting glue, and get it installed into the “Q1” corner (the Conservatory stub wall and the first part of the Great Room wall that looks out over the patio .. or it will do when we have built it!). We actually went around all the inside corners around the house and test fitted our piece and it was not so bad as we first thought. Yes we had deliberately made the whole piece bigger by half an inch, but it is good that most now fitted.
    So back at the “q1” corner, we proceeded to place the piece around the downpipe, sitting on a brick to get it positioned just right and then drilled the four holes. We applied some blobs of mastic in and around the drill holes and along the top edge and then screwed the whole thing tight to the wall.
    Creation of Slate Skirt Progresses

    Internal-corner-installed


    Next week, we will continue installing all these parts we have made in the workshop, along with all the strips of the 50mm polystyrene foam and cover all of it with slates; to form the skirt around the whole house.

  • Oak Windows Frames Ready, Slate Ribbon Started

    We resumed the task of getting our Oak Window Frames prepared, ready to be inserted into the house. The next job was to waterproof the inner section of the frames where the glass will sit so that we have extra protection against any incursion of rain water which does not drain away fully. All twelve frames were coated in a semi-flexible polyester resin dyed grey so we could see it (it will be hidden by the glass and beading), to spot any imperfections. Each frame was given a final rubbed down using a rough paper to improve grip for the resin, especially the aluminium material and then masking tape was laid everywhere that wasn’t going to be painted to protect it against dribbles etc.
    We used about 350g of the resin (which contains 20% of the flexible agent) per large frame and a little less for the three smaller ones. All the inner surface on all four sides were done, and then also the outer surface was coated too to both aid the same water protection (especially up on the header) but also to aid a better seal when we come to glue the window frames into the house itself. It took about 3 days to complete all twelve of them, sanding them and applying the masking tape in the workshop, while the smelly painting operation was done in the main house on a temporary work table (made on a pack of polystyrene foam boards!!) and each frame laid out across the floor to dry and cure.

    Oak Windows Frames Ready, Slate Ribbon Started

    Window-frame-after-painting-with-Resin


    The next job was to clean every window hole around the house, to sand away the weathering effects, especially the bottom edge that had the full blast of rain and sun on it for the last year or so. We also cut a chamfer on all four edges to provide a thicker sealant bead when we come to glue the frames into place.
    Then every window was test fitted to make sure that they will slot in. Most of the back windows had to have some minor adjustments done to the bottom edge, removing material until the frame went in and sat nice and solidly. After that, all Oak frames sat tall and straight, none were leaning over or had to be pushed over. Just Nice! We remembered to reapply the chamfer along the bottom edge too!
    Oak Windows Frames Ready, Slate Ribbon Started

    Completed-frame-test-fitting


    The final touch up operations was done to half of the window frames where the resin had reacted to the Oak timber in some fashion so those affected had their sills rubbed and cleaned with acetone and a second coat was applied. All is well now.
    Oak Windows Frames Ready, Slate Ribbon Started

    A-line-of-Windows


    While we wait for a supply of PU grey coloured sealant for gluing and sealing the frame into the wall to come (notwithstanding the troubles of COVID-19 crisis), we got started on implementing our Slate Ribbon that will go around the bottom of the wall, underneath the cladding and half buried into the dirt. This is our solution to preventing splashes of dirty rainwater from reaching our Larch cladding planks and reducing the chances of rot and other unsightly defects (and using up some of our spare roof slates). It will be made of a layer of 50mm thick polystyrene foam which is stuck to the wall with mastic glue and also a large plastic “nail” driven through and into the concrete block.
    Oak Windows Frames Ready, Slate Ribbon Started

    Plastic-Nails


    The polystyrene sheets were sliced up using our homemade “hot” wire cutter we made in our large flat top insulation cutting table.
    Oak Windows Frames Ready, Slate Ribbon Started

    Slicing-the-Polystyrene

    Oak Windows Frames Ready, Slate Ribbon Started

    Hot-wire-cutting-the-V-


    And we proceeded to slice up eleven of the twelve sheets we had bought. Each strip having a 30 degree angled top and 400mm wide. We got three strips out of each sheet so we made 33 in total.
    Oak Windows Frames Ready, Slate Ribbon Started

    33-Beveled-Strips-of-Polystyrene

    The final job of the day (Friday) was to mount two fixing points in the places where we are going to have a privacy gate to section off the public portion of the garden and drive way from our private gardens. The wall needed an extra plank fitted to the outside surface which will serve as the anchorage point for the fencing.

    Oak Windows Frames Ready, Slate Ribbon Started

    Fence-attachment-on-H-Wall


    This 95mm by 45mm timber plank goes up from the level of the cladding battens and stops at the 2metre point, this being the height of the fence. We reinforced the wall by putting in three horizontal noggins behind the cement board, inside the wall.
    Oak Windows Frames Ready, Slate Ribbon Started

    with-noggins-in-support


    It was stuck up with PU tough glue and four long screws.
    The final day was starting the process of creating our Slate Ribbon around the house, digging the soil away from the wall (we started right over the far side on the “P1” section), scrubbing the surface and then putting mastic on the wall to stick the polystyrene strips to the wall, and then drilling an 8mm diameter hole straight through and into the concrete blocks. A plastic “nail” was then driven in to anchor the foam strip into place.
    Oak Windows Frames Ready, Slate Ribbon Started

    First-strip-of-Beveled-polystyrene-installed

    Oak Windows Frames Ready, Slate Ribbon Started

    Plastic-nailing-in-progress


    Then we sliced up some slates into 55mm wide strips and proceeded to stick full size slates (using a cement based tile adhesive) directly onto the polystyrene surface and then the little strip on the slope.
    Oak Windows Frames Ready, Slate Ribbon Started

    The-slates-tiled-onto-the-Polystyrene


    The last hour was to analyse and design the the shape of the foam block that will reflect the thicker parts of an outer corner where there will be an additional oak octagon cover going around the corner. We will buy some 75mm thick foam board on Monday and then slice it up into the complex shapes needed to form the required octagon pattern that marries the Slate Ribbon going around the corner to the next wall section.
    Oak Windows Frames Ready, Slate Ribbon Started

    Outside-corner-Polystyrene


    So this week saw our first full 6-day work for ages! All our usual meetings and other commitments have been cancelled due to the COVID-19 outbreak! Something positive to come out of all this madness that has hit the world! Phew!!

  • All Window Frames Created and Installed New Better Looking Fencing for Loke

    For the start of the new week, we sanded down all the wood filler we had applied to the Sill and Header pieces where there were small knot holes and in one case, a very big knot hole on the under side of one of the sills.

    All Window Frames Created and Installed New Better Looking Fencing for Loke

    Large-knot-hole-after-filling-and-sanding


    Then we started making a jig to hold the various oak pieces that makes up our Window Frames. We have nine large windows to put together so having this jig will greatly help us maintain tight alignment and good square right angles, consistent across all windows.
    All Window Frames Created and Installed New Better Looking Fencing for Loke

    First-try-of-the-assembly-jig


    Then over the next couple of days, we proceeded to build those nine frames, using the tough thick PU slow setting glue for the major joints in all four corners and the faster thinner PU glue to hold the four aluminium strips into place around the edge, ready to support the triple glazing unit.
    All Window Frames Created and Installed New Better Looking Fencing for Loke

    The-first-window-is-assembled

    All Window Frames Created and Installed New Better Looking Fencing for Loke

    and-waiting-for-the-glue-to-cure


    Then we adjusted the jig to do the two smaller window frames and finally the smallest one too.
    All Window Frames Created and Installed New Better Looking Fencing for Loke

    Last-window-assembled

    All Window Frames Created and Installed New Better Looking Fencing for Loke

    All-13-Windows-assembled


    So that being done, and while waiting for the glue to set, we got on with another job, something completely different this time, putting up a new fence along our Loke to hide and block off the view of our mini-digger and some plies of old pallets etc. We bought the cheapest fence panels we could find, just £100 for five 6foot square panels and six metal post sockets to take 75mm square wooden posts. We made those posts by using six planks of our treated 63mm CLS timber and doubled them up to form 76mm by 63mm posts. We glued the two pieces together and once set overnight (we used some really old slow setting PU glue), we then trimmed the end to form a neat pointed tops. Plus also we stuck on a slab of cement board, just the right size to pad out the bottom of the post so it was the correct dimensions to fit nice and tightly into the metal sockets.
    After that, we dunked both ends in timber preservatives, making sure the bottom ends had a good 30 minutes sitting in the liquid.
    While that was going on, we went outside to clear away part of the old plastic mesh fence and pulled out several old wooden posts. Then collected 21 concrete blocks which will form the bottom layer underneath the panels, to raise them up off the dirt. The original round 3inch post was pulled up and moved to be right next to the hedge and we used this to tie on a string to make a taut straight line to align everything up. We were very lucky these last few days with lovely weather and that enabled us to go out and install our new fence panels, with their six new homemade wooden posts plus getting the concrete blocks set into the dirt in a level straight sections, one for each panel, before stepping up. The Loke is on a slope of about 2or 3 inches for every 6 feet, so our panels steps up each time.
    It was all fairly simple to do, getting the posts into place using a double spirit level gadget that measures the verticality in both directions at once. The metal sockets have very long spikes that easily slides into the ground and two nuts and bolts to clamp the sides of the socket onto the post.
    We made a heap of rotating toggles to hold the fence panels on the inside and nailed up long strips (about an inch square) on the outside to make a neat presentation for the whole fence line. These toggles allows us to quickly release each panel, just in case, we have a delivery that needs access to unload items.

    Section-of-fence-to-block-the-view-of-our-junk-from-our-neighbor

    Section-of-fence-to-block-the-view-of-our-junk-from-our-neighbor


    We will make a simple ‘gate’ to fill in the remaining gap that we left behind to stop most people from just accidentally wandering into our garden but have this gate to allow us to get out onto the Loke if we want to.

    Finally, for the last day, Saturday, we got back to cleaning our newly glued window frames, rubbed down all the surfaces to remove any dribbles and cleaned the aluminium strips. We now have a heap of solid window frames, waiting for the next task to be performed on them, which is to apply a waterproofing coating of resin in and around the area where the glass will be situated, especially down on the sill so that any rain water that gets passed the outside beading holding the glass in, will just run straight back out again and not sit on the wooden surface and potentially cause damage with rot.

    But First of all, we did some testing with a special blend of polyester resin where we added twenty percent ‘flexible’ resin which makes the finishing resin layer much more flexible so it won’t crack with movements. We painted some small pieces of wood, one was a thin strip and the second one was two pieces screwed together to form a slightly loose right angle joint. After we had finished cleaning the window frames, we got out our prototype narrow frame to give it a coat in this special resin. We applied masking tapes right around the frame to protect against any dribbles and had only an area of 75mm exposed, which got coated in the grey flexible resin. We didn’t use any fibre glass as we just wanted to seal the oak timber to protect it from rainwater.

    All Window Frames Created and Installed New Better Looking Fencing for Loke

    Testing-the-resin-coating-of-the-frame


    We will see how that looks on Monday and if is ok, we will proceed to do all the other twelve window frames too.

  • New Version of Larch Cladding Scorcher Machine created, Eves Got Second Coat of Black and Windows are Progressing

    We started our new week in the workshop to continue developing the scorching machine. We decided to completely dismantle our first version and start over again. Using our new found knowledge and ideas, we put together a new cleaner version and got the two input and output rollers mounted and ready to be connected to drive motors (which are on order).

    New Version of Larch Cladding Scorcher Machine created, Eves Got Second Coat of Black and Windows are Progressing

    Larch-processor-Mk2-Day-1

    New Version of Larch Cladding Scorcher Machine created, Eves Got Second Coat of Black and Windows are Progressing

    Larch-processor-Mk2-Drive-rollers-with-counterweighted-pressure-roller


    Then we got our four gas flame torches and connected new pieces of hose and reconnected back to the gas tank and did some burning test to see how the flame came out of each fan like spreader, to ensure that we would be burning the total width of the wood passing under the flames. But unfortunately, one of the four torches is of a different manufacturer and it behaves a little differently. Also we think that one of the fan spreaders is mixed up with the odd one out and the flame shape is different and not producing a same result.

    The following day, Tuesday, had a small interruption (the septic tank was serviced and emptied), we resumed on looking at the gas torches and started analysing each flame pattern, swopping parts around, comparing the results and concluded that there are subtle differences in the manufacturer’s output. We were able to improve one of the torches by expanding the air holes in the gas mixing chamber and increased the oxygen supply to get the flame much more bluer and more powerful. But doing the same trick to the other ‘poorer’ torch didn’t have the same desired effects. Under the magnifying glass, we could see on the brass nozzle injector, that the tiny little hole (less than 0.3mm in diameter) were not consistently centred and perhaps not even straight. But we decided that three were producing a good strong flame and with the spreaders, they will do the bulk of scorching the large area of the Larch timber and the fourth torch with the weaker flame will do the angled edge instead.
    So rebuilding four individual torch mounting blocks, and putting them on to a piece of plywood, we took it over to our plank moving mechanism and fixed it at an angle of about 30 degrees downwards so the flame would attack the surface of the Larch as it goes pass.

    New Version of Larch Cladding Scorcher Machine created, Eves Got Second Coat of Black and Windows are Progressing

    Larch-processor-with-torches-mounted

    New Version of Larch Cladding Scorcher Machine created, Eves Got Second Coat of Black and Windows are Progressing

    Larch-processor-Burning-torches-closeup

    New Version of Larch Cladding Scorcher Machine created, Eves Got Second Coat of Black and Windows are Progressing

    Larch-processor-Torch-hose-assembly


    This is as much as we can do at this stage, because we need the motors we got on order, to help control the movement of the plank through the flames to get a consistent scorching effect. Our test run we did today was just by pushing the Larch through by hand and it was quite obvious in how the burnt surface varied along the plank. We also noticed that the middle torch burner wasn’t as effective as the other two neighbouring ones and therefore there was a paler strip being generated down the middle. We will have to make some adjustment later on when the motors arrives.

    For the remaining of the day, after tidying up the workshop, we got back to preparing our new windows. We got all our aluminium strips in from our storage rack, and started slicing them up into all the required lengths to make up the twelve windows frames we are going to make. We made nine 1612mm lengths and twenty-four 1637mm lengths.

    On the Wednesday, we discovered that the weather was very calm and actually reasonably warm (at 10°C!!) so we switched tasks and got on with doing the second coat of the black acrylic paint under our Eves. The two Porches got their first coat and that used up our second 5litre tin of paint! A quick trip out to the local DIY store and bought our third tin and used half of it going around all the Eves, making sure that we now got a solid black coverage. We even did the boxing that makes up the Downpipe Channels.

    New Version of Larch Cladding Scorcher Machine created, Eves Got Second Coat of Black and Windows are Progressing

    Its-black-under-the-front-porch

    New Version of Larch Cladding Scorcher Machine created, Eves Got Second Coat of Black and Windows are Progressing

    and-under-the-side-porch


    To finish off the remaining paint, we painted our two temporary doors (the side door and the front door) and they are both now black.

    The for the rest of the day, we were back in the workshop to finish slicing up the aluminium strips into their required lengths, a further nine pieces of 1707mm long, two lengths of 1097mm, two lengths of 1002mm and finally, a 900mm and 805mm pieces to finish off.
    Then the drilling operation got going; making 3.5mm holes with a countersink, spaced apart by 160mm and 7mm off from the edge.

    New Version of Larch Cladding Scorcher Machine created, Eves Got Second Coat of Black and Windows are Progressing

    Drilling-and-countersinking-the-aluminium-strips


    We got through all 48 strips, drilling over 600 holes in total. All the holes were cleaned with a deburring tool and any sharp ends were filed off.
    New Version of Larch Cladding Scorcher Machine created, Eves Got Second Coat of Black and Windows are Progressing

    Strips-all-drilled

    New Version of Larch Cladding Scorcher Machine created, Eves Got Second Coat of Black and Windows are Progressing

    with-extra-holes-at-the-ends

    New Version of Larch Cladding Scorcher Machine created, Eves Got Second Coat of Black and Windows are Progressing

    Making-a-lot-of-swarf


    The next job was to recalibrate our template module that guides our router machines along the vertical Oak side of the window frames, putting in T slots. Our prototype window revealed that we had a slight misalignment between the left and the right sides and yes indeed, we could detect a difference to where the ‘end blocks’ were located. So we adjusted those by a tiny bit (0.75 mm or 1/32″ !!) and now the two ends are balanced.

    We did all one side first, twelve of them, double checking that the timber piece went in the correct way around and proceeded to cut five T slots in each piece.
    Then got all the other twelve pieces done with their T slot cut too.

    New Version of Larch Cladding Scorcher Machine created, Eves Got Second Coat of Black and Windows are Progressing

    Routing-keyhole-slots-in-the-window-sides

    The next job was to wash all the metal strips, all 48 pieces, with hot soapy water to remove the coating of the drilling coolant solution (the kitchen got rather wet, all over the floor and worktop!) so the glue will work at maximum strength, adhering to the oak timber.

    New Version of Larch Cladding Scorcher Machine created, Eves Got Second Coat of Black and Windows are Progressing

    All-the-sides-with-slots-and-the-aluminium-strips

    Then all the sill and header pieces were fetch from our main house where they have been waiting for this moment, got a thorough sand to remove any oxidation effects for being exposed to air for well over six months. But one of the little jobs was to glue in little triangular pieces into the headers, to block off a gap that was visible when the octagon wings were installed. We glued 24 pieces and nailed them into place and after lunch, power sanded the area to remove the glue and any excess wood to get a smooth finish.

    New Version of Larch Cladding Scorcher Machine created, Eves Got Second Coat of Black and Windows are Progressing

    Gluing-infils-on-the-window-headers


    We also got done was to make a jig frame structure to hold and position the four elements of our window frame so that they are always right angled to each side and also aligns up from sill to header too. The basic design is done and we will add further pieces to it to hold the sill and header pieces.
    New Version of Larch Cladding Scorcher Machine created, Eves Got Second Coat of Black and Windows are Progressing

    Start-of-a-jig-to-assemble-the-windows


    The last thing that got done for our week’s work, finally, was to fill little holes in the oak sill pieces and some of the header ones too, using a mixture of polyester resin and wood sawdust. This was shoved into the various sized knot holes and we will rub down these repairs next week.
    New Version of Larch Cladding Scorcher Machine created, Eves Got Second Coat of Black and Windows are Progressing

    Filling-some-surface-defects-in-the-Oak-sills


    It was a good week of work with only one afternoon of interruption so we got a lot done. Next week, hopefully, will be another good week and we should get our twelve window frames created.