For the start of the new week, we sanded down all the wood filler we had applied to the Sill and Header pieces where there were small knot holes and in one case, a very big knot hole on the under side of one of the sills.

Large-knot-hole-after-filling-and-sanding
Then we started making a jig to hold the various oak pieces that makes up our Window Frames. We have nine large windows to put together so having this jig will greatly help us maintain tight alignment and good square right angles, consistent across all windows.
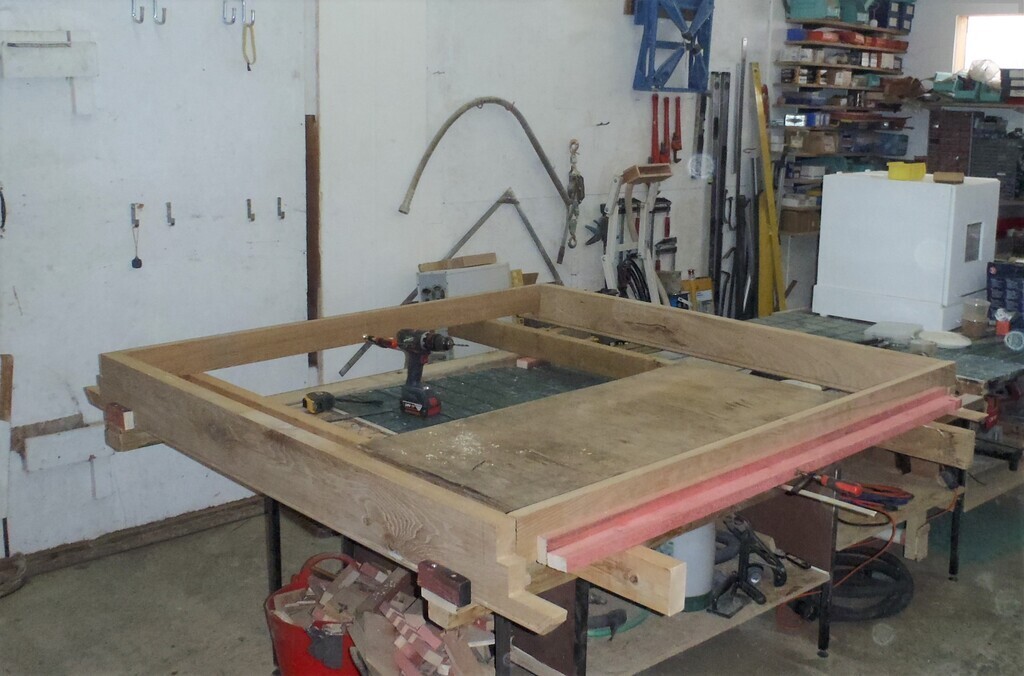
First-try-of-the-assembly-jig
Then over the next couple of days, we proceeded to build those nine frames, using the tough thick PU slow setting glue for the major joints in all four corners and the faster thinner PU glue to hold the four aluminium strips into place around the edge, ready to support the triple glazing unit.
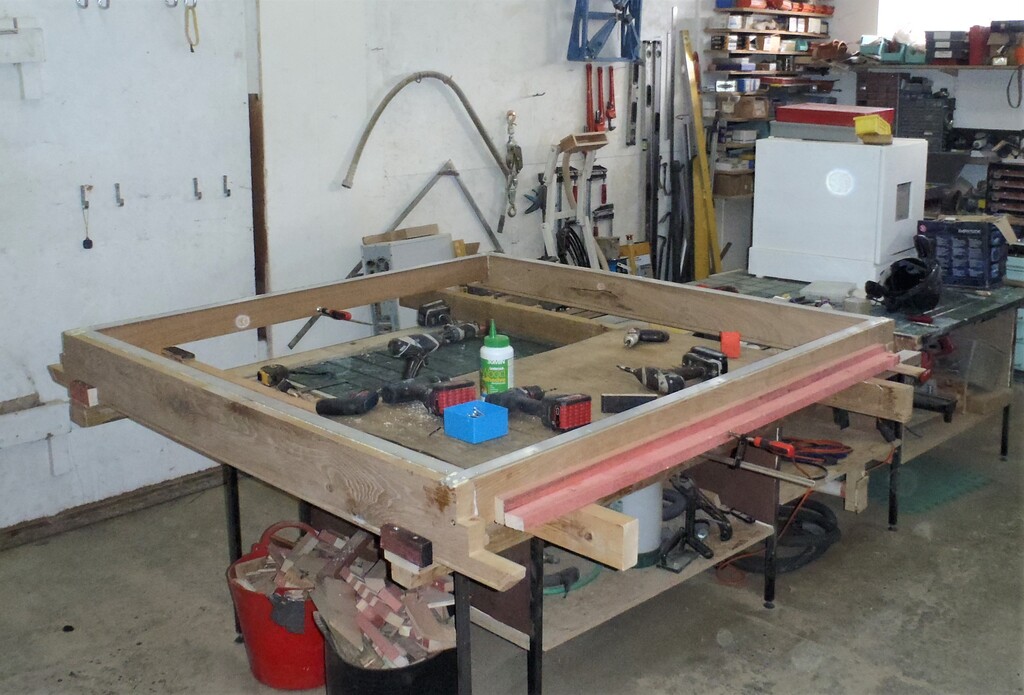
The-first-window-is-assembled
and-waiting-for-the-glue-to-cure
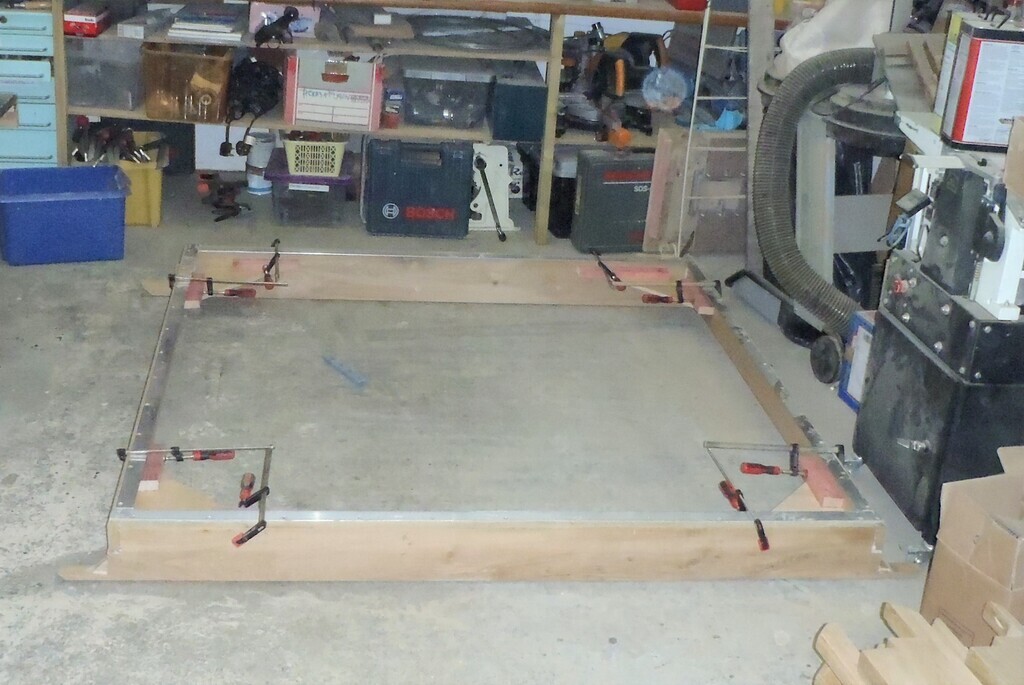
Then we adjusted the jig to do the two smaller window frames and finally the smallest one too.

Last-window-assembled
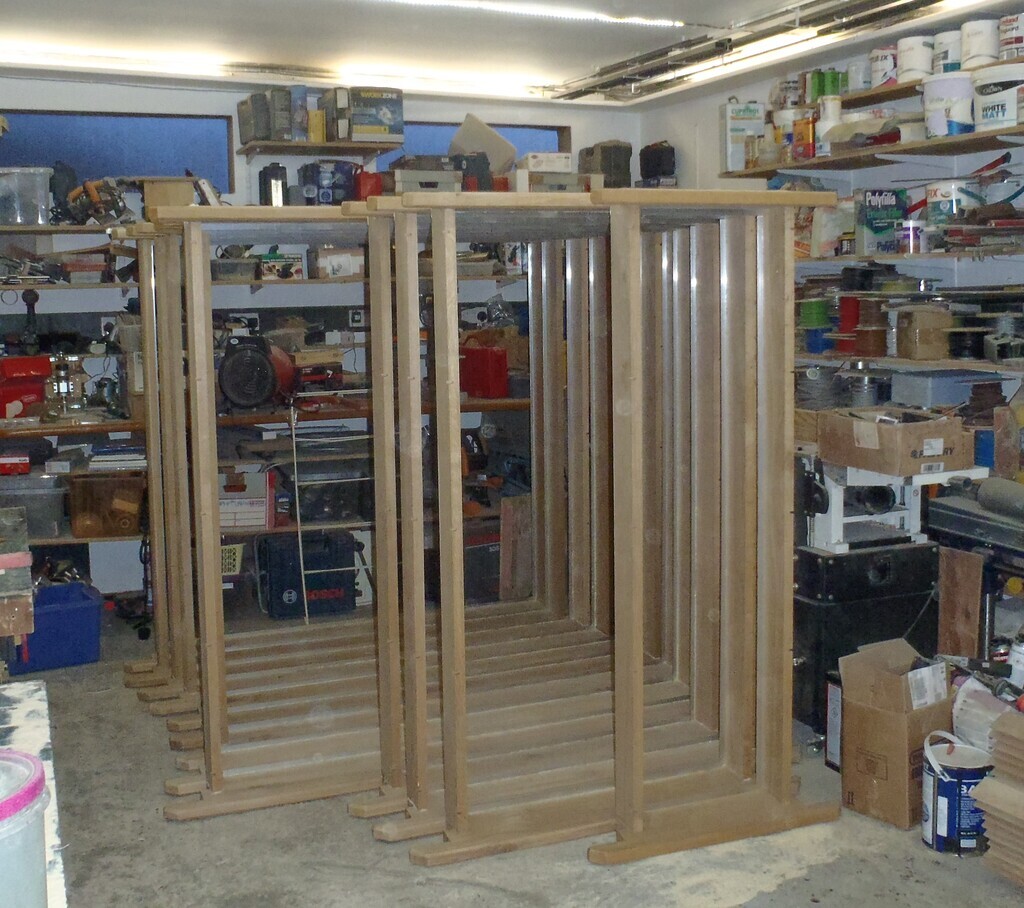
All-13-Windows-assembled
So that being done, and while waiting for the glue to set, we got on with another job, something completely different this time, putting up a new fence along our Loke to hide and block off the view of our mini-digger and some plies of old pallets etc. We bought the cheapest fence panels we could find, just £100 for five 6foot square panels and six metal post sockets to take 75mm square wooden posts. We made those posts by using six planks of our treated 63mm CLS timber and doubled them up to form 76mm by 63mm posts. We glued the two pieces together and once set overnight (we used some really old slow setting PU glue), we then trimmed the end to form a neat pointed tops. Plus also we stuck on a slab of cement board, just the right size to pad out the bottom of the post so it was the correct dimensions to fit nice and tightly into the metal sockets.
After that, we dunked both ends in timber preservatives, making sure the bottom ends had a good 30 minutes sitting in the liquid.
While that was going on, we went outside to clear away part of the old plastic mesh fence and pulled out several old wooden posts. Then collected 21 concrete blocks which will form the bottom layer underneath the panels, to raise them up off the dirt. The original round 3inch post was pulled up and moved to be right next to the hedge and we used this to tie on a string to make a taut straight line to align everything up. We were very lucky these last few days with lovely weather and that enabled us to go out and install our new fence panels, with their six new homemade wooden posts plus getting the concrete blocks set into the dirt in a level straight sections, one for each panel, before stepping up. The Loke is on a slope of about 2or 3 inches for every 6 feet, so our panels steps up each time.
It was all fairly simple to do, getting the posts into place using a double spirit level gadget that measures the verticality in both directions at once. The metal sockets have very long spikes that easily slides into the ground and two nuts and bolts to clamp the sides of the socket onto the post.
We made a heap of rotating toggles to hold the fence panels on the inside and nailed up long strips (about an inch square) on the outside to make a neat presentation for the whole fence line. These toggles allows us to quickly release each panel, just in case, we have a delivery that needs access to unload items.
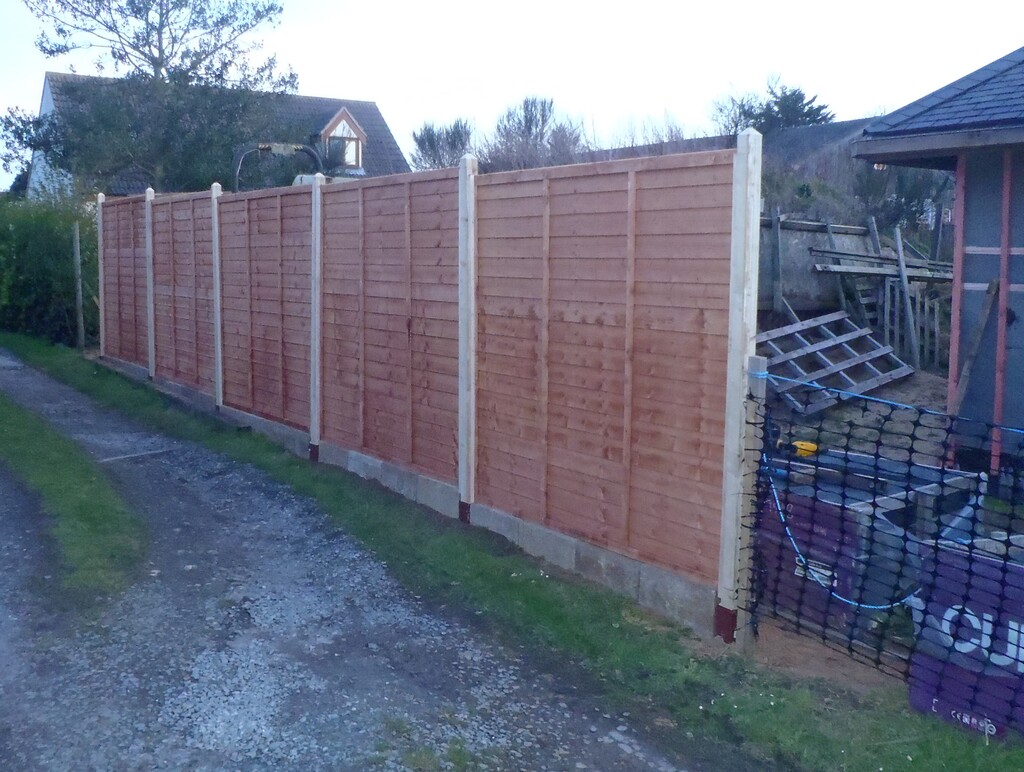
Section-of-fence-to-block-the-view-of-our-junk-from-our-neighbor
We will make a simple ‘gate’ to fill in the remaining gap that we left behind to stop most people from just accidentally wandering into our garden but have this gate to allow us to get out onto the Loke if we want to.
Finally, for the last day, Saturday, we got back to cleaning our newly glued window frames, rubbed down all the surfaces to remove any dribbles and cleaned the aluminium strips. We now have a heap of solid window frames, waiting for the next task to be performed on them, which is to apply a waterproofing coating of resin in and around the area where the glass will be situated, especially down on the sill so that any rain water that gets passed the outside beading holding the glass in, will just run straight back out again and not sit on the wooden surface and potentially cause damage with rot.
But First of all, we did some testing with a special blend of polyester resin where we added twenty percent ‘flexible’ resin which makes the finishing resin layer much more flexible so it won’t crack with movements. We painted some small pieces of wood, one was a thin strip and the second one was two pieces screwed together to form a slightly loose right angle joint. After we had finished cleaning the window frames, we got out our prototype narrow frame to give it a coat in this special resin. We applied masking tapes right around the frame to protect against any dribbles and had only an area of 75mm exposed, which got coated in the grey flexible resin. We didn’t use any fibre glass as we just wanted to seal the oak timber to protect it from rainwater.
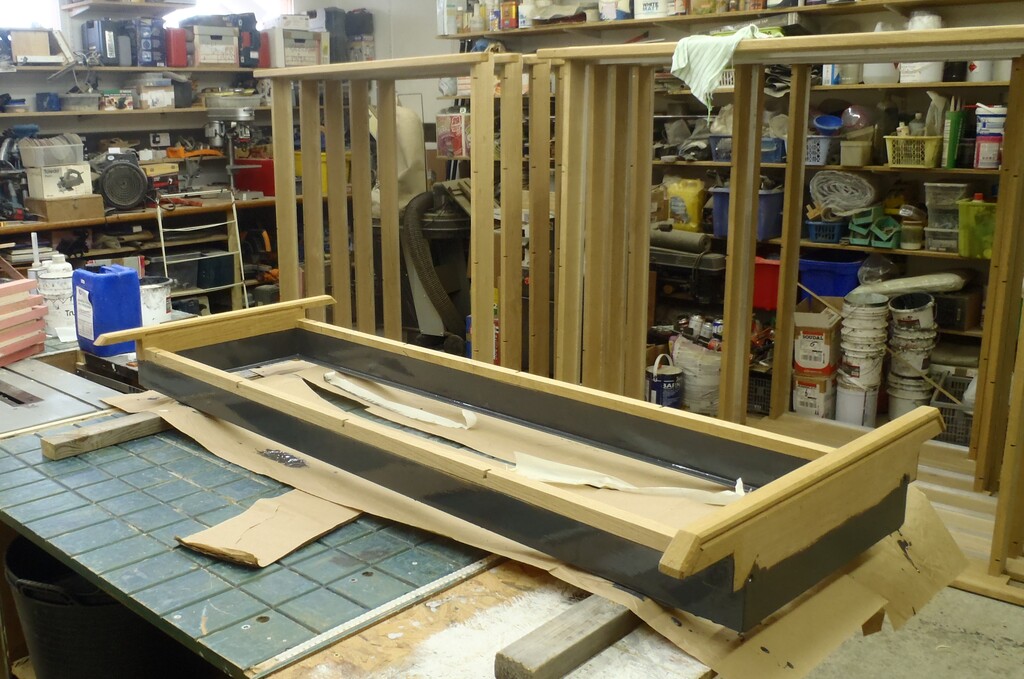
Testing-the-resin-coating-of-the-frame
We will see how that looks on Monday and if is ok, we will proceed to do all the other twelve window frames too.
Leave a Reply
You must be logged in to post a comment.