We have started the process of installing the joists for the First Floor. The last two and half days were spent on several tasks, like for example, marking out on top of all the structural walls running from the front to back of the house, with 400mm centres for each joist. We used our new green laser line generator to produce lovely straight alignments right across the whole building and then using this reference line to mark off all the 400mm centres on each wall supporting a joist.
Next we set up the saw station outside under our front porch, the only place where we had enough room to accommodate eleven metres of I-Beams and kept as dry as possible between sessions. Then put on an extension fence on two further trestles and additional roller support stands further out along the line in and out of the saw station.
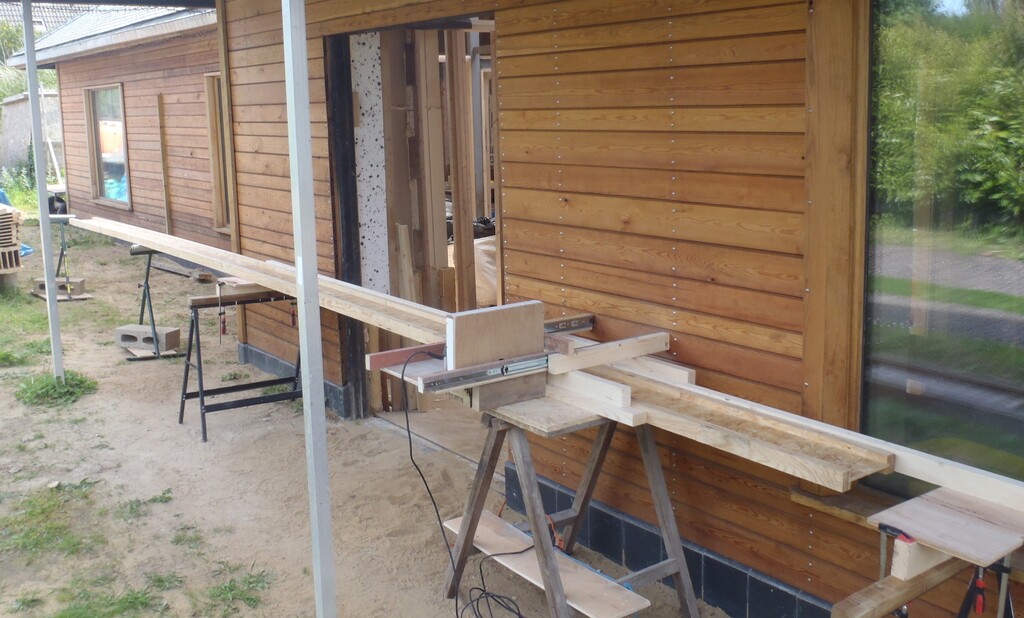
Joist-cutting-setup

Joist-plan
Then, the real work starts, we decided to start from the Great Room end of the house over Bedroom 1, we measured the distance from the Bedroom 1 wall interfacing with the Great Room, to the wall flanking the little hallway to Bedroom 2. This revealed that it was 6840mm for the first six joists, labelled 24 through to 19, arriving on the first of the twin 63mm think walls and these joist are the 53mm width flanges as they don’t have to deal with the Gallery sticking out the Great Room. Joist 18, the first of the 96mm flanges is a full 8metres long and then joist 17 and 16, also 96mm flanges were sliced at 8300mm long. The saw station worked very well, with only a slight adjustment needed to increase the spacing to allow the wider flanges into the station.

Sawing-a-96mm-joist
We carried each one across our driveway and then into our Side door, along the hallway and then sliding (just!) into Bedroom 1’s entrance, to climb up the stepladder and hoist the joist up on top of the Great Room wall and rotating around a bit before climbing up the second stepladder to dump the other end up on the En-Suite wall and finally pulled back until it reached the mini hallway. We collected the joist in a group over near the outside wall because there was a special requirement of making a 110mm diameter hole through the webbing of Joist 18 and Joist 19 to allow the sewage pipework to run from the upstairs toilet shower room. This is a rigid piece of pipework and the joists had to be free to move to allow this insertion to occur (while the other joists were out of the way).
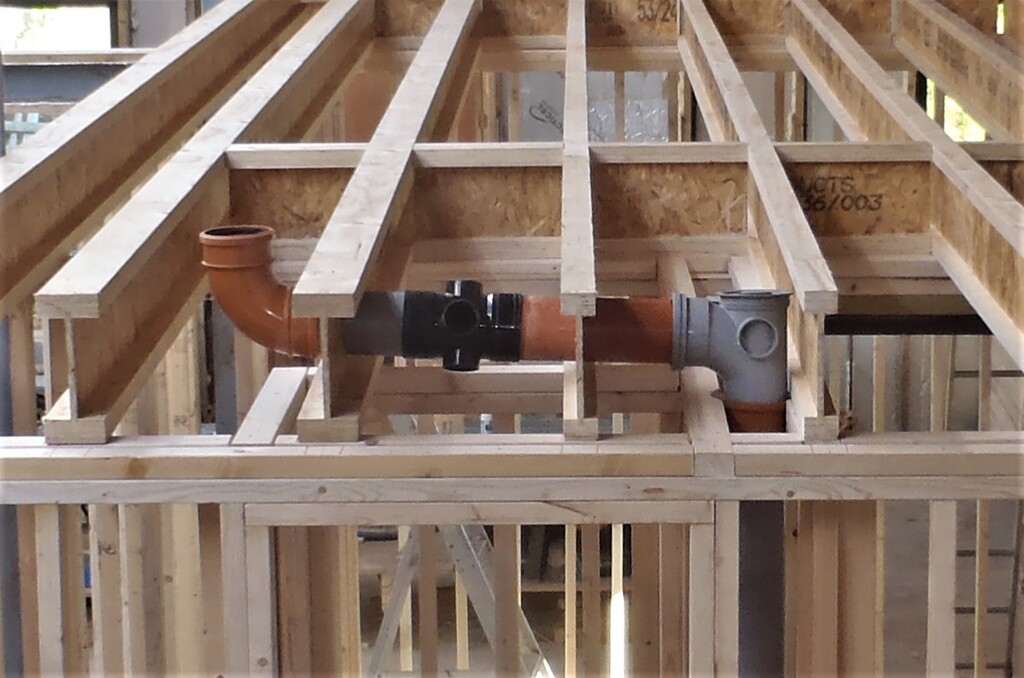
Plumbing-for-the-upstairs-Toilet
Using the left-over pieces of the I-Beams, we created a pile of noggings either measuring 347mm or 304mm wide plus a few specials measuring 325mm that fits in between a wide flange and a narrow flange joist. These noggings fills in the spacing between the joists to help anchor and stiffen up the whole joist structure to stop them slipping sideways and falling over under load.
For the end of this week, we put in a set of noggings and spaced out the joists evenly, for a test run and see how well things look. We didn’t have time to glue or nail them down.
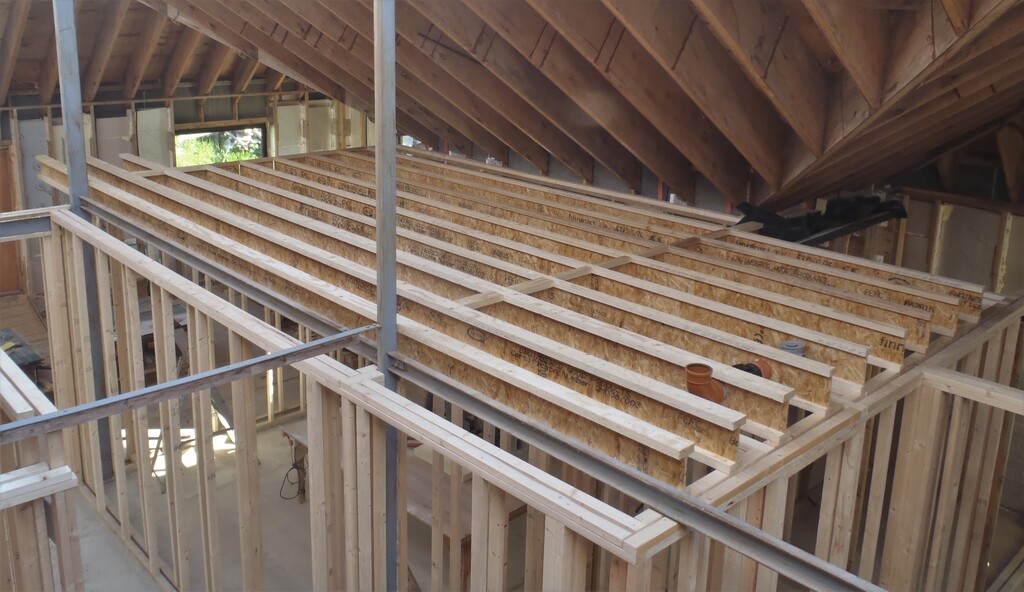
First-set-of-joists-placed-1
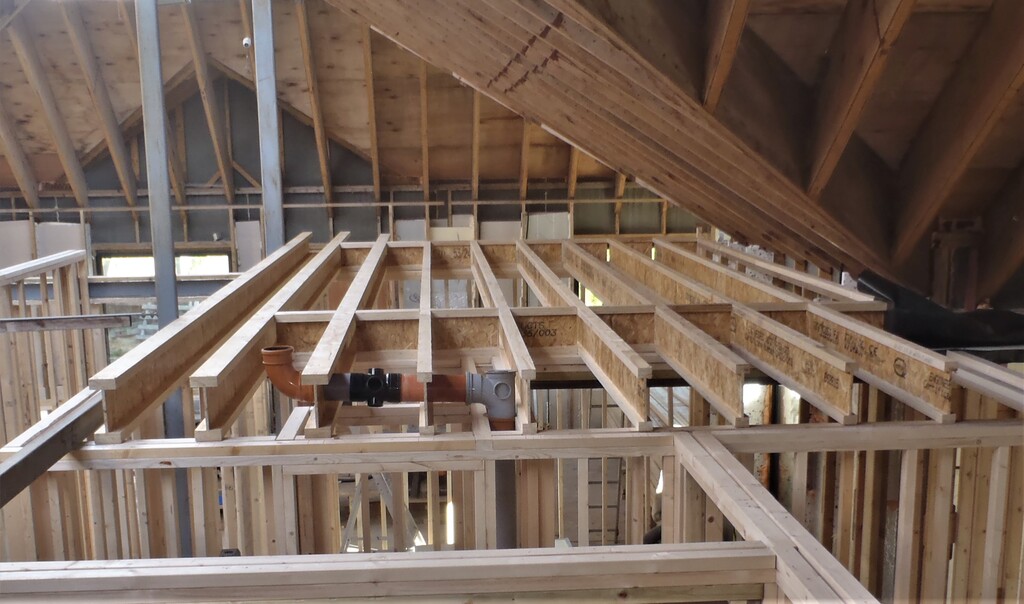
First-set-of-joists-placed-2
So we will resume next week and start fixing things down properly and so the First Floor is finally being created – Yippee!