Today sees the start of the cement board skin being mounted on our External Wall framework. But first, we did some measurements of all the corners and also transferred the ground height reference point to inside the house .
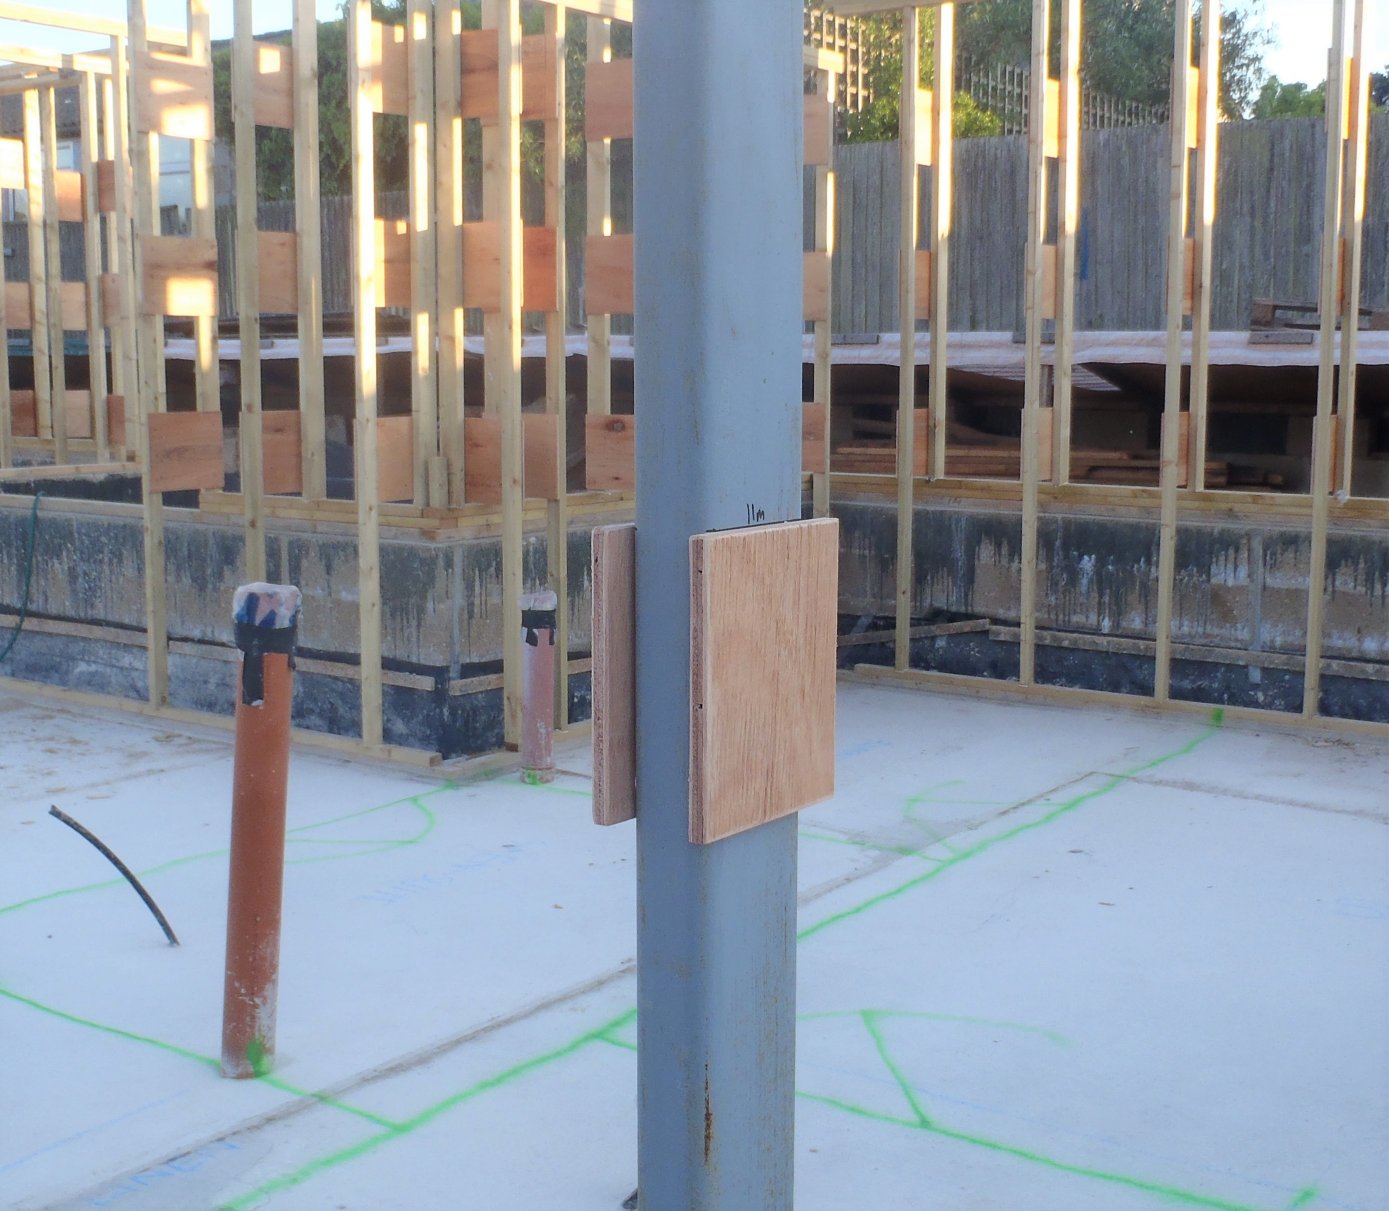
New-height-reference-point
As the photo shows, we first duplicated the Ground Reference point that we have on the Garage wall and put another one on our Steel Legs (specifically Leg number 5. we nearly forgot to do this task before we completely blocked the laser beam by having our new External Wall assembled with its skin! So this morning, we cut two pieces of 11mm plywood to exactly 160mm tall and 130mm wide and positioned the pair on the Steel Leg so they are on either side of the leg and the top edges are exactly at the Ground Reference mark – 1 metre above Ground Zero and or the level of our floor inside the house and all the footpath and doorways etc. We glued the plywood pieces in place and clamped on while it dries.
Then, we went around measuring the height between the bottom-plate to the top-plate at all 14 corners and wrote down on our plans so we will be ready to cut and slide into place those complex composite Corner Legs. We also went around and seeing where we needed extra posts to support the cement boards and only 2 extra ones were cut to size and glued into place on wall “E” and wall “H”.
After that, we double checked the spacing between the Wall Legs at places where the Top-Plate has joints in it and making sure the spacing was 612mm between centres of the two legs either side of the joint. We adjusted several of these around the perimeter.
Finally before lunch, we wanted to see how vertical the wall we are going to start putting the cement boards on, so using the spirit level, we looked at all the legs along wall “H” (the one nearest the Garage) and the wall only needed a slight amount of pull to straighten it up. We did this by employing our canvas strap ratchet device and anchored one end at the end of our swimming lane where we have some sticking up steel re-bars and the other end tied on to the top of the nearest Leg. This wall only needed an adjustment of about 10mm pulled towards the swimming lane.
After lunch, it was the long preparation job of setting up the two router machines, one with the Tongue cutter and the 2nd machine set up with the Groove cutter. We discovered that it makes it so much, much better joints if we had two machines and we cut the boards on the same side with the two machines, to produce either the tongue or the groove. It is expected that many of the manufactured building material have some variations in the thickness as we indeed discovered with our cement boards today!
So starting at the beginning of wall “H” at the corner with wall “E” (near the Loke and Driveway), we started the whole process of mounting the 10mm thick cement boards to form the skin, by first cutting a tongue along one of the long edges, and then slicing off specific lengths to go from the corner to the first window, then covering the small gap between that window and the back door (all part of the Utility Room). we left a good overlap of 75mm on both the windows and doors so we can assemble the window and door inner framework later on and glue and nail them on the back of the sticking out cement boards. All our cement boards are being glued and nailed (the nails are hot-dipped zinc galvanised, ring-shanked (has serrations on it) and coated in wood glue for maximum long life proof against rust and good stable grip in the wood)
We managed to get as far as the 2nd window along wall “H” (belonging to Bedroom 3) before it was “knock off” time! There was a lot of experiment and learning what and how to do the various steps (the routing of the edges on the cement boards, gluing, nailing etc.)
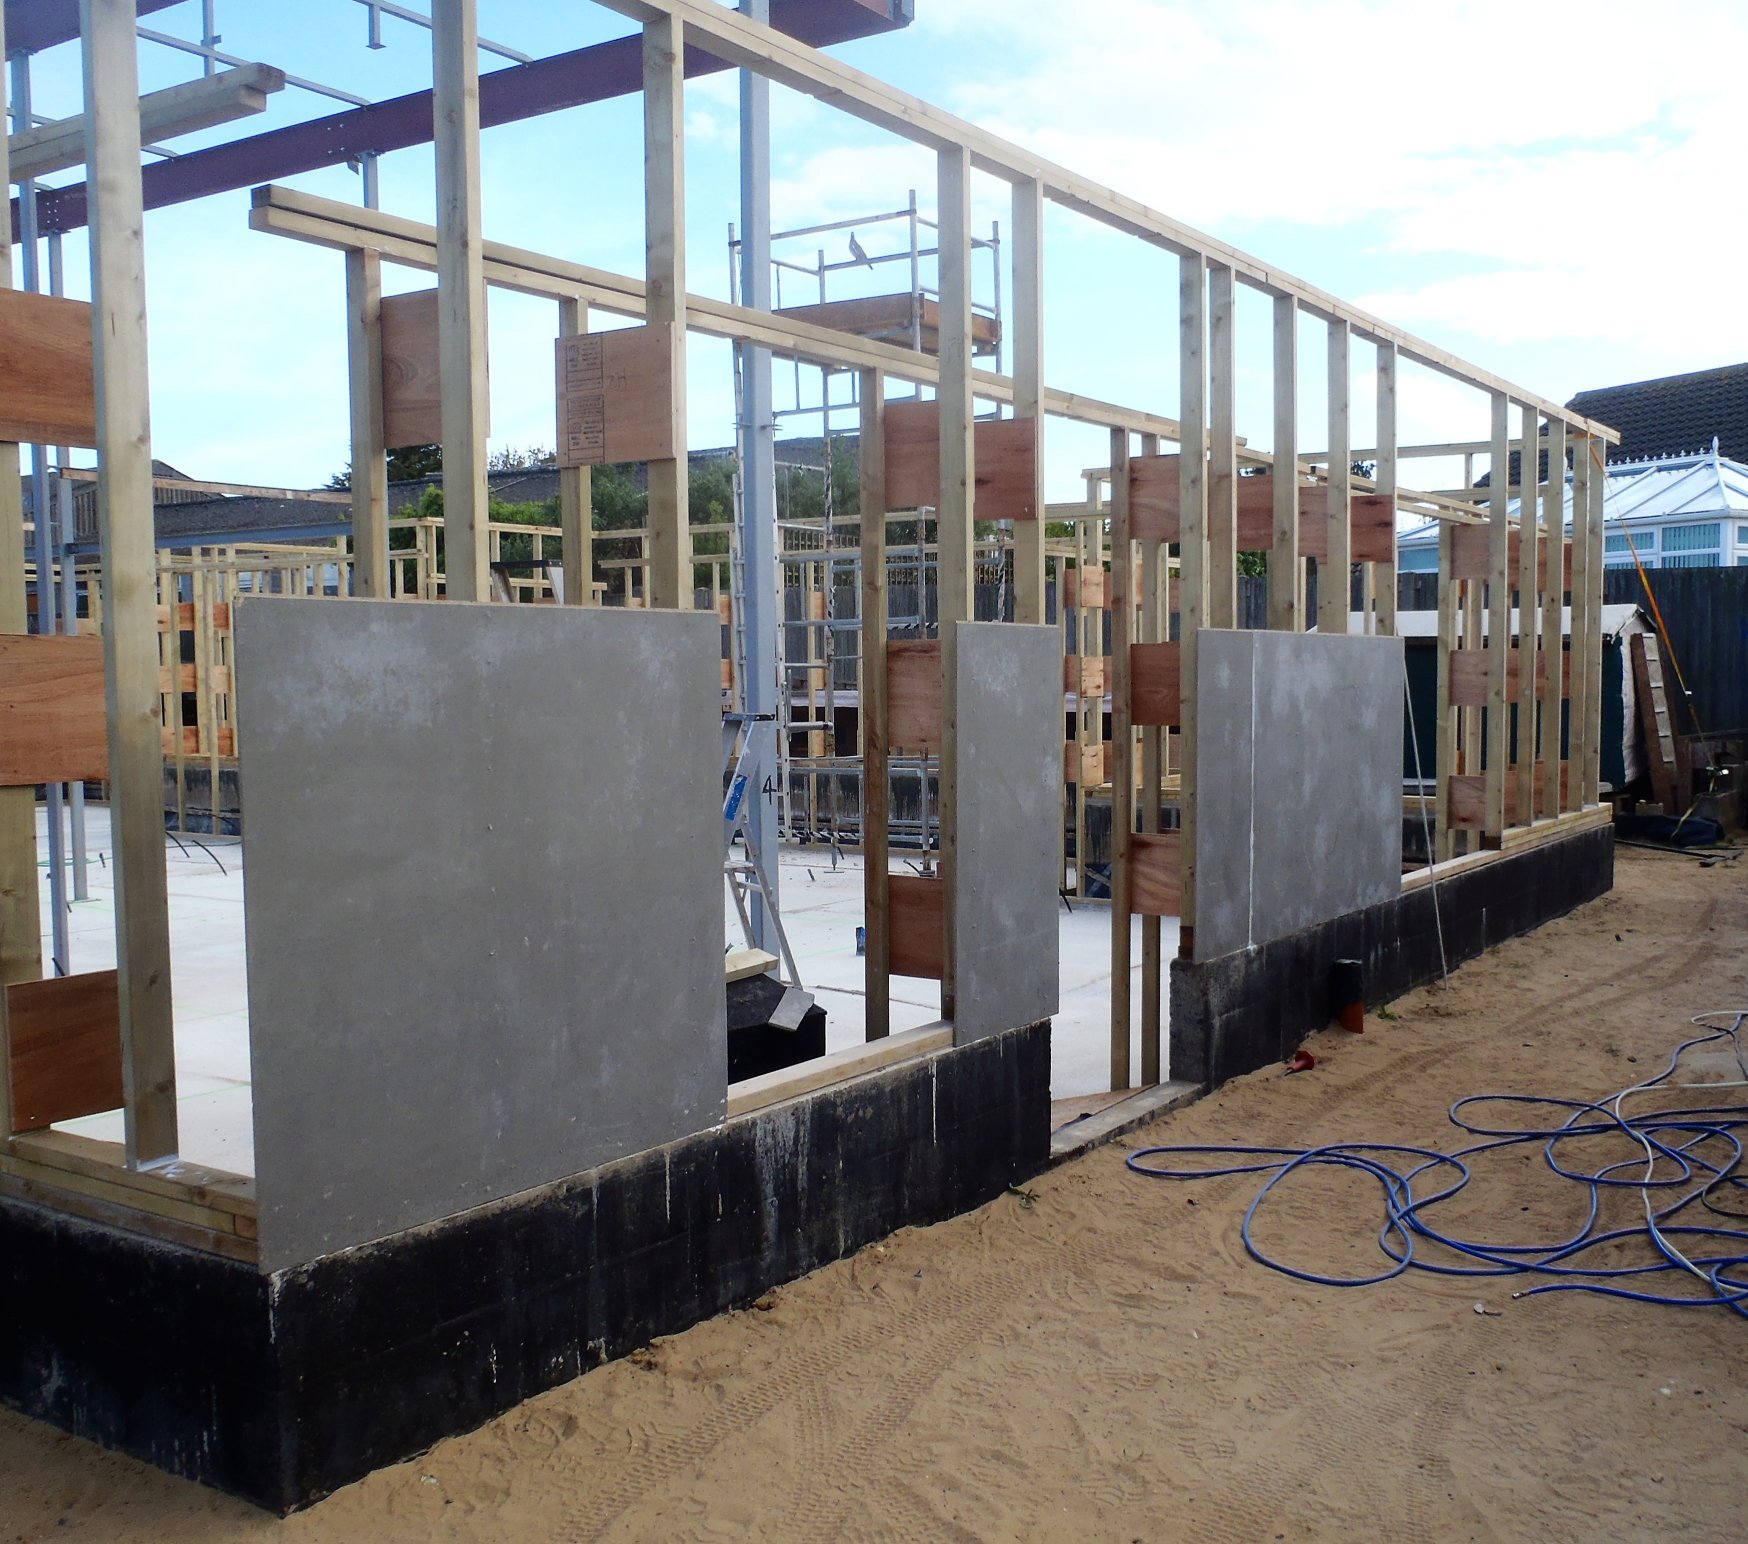
The-first-few-cement-boards-in-place
But we are learning quickly and will be able to speed up over the next day or so.
Tomorrow, we will continue to mount the 1st line of the 4foot high cement boards right around the building, before we do the 2nd line and then finally the tiny 3rd line right at the top of the External Wall!
Leave a Reply
You must be logged in to post a comment.