Yesterday, we proceeded with the job of creating the four Hip Rafters, two for each end of the skylight. The tops were planed with two 10.5degrees sloping edges and then cut a very complicated doubled angled ends to fit into the corner of the rim edge.

Hip-Rafters-fitted
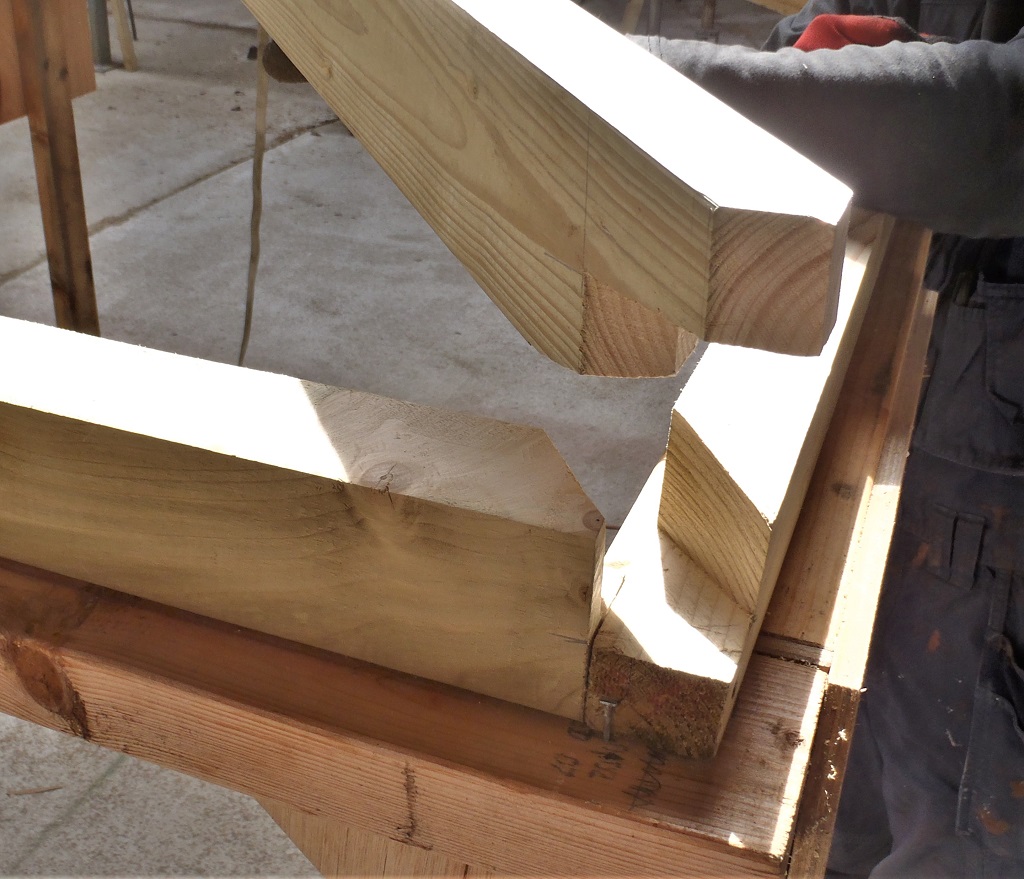
Hip-Rafter-Joint
It was quite fiddly to get all the distances correct, all the angles measured and then sliced to remove the excess material. It took us most of the day to do these four pieces.
Today, we got on with the next step in creating the skylight module, or as we discovered, some call it a “roof lantern” because of the shape and one assumes the glow of the room’s lighting will make it look like a flat lantern glowing in the dark!
Anyway, today, we created 44 pieces of timber, which are the glazing battens that will be fitted on the sides of the rafters and provide something to push the triple glazing units against. We needed 36 shorter lengths and 8 longer pieces, each being 15mm thick by 22mm high and either 1200 or 1700 mm long.
We got four lengths of our 63mm CLS timber, selected to be straighter and with not too many knots and chopped them up into ten lengths of 1200mm and four lengths of 1700mm. Each of these were then sent through our main bench circular saw and ripped them in half in both ways to create a heap of rough sawn timber measuring approximately 18mm by 29mm, at which point, each piece was bent under a little bit of stress to make sure we didn’t end up with battens that would break at a knot etc. We rejected about five of them. Next, we used our planer to trim all the surfaces smooth and get uniform thicknesses, passing all the pieces in the planer several times until we arrived at our required size. We repeated the process of testing the batten, but this time, selecting the best looking ones without too many defects or further knots and rejected half a dozen more pieces.
The final set were then passed through our router table with a little quarter round cutter so we could smooth off the outer two edges to help with the glass fibre and resin coatings we will be doing later on. Seems a lot of time to make a small pile of wood!
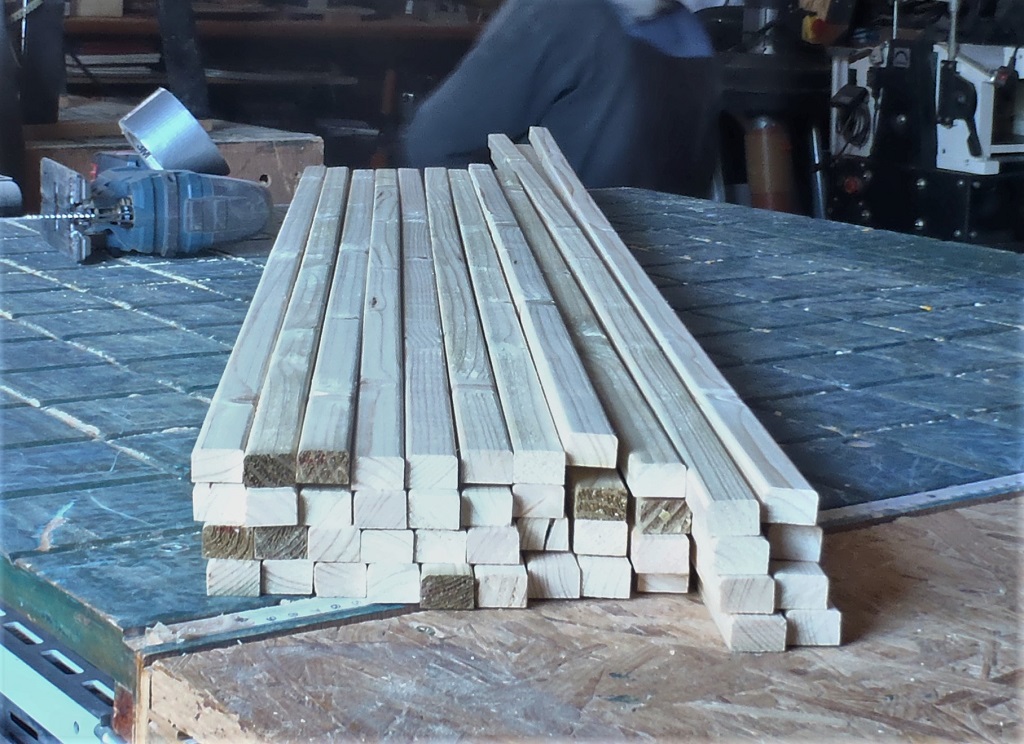
Glazing-battens
On Monday, we will glue and nail each of these new battens on to the sides of each rafter, making sure the batten is straight and flat (for the glass triple glazing units to press up to) and not be fooled by the rafter itself as it may “look” straight and flat but maybe not! We will make sure by using some form of a straight metal ruler etc. to position the batten as we fit each one!