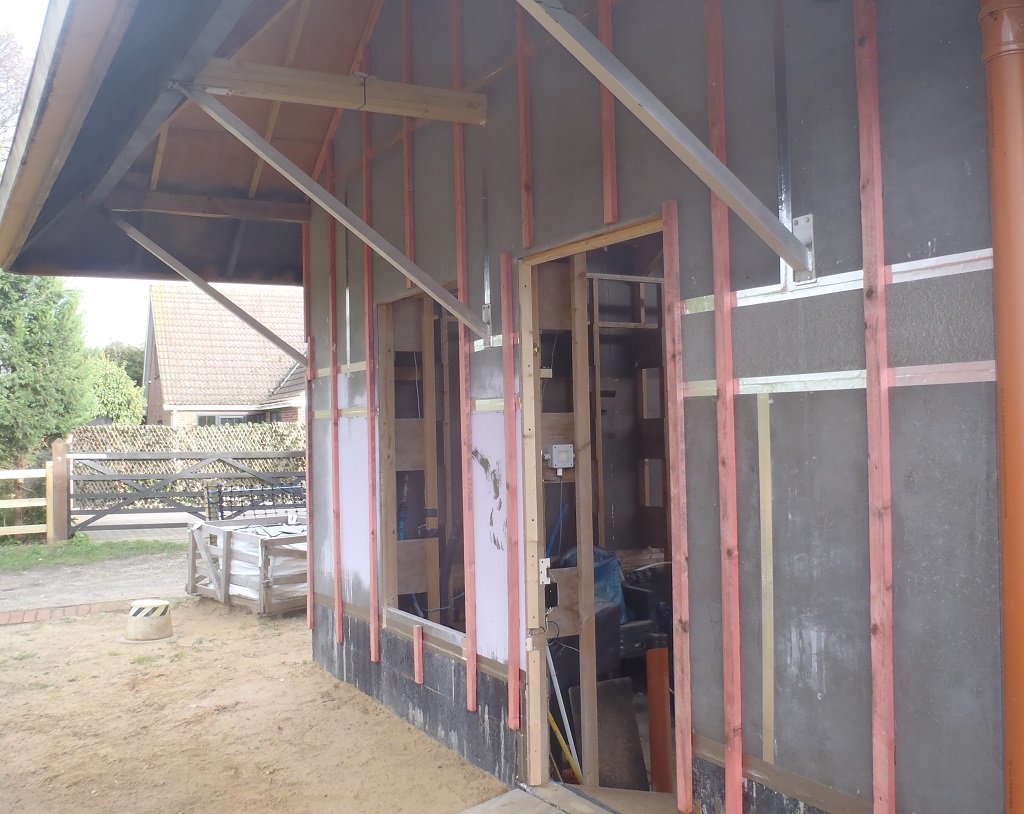
We resumed the task of putting up the cladding support battens in, around and under the two Porches, i.e. the Side Door and the Front Door sections. We had to put in reinforcing internal battens going up the gable triangles before we could put on the battens on the outside. Oh yes, plus also, we put a set of diagonal battens just under the roof surface to provide fixing for all the angled ends of cladding pieces going up into the triangle. The doors had their own shorter battens because they were positioned independently of the standard 2 foot spacings.
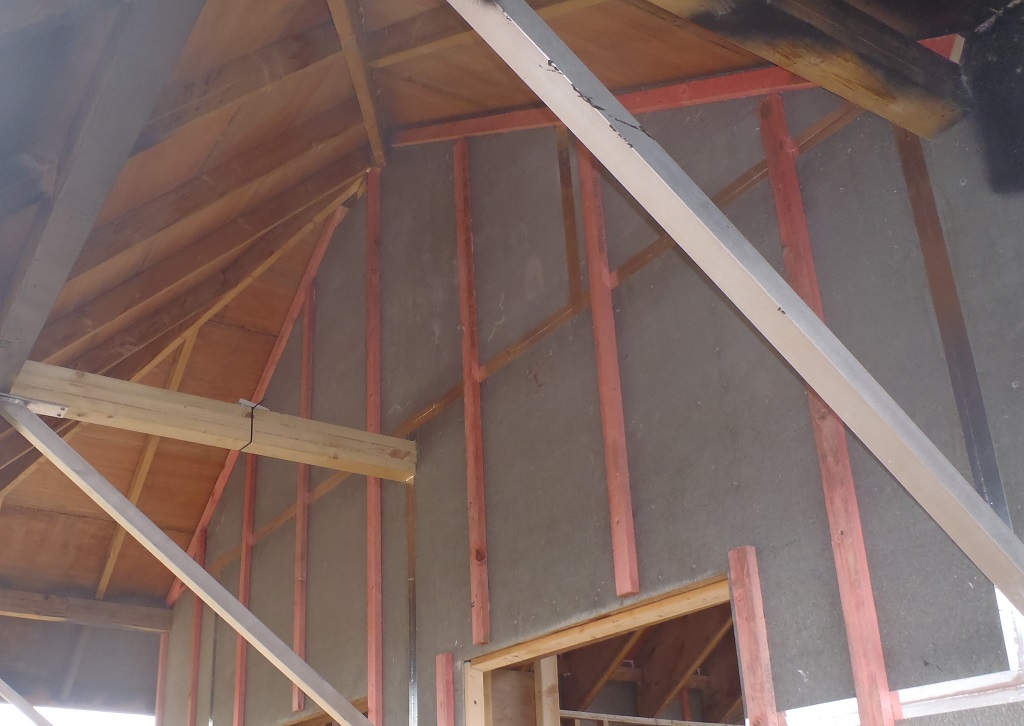
Back-door-gable-battened-1
Back-door-gable-battened-2
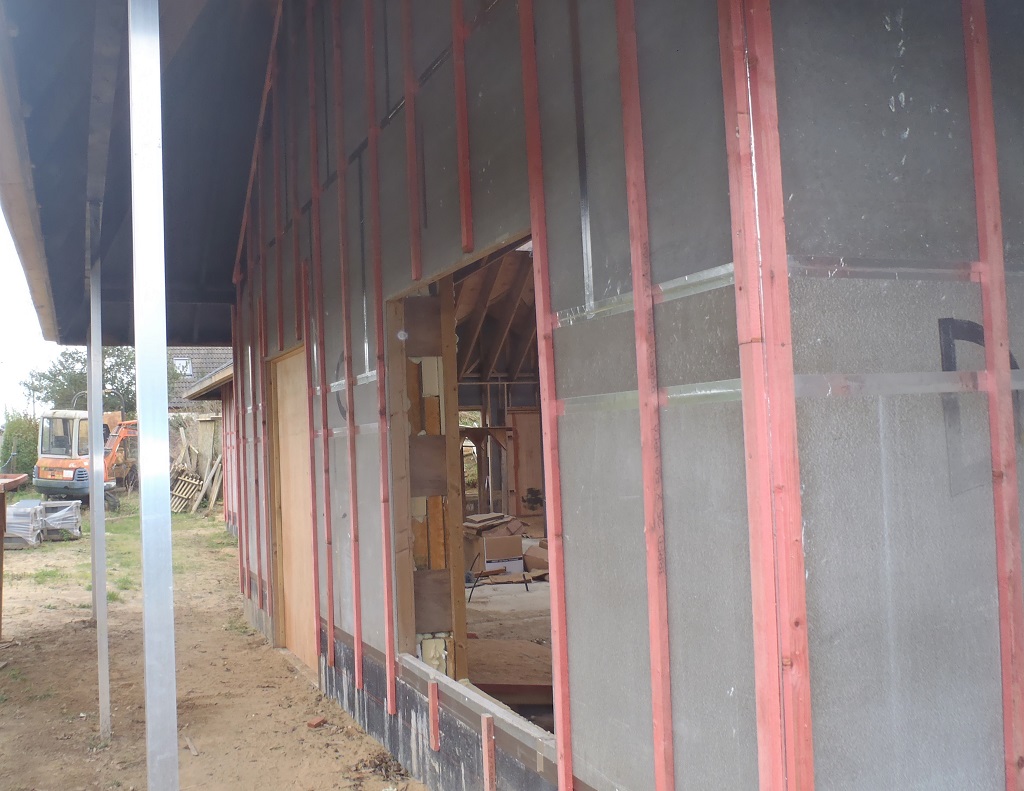
Front-door-gable-battened-1

Front-door-gable-battened-2
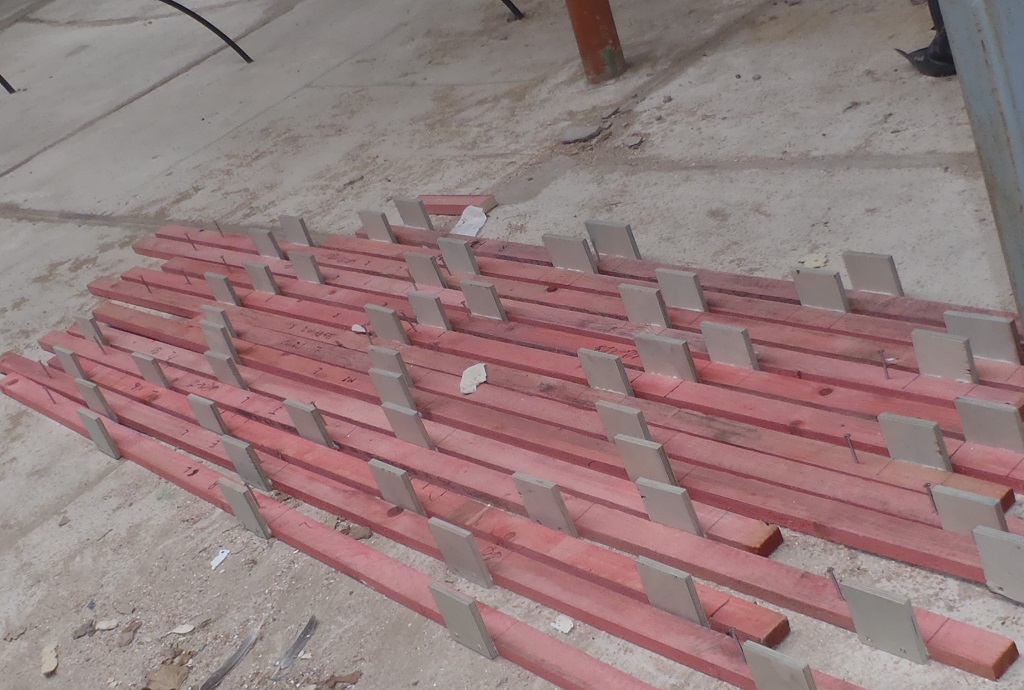
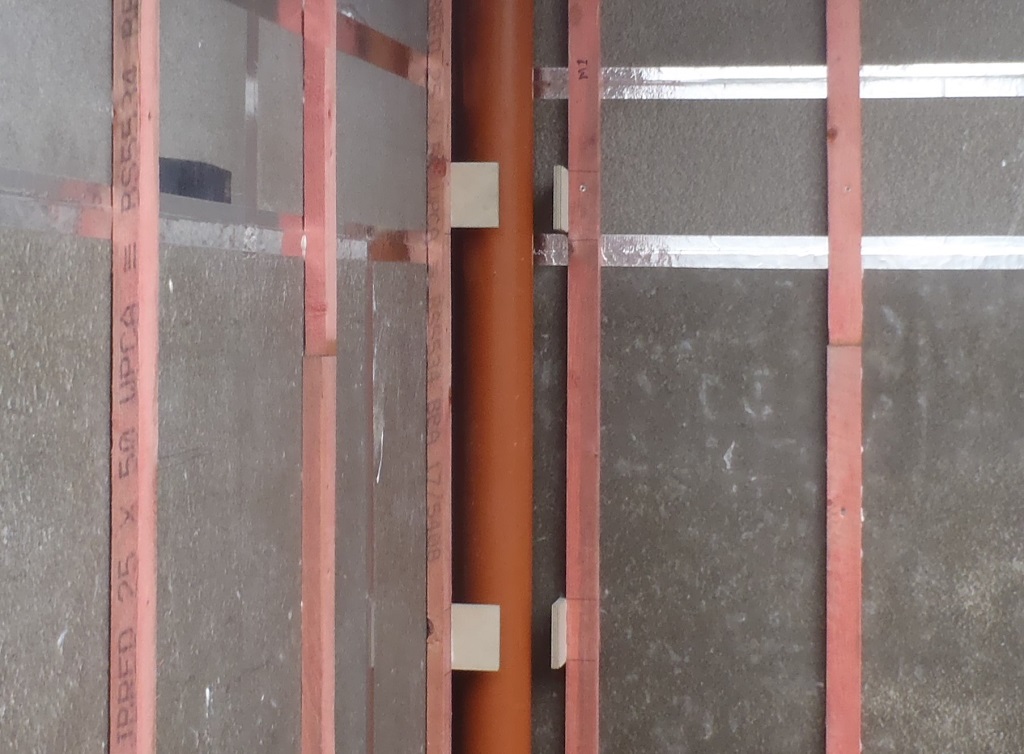
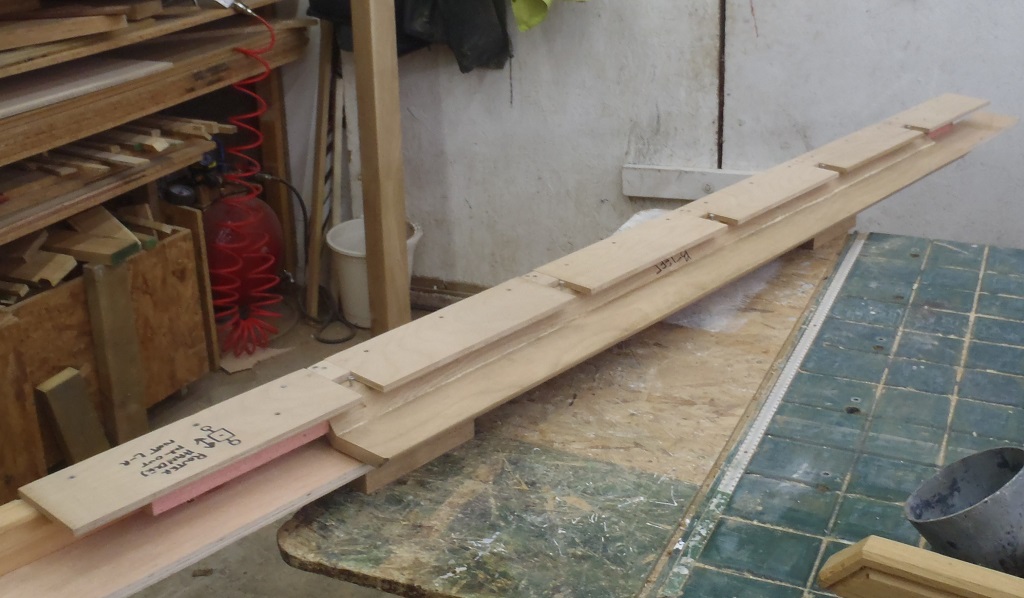
That was Monday and Tuesday that saw those sections done, we also cut up some 12mm thick marine birch plywood into 100mm square pieces and dunked them into the timber preservative solution, and left to dry overnight. Then on Wednesday, we proceeded to gather up all the battens we had previously allocated for the inner downpipe corners, making sure that we had the required 14 pieces, of which five had to be shorter ones that could only fit under the gutter channel itself. We put in the screw holes where there wasn’t one already, populated with a 80mm stainless steel screw and then spent much of the day, gluing and screwing four square plywood pieces to the narrow edge of each batten, 7 set of left-handed ones and the other 7 being a right-handed set. These plywood are sticking out away from the wall and will provide an anchorage fixing point for the Oak covering planks which hide the plastic downpipes.
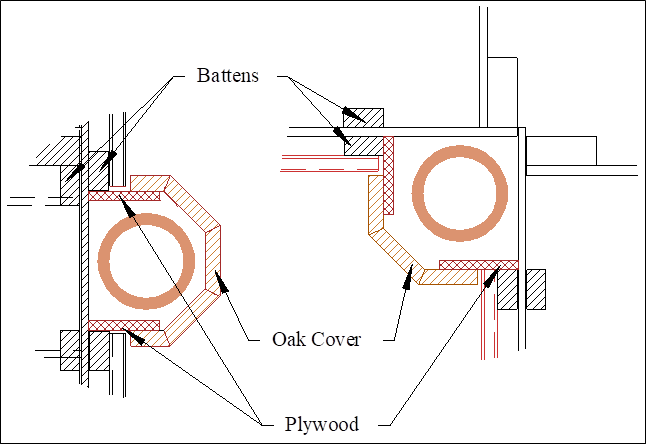
Pipe-Cladding-detail
The last little job of Wednesday was to slice up some cement boards to make 100mm wide by 500mm long pieces, ready to be also glued and screwed to the bottom of the same battens to provide a very similar function but this time to support the bottom splash back slates running around at ground level.
Pipe-cover-battens-with-plywood-attached
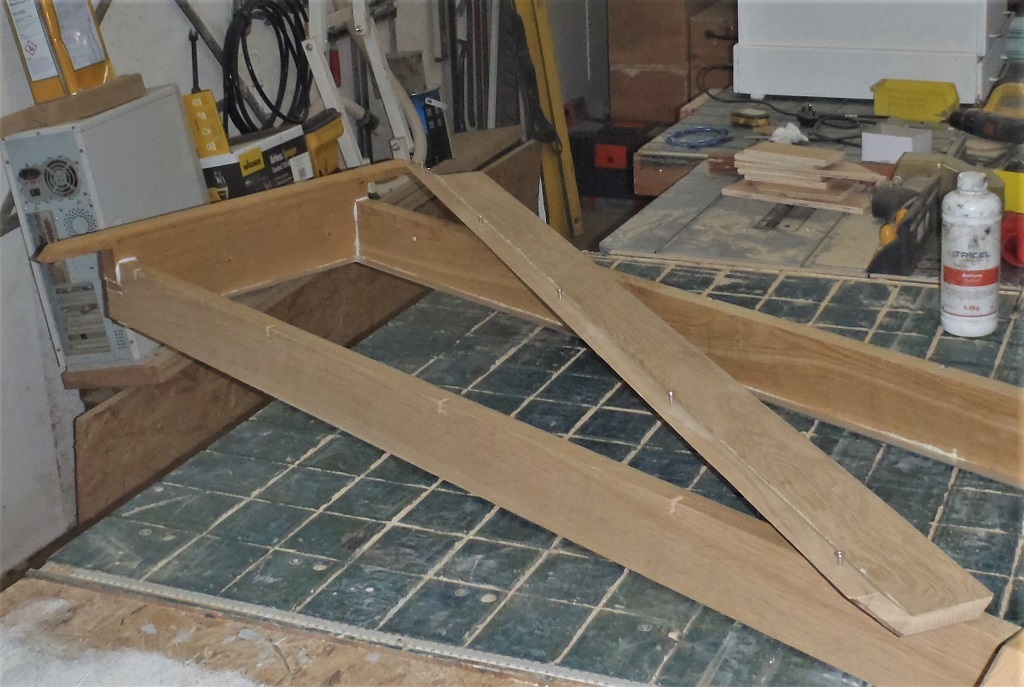
Thursday opened with the task of finishing off the preparation of the cement board strips by cutting them into 500mm lengths and then got outside with a spade, our collection of cement board pieces, a pile of screws, tools and our prepared battens. We dug foot down little holes either side of the plastic downpipes, glued and put in a single screw to hold the cement board pieces on the edge of the batten, positioned each batten up to the line we had already drawn several weeks ago and then glued plus screwed it into place. The cement board hanging down went into the soil and packed around it to secure it into place.
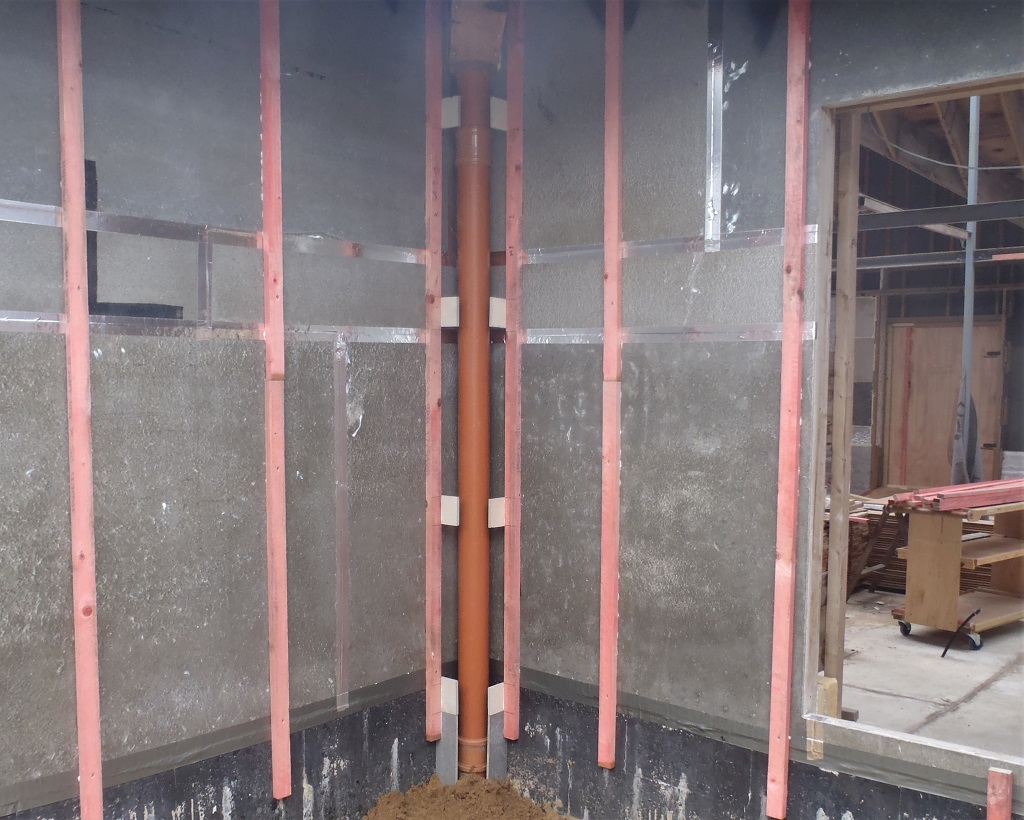
Pipe-cover-battens-installed
Pipe-cover-battens-details
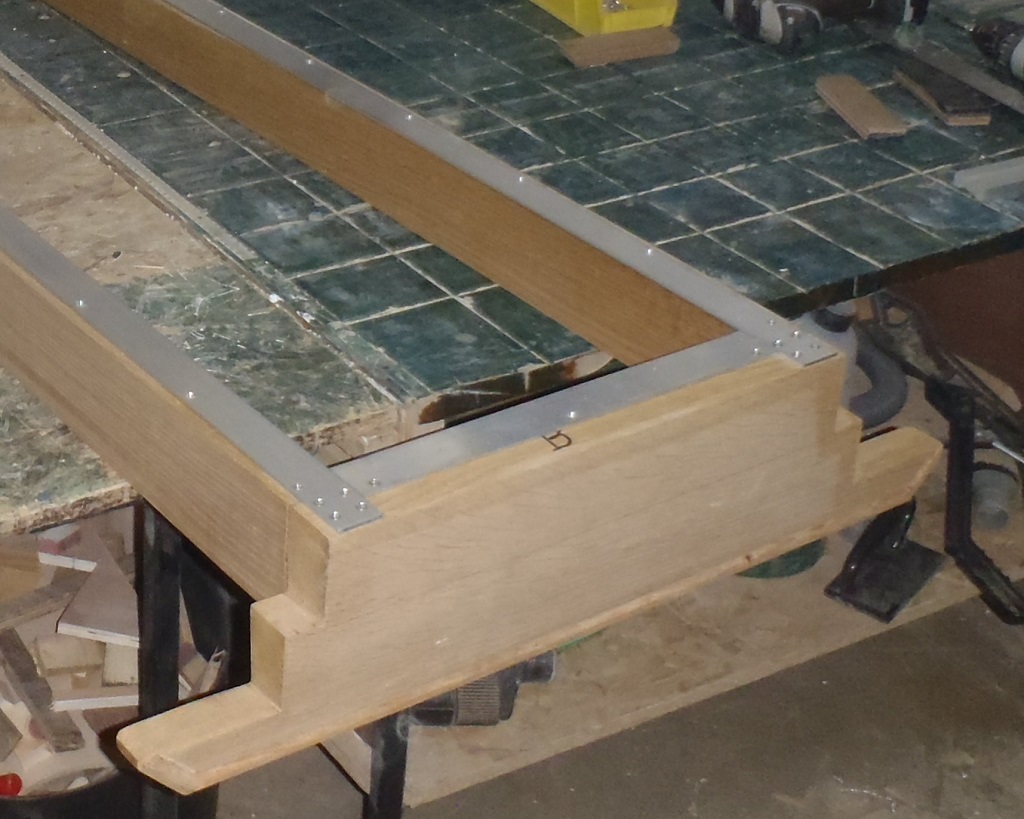
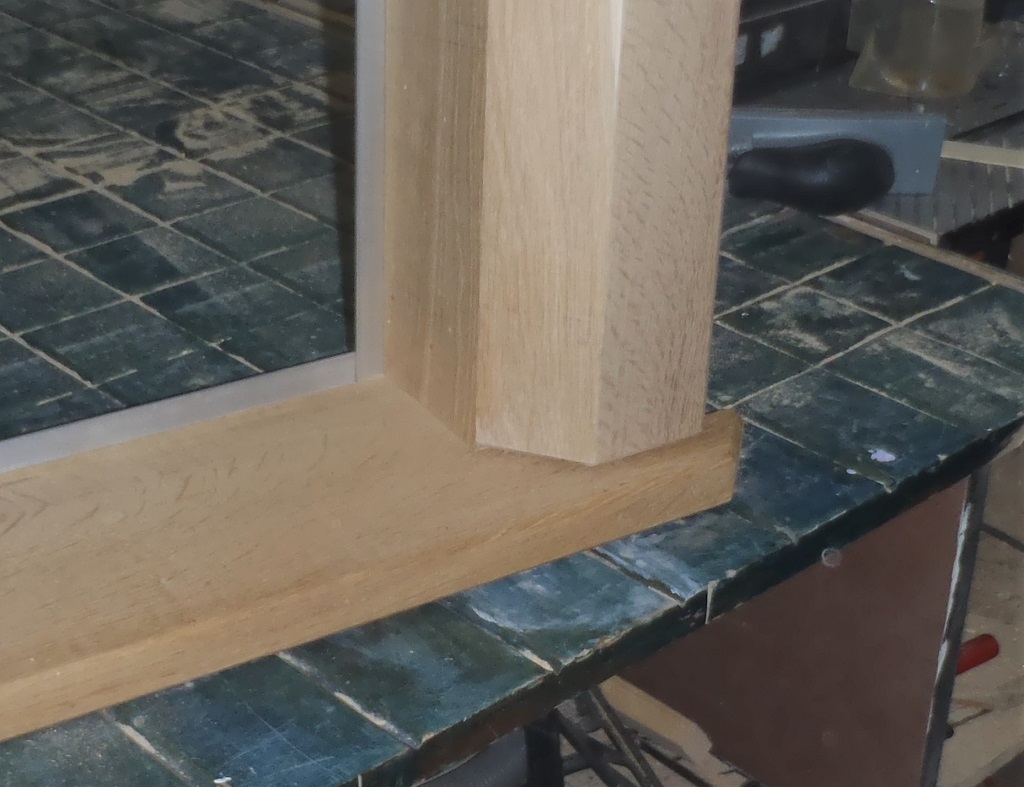
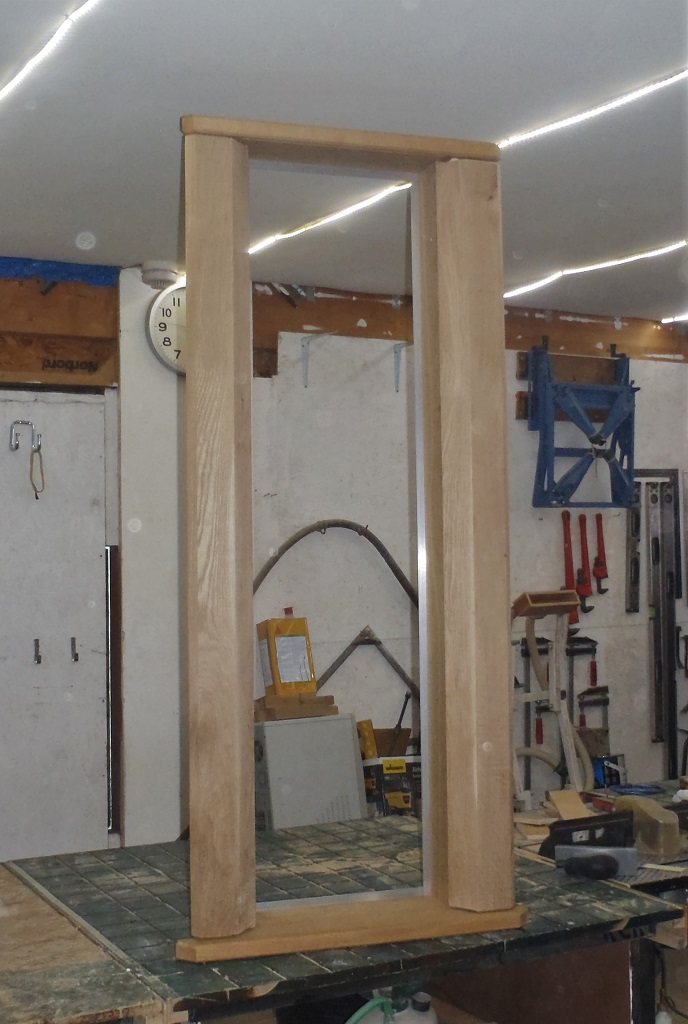
We got that done by lunch time, and in the afternoon, we resumed work on the Oak window frames in our workshop. We implemented our plans by first drilling holes in each aluminium strip, a set of holes 3mm in diameter with a counter sinking attachment fixed to the drill bit so both the hole and clearance for the screw is drilled at the same time. Each hole is 7mm from the edge and spaced apart by 160mm. Some of the ends had extra holes to be firmly fixed to its sibling oak frame. Then we went along screwing on the aluminium strips to the four frame pieces and achieved our first look at a (nearly) completed window.

Window-assembled-for-the-first-time
Window-aluminium-strips
Friday’s job was to design a jig structure to hold the two long vertical frame pieces so we could cut a special “T” slot into the side of the timber, ready to receive a screw or bolt that will be attached to the removable “octagon wings” on our windows and doors.
T-slot-for-fixing-Octagons-e1582471933186

How-the-Screw-goes-into-T-slot
We performed some tests and then went for it by cutting five T slots in each side piece. We had to use two router machines to achieve the end results as the special T router bit wasn’t longer enough so we had to cut a precursor slot first using a ordinary straight cutter bit and then used our T shaped cutter afterwards.
T-slot-and-Screw-jig
The last job of the day was to take two sets of our octagon wings and get them glued to form the section of the octagon shape and have them ready for the next day.
The last day, Saturday, we took those octagon assembled pieces and adapted our jig framework to allow us to drill a pilot hole into the interfacing surface, get a screw in and then slide the whole thing on to our window frame. After some more testing of position of this pilot hole, we proceeded to do the five holes in each of the “wings” and put in the stainless steel screws and fitted it all together.
T-slots-on-frame-and-Screws-on-the-Octagon
Window-frame-completed-1
Window-frame-completed-2
There was a lot of fiddling around of course, and we got to a point that we have learnt several things about our completed prototype window frame. For example, we saw that we had cut off too much of off the height of the octagon wings because there was too much of a gap at the top. Also the two wings were not quite aligned, having slightly different gaps at the bottom between the wings and the sill. We want a gap but only a couple of millimetres to allow the rain and moisture to be blown away and keep the timber fresh and dry. These wings are not to be permanently fixed to the window frame as we want to remove them to service the cladding in some future years, so we need to ensure long life the timber material, hence having a good circulation of air in and around all the timber materials.
We have written down all these results and we will make adjustments when we get to cut the next batch of the octagon wings sometime in a week or two.
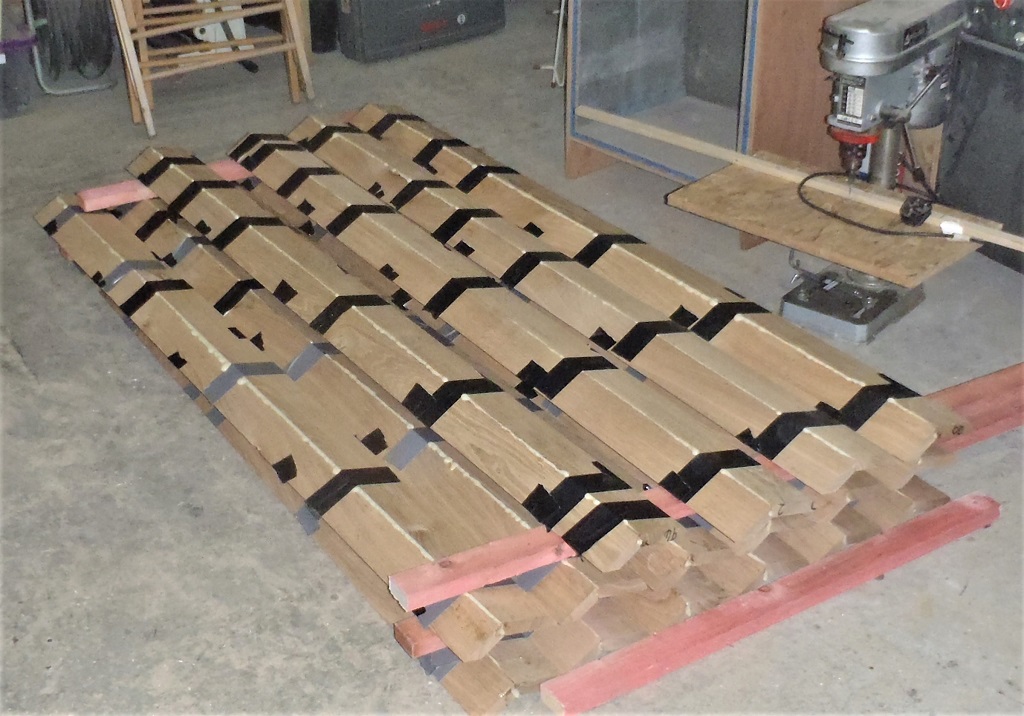
In the meantime, we had gone through the entire stack of our octagon pieces, tidying up “bad” ends and cutting every one to a uniform 1650mm long. Ultimately we are going to cut them to a more precise length, including the bevelled cut to match the slope of the bottom sill too and to the height of each window as we make them in turn.
The final last part of the day was to start gluing and holding together a batch of the octagon wings. We managed to do 16 of them before we ran out of PU glue. We got a further 8 to go to complete the set of 24, to go with our 12 windows we have in the house.
Lots-of-window-Octagons-glued-up
So next week, we will continue with that task, but also start investigating ways of oil treating the Larch cladding timber, including the fire resist treatment as well, plus also, sorting out the slates that provide the flashing protection between the dirt and our timber cladding. Oh yes, We do have one more downpipe still to do to put battens around the plastic pipe, namely the “G” point next to the Side Door – mustn’t forget that!!
Leave a Reply
You must be logged in to post a comment.