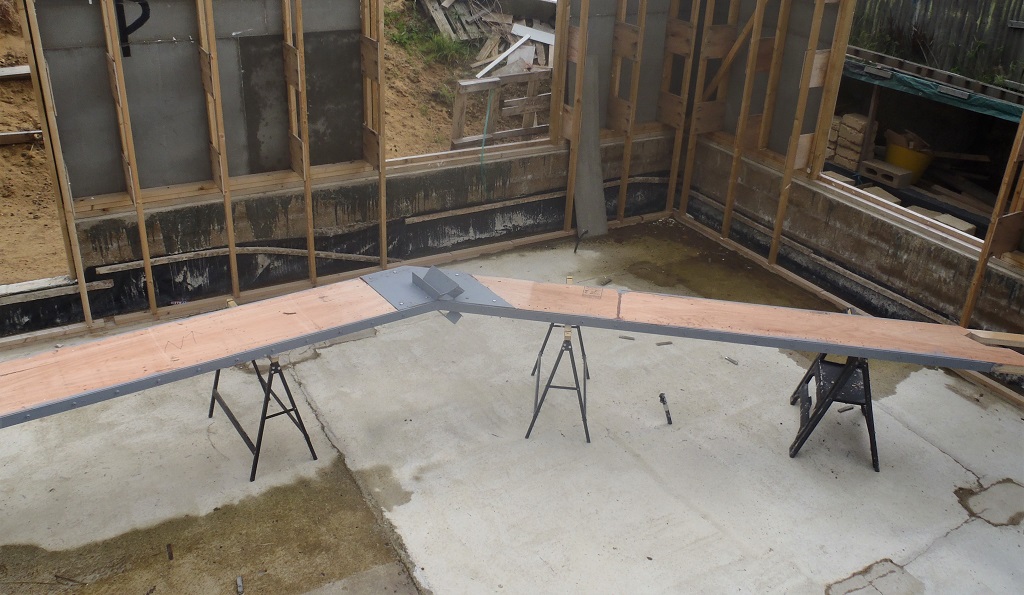
Today, we tidied up the two sections of the O Ridge rafter by running the power planer along all the edges, the top and bottom edges. This made sure that they were fresh and clean as possible, ready for the gluing and bolting on of the steel strips.
Then dragging out half the workshop tools (well it seems so!) and brought out our two sections of the rafter and laid them on trestle legs. We proceeded to drill the eight bolt holes on around the steel elbow bracket and bolted the two plates together. While this was done, we took the two 6 metre steel strips and bent them at the required 45 degrees angles and drilled and bolted those two strips on too.
After a quick lunch (as there was rain forecast to come in the middle of the afternoon), we then unbolted the two big plates off and, after cleaning the metalwork with orange oil cleaning cloth, spread glue all over the surfaces (both the metal and wood) and re-bolted them back on again. The next job was to take off each edge strip one at a time to clean them and apply glue and again bolted it all back together. Nice and tight this time!
Finally, we got out the metal primer paint to quickly cover up the bare metal strips to protect them against rust while it is still exposed. Thank goodness that this paint dries very fast indeed!
Rafter-O-complete
We dashed back indoors with all our tools, electric cable and bits and pieces and just made it before the heavier rain came down!! That was close!! Grin!