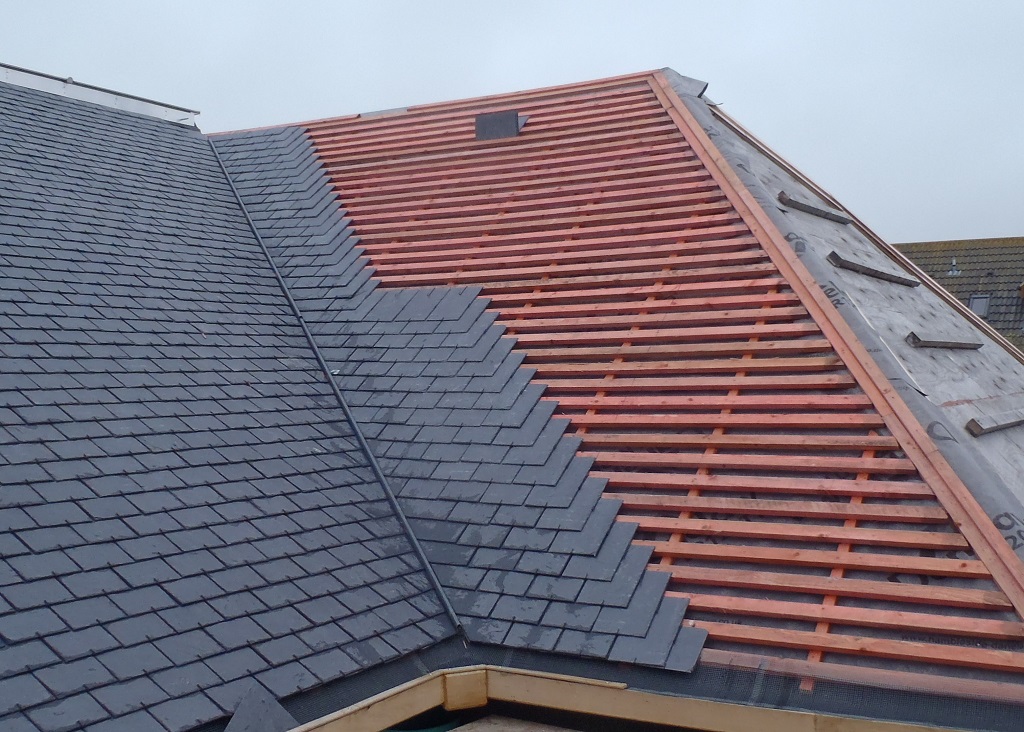
On Monday, we resumed work on the M section of the roof. The first job was to cut, trim and seal the fibre-glass trough module to fit the top of the valley and while the resin was curing, put up more slates. After lunch, the modified third piece of the valley trough was fitted and we then finished off the small triangular patch to complete the whole of the M section. This piece of roof has over 1800 slates on it. this now means we have covered approximately 30% of the whole roof.
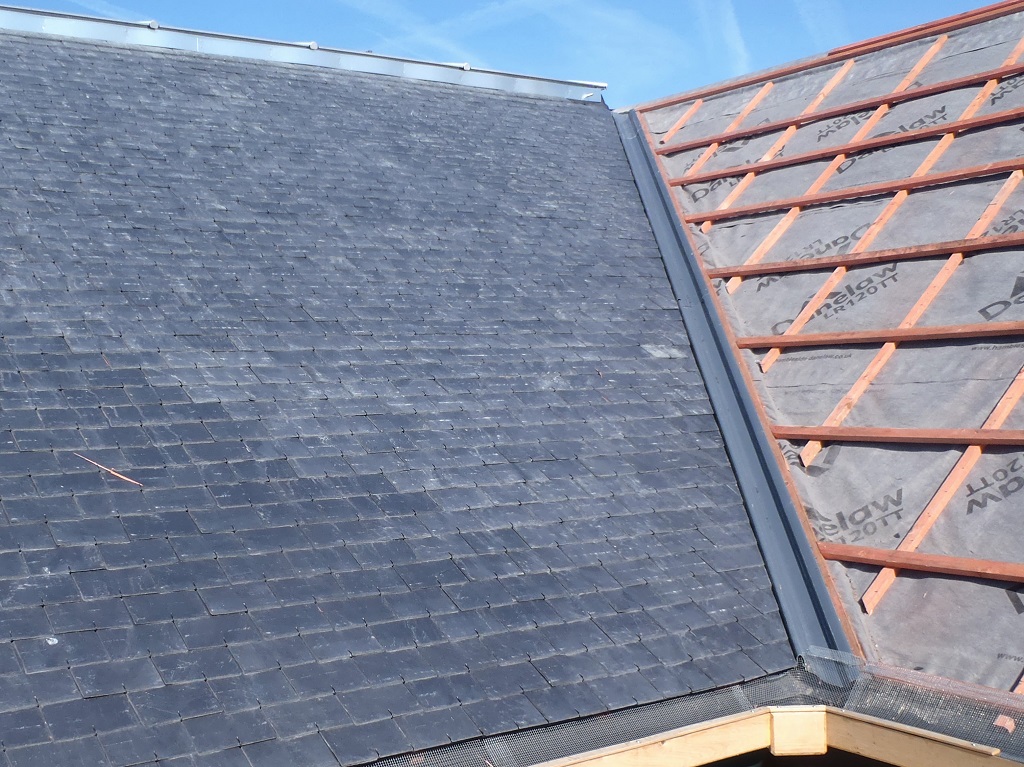
M-Complete
For the final couple of hours left on Monday, we swapped our tools over to begin nailing up the tile battens up on the next section, the N part.
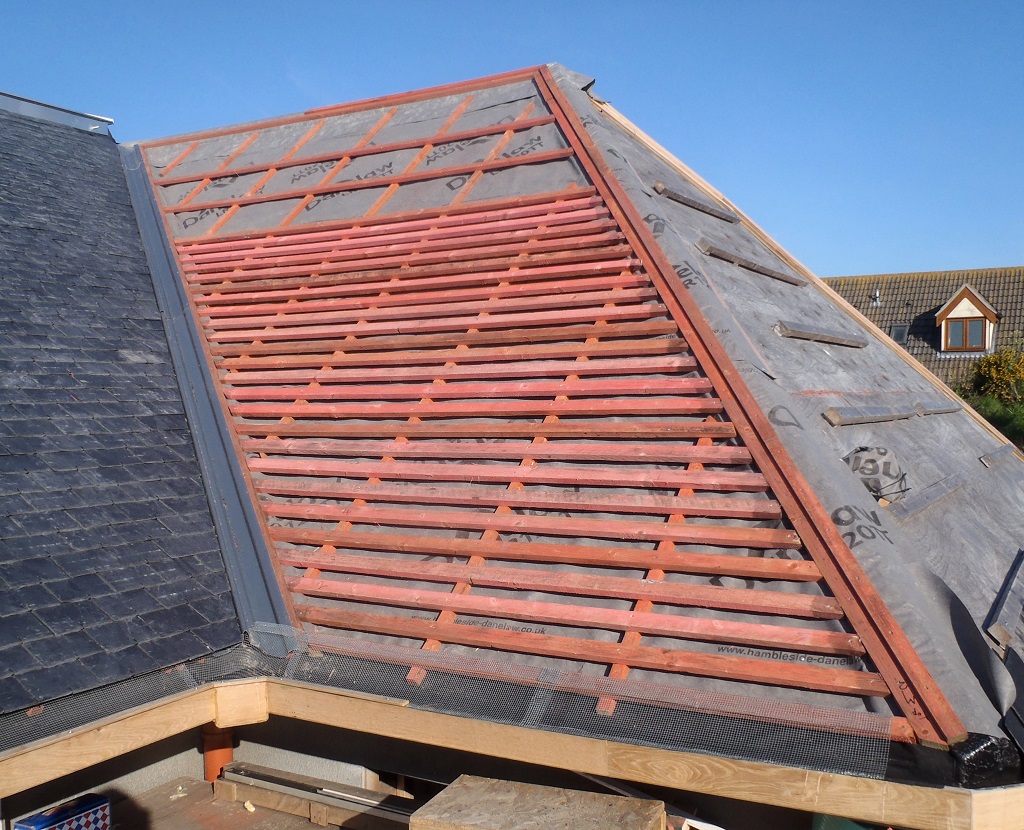
N-partial-battening
Tuesday saw the completion of the tile battens nailed into place and then we started on putting on the slates.
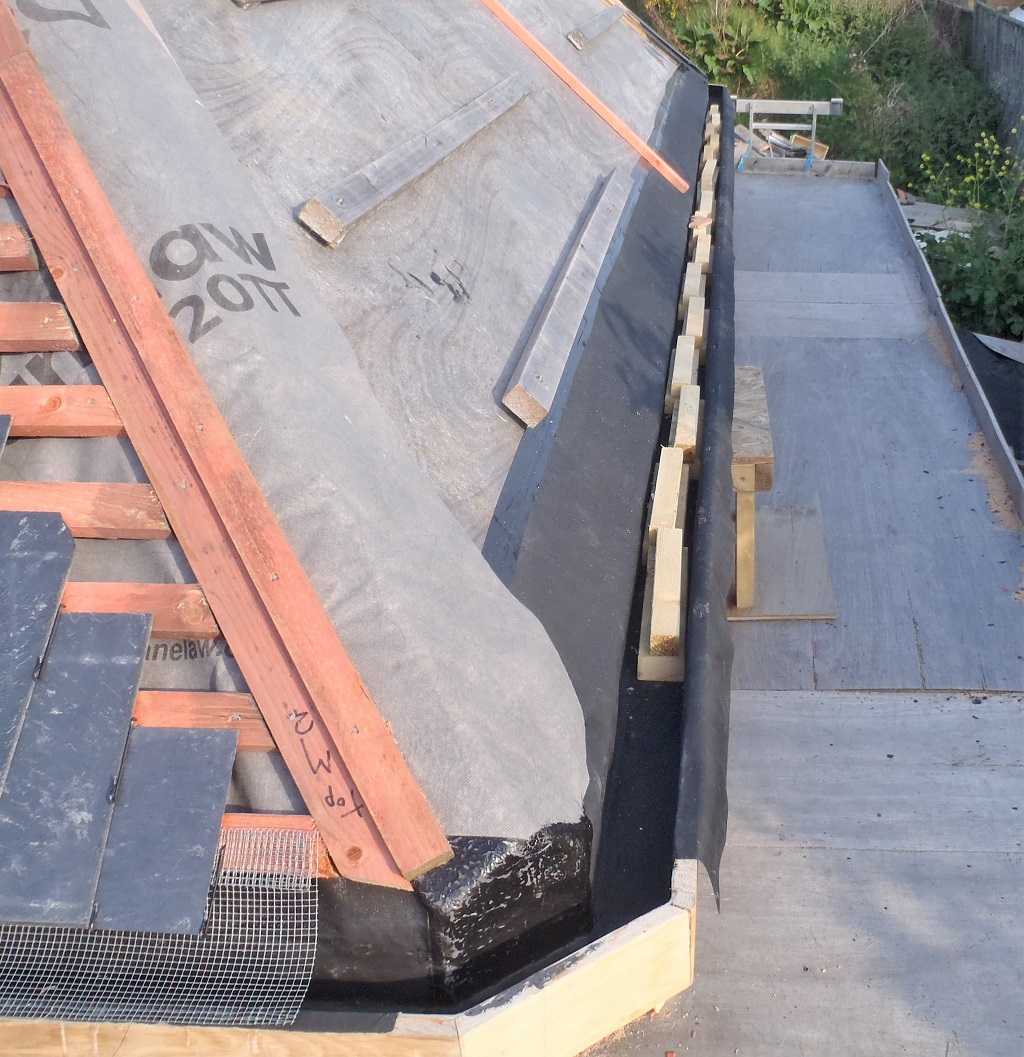
But we spotted something very odd in our gutters.
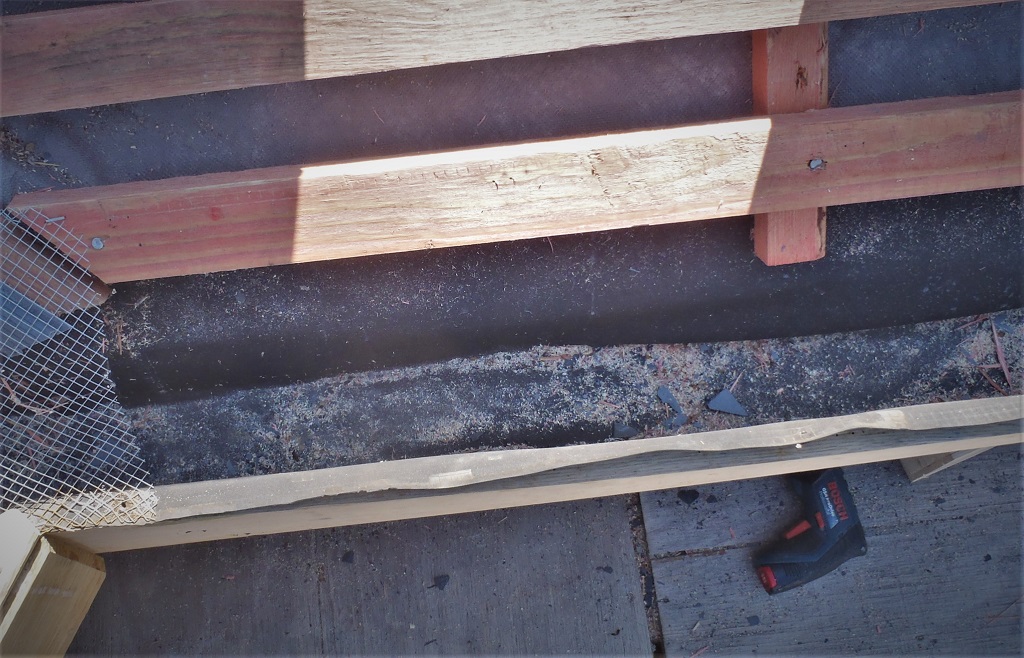
N-Gutter-Bulging-rubber
The rubber liner had “swollen” up in a bubble and when we had lifted up the metal mesh, realised that it was water underneath the rubber membrane, sitting on the oak. We had never noticed it before and we had to wonder where and how the water got into and behind all the layers of the breathable membrane up on the roof. Did this mean a hole somewhere? Did this mean a sealed joint wasn’t holding? Well, we got the vacuum cleaner out to sucked out the water and made sure that no more was lurking elsewhere.
Then we got out our garden hose and emulated a very heavy rain shower by spraying water from the top of the ridge line and all the way down the hip, to make sure that all the breathable membrane was fully covered in running water. We then waited over lunch for any developments.
After lunch, the verdict was no signs of any more water bubbling up behind the rubber. We can only put down this experience to a moment when we was putting up the membrane in the first place several weeks ago (by reviewing our photo gallery) and there is a possibility that one night, there was a short sharp shower and managed to allow a small amount (about 100millilitres) of rain water to slip behind the top line of membrane up the top of the roof, where the ridge line wasn’t covered until the following day.
We will have to keep an eye on this but nothing materialised during our water test and beside, as soon as we have put on all the slates, it will be fully waterproof anyway.
We put back the metal mesh over the gutters again and resumed the job of putting on the slates, starting at the valley end and working up the diagonal. We have also learnt our lesson about providing a fixed reference marks for the left end of all the rows by projecting up a vertical line and then measuring back from this one reference line, to all the starting points on the left end of each tile batten.
N-slating-started
Wednesday and Thursday were taken up with Stephen’s Birthday and meetings but on Friday we got back to putting up more slates and continuing up the valley.
N-Slating-valley-slated
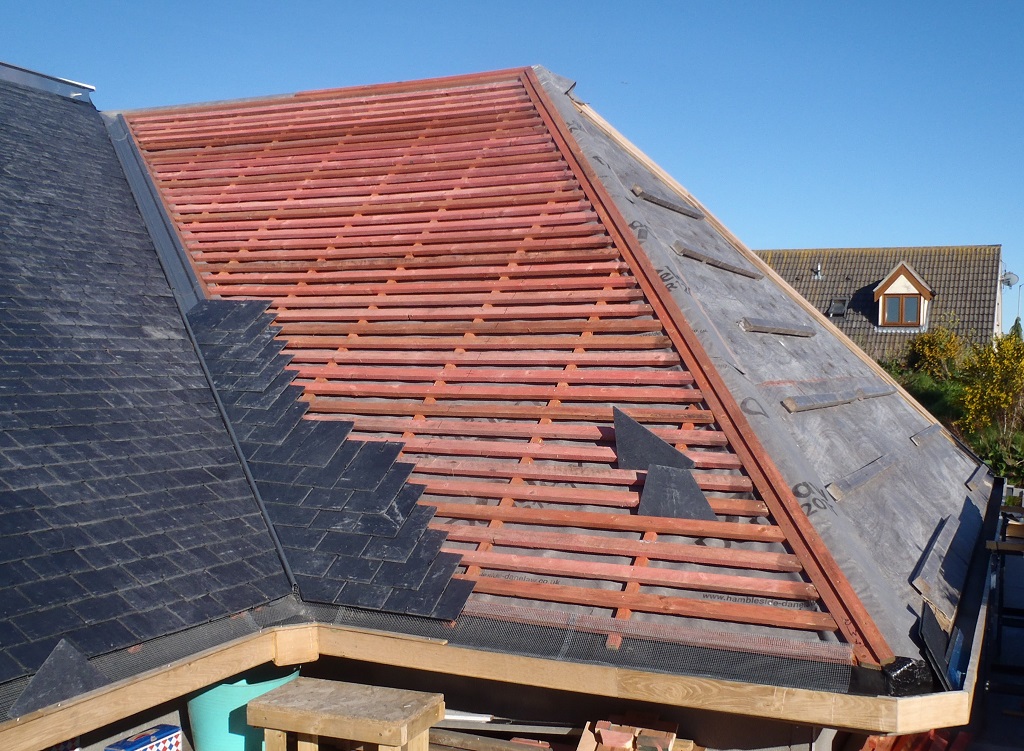
We managed to get the complicated valley all done and covered most of the N section with slates by Saturday afternoon. We had to stop because we ran out of room and we couldn’t get up and over on to the N section to complete the last few rows.
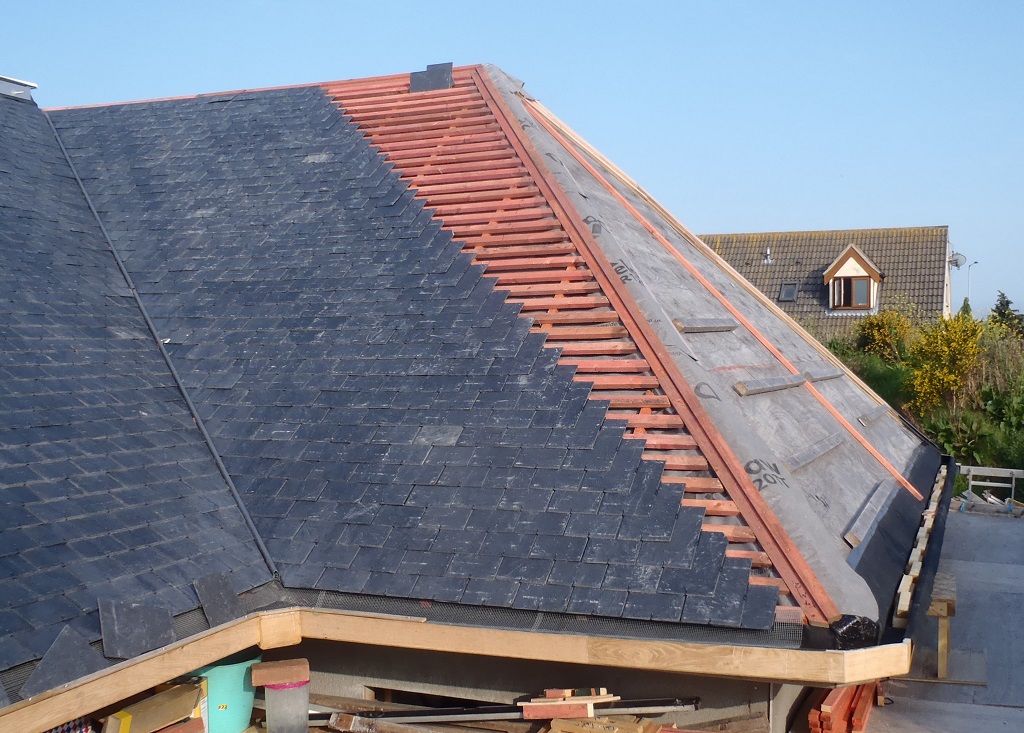
N-Mostly-slated
So for the remaining of the afternoon, we got on with the task of putting the rubber liner inside the gutter on the next section, the “O” section, and put up one central counter batten. This central batten was special because we couldn’t just nail it into place as the underlining structure, at this particular point, has a thick steel plate that reinforces the rafters. This means that nails straight down cannot penetrate into the rafter and secure the counter batten into place. instead, we used glue plus nails and positioned the batten slightly offset to one side. We fired extra-long nails at a slanting angle to hit and grip wooden rafter, bypassing the steel plate on the front of the rafter.
O-gutter-lined
Next week, we will put up the breathable membrane, secured down by more vertical counter battens and then put all the horizontal tile battens right across the O section and we can climb this to complete the N roof, and also put another 500 slates on the O roof.
And here’s this week time lapse…