Today, we resumed our creation efforts of a Birds Mouth and End of Eve template. We had a think overnight and we have decided that we could use the battery circular saw machine after all. After careful considerations, we started building up the layers of the template and then lines of 63 CLS timber, three lines at the bottom and a gap for the 89mm CLS Rafter Flange and another three lines of 63mm CLS timber. All this was glued and screwed together because we couldn’t rely on the screws surviving when we cut a whole series of clearance slots at the different angles we will need for making the Birds Mouth. We have five angles in total as follows:
• 32degrees – rafters coming down onto Wall A and E plus M and I.
• 33 degrees – Rafters to Wall B and D plus L and J.
• 40degrees – Rafters to Wall P, N and H.
• 45degrees – Rafters to Wall O and K.
• 60degrees – Special Rafters for Porch on Wall C.
We printed off on A3 paper all the Birds Mouth shapes and stuck it down on our wooden template and drew lines across the surface and used our heavy duty mains powered circular saw which has a thick strong saw blade in it and sliced clearance channels along 8 separate slots. We then did the same at the other end of the template to provide a place where the Ends of the Eve is also done at the same time as both the Birds Mouth and where exactly to cut the end is very much related to what roof angle we are dealing with. The important factor is that the gutter’s must all line up to the same height, no matter what angle the roof is. So we had a collection of numbers to position where the jig needed to go for doing the end of the eves. Again, the heavy duty saw came into its own in making more slots so our battery saw can just slide along the guide and just cut the 89mm CLS timber where we needed and get the job done quickly.
Next, we took a square piece of plywood and cut out a right angle segment (plus an extra piece to accommodate for the battery saw base plate) and this will provide the actual and exact guide for running the battery saw long. This was similarly done for the other end to provide a guide for the different angles at the end of the timber which will in turn be connected to the Facia board.
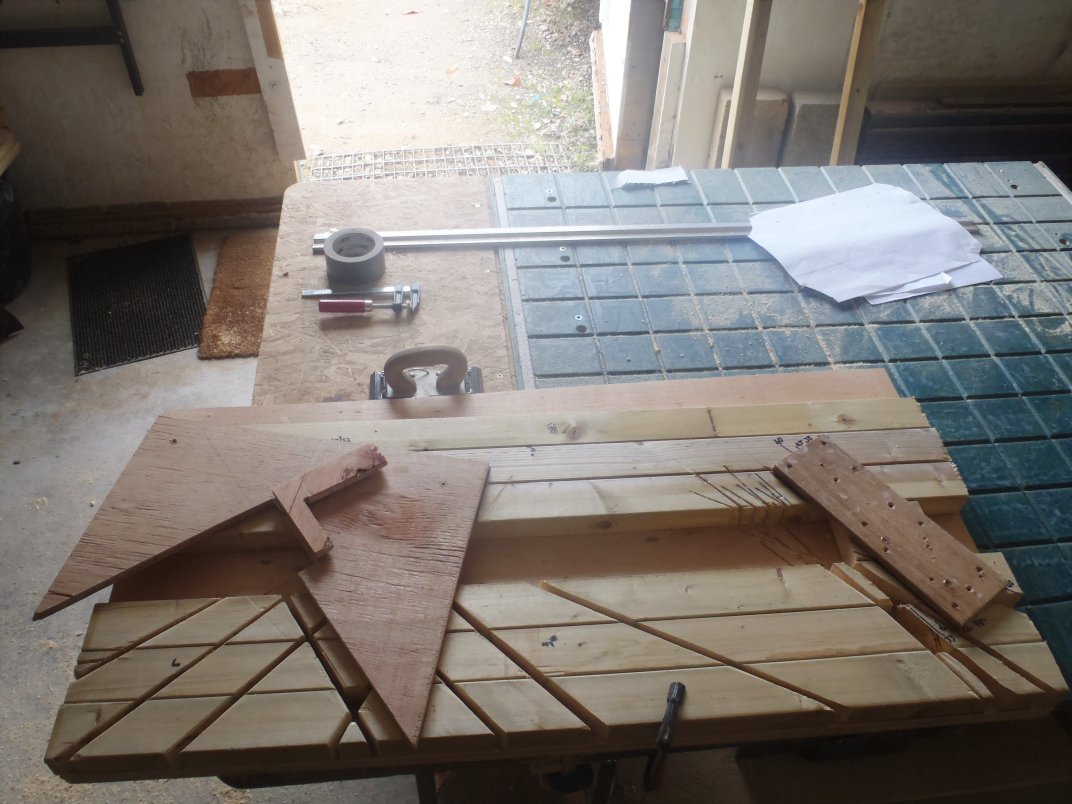
Birds-Mouth-and-end-cutting-jig
We were successful at the end of the day, by creating a Birds Mouth notch and the correct angled cut on the end of the timber as seen below in the picture
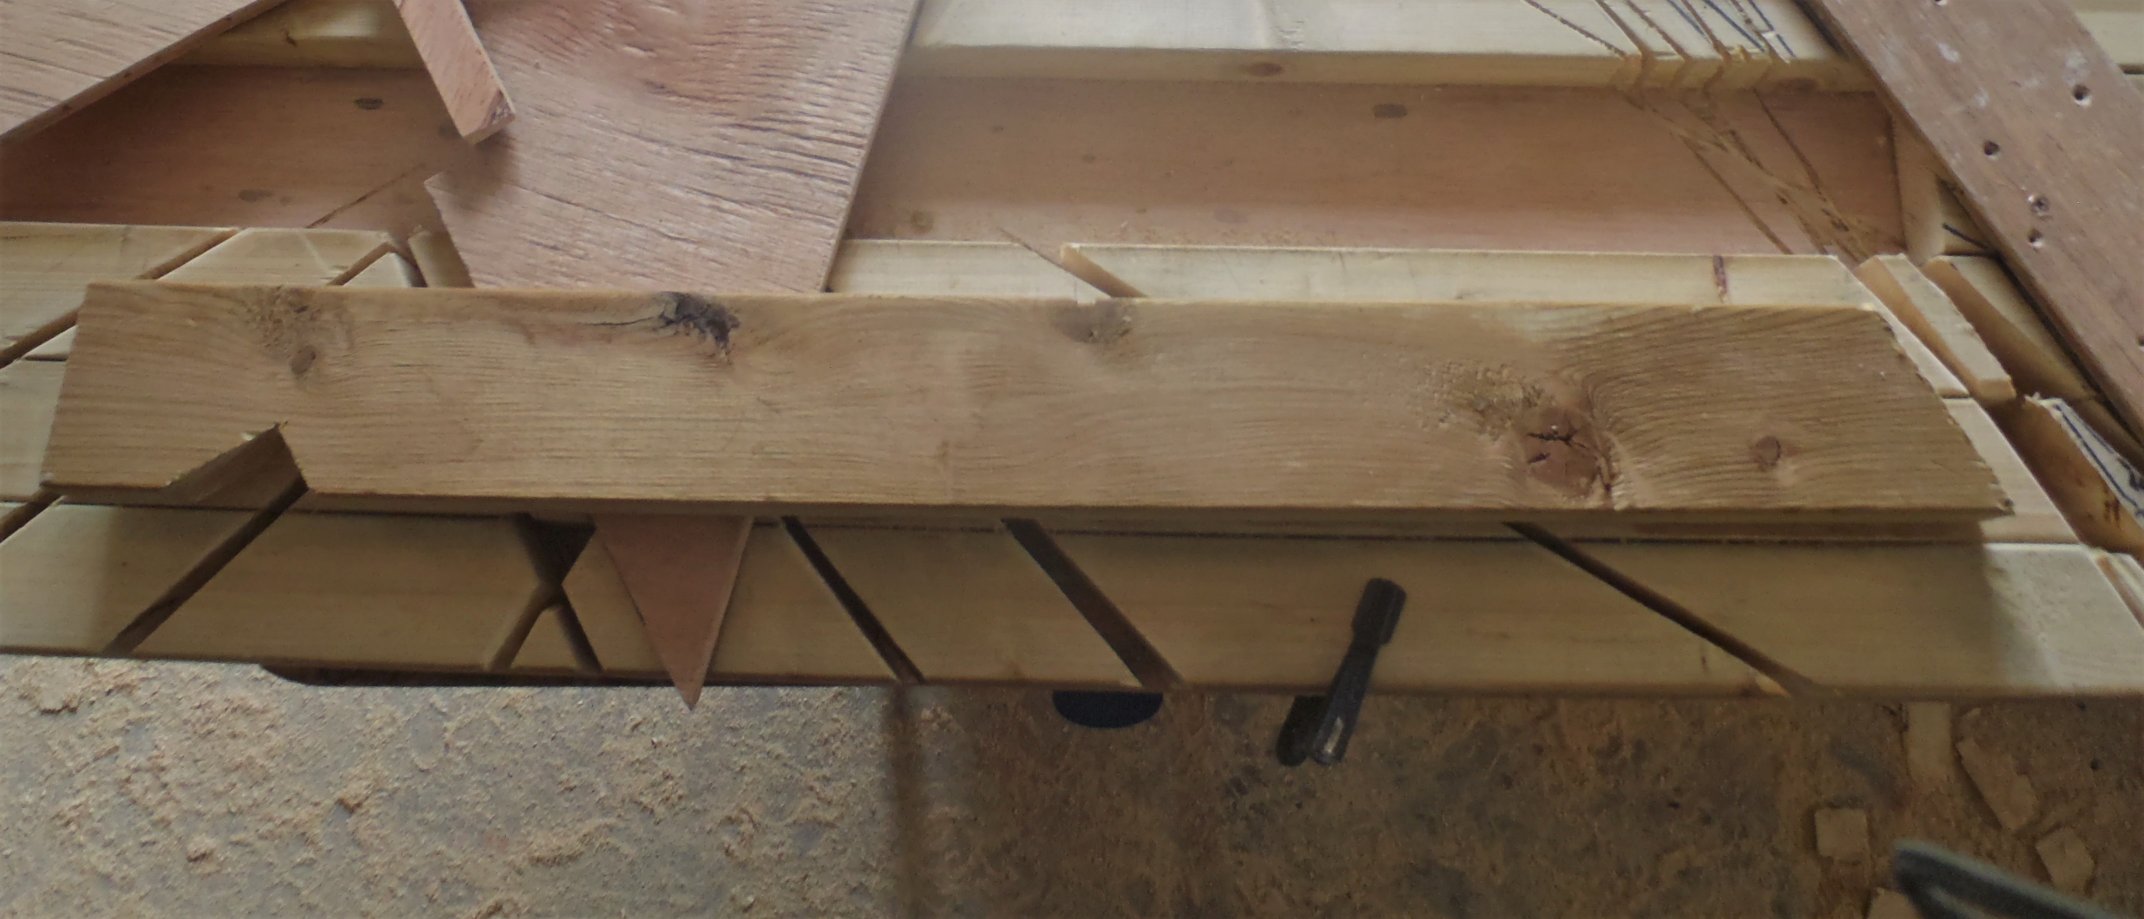
Test-piece-cut
It is quite complex but we made it or at least we hope, so as we haven’t used it in anger under full production runs so we will have to keep our fingers crossed!
Tomorrow, we continue with the next tools and jig template like the measuring template to help us get the length of each rafter accurate and be able to trim little amounts off the top end.
Leave a Reply
You must be logged in to post a comment.