For this week’s worth of work, with lots of weather interruptions along the way, we started the actual process of putting up our Slates! Using our new collection of tools and equipment, we projected a line up the roof at right angle from the Fascia to serve as the master reference line to work from. We started to use a blue chalk line to snap down lines from top to bottom but the rain nearly washed it away after doing the first 20 lines. So we reinforced the refernece line with a solid black marker pen and then marked each batten with 204mm spacings using a old metal tape which we prepared with marks so we don’t have to keep measuring the spacings each time.
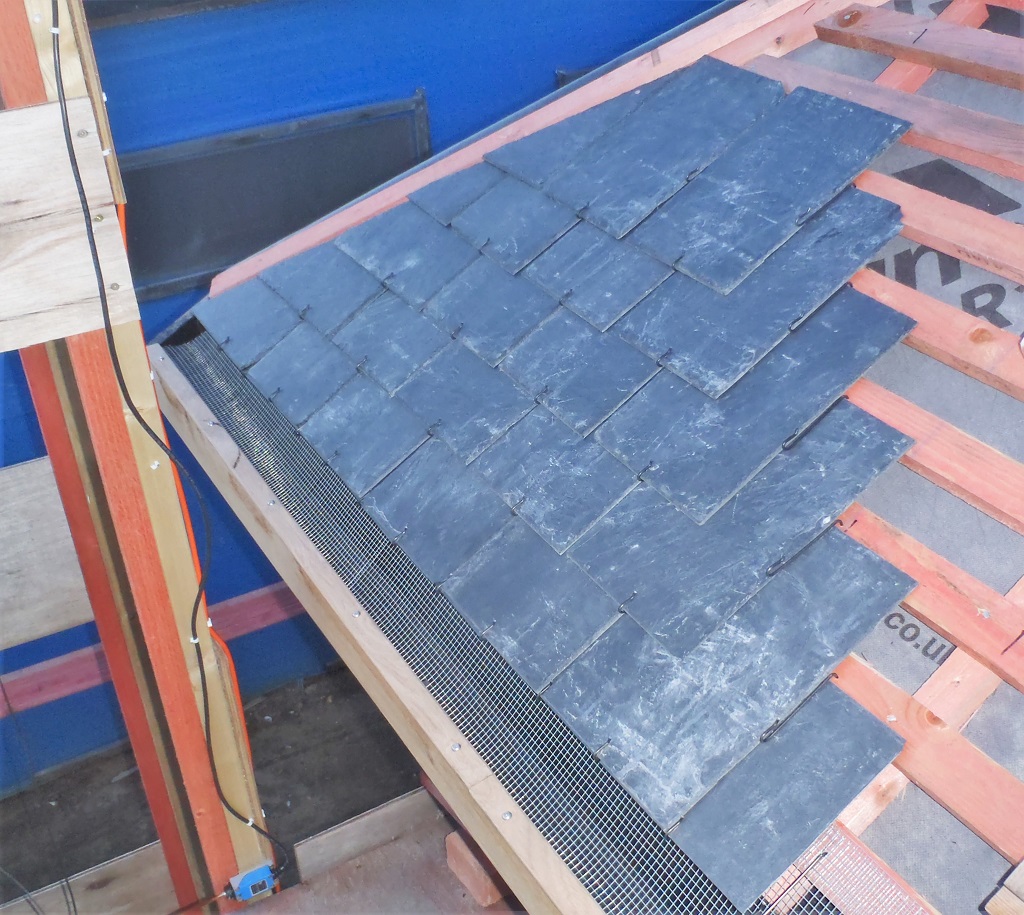
After the marks were redone, the first job to do was to cover up the Gutters with our galvanised metal mesh (1 quarter inch spaced grid and holes) by aligning the bottom edge to the front of the gutter’s upright plank, stapling it down (on top of the rubber membrane already there) and then lifting the mesh up to the first line of the tile battens. Here we also stapled it down (using stainless steel staples) and then folded up the excess mesh backwards so we had a padding of this mesh to support the bottom line of slates hanging over the gutters (the padding acts like the missing third layer of slate). Finally, we screwed down a fixing cap of oak timber we had previously made, on top of the mesh and rubber, using stainless steel wood screws with nice large dome heads to clamp down everything. We trimmed off the excess rubber away and the whole thing now look neat and tidy.

Gutter-mesh-and-capping-strips-installed-on-I
After that, We started in the bottom outside corner (the join between H and I sections of the roof) and working left to right, started putting on the slates. But the first task was to slice a dozen slate tiles to remove 112mm off their lengths, because the first layer which is hanging over the gutters needed this amount removed to align up with the bottom edge of the second layer. This ensures that any rain water flowing down the roof is still captured by at least one layer of slate before reaching the guttering. We had to smile because we nearly got caught by the “rookie mistake” of not turning over these shortened tiles upside down so the bevelled edges are visible from below and the first and second slates sit flat together back to back!
After that, it was a case of getting into the practice of nailing our nails in for each row before putting in the next slates (thus avoiding discovering afterwards that we missed some nails!!) and also remembering to turn the slates upside down when using the guillotine too, because the guillotine works downwards and causes the bevelling edge effect as the blade explodes through the slate.
We are learning as we go along!
The next thing for us to learn, is doing the diagonal shaped slates when we interface to the hip edge. After having sneaked a training video on the net, we had that one sorted too and we were able to complete 5 rows before the end of the day.
The-first-slates-1
The-first-slates-2
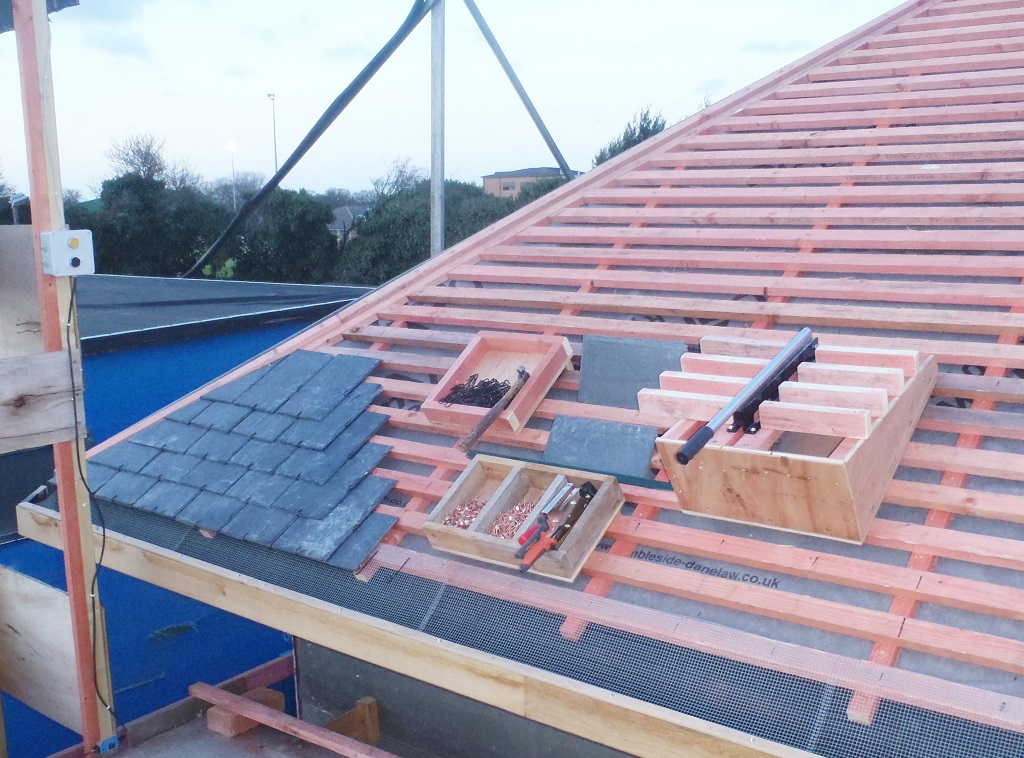
We continued on the next two days and doing three slates at a time for each row, working diagonally back towards the hip, this being the best compromise between doing more at once against having to lean over to far sideways (and slightly above) to nail in the next hooks and slide in the slates.
When we reached the inside corner, at the bottom of the valley between the I and J roof slopes and had to spend some time there to sort out the metal mesh, to shape it , cut it and bend it, to cover up the corner of the gutters and the end of the fibre-glass trough. We then completed a total of 9 stripes.
The-next-9-stripes-of-slates
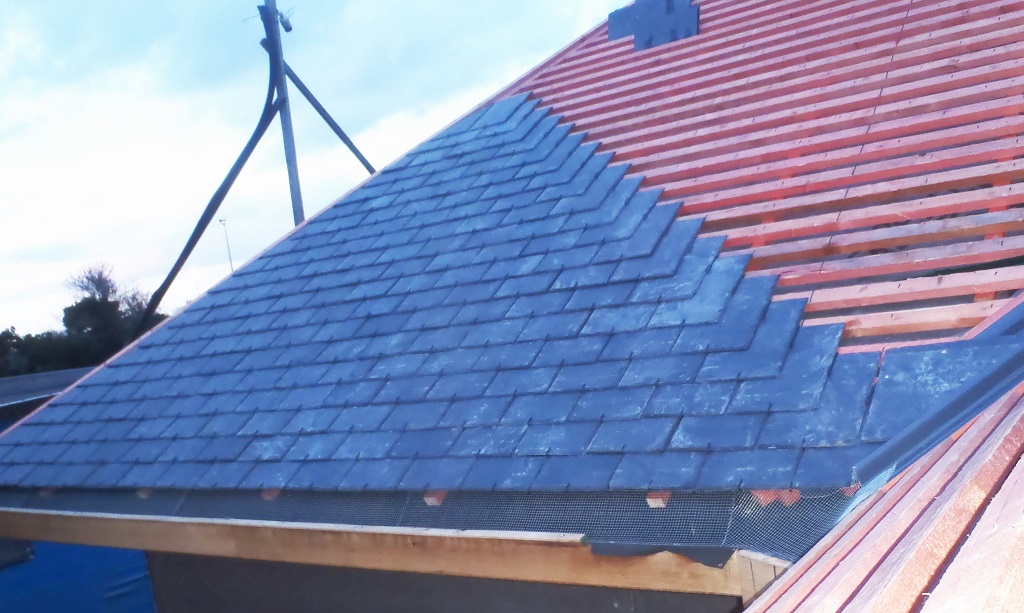
Finally, on the last day, Saturday, we could work on installing the slates without pausing to cope with another challenge like a valley, we got about 300 slates up, we had to go and load up our three “boxes on wheels” (which hold about 110 slates each) with slates from the eleven crates waiting alongside our Loke.
We finished the day by installing the second fibre-glass trough section to join on to the first one. We are getting quicker and completed 15 stripes!

The-next-15-stripes-of-slates
We are about half way up and we will resume on Monday, weather permitting, and hopefully get the rest of the roof done by Tuesday. At which point, we will start on the J section at the bottom again!